Why is my Honeywell thermostat blinking "Cool On"? If you're asking that, you're likely staring at a system that's either protecting itself or signaling a real fault. The good news is that most blinking "Cool On" messages are perfectly normal.
Honeywell thermostats deliberately delay the compressor for a few minutes to prevent damage.
Manufacturer specifications indicate that most Honeywell Home models enforce a 5-minute compressor protection delay. It's also called anti-short-cycle protection. This built-in timer lets refrigerant pressures equalize before the compressor restarts.
As of 2026, that same delay remains standard across the T4, T5, T6 Pro, T9, and T10 Pro lines. Before you panic or call a technician, let's run through the quick answer and then the full decision tree.
Quick Answer
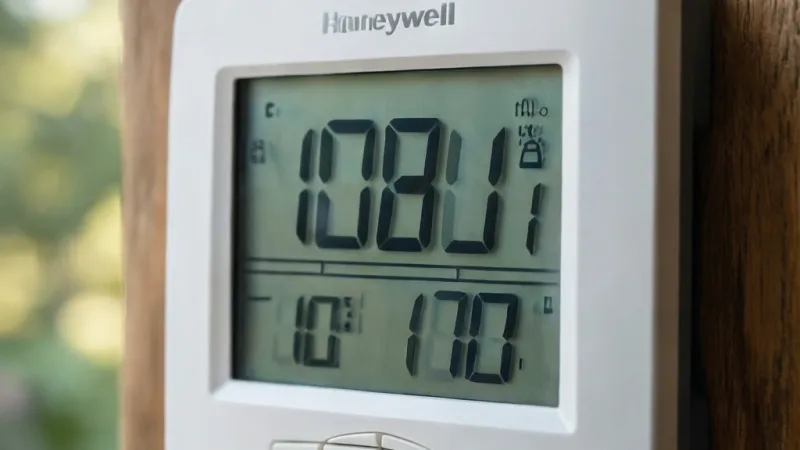
Your Honeywell thermostat blinking "Cool On" usually means the compressor delay is active. That delay lasts about 5 minutes. It protects the compressor from short cycling.
If the blink lasts past 10 minutes, check the breaker. Then check the float switch and outdoor unit.
What Blinking "Cool On" Means on a Honeywell Thermostat and When It's Normal
Let's clear up the confusion right away. A blinking "Cool On" is not the same as a blinking error code. On most Honeywell Home thermostats, the words "Cool On" flash to show that the cooling system is waiting to start.
Once the compressor kicks in, the display usually goes steady.
That waiting period is intentional. It's the thermostat's way of saying, "I hear you, but I'm giving the compressor a moment." If you just changed the setpoint, or the system just finished a cycle, a blinking "Cool On" is completely normal.
When Blinking "Cool On" Is Normal
You'll see a normal blink in several everyday situations:
- Right after you lower the setpoint by 2°F or more.
- Within 5 minutes of a power outage or breaker reset.
- After a cooling cycle ends and the thermostat is waiting to restart.
- When the system is in a recovery mode, like Adaptive Intelligent Recovery.
- During the first few minutes after you switch from heating to cooling.
In all these cases, the blink should stop and turn steady within 5 to 10 minutes. If it does, you don't have a problem.
When Blinking "Cool On" Is a Warning Sign
A blinking "Cool On" becomes a problem when it sticks around too long. Here's what to watch for:
- The blink lasts more than 15 minutes with no cooling.
- The outdoor unit never starts.
- The indoor blower runs but the air is room temperature.
- You see an alert code or "System Alert" on the screen.
- The thermostat blinks even when the setpoint is above room temperature.
Those situations point to a fault, not a delay. The next sections will help you sort out which branch you're on.
Normal vs. Abnormal Blinking: A Quick Comparison
| Symptom | Normal Blinking | Abnormal Blinking |
|---|---|---|
| Duration | 5 to 10 minutes | More than 15 minutes |
| Outdoor unit | Starts within 5 minutes | Never starts |
| Air from vents | Cool within 10 minutes | Warm or room temp |
| Display | No error code | Alert code or "System Alert" |
| Setpoint | Below room temp | Above room temp |
That table gives you a fast gut check. If you're in the right column, move on to the decision tree. If you're in the left column, just wait a few more minutes.
Why Honeywell Uses Blinking Instead of a Countdown
Some thermostats show a countdown timer. Honeywell often uses a blink instead. That's a design choice.
The blink is less distracting and saves screen space. It also works on models without a full-color display, like the T4 Pro and RTH series.
Per Resideo's official documentation, the blink pattern is consistent across most residential models. You don't need to memorize different patterns. A blink means "waiting." A steady light means "running." A blink with an alert code means "something's wrong."
How the 5-Minute Anti-Short-Cycle Timer and Cycles-Per-Hour Settings Work
The 5-minute delay isn't random. It's a carefully tuned protection feature. Understanding it will save you a lot of unnecessary worry.
Why Honeywell Delays the Compressor on Purpose
Compressors hate short cycling. Short cycling means the compressor turns on and off in rapid bursts. That's brutal on the motor windings and the contactor.
It also prevents refrigerant pressures from equalizing.
When a compressor shuts off, the high side and low side pressures need time to balance. If you restart too soon, the compressor tries to push against high head pressure. That can trip a breaker or blow a fuse.
Over time, it can kill the compressor.
Honeywell's anti-short-cycle timer enforces a minimum off time. Five minutes is the standard. Some models use 3 minutes.
The thermostat simply refuses to send a cooling call until that timer expires. The blinking "Cool On" is your visual cue that the timer is running.
How Cycles Per Hour (CPH) Fits In
The 5-minute delay is a hard minimum. But the thermostat also uses a setting called Cycles Per Hour (CPH). CPH controls how many times per hour the system can cycle under normal conditions.
For cooling, the default is usually 3 CPH. That means the system aims for about 3 cooling cycles per hour. Each cycle runs for a certain time, then rests.
The thermostat calculates run time based on how far the room temperature is from the setpoint.
If you set CPH too high, the system short cycles. If you set it too low, the temperature swings get wider. Most homeowners never need to touch this setting.
But HVAC technicians adjust it during installation.
Here's a quick reference table for cooling CPH:
| CPH Setting | Typical Use Case | Effect on Comfort |
|---|---|---|
| 2 | Humid climates, oversized systems | Longer run times, better dehumidification |
| 3 (default) | Most residential systems | Balanced comfort and efficiency |
| 4 to 6 | Rare, not recommended | Shorter cycles, higher wear |
You can find the CPH setting in the Installer Setup (ISU) menu. On most Honeywell models, you access it by holding the menu button for 5 seconds. Be careful in there.
Changing the wrong ISU code can cause real problems.
Blinking vs. Steady "Cool On" vs. "Wait" vs. "Recovery"
Honeywell uses several status messages. They're not interchangeable. Here's what each one means:
- Blinking "Cool On": The thermostat is waiting for the anti-short-cycle timer. The compressor is not running yet.
- Steady "Cool On": The compressor is running. The system is actively cooling.
- "Wait": The thermostat is holding off on a call. This often appears after a power cycle or when you switch modes too quickly.
- "Recovery": The system is pre-heating or pre-cooling to reach your scheduled setpoint. This is part of Adaptive Intelligent Recovery.
If you see "Wait" instead of "Cool On," that's still a delay. It's not a fault. The same 5-minute rule usually applies.
If/Then Logic for the Timer
Use this quick logic to interpret what you see:
- If the blink started less than 5 minutes ago, then wait.
- If the blink started after a power outage, then wait 10 minutes.
- If the blink lasts more than 15 minutes, then check the outdoor unit.
- If the outdoor unit is running but the blink continues, then check airflow.
- If the outdoor unit is silent and the blink continues, then check breakers and fuses.
That's the core of the decision tree. We'll expand each branch in the next sections.
The Decision Tree: Match Your Symptoms to the Right Branch
This is where we get practical. Follow the three steps below. Each step narrows down the cause.
By the end, you'll know which branch to follow.
Step 1: Read the Setpoint, Room Temp, and Blink Pattern
Start with the display. You need three pieces of information:
- What is the setpoint? (The temperature you want.)
- What is the current room temperature?
- Is "Cool On" blinking or steady?
Write these down or take a mental note. If the setpoint is higher than the room temperature, the system shouldn't be cooling at all. A blinking "Cool On" in that case is a configuration problem, not a delay.
If the setpoint is lower than the room temperature, the system should be trying to cool. A blinking "Cool On" means it's waiting. Now check the blink pattern.
A slow blink is usually normal. A rapid blink might indicate an alert.
Step 2: Listen at the Outdoor Unit and Feel for Airflow Indoors
Go outside and listen to the condenser. You're checking for two things:
- Is the compressor running? You'll hear a low hum.
- Is the condenser fan spinning? You'll see and hear it.
Then go inside and feel the air coming from a vent. Is it cool, warm, or room temperature? Also check if the indoor blower is running.
You can usually hear it or feel air moving.
This step splits the decision tree into two main branches:
- Branch A: Outdoor unit is running.
- Branch B: Outdoor unit is silent.
If the outdoor unit is running but the air is warm, you're still in Branch A. If the outdoor unit is silent, you're in Branch B.
Step 3: Follow the Branch That Fits
Use this table to jump to the right section:
| What You Observe | Which Branch | Next Step |
|---|---|---|
| Outdoor unit runs, air is cool | Normal delay | Wait 5 more minutes |
| Outdoor unit runs, air is warm | Branch A | Frozen coil or high pressure |
| Outdoor unit silent, indoor blower runs | Branch B | Breaker, fuse, or float switch |
| Outdoor unit silent, no indoor airflow | Branch B | Blower or control board issue |
| Blinking after power outage | Branch C | Reset and wait |
| Blinking after new install | Branch D | Wiring or configuration |
Don't skip ahead. Each branch has its own set of checks. And remember: never open the outdoor unit's electrical panel unless you're a qualified technician.
Line voltage can kill you.
Branch A: Blinking "Cool On" With the Outdoor Unit Running
You've confirmed the outdoor unit is running. The compressor is humming. The fan is spinning.
But the air from your vents isn't cold. And the "Cool On" is still blinking.
This branch is about airflow and refrigerant. The thermostat is calling for cool. The outdoor unit is trying.
But something is stopping the cold from reaching you.
Frozen Evaporator Coil and Choked Airflow
The most common cause here is a frozen evaporator coil. The evaporator coil sits inside your air handler or furnace. It gets cold when refrigerant runs through it.
If airflow is too low, the coil drops below freezing. Ice builds up. Then the air can't pass through.
You might notice low airflow before the freeze. The system might run longer than usual. Then the ice insulates the coil, and cooling stops completely.
Here's what to check:
- Replace the air filter. A clogged filter is the number one cause of frozen coils.
- Check for closed or blocked supply vents. Furniture can block returns too.
- Look for a dirty evaporator coil. If you can see it, it should be shiny, not matted with dust.
- Check the blower motor. If it's weak or dead, airflow drops.
If you find ice, turn the system off at the thermostat. Set the fan to "On" to melt the ice faster. Don't run cooling until the ice is gone.
That can take 1 to 3 hours. Then fix the airflow problem before you restart.
High Head Pressure, Dirty Condenser Coil, and Tripped Safeties
The outdoor unit can also run but not cool because of high head pressure. That happens when the condenser coil can't reject heat. The condenser coil is the one wrapped around the outdoor unit.
It needs clean airflow.
Check for:
- Cottonwood fluff, grass clippings, or dirt blocking the fins.
- Bent or crushed fins.
- A condenser fan that's running but not moving enough air.
- Shrubs or fences too close to the unit. You need at least 2 feet of clearance.
When head pressure gets too high, a safety switch trips. The compressor shuts off. The thermostat might still blink "Cool On" because it's still calling.
But the outdoor unit is actually off. You might hear it cycle on and off.
If you suspect high pressure, turn the system off. Clean the condenser coil gently with a hose. Don't use a pressure washer.
It bends the fins. Then call a technician if the problem returns.
Refrigerant Problems: Low Charge and Leaks
Low refrigerant is another possibility. But you can't diagnose that yourself. Refrigerant handling requires an EPA Section 608 certification.
If you see frost on the large copper line, that's a sign of low charge. The same goes for hissing or bubbling sounds.
Don't add refrigerant yourself. Don't buy those DIY recharge kits. They often do more harm than good.
Call a licensed technician. They'll find the leak, fix it, and charge the system properly.
What to Do Next in Branch A
- If you find a dirty filter, replace it. Then wait 2 hours and check again.
- If you find ice, thaw it. Then fix airflow. Then retest.
- If the condenser coil is dirty, clean it. Then retest.
- If none of those fix it, call a technician. You likely have a refrigerant or compressor issue.
Branch B: Blinking "Cool On" With a Silent Outdoor Unit
The thermostat wants cool. The indoor blower may be running. But the outdoor unit is dead quiet.
No hum, no fan, nothing. This branch is about power delivery and safety switches.
Tripped Breaker, Blown Low-Voltage Fuse, and Contactor Problems
Start with the breakers. Your system has two separate circuits. One feeds the air handler inside.
The other feeds the condenser outside. Both have their own breaker.
Go to your electrical panel. Look for the breaker labeled "AC," "Condenser," or "Air Handler." If it's tripped, it'll sit in the middle position. Flip it fully to OFF, then back to ON.
Don't just flip it once and walk away. If it trips again immediately, stop. That's a sign of a short or a grounded compressor.
Repeated resets can weld the contacts or start a fire.
If the breaker holds, check the low-voltage fuse on the control board. It's usually a 3A or 5A automotive-style blade fuse. A blown fuse means something shorted the 24V control circuit.
Find the short before you replace it.
The contactor is another common culprit. It's a relay inside the outdoor unit. When it fails, the compressor gets no power.
You might hear a click but nothing else. Contactor replacement is a technician job. The parts are cheap, but the panel carries line voltage.
Failed Run Capacitor and Stuck Compressor
A failed run capacitor is one of the most common outdoor unit failures. The capacitor gives the compressor and fan motor a boost to start. When it weakens, the unit hums but won't spin.
Sometimes it tries, trips a safety, and goes quiet.
Signs of a bad capacitor:
- The outdoor fan won't spin, but the compressor hums.
- The unit tries to start, clicks, then stops.
- The top of the capacitor is bulging or leaking.
- You smell a burnt, oily odor near the unit.
Capacitors hold a dangerous charge even after power is off. They can deliver a nasty shock. Discharging one safely requires a proper resistor and a multimeter.
That's technician territory.
A stuck compressor is worse. It means the compressor itself has seized. You'll hear a loud hum, then a click as the overload trips.
Then it repeats. This is a compressor failure. Replacement is expensive, often $1,200 to $2,500 depending on tonnage and refrigerant type.
As of 2026, the A2L transition to R-32 and R-454B has pushed some replacement costs higher.
Clogged Condensate Drain and Tripped Float Switch
Your indoor unit produces condensate. That's the water pulled from the air as it cools. It drains through a PVC line to a floor drain, a pump, or outside.
If that line clogs, water backs up. A float switch sits in the drain pan. When water rises, the float trips.
It cuts the cooling call to protect your ceiling and floors.
A tripped float switch is one of the most overlooked causes of a blinking "Cool On." Here's why. The thermostat is still calling for cool. But the safety switch breaks the circuit.
So the outdoor unit never starts.
Check these signs:
- Water in the drain pan under the air handler.
- Visible algae or slime in the drain line.
- A wet spot near the indoor unit.
- The float switch has a small reset lever or button.
To clear a clogged drain, use a wet/dry shop vac on the outdoor end of the line. You can also pour a cup of distilled vinegar down the trap. Never bypass a float switch.
It's there to prevent water damage.
If/Then Logic for Branch B
- If the breaker is tripped and holds after reset, then retest the system.
- If the breaker trips again right away, then call a technician.
- If the low-voltage fuse is blown, then find the short before replacing it.
- If the float switch is tripped, then clear the drain and reset it.
- If none of those apply, then suspect the capacitor or contactor. Call a tech.
What a Technician Will Check
A good tech won't just replace parts. They'll test the whole circuit. That means checking voltage at the contactor, testing the capacitor with a meter, and reading compressor amp draw.
They'll also verify the low-voltage signal from the thermostat.
If the compressor is grounded or seized, they'll confirm it with a megohmmeter. That test measures insulation resistance. Anything below 1 megohm usually means the compressor is done.
Branch C: Blinking After a Power Outage, Brownout, or Breaker Reset
The power just came back. Or you flipped the breaker. Now the thermostat is blinking "Cool On." Is that normal?
Almost always, yes.
Why the Thermostat Reboots Into a Delay
When power is interrupted, the thermostat loses its memory of recent cycles. It has no idea how long the compressor has been off. So it defaults to the safest behavior.
Wait the full 5 minutes.
That's the anti-short-cycle timer doing its job. It's protecting the compressor from a hard restart. If the power was out for hours, the compressor is already equalized.
But the thermostat doesn't know that. It waits anyway.
Some Honeywell models show "Wait" during this period. Others blink "Cool On." The behavior is the same. Give it 5 to 10 minutes.
Brownouts Are Sneakier Than Outages
A brownout is a partial voltage drop. Your lights dim but don't go out. Your thermostat might reboot without you noticing.
Then it starts the delay.
Brownouts are common in summer when grid demand spikes. Utility demand-response programs can also cause them. If your neighborhood has frequent brownouts, a whole-house surge protector is worth considering.
So is a smart thermostat with a battery backup.
Aggregate reviews report that brownouts cause more phantom "Cool On" blinks than full outages. Homeowners often miss the brief flicker. Then they're puzzled by a blinking thermostat an hour later.
What to Do in the First Five Minutes, and What Not To
Here's the right sequence after a power event:
- Leave the thermostat alone for 5 minutes.
- Don't cycle the setpoint up and down. That resets the timer.
- Don't flip the breaker repeatedly. That's hard on the compressor.
- After 5 minutes, check if the outdoor unit starts.
- If it starts and cools, you're done.
What not to do:
- Don't hit the reset button repeatedly.
- Don't pull the thermostat off the wall to "reboot" it.
- Don't assume the worst and call for emergency service.
- Don't ignore a repeated pattern of post-outage blinks.
If the blink happens every time the power flickers, that's normal. If it happens when the power is steady, that's a different branch.
When a Power Event Reveals a Real Problem
Sometimes a power event exposes a weakness. The surge damages a capacitor. Or it trips a breaker that was already marginal.
Here's what to watch for after an outage:
| Symptom After Outage | Likely Cause | Action |
|---|---|---|
| Blink clears in 5 to 10 minutes | Normal delay | Nothing |
| Blink clears but no cooling | Capacitor or refrigerant | Call tech |
| Breaker trips on reset | Short or grounded compressor | Call tech |
| Thermostat won't power on | Blown fuse or transformer | Call tech |
| Repeated blinks with no outage | Loose C-wire or power stealing | Check wiring |
That table saves you from guessing. Match your symptom to the row. Then act.
Branch D: Blinking After a New Thermostat Install or Rewire
You just replaced your thermostat. Or you rewired the subbase. Now it's blinking "Cool On" and won't cool.
This branch is almost always about wiring or configuration.
C-Wire, Power Stealing, and Dead Batteries
The C-wire, or common wire, is the backbone of a stable thermostat install. It provides constant 24VAC power. Without it, the thermostat has to steal power from the cooling or heating circuit.
That's called power stealing.
Power stealing works, but it's finicky. It can cause the thermostat to reboot mid-cycle. It can also trigger phantom blinks.
If your Honeywell thermostat is blinking "Cool On" after a new install, the C-wire is the first thing to check.
Here's what to verify:
- The C-wire is connected at the thermostat subbase.
- The C-wire is connected at the air handler control board.
- The wire is 18 AWG or thicker. Thin wire causes voltage drop.
- The wire isn't pinched, nicked, or shorted behind the wall.
- The transformer can supply enough VA for the thermostat.
If you don't have a C-wire, you have options. You can run a new wire, use a C-wire adapter kit, or install a 24VAC plug-in transformer. Honeywell sells adapter kits for most models.
Dead batteries cause similar symptoms. The T4 Pro and RTH series use AA or AAA batteries. If they're weak, the thermostat may blink or reset.
Replace them with fresh alkaline batteries. Don't use rechargeables. They run at a lower voltage.
Wrong System Type, O/B Setting, and Terminal Mismatches
The Installer Setup menu controls how the thermostat talks to your equipment. If those settings are wrong, the thermostat will call for cool but the system won't respond correctly.
Common misconfigurations:
- System type set to "Heat Pump" on a conventional system. Or the reverse.
- O/B terminal set to "O" when it should be "B." That reverses the changeover valve logic.
- Y and Y2 swapped. That affects two-stage cooling.
- G and Y swapped. That runs the fan but not the compressor.
- W and Y swapped. That calls for heat when you want cool.
Each of these can cause a blinking "Cool On" with no cooling. The thermostat thinks it's doing the right thing. The equipment disagrees.
A Quick Terminal Reference
Here's what each terminal does on a standard Honeywell subbase:
| Terminal | Function |
|---|---|
| R or Rc | 24VAC power from transformer |
| C | Common wire, completes the circuit |
| Y | Cooling call, stage 1 |
| Y2 | Cooling call, stage 2 |
| G | Indoor blower fan |
| W | Heating call, stage 1 |
| W2 | Heating call, stage 2 |
| O/B | Reversing valve for heat pumps |
If your old thermostat had different labels, don't assume the wires match. Take a photo before you disconnect anything. Then map each wire to the new subbase using the manual.
If/Then Logic for Branch D
- If you don't have a C-wire, then install one or use an adapter.
- If the batteries are weak, then replace them with fresh alkalines.
- If the system type is wrong, then fix it in the ISU menu.
- If the O/B setting is wrong, then flip it and retest.
- If the wiring doesn't match the manual, then stop and call a technician.
When to Call a Pro After a DIY Install
Call a technician if any of these apply:
- You see sparking or smell burning at the subbase.
- The thermostat won't power on at all.
- The breaker trips when the thermostat calls for cool.
- You can't identify the C-wire or the transformer.
- You're not sure whether your system is conventional or a heat pump.
A miswired thermostat can fry the control board. That's a $400 to $800 repair. It can also void your equipment warranty.
When in doubt, stop and call.
Heat Pump vs. Conventional System: Why the Same Blink Means Different Things
The blink looks identical on the screen. But the underlying cause can be totally different. That's because heat pumps have extra components.
Those components add extra failure points.
Conventional Systems: Simpler by Design
A conventional system has a furnace or air handler indoors. The outdoor unit is just an AC condenser. Cooling is straightforward.
The thermostat sends a Y signal. The contactor closes. The compressor and condenser fan run.
On a conventional system, a blinking "Cool On" almost always traces back to:
- The anti-short-cycle timer.
- A tripped float switch.
- A blown fuse or tripped breaker.
- A bad capacitor or contactor.
The logic is simple. If the outdoor unit isn't running, something is blocking the signal or the power.
Heat Pumps: The Reversing Valve Changes Everything
A heat pump runs the same refrigeration cycle in both directions. A reversing valve switches the flow. The thermostat controls that valve through the O or B terminal.
Here's the catch. If the O/B setting is wrong, the heat pump will cool when you want heat, or heat when you want cool. The thermostat will still blink "Cool On." But the system will do the opposite.
Heat pumps also have defrost cycles. During defrost, the outdoor unit switches to cooling mode briefly. That's normal.
It melts frost off the outdoor coil. The thermostat may blink or show "Wait" during this cycle.
Signs your heat pump is in defrost:
- Steam or mist rising from the outdoor unit.
- The outdoor fan stops while the compressor runs.
- The auxiliary heat kicks on indoors.
- The cycle lasts 5 to 15 minutes.
Don't panic during a defrost cycle. It's not a fault. It's the system protecting itself.
Dual-Fuel Systems Add Another Layer
A dual-fuel system pairs a heat pump with a gas furnace. The thermostat decides which to run based on outdoor temperature. That decision is controlled by a balance point setting.
If the balance point is set wrong, the thermostat may call for cooling when the outdoor temp is too low. The heat pump can't cool effectively in cold weather. It may lock out.
Then the thermostat blinks "Cool On" with no response.
Check your balance point in the ISU menu. Most systems use a default of 35°F to 40°F. Your local climate should guide the setting.
Side-by-Side Comparison
| Feature | Conventional System | Heat Pump System |
|---|---|---|
| Reversing valve | None | O or B terminal |
| Defrost cycle | None | Yes, every 30 to 90 minutes in cold weather |
| Aux heat | Gas or electric furnace | Electric resistance strips |
| Common blink causes | Timer, float switch, capacitor | Timer, O/B setting, defrost, balance point |
| Diagnostic complexity | Lower | Higher |
If you're unsure which system you have, look at the outdoor unit. A heat pump has a reversing valve and usually runs in both heating and cooling. A straight AC condenser only runs in cooling.
Resets and Installer Setup (ISU) Codes Worth Checking
Sometimes the fix is a simple reset. Sometimes it's a setting buried in the Installer Setup menu. Let's walk through both, in the right order.
Soft Reset vs. Factory Reset vs. Breaker Reset
These three resets do very different things. Use the least invasive one first.
A soft reset restarts the thermostat without wiping settings. On most Honeywell models, you do this from the menu. Look for "Reset" or "Restart." The thermostat reboots.
Your schedule and settings stay intact.
A factory reset wipes everything. It returns the thermostat to out-of-the-box defaults. You'll lose schedules, Wi-Fi credentials, and ISU settings.
Only do this if a soft reset fails. Then you'll need to reprogram everything.
A breaker reset cuts power to the whole system. That's the most disruptive option. It also clears any latched faults on the control board.
But it forces the anti-short-cycle timer to restart. So expect a blinking "Cool On" for 5 minutes after.
Here's the order to try:
- Soft reset from the menu.
- Wait 10 minutes and retest.
- Breaker reset at the panel.
- Wait 10 minutes and retest.
- Factory reset as a last resort.
ISU Codes That Affect Cooling Behavior
The Installer Setup menu holds dozens of codes. Most are irrelevant to your blink. But a handful matter.
Here are the ones to check:
| ISU Code | What It Controls | Typical Default |
|---|---|---|
| 0170 | System type (conventional vs. heat pump) | Depends on install |
| 0190 | Changeover valve (O or B) | O for most heat pumps |
| 0200 | Cooling cycles per hour | 3 |
| 0300 | Heating cycles per hour | 5 |
| 0340 | Temperature differential | 1°F |
| 0360 | Compressor protection | 5 minutes |
On the T6 Pro and T9, you enter the ISU menu by holding the menu button for 5 seconds. Then you navigate with the arrow keys. On the RTH series, the process is similar but the menu layout differs.
How to Safely Check Your ISU Settings
Before you touch anything, write down the current values. That way you can undo any change. Then verify these three settings:
- System type matches your equipment.
- Changeover valve matches your heat pump.
- Compressor protection is set to 5 minutes or longer.
Don't change CPH or temperature differential unless you know what you're doing. Those affect comfort and efficiency. Small tweaks can cause big swings.
When a Reset Won't Help
A reset won't fix a hardware problem. If the capacitor is dead, it stays dead. If the compressor is seized, it stays seized.
If the float switch is tripped, it needs to be cleared.
Use this rule. If a reset fixes the blink and it stays fixed, you're done. If the blink returns within a day, you have a real fault.
Move to the technician branch.
Honeywell Model Differences: T4, T5, T6 Pro, T9, T10 Pro, and RTH Series
Not every Honeywell thermostat blinks the same way. The behavior varies by model, firmware version, and display type. Here's what to expect from each line.
T4 Pro and T5: Basic Blink Behavior
The T4 Pro and T5 use a simple monochrome display. Status text appears at the bottom of the screen. When the compressor delay is active, "Cool On" flashes slowly.
There's no countdown timer and no color change.
These models are common in rental properties and builder-grade installs. They're reliable but minimal. If you see a blink on a T4 Pro, it's almost always the anti-short-cycle timer.
The blink rate is about once per second.
The T5 adds humidity control and a slightly larger screen. The blink behavior is identical. Neither model shows detailed alert codes.
That makes diagnosis harder, but it also means fewer false alarms.
T6 Pro: The Most Common Residential Model
The T6 Pro is Honeywell's best-selling residential thermostat. It comes in programmable and non-programmable versions. It supports both conventional and heat pump systems.
On the T6 Pro, "Cool On" blinks during the delay and goes steady when the compressor runs. You can also see alert codes like "System Alert" if something is wrong. Those codes appear near the bottom of the display.
The T6 Pro's Installer Setup menu is extensive. It includes ISU codes for system type, CPH, and compressor protection. Most HVAC techs are familiar with this model, which makes service calls easier.
T9 and T10 Pro: Smart Features Change the Display
The T9 and T10 Pro are Honeywell's smart thermostats. They have color touchscreens and Wi-Fi connectivity. The display shows more information than the T4 or T6.
On these models, a blinking "Cool On" may appear alongside a countdown timer. You'll see something like "Cool On in 3:45." That's the anti-short-cycle timer counting down. It's the clearest signal you'll get that everything is normal.
The T10 Pro also supports room sensors and advanced zoning. If you have a multi-zone system, each zone can blink independently. That's not a fault.
It just means one zone is waiting while another runs.
RTH Series: Budget-Friendly and Widely Installed
The RTH series includes models like the RTH2300, RTH6360, and RTH9585. These are sold at big-box retailers and often installed by homeowners. They're affordable and straightforward.
The RTH series blinks "Cool On" just like the others. But the menu structure is different. On the RTH6360, you access the ISU menu by holding the up and down arrows together for 5 seconds.
On the RTH9585, you use the touchscreen menu.
Battery life matters more on these models. The RTH series often runs on batteries without a C-wire. Weak batteries cause phantom blinks and random reboots.
Fresh alkalines fix most of those issues.
VisionPRO and Prestige: Legacy Models Still in Service
The VisionPRO 8000 and Prestige IAQ are older professional-grade models. Many are still running in homes today. They use a different display layout but the same anti-short-cycle logic.
On the VisionPRO, "Cool On" appears in the upper status area. A blinking version means the same thing. The compressor is waiting.
The Prestige IAQ uses a color screen and shows similar status messages.
If you have one of these legacy models, replacement parts are getting harder to find. As of 2026, Resideo still supports them but the focus has shifted to the T-series and T10 Pro.
Model Comparison at a Glance
| Model | Display Type | Blink Behavior | Best For |
|---|---|---|---|
| T4 Pro | Monochrome | Slow blink, no timer | Rentals, budget installs |
| T5 | Monochrome | Slow blink, no timer | Basic homes with humidity control |
| T6 Pro | Monochrome | Blink plus alert codes | Most residential systems |
| T9 | Color touchscreen | Blink plus countdown | Smart home users |
| T10 Pro | Color touchscreen | Blink plus countdown, zoning | Multi-zone, advanced systems |
| RTH series | Monochrome or color | Blink, menu varies | DIY installs, budget buyers |
| VisionPRO 8000 | Monochrome | Blink in status area | Legacy professional installs |
How to Find Your Exact Model
Look at the back of the thermostat or the subbase. There's a model number printed there. It usually starts with TH or RTH.
Write it down before you call support.
You can also check the Honeywell Home app. If your thermostat is connected, the app shows the model and firmware version. That helps when you're troubleshooting or ordering parts.
Mistakes to Avoid and Safety Warnings Before You Touch Anything
Some mistakes turn a simple delay into a $2,000 repair. Others can hurt you. Here's what to avoid.
Jumpering R to Y, Breaker Flipping, and Bypassed Float Switches
Never jumper R to Y as a test. That bypasses the thermostat and forces the compressor to run. If the system has a fault, you'll be running it blind.
That can destroy the compressor.
Some online guides suggest this trick to "test the system." Don't do it. The thermostat's anti-short-cycle logic exists for a reason. Jumpering removes that protection entirely.
Repeated breaker flipping is another mistake. If a breaker trips, it's telling you something. Flipping it over and over can weld the contacts inside the breaker.
It can also damage the compressor windings.
Bypassing a float switch is dangerous and illegal in some jurisdictions. The float switch prevents water damage. If you bypass it and the drain clogs, you'll flood your ceiling.
Some building codes require functioning float switches.
Line Voltage, Capacitor Discharge, and EPA 608 Rules
The outdoor unit's electrical panel carries 240V. That's enough to kill you. Never open that panel unless you're a qualified technician.
Even with the breaker off, capacitors can hold a lethal charge.
Capacitors store energy like a battery. A charged run capacitor can deliver a shock hours after power is removed. Technicians use an insulated resistor to discharge them safely.
If you don't own one, stay out of the panel.
Refrigerant handling is regulated by the EPA under Section 608 of the Clean Air Act. You need certification to buy, handle, or recover refrigerant. DIY recharge kits are a waste of money and often damage the system.
They also violate federal law if you're venting refrigerant.
Warranty and Insurance Risks
DIY repairs can void your manufacturer warranty. Most HVAC warranties require installation and service by licensed technicians. If you open the sealed system or replace major components yourself, you're on your own.
Homeowner's insurance may also deny a claim if a DIY repair caused the damage. That's especially true for electrical work. A miswired thermostat that starts a fire is a nightmare scenario.
Safety Checklist Before You Start
Use this checklist every time:
- Turn off the thermostat before removing it from the wall.
- Turn off the breaker to the air handler before opening its panel.
- Never touch the outdoor unit's electrical panel.
- Never bypass a safety switch.
- Never add refrigerant without EPA 608 certification.
- Take photos before disconnecting any wires.
- Call a licensed technician if you're unsure.
What NOT to Do: A Quick Reference
| Do Not | Why |
|---|---|
| Jumper R to Y | Bypasses compressor protection, risks damage |
| Flip breaker repeatedly | Welds contacts, damages compressor |
| Bypass float switch | Water damage, code violation |
| Open outdoor electrical panel | 240V shock hazard, capacitor discharge |
| Add refrigerant yourself | EPA 608 violation, system damage |
| Ignore repeated blinks | Small faults become big repairs |
If you remember nothing else, remember this. The thermostat is the messenger, not the problem. Don't shoot the messenger.
Maintenance That Keeps "Cool On" From Blinking Again
Most blinking "Cool On" problems start with skipped maintenance. A few simple habits prevent almost all of them.
Filters, Drain Lines, Condenser Coil, and Capacitor Checks
The air filter is your first line of defense. A clogged filter chokes airflow. That leads to frozen coils and long run times.
Replace 1-inch filters every 30 to 90 days. Replace 4-inch media filters every 6 to 12 months.
Check the drain line every season. Pour a cup of distilled vinegar down the trap to kill algae. Or use a shop vac on the outdoor end to pull out debris.
If you have a condensate pump, clean the reservoir too.
The condenser coil needs annual cleaning. Turn off the breaker first. Then rinse the fins with a garden hose.
Don't use a pressure washer. It bends the fins and reduces airflow.
Capacitors weaken over time. A technician can test them during an annual tune-up. Replacing a weak capacitor before it fails costs $150 to $300.
Replacing a compressor costs $1,200 to $2,500.
Seasonal Startup and Shutdown Routines
Before the first hot day, run a test. Set the thermostat 5°F below room temperature. Watch the display.
A brief blink is normal. If it stays blinking past 10 minutes, investigate before summer hits.
At the end of cooling season, clean the condenser coil. Cover the outdoor unit if your climate has heavy winter debris. Just make sure the cover is breathable.
Plastic covers trap moisture and cause rust.
Smart Thermostat Features That Reduce Stress
The T9 and T10 Pro offer alerts through the Honeywell Home app. You'll get a notification if the system runs too long or the temperature doesn't change. That's a huge advantage.
You'll know about a problem before it becomes an emergency.
Geofencing is another useful feature. It adjusts the temperature when you leave home. That reduces run time and wear on the compressor.
Adaptive Intelligent Recovery pre-cools before you arrive. That's more efficient than blasting cold air at the last minute.
A Simple Maintenance Calendar
| Frequency | Task |
|---|---|
| Monthly | Check and replace air filter as needed |
| Every 3 months | Pour vinegar down condensate trap |
| Every 6 months | Inspect outdoor unit for debris |
| Annually | Professional tune-up, capacitor test, coil cleaning |
| Before summer | Full cooling test with 5°F setpoint drop |
What a Professional Tune-Up Includes
A good tune-up goes beyond a filter change. The technician will:
- Test the capacitor and contactor.
- Measure refrigerant pressures and superheat.
- Check the compressor amp draw.
- Clean the condenser and evaporator coils.
- Inspect the drain pan and float switch.
- Verify thermostat settings and ISU codes.
- Check the blower motor and belt if applicable.
That visit costs $100 to $200 in most markets. It's worth every penny. A well-maintained system lasts 15 to 20 years.
A neglected one lasts 8 to 12.
Frequently Asked Questions
How long should "Cool On" blink before I worry?
Give it 10 minutes. The anti-short-cycle timer runs for 5 minutes on most models. If the blink continues past 10 minutes with no cooling, investigate.
Check the breaker, float switch, and outdoor unit. If everything looks fine, call a technician.
Does a blinking "Cool On" mean my compressor is broken?
Usually no. A blinking "Cool On" is most often the normal compressor delay. A broken compressor causes different symptoms.
You'll hear a loud hum, then a click, then silence. The outdoor unit may trip its breaker repeatedly. If you suspect a compressor failure, call a technician.
Why does my Honeywell thermostat blink "Cool On" but the fan runs?
The fan running while "Cool On" blinks points to a specific problem. The thermostat is calling for cool, and the indoor blower is responding. But the outdoor unit isn't.
Check the breaker, the low-voltage fuse, and the float switch. Those are the top three causes.
Can I fix a blinking "Cool On" myself?
Sometimes yes. You can replace the air filter, clear the drain line, reset the float switch, and check the breaker. Those are safe DIY tasks.
Anything involving refrigerant, capacitors, or the outdoor unit's electrical panel is technician territory. Don't risk your safety to save a service call.
Why does it blink only in summer?
Summer heat stresses the whole system. High outdoor temperatures raise head pressure. Long run times cause coils to freeze.
Brownouts from grid demand spike and reboot thermostats. All of those trigger the anti-short-cycle timer. If the blink only happens in summer, your system is likely running at its limits.
Should I upgrade to a smart thermostat if mine keeps blinking?
Not necessarily. A smart thermostat won't fix a mechanical problem. But it will give you better diagnostics and alerts.
If your current thermostat is old or lacks a C-wire, an upgrade makes sense. The T6 Pro or T9 are solid choices. Just fix any underlying issues first.
Final Decision Guide: Wait It Out, Fix It Yourself, or Call a Tech
Here's the bottom line. Use this guide to decide what to do next.
Wait It Out If
- The blink started less than 10 minutes ago.
- The outdoor unit just started running.
- You recently had a power outage or flipped a breaker.
- You just changed the setpoint.
- The air from your vents is getting cooler.
Waiting costs nothing. Set a timer for 10 minutes. If the blink stops and cooling resumes, you're done.
Fix It Yourself If
- The air filter is dirty. Replace it.
- The drain pan has water. Clear the drain line.
- The float switch is tripped. Reset it after clearing the drain.
- The breaker is tripped and holds after reset.
- The thermostat batteries are weak. Replace them.
These fixes are safe, cheap, and effective. Most homeowners can handle them in under 30 minutes.
Call a Technician If
- The blink lasts more than 15 minutes with no cooling.
- The breaker trips again immediately after reset.
- You smell burning or see sparking.
- The outdoor unit hums but won't start.
- You see frost on the refrigerant lines.
- The thermostat shows an alert code you don't recognize.
- You've tried the DIY fixes and nothing worked.
Don't delay on these. A small fault today becomes a major repair next week. The compressor is the most expensive part of your system.
Protecting it is worth the cost of a service call.
Cost Comparison: DIY vs. Technician
| Scenario | DIY Cost | Technician Cost |
|---|---|---|
| Filter replacement | $10 to $30 | $50 to $100 (with tune-up) |
| Drain line clearing | $0 to $10 | $100 to $200 |
| Float switch reset | $0 | $100 to $150 |
| Capacitor replacement | Not recommended | $150 to $300 |
| Contactor replacement | Not recommended | $200 to $400 |
| Compressor replacement | Not possible | $1,200 to $2,500 |
| Full system replacement | Not possible | $5,000 to $12,000 |
The One Rule That Matters Most
When in doubt, call a pro. The thermostat is trying to tell you something. A blinking "Cool On" is usually a normal delay.
But when it's not, ignoring it costs far more than a service call.
Trust your instincts. If something feels off, it probably is. A licensed HVAC technician has the tools, training, and certification to diagnose the problem safely.
Your comfort and your safety are worth it.