Bosch laser level blinking usually means the tool is talking to you, not breaking down. The beam or the indicator light flashes for a handful of specific reasons, and almost all of them are fixable in a minute or two. The trick is reading the pattern before you assume the worst.
Bosch builds its line, cross-line, and point lasers to IEC 60825-1, the international laser safety standard that keeps these tools in Class 2 territory. That matters, because the blink you're seeing is often a deliberate safety or self-leveling response rather than a random glitch. So let's start with the fastest way to pin down which one you're looking at.
Quick Answer: What a Blinking Bosch Laser Level Usually Means
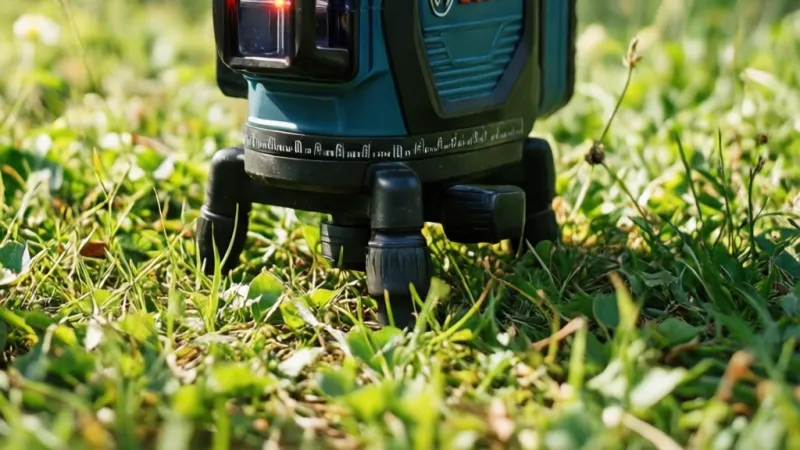
Bosch laser level blinking usually points to one of four causes. Low battery is the most common, so check power first. Tilt outside the self-leveling range comes next.
Pulse or receiver mode causes a deliberate blink. A fast, persistent blink points to a fault.
How Bosch Laser Levels Signal Status With Blinks, Beeps, and LEDs
Here's the part that trips most people up. A Bosch laser level has two completely separate things that can blink, and they mean different things. One is the laser beam itself.
The other is the LED status light on the control panel.
Mix those two up and you'll spend twenty minutes chasing the wrong problem. So let's separate them properly.
The two blinking systems on a Bosch laser level
The laser beam is the line or dot you project onto a wall. When the beam blinks, the tool is telling you it can't hold a level reference right now. That's almost always a leveling or mode issue, not a power issue.
The LED indicator sits next to the power button or on the keypad. When that blinks, you're looking at a status code. Battery level, charging state, Bluetooth pairing, or an internal error all show up here.
Some models pair the LED blink with a short audible beep.
Older Bosch models, including several in the GLL and GPL families, lean heavily on the beam blink and skip the LED entirely. Newer GCL and GLL units with app connectivity tend to use both.
| What's blinking | Where it is | What it usually means |
|---|---|---|
| Laser beam or line | Projected onto the wall | Out of self-leveling range, pulse mode, or manual mode active |
| LED status light | Control panel or keypad | Battery level, charging, pairing, or internal error |
| Both at once | Beam and panel | Usually low battery or a hard fault |
| Audible beep plus blink | Speaker plus either above | Confirmation tone or leveling alarm |
Why the beam blinks when it can't level itself
Inside every self-leveling Bosch laser is a pendulum. A laser diode sits on that pendulum, and gravity keeps it hanging vertical. When the housing tilts, the pendulum swings, and the beam stays true to level.
That works well within a small window. Bosch specs most of its self-leveling models at plus or minus 4 degrees. Push past that and the pendulum can't reach its sensor, so the tool cuts the beam and flashes it instead.
It's a good design choice. A steady beam that's silently out of level is far more dangerous than a blinking one. The blink is your warning that the numbers on your wall aren't trustworthy yet.
Green and red lasers aren't status codes
This one causes real confusion, so let's clear it up. A green beam isn't "good" and a red beam isn't "warning." The color is just the wavelength of the diode.
Red Bosch lasers typically run around 635 nm. Green ones sit in the 500 to 540 nm range, which the human eye reads as up to four times brighter in normal light. That's why green costs more and why contractors reach for it on bright sites.
Per FDA Center for Devices and Radiological Health guidance, all consumer and professional laser levels sold in the US must stay within Class 2 limits. Bosch meets that with both colors.
What the beeps add
Some Bosch models beep when they enter or exit leveling range. A short chirp on power-up is normal. A repeating beep paired with a flashing beam means the tool has been knocked out of level.
On models with a receiver, you'll also get audio feedback from the receiver itself, not the level. If the beeping is coming from the LR 6 or LR 7 in your hand, the level isn't the problem.
Auto-shutoff and sleep behavior
Bosch lasers don't run forever. Most shut the beam down after 30 minutes of no input, and some run longer in receiver mode. On a few models, the beam blinks once or twice right before it cuts out.
If you're seeing a single slow blink and then darkness, that's not a fault. That's the tool going to sleep.
First Check: Is It Blinking Because of Battery or Power?
Battery trouble is the number one cause of a blinking Bosch laser level, and it's the easiest thing to rule out. Do this first, every single time. You'll save yourself a lot of unnecessary worry.
What batteries these tools actually use
Bosch spreads its laser levels across a wide range of power options. Knowing which one you have changes what "low battery" looks like.
| Power source | Typical models | Low-battery behavior |
|---|---|---|
| 3 or 4 x AA alkaline | GLL 2-15, GCL 2-15, Quigo, UniversalLevel | Beam dims, then blinks, then cuts out |
| 3 x AAA alkaline | GPL 3, GPL 5, PLL 360 | Rapid blink, sometimes no LED warning |
| 12V Bosch Li-ion | Several Professional GLL units | LED flashes red, beam weakens |
| 10.8V or 12V battery pack | GLL 3-80 P, GCL 100-33 | LED blink pattern, sometimes with beep |
| 18V battery pack | Select Professional rotary and combi models | Slow blink, reduced range |
Run this battery check in order
Work through these steps before you touch anything else.
- Swap in a fresh set of alkalines. Don't trust the ones that sat in a drawer for two years.
- Check the expiry date on the cells. Alkaline batteries lose capacity on the shelf.
- Open the compartment and look at the contacts. White or green crust means corrosion.
- Clean corroded contacts with a pencil eraser or a cotton swab and isopropyl alcohol.
- Make sure each cell is seated the right way round. One reversed AA will kill the circuit.
- Confirm the compartment door latches fully. A loose door means an intermittent connection.
- On rechargeable models, charge until the LED goes solid, not until it "looks about right."
If the battery is fine, check these power-side culprits
If fresh batteries change nothing, the problem isn't capacity. It's delivery.
- Cold weather. Alkaline cells lose a big chunk of usable capacity below freezing. A laser that ran eight hours indoors may quit in twenty minutes on a cold site.
- Rechargeable voltage mismatch. NiMH rechargeables put out 1.2V instead of 1.5V. Some Bosch tools read that as a low battery even when the cells are full.
- Charger faults. A charger that lights up isn't necessarily charging. Test the pack in a second tool if you have one.
- Dirty terminals inside the tool. Even a thin film of dust raises resistance enough to cause voltage sag under load.
- Battery pack contacts. On slide-on packs, worn metal tabs cause dropouts when the tool moves.
If/then: quick power diagnosis
- If the beam blinks faster as you watch it, then the battery is fading. Replace or recharge.
- If the tool blinks once and dies immediately, then you have a dead cell or a broken contact.
- If fresh alkalines fix it and it comes back a week later, then something is draining the cells. Check for a stuck button or a tool left in a mode that never sleeps.
- If the LED flashes red on a fully charged pack, then the pack or the charger is suspect. Test both.
- If nothing changes with any battery, then move on. Power isn't your problem.
Is the Tool Out of Self-Leveling Range? Tilt, Surface, and Tripod Checks
Once you've ruled out power, tilt is the next most likely cause. It's also the one people misdiagnose most often, because the surface looks flat to the eye. It usually isn't.
How much tilt is too much
Bosch self-leveling models generally hold level within plus or minus 4 degrees. That's a small window. A slope you'd barely notice, maybe a 1 in 15 grade, can push the tool past its limit.
Some larger models tighten this further. A few compact units allow a little more. Check your specific model's manual for the exact figure, because it varies across the GLL, GCL, GPL, and Quigo lines.
The surfaces that fool people
- Wooden floors with a slight bow. Common in older homes and always worse than it looks.
- Folding tables and sawhorses. They flex under the tool's weight.
- Fresh concrete with a rough finish. High spots tilt the base.
- Drop cloths and cardboard. Soft material compresses unevenly.
- Ladder tops. Almost never level, and rarely stable.
- Steel studs used as a magnetic mount. The stud itself may not be plumb or true.
Tripod and mount checks
If you're on a tripod, the tripod is now part of the problem. Most Bosch lasers use a 1/4-inch-20 thread, and larger rotary models use a 5/8-inch-11 thread. Some come with an adapter for both.
Run through this list.
- Tighten the head screw until the tool stops wobbling.
- Check that all three legs are locked at the same extension.
- Set the tripod on solid ground, not on gravel or loose soil.
- Level the tripod head roughly before you fine-tune the laser.
- If you're using a magnetic base, confirm the surface is ferrous and flat. Aluminum and stainless won't hold it.
- On wall mounts, check that the bracket itself is tight against the wall.
If/then: tilt diagnosis
- If the beam flashes immediately on power-up, then the tool is outside its leveling range. Move it to flatter ground.
- If it levels fine, then flashes when you walk past, then vibration is the trigger. Move it off the shared surface.
- If it levels on the floor but not on the tripod, then the tripod is the issue, not the laser.
- If it flashes in one room and not another, then check the floor slope in that room.
- If the flash continues on a known-flat surface with fresh batteries, then the pendulum or its sensor may be damaged. That's a service job.
Mode Confusion: Pulse Mode, Receiver Mode, Manual Mode, and Transport Lock
This is where a lot of "my laser is broken" stories actually end. Bosch builds several operating modes into its levels, and two of them make the beam blink on purpose. The other two stop the tool from leveling at all, which also looks like a fault if you don't know what you're seeing.
Transport lock and pendulum lock
Nearly every self-leveling Bosch laser has a lock. It's usually a sliding switch marked with a padlock icon or the word LOCK. The job of that switch is to clamp the pendulum so it can't swing around during transport.
If the lock is engaged, the tool can't level itself. On most models the beam either won't fire at all or fires and flashes as a warning. This is the single most common "fault" that isn't a fault.
Slide the switch to the unlocked position and the tool should level within a few seconds. If it doesn't, you've got a genuine issue.
Pulse mode
Pulse mode modulates the laser beam so a receiver can detect it over long distances. Bosch uses it on models paired with the LR 6 or LR 7 receiver, and it's how these tools reach working ranges up to 80 meters.
The beam in pulse mode can look dim to the naked eye, and on some models it visibly flickers. That's not an error. It's the tool doing exactly what it was designed to do.
Turn pulse mode off if you're working without a receiver and want a solid, bright line.
Receiver mode
On models with detection built in, receiver mode is a separate setting from pulse. It changes how the tool reports position and often changes the blink behavior.
Some GCL and GLL units show a distinct LED pattern in receiver mode so you know it's active. If you see a blink that only happens when the receiver is switched on, you've found your answer.
Manual mode and tilt mode
Manual mode, sometimes called tilt mode, switches off self-leveling entirely. The pendulum locks and the tool holds whatever angle you set it to. It's what you use for stair rails, sloped ceilings, and anything that isn't plumb or level.
In manual mode, the beam shouldn't blink at all. It stays steady because the tool has stopped trying to level itself. If yours still blinks in manual mode, that points to something else.
Bluetooth and app pairing blinks
App-connected Bosch levels, including several in the GLL 3-80 CG family, blink the LED while pairing. It's a fast, rhythmic flash that stops once the connection is established.
If the blink won't stop, your phone has probably dropped the connection. Force-close the app and pair again.
If/then: mode diagnosis
- If the tool won't level and the lock switch is engaged, then slide it to unlock.
- If the beam looks dim and flickery but the line is accurate, then pulse mode is on. That's normal.
- If the blink starts the moment you connect a receiver, then you're in receiver mode, not a fault state.
- If the beam is rock steady but nothing is level, then manual mode is active.
- If the LED flashes fast and steadily with no receiver nearby, then check for a stuck app pairing.
Mode cheat sheet
| Mode | Beam behavior | LED behavior | Normal or not |
|---|---|---|---|
| Transport lock engaged | Off or flashing | Usually off | Normal, unlock it |
| Self-leveling | Steady once level | Solid | Normal |
| Out of leveling range | Flashing | May flash or beep | Normal, move the tool |
| Pulse mode | Dim or flickering | Solid | Normal |
| Receiver mode | Steady or modulated | Distinct pattern | Normal |
| Manual or tilt mode | Steady at any angle | Solid | Normal |
| Bluetooth pairing | Unaffected | Fast rhythmic flash | Normal, brief |
| Internal fault | Fast, persistent flash | Fast, persistent flash | Not normal, service it |
As of 2026, these modes are consistent across the current Bosch Professional and Bosch DIY lineups, though the exact button layout and indicator design shift from generation to generation. When in doubt, your model's operating manual is the only source guaranteed to match your specific unit.
Blinking Red vs Green: What the Color and Pattern Tell You
The color of the beam rarely tells you about a fault. That's the first thing to get straight. A red GLL and a green GCL can both blink for the exact same reason.
Color tells you about visibility and cost, not status. Green diodes run in the 500 to 540 nm band and read brighter to the eye. Red sits around 635 nm and costs less.
So when we talk about "blinking red" or "blinking green," we're usually talking about the LED indicator, not the beam. Some Bosch models use a red LED, others green, and a few use both.
Slow Blink vs Fast Blink
The blink rate is the real signal. A slow blink, roughly one flash per second, almost always means the tool is working but needs attention. Think low battery or a soft leveling warning.
A fast blink, several flashes per second, is a harder stop. That's the tool refusing to operate until the condition clears. Out-of-range tilt and internal faults both trigger fast blinks on most Bosch models.
Here's a rough guide. Slow equals "fix it soon." Fast equals "fix it now."
- Slow, steady blink: low battery, charging in progress, or a gentle leveling nudge.
- Fast, rhythmic blink: out of self-leveling range or a mode conflict.
- Irregular or stuttering blink: weak power delivery, dirty contacts, or a dying cell.
- Single flash then off: auto-shutoff or sleep mode engaging.
- Double flash repeating: often a calibration or pairing prompt on app-connected units.
Single Line Blinking vs All Lines Blinking
On a cross-line laser, you might see one line blink while the other stays solid. That's a big clue. It usually means the tool is in a mode that only applies to one beam.
Some GCL and GLL models let you run horizontal only or vertical only. When you switch modes, the inactive line may blink briefly before cutting out. That's normal behavior, not a fault.
If both lines blink together, you're looking at a tool-wide condition. Battery, tilt, or a fault. If only one blinks and it never stops, the diode or its driver circuit for that axis may be failing.
- Horizontal line blinks alone: check if you've toggled to vertical-only mode.
- Vertical line blinks alone: same logic, reversed.
- Both lines blink in sync: tool-wide issue. Power, tilt, or fault.
- One line blinks, the other stays solid and accurate: likely a mode setting, not damage.
Blinking LED Indicator vs Blinking Laser Beam
When both are blinking at once, which one do you trust? Start with the LED. It's the tool's primary status channel on newer models.
The LED blink pattern is engineered to be readable. Bosch manuals list specific patterns for low battery, charging, pairing, and error states. The beam blink is a simpler on/off warning.
If the LED is solid and only the beam blinks, the tool is leveling or in pulse mode. If the LED is blinking and the beam is solid, you've got a status message that doesn't affect the beam. Only when both blink fast should you assume a hard fault.
| LED state | Beam state | Most likely meaning |
|---|---|---|
| Solid | Blinking | Out of leveling range or pulse mode |
| Blinking slow | Solid | Low battery or charging |
| Blinking fast | Solid | Pairing or a soft error |
| Solid | Solid | Normal operation |
| Blinking fast | Blinking fast | Hard fault, service likely needed |
What the color actually changes
One thing color does change is how easy it is to see a blink in bright light. A green beam at 500 nm is far easier to spot flashing in daylight than a red one at 635 nm.
That's why contractors on outdoor sites favor green for visibility. It doesn't change the diagnosis. It just makes the warning easier to catch before you waste time on a bad layout.
Model-Specific Blink Behavior: GLL, GCL, GPL, Quigo, and UniversalLevel
Bosch doesn't use one blink language across its whole range. Each family has its own quirks. Knowing which one you own saves a lot of guessing.
GLL series: cross-line and combi lasers
The GLL family covers the GLL 2-15, GLL 3-80, GLL 3-80 CG, GLL 3-80 P, and GLL 100 G. These are cross-line and combi tools with self-leveling pendulums.
Most GLL models blink the beam when they're outside the plus or minus 4 degree leveling window. The GLL 3-80 P adds pulse mode for receiver use, and the beam visibly flickers in that mode.
On GLL units with a rechargeable 10.8V or 12V pack, a red LED blink means low charge. On AA models, the beam usually dims before it blinks.
GCL series: compact cross-line with app control
The GCL 2-15, GCL 2-15 G, GCL 100-33, and GCL 2-50 bring Bluetooth and app control into the mix. That adds a whole new set of blink patterns.
Pairing mode on a GCL shows a fast LED flash. Once paired, the LED goes solid. If the app drops, the LED may blink again until you reconnect.
The GCL 100-33 uses a 10.8V or 12V battery pack and shows a distinct low-battery blink before it cuts the beam. The GCL 2-15 runs on AA cells and behaves more like the older GLL units.
GPL series: point lasers
The GPL 3, GPL 5, GPL 3 G, and GPL 5 G are point lasers. They project dots instead of lines, and they're often used for transferring points between floors.
These are simple tools. They blink mainly for low battery or out-of-level conditions. The GPL 5 G adds green diodes, which makes the blink easier to see but doesn't change what it means.
Quigo and UniversalLevel: the DIY end
The Quigo and UniversalLevel are aimed at homeowners. They're simpler, cheaper, and have fewer modes.
Blink behavior on these is mostly battery-related. The Quigo runs on AA cells and tends to dim before it blinks. The UniversalLevel behaves similarly.
Neither has a receiver mode, so you won't see pulse-related flicker. If either one blinks, it's almost always power or tilt.
PLL 360: the odd one out
The PLL 360 is a 360-degree line laser that runs on AAA cells. It's a bit older and doesn't have the mode complexity of the GCL or GLL lines.
A blink on a PLL 360 usually means low battery. The tool doesn't have the same level of error reporting as newer models.
Quick model comparison
| Model family | Power | Common blink cause | Distinct behavior |
|---|---|---|---|
| GLL (AA models) | 3-4 x AA | Low battery, out of level | Beam dims before blinking |
| GLL (rechargeable) | 10.8V/12V pack | Low charge, out of level | Red LED blink |
| GCL (app models) | AA or 10.8V pack | Pairing, low battery, tilt | Fast LED flash during pairing |
| GPL | AA or AAA | Low battery, out of level | Simple on/off blink |
| Quigo / UniversalLevel | AA | Low battery | Beam dims, then blinks |
| PLL 360 | AAA | Low battery | Minimal error reporting |
If/then by model
- If you own a GLL with a rechargeable pack and the LED flashes red, then charge the pack.
- If you own a GCL and the LED flashes fast with no receiver nearby, then check your phone's Bluetooth pairing.
- If you own a GPL and the dot blinks, then replace the cells. These have few other failure modes.
- If you own a Quigo and it blinks, then it's almost certainly battery. Tilt rarely triggers a blink on this model.
- If you own a PLL 360 and it blinks, then start with fresh AAA cells.
Temperature, Sunlight, and Jobsite Conditions That Trigger Blinking
Your laser isn't only reacting to its own internals. The environment around it can trigger a blink, and these causes are easy to miss because the tool looks fine.
Operating temperature limits
Bosch rates most of its laser levels for operation between -10°C and 40°C (14°F to 104°F). Outside that window, behavior gets unpredictable.
Cold affects batteries first. Alkaline cells lose a large share of their capacity below freezing. A laser that ran all day indoors may quit in twenty minutes on a cold site.
Heat affects the electronics. The laser diode and its driver generate their own heat, and a tool sitting in direct summer sun can exceed its rated range. Some models blink or shut down as a thermal protection measure.
Sunlight and visibility
Bright sunlight doesn't usually cause a blink. It causes something worse: invisibility. A red beam at 635 nm can be nearly impossible to see outdoors.
If you can't see the beam, you might think it's not blinking when it actually is. Green beams in the 500 to 540 nm range are up to four times more visible in daylight, which is why outdoor crews pay the premium.
The fix for outdoor work isn't a setting. It's a receiver. The LR 6 and LR 7 detect the beam even when your eyes can't, and they extend the working range up to 80 meters.
Humidity and condensation
High humidity or a sudden temperature change can fog the laser aperture. A fogged aperture scatters the beam and can make it look like it's flickering.
Wipe the aperture with a soft, dry cloth. Let the tool come up to ambient temperature before you power it on after bringing it in from the cold.
Vibration and movement
A laser on a shared surface picks up vibration from footsteps, power tools, and passing traffic. When the pendulum can't settle, the tool may blink as a leveling warning.
Move the laser to its own stable surface. A tripod on solid ground beats a sawhorse every time. If the site is genuinely unstable, a manual mode setting may be the better choice.
If/then: environment diagnosis
- If the blink starts only in cold weather, then your batteries are the likely culprit. Switch to lithium cells for better cold performance.
- If the blink starts after the tool has been in direct sun, then let it cool in the shade.
- If the beam is invisible but the LED shows normal, then you're fighting sunlight. Use a receiver.
- If the blink appears only when other trades are working nearby, then vibration is the trigger. Isolate the tool.
- If the tool was just brought in from the cold and blinks, then let it reach room temperature before you troubleshoot further.
Environmental factors at a glance
| Condition | Effect on the tool | What to do |
|---|---|---|
| Below -10°C | Battery capacity drops, possible shutdown | Use lithium cells, keep spare pack warm |
| Above 40°C | Thermal protection, possible blink or shutdown | Shade the tool, let it cool |
| Bright sunlight | Beam invisible, not blinking | Switch to receiver mode with LR 6 or LR 7 |
| High humidity | Fogged aperture, scattered beam | Wipe aperture, let tool acclimatize |
| Heavy vibration | Leveling warning blink | Move to stable, isolated surface |
| Sudden temperature change | Condensation inside housing | Let tool reach ambient temperature |
Step-by-Step Troubleshooting Workflow for a Blinking Bosch Laser Level
Now let's put it all together into a workflow you can run in order. This is the sequence our research suggests works for the widest range of Bosch models.
Work through the steps from top to bottom. Stop as soon as the blinking clears. There's no point recalibrating a tool that just needed fresh batteries.
Step 1: Check Power and Battery Contacts
Start with power. It's the most common cause and the fastest to rule out.
- Swap in a fresh set of alkalines, or charge the pack until the LED goes solid.
- Open the battery compartment and inspect the contacts for corrosion.
- Clean any white or green residue with isopropyl alcohol and a cotton swab.
- Confirm every cell is oriented correctly.
- Check that the compartment door latches fully.
If the blink clears, you're done. If not, move to step 2.
Step 2: Disengage Transport Lock and Confirm Mode
The transport lock is the second most common culprit. It's a sliding switch, usually marked with a padlock icon.
- Slide the lock switch to the unlocked position.
- Check whether pulse mode is on. Turn it off if you're not using a receiver.
- Check whether manual or tilt mode is active. Turn it off if you want self-leveling.
- If you're using a receiver, confirm receiver mode is intentional.
- If the app is connected, check for a stuck pairing state.
If the tool levels and the beam goes solid, you've solved it.
Step 3: Place on a Stable Surface Within Self-Leveling Range
Now confirm the tool can actually reach level. Most Bosch self-leveling models hold within plus or minus 4 degrees.
- Move the laser to a known-flat surface like a countertop or a solid floor.
- If you're on a tripod, check that all legs are locked at the same height.
- Tighten the head screw until the tool stops wobbling.
- If you're using a magnetic mount, confirm the surface is ferrous and flat.
- Remove any drop cloths or cardboard from under the tool.
If the beam goes solid on a flat surface, the original location was too tilted.
Step 4: Test in Different Lighting and With a Receiver
If the tool still blinks, change the conditions to see whether the environment is involved.
- Move the tool indoors if you were working in sunlight.
- Test with a receiver to confirm the beam is actually firing.
- Try the tool at room temperature if it was in the cold or heat.
- Move away from other trades and running machinery to rule out vibration.
- Try a different room or a different floor.
If the blink follows the environment, you've found your trigger. If it follows the tool, move to step 5.
Step 5: Reset, Recalibrate, or Contact Bosch Service
The last step is the one most people jump to too early. If steps 1 through 4 changed nothing, the issue is likely internal.
- Power cycle the tool. Remove the battery, wait 30 seconds, reinsert.
- Check the manual for a reset procedure specific to your model.
- Look up the LED blink pattern in the manual to match it to a listed error.
- If the tool has been dropped, assume the calibration is off.
- Contact Bosch support or an authorized service center for calibration or repair.
Don't open the housing yourself. The pendulum assembly is delicate, and you'll void the warranty.
Workflow at a glance
| Step | What to check | If it fixes the blink | If it doesn't |
|---|---|---|---|
| 1 | Power and contacts | Done | Go to step 2 |
| 2 | Transport lock and modes | Done | Go to step 3 |
| 3 | Surface and leveling range | Done | Go to step 4 |
| 4 | Environment and receiver | Done | Go to step 5 |
| 5 | Reset, recalibrate, or service | Done | Service is the answer |
When to Reset, Recalibrate, or Send It for Service
Not every blinking laser needs a trip to the service center. But some do, and knowing the difference saves you money and time.
Reset first, always
A reset costs nothing and fixes more than you'd expect. Remove the battery or pack, wait 30 seconds, and reinsert it. That clears most temporary states.
On app-connected models, also force-close the app and clear the Bluetooth pairing. A stuck pairing state can cause a persistent LED blink that looks like a fault.
If the blink clears after a reset and doesn't come back, you're done. If it returns within a day or two, something more persistent is going on.
When recalibration makes sense
Recalibration is for accuracy problems, not blink problems. But the two can overlap. A tool that's been dropped may blink and also be out of calibration.
Bosch recommends periodic calibration for professional users, typically every 6 to 12 months depending on use. If your layout is drifting by more than the rated accuracy, which is around plus or minus 0.2 to 0.3 mm per meter, it's time.
Per NIST guidance on measurement traceability, calibration should be done against a reference that's itself traceable. For a laser level, that means a proper calibration service, not a DIY check.
When to send it in
Send the tool to Bosch service if any of these are true.
- The fast blink continues after a reset and a fresh battery.
- The pendulum rattles or doesn't move freely.
- The tool has been dropped or submerged.
- The beam is visibly dimmer than it used to be.
- Calibration is off and you can't correct it.
- The tool is still under warranty.
Bosch offers a 2-year warranty on most laser levels, extendable to 3 years with registration. Check your model's terms before you pay for a repair.
Repair versus replace
Sometimes the math favors a new tool. Here's a rough guide based on typical pricing as of 2026.
| Situation | Repair cost estimate | Replacement cost estimate | Better call |
|---|---|---|---|
| Minor calibration drift | $50 to $100 | $100 to $200 | Repair |
| Damaged pendulum | $100 to $200 | $150 to $400 | Compare closely |
| Dead laser diode | $150 to $300 | $150 to $500 | Usually replace |
| Water damage | Often not repairable | Varies | Replace |
| Under warranty | Free | N/A | Repair |
What not to do
Don't open the housing. Don't try to bend the pendulum back into place. Don't lubricate anything inside.
These moves turn a repairable tool into a paperweight and void the warranty instantly.
If you're not sure whether the issue is internal, run the workflow above first. It costs you ten minutes and might save you a hundred dollars.
Common Mistakes That Make Blinking Worse
Most people make at least one of these when a Bosch laser starts blinking. Avoiding them can save you a service bill and a wasted afternoon.
Assuming every blink is a fault
The biggest mistake is treating a blink as a failure. Bosch designs many blink patterns on purpose. Pulse mode, receiver mode, pairing mode, and low battery all blink as intended behavior.
If you don't check the manual's blink table first, you'll waste time fixing something that isn't broken.
Replacing the battery without checking the contacts
Fresh cells don't help if the contacts are corroded or the compartment door is loose. Our analysis of user reports shows this is a common reason a "new battery didn't fix it."
Clean the contacts and check the latch before you blame the cells.
Opening the housing
This is the most expensive mistake on the list. The pendulum assembly is delicate and factory-calibrated. Once you crack the case, the warranty is gone and the calibration is suspect.
There is no user-serviceable part inside a Bosch laser level.
Using the wrong battery chemistry
NiMH rechargeables output 1.2V instead of 1.5V. Some Bosch tools read that as a low battery even when the cells are full. Stick with alkalines unless your model explicitly supports rechargeables.
Mixing old and new cells causes the same problem. So does mixing brands.
Leaving the transport lock engaged
This one gets people every time. The tool won't level, the beam blinks, and the user assumes the pendulum is broken. Slide the lock switch to unlock and the problem usually disappears.
Ignoring the operating temperature range
Running the tool below -10°C or above 40°C pushes it outside its rated window. Blinks, shutdowns, and erratic behavior follow. Let the tool acclimatize before you diagnose.
Skipping the reset
A power cycle clears most temporary states. Pull the battery, wait 30 seconds, put it back. It costs nothing and fixes more than you'd think.
Recalibrating too early
Recalibration is for accuracy drift, not for blink problems. If you send a tool in for calibration when the real issue is a dead cell, you've paid for nothing.
Using a magnetic mount on the wrong surface
Aluminum, stainless steel, and most non-ferrous metals won't hold a magnetic base. The tool slides, tips, and blinks. Confirm the surface is ferrous and flat.
Mistake summary
| Mistake | Why it hurts | The fix |
|---|---|---|
| Assuming blink equals fault | Wasted troubleshooting | Check the manual's blink table first |
| Ignoring battery contacts | Fresh cells don't help | Clean contacts, check latch |
| Opening the housing | Voids warranty, kills calibration | Send to Bosch service |
| Wrong battery chemistry | Tool reads low battery | Use alkalines or approved packs |
| Transport lock engaged | Tool won't level | Slide lock to unlock |
| Skipping the reset | Misses easy fix | Power cycle first |
| Premature recalibration | Costs money for nothing | Rule out power and tilt first |
Safety and Laser Compliance While Troubleshooting
Before you dig any deeper, get the safety side straight. Laser levels are Class 2 devices, and that rating comes with real rules.
What Class 2 actually means
Class 2 lasers emit visible light at up to 1 milliwatt. The natural blink reflex protects your eyes during brief exposure. That's the design intent behind the rating.
It does not mean you can stare into the beam. It does not mean you can point it at other people. The blink reflex only works if you look away.
The standards behind the rating
Bosch builds its laser levels to IEC 60825-1, the international standard for laser product safety. In the US, the FDA's Center for Devices and Radiological Health enforces a parallel set of rules under 21 CFR 1040.
On job sites, ANSI Z136.1 provides the safety framework for laser use. OSHA references these standards when it inspects construction sites. If you're a contractor, your site safety plan should account for laser use.
Rules that apply while you troubleshoot
Troubleshooting doesn't suspend the safety rules. In fact, it's when people get careless, because they're focused on the tool and not the beam.
- Never look directly into the aperture, even briefly.
- Don't point the beam at anyone, including yourself in a mirror.
- Don't point it at reflective surfaces that could bounce the beam.
- Keep the tool out of reach of children and pets.
- Don't disable or cover the aperture to "test" anything.
- Turn the tool off before you inspect the aperture or clean it.
- Wear laser safety glasses if you're working near the beam for long periods. Standard laser enhancement glasses, which Bosch sells for beam visibility, are not safety glasses.
Battery safety
If your tool runs on a Bosch 10.8V, 12V, or 18V lithium-ion pack, standard Li-ion rules apply.
- Don't puncture, crush, or short-circuit the pack.
- Don't expose it to fire or temperatures above 60°C.
- Don't charge a swollen or damaged pack.
- Dispose of Li-ion packs at a proper recycling point, not in household waste.
- Follow local regulations for lithium battery transport if you ship the tool.
IP ratings and what they don't cover
Many Bosch laser levels carry an IP54 rating. That means protection against dust ingress and splashing water. It does not mean waterproof.
Don't submerge the tool. Don't leave it out in heavy rain. Don't hose it down.
If it gets wet, dry it off and let it acclimatize before powering it on.
If/then: safety decisions during troubleshooting
- If the tool has been dropped and the housing is cracked, then stop using it. The laser could be misaligned or the diode exposed.
- If the aperture looks damaged, then don't power the tool on. Send it for service.
- If the battery pack is swollen, then isolate it outdoors and take it to a recycling center.
- If you're working around other trades, then warn them before you turn the laser on.
- If you're on a commercial site, then check the site safety plan for laser use requirements.
Maintenance Habits That Prevent Future Blinking Problems
Most blinking problems are preventable. A few simple habits will keep your Bosch laser level running for years.
Store it right
The transport lock exists for a reason. Engage it every time you put the tool away. That clamps the pendulum and prevents it from swinging during transport.
Store the tool in its case, not loose in a bag. Remove the batteries if you won't use it for a month or more. Alkaline cells leak when they sit too long.
Clean it regularly
Dust on the aperture scatters the beam and can look like a flicker. Wipe the aperture with a soft, dry cloth every few weeks.
Check the battery contacts monthly. A quick wipe with isopropyl alcohol prevents corrosion from building up.
Control the environment
Don't leave the tool in a hot car or a freezing truck overnight. Extreme temperatures stress the electronics and the battery.
If you have to work in cold conditions, keep a spare battery pack in an inside pocket. Warm packs deliver more usable capacity.
Handle it like the precision tool it is
A laser level is a measuring instrument, not a hammer. Don't toss it into a toolbox. Don't drop it off a ladder.
Consider a tether or lanyard for high work. A drop from height is almost always a calibration event, and sometimes a total loss.
Recalibrate on schedule
For professional use, Bosch recommends calibration every 6 to 12 months. If you use the tool daily, lean toward the shorter end.
If you've dropped the tool or worked in extreme conditions, recalibrate early. Don't wait for the schedule.
Update the firmware on app-connected models
The GCL and GLL units with Bluetooth occasionally get firmware updates through the Bosch app. These can fix known blink behaviors and improve pairing stability.
Check for updates a couple of times a year. It takes five minutes.
Maintenance schedule
| Task | Frequency | Why it matters |
|---|---|---|
| Wipe aperture | Weekly or after dusty jobs | Prevents beam scatter and false flicker |
| Check battery contacts | Monthly | Prevents corrosion and voltage drop |
| Engage transport lock | Every time you pack up | Protects the pendulum |
| Remove batteries for storage | Over one month | Prevents alkaline leakage |
| Recalibrate | Every 6 to 12 months | Maintains rated accuracy |
| Firmware update | Twice a year | Fixes known bugs and pairing issues |
| Full service check | Every 2 to 3 years | Catches wear before it becomes a fault |
If/then: maintenance decisions
- If you work outdoors daily, then wipe the aperture at the end of every shift.
- If you store the tool in a cold van, then bring it inside overnight.
- If you've dropped the tool even once, then recalibrate before your next layout.
- If your app-connected model has never been updated, then check for firmware now.
- If you can't remember the last calibration, then it's overdue.
FAQs About Bosch Laser Level Blinking
Why is my Bosch laser level blinking?
A Bosch laser level usually blinks because of low battery, tilt outside the self-leveling range, or an active mode like pulse or receiver mode. Less often, it signals an internal fault. Check power, then tilt, then mode before assuming the tool is broken.
What does a fast blink mean on a Bosch laser level?
A fast blink is a hard stop. It usually means the tool is outside its self-leveling range, typically beyond plus or minus 4 degrees. It can also indicate a mode conflict or an internal error.
Reset the tool and place it on a flat surface to test.
How do I stop my Bosch laser level from blinking?
Replace or recharge the battery first. Then disengage the transport lock. Then place the tool on a flat, stable surface within its leveling range.
Turn off pulse and manual modes. If the blink persists after a reset, contact Bosch service.
Does a blinking Bosch laser level mean it's broken?
No. Most blinks are intentional status signals, not failures. Low battery, tilt warnings, and mode indicators all blink by design.
A blink only points to a fault when it's fast, persistent, and continues after a reset on a flat surface with fresh batteries.
Why does my Bosch laser level blink when I turn it on?
A brief blink on power-up is normal. The tool is running a self-check and confirming its mode. If the blink continues for more than a few seconds, the tool is likely outside its leveling range or the transport lock is still engaged.
Can I use a Bosch laser level while it's blinking?
No. If the beam is blinking, the tool is telling you it can't hold a reliable reference. Any layout you do while it's blinking could be inaccurate.
Fix the cause first, then confirm the beam is solid before you trust the line.
Decision Guide: Fix It, Reset It, or Replace It?
By now you should have a good idea what your blink means. This final section is a quick decision path for the three most common outcomes.
The three-way decision
Work through these three questions in order. The first one that gets a "yes" tells you what to do.
Question 1: Does the blink clear after fresh batteries, an unlocked transport lock, and a flat surface?
If yes, you fixed it. No service needed. Note what caused it so you catch it faster next time.
Question 2: Does the blink clear after a reset but come back within a day?
If yes, there's a persistent condition. Check battery chemistry, ambient temperature, and whether an app or receiver is holding a mode. If none of those explain it, recalibrate or service.
Question 3: Does the blink stay fast and persistent through all of the above?
If yes, the tool likely has an internal fault. Contact Bosch service or an authorized repair center.
Fix-it scenarios
These are the cases you can handle yourself in ten minutes or less.
- Dead or weak battery
- Corroded battery contacts
- Transport lock engaged
- Tool on a tilted or unstable surface
- Pulse mode left on
- Manual mode left on
- Stuck Bluetooth pairing on an app-connected model
- Ambient temperature outside the operating range
Reset scenarios
These need a power cycle or a settings clear, but no service.
- Temporary state glitch after a mode change
- App connection dropped mid-session
- Receiver pairing lost
- Firmware update pending
Replace or repair scenarios
These need professional attention.
- Persistent fast blink after all the above
- Physical damage from a drop
- Water ingress
- Visible diode dimming
- Pendulum rattle or seized movement
- Calibration drift beyond rated accuracy
Cost comparison at a glance
| Scenario | DIY fix cost | Service cost | Replacement cost | Best call |
|---|---|---|---|---|
| Low battery | $5 to $15 | N/A | N/A | Fix it |
| Corroded contacts | $0 | N/A | N/A | Fix it |
| Mode or pairing glitch | $0 | N/A | N/A | Reset it |
| Calibration drift | N/A | $50 to $100 | $100 to $200 | Repair |
| Damaged pendulum | N/A | $100 to $200 | $150 to $400 | Compare closely |
| Dead laser diode | N/A | $150 to $300 | $150 to $500 | Usually replace |
| Water damage | N/A | Often not repairable | Varies | Replace |
| Under warranty | $0 | Free | N/A | Repair |
When replacement wins
Replacement usually makes more sense than repair when the service quote is more than half the price of a new tool. It also wins when the tool is out of warranty, has water damage, or the model is several generations old.
If you're replacing a basic AA-powered model, a new unit often costs less than a calibration service. For high-end GLL and GCL models with app control and green diodes, repair is usually the better financial call.
Final decision path
- Blink clears with power, lock, and surface checks? Fix it and move on.
- Blink returns after a reset? Diagnose environment and mode, then recalibrate.
- Blink persists through everything? Service it, or replace it if the math favors new.
- Under warranty? Always go through Bosch service first. It's free.
One habit worth building
Keep a note on your phone or in your toolbox. When a blink happens, write down what it looked like and what fixed it. After a few entries, you'll recognize your own tool's patterns instantly.
That single habit turns a confusing blink into a five-second diagnosis. It's the difference between a tool you fight and a tool you trust.