A panasonic tv blinking red light is one of those problems that looks random until you count the flashes. That little red standby LED isn't just telling you something is wrong. It's telling you exactly what's wrong, one blink at a time.
Panasonic has used this self-diagnostic system across plasma, LCD, and OLED sets for decades. Per Panasonic service documentation, the number of blinks in a repeating cycle maps to a specific shutdown condition, whether that's a failed backlight, a dead voltage rail, or a stalled fan. Read the count wrong and you'll replace the wrong board.
Here's how to read it properly, step by step.
Quick Answer
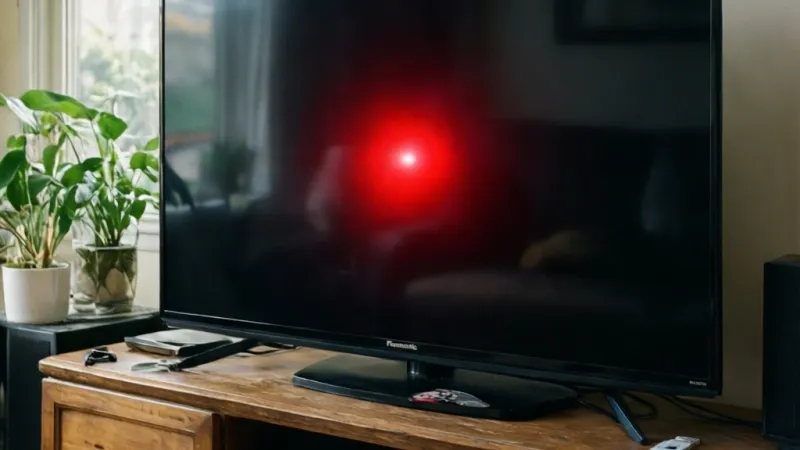
A blinking red light on a Panasonic TV means a self-diagnostic error. Count the blinks between pauses. The count identifies the faulty circuit.
One to three blinks usually points to power or backlight issues. Unplug the TV for five minutes first, then check your model's service manual if it returns.
Why Your Panasonic TV Is Blinking Red (And Why the Blink Count Is Everything)
The red light isn't a generic "something broke" signal. It's a coded message from the TV's main microcontroller, and it's the only way the set can communicate once it has shut itself down.
Your Panasonic TV Talks Through Its LED
When a Panasonic TV detects an abnormal condition, it cuts power to protect the panel and the boards. Then it pulses the standby LED in a set pattern. That pattern is the error code.
Panasonic calls these shutdown events "SOS" conditions in its service literature. Each one corresponds to a monitored circuit: a voltage rail, the backlight driver, the panel drive, a cooling fan, or the audio amplifier. The LED blinks once per detected fault category.
So the blink count is not cosmetic. It's the difference between swapping a $120 power board and replacing a $600 panel you didn't need to touch.
Solid Red, Blinking Red, Blinking Green, No Light: What Each One Means
People often lump every red LED state together. They're very different. Here's the short version.
| LED behavior | What it usually means |
|---|---|
| Solid red, no blinking | TV is in standby and the power supply is healthy |
| Blinking red, repeating pattern | Self-diagnostic shutdown, count the blinks |
| Blinking green or amber | TV is booting, updating firmware, or waking from standby |
| No light at all | No AC power reaching the set, or a dead standby circuit |
A solid red light is normal. A slowly pulsing red light with a pause between bursts is the code. If your LED is steady red and the TV simply won't respond to the remote, that's a different fault path entirely, usually a stuck standby state or a remote/receiver issue.
What Actually Triggers a Panasonic Shutdown
The main board continuously monitors several conditions. When any of them falls outside tolerance, the TV shuts down and starts blinking. In our review of Panasonic service documentation, the most common triggers are:
- Overvoltage or overcurrent on a regulated rail
- A missing or sagging voltage rail, such as 3.3V, 5V, 12V, 15V, or 24V
- Backlight overcurrent or open LED string, common on edge-lit LCD panels
- Panel drive failure, more common on older plasma sets
- Cooling fan stall, on sets that use active ventilation
- Audio amplifier fault, which trips a sound SOS on some chassis
- Thermal trip, usually from blocked vents or a failed fan
Each of those maps to a blink count. The count is your starting point, not your answer.
How Panasonic's Blink Code System Actually Works
Understanding the rhythm of the blinking matters as much as the number itself. If you count across a pause, you'll get the wrong code every time.
Blink Cycles, Pauses, and Repeats
A Panasonic blink code runs in a loop. The LED flashes a set number of times, pauses for roughly two to three seconds, then repeats the same number of flashes.
That pause is the separator. It tells you where one code ends and the next begins. If you see three flashes, a pause, then three more flashes, your code is three.
Not six.
Some sets also attempt a startup between cycles. You'll hear a click, see a brief backlight flash, then the TV drops out and the blinking resumes. That's normal behavior for a shutdown loop.
What SOS Means in a Panasonic Service Manual
"SOS" shows up constantly in Panasonic service literature. It stands for the shutdown detection logic built into the chassis. When you see "15V SOS" or "Backlight SOS" in a manual, it means the TV detected a fault on that specific circuit and shut itself down.
Panasonic service manuals list these under a self-check or SOS detection table. Each entry gives you the blink count, the monitored circuit, and the diagnostic procedure the technician should follow. That table is the single most useful document you can get your hands on.
Why One Blink Count Can Mean Different Things on Different Models
Here's where most online advice falls apart. A three-blink code on a 2011 plasma set does not mean the same thing as a three-blink code on a 2021 OLED.
Panasonic has shipped dozens of chassis families over the years. Plasma-era sets used designations like GPF, GPH, and GP9. Later LCD and OLED sets use entirely different board architectures.
The blink assignments shifted with each generation.
As of 2026, Panasonic's current lineup still uses a version of this self-diagnostic system, but the mapping is chassis-specific. You cannot reliably diagnose a TV from the blink count alone. You need the count plus the model plus the chassis.
Does the System Still Work the Same on Newer Panasonic TVs?
Mostly, yes, but with caveats. Newer sets are more likely to show an on-screen error message or log a fault before shutting down. Some also blink in patterns that don't map cleanly to the older SOS tables.
If your TV is from roughly 2015 onward, treat the blink count as a strong hint rather than a definitive diagnosis. Cross-check it against your specific model's service documentation whenever you can.
Step 1: Read the Blink Count Correctly
This is the step people rush, and it's the step that sends them down the wrong repair path. Get the count right before you do anything else.
Why Most People Miscount the Blinks
Three things trip people up constantly.
- The blinking starts before they look. By the time you notice the LED, you've missed the first flash or two.
- They count across a pause. The pause looks short, so the flashes run together into one long count.
- They count multiple cycles as one. Two bursts of four flashes becomes "eight blinks" in their head.
Any of those gives you a wrong code. A wrong code means a wrong diagnosis.
The Phone Camera Method (Most Reliable)
The most reliable way to count Panasonic blinks is to record them. Your eyes are bad at this. A camera is not.
- Prop your phone so the LED is clearly in frame.
- Start recording before you plug the TV back in.
- Plug the TV in and let it run through at least three full cycles.
- Stop recording after about 60 seconds.
- Play it back at quarter speed.
- Count the flashes in a single burst, then count the pause.
You'll get the number in under two minutes, and you'll get it right.
Watch at Least Three Full Cycles
One cycle can be misleading. The first burst sometimes includes an extra flash from the initial power-up sequence.
Watch three full cycles and confirm the count is identical each time. If it is, that's your code. If it isn't, note both numbers, because some faults produce an irregular pattern.
Note the Side Details While You Watch
The blink count is the headline, but the supporting details narrow things down fast. While you're watching, note:
- Whether you hear a click when the TV tries to start
- Whether the backlight flashes briefly before shutting down
- Whether any fan spins up for a second
- Whether the LED is pure red or has an amber or orange tint
- How long the TV stays on before it drops, if it powers up at all
A TV that clicks, flashes the backlight, then blinks is a different problem from a TV that never attempts to start. Same blink count, different diagnosis.
Write the Count Down Before You Touch Anything
Write it down. Model number, blink count, and the side details. Do this before you unplug anything or open anything.
Once you start moving cables and boards around, you'll lose track of the original symptom. That original symptom is your baseline. It tells you whether a repair actually worked.
Step 2: Find Your Model Number and Match It to the Right Code
The blink count only becomes useful once you pair it with the right model. Panasonic model numbers carry more information than most people realize.
Where to Find Your Panasonic Model Number
You've got several options, and at least one of them will work even if the TV won't turn on.
- Back panel label. Usually a white or silver sticker with the model, serial, and sometimes the chassis number.
- Original box or receipt. Still the fastest option if you kept them.
- On-screen menu. Menu, then Setup or System Information, on a working TV.
- Panasonic's official support site, where you can enter a serial number to confirm the model if the label is faded.
If the label is worn or unreadable, take a photo with your phone and zoom in. The model number is usually printed in the largest font on that sticker.
What the Model Prefix Tells You
Panasonic uses regional prefixes, and they matter for parts availability and manual lookup.
| Prefix | Region | Notes |
|---|---|---|
| TC- | North America (US, Canada) | 120V, NTSC/ATSC tuners |
| TX- | Europe, UK, Australia | 230V, DVB tuners |
| TH- | Asia, Japan | 100V/220V depending on market |
| TC-P / TX-P | Plasma era | Older sets, discontinued parts |
| TH-L / TC-L | LCD era | LED backlight, edge-lit or direct-lit |
A TC- model uses different boards than the equivalent TX- model, even when the screen size and panel look identical. Don't buy a board based on screen size alone.
Common Panasonic Blink Codes and What They Usually Point To
This table reflects the most widely documented Panasonic blink assignments across multiple chassis families. Treat it as a guide, not gospel. Your exact model's service manual is the final word.
| Blinks | Typical designation | Likely circuit |
|---|---|---|
| 1 | Backlight SOS | LED backlight string or driver |
| 2 | 15V SOS | Power supply rail |
| 3 | 3.3V SOS | Main board or power supply |
| 4 | 9V / 12V SOS | Power supply rail |
| 5 | 5V SOS | Power supply or main board |
| 6 | SC / SS SOS | Plasma sustain board |
| 7 | SD / SU SOS | Plasma sustain board |
| 8 | SS SOS | Plasma sustain board |
| 10 | Sub 3.3V / Sub 5V SOS | Main board |
| 12 | Sound SOS | Audio amplifier circuit |
| 13 | Backlight SOS | LED driver or panel |
| 14 | Fan or IP SOS | Cooling fan or IP board |
A few things to keep in mind about that table. First, plasma-specific codes like 6, 7, and 8 don't apply to LCD or OLED sets. Second, newer chassis may reassign codes entirely.
Third, some models only ever produce a handful of these codes, so an unusual count is worth double-checking.
Find the Chassis Number, Not Just the Model Number
The chassis number is the real key. It's usually printed near the model number on the back label, often as a short alphanumeric string like "GPF16DA" or "LA41".
Two TVs with different model numbers can share the same chassis and the same blink code table. Two TVs with similar model numbers can use different chassis. The chassis number is what the service manual is organized around.
Where to Get the Right Service Manual
Panasonic distributes service manuals to authorized service centers. They're not always easy to find publicly, but they're not impossible either.
- Panasonic's official support site for owner's manuals and basic troubleshooting
- Panasonic authorized service centers, who can confirm the code for your chassis
- Archived service documentation for older plasma and early LCD chassis
- Parts distributors that list chassis-compatible boards and sometimes host the matching manual
If you can't find the manual for your exact chassis, call an authorized Panasonic service center and give them the model and blink count. Most will tell you what the code means without charging you.
If You Can't Find Your Code Listed
Not every blink count shows up in a public table. When that happens, work from the symptom instead of the code.
A TV that never powers on points toward the standby and main rails. A TV that powers up, shows a picture for two seconds, then dies points toward the backlight or panel drive. A TV that runs for ten minutes before shutting down points toward heat, a fan, or a marginal capacitor.
Also worth remembering: the IEC 62368-1 safety standard governs how consumer audio and video equipment like your TV is designed and tested. It exists for good reason. The voltages inside a TV, particularly on the power board and panel driver, can be lethal if you don't know what you're doing.
Diagnosis is a reading exercise. Repair is a different skill level entirely.
Write your blink count, model number, and chassis number down. With those three pieces of information, you can walk into any repair conversation knowing exactly what you're dealing with, and you can tell immediately whether the person on the other end actually knows Panasonic hardware.
Decision Branch: The TV Won't Power On at All
This is the branch where the TV is completely dead. No picture, no sound, no click, no backlight flash. Just a red LED blinking at you from a black screen.
If you're here, the fault is almost always upstream of the panel. That means the power supply or the main board is refusing to hand off control. The panel and backlight usually aren't the culprits when the set never even tries to start.
What to Check Before You Assume a Board Failure
Start with the cheap stuff. It's embarrassing how often a "dead TV" is a dead outlet or a tripped breaker.
- Test the outlet with something else. A phone charger or lamp tells you in five seconds.
- Try a different wall socket. Ideally one on a different circuit.
- Bypass the surge protector. They fail silently and take the TV down with them.
- Inspect the power cord. A pinched or chewed cord causes exactly this symptom.
- Try the physical power button. Some Panasonic remotes stop communicating and the TV looks dead when it isn't.
If the TV still won't start on a known-good outlet with a known-good cord, move to the next step.
The 60-Second Power Reset That Actually Works
A power reset clears a locked standby state. It's not a fix for a failed board, but it does solve a real percentage of these cases.
- Unplug the TV from the wall.
- Hold the physical power button on the TV for a full 30 seconds.
- Keep it unplugged for another 60 seconds.
- Plug directly into the wall, no surge strip.
- Press the physical power button, not the remote.
If the TV powers on and stays on, you had a standby lockup. If it blinks the same code again, the fault is hardware.
If It Still Won't Start: What the Blink Count Points To
A dead TV with a steady blink pattern narrows things down fast. Match your count against these branches.
| Blink count | If this is your count | Then focus on |
|---|---|---|
| 2 | 15V rail missing | Power supply board |
| 3 | 3.3V rail missing | Main board or power board |
| 4 | 9V or 12V rail missing | Power supply board |
| 5 | 5V rail missing | Power supply or main board |
| 10 | Sub-rail failure | Main board |
If the count is 1, 13, or 14, you're on a different branch. Those usually mean the TV attempted a start and failed on backlight or fan logic.
The Main Board Handoff Test
Here's the if/then logic a technician uses. If the standby 5V rail is present at the power board connector, the power board is doing its job. If the main board isn't pulling the power-on signal low, the main board is the problem.
You can't run this test with the TV plugged in and open unless you know what you're doing. The voltages are real, and the shock risk is real. If you don't own a multimeter and know how to use it safely on live equipment, this is where you stop and call a tech.
Decision Branch: The TV Clicks, Blinks, Then Shuts Back Down
This is the most common pattern people describe. The TV clicks once or twice, the screen flashes for a split second, then everything goes dark and the red light starts blinking.
That click is a relay engaging. The brief flash is the backlight or panel getting power. The shutdown is the protection circuit reacting to something it didn't like.
This is a "tried to start, failed the check" branch.
Why the Click Matters
A relay click means the main board asked the power supply to come out of standby. That's progress. It tells you the main board is alive enough to issue commands.
If you hear the click but no backlight flash at all, the failure is happening before the panel lights up. That points at a voltage rail or the main board itself.
If you hear the click, see a flash, then lose everything, the failure is happening during the backlight or panel drive stage.
Blink Counts That Usually Produce This Pattern
Most click-and-shutdown faults land on a small set of codes. Here's how to read them.
| Blink count | Typical cause | First thing to test |
|---|---|---|
| 1 | Backlight overcurrent or open string | LED strips and driver board |
| 2 | 15V rail sagging under load | Power board capacitors |
| 7 | Plasma sustain board fault | SD or SU board (plasma only) |
| 8 | Plasma sustain fault | SS board (plasma only) |
| 12 | Audio amp short | Speaker wires and amp IC |
| 13 | Backlight driver fault | LED driver board |
On LED and OLED sets, the 1 and 13 codes are the big ones. On plasma sets, 7 and 8 are the classics.
The Quick Backlight Check
If your code is 1 or 13, you can do one safe test before you commit to a repair.
In a dark room, plug the TV in and watch the panel closely. You may see a faint glow for a second before shutdown. That glow means the backlight is trying to fire.
No glow means the driver isn't even trying.
That test tells you whether the problem is the LED strips or the driver circuit feeding them. It's not definitive, but it saves you from buying the wrong part first.
When the Click Keeps Cycling
Some TVs click, flash, blink, and repeat every 10 to 15 seconds. This is a shutdown loop. The TV keeps trying to boot and keeps failing the same check.
A shutdown loop is usually a marginal component, not a dead one. A capacitor that's drifted out of spec or a backlight string with one weak LED can pass the initial check and fail under load.
If you hear the loop stop after a minute or two and the TV stays dark, that's the protection circuit giving up. It's designed to stop retrying so it doesn't cook the panel.
Decision Branch: It Powers On But There's No Picture or Sound
This branch is trickier because the TV is technically working. You get a red or green LED that settles, the backlight may or may not be on, and there's nothing on the screen. No blink code, or a blink code that only shows up after 30 seconds.
If your TV is in this branch, the problem usually sits downstream of the power supply. The main board may be alive, the panel may have power, but the signal path is broken.
Is the Backlight On?
Put your ear close to the panel in a dark room. Cup your hands around the screen edge and look for a faint glow. This one check splits the branch cleanly.
- If the backlight is on and the screen is black, you likely have a T-CON board or panel ribbon failure.
- If the backlight is off and the screen is black, you have a backlight driver or LED strip failure.
- If you see a flashlight glow on the panel from the side, the backlight is off and the panel is just being lit externally.
That single observation saves you from buying a main board you don't need.
Does the TV Respond to the Remote?
If the remote works, the main board is running. It's receiving IR signals and processing them. That makes a main board failure less likely.
If the remote does nothing, the main board may be locked up or partially failed. That points back toward the main board, not the panel.
The Sound Test
Play a known audio source through HDMI or the built-in tuner. If you hear sound but see no picture, your main board and audio path are fine. The fault is almost certainly in the panel, T-CON, or backlight.
If you hear no sound and see no picture, the main board is the likely culprit. It handles both.
Blink Codes That Fit This Branch
A no-picture, no-sound fault sometimes produces a delayed code.
| Blink count | Likely cause |
|---|---|
| 1 | Backlight open, panel dark |
| 3 | Main board 3.3V rail fault |
| 5 | Main board 5V rail fault |
| 10 | Sub-rail on main board |
| 13 | Backlight driver or LED strip |
If your count lands here and the TV stays on for 30 seconds or more before blinking, that's a "post-boot fault." The TV started, then lost something critical.
What a T-CON Failure Looks Like
A failed T-CON board produces some very specific symptoms. You might see a white screen, a screen with vertical lines, or a screen with horizontal bands. You might see a picture that appears for a moment and then fades.
On some Panasonic sets, a T-CON fault triggers a blink code. On others, it just produces a bad picture with no code at all. If your blink count is inconsistent and the picture is distorted, suspect T-CON.
What Each Blink Count Usually Points To: 1, 2, 3, 4, 5, 6, 7, 8, 10, 12, 13, 14
This is the reference section. Come back to it after you've confirmed your blink count and model.
The numbers below reflect the most widely documented Panasonic SOS assignments across plasma, LCD, and OLED chassis families. Your exact model may differ. The chassis number, not the model number, is the final word.
Blink Code 1: Backlight SOS
One blink usually means the backlight circuit detected a fault. On LED sets, that's an open or shorted LED string, or a driver board that can't sustain current. On older plasma sets, a single blink sometimes points to a specific sustain rail, but plasma rarely uses one blink for backlight.
If you're on an edge-lit LCD or a direct-lit LCD from the last decade, one blink is a backlight problem almost every time.
Blink Code 2: 15V SOS
Two blinks typically means the 15V rail failed to come up or dropped out under load. That rail feeds several downstream circuits, so a failure here cascades.
On most Panasonic chassis, the 15V rail is generated on the power supply board. Two blinks usually means a power board fault, not a main board fault.
Blink Code 3: 3.3V SOS
Three blinks points at the 3.3V rail. That rail powers the main board logic and several support circuits.
The 3.3V rail can be generated on the power board or on the main board, depending on chassis. Three blinks on a plasma set usually means the main board. On an LCD, it can go either way.
Check the service manual for your chassis.
Blink Code 4: 9V or 12V SOS
Four blinks usually means a 9V or 12V rail has failed. These rails feed the panel drive, audio amplifier, and sometimes the tuner.
On LCD and OLED sets, four blinks often points to the power board. On plasma, the 9V rail also feeds sustain logic, so the diagnosis is more complex.
Blink Code 5: 5V SOS
Five blinks is a 5V rail fault. The 5V rail powers USB, HDMI logic, and part of the main board.
If the TV powers up and shows a picture for a moment before shutting down, and then blinks five times, the 5V rail is sagging under load. That's usually a capacitor or regulator on the power board.
Blink Code 6: SC or SS SOS (Plasma Only)
Six blinks is plasma-specific. It points at the SC board, which drives the panel's horizontal sustain.
If you own a Panasonic plasma, six blinks is a real repair, not a reset-and-go situation. SC and SS boards are replaceable, but plasma parts are increasingly hard to source.
Blink Code 7: SD or SU SOS (Plasma Only)
Seven blinks points at the SD or SU board, which drives the vertical sustain on a plasma panel.
Like six blinks, this is plasma-only and usually means a board replacement. Some technicians will also check the ribbon cables between the sustain boards and the panel before condemning a board.
Blink Code 8: SS SOS (Plasma Only)
Eight blinks is another plasma sustain fault, usually the SS board.
Plasma sets with six, seven, or eight blinks often have more than one failing board. Replacing a single board sometimes fixes it and sometimes doesn't. That's part of why plasma repair has mostly dried up.
Blink Code 10: Sub 3.3V or Sub 5V SOS
Ten blinks usually means a secondary voltage rail on the main board has failed. This is a main board fault on most Panasonic chassis.
A 10-blink code on an LCD or OLED is usually a straight main board replacement. On a plasma, the diagnosis can involve the digital board or the main board depending on chassis generation.
Blink Code 12: Sound SOS
Twelve blinks points at the audio amplifier circuit. That can mean a failed amp IC, a shorted speaker output, or a wiring fault between the amp and the speakers.
The first thing to check is the speaker wires. A pinched wire can short the amp and trigger a sound SOS. If the wires are clean, the amp IC or the audio section of the main board is the next suspect.
Blink Code 13: Backlight SOS (Second Variant)
Thirteen blinks is another backlight code on newer chassis. It usually points at the LED driver board rather than the LED strips themselves.
If you have a 13-blink code, the driver board is the first replacement. If that doesn't fix it, you're looking at the LED strips themselves, which is a panel-open job.
Blink Code 14: Fan or IP SOS
Fourteen blinks usually points at a cooling fan stall or an IP board fault. It shows up on sets with active cooling, which is more common on older plasma and high-end LCD models.
If the fan is seized, replacing it clears the code. If the fan spins freely but the code persists, the IP board or the fan control circuit is the issue.
Codes You Won't See on Every Model
Not every Panasonic chassis produces every code. A modern OLED may never generate 6, 7, or 8 because it doesn't have sustain boards. A budget LCD may never generate 14 because it has no fan.
If your TV blinks a number that isn't listed here, treat it as a chassis-specific code and find the manual. Don't force a diagnosis from a table that wasn't built for your hardware.
Power Board vs Main Board vs T-CON vs Backlight: How to Tell Them Apart
Four boards cause most Panasonic blinking-red-light faults. Learning to tell them apart saves you money and time. Here's the practical breakdown.
What Each Board Actually Does
- Power board converts AC wall power into the DC rails the TV needs. It runs in standby mode 24/7.
- Main board runs the TV's software, tuner, inputs, and control logic. It tells the power board when to wake up.
- T-CON board takes the video signal and drives the panel's timing. It sits between the main board and the panel ribbons.
- Backlight driver board powers the LED strips that light the panel. On some sets it's part of the power board. On others it's separate.
Symptom-to-Board Cheat Sheet
| Symptom | Most likely board |
|---|---|
| No power at all, standby 5V missing | Power board |
| No power, standby 5V present, no start signal | Main board |
| Powers up, backlight flashes, shuts down | Backlight driver or LED strips |
| Powers up, backlight on, no picture | T-CON or panel ribbons |
| Picture with lines or bands | T-CON or panel |
| Sound but no picture | T-CON or backlight |
| No sound, picture fine | Audio amp or main board |
This isn't perfect, but it's the right starting point for most Panasonic faults.
The Voltage Test That Narrows It Down
If you own a multimeter and you're comfortable working on live equipment, you can measure the standby rail at the power board output. A healthy Panasonic standby rail sits at 5V DC, give or take a few percent.
If the standby rail is present, the power board is doing its primary job. If the main board doesn't pull the power-on signal low, the main board is the fault.
If the standby rail is missing or unstable, the power board is the fault. That's a $100 to $200 replacement on most models.
When More Than One Board Is Suspect
Sometimes the symptoms don't fit one board cleanly. A TV might click, flash, blink a 5 code, and then produce a distorted picture on the second boot attempt.
In those cases, the power board is the most common culprit. It sits upstream of everything. A drifting power rail causes downstream boards to behave erratically, and the blink code shifts depending on which rail sags first.
Start with the power board when the symptoms are inconsistent. If the code is stable and repeatable, trust it and go to the board it names.
Parts Availability by Board
Power boards are the most available and cheapest to replace. Main boards come second. T-CON boards are harder to source on older models.
LED strips require a panel teardown and are the most labor-intensive.
As of 2026, Panasonic spare parts for plasma sets are largely discontinued. LCD and OLED parts are more available, but the newest chassis still route through authorized service centers only. That matters when you're deciding between repair and replacement, which is the next call you'll have to make.
Repair or Replace? Real Costs and the Break-Even Point
Once you know which board is likely at fault, the next question is whether fixing it makes financial sense. The answer depends on three things: the cost of the part, the labor involved, and what a comparable new TV costs today.
What Panasonic TV Repair Actually Costs
Prices vary by region, but the ranges below reflect what authorized service centers and independent repair shops typically quote. Parts are for the board itself. Labor is a separate line item on most invoices.
| Repair type | Typical parts cost | Typical labor | Total range |
|---|---|---|---|
| Power board replacement | $80 to $200 | $80 to $150 | $160 to $350 |
| Main board replacement | $100 to $250 | $80 to $150 | $180 to $400 |
| T-CON board replacement | $60 to $180 | $100 to $180 | $160 to $360 |
| LED strip replacement | $60 to $150 | $200 to $400 | $260 to $550 |
| Panel replacement | $300 to $900+ | $150 to $300 | $450 to $1,200 |
| Plasma sustain board | $150 to $400 | $150 to $250 | $300 to $650 |
Panel replacement is the killer. On a 55-inch TV that cost $600 new, a $700 panel repair makes no sense. On a 65-inch OLED that cost $2,000, it might.
The 50 Percent Rule
Use this simple benchmark. If the total repair quote is more than half the cost of a comparable new TV, replace it. If it's under half, repair it.
That rule isn't perfect. It ignores sentimental value and the hassle of shopping for a new set. But it's a solid starting point when you're standing in a repair shop with a quote in hand.
When Repair Wins
Repair usually makes sense in these situations:
- The TV is under five years old. Parts are still available and the panel has plenty of life left.
- The fault is a power board or main board. These are the cheapest, easiest board swaps.
- The TV is a high-end OLED or large-screen model. Replacement cost is high enough that repair still wins.
- The panel is confirmed healthy. A backlight or board fault on a good panel is worth fixing.
- You have warranty or extended coverage. Check first. It changes the math completely.
When Replacement Wins
Replacement usually makes more sense here:
- The TV is a plasma set. Plasma parts are largely discontinued as of 2026. Even if you find a board, it may fail again in months.
- The panel itself is dead. Panel replacement almost never makes financial sense on consumer TVs.
- The TV is 8 to 10 years old or older. Even a successful repair leaves you with aging capacitors and a dimming backlight.
- Multiple boards are suspect. Two or three board failures usually point at a deeper power issue.
- The quote is more than 50 percent of a new comparable TV.
What Age and Screen Size Do to the Math
Small TVs are almost never worth repairing. A 32-inch Panasonic costs $200 to $300 new. A $250 repair on it is a losing trade.
Large OLEDs flip the math the other way. A 65-inch Panasonic OLED runs $1,500 to $2,500 new. A $400 main board repair is a clear win, assuming the panel is healthy.
Mid-size LCDs sit in the gray zone. A 50-inch LED TV costs $350 to $600 new, so a $300 repair is borderline. That's where the 50 percent rule earns its keep.
The Parts Value Angle
If you decide not to repair, the TV still has value. Working boards sell on the used market. A functioning power board or main board from a popular Panasonic model can fetch $50 to $150.
That's worth knowing before you haul the set to the curb. Pulling and selling the good boards offsets part of your replacement cost. Just don't sell anything you haven't tested.
Mistakes That Make Things Worse (and Can Fry a Board)
Most Panasonic TV repairs that go wrong don't fail because the diagnosis was bad. They fail because someone skipped a step, touched the wrong thing, or bought the wrong part. Here are the ones we see most often.
Opening the TV Without Discharging the Capacitors
The power board holds a charge after you unplug the TV. Those capacitors can hold hundreds of volts for minutes or longer. Touching the wrong terminal can stop your heart.
Unplug the set and wait at least five minutes before opening the back. If you're going to work near the power board, learn how to discharge capacitors safely with an insulated resistor. Never short them with a screwdriver.
Buying a Board by Model Number Alone
Two Panasonic TVs with the same model number can ship with different boards depending on production run. The chassis number and the part number printed on the board itself are what matter.
Pull the board, read the part number, and match it exactly. Buying by model number alone gets you a board that looks right and doesn't work.
Ignoring the Chassis Number
The chassis number tells you which service manual applies to your TV. It also tells you which blink code table is correct. Skip it and you're diagnosing from a table built for different hardware.
If you can't find the chassis number, photograph the back label and search it online. Parts distributors often list the matching chassis.
Assuming the Panel Is Dead
A dark screen doesn't mean a dead panel. It usually means a dead backlight. Those are very different repairs at very different price points.
Before you write off the TV, run the dark-room glow test. If you see any light at all, the panel is probably fine and the fault is upstream.
Power Cycling Over and Over
Every power cycle sends a startup surge through the boards. If a rail is marginal, repeated cycling stresses it further. A fault that was a $120 capacitor can become a $300 board failure.
Count the blinks once. Write it down. Then stop cycling the TV until you have a plan.
Using the Wrong Screwdriver and Stripping Screws
Panasonic uses a mix of Phillips and JIS screws. A standard Phillips driver can cam out on JIS screws and strip the heads. Stripped screws turn a 20-minute job into an hour of drilling.
Buy a JIS screwdriver set before you open anything. It's a $15 investment that saves you real grief.
Skipping Photos Before Disassembly
Take photos at every stage. Cable routing, connector orientation, screw placement, ribbon positions. All of it.
Ribbon cables are the ones that bite. They only seat one way, and reversing one can damage the panel driver. A photo from before you touched it is your safety net.
Buying Used Boards Without a Return Policy
Used boards are a gamble. A seller with a no-return policy is selling you a lottery ticket.
Buy from sellers who offer at least a 30-day return. Test the board the day it arrives. If it doesn't fix the fault, send it back.
Trying Firmware Fixes for Hardware Faults
A firmware update won't fix a failed capacitor. It won't fix an open LED string. It won't fix a shorted sustain board.
Firmware updates address software bugs and compatibility issues. If your TV is blinking a hardware code, firmware is a waste of time. Worse, some sets won't accept an update in a shutdown loop anyway.
Trusting a Surge Protector to Save You
A cheap surge strip doesn't stop a direct lightning hit. It also doesn't stop the slow damage from repeated brownouts.
If your area gets frequent storms, a whole-home surge protector at the panel is a better investment than a $20 strip. It won't save a direct strike either, but it handles the smaller events that kill boards over time.
Safety First: What You Should Never Do Inside a TV
This section matters more than any diagnosis table. TV repair carries real electrical risk, and the consequences of getting it wrong aren't a broken TV. They're a broken you.
The Capacitor Risk Is Real
The power board and the backlight driver both store energy in capacitors. A large Panasonic power board can hold 400V DC on its primary side after the TV is unplugged.
That's enough to kill. Not "give you a shock." Kill. Treat every capacitor as charged until you've proven otherwise with a meter.
What IEC 62368-1 Means for Your TV
Modern consumer audio and video equipment is designed and tested against the IEC 62368-1 safety standard. That standard replaced the older IEC 60065 for TVs and similar gear.
The standard exists to keep you safe during normal use. It assumes the enclosure stays closed and no one pokes around inside. Open the case and you've stepped outside the protection it provides.
Tools You Actually Need
Here's the short list for a safe board swap.
- Insulated screwdrivers, including a JIS set
- Digital multimeter with a 600V DC range
- Anti-static wrist strap and mat
- Insulated needle-nose pliers
- Plastic pry tools for ribbon connectors
- A bright work light so you're not guessing
- Latex or nitrile gloves for grip and cut protection
Don't substitute a cheap meter for a proper one. You're measuring live voltages, and a meter failure at the wrong moment is dangerous.
Never Work Alone on Live Equipment
If you must measure voltages with the TV plugged in, have someone else in the house. Tell them what you're doing and where the breaker is.
Working alone on live gear is how people die. It's not dramatic. It's a slip, a contact, and no one to call for help.
Grounding and Static Rules
Static discharge can kill a main board or T-CON board instantly. Wear a wrist strap connected to a proper ground point. Work on a hard surface, not carpet.
Keep the TV on its stand or a padded bench. Don't work on a metal table without an insulating mat between you and the chassis.
When to Walk Away
Stop immediately if any of these apply:
- You don't own a multimeter or don't know how to use one
- The TV has visible burn marks, bulging capacitors, or a burnt smell
- You're not sure how to discharge the capacitors safely
- The TV is under warranty and you haven't contacted Panasonic support
- You're tired, rushed, or working alone
There's no shame in handing it to a pro. The repair shops we've looked at charge $80 to $150 for a diagnostic, and that fee often comes off the repair bill.
Recycling and Disposal Rules
If the TV is beyond repair, don't put it in the trash. TVs contain lead, mercury in older backlights, and other regulated materials.
In the US, check the EPA guidance for electronics recycling in your area. In the EU and UK, the WEEE Directive requires retailers and manufacturers to take back old equipment. Many Panasonic dealers will accept a dead set for recycling, sometimes free of charge.
FAQs About Panasonic TV Blinking Red Lights
How many blinks means a Panasonic TV is dead?
No blink count means the TV is permanently dead. Every code identifies a specific fault, and most are repairable. A one-blink or thirteen-blink backlight code is often fixable.
A plasma set with multiple sustain faults is usually not worth saving, but that's a cost decision, not a technical dead end.
Does unplugging a Panasonic TV reset the red light?
Sometimes. Unplugging for five minutes and holding the power button for 30 seconds clears a locked standby state. That fixes a small number of cases.
If the TV blinks the same code after the reset, the fault is hardware, and the reset won't help again.
Can a blinking red light fix itself?
No. A blinking red light means the TV detected a fault and shut itself down to protect the panel. The condition that triggered the shutdown doesn't go away on its own.
In rare cases, a marginal fault clears when the TV cools down, but it will return.
How much does it cost to fix a Panasonic TV with a blinking red light?
Most board-level repairs land between $160 and $400 including labor. Power board and main board swaps sit at the low end. LED strip replacement runs $260 to $550.
Panel replacement can exceed $1,200, which usually makes replacement the smarter move.
Is a blinking red light always a power board problem?
No. Power board faults are common, but main board, T-CON, backlight, and audio amp faults also trigger blink codes. The blink count tells you which circuit failed.
The power board is the most frequent culprit, but it's not the only one.
How long should I wait before trying the TV again?
Wait at least five minutes after unplugging before you power it back on. That lets the capacitors bleed down and clears any residual standby state. If the TV blinks again, stop cycling it.
Repeated power-ups stress marginal components and can turn a cheap fix into an expensive one.
Your Decision Guide: What to Do Next Based on What You Found
You've counted the blinks. You've got the model and chassis number. Now match your situation to one of the paths below and follow it.
If You Haven't Counted the Blinks Yet
Stop reading and go count them. Record at least three full cycles on your phone. Everything downstream depends on that number.
If Your Blink Count Is 1 or 13 (Backlight)
Run the dark-room glow test first. If you see light, the panel is likely fine and the driver board is the suspect. If you see nothing, the LED strips are the likely fault.
A driver board is a reasonable DIY swap. LED strips require opening the panel and are best left to a pro.
If Your Blink Count Is 2, 3, 4, or 5 (Power Rails)
The power board is the primary suspect on most chassis. Check the standby 5V rail with a meter if you can. If it's missing or unstable, replace the power board.
If it's present, the main board may be failing to send the power-on signal.
If Your Blink Count Is 6, 7, or 8 (Plasma Sustain)
You own a plasma TV with a sustain board fault. Parts are scarce and expensive as of 2026. Get a quote before you commit.
If the quote is more than half the cost of a modern OLED or LCD, replace the set.
If Your Blink Count Is 10 (Main Board)
The main board is the fault on most Panasonic chassis. A main board swap is a reasonable DIY job on most models. Match the part number exactly and buy from a seller with a return policy.
If Your Blink Count Is 12 (Sound SOS)
Check the speaker wires first. A pinched wire is the cheapest possible fix. If the wires are clean, the amp IC or the audio section of the main board is the next suspect.
If Your Blink Count Is 14 (Fan or IP)
Check whether the fan spins. A seized fan is a straightforward replacement. If the fan spins freely and the code persists, the IP board or fan control circuit is the fault.
If Your Blink Count Doesn't Match Any Table
Work from the symptom instead. Note whether the TV clicks, flashes the backlight, or stays dark. Those details narrow the branch even without a matching code.
Then call an authorized Panasonic service center and give them the model, chassis, and blink count.
If You're Not Comfortable Opening the TV
That's a valid answer. Book a diagnostic with an authorized Panasonic service center or a well-reviewed independent shop. Expect to pay $80 to $150 for the diagnostic.
Ask upfront whether that fee comes off the repair bill.
If the TV Is Under Warranty
Contact Panasonic support before you touch anything. Opening the case voids the warranty on most models. A blinking red light on a TV still in warranty is a covered repair in most regions.
The One Thing to Do Regardless
Write down everything. Model number, chassis number, blink count, what you saw, what you tried, and what it did. That record is what turns a guess into a diagnosis, and it's what any technician will ask you for the moment you call.