You probably bought bicycle blinking lights because someone told you flashing gets you seen. That advice is half right. Flashing rear lights do grab attention fast, but a flashing front light is illegal in some countries and can dazzle drivers into making worse decisions.
So the real question isn't whether to blink. It's when, where, and how fast.
Per UK Road Vehicles Lighting Regulations, a flashing bike light has to run between 1 and 4 Hz and put out at least 4 candela to count as legal. That one rule tells you plenty about how regulators think about flashing. It works, but only inside limits.
Here's how to choose modes that keep you visible without creating new problems.
Quick Answer
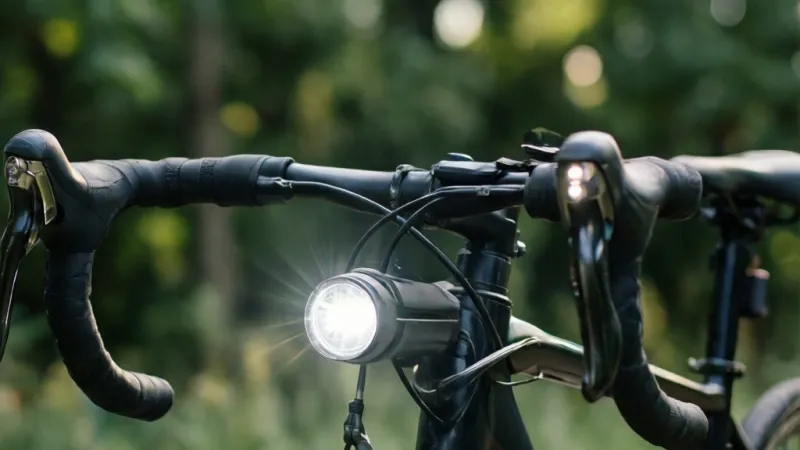
Bicycle blinking lights are rear lights that flash to grab driver attention. A flashing rear light is legal in the UK and most US states. Flashing front lights are banned in Germany and restricted elsewhere.
Steady rear lights are easier for drivers to judge distance. Best practice is simple. Flash at the rear, run steady at the front.
Why Blinking Bike Lights Are a Safety Decision, Not Just a Style Choice
Most riders treat flashing lights as a straight upgrade. Buy brighter, add flash, get safer. That's not how it works.
A bike light has two jobs, and they pull in opposite directions. The first is conspicuity, which means getting noticed in the first place. The second is localization, which means letting a driver work out where you are, how far away you are, and how fast you're closing.
Flashing is excellent at the first job. Steady is better at the second. Every mode on your light is a negotiation between those two.
The stakes justify the fuss. The National Highway Traffic Safety Administration reports that more than 1,000 cyclists die on US roads in a typical recent year. Most of those deaths happen in urban areas, and a large share occur in low-light conditions.
Visibility is one of the few risk factors a rider can actually control.
Here's the honest framing. You're not trying to be the brightest object on the road. You're trying to be identified as a cyclist, moving at a predictable speed, in enough time for someone to react.
That's a different design goal, and it changes what you should buy and how you should run it.
The two jobs a bike light has to do
| Job | What it means on the road | Best served by |
|---|---|---|
| Conspicuity | A driver notices something is there | Flashing, high contrast, motion |
| Localization | A driver judges distance and speed | Steady beam, consistent output |
| Identification | A driver recognizes a cyclist, not a random light | Human shape, biomotion, side visibility |
Notice that identification is a third job, and it's the one most riders ignore. A single bright point of light at night could be a bike, a scooter, a pedestrian with a torch, or a reflection. Research on visibility aids consistently finds that lights attached to moving body parts, like ankles and knees, are recognized as human far faster than lights on a static frame.
That's a practical takeaway. Your rear light matters, but reflective ankle bands or pedal reflectors can do work your light can't.
Why this became a rulebook topic
Laws around bicycle blinking lights exist for a reason, and it's not bureaucracy. Flashing lights interact badly with two human factors.
The first is dazzle. A bright strobe at eye level in the dark causes glare and temporary loss of contrast sensitivity. That can make a driver less able to see the road, other riders, or you once they're past you.
The second is distance ambiguity. A driver who can't judge your speed may misjudge a gap. That's the scenario where "I didn't see them" turns into "I saw them but thought I had room."
Regulators landed on flash rate limits, minimum intensities, and beam cutoff requirements to reduce both problems. As of 2026, those rules still vary widely by country, and no global standard exists.
How Flashing Lights Actually Affect Driver Perception
This is where most online advice falls apart. People repeat "flashing is more visible" as if it settles the question. It doesn't, because visibility and safety aren't the same measurement.
Let's separate what's well established from what's contested.
Conspicuity, Motion Detection, and the Target Fixation Problem
The well-established part comes from decades of visibility research. The Cochrane review by Kwan and Mapstone on visibility aids for pedestrians and cyclists found that fluorescent materials improve detection in daylight and retroreflective materials improve detection at night. That's a solid, replicated finding.
Motion is the other reliable lever. The human visual system is tuned to detect movement, especially biological movement. Lights and reflectors that move with your legs get picked up faster than static lights.
Now the contested part: target fixation, sometimes called the moth effect. The idea is that drivers steer toward whatever they're staring at, so a bright flashing light could pull a car toward you rather than away.
The aviation and motorsport literature does support target fixation as a real phenomenon. Applying it directly to bike lights is more speculative. Studies on driver behavior around flashing lights show mixed results, and the effect likely depends on brightness, flash rate, and how close the light is to eye level.
What we can say with confidence is this. Extremely bright, eye-level, high-rate strobes create glare and impair distance judgment. Whether they actively attract vehicles is unproven.
Either way, the practical advice points the same direction. Don't run a blinding strobe at driver eye height.
Why Flash Rate Matters More Than Raw Brightness
Flash rate is measured in hertz, or Hz, which is flashes per second. The UK legal window is 1 to 4 Hz, which works out to 60 to 240 flashes per minute.
That range isn't arbitrary. Below about 1 Hz, the light reads as intermittent rather than rhythmic, and drivers may not register it as a vehicle. Above about 4 Hz, the flash starts to blur into a flicker, and the advantage over a steady light drops off while glare rises.
There's also a well-documented trade-off between detection and localization. Flashing lights are detected sooner. Steady lights are judged more accurately for distance and approach speed.
If you want the research-level summary, it's this.
| Light behavior | Detection speed | Distance judgment | Glare risk |
|---|---|---|---|
| Steady, moderate output | Baseline | Best | Low |
| Slow flash (1 to 2 Hz) | Faster | Good | Low to moderate |
| Fast strobe (4+ Hz) | Fastest at close range | Poor | High |
| Pulse (bright with brief dips) | Fast | Good | Moderate |
| Random or irregular flash | Fast | Poor | Moderate |
That table is the whole argument for mode choice in one glance. Random and fast patterns buy attention at the cost of comprehension.
What brightness actually means
Riders compare lights by lumens, but lumens measure total light output in all directions. That's not what matters for road use.
Lux measures how much light lands on a surface at a given distance, which is why German StVZO lights are rated in lux. Candela measures intensity in a specific direction, and it's the unit UK law uses for the 4 candela minimum. If a manufacturer only quotes lumens, you're missing the two numbers that tell you how the light behaves on a road.
Aim matters as much as output. A front light angled slightly down puts light on the tarmac where you need it. Angled up, it puts light in drivers' eyes and wastes most of its output on trees.
Front vs Rear: Why the Blinking Rules Aren't the Same
Here's the single most useful distinction in this whole topic. Front and rear lights follow different rules, serve different purposes, and deserve different modes.
Rear lights exist almost entirely to be seen. You don't need a rear light to see the road. So flashing makes sense there.
Front lights do double duty. They help you see, and they help others see you. Flashing degrades the first job badly, which is why so many jurisdictions restrict it.
Front Flashing Lights: Where They're Banned and Why
Germany is the strictest major market. Lights sold there for road use need StVZO approval, which requires a shaped beam with a sharp horizontal cutoff, a steady output, and no dazzle for oncoming traffic. Flashing front lights don't meet that spec.
The logic is straightforward. A flashing front light is useless for actually seeing the road, and it's the most likely light to sit at driver eye level. So German regulators banned it outright.
Other countries are looser. The UK permits flashing lights on pedal cycles, front and rear, provided they flash between 1 and 4 Hz and meet the intensity minimum. The Highway Code still requires a front light that's visible from a reasonable distance and set so it doesn't dazzle.
The US has no single national rule for bike light modes. CPSC regulations cover bicycle reflectors and equipment, but individual states write their own lighting requirements. Most states require a white front light visible from 500 feet and a red rear reflector or light visible from 300 to 500 feet.
Mode restrictions are rare, which doesn't make a front strobe a good idea.
If you're building a legal, practical setup, the if/then logic looks like this.
- If you ride in Germany or bought a StVZO light, then run steady at the front and steady or pulsed at the rear.
- If you ride in the UK, then flashing is allowed front and rear, but keep the front flash slow and low.
- If you ride in the US, then check your state code, and default to steady front anyway.
- If you ride in a group, then check for a peloton or group ride mode and use it.
Rear Flashing Lights: The Case for Pulse, Day Flash, and Random Modes
The rear is where flashing earns its reputation. A driver approaching from behind has a long sightline, plenty of reaction time, and no need to judge your lateral position precisely. All they need is to notice a red light and register that it's a cyclist.
That's a job flashing does well. There's also evidence that daytime running lights help. A Danish study by Madsen and colleagues found that using permanent running lights on bicycles was associated with a meaningful reduction in collisions involving other road users.
That's one of the few cycling visibility interventions with real-world crash data behind it.
That finding is worth sitting with. It supports running a rear light in daylight, not just at night. It doesn't say the light must flash.
For the rear, the modes worth knowing are:
- Steady. Maximum distance judgment. Good in heavy rain or fog when drivers need to place you precisely.
- Pulse. A bright light with brief, shallow dips. Keeps a near-continuous presence while adding motion. This is the best all-round rear mode for most riders.
- Day flash. A bright, slower flash pattern designed for sunlight. Useful in daylight, harsh in the dark.
- Random or irregular. Unpredictable timing that resists habituation. Eye-catching, but harder to judge.
- Eco or low steady. Long runtime for touring or bikepacking, where getting home matters more than maximum output.
One more rear-specific point. Side visibility is a real gap. A rear light mounted on a seatpost is invisible to a car approaching at 45 degrees.
Look for lights with wide-angle lenses or side cutouts, and consider a second light on the seat stay or rack.
Bike Light Modes Explained: Strobe, Pulse, Day Flash, and Steady
Mode names are marketing, not standards. Two brands can use "pulse" for completely different outputs. What matters is the underlying behavior, so here's a plain-language breakdown.
| Mode | What it actually does | Best used for | Watch out for |
|---|---|---|---|
| Steady | Constant output | Front lights, fog, rain, group rides | Battery drain at high output |
| Pulse | Bright output with brief shallow dips | Rear lights, most conditions | Some drivers read it as flashing |
| Strobe | Rapid on/off, often 4+ Hz | Daylight rear visibility | Glare, poor distance judgment |
| Day flash | Slow, very bright bursts | Daylight riding | Blinding at night |
| Random | Irregular burst pattern | Urban traffic, breaking habituation | Confusing in dark rural roads |
| Eco | Low steady output | Long rides, battery reserve | Reduced visibility distance |
| Group ride / peloton | Dim, low-contrast steady or soft flash | Riding in a pack | Too dim for solo road use |
What group ride mode is for
If you've ever ridden behind someone running a 300 lumen rear strobe, you know why this mode exists. Group ride mode cuts output to something pack-friendly, usually a dim steady or a very slow soft pulse.
Use it whenever you're within a few bike lengths of another rider. It's not about being polite. A blinding light in a paceline wrecks everyone's night vision and makes the ride less safe for the whole group.
Mode order, memory, and the little annoyances
Two specs almost nobody checks until they're riding. The first is mode memory, which determines whether the light returns to your last-used mode after charging. Lights without it default to a low or steady mode, and you have to cycle through every setting to get back to where you were.
The second is mode sequence. Some lights cycle in a sensible order. Others jump from steady to strobe to off in a way that forces you to blind yourself while clicking.
If you ride in traffic, a light with a mode lock or a simple two-mode interface is genuinely better than one with nine options.
Here's a practical rule. If you can't change modes with one hand at a stoplight, the light has too many modes.
Choosing a mode by condition
The decision is simpler than the mode menu suggests. Run this in your head before every ride.
- Dark rural road, no traffic. Steady front, steady or pulse rear. You need to see, and there's nothing to dazzle.
- Dark urban street with traffic. Steady front, pulse rear. Constant presence, no glare.
- Daylight commute. Steady front at moderate output, day flash or pulse rear.
- Rain or fog. Steady both ends. Flashing in low contrast conditions makes you harder to place.
- Group ride. Group ride mode rear, steady low front.
- Shared path with pedestrians. Low steady both ends. Flashing lights on a shared path are disorienting for people walking.
- Battery running low. Switch to eco steady early. A dim constant light beats a bright light that dies in twenty minutes.
That last point matters more than people think. A light that cuts out mid-ride leaves you with nothing, and the transition from bright to dark is when drivers are most likely to lose track of you.
Brightness That Works: Lumens, Lux, Candela, and Beam Cutoff
Brightness is the most misunderstood number in bike lighting. Riders assume more lumens equals more safety, then buy a 1,800 lumen blaster and wonder why drivers still pull out in front of them.
The problem is that lumens measure total output in every direction. Your light doesn't illuminate in every direction. It points forward, or it should.
What matters on a road is how much light lands where you need it. That's lux. It measures illuminance at a surface.
Candela measures how intense the light appears to an observer in a specific direction, and it's the unit UK law uses for its 4 candela minimum.
Manufacturer specs confirm the pattern. A well-designed 70 lux light with a shaped beam will show you more road than a cheap 1,000 lumen light with a scattered hotspot. The scattered one spills light into trees, sky, and oncoming eyes.
The shaped one puts it on the tarmac.
Why a 100 Lux StVZO Light Can Beat a 1000 Lumen Blaster
StVZO is the German lighting standard, and it's the strictest mainstream one in the world. It requires a shaped beam with a sharp horizontal cutoff, a defined brightness at specific points, and no dazzle above the cutoff line.
That cutoff is the whole trick. Picture a light pattern that's flat-topped, like a beam with a ceiling. Everything below the line is brightly lit road.
Everything above it is dark. Oncoming drivers never get hit in the eye, even when your light is genuinely bright.
Now picture a typical high-lumen light with a round beam. Half its output goes above the horizon. That half does nothing useful for you and everything harmful for the person driving toward you.
So the comparison isn't 100 lux versus 1,000 lumens. It's controlled light versus uncontrolled light. Two lights can share a lumen rating and behave completely differently on a road.
| Rating | What it measures | Where it matters | Typical range |
|---|---|---|---|
| Lumens | Total light output, all directions | Comparing raw power | 50 to 2,000+ |
| Lux | Light landing on a surface at a set distance | Front light road illumination | 10 to 100+ |
| Candela | Intensity in a specific direction | Legal minimums, rear lights | 4 to 300+ |
| Beam cutoff | Where light stops vertically | Preventing dazzle | Present or absent |
What to look for on a spec sheet
Most brands lead with lumens because it's the biggest number. Here's how to read past it.
- Look for lux or candela. If a front light quotes neither, you're buying blind.
- Check for a cutoff or shaped beam. StVZO approval guarantees it. Some non-StVZO lights offer it too.
- Check beam width. A narrow spot is great for speed and terrible for urban riding. You need width to catch pedestrians stepping off kerbs.
- Check the mode brightness separately. A light rated at 1,000 lumens might run 1,000 in boost for 30 minutes and 300 in the mode you'll actually use.
- Check the runtime at the mode you'll ride. Boost mode runtimes are marketing. Mid-mode runtimes are reality.
That last point catches people constantly. A light with a 2-hour runtime at full power might give you 8 hours at a usable mid setting. For a commute, that's the number that matters.
Side Visibility and 360-Degree Awareness
Here's the gap that a single rear light can't fill. A car approaching at a junction sees you at an angle, and a seatpost-mounted light with a narrow lens may be nearly invisible from 45 degrees off-axis.
Round lights with side cutouts, wide-angle lenses, or multiple LED arrays solve this. So does a second light placed on the seat stay or rack, angled outward.
The physics is unforgiving. Light intensity falls off with distance and direction. If your lens doesn't emit sideways, nothing is there to be seen sideways.
Reflectors help here in a way lights can't. A retroreflective material bounces light straight back to its source, so a car's headlights illuminate your pedal reflectors and ankle bands from almost any angle. That's why they're legally required in many countries even when lights aren't.
A practical combination for urban riding:
- Rear light with side visibility on the seatpost
- A second small rear light on the seat stay or rack
- Reflective ankle bands or pedal reflectors
- Reflective elements on shoes, bag, or jacket
None of those items replaces the others. They cover different angles and different failure modes.
Legal Rules by Region: UK RVLR, German StVZO, EN 15194, and US State Laws
Bike light law is a patchwork, and the differences matter. A setup that's perfectly legal in London can be illegal in Munich. A setup that's legal in Munich might be under-spec in some US states.
Here's the regional picture, with the caveat that laws change and you should check your own jurisdiction.
United Kingdom
The UK Road Vehicles Lighting Regulations 1989 govern pedal cycle lighting. The key requirements for a bicycle used between sunset and sunrise:
- A front lamp showing white light, marked BS6102/3 or equivalent
- A rear lamp showing red light, marked BS6102/3 or equivalent
- A red rear reflector
- Amber pedal reflectors on pedals sold as part of the bike
Flashing lights are permitted, front and rear, provided they flash between 1 and 4 Hz and emit at least 4 candela. That's the legal window. Faster or dimmer doesn't count.
The Highway Code adds a practical requirement. Lights must not dazzle other road users. That's not a mode rule, but it's a strong hint that a front strobe at eye level isn't the intent.
Germany
StVZO §67 is the strictest framework in the major markets. Road-legal lights need type approval, a shaped beam with a cutoff, and steady output at the front. Flashing front lights aren't permitted.
Rear lights can have a flashing function under some conditions, but the approved steady mode is what satisfies the regulation. Many German-market lights offer a StVZO-compliant steady mode plus a non-approved flash mode for off-road or private use.
If you ride in Germany, buy StVZO-approved lights and run them in their approved modes. A non-approved light can affect insurance claims after a collision.
European Union
EU rules for pedal cycles and e-bikes reference EN 15194 for electrically power assisted cycles. EN 15194 requires lighting compliant with national transpositions of the relevant standards. In practice, that means most EU countries follow either a StVZO-style framework or a lighter UK-style framework.
The safest approach in the EU is to buy lights with the appropriate national approval mark for where you ride.
United States
There's no national bike light mode law. CPSC regulations at 16 CFR Part 1512 cover bicycle reflectors and equipment, but lighting requirements are written at state level.
Most states require a white front light visible from 500 feet and a red rear reflector or light visible from 300 to 500 feet when riding at night. A handful require a rear light specifically. Mode restrictions are rare, and flashing is generally allowed.
That legal freedom doesn't mean flashing everything is smart. State law sets a floor, not a best practice.
| Region | Front flashing | Rear flashing | Key standard | Approval mark |
|---|---|---|---|---|
| UK | Legal, 1 to 4 Hz, 4+ cd | Legal, same rules | RVLR 1989, BS6102 | BS6102/3 |
| Germany | Not permitted on road | Restricted | StVZO §67 | K-number, StVZO |
| EU (general) | Varies by country | Varies by country | EN 15194 for e-bikes | National marks |
| USA | Generally legal | Generally legal | State law, CPSC for reflectors | None for modes |
| Australia | Varies by state | Varies by state | AS/NZS where applicable | State rules |
How to check your own rules
The fastest reliable route is your national or state transport authority. Search for the cycling equipment rules page, not a blog summary.
Three questions to answer for your area:
- Is a flashing front light permitted?
- Is there a minimum intensity or flash rate?
- Are reflectors required in addition to lights?
If you can't find a clear answer, default to steady front, flash or pulse rear, and add reflectors. That setup is legal almost everywhere.
Blinking vs Steady: Side-by-Side Comparison
This is the decision most riders actually face. You have two modes on your light and you need to pick one. Here's the honest breakdown.
| Factor | Blinking | Steady |
|---|---|---|
| Driver detection | Faster, especially at distance | Slower at distance |
| Distance judgment | Poorer | Better |
| Glare risk | Higher, especially at eye level | Lower |
| Battery runtime | Longer | Shorter at equal output |
| Legal status | Restricted at front in some countries | Legal everywhere |
| Group ride friendly | No | Yes |
| Fog and rain performance | Worse | Better |
| Daylight conspicuity | Better | Weaker |
| Habituation risk | Lower with irregular patterns | Higher over time |
Who each mode is best for
Blinking suits the rear of the bike in daylight and in urban traffic. It suits riders who want maximum notice-me value and don't need drivers to judge their speed precisely.
Steady suits the front of the bike in every condition. It suits riders in fog, rain, or darkness where distance judgment matters. It suits group rides, shared paths, and anywhere you're near other people.
The nuance most riders miss is that blinking isn't one thing. A 1 Hz pulse and a 4 Hz strobe are both "flashing" and behave nothing alike.
Why pulse often beats both
Pulse mode sits in the middle and gets the best of both. The light stays bright and mostly continuous, with brief shallow dips in output. Drivers perceive constant presence, which helps distance judgment.
They also perceive motion, which helps detection.
If your light has a pulse mode, it's usually the right default for the rear. Steady for the front, pulse for the rear, and you've covered most situations.
The habituation problem
Drivers adapt to repeated stimuli. A light flashing at a perfectly regular rate for a long stretch becomes background noise. That's the argument for random or irregular patterns in heavy traffic.
The trade-off is real though. Irregular patterns are harder to judge for distance and speed. They can also look like a malfunctioning light or a hazard warning.
Use them in dense urban traffic where habituation is the bigger risk, and switch to pulse or steady on open roads.
What the evidence actually supports
The strongest real-world finding here comes from the Danish study by Madsen and colleagues. It found that permanent running lights on bicycles were associated with a meaningful reduction in collisions with other road users. That study used lights that were on, not specifically flashing.
The Cochrane review on visibility aids by Kwan and Mapstone supports fluorescent materials in daylight and retroreflective materials at night. It doesn't settle the flash versus steady question.
So the evidence-backed advice is simple. Run lights in daylight, not just at night. That's the intervention with crash data behind it.
Mode choice beyond that is a judgment call informed by glare, distance judgment, and local law.
Battery, Runtime, and Cold Weather: What Actually Fails Mid-Ride
Lights don't usually fail because they're badly made. They fail because the battery ran out, the cold killed the capacity, or the charging port corroded. Those are the three real-world failure modes.
Runtime claims are also optimistic in a specific way. Manufacturers often quote runtime at the lowest mode, then advertise brightness at the highest. A light rated at "50 hours" might give 50 hours in a 30 lumen eco mode and 1.5 hours in the 800 lumen boost you actually want.
Read the runtime table, not the headline. And check the runtime at the mode you'll ride in.
Cold weather is the other silent killer. Lithium-ion capacity drops significantly at low temperatures. A light that gives 6 hours at 20°C might give 3 hours at 0°C.
Verified buyer feedback reports describe this constantly in winter commuting reviews.
The practical fix is simple. Keep the light somewhere warm until you leave, and carry a backup for rides where a dead light matters.
USB Rechargeable vs Dynamo vs Replaceable Batteries
Each power source has a distinct personality. Pick based on how you ride, not on what's trending.
| Power source | Best for | Strengths | Weaknesses |
|---|---|---|---|
| USB rechargeable | Most riders, commuters | Cheap, bright, easy, no waste | Needs charging, port corrosion, battery ages |
| Dynamo | Touring, commuting, all-weather riders | Never runs out, always on | Heavier, costlier, needs a compatible hub |
| Replaceable batteries | Emergency backup, long tours | Instant swap, no charging | Lower output, ongoing cost, waste |
| E-bike integrated | E-bike commuters | Powered by the main battery, no charging | Only works on that bike |
| Capacitor standlight | Dynamo setups | Stays lit at stops | Limited runtime, small output |
USB rechargeable is the default for good reason. Modern lights are bright, light, and cheap. The weakness is the charging port and the fact that lithium batteries degrade.
Expect capacity to drop noticeably after a few hundred cycles.
Dynamo is the reliability play. A hub dynamo with a standlight means you always have light, in any weather, for years. The upfront cost is high and the wheel build is a commitment, but touring riders and year-round commuters often never go back.
Replaceable batteries still have a place. A small AAA-powered rear light that lives in your bag is a perfect backup. It won't match a modern rechargeable for output, but it will work when everything else is dead.
IP Ratings, Charging Port Corrosion, and Lithium Battery Safety
IP ratings describe water and dust resistance. The first digit is dust, the second is water. For bike lights, you mostly care about the second digit.
- IPX4. Splash resistant. Fine for light rain, not for sustained downpours.
- IPX6. Resistant to powerful water jets. Good for heavy rain.
- IPX7. Survives immersion at 1m for 30 minutes. Useful if you ride through deep puddles.
- IP67 or IP68. Dust tight plus water resistant. The best practical rating for bike lights.
Charging port corrosion is the failure mode IP ratings don't cover. Water gets into the port, the contacts oxidize, and the light stops charging. Rubber port covers help, and so does drying the port before charging.
Never charge a light with a visibly wet or corroded port. Lithium cells can fail dangerously when charging current is compromised. Use the manufacturer's cable, don't leave a light charging unattended overnight, and stop using any battery that swells, smells odd, or gets unusually hot.
A swollen lithium cell is a fire risk. Dispose of it at a proper battery recycling point, not in household waste.
Mounting and Aiming: The Setup That Keeps You Seen Without Blinding Anyone
Mounting and aiming is where good lights get wasted. A brilliant light pointed at the wrong spot is worse than a modest light pointed well.
The two rules are simple. Front light aimed slightly down, so the beam hits the road ahead of you and the cutoff sits below oncoming drivers' eyes. Rear light aimed level or very slightly down, so it's visible to drivers behind without firing into the car directly behind you at close range.
Setting up a front light
Do this in a place where you can see the beam pattern on a wall or the ground.
- Mount the light on the handlebar, roughly level with the stem.
- Roll the aim down until the top of the beam sits below eye height for a standing person.
- Check on a wall about 5 meters away. The bright zone should be on the ground, not on the wall.
- Ride slowly past a parked car and check that the beam hits the road, not the wing mirror.
If you have a shaped-beam light, the cutoff should be visibly horizontal. If it's round, aim it lower than feels natural. You'll lose some distance vision and gain a lot of goodwill from drivers.
Setting up a rear light
Rear lights are more forgiving, but they still need attention.
- Mount on the seatpost, seat stay, or rack, at a height drivers expect to see.
- Point it backward, level, not angled up into the sky or down into the road.
- Check visibility from the side by walking around the bike.
- Add a second light if your first has narrow side output.
Height matters more than people think. A light at bumper height sits in the driver's direct line of sight. A light at saddle height is easier to see over a car bonnet but harder to see behind a van.
Some riders run two, one high and one low, to cover both.
Mounts, straps, and the failure points
Mounts are the least glamorous part of bike lighting and the most common point of failure. Aggregate reviews across brands show the same complaints repeatedly.
- Silicone straps stretch and eventually tear, especially in cold weather
- Plastic brackets crack at the clamp bolt
- Rubber shims slide on wet seatposts
- Quick-release mounts rattle loose on rough roads
- GoPro-style mounts are secure but bulky
The fixes are cheap. Add a strip of old inner tube between the clamp and the bar to stop slipping. Check the mount tightness every few rides.
Carry a spare silicone strap on long rides, because they cost almost nothing and a light without a mount is dead weight.
Mounting for other positions
- Helmet mount. High visibility, moves with your head, and lets you signal drivers with a glance. Downside is that it sits at eye level and can dazzle, so run it dim.
- Backpack mount. Works well for commuters with a rucksack. Raises the light above car bonnets, which is a genuine advantage in traffic.
- Rack mount. Stable, good height, and leaves the seatpost free for a saddle bag.
- Wheel or spoke lights. Great for side visibility and being seen at junctions. Not a substitute for a rear light.
- Ankle bands. Cheap, effective, and move with your legs, which the human visual system picks up fast.
The best setup uses more than one of these. A rear light plus reflective ankle bands covers detection and identification in a way no single light can.
Common Mistakes That Make Flashing Lights Less Safe
Most riders who get hurt with lights on didn't fail to buy lights. They made a setup mistake that cancelled out the benefit. These are the ones that come up again and again.
Running a bright strobe at the front
This is the biggest one. A 600 lumen front strobe at eye level causes glare, wrecks a driver's night vision, and destroys their ability to judge your distance and speed. The light gets you noticed, then makes you harder to place.
Fix it by running steady at the front and keeping your flashing energy for the rear.
Flashing in fog or heavy rain
Flashing performs worst in exactly the conditions riders think it helps most. Fog and rain scatter light, reducing contrast and making a blinking source harder to locate. A steady light gives drivers a continuous reference point.
If it's foggy or pouring, switch both ends to steady. Drop the output a notch too, because water droplets bounce glare straight back at you.
Buying lumens instead of beam quality
A cheap 1,200 lumen light with a round beam puts half its output above the horizon. That half lights up trees and oncoming faces. A shaped-beam light at a fraction of the output will show you more road and annoy nobody.
Look for lux ratings, shaped beams, and a visible cutoff line. Ignore the biggest number on the box.
Only lighting the rear
Front lights are legally required in most places and functionally essential everywhere. You need to see potholes, glass, and pedestrians. A rear-only setup means you're visible but riding blind.
If you can only afford one light, buy a front. If you can afford two, buy a set.
Forgetting side visibility
A seatpost light with a narrow lens is close to invisible from 45 degrees. That's the angle that matters most at junctions, where the majority of urban collisions happen.
Add a second light on the seat stay, choose a model with wide-angle output, and wear something reflective on your ankles or shoes.
Flashing lights on a shared path are disorienting for pedestrians and other riders. They also wreck the night vision of anyone coming the other way. Drop to a low steady mode and keep your speed sensible.
Ignoring mode memory and battery state
A light that resets to a low mode after charging leaves you riding dim without realizing it. A light that dies mid-ride leaves you with nothing. Neither is a hardware failure.
Both are setup failures.
Charge before every ride in winter. Check the mode after charging. Carry a backup on long rides.
Mounting too high or too low
A rear light at bumper height sits in a driver's direct line of sight but disappears behind a van. One at helmet height is visible over most vehicles but can dazzle. The fix is two lights at different heights if you ride in mixed traffic.
Summary table of mistakes and fixes
| Mistake | Why it's risky | Fix |
|---|---|---|
| Bright front strobe | Glare and poor distance judgment | Run steady front |
| Flashing in fog or rain | Scattered light, poor localization | Steady both ends |
| Chasing lumens | Wasted output, dazzle | Prioritize lux and beam cutoff |
| Rear-only setup | Can't see hazards | Add a front light |
| No side visibility | Invisible at junctions | Second light or wide-angle lens |
| High modes on shared paths | Disorients pedestrians | Low steady mode |
| No mode memory | Riding dim unknowingly | Check mode after charging |
| Single mount height | Blind spots behind vehicles | Two lights at different heights |
Best Light Setup for Your Ride: Commuting, Rural Nights, Group Rides, and Daytime
There's no single perfect setup, because the conditions change what you need. Here's the if/then logic for the rides most people actually do.
Urban commuting in traffic
You need to be seen constantly and never blind anyone. Traffic means drivers are close, so glare is a real risk.
- Front: steady, 400 to 800 lumens, shaped beam, aimed down
- Rear: pulse or slow flash, 50 to 100 lumens
- Extras: second rear light on the seat stay, reflective ankle bands
Pulse is the right default here. It reads as continuous to a driver judging your speed while still adding the motion cue that grabs attention.
Rural night riding
Different problem entirely. Traffic is sparse, the road is dark, and you need to actually see. There's nothing to dazzle most of the time, so you can run brighter.
- Front: steady, 800 to 1,800 lumens, wide beam, aimed to light the road ahead
- Rear: steady or slow pulse, 50 to 100 lumens
- Extras: a helmet light for looking into corners, spare battery for long rides
A helmet light is worth mentioning here. It points where you look, which is genuinely useful on unlit bends. Keep it dim enough that it doesn't blind anyone when you glance at an oncoming car.
Group rides and pacelines
The rule here is simple. Don't be the person everyone is squinting at.
- Front: steady low, 200 to 400 lumens
- Rear: group ride or peloton mode, or low steady
- Extras: nothing that flashes at head height
Check your light for a group ride mode. If it doesn't have one, run steady at the lowest setting that's still visible.
Daylight riding
This is the setup with the strongest evidence behind it. The Danish study on permanent running lights found a meaningful reduction in collisions with other road users when lights were on in daylight.
- Front: steady, 200 to 400 lumens, or a dedicated daytime running mode
- Rear: day flash or pulse, 50 to 100 lumens
- Extras: bright clothing, reflective elements
Day flash modes are brighter and slower than night flash. They're designed to punch through sunlight. Don't run them after dark.
Winter and wet-weather commuting
Cold kills battery capacity and water kills charging ports. Plan for both.
- Front: steady, 400 to 800 lumens with a shaped beam
- Rear: steady or pulse, wide-angle lens
- Extras: fully charged spare light, IPX6 or better on both ends
Steady beats flashing in rain because drivers need a continuous reference point through the spray.
Bike touring and bikepacking
Reliability beats brightness. You may be hours from a charger.
- Front: dynamo-powered with standlight, or high-capacity USB with a power bank
- Rear: dynamo rear light or long-runtime USB with eco mode
- Extras: AAA-powered backup rear light, spare mount straps
A small battery-powered rear light that lives in your bag costs almost nothing and has saved plenty of tours.
Quick decision table
| Ride type | Front mode | Rear mode | Priority |
|---|---|---|---|
| Urban commute | Steady, moderate | Pulse or slow flash | Side visibility |
| Rural night | Steady, bright | Steady or pulse | Road illumination |
| Group ride | Steady, low | Group ride mode | Not dazzling others |
| Daylight | Steady or DRL | Day flash | Being noticed |
| Winter wet | Steady, moderate | Steady or pulse | Waterproofing |
| Touring | Dynamo or eco | Long runtime | Reliability |
Maintenance and Long-Term Care for Rechargeable Bike Lights
A bike light is a small electronic device living on the outside of a vehicle. It gets rained on, shaken, and left in the cold. A few habits will double its useful life.
Charging habits that protect the battery
Lithium-ion cells last longest when they stay between about 20% and 80% charge. Full discharges and constant 100% top-ups both accelerate wear.
You don't need to obsess over this. But if you're storing a light for weeks, charge it to around half and top it up before use. Avoid leaving a light plugged in for days at a time.
Charge at room temperature. Charging a cold light straight off a winter commute stresses the cell and can trigger a charge refusal on some models.
Cleaning without wrecking the seals
Wipe the lens with a damp cloth and mild soap. Don't blast the light with a hose or pressure washer, even if it's rated IPX7. High-pressure water can force past seals that handle rain fine.
Dry the charging port before you plug in. That single habit prevents most corrosion failures. If the port has a rubber cover, check that it's actually closed before you ride.
Storage through the off-season
If you're putting the bike away for winter or summer, take the lights off. Remove the batteries if they're replaceable. Store USB lights at around half charge in a dry place.
Leaving a light mounted on a bike in a shed for six months is how you end up with a dead cell and a corroded port.
When to replace rather than repair
Some failures are worth fixing. Others aren't.
- Torn silicone strap. Replace it. They're cheap and universally available.
- Cracked plastic bracket. Replace the mount, not the light.
- Flickering in all modes. Usually a loose connection or worn battery. Try a different mount position first.
- Reduced runtime. Battery aging. If runtime has dropped below what you need, replace the light.
- Water inside the lens. The seal has failed. Don't keep using it.
- Swollen battery. Stop using immediately. Dispose at a battery recycling point.
That last one isn't negotiable. A swollen lithium cell is a genuine fire risk, and no bike light is worth that.
Firmware and app-connected lights
Smart lights with Bluetooth or ANT+ pairing occasionally need firmware updates. Updates usually fix connection drops, radar false alerts, and mode bugs. Check the manufacturer's app a couple of times a year.
If your light pairs with a bike computer, re-pair after any firmware update. It's a common source of confusion when a light suddenly stops showing up.
A simple monthly checklist
Run through this in about two minutes:
- Check mount tightness on every light
- Inspect straps and brackets for cracks
- Wipe lenses and check for water inside
- Dry and inspect charging ports
- Charge all lights fully
- Test every mode
- Check reflective gear for damage
Two minutes a month prevents almost every mid-ride light failure.
Frequently Asked Questions
Are blinking bike lights legal?
It depends on where you ride and which end of the bike. Rear flashing lights are legal in the UK, most US states, and many other countries. Flashing front lights are legal in the UK within a 1 to 4 Hz range but banned in Germany and restricted elsewhere.
Always check your local rules.
Is a flashing light better than a steady one?
Neither wins outright. Flashing is detected faster by drivers. Steady is judged more accurately for distance and speed.
Most experienced riders run steady at the front and pulse or flash at the rear, which covers both detection and localization.
How many lumens do I need for a bike light?
For urban commuting, 400 to 800 lumens at the front is plenty. For unlit rural roads, 800 to 1,800 lumens gives you real vision. At the rear, 50 to 100 lumens is enough in most conditions.
Lux and beam shape matter more than raw lumens.
Why does my bike light die so fast in winter?
Lithium-ion batteries lose significant capacity in cold weather. A light rated at 6 hours at room temperature might give 3 hours at freezing. Keep the light warm until you leave, expect shorter runtime, and carry a backup on longer rides.
Should I use flashing lights during the day?
Yes, at the rear. Research on permanent running lights found a meaningful reduction in collisions with other road users when bicycle lights were on in daylight. Day flash modes are designed for this.
Steady or day flash both work well in sunlight.
Can flashing lights cause accidents?
A very bright front strobe at eye level can cause glare and impair a driver's distance judgment. Whether it actively attracts vehicles is unproven, but the glare risk is real and well documented. Keep flashing to the rear and run steady at the front.
Final Verdict: A Practical, Legal, and Safe Blinking Light Setup
Run steady at the front. Flash or pulse at the rear. Aim both properly.
Check your local law before you assume flashing is fine.
That setup is legal nearly everywhere. It avoids the glare and distance-judgment problems that make front strobes risky, and it keeps the attention-grabbing benefit where it actually helps.
If you want to go a step further, add three things. A second rear light at a different height. Reflective ankle bands or pedal reflectors for biomotion and side visibility.
And a spare AAA-powered rear light that lives in your bag.
None of it is expensive. All of it covers a failure mode your main lights can't.
The habit that matters most is the least glamorous one. Charge your lights, check your mounts, and dry your charging ports. Bright lights that don't work are worse than dim ones that do.
Run the setup that matches your ride, not the setup that looks best on a spec sheet. That's the difference between being lit and being safe.