Your Maytag washer door locked blinking light is one of the most common complaints we see in appliance repair discussions, and it rarely means the door is permanently broken. Most of the time the machine is telling you it can't safely unlock yet. Something in the cycle hasn't finished, or a sensor thinks it hasn't.
Manufacturer specifications indicate the lock stays engaged until the drum stops, the water drains below a set level, and the control board confirms both. Per UL 2157, the safety standard covering household electric washing machines, that interlock is a required feature, not a quirk. So before you reach for a screwdriver, let's work out which of the usual causes you're actually dealing with.
Quick Answer
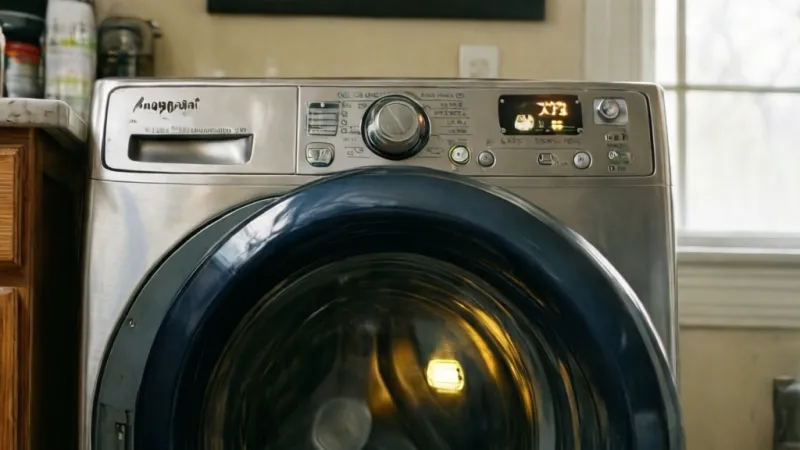
A blinking door lock on a Maytag washer usually means the cycle isn't finished. The lock waits for the drum to stop and the water to drain. Control Lock or Child Lock can also hold it shut.
A failed lock assembly or a drain fault can do the same. Wait two minutes first, then check for error codes.
Why Your Maytag Washer Door Is Locked and Blinking
A blinking lock light is a status message, not a diagnosis. The washer is telling you the interlock hasn't released yet, and it's doing that on purpose.
The lock on a Maytag washer is an electromechanical safety device. On a front loader, a latch claw grabs the strike on the door frame. A small motor or solenoid then slides a locking cam into place.
Metal contacts inside the assembly close once the cam reaches its travel limit. That contact closure is the signal the main control board waits for. No confirmation, no spin.
On a top loader, the same idea lives in the lid lock assembly under the console. It grabs the lid strike, locks during spin and certain fill or drain phases, then releases when the board says it's safe.
Why the Light Blinks Instead of Staying Solid
On most Maytag platforms, the lock indicator blinks while the assembly is mid-transition. That means it's actively locking or unlocking. Once the mechanism fully seats, the light usually goes solid.
There's a second blink behavior that matters more. If the control board asks for a lock and never receives contact confirmation, the indicator can blink indefinitely. The washer is stuck waiting for a signal that isn't coming.
That single difference, transition blink versus no-confirmation blink, splits your troubleshooting in half.
The Safety Rule Behind All of This
The interlock exists because a spinning drum with an open door is genuinely dangerous. Water at speed leaves the tub fast. Fingers near a rotating drum don't fare well either.
UL Standards & Engagement publishes UL 2157 for electric clothes washing machines. The door interlock requirement traces back to that family of safety requirements. You can read more about the standards program at ul.com.
Maytag's own support documentation at maytag.com describes the lock as a normal operating feature, not an error state. That framing matters. The lock isn't fighting you.
It's refusing to move until conditions are met.
The Five Things That Actually Cause It
In our research across owner reports, service documentation, and technician write-ups, the same five causes come up again and again. Nearly every blinking lock complaint traces back to one of them.
| Root cause | How often it's the answer | Fastest first check |
|---|---|---|
| Control Lock or Child Lock engaged | Very common | Look for a lock icon or "CL" / "LC" on the display |
| Unlock delay not finished | Very common | Wait 1 to 3 minutes, listen for the click |
| Water still in the drum or a drain fault | Common | Open the door and look, or run a Drain and Spin |
| Lock assembly failure | Moderate | Test the lock with a multimeter |
| Control board, wiring, or pressure switch fault | Less common | Check error codes and harness connections |
Notice what's missing from that list. "The washer is broken" isn't on it. Not yet, anyway.
Front Load vs Top Load: Same Symptom, Different Part
Maytag builds both front-load and top-load washers, and owners describe both as "door locked." The parts are not the same.
Front loaders use a door lock assembly mounted inside the door frame area. Top loaders use a lid lock assembly mounted under the top panel or behind the console. Different part, different test procedure, different price.
If you're not sure which you have, that's your first job. Everything downstream depends on it.
Why the Symptom Looks Worse Than It Is
A blinking light with a locked door feels like a dead machine. It usually isn't.
Aggregate user reports show that a large share of these cases resolve with a wait, a Control Lock toggle, or a drain cycle. The washer isn't failing. It's waiting on a condition that hasn't been satisfied.
So the goal isn't to force the door. It's to find out which condition is missing.
Door Lock vs Lid Lock vs Control Lock: How Each One Actually Works
People use "door lock" for all three of these. They're different systems with different failure modes. Getting the names straight saves you an hour.
The Front-Load Door Lock Assembly
This is a self-contained unit mounted in the door frame. It contains a latch mechanism, a small motor or solenoid, a sliding lock cam, and switch contacts.
When the cycle starts, the board sends voltage. The motor drives the cam. The contacts close.
The board sees confirmation and allows the cycle to proceed.
Common failure points are the cam mechanism wearing out, the motor burning open, and the switch contacts fouling. Detergent residue and lint make all three worse over time.
The Top-Load Lid Lock Assembly
Top loaders use a similar but simpler device under the top panel. Many Maytag top-load lid locks use a bimetal strip or a solenoid rather than a motor.
It locks during spin and during certain fill phases. It also locks during some drain and spin combinations to prevent splashing.
Failures here often show up as a lid lock that never releases, or one that releases too early and triggers a fault.
Control Lock and Child Lock: A Software Lock
No moving parts. Control Lock tells the user interface board to ignore input. The door or lid mechanism still works normally underneath.
That's why Control Lock is the cheapest possible fix. It costs nothing and takes three seconds.
Side-by-Side Comparison
| Feature | Front-load door lock | Top-load lid lock | Control Lock |
|---|---|---|---|
| Type | Electromechanical | Electromechanical | Software |
| Typical location | Door frame | Under top panel | Control board |
| Locks during spin | Yes | Yes | No effect |
| Blocks button input | No | No | Yes |
| Typical part cost | $50 to $150 | $40 to $120 | $0 |
| Diagnostic method | Multimeter and diagnostic mode | Multimeter and diagnostic mode | Hold button 3 seconds |
| Fails from | Wear, residue, motor burnout | Wear, solenoid failure | Nothing, it's a setting |
Maytag Model Families and What They Use
Maytag's lineup spans several families, and the lock hardware changes across them.
- Maytag Maxima and Heritage front loaders use a door lock assembly with a motor-driven cam.
- Maytag Bravos and Centennial top loaders use a lid lock assembly under the console.
- Maytag Commercial units often use a heavier-duty lock rated for more cycles.
- Current MHW and MVW series models (front load and top load respectively) follow the same split.
The takeaway is simple. Match the part to your model number, not to the word "Maytag."
Why Platform Sharing Matters
Maytag is a Whirlpool Corporation brand, and many Maytag washers share internal platforms with Whirlpool models. That's useful news.
It means service documentation and diagnostic procedures often overlap. A technician who works on Whirlpool-built machines will recognize your Maytag immediately.
For you, it means the tech sheet inside your washer is worth more than any generic online guide.
Your Blink Pattern and Error Code: The Clue Most People Skip
If your Maytag washer has a digital display, it's probably already told you what's wrong. Most owners never look.
Error codes on Whirlpool-built Maytag platforms come in two parts. The "F" code points to the system. The "E" code points to the specific failure within that system.
So F9 E1 means a drain system problem, not a door problem. That's true even though the door is what's stuck. That distinction is the single biggest shortcut in this whole process.
Solid Light vs Blinking Light
| Light behavior | What it usually means |
|---|---|
| Solid lock icon, cycle running | Normal. Lock is engaged and confirmed |
| Blinking lock icon, drum moving | Normal transition. Wait for it to settle |
| Blinking lock icon, drum stopped, no progress | Board is waiting on a condition (water, drain, or lock confirmation) |
| Blinking lock icon plus an error code | Fault confirmed. Read the code |
| No light, door won't open | Loss of power to the lock or a mechanical jam |
Where to Find Your Tech Sheet
Every Maytag washer ships with a tech sheet, also called a service sheet. It's a folded paper or laminated card with wiring diagrams and the diagnostic mode entry sequence.
Common locations:
- Taped to the inside of the lower access panel on front loaders
- Behind the console or control panel on top loaders
- Inside the door frame area on some models
- Attached to the back of the cabinet
If yours is missing, search your exact model number plus "tech sheet." The platform documentation usually turns up.
Reading F and E Codes
Treat the code as a pointer, not a verdict. A code tells you which circuit the board flagged. It doesn't always tell you which part failed.
A drain code can mean a clogged filter, a kinked hose, a dead pump, or a faulty pressure switch. Same code, four different fixes. That's why the decision tree later matters more than the code table.
Common Codes on Maytag Washers
| Code | System flagged | Often points to |
|---|---|---|
| F9 E1 | Drain | Long drain, clogged filter, kinked hose, weak pump |
| F8 E1 | Fill | No water supply, closed valve, faulty inlet valve |
| F5 E1 | Door or lid lock | Lock assembly, wiring, or lock switch fault |
| F7 E1 | Motor | Tachometer, motor control, or drive fault |
| F2 E1 | User interface | Stuck keypad or UI board fault |
| F3 E1 | Temperature sensor | Water temperature thermistor fault |
| PF | Power failure | Cycle interrupted by an outage |
| LF | Long fill | Slow or blocked water supply |
| Ld or dr | Long drain | Drain restriction or pump issue |
| oL | Overload | Too much laundry for the load sensing |
| uL | Unbalanced load | Load shifted during spin |
Two honest caveats. Not every code exists on every model, and the exact definitions shift between platforms. Your tech sheet is the final word, always.
Models Without a Digital Display
Older Maytag top loaders and some Commercial units skip the display entirely. They use blinking indicator lights instead.
On those machines, you count blinks. A pattern of blinks separated by pauses maps to a code. The tech sheet has the key.
Without the sheet, you're guessing.
If you own one of these, take a photo of the blink pattern on your phone. Counting from memory is unreliable.
Entering Diagnostic Test Mode
Most Maytag washers have a diagnostic test mode that cycles individual components, including the door or lid lock. It's the fastest way to confirm whether the lock itself works.
The entry sequence is model-specific. On some Maytag top loaders it involves pressing Start or Pause a set number of times within a short window. On front loaders it's often a button combination on the control panel.
Two warnings before you try it.
- Diagnostic mode can command the drum to spin. Keep hands, tools, and clothing clear.
- Some tests fill or drain water. Make sure the drain hose is properly installed first.
If you can't find the sequence, don't improvise. Random button mashing can clear codes you needed to read.
The Maytag Door-Locked Blinking Decision Tree
This is the part that saves you money. Instead of replacing parts at random, you answer five questions and follow the branch you land on.
How to Read the Tree Without Skipping a Step
Work the questions in order. Don't jump ahead because a later branch feels more likely.
Each question is designed to eliminate a whole category of causes. Skipping one means you might replace a $120 lock assembly when the real problem was a $0 setting.
Write down your answers as you go. If you end up calling a technician, that list is worth real money in diagnostic time.
What You'll Need Before You Start
You don't need much. Most of this is observation.
| Tool or item | Why you need it |
|---|---|
| Your model and serial number | Every part lookup and tech sheet search needs it |
| A phone with a camera | Photograph codes, blink patterns, and wiring before disassembly |
| Flashlight | Lock assemblies sit in shadowed areas |
| Multimeter | Testing lock continuity and switch contacts |
| Towels and a shallow pan | Water will come out if you open a drain path |
| Gloves | Detergent residue and sharp sheet metal edges |
Unplug the washer before any physical inspection. Turn off the hot and cold supply valves too. That's not optional.
Question 1: Is There an Error Code on the Display?
If yes, note it and match it to your tech sheet. A drain or fill code sends you straight to the water branch. A lock code sends you to the lock branch.
If no, move on.
Question 2: Is Control Lock or Child Lock On?
If the display shows "CL," "LC," or a separate padlock icon near the panel, you've found it. Hold the lock button for about 3 seconds and try the door.
If there's no such indicator, move on.
Question 3: Has the Cycle Actually Finished?
If the drum just stopped and the light is blinking, wait. Give it a full 3 minutes. Listen for the click.
If it's been sitting for 10 minutes with a blinking light, that's not a delay. Move on.
Question 4: Is There Water in the Drum?
If yes, you have a drain problem, not a lock problem. The lock is doing its job. Run a Drain and Spin cycle and see what happens.
If the drum is dry and the light still blinks, move on to the lock itself.
Question 5: Does the Lock Assembly Test Good?
If you've reached this point, it's time for the multimeter. Test continuity across the lock switch contacts. Check the harness connector for corrosion or looseness.
If the lock tests bad, replace it. If it tests good but the board never confirms the lock, the problem is upstream in the wiring or the main control board.
Where Each Branch Leads
| Your branch | What it means | Next move |
|---|---|---|
| Error code present | Board has already diagnosed it | Follow the code to its system |
| Control Lock active | Software setting | Hold the lock button 3 seconds |
| Cycle just ended | Normal delay | Wait up to 3 minutes |
| Water in drum | Drain fault | Clear the drain path and run Drain and Spin |
| Lock tests bad | Mechanical or electrical failure | Replace the lock assembly |
| Lock tests good, no confirmation | Wiring or control board | Inspect harness, then test the board |
Why This Order Matters
Most people start at the bottom of this list. They assume the lock is broken because the light is blinking.
In our research, that's the least likely explanation of the five. The lock is the most visible part, not the most common failure.
Start at the top. Eliminate the free fixes first. Then spend money.
Branch 1: Control Lock or Child Lock Is Still On
If the display shows "CL," "LC," or a padlock icon that isn't the door lock symbol, Control Lock is on. That's your answer, and it costs nothing to fix.
Control Lock is a software setting on the user interface board. It tells the panel to ignore button presses so kids and pets can't start a cycle mid-load. The door mechanism underneath still works fine.
How Do You Turn Off Control Lock on a Maytag Washer?
Hold the button marked with a padlock icon for about 3 seconds. That's the whole procedure on most Maytag models.
You'll usually hear a chime or see the indicator disappear. Then press Start or Pause, and the door should release within a few seconds.
If your control panel doesn't have a dedicated lock button, the function is often shared. Look for a small padlock icon printed under or beside a button label. That button does double duty.
Why Control Lock Gets Triggered by Accident
This is more common than you'd think. A hip brushing the panel while loading laundry can engage it. So can a child pressing buttons, or a damp cloth wiping across the console.
On some Maytag models, holding Start or Pause for 3 seconds toggles Control Lock. If you've been pressing buttons firmly to get the washer going, you may have locked the panel yourself.
Model-Specific Variations
Maytag's lineup isn't uniform here. The toggle method changes across families.
| Model family | Typical Control Lock method |
|---|---|
| Maytag Maxima front load | Hold the padlock button 3 seconds |
| Maytag Bravos top load | Hold Start/Pause 3 seconds |
| Maytag Commercial | Dedicated lock button, some with LED confirmation |
| Current MHW series | Hold the padlock icon 3 seconds |
| Current MVW series | Hold Start/Pause 3 seconds |
| Older Centennial models | Varies. Check the tech sheet |
If Control Lock Won't Clear
If you've held the button and nothing happens, two things are possible. The button itself may have failed, or the user interface board isn't reading input.
A quick test is to try other buttons. If none respond, the UI board or its ribbon connector is the suspect. If other buttons work but the lock button doesn't, that button's membrane switch is likely worn out.
The Child Lock Difference
Child Lock and Control Lock are the same feature under different labels on some Maytag washers. Same fix, same 3-second hold.
A few models pair Child Lock with a door lock override. On those, Child Lock can prevent the door from releasing even after a cycle ends. If you've disabled Control Lock and the door still won't budge, move to Branch 2.
Branch 2: The Cycle Isn't Really Over (Unlock Delay and Water Level)
If the drum just stopped and the light is still blinking, this is almost certainly your branch. Wait it out before touching anything.
Maytag front loaders don't release the door the moment the final spin ends. Manufacturer documentation describes a delay that typically runs 1 to 3 minutes. During that window, the board is confirming the drum has stopped and the water level has dropped.
What's Happening During the Unlock Delay?
Three checks run in sequence before the lock releases.
- The motor control confirms zero drum rotation
- The pressure switch confirms water has dropped below the lock threshold
- The door lock switch confirms the locking cam is fully retracted
Any one of those failing keeps the door shut. The blinking light is the board telling you it's still waiting.
How Long Should You Actually Wait?
Give it a full 3 minutes from the moment the drum stops. Set a timer if you're impatient. Standing there pulling the handle resets nothing and stresses the latch.
If the light is still blinking after 5 minutes with a dry drum and no error code, you've left this branch. Move on.
The Add Garment Pause Confusion
Many Maytag front loaders have an Add Garment feature that briefly unlocks the door mid-cycle. It only opens if water temperature and level are safe.
If you press Add Garment and the door stays locked, the machine decided conditions weren't safe. That's not a fault. The feature is protecting you from a splash of hot water.
When Water Level Keeps the Door Shut
This is where Branch 2 hands off to Branch 3. If the drum still has standing water, the lock won't release no matter how long you wait.
Look through the glass. If you can see water above the bottom of the drum, you have a drain problem. Skip ahead to the next branch.
If the Drum Is Dry and the Light Still Blinks
Then you've got a signal problem, not a delay. The board either isn't getting lock confirmation or isn't sending the release command.
Before you assume the worst, do one clean reset. Unplug the washer for a full 60 seconds. Plug it back in and try the door.
Why the Reset Sometimes Works
The control board holds cycle state in volatile memory. Cutting power clears it. If the board was stuck mid-sequence after a power flicker or a brownout, the reset wipes that stuck state.
It's not a fix for a failed lock. It is a fix for a confused board. Those two look identical from the outside.
The PF Code Connection
If the display showed "PF" at any point, you had a power failure during the cycle. That's a strong hint that the board lost its place mid-cycle.
Clear the code, run a fresh Drain and Spin, and watch what happens. If the door releases normally at the end, you're done. If it blinks again, continue down the tree.
Branch 3: Water Won't Drain, That's Why the Door Stays Locked
If there's standing water in the drum, the lock is doing exactly what it should. Stop trying to open the door and fix the drain instead.
This is the branch where most people misdiagnose. They see a blinking lock light and buy a lock assembly. The real problem is a $15 drain pump filter or a kinked hose.
Why the Lock Cares About Water Level
The pressure switch, sometimes called the water level sensor, sits at the end of a small air tube connected to the tub. As water fills, air pressure in the tube rises. The switch converts that pressure into a level reading for the control board.
The board won't release the lock until that reading drops below a set threshold. If the tube is clogged or the switch is faulty, the board thinks the tub is still full even when it isn't. That's a false lock, and it's more common than a real one.
The Four Things That Stop a Maytag Washer From Draining
Work them in this order. Cheapest and most likely first.
- Clogged drain pump filter. Front loaders have a small access door at the bottom front. Behind it sits a filter that catches coins, hair, and lint. When it clogs, water backs up.
- Kinked or blocked drain hose. Check behind the washer. A hose pinched against the wall will stop flow completely.
- Standpipe or sink drain clog. If the hose drains into a standpipe, that pipe can clog with lint over time. Test by draining into a bucket.
- Failed drain pump. The pump motor can burn out or jam. You'll usually hear a humming noise with no water movement.
Clearing the Drain Pump Filter Safely
This is the step where people flood their laundry room. Follow the order.
- Unplug the washer.
- Lay towels down and place a shallow pan under the access door.
- Open the small round door at the bottom front.
- Slowly unscrew the filter cap. Water will come out. Let it drain into the pan.
- Pull the filter out and rinse it under a tap.
- Check the pump impeller behind the filter. Remove any debris by hand.
- Reinstall the filter, close the door, and plug the washer back in.
- Run a Drain and Spin cycle.
If the drum empties and the door releases at the end, you've fixed it.
What If the Drain Pump Runs but Nothing Moves?
If you hear the pump humming and the drum stays full, the impeller is likely jammed or the pump is dead. A jammed impeller is sometimes fixable by hand. A burned-out motor isn't.
Replacement drain pumps for Maytag front loaders typically run $30 to $70 for the part. Labor is the bigger cost if you call someone.
The Pressure Switch Tube Check
This one gets missed constantly. Follow the small clear or gray tube from the pressure switch down to the tub. Look for cracks, kinks, or a buildup of detergent residue inside.
Disconnect the tube at the switch end and blow through it gently. If air won't pass, the tube is blocked. Clear it with warm water and a pipe cleaner.
Reconnect it firmly.
The F9 E1 and Ld Codes
If you saw F9 E1, Ld, or dr on the display, the board already told you it's a drain fault. Those codes point to long drain time, not to the lock.
Treat them as confirmation, not as a separate problem. Fix the drain, and the lock releases on its own.
If the Drain Is Clear and the Door Still Won't Unlock
Then the pressure switch itself may have failed. It's a small, inexpensive part, usually $20 to $50. Testing it requires a multimeter and a bit of patience.
At this point you've eliminated the easy fixes. Branch 4 is next.
Branch 4: The Lock Assembly Itself Has Failed
If the drum is dry, the drain is clear, and the light still blinks with no confirmation, the lock assembly is the prime suspect. Now it's worth testing properly.
Don't buy a part on suspicion. Test first. A multimeter costs less than a lock assembly, and it tells you definitively whether the lock is dead.
Symptoms of a Failed Maytag Door Lock Assembly
These are the patterns that show up repeatedly in owner reports and service documentation.
- Door won't lock at all, and the cycle won't start
- Door locks but the board never confirms it, so the cycle stalls
- Door stays locked after the cycle ends and no reset clears it
- Grinding or clicking noise from the door frame area
- Visible burn marks or melted plastic on the lock housing
- Detergent residue packed into the latch mechanism
How Do You Test a Maytag Door Lock With a Multimeter?
Unplug the washer first. Then remove the lock assembly and test continuity across its switch contacts.
On most Maytag front-load door locks, you'll find a connector with several pins. Two of them feed the lock motor. Two or more carry the switch contacts that report lock status back to the board.
Set your multimeter to continuity or resistance. With the lock in the unlocked position, the switch contacts should read open. Manually actuate the lock mechanism, and they should read closed or near zero ohms.
If the contacts never change state, the switch inside the assembly has failed. If the motor windings read open when they should show a resistance value, the motor is dead. Either way, replace the assembly.
Typical Resistance Values and What They Tell You
Exact values vary by model, so treat these as ballpark ranges only. Your tech sheet is the authority.
| Component | Typical reading | What a bad reading means |
|---|---|---|
| Lock motor winding | 100 to 500 ohms | Open circuit means dead motor |
| Switch contacts, unlocked | Open (infinite) | Closed when it should be open means stuck switch |
| Switch contacts, locked | Near 0 ohms | Open when it should be closed means failed contact |
| Harness connector pins | Continuity end to end | No continuity means broken wire |
Common Part Numbers to Know
These come up often, but always verify against your exact model number before ordering.
- W10714883 is a widely used front-load door lock assembly on Whirlpool-built platforms, including many Maytag front loaders.
- W11307244 is a common top-load lid lock assembly on Maytag and Whirlpool top loaders.
Part numbers change between production runs. Match by model and serial number, not by the word "Maytag."
OEM vs Aftermarket Lock Assemblies
This is a real decision, so here's the honest comparison.
| Factor | OEM (Maytag/Whirlpool) | Aftermarket |
|---|---|---|
| Price | $50 to $150 | $20 to $60 |
| Fit | Exact | Usually good, occasionally off |
| Durability | Matches original | Varies widely by brand |
| Warranty | Manufacturer-backed | Seller-backed, often 30 to 90 days |
| Availability | Dealer or official parts site | Online marketplaces |
For a part that controls a safety interlock, OEM is the safer call. The savings on aftermarket aren't worth a lock that fails in six months.
Replacing the Door Lock Assembly
The job is moderate DIY territory. Front-load door locks usually require removing the outer door boot clamp and peeling back the rubber seal to reach the mounting screws. Top-load lid locks are often easier, accessible under the console.
Budget 45 to 90 minutes for a first attempt. Take photos at every step. Reconnect the harness fully and listen for the click when you test.
When the New Lock Still Doesn't Confirm
If you've installed a known-good lock and the board still won't acknowledge it, the problem isn't the lock. It's the wiring between the lock and the board, or the board itself. That's Branch 5.
Branch 5: Control Board, Wiring, or Pressure Switch Fault
If a new lock assembly tests good and the board still won't confirm it, you're looking at the signal path. The lock is fine. Something between it and the board isn't.
This is the least common branch, but it's the one that makes people give up and buy a new washer unnecessarily.
Start With the Wiring Harness
The harness is the cheapest thing to inspect and the most overlooked. Look for these problems along the run from the lock to the main control board.
- Loose or partially seated connector at either end
- Corroded pins, especially in humid laundry rooms
- Chafed or pinched wire where it passes through the cabinet
- Rodent damage, which is more common than people expect in garages and basements
- Broken wire strands inside intact insulation, usually at a flex point
Wiggle each connector while watching for a change in the blinking pattern. If the light behaves differently when you move a connector, you've found the fault.
Testing Continuity End to End
Unplug the washer. Disconnect the harness at both the lock and the board. Set your multimeter to continuity and test each wire in the run.
You're looking for near-zero resistance on each conductor. An open reading on any wire means a break somewhere along that path. Repair or replace the harness.
The Main Control Board (CCU)
The central control unit, often called the CCU or main board, is the brain. It reads inputs, drives the lock, and decides when to release. When it fails, the symptoms can mimic anything.
Signs that point to the board rather than the lock:
- Multiple unrelated functions failing at once, like the lock and the display
- The washer behaving erratically across different cycles
- Visible burn marks, discoloration, or a burnt smell on the board
- No voltage reaching the lock connector when the board commands a lock
Board replacement is expensive, typically $150 to $300 for the part. Before you buy one, confirm the lock and harness both test good. Boards rarely fail alone.
The Pressure Switch and Its Tube
We touched on this in Branch 3, but it deserves a second look here. A faulty pressure switch sends a false water level reading to the board. The board then refuses to release the lock because it believes the tub is full.
Two failure modes matter. The switch itself can drift out of calibration, or the air tube can clog with detergent residue. The tube is the cheaper and more likely problem.
Clear the tube first. If the symptoms persist, test the switch. Replacements are usually $20 to $50.
The User Interface Board (UI)
On models with a separate UI board, the panel you press is not always the board that makes decisions. A failed UI board can prevent the lock command from ever reaching the CCU.
The tell is a control panel that responds inconsistently or not at all. If buttons don't register but the washer otherwise runs, the UI board is suspect.
Using Diagnostic Test Mode to Isolate the Fault
This is where diagnostic mode earns its keep. It lets you command the lock directly, bypassing the normal cycle sequence.
If diagnostic mode locks the door successfully, the lock and its wiring are good. The problem is upstream in the board's logic or an input it's reading. If diagnostic mode can't lock the door, the fault is in the lock, the harness, or the board's output stage.
That single test splits Branch 5 cleanly in two.
When to Stop and Call a Technician
Here's our honest guidance. If you've reached this point, you've already done more diagnosis than most owners ever will.
Call a professional if any of these apply:
- You've confirmed the lock and harness are good, and you're facing a board replacement
- You're not comfortable working around 120V AC wiring with the cabinet open
- The washer is under warranty or an extended service plan
- You've replaced two parts and the symptom hasn't changed
A technician visit typically runs $100 to $250 in labor plus parts. That's real money. But so is a $250 board you didn't need because a $20 pressure switch was the actual fault.
The Honest Cost-Benefit Call
If your Maytag washer is under 8 years old and the repair is a lock assembly or a drain pump, repair usually wins. If it's over 12 years old and you're facing a control board plus a lock, compare the repair quote against a replacement.
That math changes by model. But the decision tree still applies. Diagnose first, then decide.
Never decide first and diagnose second.
Step-by-Step: Safe Reset, Drain, and Unlock Procedure
This is the universal sequence. Run it in order, no matter which branch you landed on. It clears the software state, empties the water, and gives the lock a clean chance to release.
Skip a step and you risk a flooded floor or a damaged latch. So take them in order.
Step 1: Cancel the Cycle Properly
Press Cancel or hold Start/Pause until the washer acknowledges it. On most Maytag models, that takes about 3 seconds. Wait for the drum to stop completely before doing anything else.
Don't yank the power cord mid-cycle. That leaves water sitting in the tub and can confuse the board on the next startup.
Step 2: Wait the Full Unlock Delay
Give it 3 minutes. Stand back and listen for the click of the lock retracting. If you hear it and the light goes solid or off, try the door handle gently.
If the light is still blinking after 3 minutes with a dry drum, move on.
Step 3: Check for Standing Water
Open the door if you can, or look through the glass if you can't. If there's water above the bottom of the drum, you're in a drain situation, not a lock situation.
Go to Step 4. Don't skip it.
Step 4: Drain the Tub Manually
Front loaders have a small access panel at the bottom front. Behind it sits the drain pump filter.
- Unplug the washer.
- Lay towels down and set a shallow pan under the access door.
- Open the round door slowly.
- Unscrew the filter cap a quarter turn at a time. Water will trickle out. Let it drain.
- Once flow stops, remove the filter and rinse it.
- Reach into the pump housing and clear any debris from the impeller.
- Reinstall the filter, close the door, and plug the washer back in.
If you can't find an access panel, your model may use a drain hose behind the lower panel instead. Check your tech sheet before you start pulling panels.
Step 5: Run a Drain and Spin Cycle
Select Drain and Spin and press Start. Listen for the pump. You should hear steady water movement, not just a hum.
A clear gurgle at the end means the tub emptied. A humming noise with no flow means the pump is jammed or dead.
Step 6: Power Cycle the Board
Unplug the washer for a full 60 seconds. This clears the volatile memory on the main control board. Plug it back in and wait for the display to boot.
A confused board will often release the lock after this. A failed lock won't. That difference tells you which branch you're really in.
Step 7: Test the Door or Lid
Press the handle or lift the lid. If it opens, you're done. Run a short cycle and watch the lock behave normally.
If it stays shut with a dry drum and no error code, you've confirmed a hardware fault. Continue to the lock test.
Step 8: Manual Release as a Last Resort
Every Maytag front loader has a manual release. On most models, it's a small tab or cord behind the lower access panel, near the drain filter.
Pull it downward or to the side to retract the lock cam by hand. The door will open.
Two warnings. Water may still be inside the drum, so open the door slowly. And a manual release is a recovery move, not a fix.
If you need it more than once, something is broken.
Step Overview
| Step | Action | Time |
|---|---|---|
| 1 | Cancel the cycle | 5 seconds |
| 2 | Wait out the unlock delay | 1 to 3 minutes |
| 3 | Check for standing water | 1 minute |
| 4 | Drain the tub manually | 10 to 20 minutes |
| 5 | Run Drain and Spin | 15 to 30 minutes |
| 6 | Power cycle the board | 2 minutes |
| 7 | Test the door | 10 seconds |
| 8 | Manual release if needed | 2 minutes |
Mistakes to Avoid and Why You Should Never Force the Door
Every year, appliance technicians see the same avoidable damage. Owners get frustrated, force the door, and turn a $60 part into a $400 repair.
Here's what not to do.
Why Forcing the Door Open Is a Bad Idea
The lock cam and latch claw are made of molded plastic and thin metal. They're designed to hold against the pull of a normal handle, not against a determined human.
Force the door and you'll snap the claw, bend the strike, or crack the door frame. On a front loader, that can mean a new inner door assembly. On a top loader, it can mean a cracked lid.
That's before we get to the water. A forced door with a full drum dumps several gallons onto your floor in seconds.
Don't Unplug Mid-Cycle to Force a Reset
Pulling the cord during a spin is tempting. It's also a bad habit.
The drum coasts down without braking. Water stays in the tub. And the board may log a power failure fault that masks the real problem on your next attempt.
Cancel the cycle properly first. Then unplug if you need a reset.
Don't Assume the Lock Is the Fault
This is the single most expensive mistake on the list. In our research, drain faults and Control Lock account for more blinking lock complaints than failed lock assemblies do.
Buy a lock assembly before you've checked the drain, and you've spent $80 to solve nothing.
Don't Ignore Error Codes
If the display shows a code, write it down before you clear anything. Codes get wiped when you power cycle or run a diagnostic test.
A lost code means a lost clue. Photograph the display if you can.
Don't Use Too Much Detergent
Excess suds are a hidden cause of lock and drain faults. Suds confuse the pressure switch. The board reads a false water level and refuses to release the lock.
Use HE detergent in an HE washer. Measure to the line. More soap does not mean cleaner clothes.
Don't Skip the Filter
A drain pump filter that hasn't been cleaned in a year is a clog waiting to happen. Coins, hair, and lint build up quietly until the day the washer stops draining.
Once a month is a reasonable schedule for a busy household.
Don't Mix Up the Parts
A top-load lid lock and a front-load door lock are not interchangeable. Neither are lock assemblies from different Maytag model families.
Order by model and serial number. Verify the part number on the box before you open it.
Don't Work on a Plugged-In Washer
This one is a genuine safety issue. The lock assembly sits near 120V AC wiring. The control board carries live voltage even when the washer looks idle.
Unplug the unit. Turn off both supply valves. Then start work.
Don't Overlook the Pressure Switch Tube
It's a $3 piece of tubing that causes more false lock faults than most people realize. If you've replaced a lock and the symptom returns, check that tube.
Detergent residue builds up inside it over time. Blow through it gently to confirm airflow.
Don't Let a Simple Fix Become a Service Call
If you've followed the tree and you're still stuck, that's fine. Call someone. But call them with information, not with a guess.
Tell the technician the code, the blink pattern, and what you've already tested. That shortens the visit and often lowers the bill.
Parts, Costs, and DIY vs Technician: What You're Really Facing
Now for the money question. Here's what each fix actually costs, based on current parts pricing and typical labor rates as of 2026.
Typical Part Costs
Prices vary by model, region, and whether you buy OEM or aftermarket. These are working ranges from our research across parts suppliers and owner reports.
| Part | OEM price range | Aftermarket range | DIY difficulty |
|---|---|---|---|
| Front-load door lock assembly | $50 to $150 | $20 to $60 | Moderate |
| Top-load lid lock assembly | $40 to $120 | $18 to $50 | Easy to moderate |
| Drain pump | $30 to $70 | $20 to $45 | Moderate |
| Pressure switch | $20 to $50 | $12 to $30 | Easy |
| Pressure switch tube | $3 to $12 | $2 to $8 | Easy |
| Main control board (CCU) | $150 to $300 | $90 to $200 | Moderate to hard |
| User interface board | $100 to $250 | $70 to $160 | Moderate |
| Drain pump filter | $10 to $30 | $8 to $20 | Easy |
| Door strike or latch | $10 to $35 | $6 to $25 | Easy |
Typical Labor Costs
If you call a technician, expect a service call fee plus labor. Rates vary a lot by market.
- Service call or diagnostic fee: $75 to $150
- Labor per hour: $75 to $150
- Typical total for a lock replacement: $200 to $400
- Typical total for a drain pump replacement: $180 to $350
- Typical total for a control board replacement: $350 to $600
DIY vs Technician: An Honest Comparison
| Factor | DIY | Technician |
|---|---|---|
| Cost | Parts only | Parts plus $150 to $400 |
| Time | 1 to 3 hours for most jobs | Scheduled visit, often 2 to 5 days out |
| Tools needed | Screwdrivers, multimeter, towels | None on your end |
| Risk | Moderate if you skip safety steps | Low |
| Warranty | Voids nothing, but no guarantee on your work | Usually 90 days on parts and labor |
| Best for | Lock, filter, pump, pressure switch | Control board, UI board, warranty units |
Who Should DIY and Who Shouldn't
DIY makes sense if you're comfortable with basic hand tools and you can follow the tree without skipping steps. The lock, filter, pump, and pressure switch are all realistic home jobs.
Hire a pro if you're facing a board replacement, if the washer is still under warranty, or if you've already replaced two parts with no change. Also hire out if you're not comfortable working around 120V AC wiring.
The Repair or Replace Decision
Here's a simple rule of thumb from the appliance trade. If the repair costs more than half the price of a comparable new washer, and the machine is over 10 years old, replacement usually wins.
A lock assembly at $80 in parts on a 6-year-old Maytag? Repair it. A control board plus a lock at $500 in parts on a 13-year-old unit?
Run the numbers carefully.
Warranty coverage matters here. Many Maytag washers carry a 1-year parts and labor warranty. Some models extend coverage on the drive motor.
Check your paperwork before you spend anything.
Maintenance Habits That Keep the Blinking Lock From Coming Back
Most blinking lock faults are preventable. A few minutes of routine care each month goes a long way.
Clean the Drain Pump Filter Monthly
This is the single highest-value habit on the list. Pull the filter, rinse it, and clear the pump housing.
A clean filter means faster draining. Faster draining means the lock releases on schedule.
Use HE Detergent and Measure It
High-efficiency detergent is formulated for low water volumes. Regular detergent creates too many suds in an HE washer.
Suds trigger false water level readings. That's a lock fault that looks like a hardware failure but isn't.
Leave the Door or Lid Ajar Between Loads
Mold and mildew love a closed front-load door. So does detergent residue on the latch.
Prop the door open a few inches when the washer is empty. Wipe the boot seal and the latch area with a damp cloth once a week.
Wipe Down the Lock and Strike
Detergent residue and lint pack into the lock mechanism over time. A soft cloth and warm water clear it.
Don't spray cleaner directly into the lock. Moisture inside the assembly can corrode the contacts.
Run a Tub Clean Cycle Every Month
Most Maytag washers have a Tub Clean or Clean Washer cycle. Run it monthly with a washer cleaner or a cup of white vinegar.
This flushes residue from the tub, the pressure switch tube, and the drain path. It also keeps odors in check.
Check the Drain Hose and Standpipe
Look behind the washer every few months. A hose pinched against the wall or a standpipe packed with lint will slow draining.
Slow draining leads to long drain codes and delayed lock release.
Inspect the Pressure Switch Tube Annually
Disconnect the tube at the switch end and blow through it. Airflow should be unrestricted. If it isn't, clear it with warm water.
This five-minute check prevents one of the most confusing false lock faults.
Keep the Washer Level
An unlevel washer vibrates more. Vibration stresses the lock assembly and the door frame over time.
Check the leveling feet once a year. Adjust them so the machine sits flat and doesn't rock.
Don't Overload the Drum
Too much laundry means an unbalanced spin. Unbalanced spins trigger error codes and can stall the cycle before the lock releases.
Fill the drum loosely. Leave a hand's width of space at the top.
Keep a Simple Log
Write down the date and the symptom each time the light blinks. If it becomes a pattern, you'll spot the trigger fast.
That log is also gold if you ever call a technician.
Frequently Asked Questions
Why is my Maytag washer door locked and blinking?
A blinking lock light usually means the cycle hasn't fully ended or the board hasn't confirmed the lock. It can also mean Control Lock is on, water is still in the drum, or the lock assembly has failed. Wait 3 minutes first, then check for error codes.
How do I unlock a Maytag washer door that won't open?
Cancel the cycle and wait up to 3 minutes. Unplug the washer for 60 seconds, then plug it back in. If the drum has water, drain it through the pump filter.
If it still won't open, use the manual release tab behind the lower access panel.
What does it mean when the lock light keeps blinking after the cycle ends?
It usually means the control board is waiting for lock confirmation that never arrives. Either the lock switch has failed or the wiring between the lock and board is broken. Test the lock with a multimeter before replacing anything.
How do I turn off Control Lock on a Maytag washer?
Hold the button marked with a padlock icon for about 3 seconds. On models without a dedicated lock button, hold Start or Pause instead. You'll hear a chime or see the indicator disappear.
Then press Start and the door should release.
Can I force the door open on a Maytag front load washer?
No. Forcing it can snap the plastic latch claw, bend the door strike, or crack the inner door frame. If there's water in the drum, forcing it also floods your floor.
Use the manual release tab instead, and open the door slowly.
How much does it cost to fix a Maytag washer door lock?
The lock assembly itself runs $50 to $150 for OEM parts, or $20 to $60 aftermarket. If you hire a technician, expect $200 to $400 total including labor and the service call fee. Drain and pressure switch fixes cost considerably less.