When people search for honeywell ac thermostat cool on blinking, they usually want one thing. Is the system broken, or is it just waiting? The short answer is that a blinking "Cool On" is normally the thermostat telling you a compressor delay is running.
That delay is deliberate, and it protects your outdoor unit.
Manufacturer specifications for most Honeywell Home and Resideo thermostats list a minimum off time of roughly five minutes before the compressor can restart. That one number explains the bulk of blinking "Cool On" reports in aggregate user feedback. But five minutes isn't a universal rule, and what happens next depends entirely on what your equipment is doing.
Quick Answer
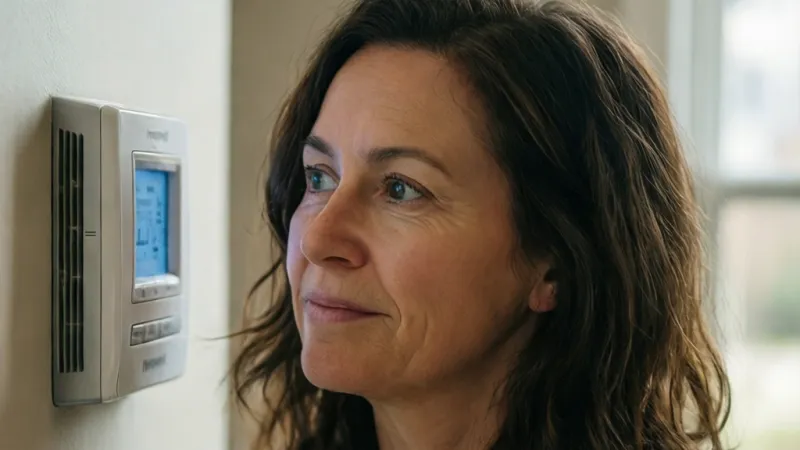
Blinking "Cool On" usually means a compressor delay is running. Honeywell thermostats wait about five minutes before restarting cooling. That protects the compressor from short cycling.
If the blink clears and cold air arrives, nothing is wrong. If it keeps blinking with no cooling, check power and the outdoor unit.
What Cool On Blinking Means on a Honeywell Thermostat
A blinking "Cool On" on a Honeywell Home thermostat is a status message, not an error code. The thermostat is telling you it has an active cooling call. It's also telling you that the call hasn't been satisfied yet.
That distinction matters more than people realize. Most homeowners read "Cool On" as "the AC is running right now." Honeywell's display logic doesn't work that way at all.
What the Cool On Label Actually Tracks
"Cool On" tracks the thermostat's own request for cooling, not the compressor's state. When you set the temperature below the room reading, the thermostat closes the Y terminal circuit. That sends 24VAC down the low-voltage wire to the outdoor unit's contactor.
The display flips to "Cool On" at that exact moment. Whether the compressor starts instantly depends on the timer inside the thermostat or the control board.
So "Cool On" is really two pieces of information stacked into one label. There's the request, and there's the wait.
Solid Versus Blinking: The Difference in One Line
Solid "Cool On" means the call is active and the delay has passed. Blinking "Cool On" means the call is active but the thermostat is holding the compressor off on purpose.
Here's how the common display states line up.
| Display state | What the thermostat is saying | Typical duration |
|---|---|---|
| Solid "Cool On" | Cooling call active, delay complete | Until setpoint is met |
| Blinking "Cool On" | Cooling call active, compressor delay running | Up to 5 minutes |
| "Cool On" plus "Wait" | Timed delay, often after a power blip | 3 to 5 minutes |
| "Cool On" plus alert number | Configuration issue or service alert | Until cleared |
Not every Honeywell model uses the same wording. The T5, T6 Pro, T9, and T10 Pro families lean on the app for detail. Older RTH and FocusPRO units sometimes flash the whole screen instead of just the word.
Three Things a Blinking Cool On Usually Means
In our review of user reports and manufacturer documentation, the blink almost always falls into one of three buckets.
- A normal compressor protection delay is running. This is the most common cause by far.
- A power interruption reset the internal timer. Even a one-second outage can do it.
- The thermostat is calling, but the equipment isn't responding. This is the one that needs real troubleshooting.
The first two resolve themselves. The third one is where the rest of this guide lives.
How the 5-Minute Compressor Protection Delay Actually Works
The delay exists because compressors hate being restarted too quickly. When a compressor shuts off, the refrigerant pressures inside the system haven't equalized yet. Restart it too soon and the compressor tries to push against that pressure.
That's called a hard start. Do it often enough and you get a short-cycling compressor.
Why Short Cycling Kills Compressors
A hard start pulls locked rotor amps, which can be five to seven times the normal running current. That spike heats the windings and stresses the start components. Capacitors and contactors are usually the first things to fail.
The compressor itself is next.
Per compressor manufacturer guidance and general HVAC engineering practice, a minimum off time of three to five minutes lets pressures equalize. Most Honeywell thermostats default to five minutes. Some models let a contractor adjust that in the installer setup menu.
So the blink isn't a bug. It's the thermostat doing exactly what it was designed to do.
Where the Timer Actually Lives
This trips people up constantly. The anti-short-cycle timer can live in two places.
- Inside the thermostat firmware, which is the case for most modern Honeywell Home and Resideo models.
- Inside the furnace or air handler control board, which is common on older equipment.
If both exist, the longer one wins. That's why some systems take closer to five minutes even when the thermostat is set to three.
The outdoor unit itself usually doesn't have a timer unless someone installed a hard start kit or a time delay relay. If you're not sure which setup you have, the model number on the thermostat and the control board will tell a technician in about ten seconds.
Why Bumping the Thermostat Makes It Worse
Here's the mistake we see most often. Someone sees the blink, panics, and drops the setpoint another five degrees. Then they do it again two minutes later.
Every setpoint change doesn't reset the compressor timer, but a full mode change will. Flipping from Cool to Off and back to Cool restarts the clock. So does cutting power at the breaker.
The result is a longer wait, not a shorter one. If you want the timer to finish, leave the thermostat alone.
Does the Delay Reset After a Power Blip?
Yes. A brief outage, even a flicker, wipes the timer memory on most residential thermostats. When power returns, the thermostat starts a fresh five-minute count.
That's why "Cool On" starts blinking right after a storm. Nothing is broken. The thermostat is being cautious.
As of 2026, most Honeywell Home smart models also log the event in the Resideo Home app. If you see a "system restarted" note in the history, that confirms the cause.
60-Second Triage: Solid Cool On vs Blinking vs Wait
Before you touch anything, look at the display and listen. You can sort most situations in under a minute.
What to Check First
- Is the word "Cool On" solid or blinking? Solid means the wait is over.
- Is the indoor fan running? Put your hand near a supply vent.
- Can you hear the outdoor unit? A low hum or fan noise means the compressor circuit is live.
- Is the room temperature dropping? Give it five minutes and check again.
Triage Table: Match Your Display to Your Next Move
| What you see | What you hear | Most likely cause | Next step |
|---|---|---|---|
| Blinking "Cool On" under 5 min | Nothing yet | Normal compressor delay | Wait it out |
| Solid "Cool On", no cold air | Indoor fan only | Frozen coil or low refrigerant | Check filter, call a pro |
| Blinking "Cool On" past 5 min | Nothing at all | Power, breaker, or float switch | See Branch 2 below |
| Blinking "Cool On" past 5 min | Outdoor unit running | Refrigerant or airflow problem | See Branch 3 |
| Blank or frozen display | Nothing | Thermostat power loss | See Branch 4 |
If your situation matches the first row, you're done. Close this page and go get a glass of water.
When the Blink Is Genuinely Normal
A blinking "Cool On" is normal any time the thermostat has just finished a cooling cycle. It's also normal after a setpoint change, a power event, or a mode switch.
What's not normal is a blink that never resolves. If you've waited ten minutes and the display still hasn't gone solid, the delay isn't the issue.
Decision Branch 1: Blinking Clears Within 5 Minutes
If the blink clears and the outdoor unit kicks on, you don't have a problem. You have a working thermostat.
Still, it's worth confirming the system is actually cooling. A compressor can run without producing cold air if the refrigerant charge is low or the coil is blocked.
How to Confirm Real Cooling
- Give the system 10 to 15 minutes to stabilize.
- Hold a thermometer at a supply register and note the reading.
- Compare it to the return air temperature near the thermostat.
- A healthy split is roughly 16 to 22 degrees Fahrenheit.
If you're seeing a 5-degree split, something's wrong. If you're seeing 20, you're in good shape.
What If It Clears but the Air Isn't Cold?
This is a classic airflow problem disguised as a thermostat problem. The blink resolved, the fan is moving air, and the house still feels warm.
Start with the filter. A clogged filter chokes the evaporator coil and drops the temperature split fast. Most residential filters should be swapped every 30 to 90 days depending on MERV rating and pets.
If the filter is clean and the split is still low, the issue is likely refrigerant or a failing compressor. That's EPA Section 608 territory, and it requires a certified technician. You can read the certification rules at EPA Section 608 if you want the details.
Should You Shorten the Delay?
No. Some installer menus allow a shorter minimum off time, but there's no good reason to touch it on a residential system.
The five-minute default exists to protect a component that costs $1,200 to $2,500 to replace. Trading compressor life for five minutes of comfort is a bad deal.
Decision Branch 2: Blinking Past 5 Minutes With a Silent Outdoor Unit
This is the branch that actually needs work. The thermostat wants cooling, the delay has expired, and the outdoor unit is doing nothing.
Work through these checks in order. Stop as soon as you find the fault.
Step 1: Confirm the Thermostat Settings
- Mode is set to Cool, not Off or Auto with a satisfied setpoint.
- The setpoint is at least 3 degrees below the room temperature.
- The fan is set to Auto, not On. Fan On runs the blower without cooling.
- The schedule isn't overriding your manual setting with a "Hold" conflict.
On T5, T6 Pro, T9, and T10 Pro models, tap the mode icon and confirm the system type. If the thermostat is configured as a heat pump but you have a conventional AC, the Y and O/B signals get crossed up.
Step 2: Check the Breakers and the Disconnect
- Find the double-pole breaker feeding the outdoor unit.
- Look for a tripped breaker or a breaker that's warm to the touch.
- Check the outdoor disconnect box near the condenser. Pull the handle and look at the cartridge fuses.
If a breaker trips twice in a row, stop. Something is shorted, and resetting it again can damage the compressor.
Step 3: Check the Float Switch and Condensate Drain
A clogged condensate drain lifts the float switch, and that switch cuts the cooling call. The thermostat keeps blinking because it doesn't know why the equipment stopped.
Look for a small pan or a PVC drain line near the air handler. If the pan is full, clear the line with a shop vac or a wet-dry pump.
Step 4: Check the Low-Voltage Fuse
Most control boards have a 3-amp or 5-amp automotive-style fuse protecting the 24VAC circuit. A blown fuse kills the whole cooling call even though the thermostat still shows "Cool On."
Pull the fuse and hold it up to a light. A broken element means you've found your problem. But a fuse doesn't blow for no reason.
Check the thermostat wiring for a short before replacing it.
Step 5: Check the C-Wire and Thermostat Wiring
The C-wire, or common wire, gives the thermostat a steady 24VAC return path. Without it, some Honeywell models rely on power stealing, which can cause erratic behavior on certain systems.
- Verify the C-wire is landed on the C terminal at both ends.
- Check that the R wire is on R or Rc, not floating.
- Look for a loose strand touching a neighboring terminal.
If you recently installed the thermostat and this is your first cooling season, miswiring is the most likely cause.
Step 6: Check the Capacitor and Contactor (Pro Territory)
If you're comfortable working inside the outdoor unit with the power off at the disconnect, you can visually inspect the capacitor for bulging. A failed run capacitor is one of the most common reasons a condenser sits silent.
That said, capacitors hold a charge even after power is removed. If you don't know how to discharge one safely, leave it alone.
Symptom to Cause Map
| Symptom | Likely cause | DIY or pro |
|---|---|---|
| No sound, breaker tripped | Short circuit or grounded compressor | Pro |
| No sound, breaker fine | Blown low-voltage fuse or float switch | DIY check |
| Clicking, no start | Failed capacitor or contactor | Pro |
| Humming, no fan | Seized condenser fan motor | Pro |
| Thermostat dead, system fine | Missing C-wire or dead batteries | DIY |
When to Stop and Call a Technician
Call a licensed HVAC technician if any of these apply.
- The breaker trips more than once.
- You smell burning near the air handler or outdoor unit.
- The capacitor is bulging or leaking.
- You've checked power, filter, float switch, and wiring with no result.
- The system is under warranty and you want to keep it that way.
Most diagnostic visits run $75 to $200, and that fee usually applies to the repair if you approve the work. For a compressor issue, that's money well spent.
For model-specific wiring diagrams and installer menus, the Honeywell Home support library is the place to start. Match your exact model number, not just the family name. A T6 Pro and a T6 Pro with a different firmware revision can behave differently.
Decision Branch 3: Blinking Past 5 Minutes With the Outdoor Unit Running
If the outdoor unit is running but the house won't cool, the thermostat isn't your problem. The cooling call went through. Something downstream is failing.
This branch is the trickiest one. You have a live compressor, a spinning condenser fan, and no cold air. That combination points to airflow, refrigerant, or a mechanical fault.
Start With the Temperature Split
The temperature split tells you whether the system is moving heat. Measure the return air at the thermostat and the supply air at the nearest register.
A healthy split is 16 to 22 degrees Fahrenheit. Under 14 degrees and you've got a real problem. Over 24 degrees and you're likely looking at low airflow.
Run the test for 15 minutes. Don't measure right after startup. The system needs time to stabilize.
Frozen Evaporator Coil: The Most Common Cause
A frozen evaporator coil blocks airflow and kills cooling. The indoor fan still runs, but the air coming out feels cool, not cold.
Ice on the coil usually means one of two things. Either airflow is restricted, or refrigerant is low. Both cause the coil temperature to drop below freezing.
- Check the air filter first. A clogged filter is the number one cause.
- Look at the copper lines near the air handler. Frost or ice is a dead giveaway.
- Switch the thermostat to Fan Only for two to three hours to thaw the coil.
Running the AC with a frozen coil can flood the compressor with liquid refrigerant. That's called slugging, and it can destroy the compressor.
Low Refrigerant Charge
Low refrigerant doesn't happen on its own. A sealed system loses charge only through a leak.
Signs of a low charge include:
- Ice on the larger suction line.
- Hissing or bubbling sounds near the outdoor unit.
- Longer run times with weaker cooling.
- Higher-than-normal electric bills.
You can't fix a refrigerant leak with a top-off. Federal law requires locating and repairing the leak first. Per EPA Section 608 rules, only certified technicians can legally handle refrigerant.
Airflow Problems Beyond the Filter
The filter is the easy check. But airflow can also be restricted by other things.
- A dirty blower wheel.
- A collapsed or disconnected duct.
- Closed or blocked supply registers.
- An undersized return duct.
If your filter is clean and the coil is frozen anyway, airflow is still the likely culprit. The blower wheel is a common one. Over years it collects dust and loses efficiency.
Blower Motor and Capacitor Issues
If the indoor fan isn't running at full speed, the coil gets cold and freezes. A weak blower capacitor is a common cause.
Listen to the blower. A healthy one sounds steady. A failing one hums, clicks, or runs slow.
Replacing a blower capacitor is a technician job. The blower compartment has live voltage even when the thermostat is off.
Duct Leaks and Pressure Problems
A duct leak in the attic or crawlspace dumps cold air where you don't need it. The thermostat sees a warm room and keeps calling for cooling.
Look for disconnected flex duct, torn insulation, or separated joints. Duct sealing runs $400 to $1,500 depending on home size. The energy savings often pay for it in two to three years.
What a Technician Checks
When the DIY checks come up empty, a tech runs these diagnostics:
- Superheat and subcooling readings.
- Static pressure across the coil and filter.
- Compressor amp draw against nameplate rating.
- Capacitor microfarad readings versus the rated value.
- Refrigerant pressures against the manufacturer's charging chart.
This is where most "Cool On" mysteries get solved. The thermostat was never the issue.
If/Then Summary for Branch 3
- If the split is under 14 degrees and the coil is frozen, thaw it and check airflow.
- If the coil is clean and the split is low, suspect refrigerant.
- If the outdoor unit sounds rough, suspect the compressor or capacitor.
- If everything checks out but cooling is weak, suspect ducts or charge.
- If you see ice on the suction line, call a pro. Don't run the system.
Decision Branch 4: Blank Display, Frozen Screen, or Alert Codes
A dead or frozen thermostat is a different animal. The blink was never the issue. Power or communication is.
Work through these checks in order.
Blank Display With No Backlight
A completely blank Honeywell thermostat usually means it lost power. That's either the batteries or the C-wire.
- On battery-powered models, replace the batteries with fresh alkaline cells.
- On C-wire models, check the breaker feeding the air handler.
- Look for a tripped float switch. It cuts the 24VAC feed to the thermostat on many installs.
If you replace the batteries and the display comes back but cooling doesn't, the thermostat lost its configuration. You'll need to re-enter the system type, equipment stages, and schedule.
Frozen Screen or Unresponsive Touch
A frozen screen on a T5, T6 Pro, T9, or T10 Pro is usually a firmware hang. The fix is a hard reset.
- Pull the thermostat off the wall plate for 30 seconds.
- Wait, then snap it back on.
- If it stays frozen, cut power at the air handler breaker for a full minute.
The Resideo Home app can also push a firmware update. Check the app for an update prompt before you assume the unit is dead.
Reading Honeywell Alert Codes
Honeywell smart thermostats display alert numbers when something's off. The exact codes vary by model.
| Alert type | Common meaning | Action |
|---|---|---|
| Indoor temperature sensor fault | Internal sensor failure | Replace thermostat |
| Outdoor sensor fault | Sensor wiring or sensor failure | Check sensor wiring |
| No communication with equipment | Wiring or control board issue | Check C-wire and terminals |
| Low battery | Battery below threshold | Replace batteries |
| Filter reminder | Runtime-based filter alert | Replace filter, reset timer |
| Heat pump fault | Reversing valve or defrost issue | Call technician |
Alert codes are model-specific. The T6 Pro and T9 use different numbering for the same fault. Always match the code to your exact model in the Honeywell Home support library.
Communication Errors on Smart Models
Wi-Fi thermostats can lose their connection without losing cooling. The system still runs on its last schedule. But you lose remote control and history.
- Check your router. A reboot fixes most Wi-Fi drops.
- Confirm the thermostat is on the 2.4 GHz band. Most Honeywell Home models don't support 5 GHz.
- Re-pair the thermostat in the Resideo Home app if your network name changed.
Wi-Fi loss won't cause a blinking "Cool On." Don't chase the wrong problem.
When the Display Works but the System Doesn't
This is the confusing middle ground. The thermostat looks fine, the display is solid, and the AC still won't run.
Check the equipment side. Look at the control board LEDs on the air handler. Most boards blink a diagnostic code that tells you exactly what's wrong.
Carrier, Trane, Lennox, and Goodman each use their own LED blink patterns. Match the pattern to the brand's service manual.
Alert Codes You Should Never Ignore
Some alerts are informational. Others point to damage in progress.
- Repeated low-voltage fuse blows. There's a short somewhere.
- Compressor lockout alerts. The control board is protecting the compressor.
- High-pressure or low-pressure switch trips. Refrigerant or airflow problem.
- Over-temperature alerts on the air handler. Blower or limit switch issue.
Ignoring these can turn a $200 repair into a $2,000 replacement.
Honeywell Model Differences: T5, T6 Pro, T9, T10 Pro, and RTH Series
Not all Honeywell thermostats behave the same way. The "Cool On" text, the blink pattern, and the alert handling all vary by model.
Here's how the main families stack up.
| Model family | Display style | Alert codes | C-wire required | App support |
|---|---|---|---|---|
| T5 | Simple LCD, basic text | Limited | Recommended | Resideo Home |
| T6 Pro | LCD with text and icons | Yes, numbered | Recommended | Resideo Home |
| T9 | Color touchscreen | Yes, detailed | Required | Resideo Home |
| T10 Pro | Color touchscreen, premium | Yes, detailed | Required | Resideo Home |
| RTH series | Basic LCD | Minimal | Optional | Some models only |
| VisionPRO 8000 | Professional LCD | Yes | Recommended | Some models |
| Prestige IAQ | Color, pro-grade | Yes, extensive | Required | Yes |
| FocusPRO | Contractor LCD | Limited | Recommended | No |
| Round | Mechanical or basic digital | No | Optional | No |
T5 and T6 Pro: The Workhorses
The T5 and T6 Pro are the most common residential models. Both use a simple LCD. The "Cool On" text blinks during a compressor delay on both.
The T6 Pro adds numbered alert codes. That's a big deal for troubleshooting. If your T6 Pro shows an alert number, look it up in the manual before doing anything else.
Both models work with a C-wire or without. Without a C-wire, they use power stealing. Power stealing can cause weird behavior on some systems.
T9 and T10 Pro: Smart and Demanding
The T9 and T10 Pro are color touchscreen models. They need a C-wire. No exceptions.
They also push a lot more data to the Resideo Home app. You'll see runtime history, filter status, and equipment alerts in the app. That makes diagnosis much easier.
The T9 and T10 Pro also handle multi-stage and variable-speed equipment better than the older models. If you have a two-stage AC or a modulating furnace, these are the right pick.
RTH Series: The Budget Line
RTH thermostats are sold at retail. They work fine for basic single-stage systems. But they lack the diagnostic depth of the T-series.
RTH models often skip numbered alerts. They just show "Cool On" and nothing else. That makes troubleshooting harder.
If your RTH blinks "Cool On" past five minutes with no cooling, follow the Branch 2 checks. There's no shortcut with these models.
VisionPRO, Prestige, and FocusPRO
These are contractor-grade thermostats. They show up in a lot of older installs.
The VisionPRO 8000 and Prestige IAQ have deep installer menus. They let a tech tune cycle rates, compressor delays, and staging. The FocusPRO is simpler and aimed at basic installs.
If you've inherited one of these with a new home, grab the manual before you touch the installer menu. It's easy to change something that breaks the setup.
Which Model Do You Have?
The model number is on the back of the thermostat or under the faceplate. It's also in the Resideo Home app if the unit is paired.
Write it down before you call a technician. It saves time and prevents the "wrong manual" problem.
Wiring and Setup Checks: C-Wire, O/B Terminal, Conventional vs Heat Pump
Wiring issues cause a huge share of "Cool On" problems. This section walks the terminals one by one.
The Terminal Cheat Sheet
Here's what each low-voltage terminal does.
| Terminal | Function | Notes |
|---|---|---|
| R or Rc | 24VAC hot from transformer | Feeds the thermostat |
| Rh | 24VAC hot for heating | Separate on dual-transformer systems |
| C | Common wire | Provides steady 24VAC return |
| Y | Cooling call | Energizes the contactor |
| Y2 | Second-stage cooling | For two-stage AC |
| G | Indoor fan | Runs the blower |
| W | First-stage heat | Conventional heat |
| W2 | Second-stage heat | Auxiliary or backup heat |
| O/B | Reversing valve | Heat pump only, O or B depending on brand |
| Aux/E | Auxiliary or emergency heat | Heat pump only |
Why the C-Wire Matters More Than People Think
The C-wire gives the thermostat a steady 24VAC return. Without it, many smart thermostats use power stealing.
Power stealing pulls tiny amounts of current through the cooling or heating circuit. That works on some systems and fails on others.
Symptoms of power stealing problems include:
- Random reboots.
- Blinking displays that don't match real system state.
- Fan running without a call.
- Wi-Fi drops.
If you see these on a T5, T6 Pro, T9, or T10 Pro, add a C-wire. Honeywell sells a C-wire adapter for installs without a spare conductor.
O/B Terminal and Heat Pump Confusion
The O/B terminal controls the reversing valve on a heat pump. It tells the system whether to heat or cool.
Different brands use different conventions. Rheem and Ruud energize the reversing valve in heating mode (B). Most others energize it in cooling mode (O).
If the O/B setting is wrong, the thermostat calls for cooling and the system heats. Or the cooling is weak and the system fights itself.
Check the installer setup menu. The system type must match the equipment. "Conventional" on a heat pump will cause chaos.
Conventional vs Heat Pump Configuration
This is the single biggest setup mistake we see in user reports.
- Conventional system: gas furnace or electric air handler plus AC. Uses W for heat, Y for cool.
- Heat pump system: one outdoor unit handles both. Uses Y, G, O/B, and often Aux/E.
If you tell a Honeywell thermostat it's conventional when it's actually a heat pump, the reversing valve never gets the right signal. Cooling becomes weak or nonexistent.
Miswiring Symptoms to Watch For
| Symptom | Likely miswiring |
|---|---|
| AC runs in Heat mode | O/B setting reversed |
| Fan runs constantly | G wire shorted or fan set to On |
| No cooling, indoor fan runs | Y wire loose or on wrong terminal |
| Thermostat reboots randomly | No C-wire, power stealing issue |
| Breaker trips on cooling call | Y wire shorted to R or C |
How to Verify Wiring Safely
- Turn off power at the air handler breaker.
- Pull the thermostat off the wall plate.
- Compare wire colors to the terminal labels.
- Check for loose strands or wires touching neighbors.
- Verify the same colors land on the right terminals at the control board.
If the wiring looks wrong and you're not sure, take a photo and call a technician. Don't guess.
Reset, Power Cycle, and the Point Where DIY Stops
Resets fix a surprising number of "Cool On" problems. But not every problem. Here's how to do them properly and when to stop.
Soft Reset vs Hard Reset
A soft reset keeps your settings. A hard reset wipes them.
- Soft reset: restart the thermostat without losing schedule or configuration.
- Hard reset: factory reset, everything goes back to default.
Most users want the soft reset. Try that first.
How to Soft Reset a Honeywell Thermostat
The exact steps vary by model, but the pattern is the same.
- T5, T6 Pro: Press and hold the up and down arrows together for five seconds.
- T9, T10 Pro: Swipe to Settings, then System, then Restart.
- RTH series: Remove the thermostat from the wall plate for 30 seconds, then reattach.
After the reset, give the thermostat five minutes to boot and re-establish the cooling call.
How to Hard Reset
A factory reset wipes your schedule, Wi-Fi, and equipment settings. Only do this if the soft reset fails.
- T5, T6 Pro: Enter the installer menu and select Factory Reset.
- T9, T10 Pro: Settings, then Reset, then Factory Reset.
- RTH series: Hold the mode button for 10 seconds, then confirm.
After a factory reset, you'll need to re-enter the system type, equipment stages, and schedule. If you don't know the right settings, call a tech.
Power Cycling the Whole System
Sometimes the thermostat is fine and the equipment control board is stuck. A full power cycle fixes that.
- Turn the thermostat to Off.
- Flip the air handler breaker off.
- Flip the outdoor unit disconnect off.
- Wait 60 seconds.
- Restore power in reverse order.
This resets the control board and clears any latched faults.
When to Stop DIY and Call a Pro
Here's the honest cutoff line. Stop and call a licensed HVAC technician if any of these apply.
- You've replaced the batteries and reset the thermostat with no result.
- The breaker trips more than once.
- You see ice on the refrigerant lines.
- You smell burning or see scorch marks.
- The outdoor unit hums but won't start.
- You're not comfortable working near 240V wiring.
- The system is under warranty and you want it honored.
A diagnostic visit runs $75 to $200 in most US markets as of 2026. That's cheap compared to a compressor replacement.
What to Have Ready When You Call
Make the call quick and useful. Have these ready:
- Thermostat model number.
- Outdoor unit model and serial numbers.
- Indoor unit model and serial numbers.
- The exact display text or alert code.
- What you've already checked.
- When the problem started.
Technicians can often pre-diagnose from this list before they arrive. That saves you money on the visit.
Mistakes That Make It Worse and Can Void Your Warranty
Most of the damage we see in user reports comes from panic, not from the original fault. The thermostat blinked, someone got impatient, and a $200 problem became a $2,000 one. Here are the moves that cause the most harm.
The Setpoint Spiral
Dropping the setpoint five degrees doesn't speed anything up. It just makes the compressor run longer once it does start.
Do it three or four times in ten minutes and you've extended the runtime without gaining a single degree of comfort. Leave the setpoint where it is. Let the timer finish.
Flipping the Breaker More Than Once
One reset is fine. Two is questionable. Three is a mistake.
A breaker that trips twice is telling you something is shorted or grounded. Every additional reset pushes current through a fault that shouldn't have current at all. That's how compressors die and how control boards burn.
If it trips a second time, stop. Call someone.
Jumpering Safety Switches
The float switch and the high-pressure switch exist to stop the system. Bypassing either one is dangerous.
A jumpered float switch lets the drain pan overflow into your ceiling. A jumpered pressure switch lets the compressor run into a condition it's designed to avoid.
Neither trick fixes anything. Both can void your warranty on the spot.
Replacing a Fuse With the Wrong Amperage
The low-voltage circuit on most residential control boards uses a 3-amp or 5-amp automotive-style fuse. It's usually purple or orange.
Putting a 10-amp or 15-amp fuse in that slot removes the protection entirely. The next short takes out the transformer instead, and that's a $150 to $400 part.
Use the exact amperage printed on the board. If you don't have one, get one. Don't improvise with foil or a higher-rated fuse.
Mixing Up Capacitor Ratings
Capacitors are rated in microfarads, usually with a tolerance of plus or minus 6 percent. A 35/5 MFD dual-run capacitor is not interchangeable with a 40/5.
Going up slightly is sometimes acceptable to a technician. Going down is not. Going way up overheats the motor windings.
If you're replacing a capacitor yourself, match the microfarad rating and the voltage rating exactly. Match the physical size too, since mounting brackets vary.
Running the System With a Frozen Coil
A frozen evaporator coil restricts airflow and lets liquid refrigerant reach the compressor. That's called slugging, and it's the fastest way to destroy a compressor.
Thaw the coil completely before you run the system again. Switch the thermostat to Fan Only for two to three hours. Better yet, turn the whole system off and let it thaw naturally.
DIY Refrigerant Top-Offs
Adding refrigerant isn't like adding oil to a car. It's a sealed system, and if it's low, it's leaking.
Federal law under EPA Section 608 prohibits venting refrigerant to the atmosphere. It also restricts who can legally purchase and handle refrigerant. Most refrigerants sold at retail are not the ones your system uses.
A top-off without a leak repair is temporary. It also hides the real problem until the compressor fails.
Warranty-Killing Moves
Most equipment warranties run 5 to 10 years on parts. They typically require professional installation and service for refrigerant work and electrical repairs.
| Action | Warranty risk |
|---|---|
| DIY refrigerant work | Almost always voids coverage |
| Jumpering safety switches | Voids coverage |
| Oversized fuse or breaker | Voids coverage |
| Unlicensed electrical work | Voids coverage |
| Wrong capacitor rating | Voids coverage |
| Missing filter maintenance | Can void coverage on some brands |
Keep your receipts and service records. If you sell the house, the new owner will want them.
Safety First: Breakers, Capacitors, Float Switches, and Refrigerant Rules
The equipment around a thermostat runs on two very different voltages. Knowing which one you're near changes everything about how you work.
The Two Voltages You're Dealing With
The thermostat and its wiring run on 24VAC. That's low voltage. It can give you a tingle but it won't kill you.
The air handler and the outdoor condenser run on 240VAC in most US homes. That circuit can absolutely kill you. Treat every wire inside those cabinets as live until you've verified otherwise with a meter.
Never assume flipping the thermostat to Off removes power. It doesn't.
Capacitor Discharge Hazard
Run capacitors store a charge even after power is removed. A charged capacitor can deliver a painful and potentially dangerous shock minutes after the breaker is off.
Never touch the terminals of a capacitor with bare hands. Discharge it properly with an insulated resistor, or leave it alone.
A bulging or leaking capacitor is a clear sign of failure. It's also a clear sign to call a technician.
Lockout and Tagout Basics
If you're doing any work near the equipment, follow lockout and tagout practice. It's an OSHA standard for a reason.
- Turn the breaker off.
- Lock the panel if you can.
- Tag it so nobody flips it back on.
- Verify power is off with a non-contact voltage tester.
A family member flipping a breaker while you're working is a real and common accident.
Float Switch Rules
The float switch is a safety device. It cuts the cooling call when the condensate pan fills.
Never bypass it. Never tape it up. Never remove the float.
If it keeps tripping, the drain is clogged or the pan is misaligned. Fix the drain. The switch is doing its job.
Refrigerant Law and Certification
Refrigerant handling is regulated under Section 608 of the Clean Air Act. Technicians must hold EPA certification to buy, handle, or recover refrigerant.
That includes R-410A, R-32, and the newer R-454B blends showing up in 2025 and 2026 equipment. Each has different handling and pressure characteristics.
If a contractor offers to "top off" your system without looking for a leak, that's a red flag. Leak repair comes first. Charge comes second.
Personal Protective Equipment
Even simple checks deserve basic PPE. It costs almost nothing and prevents most injuries.
- Safety glasses for anything near a refrigerant line or a dusty blower.
- Insulated gloves for electrical work.
- Non-contact voltage tester before touching any wire.
- Closed-toe shoes with a rubber sole.
That's the whole kit. Skip the flip-flops.
Safety Checklist by Task
| Task | Main hazard | Required precaution |
|---|---|---|
| Replacing thermostat batteries | None | None |
| Checking air filter | Dust, minor cuts | Gloves optional |
| Checking breaker panel | Arc flash, shock | Dry hands, no standing water |
| Inspecting outdoor unit | 240V, fan blades | Power off at disconnect |
| Checking capacitor | Stored charge | Discharge tool or leave it alone |
| Handling refrigerant | Frostbite, legal | EPA certification required |
| Clearing condensate drain | Water damage, bacteria | Gloves, shop vac |
If any item on that list makes you hesitate, hire it out. Nobody's judging.
Real Scenarios: Heat Waves, Power Outages, and Fresh Thermostat Installs
Theory is useful. Patterns are more useful. These are the situations where "Cool On" blinking shows up most often.
Scenario 1: Heat Wave, Outdoor Temps Above 100 Degrees
A homeowner in Phoenix sets the thermostat to 72 at 3 PM on a 108-degree day. The display starts blinking.
The blink clears in five minutes. The system runs continuously for three hours. The house drops to 78 and stops there.
This is not a thermostat fault. It's a capacity issue. A correctly sized AC is designed for a design temperature, usually around 100 to 105 degrees in that climate.
Above design temperature, the system can't keep up. The thermostat will show "Cool On" the entire time. Nothing is broken.
What helps in this scenario:
- Close blinds on west-facing windows.
- Run ceiling fans to raise the effective comfort temperature.
- Avoid using the oven during peak heat.
- Set the thermostat a few degrees higher than usual.
Scenario 2: Power Outage After a Storm
The power flickers during a thunderstorm. When it comes back, the thermostat shows blinking "Cool On."
This is the classic reset scenario. The thermostat lost power mid-cycle and started a fresh compressor delay on restart.
The outdoor unit should start within five minutes. If it does, you're done. If it doesn't, work through the Branch 2 checks in order.
Watch for this on systems with a hard start kit. The kit adds a second delay on top of the thermostat's. Total wait can stretch to eight or ten minutes.
Scenario 3: New Thermostat Install, First Cooling Season
A homeowner installs a T6 Pro in October. Everything works fine through winter. Then June arrives and "Cool On" blinks forever with no cooling.
Nine times out of ten, the system type is set wrong. The installer chose "Conventional" when the home has a heat pump. Or the O/B setting is reversed.
The thermostat is calling for cooling. The equipment is doing something else entirely.
Fix it in the installer menu. If you don't have the installer menu access, the manual explains how to reach it. If that feels risky, call a tech.
It's a ten-minute fix.
Scenario 4: Second Home Left Off for Months
A vacation home sits empty from November to May. The owner arrives in June and turns on the AC.
The thermostat blinks "Cool On." The outdoor unit hums and then trips the breaker.
Sitting idle causes problems. Capacitors dry out. Contactors get pitted.
Rodents nest in the outdoor unit's electrical compartment.
This is a technician call, not a DIY call. Ask for a spring startup service. It usually runs $100 to $250 and includes a capacitor check, a coil cleaning, and a refrigerant pressure reading.
Scenario 5: Heat Pump in Defrost Mode
Heat pumps run defrost cycles in heating season. During defrost, the system briefly runs in cooling mode to warm the outdoor coil.
Some homeowners see "Cool On" flash during defrost and panic. It's normal behavior. The cycle lasts two to ten minutes depending on outdoor temperature and humidity.
If you see this in winter, don't touch anything. It'll resolve on its own.
Scenario 6: Zoned System With One Zone Calling
A two-zone home has one thermostat calling for cooling and one satisfied. The calling thermostat blinks "Cool On."
The zone control board may be holding the compressor off until the second zone's damper positions. This is a control logic delay, not a fault.
If the delay runs more than ten minutes, check the zone board for a fault LED. Zoned systems are more complex and often need a technician familiar with the specific panel brand.
Scenario Patterns at a Glance
| Scenario | Typical blink duration | Likely outcome |
|---|---|---|
| Heat wave above design temp | Entire run cycle | Normal, capacity limit |
| Power outage restart | 3 to 10 minutes | Normal |
| New install, wrong config | Indefinite | Configuration fix |
| Long idle period | Until fault clears | Technician visit |
| Heat pump defrost | 2 to 10 minutes | Normal |
| Zoned system delay | 5 to 10 minutes | Usually normal |
If your situation matches one of the "normal" rows, you can relax. If it matches a fault row, follow the branch that fits.
Frequently Asked Questions
How long should Cool On blink on a Honeywell thermostat?
Blinking "Cool On" should clear in about five minutes on most Honeywell Home models. That's the compressor protection delay. Some systems with a hard start kit or a control board timer take up to eight or ten minutes.
If it's still blinking past ten minutes with no cooling, something else is wrong.
Does blinking Cool On mean the AC is running?
No. Blinking "Cool On" means the thermostat has an active cooling call but is holding the compressor off. Solid "Cool On" means the delay has passed and the system should be running.
If you're unsure, put your hand near a supply vent and listen for the outdoor unit.
Why does Cool On blink after a power outage?
A power interruption resets the thermostat's internal compressor timer. When power returns, the thermostat starts a fresh delay to protect the compressor from a hard start. That's why the display blinks right after a storm.
It usually clears within five minutes on its own.
Can I shorten the compressor delay on a Honeywell thermostat?
Technically, yes, if your model has an installer menu with a cycle rate or minimum off time setting. Practically, no. The delay protects a component that costs $1,200 to $2,500 to replace.
Shortening it trades compressor lifespan for a few minutes of comfort. Leave it at the default.
What if Cool On blinks but the house stays warm?
That points to a problem downstream of the thermostat. Check the air filter, the outdoor unit, the breaker, and the float switch. If the outdoor unit runs but the air isn't cold, suspect a frozen coil or low refrigerant.
Those need a certified technician.
Is blinking Cool On ever an error code?
On most Honeywell Home models, no. The blink is a status indicator, not a fault code. Real faults show up as numbered alerts on T6 Pro, T9, and T10 Pro models.
If you see a number next to the alert icon, look it up for your exact model.
Decision Guide: Your Next Step at a Glance
Find your situation in the table below. Follow the row that matches.
| What you're seeing | What it means | Your next step |
|---|---|---|
| Blinking under 5 minutes, no sound yet | Normal compressor delay | Wait it out |
| Blinking clears, cold air arrives | Working as designed | Nothing to do |
| Blinking past 5 minutes, outdoor unit silent | Power, fuse, float switch, or wiring | Run Branch 2 checks |
| Blinking past 5 minutes, outdoor unit running | Airflow, refrigerant, or compressor fault | Run Branch 3 checks |
| Display blank or frozen | Power loss or firmware hang | Run Branch 4 checks |
| Alert number on screen | Model-specific fault | Look up the code for your model |
| Blinking after a power blip | Timer reset | Wait five minutes |
| Blinking in winter on a heat pump | Defrost cycle | Leave it alone |
The Five-Minute Rule
Wait five minutes before you do anything. That single habit prevents most unnecessary service calls.
If the blink clears and cold air arrives, you're done. If it doesn't, you now have a clear path.
The Ten-Minute Cutoff
If you've waited ten minutes and the display still blinks with no cooling, the delay isn't the cause. Stop waiting and start checking.
Work through power first. Then airflow. Then wiring.
Then call a technician.
What to Say When You Call
Keep it short and specific. Tell the dispatcher:
- Your thermostat model.
- How long the blink has lasted.
- Whether the outdoor unit is running.
- What you've already checked.
- Any alert number on the screen.
That's enough for most shops to send the right tech with the right parts. It also tells them you're not guessing, which tends to get you a better appointment slot.
When the Answer Is Just Patience
Sometimes the system is fine and the thermostat is doing exactly what it was built to do. A blinking "Cool On" under five minutes is not a fault. It's a feature that keeps your compressor alive.
If you've read this far and your situation matches that description, close the app, put down the screwdriver, and let the timer finish. Your AC will thank you.