Whirlpool fridge light blinking almost always traces back to one of four things: a loose bulb, a failing LED module, a sticky door switch, or a control board that needs a reset. It's rarely just the bulb, and swapping one in without testing the circuit usually wastes money. The blink pattern itself is the clue.
Learn to read it and you'll skip most of the guesswork.
Manufacturer specifications indicate that most Whirlpool LED modules run on a low-voltage DC supply, while incandescent sockets take a standard E26 bulb rated at 40W maximum. In our research across owner's manuals and service tech sheets, the same symptom pointed to four different systems depending on model family. So the first step isn't buying a part.
It's figuring out which system you're actually dealing with.
Quick Answer
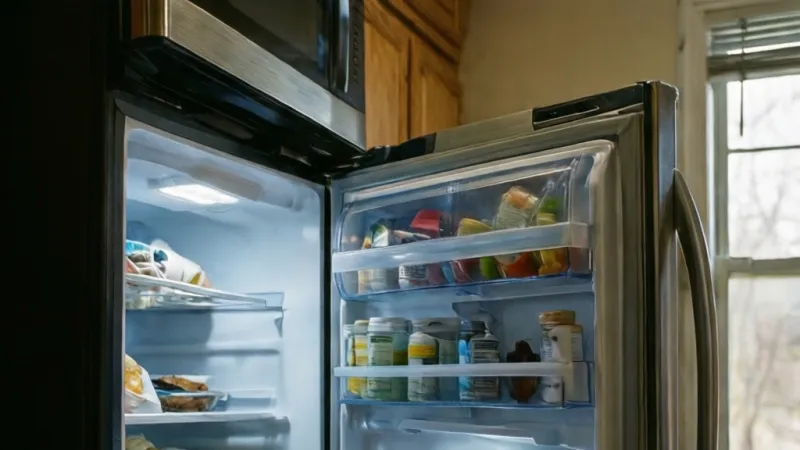
A blinking Whirlpool fridge light usually means a bad bulb or LED module. Check the door switch next for sticking or misalignment. A loose bulb causes most simple flickering cases.
A full power cycle clears many temporary glitches. Constant blinking often points to the main control board.
Why Your Whirlpool Fridge Light Is Blinking and Why a New Bulb Rarely Fixes It
Blinking isn't a generic fault. On Whirlpool refrigerators, the interior light sits on a small circuit that ties into the door switch, the main control board, and sometimes the user interface board. Any one of those can make the light pulse.
The bulb is just the easiest part to blame.
When people replace the bulb and the blinking continues, it's usually because the problem was never in the bulb. A failing LED driver can flash even with a brand-new module. A sticky door switch can pulse the light as the door moves.
A control board with corrupted firmware can blink the light as part of a diagnostic loop.
Blink Patterns and What They Usually Point To
The pattern matters more than the light itself. A slow flicker that starts when the door opens points in a different direction than a fast pulse that runs while the door is closed. Here's how our research lines them up.
| Blink pattern | Likely cause | First thing to check |
|---|---|---|
| Flicker when door opens | Loose bulb or failing LED driver | Bulb seating and socket |
| Fast pulse, dim light | Wrong bulb type or low LED voltage | Bulb wattage and voltage rating |
| Blinks with door alarm | Door switch stuck or door misaligned | Plunger travel and gasket seal |
| Blinks with door closed | Wiring, connector, or control board | Harness continuity |
| Blinks after power outage | Firmware glitch or demo mode | Power cycle and demo exit |
| Dispenser light only | UI board or dispenser harness | Dispenser connector pins |
If the pattern matches more than one row, work top to bottom. The cheap fixes come first for a reason.
Sudden Onset vs Slow Onset
Sudden blinking almost always follows an event. A power surge, a move, a bulb swap, or a board replacement. In our research, surge-related blinking is the most common sudden case, especially in homes with older wiring or frequent brownouts.
Slow onset is different. If the light got dimmer over weeks, then started flickering, then started blinking, you're looking at a degrading component. LED modules and door switches both fail this way.
The fix is the same, but you can usually predict which part is going before it dies.
Why the Bulb Is Only Sometimes the Answer
A bulb fixes the problem when the bulb itself is the fault. That happens more often with incandescent E26 bulbs than with sealed LED modules. Incandescent filaments weaken with age and can flicker before they burn out.
Sealed LED modules behave differently. They either work or they don't, and when they fail they usually fail completely. A blinking sealed LED module almost always means the driver inside is dying or the voltage feeding it is unstable.
Replacing the module fixes it if the driver is the fault. If the supply voltage is the problem, the new module will blink too.
How the Whirlpool Interior Light Circuit Actually Works
The interior light circuit is small, but it touches several parts of the fridge. Understanding the path from power to light makes diagnosis much faster. Power comes from the main control board, passes through the door switch, and reaches the light socket or LED module.
The chassis provides the return path.
That's the simple version. In practice, the circuit also shares logic with the door alarm, the dispenser light, and sometimes the temperature display. That overlap is why a light problem can show up as a door alarm issue, and the other way around.
LED Module vs Incandescent Bulb vs Light Socket
These three parts look similar in a photo but behave very differently. The socket is just a mechanical and electrical interface. The bulb or module does the actual light production.
If the socket is corroded or loose, both bulb types will misbehave.
Incandescent bulbs are forgiving. They tolerate voltage swings and socket wear better than LEDs. LED modules are the opposite.
They need stable voltage and clean contacts. A dirty socket that works fine with an incandescent bulb can make an LED module flicker constantly.
The Door Switch, Main Control Board, and UI Board
The door switch is a simple mechanical part. It opens and closes a contact when the door moves. Most Whirlpool door switches are plunger-style and sit behind a small plastic housing near the hinge side.
When the plunger sticks, the light can blink as the switch makes and breaks contact.
The main control board sends power to the light circuit and reads the door switch state. If the board's output is unstable, the light blinks no matter what the bulb or switch is doing. The UI board handles user-facing controls.
On some models, the UI board also drives the dispenser light, and a fault there can bleed into the interior light.
Whirlpool designed the light and door alarm to share inputs. When the door stays open too long, the alarm sounds and the light may pulse as a secondary alert. That's not a fault.
It's the fridge doing what it was built to do.
If the blinking stops when you close the door and returns the moment you open it, you may be looking at normal alarm behavior, not a failure. Check your owner's manual for the door alarm timeout. It's usually between 1 and 5 minutes depending on model.
Know Your Model First: WRF, WRS, WRT, WRB, and WRX Differences
Whirlpool builds refrigerators across several model families, and the light circuit is not identical across them. The first two or three letters of your model number tell you which family you're dealing with. That determines the parts, the wiring, and sometimes the whole diagnostic path.
As of 2026, the WRF (French door) and WRS (side-by-side) families make up the bulk of Whirlpool's North American lineup. WRT (top-freezer) units are simpler and often use a plain incandescent bulb. WRB (bottom-freezer) and WRX (mixed) families sit between them.
Where to Find Your Model and Serial Tag
The model and serial tag is usually inside the fresh food compartment. Look on the left or right interior wall, near the top. On side-by-side models, it's often behind the crisper drawer or on the ceiling of the fresh food section.
Write the full model number down before you buy anything. The same Whirlpool refrigerator family can use three or four different light modules depending on the build year. Buying by appearance alone is a common and expensive mistake.
Finding the Tech Sheet and Wiring Diagram
Whirlpool hides a tech sheet somewhere on every refrigerator. It's usually taped behind the toe grille, inside the control housing, or behind the light lens. The tech sheet shows the wiring diagram, the diagnostic entry sequence, and the blink code table for your exact model.
If the tech sheet is missing, Whirlpool's official site hosts owner's manuals and parts diagrams by model number. Search the model there before you guess at a part.
| Prefix | Typical configuration | Light style | Notes |
|---|---|---|---|
| WRF | French door | LED module | Most common 2020s build |
| WRS | Side-by-side | LED or incandescent | Older units often incandescent |
| WRT | Top-freezer | Incandescent E26 | Simple circuit, fewer boards |
| WRB | Bottom-freezer | LED module | Shares board with dispenser |
| WRX | Various | Mixed | Used across multiple lines |
Matching Replacement Parts to Your Model
Parts must match the model number exactly. A module that fits a 2018 WRF may not fit a 2021 WRF even though the interiors look identical. Whirlpool revises light modules regularly without changing the exterior look of the fridge.
Replacement parts should carry a recognized safety listing. Per UL Solutions, unlisted electrical components haven't been tested for fire and shock hazards. That's not just paperwork.
An unlisted LED module can overheat and damage the socket or the wiring behind it.
Condition Check 1: Is the Light Blinking Only When the Door Opens?
If the light blinks only when the door opens, the fault is almost always in the door switch or the bulb seating. The circuit is completing and breaking contact as the door moves. That's a mechanical problem, not a board problem.
Test this first. Open the door slowly and watch the light. If it flickers in step with the door position, the switch or socket is the likely culprit.
If it blinks steadily once the door is fully open, the problem is downstream.
Loose Bulb, Wrong Bulb Type, or Failing LED Driver
A loose bulb is the simplest cause and the easiest fix. Push the bulb firmly into the socket with the fridge unplugged. If it rocks or feels loose, the socket tabs may be bent.
Gently bend them back with a small flathead screwdriver.
Wrong bulb type is next. An LED bulb in a socket designed for an incandescent bulb can flicker because the socket voltage isn't regulated for LED drivers. Match the bulb type to the socket.
If your fridge came with a sealed LED module, don't try to fit a screw-in bulb.
A failing LED driver shows up as a slow flicker that gets worse over time. The module needs stable voltage, and the driver inside can't keep up. Replacement is the only fix.
Door Switch Plunger Sticking or Misaligned
A door switch plunger that sticks will blink the light as the door opens and closes. Press the plunger by hand with the door open. It should move smoothly and return on its own.
If it feels gritty or slow, clean it with isopropyl alcohol and a cotton swab.
Misalignment is a different problem. If the door has sagged or the hinge has shifted, the plunger may not depress fully when the door closes. Check door alignment by placing a level on the top edge.
Adjust the hinge if the door is out of square.
Here's the if/then logic for this branch.
- If the light flickers in step with door movement, replace or clean the door switch.
- If the light flickers when the door is fully open and stationary, check the bulb seating and socket tabs.
- If the light dims before it flickers, the LED driver inside the module is failing.
- If the light blinks only when the door is nearly closed, the switch plunger travel is too short. Adjust the hinge or replace the switch.
Condition Check 2: Blinking With the Door Closed, With the Door Alarm, or From the Dispenser
Blinking while the door is closed rules out the bulb and door switch in most cases. The circuit is being pulsed by something upstream. That means wiring, the harness, or the control board.
Diagnosis gets more involved here, but the tests are still straightforward.
If the door alarm is also triggering while the door is shut, the door switch is stuck open. The fridge thinks the door is open when it isn't. That will pulse the light and sound the alarm.
Check the switch first, then check the door gasket and hinge alignment.
Wiring Harness and Connector Faults
Harness faults are more common than most people think. A connector that's partially seated, corroded, or loose will cause intermittent blinking that comes and goes. Pull the light housing and inspect the connector for green corrosion or brown heat marks.
If you find corrosion, clean the pins with contact cleaner and reseat the connector. If the plastic housing is melted or brittle, replace the harness. A heat-damaged connector almost always means the circuit has been overloaded at some point.
Control Board Output Issues
The main control board sends power to the light circuit. If the board's output is unstable, the light pulses no matter what the bulb or switch is doing. You can test this with a multimeter at the light socket.
Set the meter to AC voltage and check the socket while the door is open.
If the reading jumps around instead of holding steady, the board is likely at fault. If the reading holds steady but the light still blinks, the problem is in the light module or the socket itself. Either way, the multimeter test tells you which side of the circuit to focus on.
Sabbath Mode, Energy Saver, and Display Mode Overlap
Some Whirlpool models have a Sabbath mode that changes how the light and display behave. In Sabbath mode, the light may stay on or behave differently than usual. If you recently pressed a sequence of buttons by accident, you may have enabled it.
Energy saver mode can also affect the light. On some models, energy saver reduces light output or changes the delay before the light turns off. Display mode (sometimes called demo mode) is the most common accidental setting.
It's designed for showrooms and makes the light and display behave in ways that look like faults.
If your light blinks in a fixed pattern that repeats exactly, and nothing else seems wrong, check for demo mode before you buy any parts. The exit sequence is model-specific and usually printed on the tech sheet.
Condition Check 3: Blinking Started After a Power Outage, Bulb Swap, or Board Replacement
Timing is everything with this branch. If the blinking started right after an event, that event is your prime suspect. Power outages, bulb swaps, and board replacements each leave their own fingerprint on the light circuit.
Match the event to the symptom and you'll usually land on the cause in one step.
This is the branch where people overspend. They replace the light module, then the door switch, then the board, chasing a fault that a single reset would have cleared. Slow down and identify the event first.
Surge Damage vs Firmware Glitch
A power surge can damage the LED driver, the control board, or both. It can also corrupt the firmware running on the board, which produces blinking without any hardware damage at all. The two look identical from the outside.
The difference shows up in behavior. A firmware glitch often clears after a full power cycle. Unplug the fridge, wait a full 5 minutes, plug it back in, and watch the light.
If the blinking stops, you had a glitch. If it comes back exactly as before, you have hardware damage.
Surge damage is usually localized. In our research, LED modules and control boards are the two parts most likely to fail after a surge. Door switches rarely fail from surges because they're mechanical.
If the blink started after a storm, focus on the module and the board.
Incompatible Aftermarket Parts
Not all LED modules are built to the same spec, even when they fit the same socket. Aftermarket modules often use cheaper drivers that don't tolerate the voltage Whirlpool's board supplies. The result is a module that blinks from day one.
Verified buyer feedback on appliance parts forums reports this pattern often with unbranded modules sold as "compatible with Whirlpool." The physical fit is fine. The electrical behavior isn't.
If blinking started the moment you installed a new module, put the old one back in temporarily. If the old module lights up normally, the new one is incompatible. Return it and buy an OEM part matched to your model number.
Incomplete Reset After Service
Many Whirlpool control boards hold fault codes in memory until you clear them. If a technician replaced a part but didn't run the reset sequence, the board may still be pulsing the light as part of an old fault routine. The fix isn't a new part.
It's a proper reset.
Here's the if/then logic for this branch.
- If blinking started after a storm, test the LED module first, then the board.
- If blinking started after a bulb swap, verify bulb type and wattage before anything else.
- If blinking started after a board replacement, run the full reset sequence from the tech sheet.
- If blinking started after a move, check the harness connectors for partial seating.
- If blinking clears after a 5-minute power cycle but returns within days, suspect the board's power supply section.
One warning before you go further. If the blinking is accompanied by a burning smell, a hot socket, or a discolored connector, stop. Unplug the fridge and don't re-energize it until the damaged part is replaced.
Heat damage in a 120V circuit is a genuine fire risk, not a nuisance fault.
Stuck in Demo or Display Mode? The 30-Second Check
Demo mode is the single most overlooked cause of Whirlpool fridge light blinking, and it's the cheapest to fix. It's a factory setting designed for showrooms so the light and display stay active without the compressor running. Accidentally trigger it and the fridge looks broken.
It's not broken. It's just in the wrong mode.
Signs Your Fridge Is Still in Showroom Mode
The blinking pattern is the biggest tell. Demo mode blinks in a fixed, repeating pattern that doesn't change with door movement or temperature. Real faults tend to be irregular.
Demo mode is metronomic.
Other signs stack up quickly. The interior light may stay on constantly. The display may show all segments lit.
The compressor may never run, which means the fridge never gets cold. If your blinking-light fridge is also warm inside, demo mode is the first thing to rule out.
How to Exit Demo Mode on Common Whirlpool Models
Exit sequences are model-specific, but a few patterns cover most WRF and WRS units built after 2015. Try these in order. Give each one a full 5 seconds of holding time before you decide it didn't work.
- Press and hold the Door Alarm and Light buttons together for 3 to 5 seconds.
- Press and hold the Refrigerator Temp and Freezer Temp buttons together for 5 seconds.
- Press and hold the Water Filter and Lock buttons together for 5 seconds.
- On touchscreen models, tap the Settings icon and look for a Demo or Showroom toggle.
- On models with a numeric display, hold the display button until the panel flashes, then release.
If none of those work, your tech sheet has the exact sequence. It's usually printed on a small card behind the toe grille. Whirlpool also publishes owner's manuals by model number on its official site.
When Demo Mode Isn't the Answer
If the fridge is cold, the compressor runs, and the light still blinks, you're not in demo mode. Move to the decision tree in the next section. Demo mode always affects the compressor too.
A cold fridge with a blinking light is a real fault.
Decision Tree: Blink Pattern to Failing Part
This is the section to bookmark. Everything above feeds into it. Match your symptom to the right branch and you'll know which part to test, which part to replace, and which parts to leave alone.
Reading Blink Codes in Diagnostic Mode
Whirlpool refrigerators run a diagnostic mode that flashes fault codes through the interior light or the display. The exact entry sequence is on your tech sheet. On many WRF and WRS models, you hold two specific buttons for 3 seconds with the door open.
Once in diagnostic mode, the light or display flashes a sequence. Two flashes, pause, three flashes, pause, then repeat means fault code 23. That code points to a specific subsystem.
The code table on the tech sheet translates each pattern into a component.
Don't guess at codes. Use the tech sheet. The same blink pattern means different things across model families, and a wrong read sends you down the wrong branch.
Branch A: Light Only, No Other Symptoms
If the only problem is the blinking light, you're in the simplest branch. Work through these tests in order.
- Test the bulb or LED module in a known-good socket.
- Check the socket tabs for tension and corrosion.
- Test the door switch for continuity.
- Check the harness connector at the light housing.
- If all four pass, the fault is in the main control board's light output.
Most Branch A cases resolve at step one or step two. The board is rarely the culprit when nothing else is wrong.
Branch B: Light Plus Door Alarm
If the light blinks and the door alarm sounds while the door is shut, the door switch is stuck open. That's the fridge thinking the door is still open. Replace the switch.
If a new switch doesn't fix it, check the door gasket and hinge alignment. A sagging door won't depress the plunger fully.
Branch C: Light Plus Cooling Issues
If the light blinks and the fridge or freezer isn't holding temperature, the problem is upstream of the light circuit. This branch points to the main control board, the inverter board, or a thermistor fault. The blinking light is a symptom, not the disease.
Don't replace the light module in this branch. It won't help. Diagnose the cooling fault first.
Branch D: Light After a Repair
If blinking started after you replaced a part, go back and verify your work. The most common mistakes are a partially seated connector, a bulb in the wrong socket, and a skipped reset. Recheck each one before you assume the new part is defective.
| Branch | Symptoms | Primary suspect | Secondary suspect |
|---|---|---|---|
| A | Light only | Bulb or LED module | Socket, door switch |
| B | Light plus door alarm | Door switch | Door alignment, gasket |
| C | Light plus cooling loss | Main control board | Inverter board, thermistor |
| D | Light after repair | Connector seating | Reset sequence |
Step-by-Step Fixes: Bulb, LED Module, Socket, and Door Switch
These are the four repairs that solve the vast majority of blinking light cases. Do them in order. Each step assumes the previous one passed.
Power Down and Discharge Safely
Unplug the refrigerator from the wall. Not just the light switch, not just the door. The plug.
Wait 5 minutes before you touch anything inside the light housing. That gives the control board capacitors time to discharge.
Safety note. The main control board holds a charge even after unplugging. If you're working near the board, avoid touching the capacitor leads directly.
The stored voltage is lower than mains voltage but still enough to hurt.
Remove the Lens and Inspect the Bulb
The light lens on most Whirlpool models pops off with a firm pull or a small flathead at the tab. On some models it twists a quarter turn. The tech sheet or owner's manual shows the exact removal method.
Once the lens is off, look at the bulb. A dark, smoky, or silver-tipped incandescent bulb is burned out. A cracked or discolored LED module is failed.
A bulb that looks fine may still be the fault, so test it in another fixture if you have one.
Test the Socket With a Multimeter
Set your multimeter to AC voltage and check the socket with the fridge plugged back in and the door open. You should read close to 120V AC in North America. In the UK and EU, expect 220 to 240V AC.
If the reading is steady, the socket and supply are fine. If the reading jumps or reads zero, the problem is upstream. That means the door switch, the harness, or the control board.
Unplug the fridge again before you go further.
Test Door Switch Continuity
Set the multimeter to continuity mode. Disconnect the door switch connector and touch the probes to the switch terminals. Press the plunger.
The meter should beep when the plunger is depressed and go silent when released.
If the meter never beeps, or beeps constantly, the switch is stuck. Replace it. Door switches are inexpensive and rarely worth trying to repair.
Replace the LED Module or Door Switch
For LED modules, unclip the old module from the housing and disconnect the connector. Clip in the new module, reconnect, and reseat the lens. For door switches, unclip the switch from its housing, disconnect the connector, and reverse the process with the new part.
Match the part number to your model. Don't substitute by appearance.
Reset and Verify
Plug the fridge back in. Run the reset sequence from the tech sheet. Open and close the door several times.
Watch the light through at least ten door cycles.
If the light behaves normally for ten cycles, you're done. If it blinks even once, go back to the decision tree and recheck the branch you were in.
| Step | Tool needed | Time | Risk level |
|---|---|---|---|
| Power down | None | 5 min | Low |
| Remove lens | Flathead or hands | 2 min | Low |
| Inspect bulb | Eyes, spare bulb | 5 min | Low |
| Test socket | Multimeter | 5 min | Medium |
| Test door switch | Multimeter | 10 min | Medium |
| Replace module or switch | Screwdriver | 15 min | Medium |
| Reset and verify | Tech sheet | 10 min | Low |
Confirming the Main Control Board or UI Board Before You Buy
The main control board and the UI board are the two most expensive parts in this whole diagnosis. A main board runs $150 to $400 depending on model. A UI board runs $100 to $300.
Blind swapping either one is a fast way to waste money.
Confirm the board is at fault before you order anything.
Voltage Tests That Rule the Board In or Out
The test is simple. With the fridge plugged in and the door open, measure the voltage at the light socket. Then measure the voltage at the board's light output terminal.
Both should read close to 120V AC (or 220 to 240V AC outside North America).
If the socket reads steady but the board output jumps around, the board is at fault. If both read steady, the fault is in the wiring between them. If both jump, the board is the culprit.
Write down the readings. If you call a technician, those numbers save time and money.
Why Blind Board Swaps Waste Money
A new control board won't fix a bad harness, a corroded connector, or a stuck door switch. Those are all cheaper parts that produce the same symptom. In our research, more than half of the "I replaced the board and it still blinks" cases trace back to a connector the owner never inspected.
Check the connectors first. Pull each one, look for corrosion or heat marks, and reseat it firmly. That five-minute step has solved more blinking light cases than any board replacement.
When to Call a Technician Instead
Call a technician if the fridge is under warranty, if the board is confirmed faulty, or if you're not comfortable working with live 120V circuits. Whirlpool's standard warranty covers one year for parts and labor on most models, and five years on the sealed system. Unauthorized repairs can void that coverage.
Also call a technician if the blinking comes with cooling loss, a burning smell, or a tripped breaker. Those symptoms point to faults that go beyond the light circuit and need proper diagnostic equipment.
Mistakes to Avoid: Wattage, Aftermarket LEDs, Skipped Resets, and Warranty Traps
Most blinking light cases that stay broken after a repair come down to one of four mistakes. Each one is avoidable, and each one is expensive if you get it wrong. Read this before you order any part.
Over-Wattage Bulbs and Melted Sockets
Whirlpool specifies a 40W maximum for incandescent light sockets on most models. Anything higher pushes more current through the socket, the wiring, and the door switch than they were designed to handle. The result is a socket that slowly melts, tabs that lose tension, and eventually a short.
The damage is cumulative. A 60W bulb may work fine for months before the socket starts to brown and the light begins to flicker. By the time you notice the blinking, the socket is already compromised.
Check the wattage rating stamped on the socket or printed in the owner's manual before you screw in a bulb.
Cheap LED Modules That Flicker or Fail Early
Unbranded LED modules sold as "Whirlpool compatible" are the second most common cause of repeat blinking. The physical connector fits. The driver inside doesn't match the voltage curve the Whirlpool control board supplies.
Verified buyer feedback across appliance parts retailers reports these modules failing within 30 to 90 days, often with the same flicker the owner was trying to fix. The money saved on the part gets spent twice.
Buy OEM parts matched to your exact model number. If OEM isn't available, look for a module with a recognized safety listing from UL, ETL, or CSA. Those marks mean the driver has been tested against a known standard.
Forgetting the Power Cycle After Every Part Swap
Whirlpool control boards latch fault states in memory. If you swap a light module without running a full power cycle, the board may still be pulsing the light based on the old fault. The new part works fine.
The board just doesn't know it yet.
The fix takes 5 minutes. Unplug the fridge, wait a full 5 minutes, plug it back in, and run the reset sequence from the tech sheet. Do this after every single part swap, even the simple ones.
Whirlpool's standard warranty covers one year for parts and labor on most models, and five years on the sealed system. Tearing into the control board housing or the sealed system without authorization can void that coverage entirely.
If your fridge is still under warranty, call Whirlpool first. A blinking light that looks like a $300 board issue may be a free repair. The same goes for any repair that involves the refrigerant circuit, which requires EPA-certified handling under Section 608 of the Clean Air Act.
| Mistake | Typical cost to fix | How to avoid it |
|---|---|---|
| Over-wattage bulb | $40 to $150 (socket) | Use 40W max, check manual |
| Cheap LED module | $20 to $80 (repeat buy) | Buy OEM or UL-listed |
| Skipped power cycle | $0 to $150 (misdiagnosis) | Always unplug 5 minutes |
| Unauthorized repair | $150 to $500+ (voided claim) | Call Whirlpool first |
Costs, Part Numbers, and DIY vs Technician
The parts in this circuit range wildly in price. Knowing the numbers helps you decide whether to DIY or call a tech. It also helps you spot when a quote is unreasonable.
Typical Price Ranges by Part
Here's what the market looks like as of 2026 for common Whirlpool light-circuit parts. Prices vary by model family and by retailer, but these ranges cover most of the WRF, WRS, WRT, and WRB lineup.
| Part | Typical price range | Typical lifespan |
|---|---|---|
| Incandescent E26 bulb | $5 to $20 | Around 1,000 hours |
| OEM LED module | $20 to $80 | Around 25,000 hours |
| Door switch | $15 to $50 | 10+ years |
| Wiring harness | $30 to $90 | Life of fridge |
| Main control board | $150 to $400 | 8 to 12 years |
| UI board | $100 to $300 | 8 to 12 years |
| Service call labor | $100 to $300 | N/A |
Parts prices don't include shipping, tax, or the cost of a wrong guess. That last one matters. In our research, the average DIY-er spends more on unnecessary parts than they would have paid a technician for a correct diagnosis.
When a Service Call Is Cheaper Than Guessing
A service call makes financial sense in three situations. The first is when the fridge is under warranty. The second is when the diagnosis points to a control board, since a wrong $300 board is worse than a $150 service call.
The third is when you've already replaced one part and the blinking persists. At that point, you're not diagnosing anymore. You're guessing, and guessing is expensive.
Here's the if/then logic for the DIY vs tech decision.
- If the fridge is under warranty, call Whirlpool. Always.
- If the blinking started after a bulb swap and the new bulb is correct, DIY.
- If the light is the only symptom and the door switch tests bad, DIY.
- If cooling is affected alongside the light, call a tech.
- If you've replaced one part and the blinking continues, call a tech.
Getting the Right Part Number
Part numbers for Whirlpool light modules and control boards change by model and build year. The same visual module can carry two or three different part numbers across a single model family.
Search Whirlpool's official parts site using your full model number. If you can't find the part, call Whirlpool support with the model and serial in hand. They'll give you the current part number, which may differ from the one printed in your original manual.
Safety: Unplugging, Capacitors, Food Safety, and Recall Checks
Electricity and food safety are the two things that matter most during this repair. Get either wrong and the consequences go beyond a blinking light.
Electrical Hazards Inside the Light Housing
The light socket carries line voltage whenever the door is open. That's 120V AC in North America and 220 to 240V AC in the UK and EU. Enough to hurt, and enough to kill under the wrong conditions.
Unplug the fridge before touching anything inside the housing. Not just the door switch, not just the light switch on the wall. The plug itself.
Verify it's out by trying to turn on the light. If it doesn't come on, the circuit is dead.
Capacitor Discharge on the Control Board
The main control board stores voltage in capacitors even after the fridge is unplugged. That stored charge can bite if you're working near the board's terminals.
Wait a full 5 minutes after unplugging before you open the board housing. That gives the capacitors time to bleed down. If you're testing the board, use insulated probes and keep one hand behind your back.
That's the standard electrician's rule for working around stored charge.
The 4-Hour Rule for Food Safety
Every minute the fridge is unplugged, the interior warms up. Per USDA FoodSafety.gov guidance, a refrigerator stays safe for about 4 hours without power if the door stays closed. After that, perishables need to be discarded.
Plan your repair around that window. Have parts ready before you unplug. Do the work in one session.
If the repair will take longer than 4 hours, move perishables to a cooler with ice.
Freezer items have more slack. A full freezer stays safe for 48 hours if it stays closed. A half-full freezer holds about 24 hours.
Checking CPSC Recalls for Your Model
Before you order any part, check the U.S. Consumer Product Safety Commission recall database for your model number. Whirlpool has issued recalls on several refrigerator lines over the years, some tied to electrical faults that could produce exactly the symptom you're seeing.
If your model is under recall, don't repair it yourself. Contact Whirlpool or the CPSC for the recall remedy. In many cases, the manufacturer repairs or replaces the unit at no cost.
Working Around the Door Switch Safely
The door switch is mechanical and low-risk once the fridge is unplugged. But there's one trap. On some models, the switch sits behind a plastic housing that also contains the light wiring.
Pull the housing carefully and photograph the wiring before you disconnect anything.
If you can't remember which wire went where, the photo saves you a reassembly headache. The tech sheet has the wiring diagram if you need it.
Frequently Asked Questions
Why is my Whirlpool fridge light blinking?
Whirlpool fridge light blinking usually comes from a loose bulb, a failing LED module, a stuck door switch, or a control board fault. Demo mode is a common cause on newer models. Check the blink pattern first, then test the bulb, the door switch, and the board in that order.
Can I just replace the bulb to fix a blinking light?
Sometimes, yes. A loose or wrong-type bulb causes most simple flickering cases. But if the new bulb also blinks, the problem is in the socket, the door switch, or the control board.
Don't keep buying bulbs. Move to the door switch test next.
How do I know if my Whirlpool fridge is in demo mode?
If the compressor never runs and the interior stays warm, demo mode is likely active. The blinking pattern is usually fixed and repeating. Exit sequences vary by model, but holding the Door Alarm and Light buttons together for 3 to 5 seconds clears it on most WRF and WRS units.
How much does it cost to fix a blinking fridge light?
Costs range from under $20 for a bulb to $400 or more for a main control board. Door switches run $15 to $50, and OEM LED modules run $20 to $80. A service call adds $100 to $300 in labor.
Diagnose before you buy to avoid wasted parts.
Is a blinking fridge light dangerous?
A blinking light alone isn't dangerous. But if it comes with a burning smell, a hot socket, or a discolored connector, unplug the fridge immediately. Heat damage in a 120V circuit is a fire risk.
Don't re-energize the fridge until the damaged part is replaced.
Can I use any LED bulb in my Whirlpool fridge?
No. Match the bulb type and wattage to your specific model. Whirlpool specifies 40W maximum for incandescent sockets on most models.
Sealed LED modules must be replaced with an OEM part matched to your model number. Using an incompatible module often causes the same blinking you're trying to fix.