A Tesla charger blinking red isn't a random glitch. It means the charging equipment detected a fault and cut power on purpose. That's a safety feature doing its job, not a breakdown.
Before you unplug anything or flip a breaker, count the blinks, because the number is the message.
The behavior comes from the EVSE (Electric Vehicle Supply Equipment), the box that feeds power to your car. Per UL 2231 and SAE J1772, that equipment must monitor ground continuity and shut down fast when something looks wrong. Tesla splits fault reporting across three places: the Wall Connector, the Mobile Connector, and the car's charge port light.
So the first real question is always which one is blinking.
Quick Answer
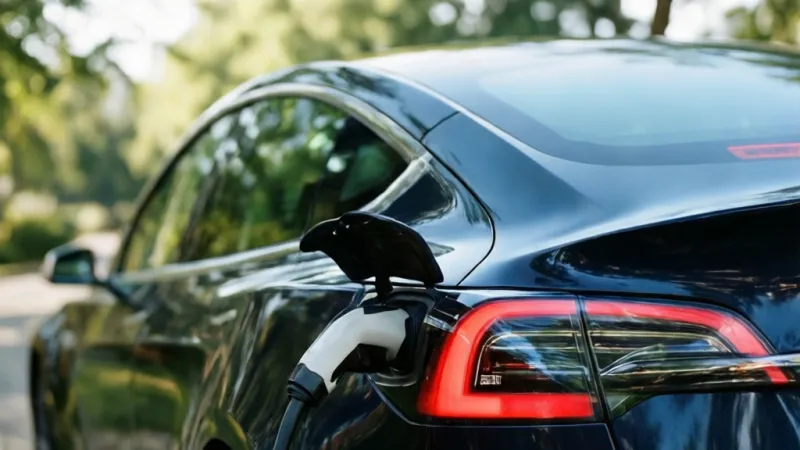
Tesla charger blinking red means the unit detected a fault and stopped charging. Count the red blinks before doing anything else. The count identifies the fault category.
Most cases trace to a ground fault, heat, or bad input voltage. If you smell burning, stop and call an electrician.
Why Your Tesla Charger Blinks Red and Why the Blink Count Is the Real Clue
Red is the only color in Tesla's charging system that means "I stopped on purpose." Blue means ready. Green means charging or finished. Amber means something is being limited.
Red means a fault was detected and the session was aborted.
Tesla had a design problem to solve. A wall-mounted charger has no screen, no keypad, and no menu. It's a sealed box in a garage.
The only way to talk to the owner is a single LED, so Tesla turned that LED into a diagnostic channel. The color tells you the category of problem. The blink count tells you the specific fault.
That's why counting matters. Two red blinks and six red blinks are not the same event, and they don't lead to the same fix. One might be moisture in the handle.
The other might be a failed internal relay. Guessing skips straight past the information the hardware is trying to give you.
Solid Red vs Blinking Red
Solid red usually means a hard stop with no further detail available at the unit. Blinking red means the unit is encoding a fault code for you. A single long red flash followed by a pause is different from a rapid burst of flashes, so watch the rhythm, not just the total.
The LED States You'll See on a Healthy Unit
| LED state | What it means | Normal? |
|---|---|---|
| Solid blue | Connected, waiting to charge | Yes |
| Pulsing blue | Charging in progress | Yes |
| Solid green | Charge complete | Yes |
| Solid amber | Charging current reduced | Sometimes |
| Solid red | Fault, session stopped | No |
| Blinking red | Fault with a code | No |
Why the Same Fault Can Look Different on Two Cars
The Wall Connector, the Mobile Connector, and the vehicle's onboard charger all participate in the same handshake. If the car's onboard charger flags a problem first, the wall unit may blink red in response. Same symptom, different root cause.
That's the single most common reason people replace a charger that was never broken.
Tesla updates charger firmware over the air on Gen 3 Wall Connectors, and fault reporting has changed across versions. As of 2026, a unit on older firmware can report a fault differently than the same hardware on current firmware. When in doubt, check the version before you diagnose.
Which Charger Are You Dealing With? Wall Connector, Mobile Connector, or the Car Itself
You have three possible sources, and they behave differently. Figure out which one is actually flashing before you touch anything. Standing in the garage staring at the wrong device wastes time and can lead you toward the wrong repair.
The Tesla Wall Connector
The Wall Connector is the hardwired box mounted on your wall, sometimes called the HPWC (High Power Wall Connector) in older documentation. Gen 2 units are the older silver-faced design. Gen 3 units are the current white-faced design with built-in Wi-Fi.
A Wall Connector fault points at the unit itself, the wiring feeding it, or the car.
The Tesla Mobile Connector
The Mobile Connector is the portable unit that lives in the trunk, sometimes called the UMC (Universal Mobile Connector). It plugs into a NEMA 14-50, 6-50, 5-15, or 5-20 outlet depending on the adapter you're using. Because it relies on a plug and a receptacle, it's far more exposed to ground faults, worn outlets, and voltage sag than a hardwired unit.
The Charge Port Light on the Car
The charge port light sits on the vehicle, not the equipment. Tesla's owner's manuals describe blue for ready, flashing green for charging, solid green for complete, amber for a reduced or incomplete connection, and red for a fault. A red charge port light with a normal-looking wall unit usually points at the car or the connector interface.
How to Tell Them Apart in Ten Seconds
| What's blinking | Device | Most likely fault domain |
|---|---|---|
| LED on the wall box | Wall Connector | Unit, home wiring, or vehicle |
| LED on the cable brick | Mobile Connector | Outlet, adapter, or ground path |
| Light on the car's port | Vehicle | Charge port, onboard charger, or connector |
| Two of them at once | Both | Start with the wall side |
Why the Distinction Changes Everything
A Mobile Connector fault on a NEMA 14-50 outlet often traces to a loose neutral, a worn receptacle, or a shared circuit. The same symptom on a hardwired Wall Connector usually traces to the unit's internal ground monitoring or a terminal that wasn't torqued correctly at install. Different tools, different people, different fix.
If you're unsure which generation you own, the label on the back of the unit or the Tesla app's charging screen will tell you. Gen 3 Wall Connectors appear in the app once you've connected them to Wi-Fi. Gen 2 units do not.
Tesla Red Blink Codes: What the Blink Count Actually Tells You
Here's the honest version. Tesla does not publish one universal blink table that covers every generation, every region, and every firmware version. What Tesla does publish, in each product's installation and owner documentation, is a fault code system tied to the number of red blinks.
That means the count is real and worth reading, but you should verify the mapping against your own unit's manual. The categories below reflect the fault types owners and installers report most often, grouped by count. Treat them as a starting point, not a substitute for your documentation.
How to Count Red Blinks Correctly
- Watch one full cycle from the moment the pattern starts.
- Note the number of flashes before the pause.
- Time the pause. A long pause separates one code from the next repeat.
- Film it on your phone if the pattern is fast.
- Repeat the observation twice to confirm the count.
Typical Fault Categories by Blink Count
| Blinks (typical) | Fault category | Where it usually lives |
|---|---|---|
| 1 to 2 | Ground fault or ground loss | Connector, charge port, or house wiring |
| 3 | Input voltage out of range | Panel, utility supply, loose terminals |
| 4 | Over-temperature | Sun exposure, coiled cable, tight conduit |
| 5 | Communication or pilot signal fault | Cable, handle pins, onboard charger |
| 6 | Relay or self-test failure | Inside the charging unit |
| 7 to 8 | Internal or firmware fault | Unit firmware or hardware |
The Fault Categories Explained in Plain Terms
A ground fault means current found a path it shouldn't have. That's the most common red blink cause by a wide margin, and it's usually moisture, a damaged cable, or a wiring problem rather than a dead charger.
Input voltage out of range means the unit saw voltage that was too high or too low to charge safely. Undervoltage often shows up on hot afternoons when the neighborhood load peaks. Overvoltage can happen on a shared transformer or after a utility switching event.
Over-temperature means the unit or connector got hotter than its threshold. The Wall Connector's operating range is roughly -22°F to 122°F (-30°C to 50°C), and direct summer sun can push a black cable well past ambient. Thermal derating kicks in first, then a fault if it keeps climbing.
Communication and pilot signal faults live in the low-voltage handshake between the unit and the car. Bent pins, debris in the connector, or a failing onboard charger can all trigger it. Relay and self-test failures are internal, and they're the ones that usually end in a replacement.
Why Blink Counts Differ Between Generations
Gen 2 Wall Connectors and Gen 3 Wall Connectors use different control boards and different firmware. Mobile Connector Gen 1 and Gen 2 units differ as well. A code that means "ground fault" on one generation can map to a different number on another, which is exactly why the manual for your specific unit matters.
If you have a Gen 3 Wall Connector, connect it to Wi-Fi. The unit can report faults to the Tesla app, and installers can pull more detail through Tesla's installer tools. That beats counting blinks in a dark garage.
What the Charge Port Light Codes Mean
The vehicle side uses a simpler language. Blue means the connector is latched and ready. Flashing green means power is flowing.
Solid green means the session finished. Amber means the connection is incomplete or current is reduced. Red means the car detected a fault and stopped.
A red charge port light with no red LED on the wall equipment is a strong hint that the problem is on the vehicle side. Try a different charger before you book service.
The 5-Minute Safety Check Before You Touch Anything
Do this before you reset, unplug, or open anything. It takes five minutes and it separates a nuisance fault from a genuine hazard.
Step 1: Stop the Session Properly
End the charge from the Tesla app or the car's touchscreen. Don't yank the connector out mid-session. The connector carries significant current, and pulling it under load stresses the pins and the port.
Step 2: Feel for Heat, Don't Grab
Touch the connector body briefly with the back of your hand. If it's uncomfortably warm, leave it alone and let it cool. A hot connector plus a red light is a stop-everything situation, not a reset situation.
Step 3: Look for the Obvious Physical Clues
- Burn marks or discoloration on the connector or charge port
- Melted plastic or a scorched smell
- Water droplets inside the connector or on the port pins
- Insect nests or debris in the port
- A visibly damaged or kinked cable
- Green corrosion on the pins
Any of those findings means stop. Don't reset and retry.
Step 4: Check the Breaker and the Outlet
If you're on a Mobile Connector, check whether the breaker tripped. Then check the receptacle for looseness, discoloration, or a burned smell. A NEMA 14-50 that's been heat-cycled for years can develop resistance at the contacts, and that shows up as voltage drop and faults.
Step 5: Note the Conditions, Not Just the Symptom
Write down what was happening when it faulted. Was it raining? Was the car at 90% and topping off?
Was the air conditioning running? Had the unit been charging for six hours straight? Patterns narrow the diagnosis faster than any single data point.
When to Skip the Checks Entirely
If you see smoke, hear arcing, smell burning, or find melted components, stop. Turn the breaker off at the panel if you can reach it safely, and call a licensed electrician. Electrical faults that produce heat are a fire risk, and no amount of resetting fixes a compromised connection.
Per NFPA guidance and NEC Article 625, EV charging equipment installation and repair falls under specific code requirements. That's a licensed-electrician scope in most jurisdictions, not a homeowner scope.
The Reset Question
Resetting clears the fault flag. It does not fix the cause. If the unit faults again immediately after a reset, you've confirmed a persistent problem.
If it runs fine for weeks, you may have had a transient event like a brief voltage sag or a splash of water.
One reset is reasonable diagnostics. Three resets in an afternoon is you ignoring the hardware.
Branch 1: Red Blinks on the Tesla Wall Connector
This is the hardwired unit on your wall. Work through the branches below in order. Each one starts with a condition and tells you what to do next.
If the Blinks Started Right After Rain or a Car Wash
Moisture is the most common trigger for a ground fault on a Wall Connector. Water in the connector handle or on the charge port pins creates a leakage path the unit detects instantly.
Unplug the connector from the car. Shake it out and let it dry in a warm, dry space for a few hours. Check the charge port on the car for standing water.
Then try again. If it faults a second time in dry conditions, the issue isn't moisture and you move to the next branch.
If the Wall Connector Body Is Warm or Hot
Over-temperature faults mean the unit is shedding heat it can't get rid of. Common causes include direct afternoon sun on the enclosure, a cable coiled tightly around the unit, or an undersized circuit that's been running near its limit.
Shade the unit if you can. Uncoil the cable fully during charging. If the unit still faults on a mild day at moderate current, the wiring feeding it may be undersized or the terminals may be loose.
That's an electrician call.
If the Breaker Trips Along With the Red Light
A tripping breaker plus a red LED is a different animal. That combination points at an overcurrent condition or a ground fault large enough to trip the breaker's own protection.
Do not keep resetting the breaker. Each reset sends current through a fault path that may be heating up. Leave the breaker off and get an electrician to megger the circuit and inspect the terminations.
If It Faults at the Same Time Every Day
Timing patterns are gold. A fault that lands every afternoon at 4 p.m. often tracks with grid voltage sag when neighborhood demand peaks. A fault at 2 a.m. might line up with a utility capacitor switch or a scheduled appliance.
Check the Tesla app's charging history for the voltage the car recorded during those sessions. Consistent readings below 200V on a 240V circuit point at a supply problem rather than a charger problem.
If the Unit Faults and Then Charges Fine on Retry
Intermittent faults are usually environmental or marginal. A connector that's slightly worn, a terminal that's slightly loose, or a ground path that's slightly high-resistance can all pass most of the time and fail occasionally.
Log every occurrence with the date, time, weather, and state of charge. Three or more events in a month is a pattern worth acting on. One event in six months is background noise.
If You Have a Gen 3 Unit With Wi-Fi
Gen 3 Wall Connectors can report fault detail through the Tesla app and through installer tooling. Connect the unit to your home Wi-Fi if you haven't already, then check the app before you start counting blinks. It's faster and more precise.
Gen 3 units also support power sharing across multiple Wall Connectors on one circuit. A misconfigured power sharing setup can produce faults that look like hardware failures. If you have two units on one feeder, verify the configuration before replacing anything.
If the Fault Persists After a Power Cycle
Cut power to the Wall Connector at the breaker for a full minute, then restore it. This forces a clean self-test on the internal relay and GFCI circuitry.
A unit that fails its self-test after a clean power cycle has an internal problem. At that point, your options are warranty service through Tesla's charging support pages or replacement. Don't open the enclosure.
The capacitors and the line voltage inside are not homeowner territory, and opening it can void your warranty.
If the Car Charges Fine on a Different Charger
That test isolates the problem to the Wall Connector or its supply circuit. Plug into a public Level 2 station or a friend's charger and confirm the car accepts a full session. If it does, the vehicle is fine and the fault lives on your wall.
Wall Connector Fault Decision Table
| Condition | Likely cause | Next action |
|---|---|---|
| Faults only when wet | Moisture in connector or port | Dry it out, retest |
| Faults in direct sun | Over-temperature | Shade it, uncoil cable |
| Breaker trips too | Overcurrent or hard ground fault | Stop, call electrician |
| Faults at peak hours | Undervoltage | Log voltage, contact utility |
| Faults randomly | Marginal connection | Log events, inspect terminations |
| Fails after power cycle | Internal hardware fault | Warranty or replace |
| Car charges elsewhere | Wall Connector or circuit | Electrician diagnosis |
What the Installer Should Check
If you end up calling someone, hand them this list. It saves a return trip.
- Terminal torque on the line and ground connections
- Wire gauge against the breaker size
- Ground continuity back to the panel
- Voltage under load, not just at rest
- Torque on the charge connector pins
- Firmware version and any pending updates
- Whether the circuit is shared with other heavy loads
Torque specs matter more than people think. Tesla's documentation calls for specific torque values on the terminal block, and a connection that's finger-tight will heat up under a 48A load. Loose terminations are one of the most common root causes behind repeat faults that owners blame on the charger.
Branch 2: Red Blinks on the Tesla Mobile Connector
The Mobile Connector lives in your trunk and plugs into a wall outlet, which is exactly why it faults more often than a hardwired unit. Every connection between the utility and your car passes through a plug, a receptacle, and an adapter. Each of those is a wear point.
The Gen 2 Mobile Connector tops out at 32A on a NEMA 14-50, which works out to about 7.7 kW and roughly 30 miles of range per hour on a Model 3. That's a lot of current through a residential plug. Small resistance at any contact turns into heat, and heat is what the unit is watching for.
If the Outlet Is a Standard 120V Household Receptacle
A NEMA 5-15 or 5-20 outlet on a shared household circuit is the most fragile setup you can charge from. These receptacles were never designed to carry a continuous 12A load for eight hours straight.
If the fault appears after a few hours, check whether the outlet face is warm or discolored. A worn 5-15 receptacle with loose contacts is a genuine fire risk, and it's one of the few failure modes where the charger is protecting you from your house.
Move to a dedicated circuit or a 240V outlet if you can. If you can't, inspect the receptacle for heat damage and replace it with a commercial-grade unit rather than a builder-grade one.
If the Adapter Plug Is Hot to the Touch
The Gen 2 Mobile Connector's adapter contains a temperature sensor, and the unit will derate or fault when that sensor reads high. That's a deliberate design choice, not a malfunction.
Pull the adapter out and inspect the prongs. Discoloration, pitting, or a burnt smell means the adapter has been heat-cycling and needs replacing. Check the outlet too, because a bad receptacle will cook a healthy adapter.
Never sand or file the prongs to make them fit tighter. That removes plating and accelerates the problem.
If the Fault Only Happens at One Specific Outlet
That's your answer. The unit is fine and the outlet is not. Test the same Mobile Connector at a different 240V receptacle and see if the fault follows the outlet or the cable.
If the fault stays with the outlet, stop using that receptacle. Have an electrician check the terminations behind it, the breaker size, and the wire gauge feeding it.
If the Fault Follows the Cable
A fault that travels with the Mobile Connector points at the unit, the cable, or the connector handle. Look for kinks, cracked insulation, or a handle that's been dropped one too many times.
Bent or corroded pins inside the connector are a common culprit. Compare the pins against a known-good connector and look for any that sit at a different depth or angle.
Tesla's warranty on the Mobile Connector runs one year, which is shorter than the Wall Connector's four. If yours is inside that window and the fault follows the cable, open a service request before you spend money.
If the Fault Started After You Used an Extension Cord
Stop. Extension cords are not rated for continuous EV charging loads, and the voltage drop across a long cord is exactly the condition that triggers undervoltage faults.
Even a heavy 10-gauge cord adds resistance and heat at both plug ends. If you need more reach, the correct fix is a longer charging cable or a new outlet location, not an extension cord.
If the Fault Happens on a GFCI-Protected Outlet
Nuisance tripping on GFCI circuits is a known friction point with EV charging. The charger's own CCID monitoring and the outlet's GFCI can both react to the same small leakage current, and the outlet wins the race.
NEC 625.54 requires GFCI protection on receptacles installed specifically for EV charging in most jurisdictions. That's a code requirement, not an optional extra, so don't remove the GFCI to make the fault go away.
If a hardwired installation is possible, it sidesteps the double-protection issue entirely. Many owners who charge daily move to a hardwired Wall Connector for exactly this reason.
Mobile Connector Fault Decision Table
| Condition | Likely cause | Next action |
|---|---|---|
| Faults after hours on 120V | Overloaded household circuit | Move to dedicated 240V circuit |
| Adapter hot or discolored | Worn outlet or adapter | Replace adapter, inspect outlet |
| Fault follows one outlet | Receptacle or wiring | Electrician inspection |
| Fault follows the cable | Unit or connector damage | Warranty claim or replace |
| Started after extension cord | Voltage drop | Remove cord, fix reach properly |
| Trips the GFCI outlet | Leakage current | Hardwire or accept the tradeoff |
What Not to Do With a Mobile Connector
- Don't leave it plugged into a worn outlet "just until payday."
- Don't coil the cable tightly while it's carrying current.
- Don't charge through a power strip or a surge protector.
- Don't ignore a warm plug body.
- Don't assume a new adapter fixes a bad receptacle.
Branch 3: Red or Flashing Light at the Charge Port
A red light on the car's charge port means the vehicle stopped the session, not necessarily the charging equipment. That distinction changes who you call.
The charge port light follows a fixed color language across the Model S, Model 3, Model X, Model Y, and Cybertruck. Blue means the connector is latched and the car is ready. Flashing green means power is flowing.
Solid green means the session finished normally.
Amber means the connection is incomplete or the current is reduced. Red means the vehicle detected a fault and halted charging. If you see amber, the car is often telling you the connector isn't fully seated.
If the Port Light Is Red but the Wall Unit Is Normal
The fault lives on the vehicle side. That's the onboard charger, the charge port assembly, the port latch, or the connector interface.
Try a different charging station before you book service. A public Level 2 station or a Supercharger that works normally narrows it down fast, though Superchargers use DC pins and won't test the AC path the same way.
If the car faults at every AC charger but charges fine on DC fast charging, the onboard charger is the prime suspect. That's a service-center job, not a driveway job.
If the Port Light Flashes Amber Then Goes Red
Amber first means the car saw a connection problem before it saw a fault. That sequence usually points at a connector that isn't seated, a latch that isn't engaging, or debris on the pins.
Unplug and look into the port. You're looking for dust, sand, ice, insect nests, or a bent pin. A soft brush and a dry cloth handle most of it.
Never spray anything into the port.
If the Port Is Hard to Insert or Remove
The charge port on newer Teslas is motorized, and the latch can stick. If the connector won't seat with a normal push, don't force it. Forcing it bends pins, and bent pins cause the exact fault you're trying to clear.
Most Teslas have a manual release for the charge port. The location varies by model and is documented in the owner's manual. Use it if the connector is genuinely stuck.
If the Fault Appears Only in Cold Weather
Ice in the charge port and stiff latch mechanisms cause cold-weather faults. The port heater on newer models handles some of this, but freezing rain can still defeat it.
Clear ice from the port before plugging in. A plastic scraper is safer than metal, and warm breath or a warm hand on the port door helps more than people expect.
If You See Moisture in the Port
Water in the port creates a leakage path, and the car will refuse to charge. That's the system working correctly.
Dry the port with a clean cloth and let it air out. If the car still faults after a dry port and a known-good charger, the port assembly itself may have a moisture-related fault.
Charge Port Light Meanings
| Light | Meaning | Action |
|---|---|---|
| Blue | Connected, ready | None |
| Flashing green | Charging | None |
| Solid green | Complete | None |
| Amber | Incomplete or reduced | Reseat connector |
| Red | Fault, stopped | Diagnose vehicle or connector |
| Off | No connection | Check connector seating |
When to Book Service
Book service if the car faults on multiple known-good AC chargers, if the port light shows red with a clean and dry port, or if you see physical damage to the port or pins. Those are vehicle faults, and they don't resolve with resets.
Ground Faults, Open Ground, and GFCI Trips: The Number One Cause
Ground faults cause more red blink events than every other category combined. Understanding why helps you stop chasing the wrong fix.
A ground fault means current is returning through a path it shouldn't. In a healthy circuit, all the current that leaves on the hot conductor comes back on the neutral. If even a small amount takes a shortcut to earth, the equipment detects the imbalance and cuts power.
EV charging equipment monitors this continuously through CCID (Charge Circuit Interrupting Device) circuitry. The threshold is measured in milliamps, and it's sensitive enough to catch a splash of water in a connector.
What Actually Triggers a Ground Fault
- Moisture in the connector handle or charge port
- A damaged cable with compromised insulation
- A loose or corroded ground conductor in the circuit
- An outlet with a degraded ground path
- A vehicle with an internal leakage path
- Contamination on the connector pins
What Open Ground Means and Why It's Serious
An open ground means the ground conductor isn't connected. The charger will refuse to charge because it can't verify a safe return path.
This is never a nuisance fault. An open ground removes the protection that keeps a fault from energizing the chassis of your car or the housing of your charger. If you have an open ground, stop charging until an electrician fixes it.
A plug-in outlet tester will show an open ground in seconds. That's a five-dollar tool worth owning if you charge from a receptacle.
Why GFCI Outlets and EV Chargers Argue
GFCI receptacles trip on a leakage threshold, and EV chargers have their own leakage monitoring. When both are in the path, a tiny amount of normal leakage can trip the outlet first.
This is why hardwired installations are the cleaner long-term answer for daily charging. It's also why code treats hardwired and receptacle installations differently.
How to Test the Ground Path Safely
Don't test a ground by yourself with a multimeter unless you know what you're doing around live 240V circuits. A plug-in tester on a receptacle is safe and simple. Anything involving the panel is electrician territory.
If you want data, ask the electrician to measure ground continuity back to the panel and to check voltage under load. Those two numbers explain most ground-related faults.
Ground Fault vs Open Ground vs GFCI Trip
| Condition | What it means | Who fixes it |
|---|---|---|
| Ground fault | Current leaking to earth | Varies, often moisture or cable |
| Open ground | Ground conductor disconnected | Electrician |
| GFCI trip | Outlet protection activated | Depends on the cause |
| Nuisance trip | Marginal leakage under threshold | Sometimes a hardwire fix |
Overheating, Undervoltage, and Breaker Trips: When Your Home Wiring Is the Culprit
Faults that repeat at the same time of day or under the same load are usually telling you about your electrical supply, not your charger.
The Wall Connector's operating range is roughly -22°F to 122°F (-30°C to 50°C). Inside that range the unit still derates as it heats up. If it can't shed heat fast enough, it faults.
If the Fault Shows Up on Hot Afternoons
Direct sun on a dark enclosure plus a cable coiled around the unit equals trapped heat. The unit responds by reducing current, and if that isn't enough, it stops.
Shade the unit. Uncoil the cable fully. If the enclosure is in a hot garage with poor airflow, that matters too.
If the Fault Correlates With Peak Demand Hours
Undervoltage happens when the grid sags under load. A 240V circuit that reads 205V at 6 p.m. on a July afternoon is a supply problem, not a charger problem.
The Tesla app records voltage during sessions. If you see consistent readings well under 240V during faults, you have data worth showing your utility or your electrician.
If the Breaker Trips Repeatedly
A breaker that trips more than once is not a breaker problem to solve by resetting. It's a signal that current is exceeding the circuit's rating or that a fault path exists.
Check what else is on that circuit. A 60A breaker feeding a Wall Connector on a 48A continuous setting is correctly sized. A 40A breaker feeding the same unit is not.
If the Breaker Is Warm or Buzzing
Warm is normal under load. Buzzing, humming, or a hot panel cover is not. Stop charging and get an electrician to inspect the terminations.
Loose lugs in a panel are a real fire risk, and they get worse over time. This is one of the few situations where waiting costs more than calling.
If the Terminals Were Never Torqued to Spec
Tesla's installation documentation specifies torque values for the terminal block, commonly around 50 lb-in (5.6 Nm) for Wall Connector terminations. A connection tightened by feel can loosen as it heat-cycles.
Loose terminations cause voltage drop, heat, and intermittent faults that look random. If your unit was installed years ago and never rechecked, that's a reasonable thing to have inspected.
Common Supply-Side Causes
| Symptom | Likely cause | Fix |
|---|---|---|
| Faults on hot days | Thermal derating | Shade and uncoil cable |
| Faults at peak hours | Undervoltage | Log voltage, contact utility |
| Breaker trips at high current | Undersized breaker or wire | Electrician re-evaluation |
| Warm panel or buzzing | Loose terminations | Electrician, stop charging |
| Voltage drop under load | Long run or thin wire | Rewire or reduce current |
When the Numbers Don't Add Up
If your charger is set to 48A on a 60A breaker, that's correct for continuous duty. If it's set to 48A on a 50A breaker, that's a code violation and a fire risk. Verify the setting in the Tesla app and the breaker size at the panel.
Setting the current lower is a legitimate temporary measure. It's not a fix for undersized wiring.
When the Fault Is in the Car, Not the Charger
Vehicle-side faults get misdiagnosed as charger failures constantly. The test is simple. If the car faults on multiple known-good chargers, the car is the problem.
The onboard charger converts AC from the wall into DC the battery can accept. It's a sealed component inside the vehicle, and it's the most common vehicle-side failure behind repeat AC charging faults.
The Onboard Charger
Symptoms of a failing onboard charger include charging that stops partway, faults only on AC, faults at higher current but not lower, and faults that move with the car between locations.
DC fast charging bypasses the onboard charger, so a car that Supercharges normally but won't AC charge points straight at it. That's useful diagnostic information to hand to Tesla service.
The Charge Port Assembly
The charge port includes the pins, the latch, and on newer models a motorized door and a heater. Bent pins, a stuck latch, or a failed port heater all produce red lights.
Look into the port with a light. All pins should sit at the same depth and angle. Anything visibly off is a service item.
The Pilot Signal and Handshake
Before any power flows, the charger and the car exchange low-voltage signals over the control pilot and proximity pilot lines. This handshake tells both sides how much current is available and confirms the connector is latched.
A fault in that handshake shows up as a communication error on the charger and a red light on the car. It can come from either end, which is why testing at another charger matters.
The Battery Management System
The BMS can refuse a charge if cell temperatures are out of range or if it detects an anomaly. That refusal may present as a red light with no obvious equipment fault.
Extreme cold and extreme heat both trigger this. Preconditioning the battery, either through the app or by navigating to a charger, usually resolves temperature-related refusals.
How to Isolate a Vehicle Fault in Three Steps
- Charge at a different known-good AC charger. Fault follows the car? It's the car.
- Try a lower current setting. Fault disappears at low current? Suspect the onboard charger.
- Try DC fast charging. Works fine? The AC path in the car is the problem.
Vehicle Fault Indicators
| Indicator | Points to | Next step |
|---|---|---|
| Faults on every AC charger | Onboard charger | Book service |
| Faults only at high current | Onboard charger | Book service |
| Visible pin damage | Charge port | Book service |
| Amber then red | Connector seating or port | Clean and reseat |
| Works on DC only | AC charging path | Book service |
| Temperature-related | Battery thermal state | Precondition and retry |
What Service Will Ask You
Tesla service typically wants the timestamps of the faults, the charger types involved, and whether the car charges elsewhere. Have those ready. It shortens the diagnostic process and gets you a loaner decision faster.
Resetting, Power Cycling, and Firmware Updates That Actually Clear Faults
A reset clears the fault flag. It doesn't fix the cause. That distinction matters because people reset a fault twenty times and then wonder why the charger keeps failing.
Think of it like a smoke detector. Silencing it stops the noise. It doesn't put out the fire.
A reset buys you one clean attempt to see whether the fault was transient or persistent.
How to Power Cycle a Tesla Wall Connector
Turn the breaker off at the panel. Wait a full minute, not five seconds. Then turn it back on and watch the LED through its startup sequence.
The unit runs a self-test on its internal relay and GFCI circuitry at startup. If it faults during that test, you've confirmed an internal hardware problem. If it passes and charges normally, you likely had a transient event.
Do this once. Twice if you're genuinely unsure. Three times in an afternoon means you're avoiding the real diagnosis.
How to Reset a Tesla Mobile Connector
Unplug the Mobile Connector from the wall outlet. Wait about 30 seconds. Plug it back in and watch the LED on the control box.
The Mobile Connector has no user-serviceable reset button. The unplug and replug cycle is the reset. If the fault returns immediately on a known-good outlet, the unit or the adapter is the problem.
Try a different adapter if you have one. The adapter is the cheapest component in the chain and the easiest to swap.
How to Reset the Vehicle Side
A touchscreen reboot clears many vehicle-side charging faults. Press and hold both scroll wheels on the steering wheel until the screen goes black, then release. The car takes about a minute to come back.
For charge port issues, you can also try opening and closing the charge port door from the app. That cycles the latch mechanism and clears minor seating faults.
If the car faults again right after a reboot, the issue is real. Reboots don't fix hardware.
What Firmware Updates Change
Gen 3 Wall Connectors receive firmware over the air once they're connected to Wi-Fi. Tesla has shipped updates that changed fault reporting, improved ground fault tolerance, and fixed charging behavior under specific conditions.
Gen 2 Wall Connectors do not have Wi-Fi and do not receive over-the-air updates. What's on the unit is what you have. That's a meaningful difference when you're comparing generations.
Vehicle firmware matters too. Tesla periodically updates onboard charger behavior and charge port logic. If your car is behind on updates, connect it to Wi-Fi and let it install.
When a Reset Is the Wrong Move
Never reset if you've seen any of these.
- Smoke, arcing sounds, or a burning smell
- Melted or discolored plastic on the connector or outlet
- Water visibly inside the connector or charge port
- A breaker that trips immediately on reset
- A panel that's warm or buzzing
Those are stop-and-call situations. A reset in any of those conditions sends current through a compromised path.
Reset Types and What They Clear
| Reset method | What it clears | What it doesn't fix |
|---|---|---|
| Breaker power cycle | Fault flag, stuck state | Wiring, moisture, hardware faults |
| Unplug Mobile Connector | Fault flag, adapter state | Bad outlet, bad adapter |
| Touchscreen reboot | Vehicle-side glitches | Onboard charger failure |
| Charge port door cycle | Latch and seating faults | Bent pins, port damage |
| Firmware update | Known software bugs | Anything physical |
How Often Should You Update Firmware
Connect your Gen 3 Wall Connector to Wi-Fi and leave it connected. Updates install automatically, usually overnight. There's no manual update path for most owners.
For the car, install updates when prompted. Skipping several versions can leave you on firmware with known charging bugs that have already been fixed.
Mistakes That Turn a Small Fault Into a Real Problem
Most red blink stories that end badly share the same mistakes. Avoid these and you'll keep a nuisance fault from becoming an expensive repair.
Resetting Until It Sticks
This is the single most common mistake. A fault that keeps returning is telling you something. Resetting until it happens to charge once doesn't fix anything.
It just delays the diagnosis and increases the chance of damage.
Ignoring Heat
A warm connector is normal under load. A hot connector is not. If the handle or the plug body is uncomfortable to hold, stop.
Heat at a connection means resistance, and resistance means the connection is degrading.
Owners who ignore heat often end up replacing the connector, the outlet, or both. The cost climbs every time they charge through it.
Using an Extension Cord
There's no safe extension cord for daily EV charging. Even a heavy 10-gauge cord adds resistance and creates two more heat points. The voltage drop also triggers undervoltage faults.
If you can't reach your outlet, the correct fix is a longer charging cable or a new outlet location. Not a cord from the hardware store.
Replacing the Charger Before Isolating the Fault
A new Wall Connector costs around $450 before installation. Replacing one that was never broken is an expensive way to learn nothing.
Test the car on a different charger first. Test the charger on a different car if you can. Ten minutes of isolation saves hundreds of dollars.
Doing Panel Work Yourself
Opening a residential electrical panel to check terminations, swap a breaker, or add a circuit is licensed work in most jurisdictions. It's also genuinely dangerous. A 240V circuit at 48A carries enough energy to kill.
NEC Article 625 sets specific requirements for EV supply equipment. Meeting those requirements is a professional's job, and an unpermitted install can void insurance coverage.
Cleaning Pins With the Wrong Tools
Never use metal tools, abrasive pads, or contact cleaner on charging pins. The plating on those pins is thin and doing real work. Scratches create corrosion sites that cause future faults.
A soft dry cloth and a soft brush handle almost everything. If the pins are visibly damaged, the connector needs replacement, not cleaning.
Turning Up the Current to Compensate
Some owners raise the current setting when charging feels slow. That's backwards. If a charger is faulting, higher current makes every underlying problem worse.
Lower the current if you need to keep charging while you diagnose. Never raise it.
Assuming the Fault Is Always the Charger
Vehicle-side faults account for a large share of red blink cases. If the car faults on three different known-good chargers, the charger isn't the problem.
Owners who replace a working Wall Connector because of an onboard charger fault are the clearest example of this mistake.
Mistakes and Their Real Costs
| Mistake | Immediate risk | Long-term cost |
|---|---|---|
| Repeated resets | Fire risk from fault path | Damaged charger or wiring |
| Ignoring heat | Melted connector | New connector and outlet |
| Extension cord use | Overheating, voltage drop | Damaged equipment |
| Blind replacement | None, just wasted money | $450 plus install |
| DIY panel work | Shock, fire, code violation | Insurance and permit issues |
| Wrong cleaning tools | Pin damage | New connector or cable |
| Raising current | Overload | Breaker trips, heat damage |
| Blaming the charger | Missed vehicle fault | Repeat failures |
Safety, Code, and Warranty: What You Must Never Do
Charging equipment sits at the intersection of high current and residential wiring. That's not a place for improvisation. Here's where the lines are.
The Standards That Govern EV Charging Equipment
EV supply equipment in North America is designed and tested against UL 2594 for the equipment itself and UL 2231 for the protective systems inside it. The connector interface follows SAE J1772, which defines the control pilot and proximity pilot signals your car and charger use to negotiate.
Installation falls under NEC Article 625. That article covers conductor sizing, overcurrent protection, disconnects, and GFCI requirements for EV charging circuits. It's the reason a 48A continuous load needs a 60A circuit and specific wire gauge.
Europe and the UK operate under IEC 61851 and regional wiring regulations, which is why European Wall Connectors use Type 2 connectors and different voltage configurations. The physics is the same. The paperwork isn't.
GFCI Rules You Can't Remove Your Way Around
NEC 625.54 requires GFCI protection for receptacles installed for EV charging in most jurisdictions. If your Mobile Connector keeps tripping a GFCI outlet, removing the GFCI is not a fix. It's a code violation and a safety downgrade.
The correct answers are to diagnose the leakage source, move to a hardwired installation, or accept that some nuisance tripping is inherent to double protection. Hardwiring removes the outlet from the equation entirely.
What Voids Your Tesla Warranty
Tesla's charging equipment warranty covers manufacturing defects. It does not cover damage from improper installation, modified equipment, or unauthorized repair.
- Opening the Wall Connector enclosure
- Cutting or splicing the charging cable
- Modifying the connector or adapter
- Installing on an undersized circuit
- Using unapproved adapters
- Removing or bypassing safety components
The Wall Connector warranty runs four years. The Mobile Connector warranty runs one year. Both are shorter than most people assume, so document your fault history early.
What You Should Never Do, Period
- Never open the charger enclosure. Line voltage and charged capacitors live inside.
- Never bypass a breaker that keeps tripping.
- Never remove a GFCI to stop nuisance trips.
- Never charge through a damaged cable, even temporarily.
- Never use a charger with visible burn marks.
- Never ignore a burning smell or arcing sound.
- Never work on a live 240V circuit.
- Never assume a permit isn't required.
What to Do Instead
Document the fault with photos and timestamps. Log the conditions. Then hand that information to a licensed electrician or open a Tesla service request.
If the fault involves heat, moisture, or damaged components, stop charging entirely until it's inspected. Charging on a compromised circuit is how garages catch fire.
Who to Contact for What
| Situation | Contact | Why |
|---|---|---|
| Suspected unit defect in warranty | Tesla | Warranty replacement |
| Wiring, panel, or outlet issue | Licensed electrician | Code and safety |
| Repeated utility voltage sag | Your utility | Supply-side problem |
| Vehicle-side fault | Tesla service | Onboard hardware |
| Code question or permit | Local AHJ | Jurisdiction rules |
Call Tesla or Call an Electrician? A Simple Decision Guide
The right call depends on where the fault lives. Work down this list and stop at the first match.
If the Car Faults on Multiple Known-Good Chargers
Call Tesla. The fault is in the vehicle, most likely the onboard charger or the charge port assembly. An electrician can't help with a car.
If the Wall Connector Fails Its Self-Test After a Power Cycle
Call Tesla first. An internal self-test failure is a hardware fault inside the unit, and that's a warranty matter. If the unit is out of warranty, you're choosing between a replacement and a paid diagnosis.
If the Breaker Trips, the Panel Is Warm, or You Smell Burning
Call an electrician immediately. Stop charging first. This is a home wiring problem, and it's the category with real fire risk.
If You Have an Open Ground or Reverse Polarity
Call an electrician. Both conditions mean the circuit isn't safe, and both are code violations. A plug-in tester confirms the diagnosis in seconds.
If the Fault Only Happens on One Outlet
Call an electrician. The Mobile Connector is fine. The receptacle, its terminations, or the circuit feeding it needs inspection.
If the Fault Started After Rain or a Car Wash
Handle this yourself first. Dry the connector and the charge port, then retry. If it clears and stays clear, you're done.
If it faults again in dry conditions, move to the next branch.
If the Fault Is Intermittent With No Pattern
Start with documentation. Log every event with date, time, weather, state of charge, and current setting. If you get three or more events in a month, call an electrician for a circuit inspection and open a Tesla service request for the unit.
If You're Not Sure Which Side Is Faulting
Test the car on a public Level 2 charger. It's a free test that splits the problem cleanly in half. Fault follows the car, it's Tesla.
Fault stays home, it's the wall or the wiring.
If You Have a Gen 3 Unit and Wi-Fi
Check the Tesla app before you call anyone. The app often reports more detail than the LED can. It also shows your charging history with voltage and current data, which is exactly what a technician wants.
Decision Guide
| Condition | Call | Urgency |
|---|---|---|
| Faults on all AC chargers | Tesla | Soon |
| Fails self-test after power cycle | Tesla | Soon |
| Breaker trips, heat, or burning smell | Electrician | Immediate |
| Open ground or reverse polarity | Electrician | Immediate |
| Faults on one outlet only | Electrician | Soon |
| Fault clears after drying | Nobody, monitor | Low |
| Intermittent, no pattern | Log, then both | Medium |
| Unknown side | Test at public charger | Low |
What to Have Ready When You Call
Have the charger model and generation, the blink count, the date and time of the fault, the current setting, and whether the car charges elsewhere. For an electrician, have the breaker size, wire gauge if you know it, and the outlet type.
That information turns a diagnostic visit into a repair visit. It saves you a service call fee and a return trip.
Frequently Asked Questions
What does it mean when my Tesla charger blinks red?
It means the charging equipment detected a fault and stopped the session on purpose. Red is the fault state across the Wall Connector, Mobile Connector, and vehicle charge port. The blink count or the location of the light narrows down the cause, so count the flashes before doing anything else.
How many red blinks indicate a ground fault?
One or two blinks typically point at a ground fault or a lost ground path. Ground faults are the most common red blink cause overall. Moisture, a damaged cable, or a loose ground conductor are the usual culprits.
Confirm the mapping against your specific unit's manual, since generations differ.
Can I reset my Tesla charger myself?
Yes, for a single clean attempt. Power cycle the Wall Connector at the breaker for a full minute, or unplug and replug the Mobile Connector for 30 seconds. If the fault returns immediately, stop resetting and diagnose the cause.
Repeated resets on a real fault increase the risk of damage.
Is it safe to keep using a Tesla charger that blinks red?
No, not until you know why. Stop charging if you see heat, moisture, burn marks, a burning smell, or a breaker that trips. Those conditions mean a compromised connection.
If the fault was a one-time event after rain and the unit now charges normally, you're likely fine to continue.
Why does my Tesla charger blink red only at night?
Nighttime faults often trace to cooler temperatures causing condensation, or to voltage changes when neighborhood load drops. They can also line up with scheduled appliances or off-peak utility switching. Log the exact times and check the voltage the car recorded during those sessions in the Tesla app.
How much does it cost to fix a Tesla charger blinking red?
It depends entirely on the cause. Drying a wet connector costs nothing. A replacement Mobile Connector adapter runs around $50 to $100.
A new Wall Connector is roughly $450 before install, with electrician labor typically $500 to $2,000 depending on the run and panel capacity. Vehicle-side repairs go through Tesla service.