A blinking red light on a Genie garage door sensor usually means the safety beam isn't reaching the receiving unit. That's the short version. The full picture depends on which sensor is blinking, what the other unit is doing, and whether anything in your garage changed recently.
Genie's Safe-T-Beam system pairs an infrared emitter with a receiver, mounted between 5 and 6 inches above the floor. UL 325, the safety standard for automatic door operators, requires the door to reverse within 2 seconds of contacting a 2-inch obstruction. So when that red LED blinks, the opener is telling you its entrapment protection circuit is open.
It will not close the door on its own. Here's how to read the signal and fix it.
Genie Garage Door Sensor Blinking Red
Quick Answer
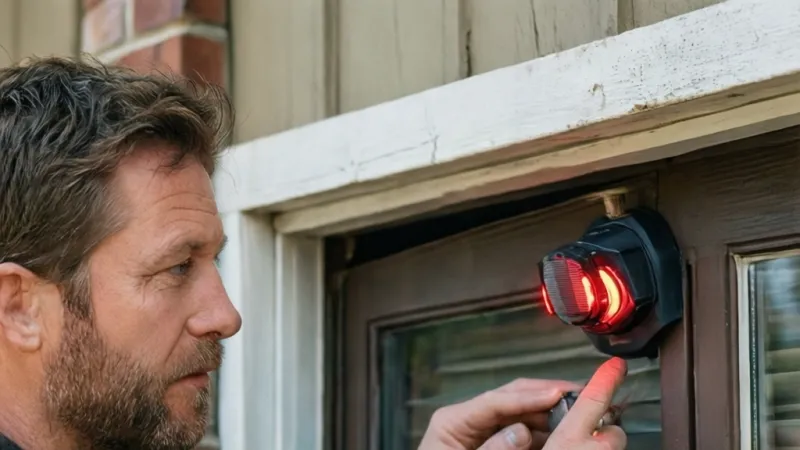
A Genie sensor blinking red means the receiver lost the infrared beam.
Misalignment, dirt, and obstructions cause most cases.
Clean both lenses, then realign until the red LED goes solid.
A solid red LED means the beam is good.
If it keeps blinking, test the wiring and the sensor.
Why Your Genie Garage Door Sensor Blinks Red
The LED on a Safe-T-Beam sensor is a status light, not an error light. It's reporting whether the receiver can currently see the infrared beam from the emitter across the door opening. Blinking means no.
Solid means yes.
On most Genie Safe-T-Beam generations, the two units split the work by color. The sending unit shows a green LED when it has power and is transmitting. The receiving unit shows a red LED.
Solid red means the beam arrived and the safety circuit is closed. Blinking red means the beam is interrupted, misaligned, or weak.
That single distinction is the whole diagnosis in about 80% of cases. If you've seen a red LED blinking steadily at roughly one flash per second, that's the standard Genie "beam not received" indication. A slow blink and a fast blink can carry different meanings on some models.
Pull your opener's manual before you assume.
Here's the plain-English version:
- The emitter fires an invisible infrared beam across the opening, at roughly the height of a license plate.
- The receiver watches for that beam and holds a relay closed while it sees it.
- Break the beam and the relay opens. The opener's control board reads an open safety circuit.
- The opener refuses to close, or reverses immediately if the door is already coming down.
One thing worth flagging early: this is not the same LED language used by Chamberlain or LiftMaster. Those brands typically use amber and green, and a blinking amber means something different. If you're troubleshooting a Genie, ignore any advice built around Chamberlain's LED codes.
You'll chase the wrong fault.
What the LED states actually tell you
| LED you see | Which unit | What it means |
|---|---|---|
| Solid green | Sending | Powered and transmitting normally |
| No light at all | Sending | No power, broken wire, or failed unit |
| Blinking red | Receiving | Beam interrupted, blocked, or misaligned |
| Solid red | Receiving | Beam received, circuit closed, door can close |
| Blinking red on both | Either | Usually a power or wiring fault, not alignment |
Colors do vary by generation and by opener model. On a few Genie systems both units use the same LED color, and you have to rely on the labels. When in doubt, the label stamped on the housing beats a guess based on color.
The symptom that almost always comes with it
If your remote won't close the door but holding the wall button down does, you've got a safety circuit fault. That's textbook. The wall console's constant-pressure mode is designed to let you close the door under supervision when the safety circuit is open.
That's why it works when nothing else does.
That's also why "just hold the button" is not a fix. It's a workaround, and it defeats the protection UL 325 exists to require. More on that in the safety section.
Why this isn't a force or travel-limit problem
Plenty of people see a blinking red light and start turning up the force adjustment. That won't help. Force settings govern how hard the opener pushes.
The safety beam sits on a separate circuit entirely.
Cranking up force on a door with a live sensor fault can actually make things worse. It can mask a mechanical problem, stress the door hardware, and leave you with an opener that still won't close automatically. Fix the beam first.
Adjust force only after the LED is solid and the door still won't complete a cycle.
How the Genie Safe-T-Beam System Works and Why the LED Turns Red
Safe-T-Beam is Genie's name for its photoelectric safety system. It's been a standard feature on residential Genie openers for decades. The concept is simple.
Two small units face each other across the door opening. One beams infrared light, the other listens for it.
When the beam is intact, the receiving unit holds an internal relay closed. That relay is wired back to the opener's control board on the low-voltage safety terminals. The control board treats a closed circuit as all clear.
It treats an open circuit as someone or something in the doorway.
That logic is what makes the system fail safe. Cut the wire, unplug a sensor, or let dirt block the lens, and the circuit opens. The opener defaults to the safe behavior, which is refusing to close.
Annoying on a Tuesday morning. Exactly right when a kid's bike is parked under the door.
What UL 325 actually requires
UL 325 covers automatic garage door operators. It has required a non-contact entrapment protection device on residential openers since 1993. The non-contact part matters.
A mechanical edge only reacts after contact. A photoelectric beam reacts before contact.
Under the current standard, the door must reverse within 2 seconds of contacting a 2-inch rigid object laid flat on the floor. That's the classic 2×4 test. It's also why sensor height is specified rather than left to taste.
Genie's installation guidance calls for the beam to sit between 5 and 6 inches above the floor, well inside the range where the test board would sit.
Genie's own documentation confirms these figures and lists model-specific LED behavior. The Genie Company is the place to start if your manual has gone missing. The [U.S.
Consumer Product Safety Commission](https://www.cpsc.gov) also maintains garage door safety guidance worth reading if you've inherited an older opener with unknown history.
The physical specs worth knowing
- Beam range: rated up to about 20 feet, which covers standard single and double residential doors.
- Wiring: low-voltage Class 2, typically 18 to 22 AWG bell wire.
- Sensor height: 5 to 6 inches above the floor, per Genie installation instructions.
- Alignment tolerance: small. A few degrees off and the receiver loses the beam.
- Lens: a clear plastic window that collects dust, pollen, and spiderwebs.
Why the red LED blinks instead of just going dark
Designers chose a blinking LED on purpose. A dead LED and a healthy-but-blocked LED would look identical otherwise. Blinking tells you the unit is alive and powered.
The problem is upstream in the optical path.
Some Genie openers also flash diagnostic codes through the opener's light or a status LED on the head unit. The number of flashes maps to a specific fault in the manual. That's a secondary signal.
The sensor LED itself is faster and more direct, which is why we always start there.
What changed on newer Genie models
Newer Genie openers, including current StealthDrive and SilentMax lines, use updated control boards with different LED conventions than the openers sold in the 1990s and 2000s. The core physics didn't change. The diagnostic language did.
So don't assume a 2003 ChainMax and a 2024 StealthDrive report faults the same way. As of 2026, Genie's own support documentation is organized by model family for exactly this reason. Look up your model number, which lives on a label on the opener head or the back of the wall console.
The control board's role
The control board is the referee. It polls the safety circuit constantly and gates the close cycle on it. If the board itself fails, you can get symptoms that look like a sensor fault.
That includes a blinking LED that never goes solid no matter how perfectly you align things.
That's why isolation testing matters. A sensor problem and a board problem can produce identical symptoms from the outside. The difference shows up when you test the units individually.
Identify Which Sensor Is Blinking: Sending vs. Receiving
Before you touch anything, figure out which unit is complaining. You'd be surprised how many people realign the wrong side, or both, when only one is at fault.
The sending unit is the emitter. It produces the infrared beam and shows a green LED on most Genie generations. The receiving unit is the detector.
It shows a red LED and is the unit that blinks when the beam is lost.
Both units are usually labeled. Look for Sending and Receiving molded into the plastic housing or printed on the mounting bracket. Genie's replacement kits ship as matched pairs.
If you're installing new ones, keep the labels straight.
Three ways to tell them apart
- Read the label. Fastest method, and it beats every guess based on color.
- Check the LED. Green on one side, red on the other, on most Genie systems.
- Use your phone camera. Point a front-facing camera at each lens. A working infrared emitter shows up as a faint purple-white glow on most phone front cameras. Rear cameras usually filter IR out.
If the phone test shows the emitter glowing and the receiver's red LED still blinks, the beam is being lost somewhere between the two. That points to alignment, obstruction, or the receiver itself.
Sending unit blinking or dark
If the sending unit shows no light, you're not looking at an alignment problem. You're looking at power. The emitter needs voltage to work.
No light means it isn't getting any.
Check the wiring at the opener head first, then at the sensor. Look for a wire that's slipped off its terminal, a corroded connection, or damage along the run. Rodents chew this wire more often than you'd think, especially in garages that back onto open ground.
Receiving unit blinking red
This is the most common fault by far. It almost always comes down to one of four causes: dirt on the lens, an obstruction in the beam path, misalignment, or direct sunlight washing out the receiver.
Work them in that order. Cleaning takes ten seconds. Clearing a trash can takes five.
Alignment takes a screwdriver and a couple of minutes. Sunlight sometimes needs a hood or a repositioned bracket.
Both units blinking
Two blinking LEDs is rarely an alignment issue. Alignment failures are usually one-sided. When both units misbehave at once, think shared cause.
Power quality, a loose common wire, a failing control board, or a voltage drop from a damaged run.
Start at the opener head. Confirm the safety terminals are tight. Then work outward toward each sensor.
What each unit is telling you
| Condition | Likely culprit | First move |
|---|---|---|
| Sending unit dark | Power or wiring | Check terminals at the opener head |
| Sending unit lit, receiver blinking | Beam path | Clean lenses, then realign |
| Sending unit lit, receiver blinking in bright sun | Sun interference | Shade the receiver lens |
| Both blinking | Shared wiring or board fault | Test voltage at the safety terminals |
| Receiver solid red, door still won't close | Not a sensor fault | Check wall console and travel limits |
A quick note on pairing and compatibility
Genie Safe-T-Beam sensors aren't one universal part. Compatibility runs by opener family and generation. Replacement kits are sold with a specific part number.
The commonly cited Genie 37226R.S kit fits a defined group of models, not every Genie ever made.
Buying the wrong generation means the LED might light up but the opener still won't read the circuit correctly. Match the kit to your opener's model number, not to a photo that looks similar.
Genie Sensor Blinking Red Decision Tree: Symptom-to-Fix Path
Here's the part that saves you an afternoon. Follow the branch that matches what you're actually seeing. Don't skip ahead.
Nine times out of ten, the answer shows up in the first two steps.
Start here: the 60-second triage
- Look at both sensors and note the LED state on each.
- Look between them for anything in the beam path. A broom, a recycling bin, a parked bike, snow piled at the threshold.
- Wipe both lenses with a dry microfiber cloth.
- Check the LED again.
If the red LED went solid, you're done. If it's still blinking, keep going.
Branch 1: One sensor blinking red
If only the receiving unit blinks and the sending unit shows a steady green, your problem lives in the beam path itself.
- Clear the opening completely. Get everything out from between the lenses.
- Clean both lenses with a dry microfiber cloth. Skip paper towels, which can scratch the plastic.
- Check for cobwebs. Spiders love sensor housings, and a single strand across the lens can break the beam.
- Realign. Loosen the adjustment screw on one unit, aim it at the other, and watch the LED. When it goes solid, tighten without shifting the aim.
- Test. Press the wall button and see if the door closes normally.
If the LED goes solid and then starts blinking again after a day or two, vibration is shifting the bracket. Check for a loose mount or a door track that's shaking the wall.
Branch 2: Both sensors blinking red
If both units are blinking, alignment is unlikely to be the root cause. Shared electrical faults behave this way.
- Power cycle the opener. Unplug it or trip the breaker for 30 seconds, then restore power.
- Check both wire runs for damage. Look for chew marks, pinches under the track, and wire pulled tight around a corner.
- Confirm the wires are seated on the correct terminals at the opener head. Genie Safe-T-Beam units typically land on the same two low-voltage terminals.
- Test for voltage at the sensor end if you have a multimeter.
- If voltage is present at both sensors and both still blink, the control board is the next suspect.
Branch 3: Solid red vs. blinking red
If the receiver's LED is solid red and the door still won't close, you don't have a beam problem. Stop troubleshooting the sensors.
- Check the wall console for a stuck or faulty button.
- Check the remote's battery and reprogram it if needed.
- Look at the opener's travel limits and force settings in the manual.
- Check the door itself for binding, a broken spring, or a roller off the track.
Solid red means the safety circuit is fine. The fault is somewhere else in the closing sequence.
Branch 4: Green LED but the door still won't close
If the sending unit is green and the receiving unit is lit, but the door won't close from the remote, try the wall button. If holding the wall button closes the door, the safety circuit is being read as open somewhere downstream.
- Inspect the wire from the safety terminals to the control board for a loose connection.
- Check whether the opener's diagnostic LED is flashing a code. Your manual maps the flash counts.
- Test the safety reverse function with a 2×4 laid flat in the door's path, per UL 325 procedure.
- If the door closes on the wall button but not the remote, the remote may need reprogramming rather than repair.
Branch 5: Blinking red only in certain conditions
If the LED goes solid at night and blinks every sunny afternoon, you're looking at infrared interference. Low sun angles hit the receiver lens directly and swamp the signal.
- Note the time of day and the direction the garage faces.
- Install a sun shield or hood over the receiving unit.
- Reposition the receiver slightly deeper into the garage if the bracket allows.
- Consider swapping the units' positions if your wiring has enough slack and your model permits it.
This is common on west-facing and east-facing garage doors. It gets worse in winter when the sun sits low for longer.
Branch 6: You've done everything and it still blinks
At this point you're choosing between replacing the sensor pair and replacing the control board. Isolate before you spend.
| Test | If it passes | If it fails |
|---|---|---|
| Swap the two units (if your model allows) | Beam path issue, not the unit | Unit likely failed |
| Measure voltage at the sensor terminals | Wiring is good, sensor fault | Wiring or board fault |
| Check voltage at the board's safety terminals | Board is likely fine | Board is suspect |
| Try a known-good Safe-T-Beam pair | Old units were faulty | Board needs attention |
The rule of thumb from our research into Genie's replacement parts: sensors fail far more often than control boards. Start with the cheaper part. Swap the sensor pair first, keep the receipt, and only move to the board if a new matched set behaves exactly the same way.
Step-by-Step: Realigning and Cleaning Genie Sensors
Realigning a Genie Safe-T-Beam is a ten-minute job with one screwdriver and a dry cloth. The trick isn't the work itself. It's doing the steps in the right order so you're not chasing a clean sensor that's still pointed at the floor.
Work in this sequence. Skip nothing. Each step narrows the fault.
Step 1: Kill the power
Unplug the opener or switch off its breaker. This isn't strictly required for cleaning, but it's mandatory before you touch any wiring. A moving door during a sensor job is how fingers get hurt.
Wait ten seconds. Then restore power. The opener re-polls the safety circuit on startup, which gives you a clean starting state.
Step 2: Clear the beam path
Walk the full width of the door opening. Look at the invisible line an infrared beam would trace between the two lenses, roughly at license-plate height.
Remove anything that intersects that line:
- Trash bins, recycling crates, storage boxes
- Brooms, rakes, snow shovels leaning against the wall
- Kids' bikes, scooters, and skateboards
- Parked lawn equipment
- Piled snow at the threshold
- Hanging straps, garden hoses, or extension cords
Nine times out of ten on a first-time call, something has moved since the last time the door worked. Find it before you touch a screw.
Step 3: Clean both lenses
Use a dry microfiber cloth. Wipe the clear plastic window on each unit in small circles. Skip paper towels, since they scratch the plastic and leave lint behind.
Skip glass cleaner too, since some formulas leave a film that holds dust.
If the lens feels gritty, use a soft brush first, then the cloth. Cobwebs are the silent killer here. A single strand across a lens blocks infrared as effectively as a brick.
Step 4: Check sensor height
Genie's installation instructions call for the beam to sit between 5 and 6 inches above the floor. That range is chosen to match the UL 325 test board, which is a 2-inch high rigid object.
If your sensors are mounted higher than 6 inches, the beam may pass over a small obstacle that the standard test board would catch. If they're lower than 5 inches, snow, puddles, or debris at the threshold will break the beam constantly.
Measure from the floor to the center of each lens. Both sides should match.
Step 5: Check the mounting brackets
Grab each sensor housing and wiggle it gently. Any movement at all is a problem. Vibration from the door's travel will shift a loose sensor out of alignment within days.
Tighten the bracket screws. If the bracket itself is bent, replace it. A bent bracket is almost impossible to align reliably, and it will keep drifting.
Step 6: Realign the sensors
This is the step most guides get wrong. You don't aim the sensors by eye. You aim them by watching the LED.
- Loosen the adjustment screw on the receiving unit just enough that the housing can pivot.
- Slowly sweep the receiver left, right, up, and down by hand.
- Watch the red LED the entire time.
- When it goes solid, stop moving.
- Hold the housing in that exact position and tighten the screw.
- Check the LED again. If it went back to blinking, loosen and repeat.
If the receiver won't go solid no matter how you sweep it, the problem isn't alignment. Move to the wiring checks.
Step 7: Try the string method for stubborn cases
If sweeping by hand keeps failing, run a taut string from the center of one lens to the center of the other. The string gives you a physical reference line.
Aim each sensor so its lens face is square to the string. Then fine-tune by hand while watching the LED. This is slower, but it works when the brackets are slightly mismatched in height.
Step 8: Confirm solid LEDs on both units
Sending unit: green and steady. Receiving unit: red and steady. Any other combination means the job isn't finished.
If both are solid but the door still won't close from the remote, walk through the door-closing checks in the previous section. You've fixed the beam.
Step 9: Run the safety reverse test
Lay a 2×4 flat on the floor in the middle of the doorway. Press the wall button to close the door.
The door must contact the board and reverse within 2 seconds, per UL 325 procedure. If it doesn't, the sensors are aligned but something else is off. Recheck the beam alignment, then look at the opener's travel limits.
Lens cleaning: what works and what doesn't
| Method | Works? | Notes |
|---|---|---|
| Dry microfiber cloth | Yes | Best default choice |
| Soft brush, then cloth | Yes | For gritty or dusty lenses |
| Glass cleaner | Avoid | Leaves film that attracts dust |
| Paper towel | Avoid | Scratches plastic, leaves lint |
| Compressed air | Sometimes | Good for cobwebs, can push dirt inward |
| Water only | Avoid | Streaks, and moisture near electronics |
How often should you clean them?
Twice a year is the sensible baseline for a normal residential garage. Add extra passes if you live near construction, farmland, or heavy pollen areas.
If your garage is home to spiders, clean monthly during warm months. Spiders rebuild webs fast, and the sensor housing is a favorite anchor point.
Wiring, Power, and Connection Checks for Blinking Red Sensors
If cleaning and realignment didn't stop the blink, the problem has moved off the optical path and onto the electrical one. This is where a modest multimeter pays for itself. You can pick one up for under $25 at any hardware store.
The Safe-T-Beam circuit runs on low-voltage Class 2 power, typically 18 to 22 AWG bell wire. It's a simple two-conductor circuit from the opener head to each sensor. Simple means easy to test.
It also means easy to break.
Start at the opener head
Pop the light lens off the opener and locate the safety terminals on the back of the head unit or on the control board. Genie typically labels them as the Safe-T-Beam terminals, sometimes with a small icon.
Look at the wires seated there. What you're checking:
- Wires firmly seated under each screw or push terminal
- No stray strands touching a neighboring terminal
- No corrosion or green oxidation on the contacts
- No soft, discolored, or melted insulation
A loose wire here can produce both-blinking symptoms that look like a dead sensor. Tighten, tug-test gently, and re-check the LEDs.
Follow the wire run
Walk the entire path from the opener head down to each sensor. Look for these specific failure points:
- Pinches where the wire passes through wall studs or the door track.
- Staples driven too deep, cutting into the insulation.
- Chew marks from mice, rats, or squirrels. This is more common than people expect, especially in garages backing onto open ground.
- UV damage on any outdoor run. Bell wire left exposed to sun for years gets brittle.
- Splices with wire nuts that have loosened or corroded.
If you find damage, cut the section out and re-splice with fresh wire nuts and electrical tape. Prefer a single continuous run over multiple splices. Fewer connections means fewer failure points.
Test for voltage at the sensor
Set your multimeter to DC voltage in the 20V range. Back-probe the two wires entering the sensor while the opener has power.
Genie Safe-T-Beam sensors typically run on low DC voltage. The exact figure varies by model, so check your opener's manual for the spec. If you see zero volts, the sensor isn't getting power.
If you see the expected voltage but the LED is dark, the sensor has failed.
If you see voltage that's noticeably low, you've got a resistance problem somewhere in the run. A partial break, a corroded splice, or a wire pinched against metal will drop the voltage enough to starve the sensor.
Test continuity on the wire run
With power off and both ends disconnected, set the meter to continuity mode. Touch one probe to each conductor at the opener end and the matching probe to the sensor end.
You want a clean tone or a reading near zero ohms on each conductor. Anything higher, or intermittent, means resistance in the line. Wiggle the wire while testing.
A broken conductor inside intact insulation will only show up when you flex the cable.
Check the wall console
The wall console shares low-voltage wiring with the safety circuit on many Genie openers. A shorted console can drag the whole circuit down and produce symptoms that look like a sensor fault.
Disconnect the wall console wires at the opener head and see if the sensor LEDs stabilize. If they do, the console or its wiring is the problem. Replace or re-run as needed.
Consider the opener's power source
Garages share circuits with freezers, power tools, and increasingly, EV chargers. Voltage sag from a heavy load on the same circuit can cause intermittent sensor faults. As of 2026, more homes are running level 2 EV charging in the garage, and that load is significant.
Try running the opener when nothing else on that circuit is drawing power. If the blinking red stops, you've found a supply issue, not a sensor issue. An electrician may need to check the circuit.
What the symptoms map to
| Symptom | Likely cause | Test |
|---|---|---|
| No voltage at sensor | Break in the wire run | Continuity test |
| Correct voltage, dark LED | Failed sensor | Swap with known-good unit |
| Low voltage at sensor | Corrosion, pinch, or splice fault | Inspect run, re-splice |
| Both LEDs blink after power cycle | Board or shared power issue | Check voltage at board terminals |
| Sensor LEDs stabilize when console is disconnected | Wall console fault | Replace console |
When to stop and call an electrician
Stop if you see signs of mains voltage in the box, scorch marks on the control board, or a burning smell. Safe-T-Beam wiring is low voltage and safe to work on. The mains side that feeds the opener is not.
If your multimeter shows anything unexpected on the line side, or if the breaker trips when the opener runs, that's an electrician's job, not a Saturday DIY project.
When Sunlight or Weather Causes Genie Sensor Blinking Red
There's a specific pattern that points to sun interference. The door works fine at night and first thing in the morning. Then it refuses to close in the afternoon.
Then it works again after sunset.
That's not a broken sensor. That's infrared from the sun overwhelming the receiver's detector. The sun puts out plenty of IR, and when it hits the receiver lens dead-on, the sensor can't tell the difference between the sun's output and the beam from its partner.
Which garages are most at risk
West-facing and east-facing door openings take the worst of it. West-facing gets late afternoon sun when the sun sits low and bright. East-facing gets the same treatment at sunrise.
The problem is worse in winter. The sun stays low in the sky for longer, and low-angle light slips straight under door overhangs and into the receiver lens. Summer sun is higher and often misses the lens entirely.
Northern latitudes see longer low-sun windows. If you're anywhere above about 40 degrees latitude, expect a more pronounced seasonal pattern.
How to confirm it's the sun
Watch the LED across the day. If it goes solid in the evening and blinks every sunny afternoon, that's your answer. Clouds should make it behave.
So should parking a car to shade the sensor, as a quick test.
Do the phone camera check on the emitter too. If the emitter is glowing and the receiver LED still blinks only in bright sun, you've isolated it.
The fix: shade the receiver
The cheapest, fastest fix is a sun shield or hood. These are small plastic or metal covers that clip over the top of the sensor housing and block overhead light without blocking the beam.
Genie and aftermarket suppliers both sell them. You can also improvise with a piece of opaque plastic cut to size and attached with double-sided tape. Ugly but effective.
Aim the shield to block the sun without shadowing the lens itself. If the shield blocks the beam, the LED will stay red. Test after installing.
Repositioning the sensor
If a shield isn't enough, move the receiver slightly deeper into the garage. Even an inch of setback can pull it out of the sun's direct path. Check that the beam still reaches the emitter at the other side.
Some brackets allow you to angle the sensor slightly downward or upward to dodge the sun without losing alignment. Small adjustments there often solve the problem.
What if you can't shade it?
For stubborn cases, some installers swap the emitter and receiver positions so the receiver sits on the shaded side. This only works if your wiring has enough slack, and it requires re-running or extending the low-voltage cable.
If neither side is shaded, a sun shield plus a slight downward angle on the receiver is usually the practical answer.
Cold weather and condensation
Winter brings a second set of problems. Condensation forms on the lens when temperatures swing, especially in heated garages. A fogged lens scatters the beam and can produce intermittent blinking.
Wipe the lens with a dry cloth whenever you notice fogging. In persistent cases, a small packet of desiccant placed inside the housing, if there's room, can help. Don't block the lens or the vents.
Snow, ice, and drift
Snow piled at the threshold is a classic winter cause of blinking red. The beam sits 5 to 6 inches above the floor, which is exactly the height of a modest drift.
Clear snow back from the door opening during storms. If your garage faces the prevailing wind, this becomes a regular chore. Some homeowners install a low threshold seal or a snow fence upstream to reduce drift.
Ice on the lens is worse than snow. It refracts the beam unpredictably. Scrape gently with a plastic scraper, then wipe dry.
Humidity and corrosion
Coastal garages and humid climates see corrosion on the sensor terminals long before inland equivalents. Salt in the air accelerates it. Check terminals once a year and clean them with a contact cleaner if you see oxidation.
The same humidity softens wire insulation over time. Inspect any exposed run every few years and replace if the jacket feels stiff or cracked.
Rodent activity in cold months
Mice move into garages when temperatures drop. They chew sensor wiring, often right behind the mounting bracket where it's hard to see. If your blinking red appears suddenly with the first cold snap, inspect the wire run carefully.
Look for small droppings and shredded insulation near the wire path. If you find chew damage, re-splice with fresh wire and consider protecting the run with split loom or conduit.
| Condition | Pattern | Fix |
|---|---|---|
| Bright afternoon sun | Solid at night, blinks in afternoon | Sun shield, reposition receiver |
| Morning sun on east-facing door | Blinks early, fine by noon | Sun shield, adjust angle |
| Condensation on lens | Intermittent, worse in temperature swings | Wipe dry, add desiccant |
| Snow drift at threshold | Blinks after snowfall | Clear snow, add drift barrier |
| Ice on lens | Blinks in freezing rain | Scrape, wipe dry |
| Rodent chew after cold snap | Sudden failure, wire damage visible | Re-splice, protect run |
Faulty Sensor vs. Faulty Control Board: How to Tell
Here's the hard truth about this diagnosis. A dead sensor and a dead control board can look identical from the outside. Both produce a blinking red LED.
Both refuse to close the door. Both resist every alignment you try.
Isolating between them takes a bit of method. The upside is that once you know which side has failed, the fix is straightforward. In our research, the sensor is the culprit far more often than the board.
The isolation mindset
You're not guessing. You're swapping known variables one at a time and watching what changes. Every test either moves you toward the sensor or toward the board.
Start with the cheapest test. End with the most expensive part.
Test 1: Swap the sensors
If your Genie Safe-T-Beam units are the same shape and model, you can physically trade their positions. Unbolt both, swap them, and reconnect. Power up and check the LEDs.
- If the blink follows the unit, the unit is faulty.
- If the blink stays on the same side, the wiring or board is at fault.
This test alone resolves most of the ambiguity. It takes fifteen minutes and costs nothing.
Not every Genie generation has swappable sending and receiving units. If yours are physically different shapes or have different part numbers, skip to Test 2.
Test 2: Measure voltage at the sensor terminals
With the opener powered, back-probe the sensor's incoming wire. Check for the DC voltage specified in your model's manual.
- Voltage present and correct, LED dark: sensor has failed.
- Voltage present and correct, LED blinking: beam problem, not board.
- Voltage missing: wiring or board fault.
- Voltage low: resistance in the run, or a weak board output.
This test tells you whether power is even reaching the sensor. If it isn't, the sensor can't be the cause.
Test 3: Measure voltage at the board's safety terminals
Now check the other end. With the safety wires disconnected at the board, measure the voltage across the two safety terminals. On most Genie openers, you should see a low DC voltage.
The exact figure is in the manual.
If the board isn't putting out any voltage at those terminals, the board is the problem. If voltage is present but the sensors won't cooperate when reconnected, the wiring between the board and sensors needs attention.
Test 4: Try a known-good sensor pair
This is the definitive test, but it costs money. Buy a matched Genie Safe-T-Beam replacement kit for your opener's model.
Wire it in without permanently mounting it. Just hold the two units facing each other about a foot apart. Power up and observe the LEDs.
- If the new pair works, your old sensors were faulty. Mount and align the new pair.
- If the new pair behaves exactly like the old pair, the board is the suspect.
Keep the receipt. Most retailers accept returns on uninstalled parts, but the kit will be installed by this point. That's a cost of diagnosis.
Signs that point specifically to the control board
- Both LEDs blink no matter what you connect.
- The opener's diagnostic LED flashes an error code not covered in the manual.
- The opener starts on its own, or won't respond to the wall console at all.
- Force and travel limits won't hold their settings.
- The light on the opener head flickers or behaves erratically.
- You've replaced sensors and the fault is unchanged.
Board failures often arrive after a power surge, a lightning strike nearby, or a water leak in the garage. If any of those happened just before the blinking started, weight the board more heavily.
What a replacement board involves
Genie control boards are model-specific. You need the exact part number for your opener. The number is usually printed on the board itself and listed in the parts diagram at the back of the manual.
Swapping a board is a plug-and-play job on most models. Photograph every connector before you unplug anything. A single misplaced wire is enough to keep the fault going after the swap.
Some Genie openers have the receiver circuit integrated into the main board. On those, replacing the sensors won't help if the receiver section has failed. When in doubt, call Genie support with your model number and symptom before you order.
Decision guide
| Test result | Likely fault | Next step |
|---|---|---|
| Blink follows the swapped unit | Failed sensor | Replace sensor pair |
| Blink stays on same side after swap | Wiring or board | Test voltage at the sensor |
| Voltage absent at sensor, present at board | Broken wire | Locate the break and repair |
| Voltage absent at both | Control board | Replace board or call support |
| New sensor pair behaves the same | Control board | Replace board or call support |
| New sensor pair works | Old sensors | Mount and align new pair |
Cost reality check
Safe-T-Beam replacement kits typically run in the $30 to $60 range as of 2026. Genie control boards generally run higher, often in the $60 to $120 range depending on model. Add labor if you call a technician.
The math favors starting with the sensors. Even if you end up needing a board afterward, the sensors you bought are a spare pair for the future. Boards don't have that second life.
Common Mistakes That Make Genie Sensor Problems Worse
We've seen all of these in aggregated user reports and warranty feedback. Some are just wasted effort. A few are genuinely dangerous.
If you catch yourself doing any of them, stop and reset.
Taping the sensors together
This is the classic shortcut and it's flat-out dangerous. Taping both units face-to-face and stuffing them above the opener disables the safety beam entirely.
The door will close every time, which feels like a fix. It isn't. It removes the only feature that stops the door from crushing a child, a pet, or a parked car.
Skip it. No exceptions.
Shoving the sensors in a corner
Same idea, less obvious. Some people mount both sensors side by side in a corner so they can see each other, leaving the door opening completely unmonitored.
The beam still completes, so the LEDs look correct. But the door has no protection at the threshold. This is functionally the same as taping them together.
Turning up the force to compensate
If the door won't close because of a sensor fault, cranking up the force won't help. The force setting changes how hard the opener pushes. It doesn't touch the safety circuit.
Worse, raising force on a working opener can hide mechanical problems. A worn roller or a stiff hinge will get forced through, causing more wear. Adjust force only after the safety circuit is healthy and the door still needs more push.
Bypassing the safety circuit
Some openers can be wired to bypass the safety sensor terminals. Never do this, even to test. If the door closes on something while the circuit is bypassed, you've converted a safety feature into an injury risk.
Test a suspected sensor fault by swapping units or measuring voltage. There's no test that requires bypassing.
Skipping the alignment LED check
People clean, realign, and walk away without watching the LED go solid. Then they're surprised when the door still won't close the next day.
The LED is the feedback loop. If it never went solid, you never actually aligned the sensors. Go back and watch it while you move the housing.
Swapping in unbranded sensors
Genie Safe-T-Beam systems expect specific electrical characteristics from their sensors. A random universal sensor may light up but fail to speak the same language as the control board.
Buy a matched Genie replacement kit for your specific model. If you can't find one, call Genie support with the model number. They'll point you at the current compatible part.
Replacing sensors before checking wiring
You can install a fresh pair and end up with the exact same blink. If the wire run is broken, new sensors won't help. Test the run first.
Always do the cheap tests in order: clean, realign, test wiring, then replace sensors.
Ignoring the wall console
A bad wall console can drag the whole safety circuit down and produce blinking on otherwise healthy sensors. It's an uncommon fault but a real one. If your LEDs stabilize with the console disconnected, you've found it.
Over-tightening brackets
Snug the bracket screws. Don't crank them. Over-tightening can crack the plastic housing, strip a threaded insert, or bend a thin stamped bracket out of alignment.
If you strip a screw hole, a slightly larger wood screw often fixes it. If the bracket is bent, replace it rather than trying to bend it back. Bent brackets rarely stay true.
Not running the 2×4 test after the fix
Every sensor repair ends with a safety reverse test. Lay a 2×4 flat in the doorway, press the wall button, and confirm the door reverses on contact within 2 seconds.
If it doesn't, the repair isn't done. The LED being solid isn't enough. The door has to actually behave correctly under the required test.
Ignoring repeated blinking
A sensor that goes solid and then starts blinking again within a week is telling you something. There's vibration, thermal drift, or a marginal wiring connection that's failing under load.
Don't just re-clean and forget. Find the underlying cause. Recheck the bracket, the wire run, and the alignment against the string reference.
Deep-cleaning with water or spray
Never spray water or liquid cleaner directly on a sensor. Moisture gets into the housing and corrodes the electronics. Use a dry cloth, or a slightly damp cloth with the sensor bagged.
Never a direct spray.
If the sensor took water damage from a storm or a leak, replacement is usually the fastest path. Corroded internals rarely come back.
Safety and Compliance: UL 325, Entrapment Protection, and Genie Sensors
This is the section where we stop treating the blinking LED as an inconvenience and start treating it as what it actually is: a safety system telling you it can't protect anyone right now. Everything below follows from that.
A garage door carries real force. A standard residential door weighs 100 to 250 pounds, and the opener can push that load down at speed. The safety beam is the one feature standing between all that momentum and whatever walks under the door at the wrong moment.
Why you should never disable Safe-T-Beam
Disabling the beam converts a supervised automatic door into an unsupervised one. The door will close, but it will close on anything in its path. Children, pets, and cars are the common casualties.
Every year, CPSC data continues to attribute serious injuries and deaths to garage doors, many of them involving children under age 15. The safety beam exists because those injuries were once routine.
If you've inherited a home with the sensors taped together, wired in series, or stashed above the opener, that's a safety defect you should correct immediately. Not next weekend. Now.
What UL 325 requires on a residential opener
UL 325 is the Standard for Safety covering door, drapery, gate, louver, and window operators. For residential garage door openers, it establishes the entrapment protection rules that every major manufacturer builds to.
The key requirements:
- A non-contact entrapment protection device, meaning a photoelectric safety beam.
- Reversal within 2 seconds of contacting a 2-inch rigid object.
- Reversal on interrupting the beam while the door is closing.
- An audio or visual warning before the door moves, on newer models.
- Continued monitoring of the safety circuit during every close cycle.
Genie Safe-T-Beam meets all of these. When the receiver blinks red, the circuit is open and the opener is correctly refusing to close. The brilliant part of that behavior is that it defaults safe.
International and regional standards
US and Canadian openers are generally built to UL 325 and its Canadian equivalent, CSA C22.2 No. 247. European openers follow EN 12453, and Australian openers follow AS/NZS 60335.2.95. If you've got a Genie on the wall, you're almost certainly in UL 325 territory.
Local building codes may layer additional requirements on top. Some jurisdictions require an annual inspection of commercial openers, but residential openers are generally left to the homeowner to maintain.
What the safety reverse test actually checks
The 2×4 test isn't decorative. It's the specific check from UL 325 that verifies your installation handles a real obstruction.
Lay a 2×4 flat on the floor in the middle of the doorway. Press the wall button to close the door. The door must contact the board and reverse within 2 seconds.
If it fails, something in the safety chain is out. Sensor alignment, wiring integrity, control board operation, or travel limits. Don't let a failing test ride.
A door that won't reverse is a door that can't be trusted around people.
When a professional is required
Most sensor diagnosis and replacement is well within DIY reach. There are cases where you should call a professional:
- Any work on the mains wiring feeding the opener.
- A door with a broken or unbalanced spring.
- Control board replacement on a model you can't confirm parts for.
- Any opener that trips the circuit breaker.
- A door that fails the safety reverse test after sensors are confirmed healthy.
The sensor is a low-voltage device you can safely work on. The door, the spring, and the mains circuit are not.
Where the liability actually falls
If someone is injured by your door, and the safety system is found to have been disabled or ignored, you own that. Homeowner insurance may not cover a claim rooted in deliberate safety-defeat.
Warranty also matters. Genie's warranty terms generally exclude damage or failure caused by removal or defeat of safety features. Disabling the sensors can void parts coverage on the opener itself.
You know your household. If you've got kids who play near the garage, pets who wander through, or anyone who can't duck a moving door, the safety system isn't optional. It's the reason the door can be automatic at all.
Maintenance and Monthly Safety Tests to Prevent Blinking Red
The single best way to keep that red LED solid is a small amount of maintenance at a steady cadence. Ten minutes a month covers it. Thirty minutes twice a year keeps the whole system healthy.
Here's the schedule we'd recommend to any Genie owner.
Monthly: safety reverse test
Lay a 2×4 flat on the floor in the middle of the opening. Press the wall button to close the door. Confirm the door reverses on contact within 2 seconds.
Do this the first weekend of every month. It's the only check that proves the entire safety chain is working, not just the LEDs.
If it fails, walk through the decision tree in the earlier section. Don't just assume the sensors need cleaning.
Monthly: visual check
Walk the door opening. Look at both sensor lenses. Look for cobwebs, dust, insect activity, or anything leaning into the beam path.
Check the LED state. Both should be solid when the door is idle. A red blink here is a two-minute fix, not a tomorrow problem.
Quarterly: clean the lenses
Dry microfiber cloth on both lenses. Gentle circular motion. Check for scratches or cracks while you're there.
Wipe the housing too. Dust accumulates on top and washes down onto the lens in humid weather.
If spiders are present, clean monthly through spring and summer. Their webs rebuild fast.
Semi-annually: alignment check
Grab each sensor housing and wiggle it. Any movement means a loose bracket. Tighten or replace as needed.
Re-run the string reference if you've got a stubborn alignment history. A taut string from lens to lens quickly shows whether the beam is still true.
Annually: wiring inspection
Walk the full run from the opener head to each sensor. Look for:
- Chew marks or rodent droppings
- Pinches at wall penetrations
- UV damage on outdoor sections
- Corrosion at the terminals
- Loose wire nuts or splices
Re-splice anything that looks suspicious. A single compromised connection can cause intermittent blinking for months before it fails completely.
Battery and remote maintenance
The wall console and remote are separate devices from the sensors, but they share the opener's logic. Weak remote batteries cause "door won't close" calls that get misdiagnosed as sensor faults.
Replace remote batteries once a year whether they need it or not. If you've got a wall console with a battery backup, check it every six months.
What to do after severe weather
An electrical storm is a common trigger for control board damage. After a major storm, run the 2×4 test. If it passes, you're clear.
If it fails, work through the wiring and board tests.
Snow and ice need clearing away from the threshold during winter. A drift at the sensor height will break the beam continuously until it melts.
Long-term: know when sensors are due for replacement
Safe-T-Beam units typically last 8 to 15 years in a protected garage. Coastal environments cut that down. So does chronic moisture exposure.
Signs it's time to replace:
| Sign | What it means |
|---|---|
| LED won't go solid after alignment | Emitter or detector weak |
| Intermittent failure that clears with temperature | Internal component drift |
| Visible cracks in the lens | Beam scatter, dust ingress |
| Corrosion on the housing | Electronics aging |
| Replacement kit cheaper than a service call | Cost favors replacement |
A maintenance calendar at a glance
| Interval | Task | Time |
|---|---|---|
| Monthly | 2×4 safety reverse test | 5 minutes |
| Monthly | Visual LED and obstruction check | 2 minutes |
| Every 3 months | Clean lenses and housings | 5 minutes |
| Every 6 months | Bracket and alignment check | 10 minutes |
| Annually | Full wiring inspection | 15 minutes |
| Annually | Replace remote and console batteries | 5 minutes |
| After storms | Safety reverse test | 5 minutes |
Easy habits that prevent most faults
Park far enough from the door opening that you're not bumping sensors with a mirror. Keep storage bins and bikes out of the beam path. Don't lean brooms or tools against the wall in the doorway.
Small habits like those prevent the majority of the blinking red calls homeowners see. The mechanical fixes are cheap. The behavioral fixes are free.
Genie Safe-T-Beam Replacement: Costs, Part Numbers, and Compatibility
If you've confirmed the sensors are at fault and alignment can't save them, replacement is the move. The parts are inexpensive. The job is a two-hour afternoon at most.
The important thing is to buy the right kit for your opener.
The Genie 37226R.S Safe-T-Beam kit
The Genie 37226R.S is one of the most commonly referenced Safe-T-Beam replacement kits in current circulation. It ships as a matched pair of sending and receiving units, with mounting brackets and wire.
The kit fits a defined range of Genie residential openers built around the Safe-T-Beam platform. It is not universal across every Genie ever made. Before ordering, look up the parts list for your opener's model number.
If your opener predates the Safe-T-Beam redesign or belongs to an uncommon model family, Genie support can confirm the current compatible part. Have the model and serial number ready.
Other Genie replacement options
Genie has produced several generations of Safe-T-Beam hardware over the decades. Each generation has a corresponding replacement kit, and they are not always interchangeable.
| Kit or family | Typical fitment |
|---|---|
| Genie 37226R.S | Current production Safe-T-Beam openers |
| Earlier Safe-T-Beam kits | Older SilentMax, ChainMax, and legacy models |
| Universal sensor kits | Some models, with mixed results, match carefully |
The safest approach is always to match by model number, not by appearance. Two sensors can look identical and behave completely differently at the electrical level.
What you actually get in a kit
A typical Genie Safe-T-Beam replacement kit includes:
- Two sensor units, one sending and one receiving
- Two mounting brackets
- Mounting hardware
- Wiring pigtails or a short section of bell wire
- Installation instructions
Kits don't usually include the full wire run back to the opener. If your existing wire is damaged, you'll need to buy bell wire separately. Typically 18 to 22 AWG, two-conductor, sold by the foot or in 25 and 50 foot spools.
Cost breakdown
As of 2026, here's roughly what you're looking at for parts and labor in the US market.
| Item | Typical cost |
|---|---|
| Genie Safe-T-Beam kit (OEM) | $30 to $60 |
| Universal sensor kit | $20 to $50 |
| Bell wire, 50 feet | $8 to $20 |
| Sun shield or hood | $5 to $15 |
| Professional service call (sensor replace) | $100 to $200 |
| Professional service call (board replace) | $150 to $350 |
Add travel charges if you're outside a metro area. Some installers waive the trip fee if you book a full opener tune-up at the same time.
DIY vs. professional installation
DIY sensor replacement is one of the easier garage door repairs. You're working with low-voltage wiring and a bracket. No springs, no tension cables, no mains connections.
A confident DIYer can handle it in 60 to 90 minutes. That includes alignment and the safety reverse test.
Professional installation makes sense if:
- You've never used a multimeter and the diagnosis is still unclear.
- Your existing wire run needs replacement through walls or finished ceilings.
- The opener is mounted high or in an awkward location.
- You've already replaced sensors once without success.
- You want the job documented for warranty or insurance.
For most homeowners, DIY wins on cost. For anyone short on time or unsure of their diagnosis, a service call saves hours of trial and error.
Compatibility checklist before you buy
Run through this before you click buy on any replacement kit:
- Confirm your opener's model number from the label on the head unit.
- Check the parts diagram in your manual for the specific Safe-T-Beam part number.
- Verify the kit's sending and receiving units match the shape and connection type of your originals.
- Check whether your model uses a dedicated safety terminal block or a plug connector.
- Confirm the wire type and length included in the kit.
- Cross-check the seller's compatibility statement against your actual model.
If any of that is unclear, call Genie support. They're the fastest route to the right part number, and they won't sell you something that doesn't fit.
Warranty considerations
OEM Genie parts generally carry a manufacturer warranty against defects. The exact term varies by part and by when you purchased the opener.
Installing an aftermarket or universal sensor may void parts coverage on the safety system. If your opener is still under warranty, check with Genie before installing non-OEM parts.
Keep your receipt and packaging until you've confirmed the new sensors work through a full safety test cycle. That's your return path if the fit or the behavior isn't right.
Frequently Asked Questions
What does a blinking red light on a Genie garage door sensor mean?
It means the receiver isn't detecting the infrared beam from the emitter. The safety circuit is open, and the door will not close automatically. Common causes are misalignment, dirty lenses, obstructions in the beam path, or a wiring problem.
You can, because the wall console's constant-pressure mode is designed for supervised closing. It is not a fix. The safety circuit is still open, and the door has no automatic entrapment protection while you hold the button.
How do I realign Genie Safe-T-Beam sensors?
Loosen the adjustment screw on the receiving unit and sweep it slowly by hand while watching the red LED. When the LED goes solid, hold that position and tighten. Recheck the LED and run the 2×4 safety test.
Why does my Genie sensor blink red only in the afternoon?
Direct sunlight hitting the receiving lens is overwhelming the infrared detector. This is common on east and west-facing doors. A sun shield or repositioning the receiver slightly usually fixes it.
How much does it cost to replace a Genie Safe-T-Beam sensor?
OEM Genie replacement kits typically run $30 to $60. Universal kits are $20 to $50. A professional service call for sensor replacement is usually $100 to $200 including labor, depending on your area.
Can I replace Genie sensors with any universal kit?
Not safely, no. Genie Safe-T-Beam sensors expect specific electrical characteristics from the control board. A universal kit may light up but fail to close the circuit correctly.
Match the part number to your opener's model.
Final Decision Guide: Fix, Replace, or Call a Pro?
When you're staring at that blinking red light, the decision usually comes down to three paths. Here's how to pick the right one in about a minute.
Fix it yourself if
- The LED goes solid when you clean and realign the sensors.
- You can see an obstruction, cobweb, or drift in the beam path.
- The fault appeared after something bumped the sensor.
- The door works fine at night but not during peak sun.
- You're comfortable with basic tools and a screwdriver.
These cases cover the vast majority of blinking red situations. Spend the ten minutes. You'll likely save the service call.
Replace the sensors if
- Cleaning and realignment don't produce a solid LED.
- The lens is cracked, cloudy, or physically damaged.
- The housing shows corrosion or water damage.
- The fault keeps returning within days of every alignment.
- The units are more than a decade old and this is the second failure.
A matched Genie Safe-T-Beam kit is a cheap fix. Keep the receipt and confirm compatibility before ordering.
Call a professional if
- You've replaced sensors and the fault is unchanged.
- Voltage at the sensor terminals is wrong, suggesting a board fault.
- The wire run needs replacement through walls or ceilings.
- You see burn marks, scorch marks, or smell burning near the opener.
- The 2×4 test fails even after the LEDs are solid.
- The door itself binds, hangs, or has a broken spring.
Sometimes the smartest move is handing it off. Sensors are DIY-friendly. Boards and door hardware are not.
The one thing that matters most
Whatever path you choose, don't leave the safety system disabled. Not taped, not bypassed, not propped. A working safety beam is the difference between an automatic door and a hazard.
Get the red LED solid. Run the 2×4 test. Then you're done.