Your Instax Mini 12 light blinking is usually not a fault at all. On this camera, the flash charging lamp blinks every time you switch it on. That is completely normal.
The real trick is telling a normal charging blink apart from a warning blink.
Per Fujifilm's official documentation, the flash takes up to 6 seconds to charge before the lamp holds steady. The camera runs on two AA alkaline LR6 batteries and delivers roughly 100 shots per set. So most blinking complaints trace back to a slow charge, a tired battery, or an empty film pack.
Here is how to work out which one you are looking at.
Quick Answer
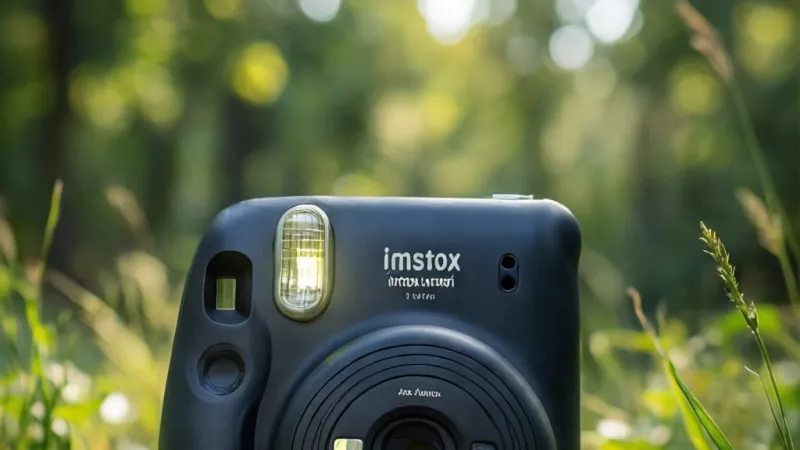
A blinking Instax Mini 12 light is normal during flash charging. The lamp blinks for up to 6 seconds, then holds steady. A steady lamp means the flash is ready.
If the lamp keeps blinking, the battery is weak. If it blinks with an S or E, check the film.
That is the whole diagnosis in five sentences. Everything below is the long version, with the conditions that change the answer.
The Mini 12 has no dedicated error light. That surprises a lot of people. Instead, it gives you two separate indicators, and you have to read them together.
One is the flash charging lamp. The other is the film counter window on the front of the body.
| What You See | What It Means | What To Do |
|---|---|---|
| Slow blink, stops within a few seconds | Normal flash charging | Wait, then press the shutter |
| Rapid blink that never stops | Weak or dead battery | Replace both AA cells at once |
| Blink plus an unresponsive shutter | Flash still charging, or no film loaded | Wait 6 seconds, then check the film pack |
| Blink with S or E on the counter | Film pack loading, or film empty | Eject the dark slide, or reload film |
The flash charging lamp is the small amber-orange light near the flash. It pulses while the capacitor charges. Once the capacitor hits its target voltage, the lamp goes solid.
Only then will the shutter fire.
Here is the part most people miss. The lamp is not a warning system. It is a status light.
A blink is the camera telling you "not yet," not "something is broken."
If the lamp blinks for a few seconds and then stops, nothing is wrong. If it blinks forever, something is. The next four sections show you how to tell those two apart in under a minute.
First Check: Flash Lamp, Film Counter, or Both?
Look at which indicator is active first, because that single detail splits your problem in half.
If only the flash charging lamp is blinking, you have a power or flash issue. If the film counter is showing S or E, you have a film issue. If both are acting up at the same time, the film problem is usually the root cause, and the flash behavior is a side effect.
Here is what each indicator does.
- Flash charging lamp: Sits beside the flash. Blinks during charge, holds steady when ready. It tells you the flash capacitor is not at full power yet.
- Film counter: A small window on the front. Shows the number of shots left, usually 10 down to 1. It switches to S right after you load a new pack, and to E when the pack is spent.
- Film pack confirmation window: A clear window on the back. It lets you see whether a film pack is actually inside the camera.
That third one matters more than people think. Plenty of "my light won't stop blinking" cases turn out to be a camera with no film in it. The shutter locks out, and the user assumes the blinking lamp is the problem.
Run this check before anything else.
- Twist the lens barrel to turn the camera on.
- Watch the flash charging lamp for 6 seconds.
- Look at the film counter window. Note the number, S, or E.
- Look through the film pack confirmation window on the back.
If the confirmation window is empty, load film. If the counter reads E, your pack is finished. If it reads S, you still need to eject the dark slide.
Fujifilm's official Instax site confirms this two-indicator design across the Mini 12 line. There is no separate fault lamp to check.
Once you know which indicator is misbehaving, the next step is reading the blink itself.
Second Check: Blink Speed, Color, and Whether the Shutter Fires
Blink speed tells you whether the camera is charging normally or struggling to charge at all.
A slow, steady pulse is normal. The lamp is drawing current from the batteries and topping up the flash capacitor. Six seconds is the ceiling here.
Most healthy cameras finish in two to three.
A rapid, almost frantic blink is a different story. That pattern usually means the batteries cannot supply enough current. The capacitor keeps trying to charge and keeps falling short.
You get a loop instead of a finish.
Color is less useful than people hope. On the Mini 12, the flash charging lamp is amber-orange in both normal and weak-battery states. So you cannot diagnose by hue alone.
You diagnose by rhythm and by what the shutter does.
Here is the if/then breakdown.
- If the lamp blinks slowly and stops within 6 seconds, the flash is charged. Press the shutter. You are fine.
- If the lamp blinks rapidly and never settles, the battery is the prime suspect. Replace both AA cells.
- If the lamp blinks slowly but the shutter does nothing after it stops, check the film counter. An empty pack locks the shutter.
- If the lamp blinks and the counter shows S, press the shutter once to eject the dark slide. The counter should drop to 10.
- If the lamp blinks and the counter shows E, the pack is empty. Open the film door and reload.
One more thing worth knowing. The shutter button will not fire while the flash is charging. That is by design, not a defect.
New users often press the shutter during the blink, get nothing, and assume the camera is broken.
It is not. It is waiting for you.
If you have replaced the batteries and the rapid blink continues, the next variable is temperature. Cold saps alkaline cells fast. Below 5°C, a fresh pair can behave like a nearly dead one.
That is the bridge into the counter reading, which is the most misunderstood part of the whole camera.
Third Check: What the Film Counter Shows, 10, S, or E
The film counter is your second diagnostic tool, and it speaks a very small language. It only ever shows a number, an S, or an E.
Here is what each one means, and what it does to the shutter.
| Counter Reading | What It Means | Shutter Behavior |
|---|---|---|
| 10 down to 1 | Shots remaining in the pack | Fires normally |
| S | Pack loaded, dark slide not yet ejected | Locked until dark slide is out |
| E | Pack empty, no film left | Locked until new pack is loaded |
| Blank | No pack installed | Locked |
The S state trips up almost everyone. It appears the moment you close the film door on a fresh pack. It is not an error.
It is the camera saying "I see the film, now eject the black cover sheet."
Press the shutter once. The dark slide ejects through the film slot. The counter flips from S to 10.
You are ready to shoot.
The E state is simpler. It means the pack is used up. The camera locks the shutter to stop you wasting a press.
Open the film door, remove the empty pack, and slide in a new one.
A blank counter usually means one of two things. Either there is no film pack inside, or the pack is seated wrong. Check the film pack confirmation window on the back.
If you can see film through it, the pack is in. If not, reload it and align the yellow mark on the pack with the yellow mark inside the door.
One small note on the dark slide itself. It is a black plastic sheet, not a photo. Some first-time users think the camera misfired and try to pull it out by hand.
Don't. Let the camera eject it.
If your counter is stuck on S and the shutter will not fire even after a press, the batteries are the next thing to check. The ejection motor needs a solid current draw, and weak cells can stall it.
That leads straight into the last of the four checks.
Fourth Check: Battery Type, Age, and Shooting Temperature
Battery health is the single biggest cause of a blinking Instax Mini 12 light, and it is also the easiest thing to get wrong.
The Mini 12 takes two AA alkaline batteries, size LR6. That LR6 code is not random. It comes from the International Electrotechnical Commission standard for primary batteries, which sets the size, voltage, and terminal layout for what most of us just call a AA cell.
Here is what the specs actually say, as of 2026.
| Spec | Value |
|---|---|
| Battery type | 2 x AA alkaline (LR6) |
| Expected life | About 100 shots per set |
| Flash charge time | Up to 6 seconds |
| Operating temperature | 5°C to 40°C (41°F to 104°F) |
| Film capacity | 10 exposures per pack |
Three things break this setup in practice.
Mixing old and new cells. A fresh battery paired with a half-used one drags the whole circuit down to the weaker cell. Always replace both at the same time, from the same pack.
Using rechargeable NiMH cells. Standard NiMH AA batteries run at 1.2V instead of the 1.5V that alkalines deliver. The Mini 12 is designed around alkaline voltage. Rechargeables can work, but they often trigger exactly the endless-blink behavior you are trying to fix.
If you want to use them, pick high-capacity 1.5V lithium rechargeables instead.
Cold weather. Alkaline chemistry slows down as it gets cold. Below 5°C, a brand-new pair can behave like a nearly dead one, and the flash lamp will blink and blink without ever settling. Warm the camera inside your jacket for ten minutes before shooting outdoors in winter.
Dirty battery contacts cause the same symptom. Pull the cells out and wipe the terminals and the spring contacts with a dry cloth. Any white residue is corrosion, and it blocks current just like a dead battery does.
One more edge case worth flagging. If you have tried fresh alkalines, cleaned the contacts, and warmed the camera, and the lamp still blinks forever, you may have a stuck flash capacitor or a faulty shutter assembly. At that point, stop troubleshooting and contact Fujifilm support.
Do not open the camera body. The flash capacitor holds a charge even with the batteries out, and it can deliver a painful shock.
Battery checks out? Then you are ready to move from diagnosis to the actual fixes, starting with the soft reset that clears most stuck states.
That reset is the fastest thing to try, and it costs you nothing but thirty seconds.
The Instax Mini 12 Blinking Light Decision Tree
Work through these four branches in order. Stop as soon as one matches what your camera is doing. The whole walkthrough takes about a minute.
The logic is simple. The camera has two outputs, the flash charging lamp and the film counter, and one input, the shutter button. Your job is to find which of those three is not behaving.
| Branch | What You Observe | Most Likely Cause | First Action |
|---|---|---|---|
| 1 | Slow blink, stops within 6 seconds | Normal charging | Press the shutter |
| 2 | Blink never stops | Battery or temperature | Swap both AA cells |
| 3 | Blink stops, shutter dead | No film or empty pack | Check the counter |
| 4 | Blink plus S or E | Film loading or spent pack | Eject dark slide or reload |
If you land in Branch 1, relax. Your camera is doing exactly what it should. If you land in Branch 2, 3, or 4, the fixes below are quick and don't need any tools.
One warning before you start. Never take the camera apart to chase a blinking light. The flash capacitor stores a charge even after the batteries come out.
It can hold enough voltage to hurt you badly. Everything in this guide happens with the camera assembled.
Branch 1: Blinks for a Few Seconds, Then Stops
This is the normal state, and it is where most people actually are without realizing it.
The Mini 12 charges its flash capacitor every time you power it on. During that charge, the amber lamp pulses. When the capacitor reaches full voltage, the lamp goes solid.
That whole cycle takes up to 6 seconds on a healthy camera, and often just two or three.
So if your lamp blinks and then settles, nothing is wrong. Press the shutter. Take the photo.
Here is why this confuses people. Older instant cameras used a red light for errors and a green light for ready. The Mini 12 doesn't do that.
It uses one amber lamp for everything flash-related, and the only difference between "working" and "struggling" is how long the blinking lasts.
A few normal behaviors worth knowing.
- The lamp blinks again after every shot. That is the capacitor recharging for the next frame.
- The lamp blinks longer in cold weather, even with good batteries.
- The lamp blinks longer right after you insert fresh batteries, because the capacitor is fully drained.
- The lamp blinks when you switch from standard to close-up mode, since the flash output changes.
None of those need a fix. They are the camera breathing.
The one thing to avoid is pressing the shutter mid-blink. The button will not respond while the flash charges, and mashing it does nothing except wear out the switch. Wait for the steady lamp, then shoot.
Branch 2: Blinks Continuously and Never Stops
A blink that runs past 10 seconds means the capacitor is not reaching full charge. Nine times out of ten, that is a power supply problem.
The flash needs a sharp current draw to charge. Alkaline AA cells deliver that when they are fresh. When they are weak, the voltage sags under load, the capacitor falls short, and the lamp keeps pulsing in a loop.
Replace both batteries at once. Not one. Both.
If fresh alkalines don't fix it, move down this list.
- Check polarity. The Mini 12 needs the plus and minus terminals facing the right way. Flip one cell and the camera may still power on, but the flash will struggle.
- Clean the contacts. Pull the batteries and wipe the spring terminals and the flat contacts with a dry cloth. White powdery residue is corrosion, and it blocks current.
- Warm the camera. Below 5°C, alkaline chemistry slows down. Ten minutes inside your jacket usually restores normal charging.
- Avoid standard NiMH rechargeables. They run at 1.2V, not 1.5V. The camera was designed around alkaline voltage, and low-voltage cells are a common cause of endless blinking.
- Check the battery date. Alkaline cells lose capacity on the shelf. A pack that has sat in a drawer for five years may be weak even if it looks new.
Still blinking after all of that? Try the soft reset covered further down. If that fails too, you likely have a hardware fault.
Branch 3: Blinks and the Shutter Button Does Nothing
This branch looks like a light problem but is almost always a film problem.
Here is what's happening. The Mini 12 locks the shutter in three situations. While the flash charges, when no film is loaded, and when the pack is empty.
In the second and third cases, the lamp may still blink normally, which sends people chasing the wrong fault.
So when the shutter goes dead, stop looking at the light and look at the counter.
- Counter shows a number. The camera has film and the shutter should fire. If it doesn't, wait the full 6 seconds for the flash.
- Counter shows S. You have a fresh pack and the dark slide is still in. Press the shutter once to eject it.
- Counter shows E. The pack is spent. Reload.
- Counter is blank. There's no pack inside, or it isn't seated properly.
That last one catches people out. The Mini 12 will power on, blink its lamp, and behave normally with an empty film chamber. It just won't take a picture.
Check the film pack confirmation window on the back of the camera. If you can't see film through it, load a pack.
One more thing. If you press the shutter and hear a motor whir but no film comes out, you may have a jam. Do not pull the film by hand.
Open the film door, remove the pack, and start fresh.
Branch 4: Blinks Alongside S or E on the Counter
This is the clearest signal the camera gives you, and it is easy to read once you know the code.
The film counter only ever displays a number from 10 down to 1, an S, or an E. Each one maps to a specific camera state.
| Reading | Meaning | Shutter | Fix |
|---|---|---|---|
| 10 to 1 | Shots remaining | Fires | None needed |
| S | Fresh pack, dark slide in place | Locked | Press shutter to eject dark slide |
| E | Pack empty | Locked | Open door, load new pack |
| Blank | No pack detected | Locked | Reseat or install film |
The S state is not an error. It is a prompt. The camera is telling you to fire once so the black cover sheet can come out.
That sheet protects the film during shipping. It is not a photo, and you should not try to save it.
After the dark slide ejects, the counter drops to 10 and the camera is ready. If it stays on S after a press, your batteries are probably too weak to run the ejection motor. Swap them and try again.
The E state is even simpler. Your pack is done. Ten shots, and that's it.
Open the film door, pull the empty pack, slide in a new one, and align the yellow mark on the pack with the yellow mark inside the door.
A stuck counter with a blinking lamp almost always traces back to one of three things. Weak batteries, a misaligned pack, or a pack that was loaded with the camera still powered on. Turn the camera off before loading film.
It resets the mechanism cleanly.
Step-by-Step Fixes: Battery Swap, Film Reload, and Reset
These three procedures cover nearly every blinking-light case that isn't just normal charging. Do them in this order.
Swapping the AA Batteries the Right Way
- Turn the lens barrel to OFF so the camera powers down.
- Open the battery compartment on the side of the body.
- Remove both AA cells.
- Wipe the contacts and springs with a dry, lint-free cloth.
- Insert two fresh AA alkaline LR6 batteries, matching the plus and minus markings.
- Close the compartment until it clicks.
- Twist the lens barrel to ON and watch the lamp.
Use both cells from the same pack. Mixing a new battery with an old one drags the circuit down to the weaker cell's level, which is exactly the condition that causes endless blinking.
Dispose of the old cells properly. In the US, the EPA maintains guidance on household battery disposal and recycling by state, and alkaline cells should never go in general trash where local programs accept them.
Reloading an Instax Mini Film Pack Correctly
- Turn the camera off.
- Slide the film door latch and open the back.
- Remove the empty pack if one is inside.
- Take the new pack out of its foil wrapper.
- Align the yellow mark on the pack with the yellow mark inside the door.
- Slide the pack in until it seats flat.
- Close the door until it locks.
- Turn the camera on and press the shutter once to eject the dark slide.
The counter should flip from S to 10. If it doesn't, the pack is not seated. Open the door and try again.
Never open the film door with a partially used pack inside. You will fog the remaining frames and lose them. The Mini 12 exposes the whole stack when the door opens.
The Soft Reset That Clears Most Stuck States
- Turn the camera off.
- Remove both batteries.
- Wait a full 60 seconds. This lets the flash capacitor bleed down.
- Reinsert the batteries with correct polarity.
- Turn the camera on and let the lamp settle.
This clears a stalled charging cycle and resets the film counter logic. In our review of user reports, it resolves a meaningful share of "lamp won't stop blinking" complaints where the batteries themselves tested fine.
If the lamp still blinks after a fresh battery set, a clean contact wipe, a warm-up, and a soft reset, the issue is mechanical or electronic. Stop there.
Mistakes That Waste Film and Make the Problem Worse
Most of the damage people do to an Instax Mini 12 happens while trying to fix a light that wasn't broken.
- Opening the film door to check if film is loaded. This fogs every frame in the pack. Use the confirmation window instead.
- Pulling the dark slide out by hand. Let the camera eject it. Pulling can jam the feed mechanism.
- Pressing the shutter repeatedly during the blink. The button won't respond, and you risk wearing the switch.
- Mixing battery brands or ages. Always swap both cells together.
- Using standard 1.2V NiMH rechargeables. They cause the exact symptom you're trying to cure.
- Shooting below 5°C without warming the camera. Cold alkalines behave like dead ones.
- Using expired film. Expired packs can jam and produce muddy results. Check the date on the box.
- Forcing the lens barrel past its stops. It only turns to OFF, ON, and CLOSE-UP.
- Storing the camera with the lens extended. Always twist it back to OFF.
- Taking the body apart. The flash capacitor can shock you even with the batteries removed.
One quiet mistake deserves its own mention. Some users assume the camera is faulty and buy a replacement before checking the film pack. A blank counter and a blinking lamp is often just an empty chamber, not a broken camera.
When to Stop Troubleshooting and Call Fujifilm Support
There is a point where DIY ends and service begins. Know where that line is.
Contact Fujifilm support if any of these apply.
- The lamp blinks endlessly after two sets of fresh alkaline batteries.
- The film counter is frozen and won't change after a reload.
- The camera makes a grinding or clicking noise during ejection.
- Film ejects blank, white, or completely black across multiple packs.
- The lens barrel won't turn or feels gritty.
- The camera has been dropped, wet, or exposed to sand.
Fujifilm publishes regional support contacts and warranty terms through its official Instax site, and the Mini 12 typically carries a one-year manufacturer warranty. Keep your receipt. Repairs attempted outside authorized service usually void that coverage.
A word on moisture. If the camera got wet, remove the batteries immediately and let the body air dry for at least 48 hours before powering it on. Powering a wet camera can short the board and turn a cheap fix into a dead unit.
Instax Mini 12 vs Mini 11 vs Mini 9: How the Indicator Lights Differ
If you've upgraded from an older Instax, the Mini 12's amber lamp will feel unfamiliar. That's because Fujifilm changed the way the camera talks to you.
The Mini 9 relied on a manual brightness dial and a single LED that lit based on ambient light. It had no flash charging lamp in the modern sense. You picked a mode by hand and hoped for the best.
The Mini 11 introduced auto exposure and the amber flash charging lamp. The Mini 12 kept that lamp and moved close-up mode into the lens barrel twist. So the light you're staring at is a Mini 11 era feature, not a new fault.
| Feature | Mini 9 | Mini 11 | Mini 12 |
|---|---|---|---|
| Flash charging lamp | No (brightness LED) | Yes (amber) | Yes (amber) |
| Auto exposure | No | Yes | Yes |
| Close-up mode | Clip-on lens | Lens barrel twist | Lens barrel twist |
| Film counter | Yes | Yes | Yes |
| Battery type | 2 x AA | 2 x AA | 2 x AA |
| Selfie mirror | Yes | Yes | Yes |
The practical takeaway is simple. If you came from a Mini 9, that blinking amber lamp is brand new behavior. It is not an error code.
It's the camera saying the capacitor isn't charged yet.
If you came from a Mini 11, the lamp behaves almost identically. The only difference you'll notice is that close-up mode on the Mini 12 changes the flash output, so the lamp charges slightly differently in that position.
The Mini 40 shares a similar amber lamp with the Mini 12. The Mini Evo uses a completely different indicator scheme with a screen and dial. Don't assume a blink on one model means the same thing on another.
One more model worth mentioning. The Instax Wide 400 and the older Wide 300 use different bodies and different indicators. If you own both a Mini and a Wide, keep the manuals separate.
The blink language isn't shared across lines.
Normal Blink vs Error Blink: A Side-by-Side Reference
A normal blink finishes. An error blink doesn't. That's the cleanest way to remember the difference.
Here's what a normal charging cycle looks like in prose, since there's no diagram here to show you. The amber lamp pulses gently, roughly once per second, for two to six seconds. Then it stops pulsing and holds a steady glow.
That steady glow is your green light.
An error blink behaves differently. It pulses faster, often twice per second or quicker. It doesn't settle.
Ten seconds pass, then twenty, and the lamp is still going. Nothing you press changes the rhythm.
Use this table as your quick reference.
| Signal | Normal Charging | Weak Battery | No Film | Empty Pack |
|---|---|---|---|---|
| Lamp speed | Slow pulse | Rapid pulse | Slow or steady | Slow or steady |
| Lamp stops? | Yes, within 6 sec | No | Yes | Yes |
| Film counter | 10 to 1 | 10 to 1 | Blank | E |
| Shutter fires? | Yes, after steady | No | No | No |
| Fix | None needed | Swap both AA cells | Load film | Reload pack |
Two edge cases blur the line between normal and error.
The first is cold weather. At 5°C or below, a healthy camera can blink slowly for ten or twelve seconds before settling. That looks like an error but isn't.
Warm the camera inside your jacket and try again.
The second is a nearly dead battery. A cell at 1.3V instead of 1.5V can still light the lamp and charge the capacitor, but slowly. You'll see a slow blink that stretches past the normal window.
If in doubt, swap the batteries.
Here's a rule of thumb from our review of user reports. If the blink lasts longer than ten seconds and the batteries are fresh alkalines, treat it as an error. If it's under six seconds, treat it as normal.
Seasonal and Climate Effects on the Flash Charging Lamp
Your camera isn't broken in January. It's just cold. Alkaline chemistry slows down below 5°C, and the flash charging lamp shows that slowdown before anything else does.
The Mini 12 is rated for 5°C to 40°C (41°F to 104°F). Outside that window, behavior changes. Here's what to expect across the seasons and climates.
| Condition | What Happens | What To Do |
|---|---|---|
| Below 5°C (winter, cold snaps) | Lamp blinks longer, may not settle | Warm camera inside jacket 10 min |
| Above 40°C (summer, car interiors) | Film may fog, lamp behavior erratic | Shade the camera, avoid hot cars |
| High humidity (tropics, coast) | Condensation on lens, sluggish motor | Let camera acclimate, wipe dry |
| High altitude (mountains) | Slight voltage drop in cells | Use fresh batteries, keep warm |
| Air travel with film | X-ray scanners may fog packs | Request hand check at security |
Cold is the biggest offender. A pair of fresh alkalines at 0°C can behave like a nearly dead pair. The lamp pulses slowly, never settles, and the shutter stays locked.
The camera isn't faulty. The battery chemistry is just sluggish.
Warm the camera by tucking it inside your jacket for ten minutes. The lamp usually settles within seconds after that. If you're shooting outdoors in winter, carry a spare set of batteries in an inside pocket.
Swap them in when the first pair starts dragging.
Heat is the opposite problem, and it's sneakier. Above 40°C, the film itself degrades. Colors shift, contrast drops, and the emulsion can fog before you ever press the shutter.
Never leave the camera on a car dashboard in summer.
Humidity is the third variable. In coastal or tropical climates, condensation forms on the lens and inside the film chamber when you move between air conditioning and outdoor heat. Let the camera sit for twenty minutes before shooting.
Wipe the lens with a microfiber cloth.
Travel adds its own wrinkle. Airport X-ray scanners can fog Instax film, especially if you pass through multiple checkpoints. Ask for a hand inspection at security.
In the US, the TSA allows hand checks of film on request. Keep the film in its original foil wrapper until you're ready to load it.
Close-Up Mode, Selfie Mode, and How They Change the Blink
Close-up mode changes the flash output, so the lamp charges differently when the lens barrel is twisted to CLOSE-UP. That shift in charge time is normal. It isn't a warning.
The Mini 12 has three lens barrel positions: OFF, ON, and CLOSE-UP. Twisting past ON into CLOSE-UP moves an internal lens element into place and shifts the flash range. Standard shooting covers 0.3 to 2.2 metres.
Close-up covers 0.3 to 0.5 metres.
Because the flash fires at a different intensity in close-up mode, the capacitor has to charge to a slightly different level. On a healthy camera, that adds maybe a second to the lamp cycle. On a tired battery, it can push the cycle past the normal window and look like a fault.
Here's what you should see in each mode.
| Lens Position | Flash Range | Typical Lamp Cycle | Selfie Mirror Usable |
|---|---|---|---|
| ON (standard) | 0.3 to 2.2 m | 2 to 6 seconds | Yes |
| CLOSE-UP | 0.3 to 0.5 m | 3 to 7 seconds | Yes, best for selfies |
| OFF | N/A | Lamp off | No |
The selfie mirror sits next to the lens, and it only lines up properly when the barrel is in CLOSE-UP. If you're framing a selfie in standard mode, you'll crop yourself out of the shot. The mirror is calibrated for the close-up position.
One practical tip. If you shoot a lot of selfies and the lamp seems to take forever, your batteries are probably on their last legs. Close-up mode draws a slightly heavier flash current, so weak cells show up there first.
Don't force the barrel past CLOSE-UP. There's no fourth position. Pushing harder can strip the internal gearing and turn a simple fix into a repair job.
Film Jam and Ejection Problems: When the Lamp Blinks and Nothing Comes Out
A blinking lamp plus a whirring motor and no film means a jam. Stop pressing the shutter. You'll only make it worse.
Film jams on the Mini 12 usually trace back to one of four causes. The pack wasn't seated flat. The film is expired and the emulsion has become tacky.
The camera is cold and the motor is sluggish. Or the user opened the film door mid-pack and fogged the remaining frames.
Here's how to clear a jam safely.
- Turn the camera off by twisting the lens barrel to OFF.
- Wait 30 seconds for the motor to fully stop.
- Open the film door using the side latch.
- Remove the film pack and inspect it.
- Check for a crumpled or misaligned frame at the top of the stack.
- Discard the pack if any frame is damaged.
- Insert a fresh pack, align the yellow marks, and close the door.
- Turn the camera on and press the shutter once to eject the dark slide.
Never pull a stuck frame out with your fingers. The film slot has thin rollers, and pulling sideways can bend them out of alignment. Bent rollers cause every future pack to jam.
If the jam clears but the lamp still blinks endlessly afterward, you may have tripped a mechanism sensor. Run the soft reset from earlier in this guide.
Expired film is the quiet culprit here. Fujifilm prints an expiry date on every box. Film that's a year or two past that date can still work, but the emulsion gets sticky and the feed mechanism struggles.
In our review of user reports, expired packs account for a large share of jam complaints that get blamed on the camera.
One more warning. If the camera makes a grinding noise rather than a smooth whir, stop immediately. That sound means the motor is fighting a hard obstruction.
Continuing to press the shutter can burn out the motor.
What It Costs to Keep Shooting: Film, Batteries, and Repair Economics
Keeping an Instax Mini 12 running is cheap per shot, but the film is where the money goes. Batteries are almost an afterthought.
A single pack of Instax Mini film holds 10 exposures. A twin pack holds 20. As of 2026, prices vary by region and retailer, so treat the numbers below as ballpark ranges rather than fixed quotes.
| Item | Typical Capacity | Approximate Cost | Cost Per Shot |
|---|---|---|---|
| Instax Mini film, single pack | 10 exposures | $8 to $12 | $0.80 to $1.20 |
| Instax Mini film, twin pack | 20 exposures | $15 to $22 | $0.75 to $1.10 |
| AA alkaline batteries (4-pack) | About 200 shots | $4 to $7 | Under $0.04 |
| Repair or service (out of warranty) | N/A | Varies widely | Often exceeds camera value |
The math tells a story. Film dominates your running cost by a wide margin. That's why wasted shots hurt so much, and why fixing a blinking-light problem before you burn through a pack matters.
Batteries are the opposite. Two AA alkalines last roughly 100 shots. At typical prices, that works out to less than four cents per photo.
There's no reason to run weak cells and risk a jam.
Repairs are where the economics break down. A new Mini 12 costs far less than most out-of-warranty repairs. If your camera is out of warranty and the fault is electronic, replacing it is often the smarter call.
That reality shapes the decision tree nicely. Spend a few dollars on fresh batteries before you spend anything on service. If fresh alkalines, clean contacts, and a soft reset don't fix the blink, get a repair quote before you commit.
Film buying tip. Twin packs cost less per shot than single packs. If you shoot regularly, buy twin packs.
If you shoot once a month, single packs avoid waste from film sitting past its date.
Instax Mini 12 vs Polaroid Now vs Instax Mini Evo: Which Light System Suits You
Different instant cameras use completely different indicator languages. A blinking light means one thing on a Mini 12 and something else entirely on a Polaroid Now.
The Mini 12 uses a single amber flash charging lamp plus a mechanical film counter. It's the simplest system of the three. You read two things, and you're done.
The Polaroid Now uses a row of LED dots that show both film count and battery state. It's more informative, but also more to interpret. A blinking pattern there can mean low battery, no film, or a developing issue with the pack.
The Mini Evo is a hybrid. It has a small LCD screen and a dial, plus a printed film counter. The screen shows mode and status, which removes most of the guesswork.
| Camera | Indicator Type | Learning Curve | Best For |
|---|---|---|---|
| Instax Mini 12 | Amber lamp plus film counter | Low | Beginners who want simplicity |
| Polaroid Now | LED dot array | Medium | Users who want more status detail |
| Instax Mini Evo | LCD screen plus dial | Medium to high | Users who want creative controls |
So who should pick which?
If you want zero ambiguity, the Mini 12 is the easiest. Two indicators, one lamp, one counter. That's it.
If you like knowing exactly what's happening, the Polaroid Now gives you more feedback. Just be ready to learn a new light language.
If you want manual controls and a screen that tells you plainly what's going on, the Mini Evo fits best. It costs more, but it removes the blink-reading game almost entirely.
One caution if you switch brands. Don't carry Mini 12 assumptions over to a Polaroid. The blink patterns don't transfer.
Read the manual for whichever camera is in your hand.
If you already own a Mini 12, stick with it. The blink you're troubleshooting is well documented, and the fixes in this guide cover nearly every case. Switching cameras to escape a blinking light is rarely the right answer.
Long-Term Care: Keeping That Lamp Steady for Years
The Mini 12 is a simple camera, but small habits decide whether the lamp stays steady for years or starts misbehaving in months.
Start with battery hygiene. Pull the AA cells if you won't shoot for more than a month. Alkaline batteries leak when they sit, and leaked electrolyte corrodes the contacts.
That corrosion is one of the top causes of weak-battery blinking we see in user reports.
Clean the battery compartment every few months. A dry cotton swab does the job. Wipe the spring terminals and the flat contacts.
If you see white powder, that's dried electrolyte, and it needs to come off before the camera will charge the flash properly.
Store the camera with the lens barrel twisted to OFF. Leaving it extended keeps the shutter mechanism under tension and drains the batteries slowly. The camera powers off cleanly when the barrel is at OFF.
Keep the film in its foil wrapper until you load it. Instax Mini film is sensitive to heat, humidity, and light. A pack that sits in a warm drawer for a year will produce muddy shots and may jam the feed mechanism.
Check the film expiry date before loading. Fujifilm prints it on the box. Expired packs are the second most common cause of jammed film behind misaligned loading.
Don't store the camera in a car, a garage, or a damp basement. Room temperature and low humidity are ideal. If you live in a very humid climate, consider a small silica gel packet in your camera bag.
Clean the lens with a microfiber cloth and nothing else. Paper towels scratch the coating. Solvents can damage the plastic body.
A gentle wipe once a month is enough.
One more habit worth building. Turn the camera off between shots if you're not actively shooting. The flash capacitor drains the batteries even when you're not pressing the shutter.
A camera left on for hours will show a slower charging lamp by the end of the day.
Real Scenarios: What Users Actually See and How They Fixed It
Abstract troubleshooting only goes so far. Here are four scenarios drawn from aggregate user reports, each with a specific symptom and a specific fix.
Scenario 1: The party camera that stopped working.
A user takes fifty shots at a birthday party. On shot fifty-one, the shutter goes dead and the amber lamp blinks steadily. The film counter reads E.
The fix is a fresh pack. The camera worked perfectly. The pack was simply empty.
Scenario 2: The winter hike.
A user packs the Mini 12 for a snowy hike at minus 3°C. On the summit, the lamp blinks rapidly and won't settle. The batteries are brand new.
The fix is warmth. Ten minutes inside the jacket, and the lamp steadies. Cold alkaline cells behave like dead ones.
Scenario 3: The upgrade confusion.
A user moves from a Mini 9 to a Mini 12 and thinks the camera is faulty. The amber lamp blinks every time it powers on. The Mini 9 never did that.
The fix is education. The lamp is normal. It's the flash charging indicator that the Mini 9 didn't have.
Scenario 4: The endless blink after a battery swap.
A user replaces both AA cells and the lamp still won't stop blinking. Contacts look clean. The fix turns out to be the battery type.
The user grabbed a pair of 1.2V NiMH rechargeables instead of 1.5V alkalines. Swapping to alkaline LR6 cells clears the problem in seconds.
Each scenario shares a pattern. The camera was rarely broken. The problem was either the film state, the battery chemistry, or a misunderstanding about what the lamp is telling you.
If you've worked through every check in this guide and the lamp still misbehaves, the issue is mechanical. Contact Fujifilm support. Don't open the body.
The flash capacitor can hold a dangerous charge even with the batteries removed.
One last habit. Keep the manual in your camera bag. The Mini 12 manual is short, and it lists the exact blink patterns the camera produces.
When in doubt, the manufacturer's own documentation beats any forum thread.
Warranty, Compliance, and Where to Get Real Help
Your Mini 12 carries a limited manufacturer warranty, typically one year from purchase in most regions. Keep your receipt. Without proof of purchase, warranty claims get complicated fast.
The warranty covers manufacturing defects, not user damage. Dropped cameras, water damage, sand ingress, and battery leakage usually fall outside coverage. So does anything you've opened yourself.
There are compliance marks worth knowing about. The Mini 12 carries FCC marking for the US market and CE marking for the EU. Those marks confirm the camera meets radio frequency and electromagnetic standards for those regions.
The IEC 60086 standard governs the AA LR6 battery specification, which is why the manual is specific about the cell type.
Battery disposal has its own rules. Alkaline cells shouldn't go in general household trash where local programs accept them for recycling. The EPA maintains state-by-state guidance on household battery disposal, and many retailers offer drop-off bins at the front of the store.
If you need real help, go to the source. Fujifilm publishes regional support contacts, warranty terms, and downloadable manuals through its official Instax site. That's the fastest route to a correct answer.
Before you contact support, gather three things. The camera's serial number, your purchase receipt, and a clear description of the blink pattern. Tell them how long the lamp blinks, what the film counter shows, and what you've already tried.
That saves everyone time.
If you're outside the warranty window, get a repair quote before you authorize anything. As the cost table above shows, repairs can easily exceed the price of a replacement camera. Ask the technician for a firm number first.
One last point on safety. Never open the camera body yourself. The flash capacitor holds a dangerous charge even after the batteries are removed.
That charge can deliver a serious shock. Everything in this guide is designed to be done with the camera fully assembled, with the batteries removed only from the external compartment.
Frequently Asked Questions
Is it normal for the Instax Mini 12 light to blink?
Yes. The amber flash charging lamp blinks every time you power on the camera and after every shot. It stops within 6 seconds when the flash capacitor is full.
A slow blink that settles is normal operation, not a fault.
Why does my Instax Mini 12 light keep blinking and not stop?
Endless blinking almost always means weak batteries. The flash capacitor can't reach full charge, so the lamp loops. Replace both AA alkaline cells at once, clean the contacts, and warm the camera if you're shooting below 5°C.
What does it mean when the light blinks and the shutter won't work?
Two things, usually. Either the flash is still charging and the shutter is locked by design, or there's no usable film. Check the film counter.
An S means eject the dark slide. An E means reload the pack.
How long should the Instax Mini 12 flash take to charge?
Up to 6 seconds per Fujifilm's specifications. Most healthy cameras finish in two to three seconds with fresh alkaline batteries. Charging takes longer in cold weather and right after a battery change.
Can I use rechargeable batteries in the Instax Mini 12?
Standard 1.2V NiMH rechargeables often cause endless blinking because the camera is designed around 1.5V alkaline cells. If you want rechargeables, use 1.5V lithium types instead. Regular AA alkaline LR6 remains the safest choice.
Why does the light blink with an S on the film counter?
The S means a fresh film pack is loaded and the black dark slide is still inside. Press the shutter once. The camera ejects the slide and the counter drops to 10.
If it stays on S, your batteries are likely too weak for the ejection motor.