A wired smoke detector blinking red is rarely a random glitch. On most hardwired alarms, that light is speaking a specific code. The message changes with the blink speed, the brand, and the age of the unit.
Some red blinks mean the alarm is running fine on AC power, while others mean the sensor has failed or the unit has reached the end of its service life.
The catch is that there's no universal red-blink standard. Under UL 217, the safety standard covering residential smoke alarms, each manufacturer writes its own LED logic. So a slow red blink on a Kidde can mean something very different than the same pattern on a First Alert.
Before you pull the battery or yank the unit off the ceiling, it helps to know which message your alarm is actually sending.
Quick Answer
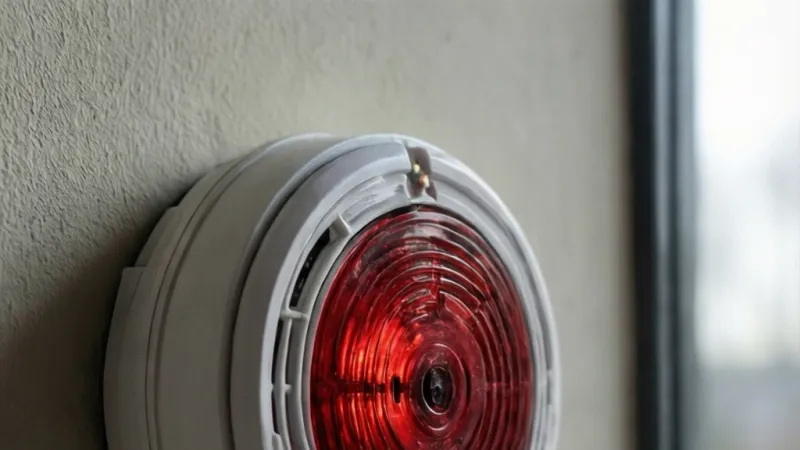
A wired smoke detector blinking red is usually a status signal. It rarely means there's an active fire. A slow blink often means normal AC power.
A fast blink usually points to alarm memory or a sensor fault. Grouped blinks suggest low battery or end of life.
Why a Blinking Red Light on a Hardwired Smoke Alarm Is a Safety Call, Not a Cosmetic One
Our research shows that the biggest risk with a red-blink question isn't the light itself. It's what people do next. Faced with an alarm they can't decode, plenty of homeowners pull the battery, tape over the LED, or take the unit off the ceiling entirely.
That turns a working alarm into a hole in the ceiling and a gap in your protection.
The National Fire Protection Association reports that working smoke alarms cut the risk of dying in a home fire roughly in half. The same body notes that about three in five home fire deaths happen in homes with no smoke alarms at all, or with alarms that don't work. That second category deserves your full attention.
It isn't just missing alarms that kill people. It's alarms that were installed properly, then quietly disabled by someone who misread a blinking light.
So there are two ways to get this wrong, and both are dangerous.
- Reading a normal power blink as a fault, so you replace or remove a perfectly good alarm.
- Reading a real fault blink as noise, so a dead alarm stays on your ceiling for years.
The fix in both cases is the same. Identify the model. Find the manufacturer's code chart.
Match the blink cadence against the chirp pattern. Only then decide whether to replace a battery, clean a sensor, or swap the whole unit.
| Mistake | What it looks like | Real cost |
|---|---|---|
| Disabling a healthy alarm | Slow red blink, unit seems "off" | Home loses coverage for months or years |
| Ignoring a fault signal | Fast or grouped blinks continue | Alarm may stay silent in a real fire |
Manufacturer specifications confirm that a single LED can carry four or five different meanings depending on cadence. Kidde, First Alert, USI, Aico, and FireAngel each publish their own charts, and the charts don't agree with each other. That's the whole reason this topic trips people up.
It's not that the code is complicated. It's that the code changes depending on which alarm is on your ceiling.
One more thing before we go further. A red blink is a safety question, not a cosmetic one. Every decision you make here affects whether your household gets warning in a fire.
That's why the rest of this guide walks through what the light is actually saying, pattern by pattern, brand by brand. And it starts with how a wired alarm is built.
How a Wired Smoke Alarm Works: AC Power, Battery Backup, and LED Logic
A "wired" or hardwired smoke alarm runs on your home's 120-volt AC circuit. It pulls a small amount of current through a dedicated line, usually from a bedroom or hallway circuit. The unit mounts to a standard electrical box in the ceiling or high on a wall, using a twist-lock bracket and a quick-connect plug.
Behind the base you'll find three wires on most modern units. Black is hot, white is neutral, and red is the traveler. The traveler is the interconnect line.
It lets one alarm trigger every other alarm on the circuit, so a fire in the basement wakes someone on the second floor.
| Component | What it does |
|---|---|
| Alarm head | Houses the sensor, LED, horn, and Test/Silence button |
| Mounting base | Locks the head to the ceiling electrical box |
| Wiring harness | Plugs the head into the home's wiring |
| Red traveler wire | Carries the interconnect signal to other alarms |
| Backup battery | Keeps the alarm live during a power outage |
Most hardwired units also take a backup battery. Older models use a 9-volt. Newer ones often use AA, AAA, or a sealed 10-year lithium cell that you can't replace.
That backup is what keeps the alarm alive during a power cut, and it's also the source of the low-battery chirp.
Where the LED logic actually comes from
Now here's where things get messy. The LED on a wired alarm has no universal color code. Some manufacturers use green for AC power and reserve red for alarm or trouble.
Others use red for power and a different pattern for faults. Kidde, First Alert, USI, Aico, and FireAngel all publish their own charts, and those charts don't match.
A quick note that saves people a lot of confusion. First Alert and BRK are the same company. Both brands use similar LED logic.
If you've got a BRK unit, the First Alert chart usually applies. Same story for Aico and Ei Electronics in the UK and Ireland.
What's inside the sensing chamber
The sensor inside the head is what actually detects smoke. Ionization sensors react fastest to flaming fires. Photoelectric sensors catch smoldering fires sooner.
Dual-sensor models combine both. Combination units add a carbon monoxide sensor to the same housing, which is why some wired alarms show extra blink codes.
Per UL 217 testing, every listed residential alarm has to hit at least 85 decibels at 10 feet. That's loud enough to wake most sleepers. It's also why a chirp and a full alarm sound so different.
A chirp is a diagnostic. A full alarm is a warning.
Every modern wired alarm has a single Test/Silence button on the face. Press and hold it for a few seconds and the unit runs a self-test. That test checks the sensor, the horn, and the power source.
On most models, a successful test ends with a short beep and a brief LED flash.
On some models, holding the button also clears alarm memory. That's the feature that keeps a red LED blinking after the unit trips. If your alarm is stuck in memory mode, this is often the one button that fixes it.
The dedicated circuit rule
One more thing worth knowing. The circuit feeding your smoke alarms must be dedicated and unswitched. No wall switch.
No dimmer. If someone wired your alarms to a switch, that's a code problem, and it explains a lot of mystery blinks and dead alarms.
As of 2026, that requirement hasn't changed. NFPA 72 still calls for a dedicated, non-switched circuit, and most local codes follow suit.
Now that you know what's inside the unit, let's decode the blink itself.
Decode Your Blink Pattern by Cadence
The single most useful thing you can do is time the blink. Grab your phone, open the timer, and watch the LED for a full minute. Cadence is the code.
Once you've counted the interval and the grouping, you're 80 percent of the way to the answer.
Slow blink (every 30 to 60 seconds)
This is the pattern that scares people most, and it's usually the most innocent. On many wired alarms, a slow red blink is the AC power indicator. It means the unit is running on mains power and the circuit is live.
On other brands, the exact same slow blink is the alarm memory light. It's telling you the unit tripped at some point and hasn't been reset. Manufacturer documentation from Kidde and First Alert confirms both uses exist.
The blink speed alone won't tell you which one you're looking at. You need the model number.
Rapid blink (about once per second)
A fast red blink, roughly one per second, usually means the unit has tripped. The alarm is in memory mode, holding onto the event so you can find the unit that started it. In a multi-alarm house, that's genuinely useful.
Instead of checking six alarms, you walk to the one with the fast blink.
On some models, a rapid blink also flags a sensor fault. If pressing and holding Test/Silence doesn't clear the light, treat it as a fault, not memory.
Grouped blinks (2, 3, or 8 in a burst)
Grouped blinks are the trickiest pattern to read. Two or three flashes in a row, then a pause, usually means a trouble signal or a sensor issue. Eight flashes in a row, followed by a longer pause, usually means the unit has reached end of life.
These codes vary by brand, and they're the reason the manual matters. A two-blink pattern on a Kidde and a two-blink pattern on an Aico can mean two different things.
Steady red vs. green vs. amber
A steady red light on some alarms means the unit is actively in alarm. On others, it means a fault. Green almost always means AC power is fine.
Amber or yellow almost always means trouble, a service warning, or a degraded sensor.
Here's the practical takeaway. If you can't find the manual, call the manufacturer's support line with your model number. Most of them will tell you the code in under five minutes.
| Blink pattern | Common meaning | What to do first |
|---|---|---|
| Slow (every 30 to 60 sec) | AC power OK, or alarm memory | Check the manual for your exact model |
| Rapid (about 1 per second) | Unit tripped, memory mode | Press and hold Test/Silence to clear |
| Grouped (2 or 3 in a burst) | Sensor fault or trouble signal | Clean the sensing chamber, retest |
| Grouped (8 in a burst) | End of life | Replace the alarm head |
| Steady red | Active alarm or hard fault | Check the manual, act fast |
Never guess on this one. A wrong guess costs you either a working alarm or a quiet one. Both outcomes are worse than taking five minutes to look up the code.
The Chirp and Blink Combination: Low Battery, Sensor Fault, or End of Life
The LED is only half the message. The other half is the chirp. Together they form a two-part code that most manufacturers design to be unmistakable once you know the pattern.
If your alarm is blinking and chirping, listen for the count.
One chirp every 30 to 60 seconds
That's low battery. It's the classic pattern, and it's the one most people already know. Replace the backup battery, or if the unit has a sealed 10-year cell, replace the whole alarm head.
One chirp is also the code that starts at 2 a.m. on a Sunday. That's not a design flaw. It's because a cold battery loses voltage overnight, which pushes it just under the alarm's threshold.
Three chirps every 40 to 60 seconds
That's a sensor fault or unit error. The sensing chamber may be dirty, or the unit has failed an internal self-test. Power down at the breaker, remove the head, and blow out or vacuum the sensing chamber.
Reassemble, restore power, and test again.
If the three chirps come back after cleaning, the unit has a real fault. It's time to replace it.
Eight chirps every 40 to 60 seconds
That's end of life. The alarm has reached its maximum service life and cannot be reset. Replacing the battery won't help, and cleaning won't help either.
The unit has to come down.
Per manufacturer specs, smoke alarms last 10 years from the date of manufacture. CO sensors inside combination units often expire sooner, usually at 5 to 7 years. Check the date stamp on the back of the unit before you assume it's a battery issue.
Continuous alarm
That's not a chirp. That's the full 85-decibel horn. It means smoke or carbon monoxide is present.
Get everyone out of the house, call 911, and only investigate once you're outside and accounted for.
| Chirp pattern | Likely meaning | First action |
|---|---|---|
| 1 chirp every 30 to 60 sec | Low battery | Replace the backup battery |
| 3 chirps every 40 to 60 sec | Sensor fault or unit error | Clean the chamber, retest |
| 8 chirps every 40 to 60 sec | End of life | Replace the alarm head |
| Continuous horn | Smoke or CO detected | Evacuate, then call for help |
Why low-battery and end-of-life chirps sound so similar
This is the trap that catches most people. A low-battery chirp and an end-of-life chirp are close in pitch and volume. They're both short.
They're both annoying. The difference is the count and the interval.
Count the chirps. Time the gap. That's how you tell them apart.
If you get eight chirps in a burst, the battery isn't the issue. The alarm is telling you it's done.
One more thing worth knowing. A sealed 10-year battery that starts chirping at year 8 or 9 isn't low. It's hit its service limit.
You can't swap the cell. The whole unit has to go.
What Happens After a Power Outage or a Tripped Breaker
A power outage does two things to a wired smoke alarm. It drains the backup battery, and it reboots the unit's internal logic. Both can leave a light blinking that wasn't blinking before.
Neither means the alarm is broken.
After the power comes back on
When AC power returns, most wired alarms run a self-check. Some flash the LED to confirm the reboot. Others hold the last event in memory, so a red blink that started during the outage keeps going until you clear it.
Press and hold the Test/Silence button for a few seconds. On most models, that clears the memory and returns the LED to its normal state. If the light stays on after that, you're dealing with something else.
When the backup battery doesn't recover
A long outage is hard on a 9-volt or AA backup. If the outage ran for hours, expect a low-battery chirp within a day or two of the power coming back. That chirp is the unit telling you the backup didn't fully recover.
Replace it and move on.
This is why we recommend replacing backup batteries once a year, regardless of how the alarm behaves. A fresh battery turns a 12-hour outage into a non-event. A weak one turns it into a midnight chirp.
When a breaker trips
If your smoke alarms share a circuit and that breaker trips, the alarms lose AC power. They'll run on backup until the battery dies, then chirp. Check your electrical panel before you assume the alarm is faulty.
In our research, this is one of the most common false alarms in older homes. Somebody plugs in a space heater. The breaker trips.
The alarms start chirping two days later. The fix isn't a new alarm. It's a dedicated circuit.
Brownouts and voltage sags
Brownouts don't always trip a breaker. The voltage just sags for a while. Some alarms read that as a power fault and blink a trouble code.
If the light clears on its own once voltage stabilizes, it was likely a brownout and not a hardware problem.
If you live in an area with frequent brownouts, a whole-home surge protector is worth considering. It won't stop every event, but it protects the alarm's internal electronics from repeated stress.
The dedicated circuit rule, one more time
Per NFPA 72, the circuit feeding your smoke alarms must be dedicated and unswitched. No dimmer. No wall switch.
No shared outlet that someone can flip off without thinking. If your alarms lose power every time someone hits a switch, you've found your problem.
When the unit itself might be recalled
Sometimes a wired alarm blinks or chirps because of a manufacturing defect, not a wiring issue. The U.S. Consumer Product Safety Commission maintains a public recall database that covers smoke and CO alarms.
Look up your model number before you spend money on a replacement.
If your model shows up in a recall, the manufacturer usually replaces it for free. That's a much better outcome than buying a new one.
Once you've ruled out power problems and recalls, the next step is figuring out whether the blink is memory or a genuine fault. That distinction decides whether you clean the unit, reset it, or replace it entirely.
Alarm Memory Mode: Finding the Unit That Actually Tripped
In a house with one alarm, a red blink is easy to interpret. In a house with six interconnected alarms, it's a puzzle. One unit detected smoke, tripped the whole chain, and then kept its LED lit so you could find it later.
That's alarm memory, and it's one of the most useful features on a hardwired system.
The feature exists for a good reason. A nuisance alarm at 3 a.m. wakes everyone, gets silenced, and then everyone goes back to bed. By morning, nobody remembers which alarm started it.
Memory mode answers that question without guesswork.
What alarm memory actually does
When a wired alarm trips, the unit that sensed the smoke holds onto that event. Its LED keeps blinking after the horn stops. The other alarms in the chain go quiet and return to normal.
So the blinking unit is the origin, and the rest are just followers.
Manufacturer documentation describes this as "alarm memory" or "latching alarm indication." The exact behavior varies. Some units blink rapidly for 24 hours, then reset themselves. Others hold the pattern until you press the button.
How to find the tripped unit in a house with six alarms
Walk the house and look at every LED. You're hunting for one unit with an active pattern while the others sit steady or blink slowly. That's your origin point.
If your ceilings are high and the LEDs are hard to read, use your phone camera on zoom. The blink is easier to catch on a small screen than with the naked eye. This is a visual search, not an electrical one.
In our research, most "mystery red light" calls end here. The homeowner finds one unit blinking and five others normal, and the answer becomes obvious.
How to clear memory on common models
Press and hold the Test/Silence button on the blinking unit for a few seconds. On most models, the unit beeps and the LED returns to its normal state. If the light comes right back, you're not looking at memory.
You're looking at a fault or end-of-life signal.
Here's the if/then logic that saves time.
- If the blink clears and stays clear, it was memory. Done.
- If the blink returns within a minute, treat it as a trouble code.
- If the blink returns along with three chirps, clean the sensing chamber.
- If the blink returns along with eight chirps, the unit is at end of life.
Why memory mode looks like a fault to most people
A rapid red blink is dramatic. It looks like something is wrong. That's exactly why people pull the battery instead of pressing the button.
The confusion gets worse because some brands use the same rapid pattern for a sensor fault. So a fast blink can mean "I tripped once" or "my sensor failed," depending on the model. The chirp count is what separates them.
Memory mode is silent. A fault chirps.
If your alarm is blinking fast and staying quiet, it's probably memory. If it's blinking fast and chirping, dig into the fault codes.
When memory mode masks a real problem
There's a scenario worth flagging. A unit can trip on real smoke from a small fire, get silenced, and then sit in memory while the actual cause goes unaddressed. A smoldering outlet, a failing appliance, or a lint buildup behind a dryer can produce just enough smoke to trip once.
Treat any unexplained trip as a signal. If nothing was cooking and nobody burned toast, look around the room. Check outlets, cords, and anything warm.
Memory mode tells you where the alarm went off. It doesn't tell you why. That part is on you.
Brand by Brand: Kidde, First Alert, BRK, USI, Aico, FireAngel, and Gentex
Here's the single most important fact in this whole topic. The two biggest residential brands in North America use opposite color logic. What's normal on one is a warning on the other.
That's the root of most of the confusion people run into.
Kidde
Kidde is one of the largest residential alarm makers in the US. Across much of its hardwired line, including the i12010S, P12040, i12060, and the P4010ACS series, the published charts tend to use green for AC power indication and red for alarm, memory, or trouble. That's a general pattern, not a universal rule.
Individual models break it.
Kidde also makes combination smoke and CO units like the KN-COSM-BA and P4010ACSCO. Those add extra codes because they monitor two hazards on one sensor board. Their manuals run several pages longer than a smoke-only chart.
First Alert and BRK
First Alert and BRK are the same company. BRK Brands owns both names, and the LED logic carries across. That's genuinely useful to know.
If you own a BRK unit and can only find a First Alert manual, you're probably reading the right chart.
Several First Alert models, including the widely installed 9120B and the SC9120B combo, describe a red LED flashing once a minute as normal AC power indication. Read that again. On those units, a slow red blink is the alarm telling you everything is fine.
That one fact explains a huge share of panicked searches. Someone sees a red light, assumes danger, and starts shopping for a replacement they don't need.
USI
Universal Security Instruments, usually shortened to USI, builds hardwired alarms that show up in a lot of builder-grade and multifamily installs. Models like the USI 5304 and MI106 series use LED patterns that differ from both Kidde and First Alert. The interconnect behavior is similar.
The light codes are not.
Aico and Ei Electronics
Aico is the trading name of Ei Electronics, an Irish manufacturer that dominates the UK and Irish residential market. If you're in the UK or Ireland, you're probably looking at an Aico Ei140RC, Ei2110e, or Ei650. Their LED behavior follows UK conventions, and their flash patterns don't map onto US brands at all.
Aico units also support house codes for wireless interconnect, which adds another layer of diagnostic behavior. Their technical support line is genuinely helpful if you can quote the model number.
FireAngel
FireAngel is a UK brand found in a lot of social housing and rental properties. Their mains-powered units use their own LED logic, and several models include a specific fault indication that shows up as a repeating flash sequence.
Gentex
Gentex leans toward commercial and multifamily work, along with builder-grade residential installs. Gentex devices often follow conventions closer to commercial fire alarm equipment than to consumer alarms. If you're in an apartment building with a Gentex on the ceiling, you may be looking at a system the building manages, not something you should touch.
| Brand | Typical LED convention | Where the answer lives |
|---|---|---|
| Kidde | Green for AC power on many models, red for alarm or fault | Kidde user manual and support line |
| First Alert / BRK | Red flash once a minute often means normal AC power | First Alert or BRK manual for your model |
| USI | Model-specific patterns, distinct from Kidde and First Alert | USI manual and tech support |
| Aico / Ei | UK conventions, red pulse often indicates mains power | Aico technical support |
| FireAngel | UK conventions with specific fault sequences | FireAngel manual and support |
| Gentex | Closer to commercial fire alarm conventions | Building management or Gentex support |
How to read any chart in under two minutes
Find the model number. It's on the back of the alarm head, on the mounting base, or inside the battery compartment. Write it down before you do anything else.
Then search the manufacturer's own support site for that exact model. Not a general "smoke alarm codes" page. The specific model manual.
Finally, match three things at once: LED color, blink cadence, and chirp count. Any two of those can mislead you. All three together are reliable.
If the manual is lost and the model number is worn off, call the manufacturer. Give them the approximate age of the unit and describe the pattern. They can usually narrow it down.
Age and Expiration: Why a 10-Year-Old Alarm Blinks No Matter What You Do
A wired alarm that blinks red and chirps eight times is not asking for a battery. It's telling you it's finished. No amount of cleaning, resetting, or fresh batteries will change that outcome.
This is the point where a lot of people waste money and time. They buy a new 9-volt, install it, and the chirp comes back within a day. Then they buy a different brand of battery.
Then they give up and take the alarm down. All of that could have been avoided by checking one date stamp.
Why 10 years is the number
Smoke sensors degrade. The sensing chamber collects dust, the internal electronics age, and the calibration drifts. After a decade, a unit may still beep when you press the test button and still fail to detect real smoke at the right threshold.
Per manufacturer specifications, replace smoke alarms 10 years from the date of manufacture. That's the industry standard across Kidde, First Alert, USI, Aico, and FireAngel. It's also reflected in guidance published by the U.S.
Fire Administration.
The 10-year clock starts at manufacture, not at installation. A unit that sat in a warehouse for two years before it went on your ceiling has eight years of useful life left, not ten.
How to find the manufacture date
Look at the back of the alarm head. There's a label with a date code. It might read as a full date, like "2021 JAN 15." It might read as a coded string, like "21J15." Some brands print it as a simple year and week.
Write it down. If the unit is more than 10 years old, you have your answer and you can stop troubleshooting.
If you can't find a date at all, that's a warning sign on its own. Very old units often predate mandatory date labeling, which means they're well past their service life.
CO sensors expire sooner
Combination smoke and CO units have two clocks running. The smoke sensor lasts about 10 years. The carbon monoxide sensor often expires at 5 to 7 years, depending on the model and the manufacturer.
That's why a combo unit can start chirping at year six even though the smoke side still works. It's not a battery problem. The CO cell has reached its limit, and the unit is designed to fail loudly rather than silently.
If you own a combination unit, check the manual for the specific CO sensor life. Don't assume 10 years applies to both sensors.
What changed with UL 217 8th edition
The 8th edition of UL 217 brought tougher testing for both smoldering fires and cooking nuisance alarms. Newer alarms are better at ignoring burnt toast while still catching real smoke. They also tend to have more sophisticated diagnostics, which means more blink codes and more chirp patterns.
If you're replacing a 15-year-old unit, the new one will behave differently. Different blink patterns, different chirp cadence, sometimes a different LED color convention. Don't assume the new alarm is faulty because it doesn't match the old one.
Sealed 10-year batteries change the math
Many current hardwired alarms ship with a sealed lithium backup that you can't replace. That battery is designed to last the life of the unit. When it fails, the alarm fails with it.
On those models, a low-battery chirp near year eight or nine usually means the whole unit is done. There's no cell to swap. The sealed design is intentional, because it removes the most common failure mode in residential alarms: a missing or dead backup battery.
What to do when the unit is expired
Replace the alarm head. In most cases, you can keep the existing mounting base and wiring harness if you buy the same brand and a compatible model. That makes the swap a two-minute job with no electrician needed.
If you're changing brands, you'll likely need a new base and harness too. That's still a straightforward swap, but it means working at the breaker and handling the wiring connections.
While you're up there, check the other alarms on the circuit. If one is expired, its siblings from the same install are probably expired too. Replacing them all at once is cheaper and safer than chasing failures one at a time for the next year.
Step by Step: Safe Troubleshooting Before You Touch Anything
Work through these steps in order. Each one narrows the possibilities, and you'll usually have an answer within the first three.
Step 1: Silence the alarm and note the pattern
Press the Test/Silence button once to quiet the unit. Then watch the LED for a full 60 seconds and count the chirps in that window. Write both down.
Don't skip this. The pattern is your only diagnostic data, and once you start resetting things, it's gone.
Step 2: Read the model number and the date stamp
The model number is on the back of the head or inside the battery compartment. The date stamp is usually right beside it. Both are essential.
If the unit is 10 years old or more, stop here. Replace it.
Step 3: Check the backup battery
Open the battery compartment and test the cell with a multimeter if you have one. A healthy 9-volt reads around 9.5 volts. A healthy AA or AAA reads about 1.5 volts.
Anything noticeably below that is a candidate for replacement.
If the unit has a sealed lithium backup, there's nothing to check. Move on.
Step 4: Confirm the alarm has AC power
Flip the breaker off and back on for the circuit feeding the alarms. Then watch the LED. On many models, a restored power indication means the unit rebooted cleanly.
If the LED never comes back to a normal state, you may have a wiring problem rather than an alarm problem. That's an electrician's job, not a homeowner's.
Step 5: Press and hold Test/Silence for a full reset
Hold the button for the duration specified in your manual, usually 5 to 10 seconds. Listen for the confirmation beep. This clears alarm memory and runs a self-test.
If the red blink clears and stays clear, you're done.
Step 6: Power down and clean the sensing chamber
Turn off the breaker. Twist the head off the base and unplug the wiring harness. Take the head outside and use compressed air or a vacuum with a brush attachment on the lowest setting.
Don't use water. Don't spray anything into the chamber. Don't poke at the sensor with a cotton swab.
The chamber is delicate, and rough handling can turn a minor fault into a permanent one.
Step 7: Reassemble, restore power, and retest
Plug the harness back in, twist the head onto the base, and turn the breaker back on. Press and hold Test/Silence to run a self-test.
If the fault code returns, the sensor has failed. Replace the unit.
Step 8: Verify the interconnect chain
Once the unit is working, press and hold the test button on it. Every other alarm on the circuit should sound within a few seconds. If one doesn't, that alarm has a problem of its own.
This step gets skipped constantly, and it matters. An interconnect chain with one dead link is a house with a blind spot.
| Situation | Most likely cause | Action |
|---|---|---|
| Slow blink, no chirp, unit under 10 years | Normal AC power indication | Leave it alone |
| Slow blink, no chirp, unit over 10 years | Aging unit, likely still functional | Plan replacement |
| Fast blink, no chirp | Alarm memory | Hold Test/Silence to clear |
| Fast blink plus 3 chirps | Sensor fault | Clean the chamber, retest |
| Any blink plus 8 chirps | End of life | Replace the alarm head |
| Continuous horn | Smoke or CO present | Evacuate, then call 911 |
When to stop troubleshooting and replace
Here's the honest cutoff. If you've cleaned the chamber, replaced the battery, cleared memory, and the fault code still comes back, the unit is done. Sensors fail.
Replacing the alarm is cheaper than guessing, and it's the only option that restores protection.
Mistakes That Quietly Put Your Household at Risk
Most of these mistakes don't feel like mistakes at the time. They feel like solving an annoying problem. That's what makes them dangerous.
Pulling the battery to stop the chirp
This is the single most common error, and it's the one that kills people. The chirp exists because something needs attention. Removing the battery stops the noise and removes your protection at the same time.
If you can't deal with the alarm today, silence it with the button and put a reminder in your phone for tomorrow. Don't leave a unit disabled overnight.
Taping over the LED
Covering the light doesn't change the underlying state. The alarm still has whatever fault triggered the blink. All you've done is hide the information you need.
Taking the alarm down and leaving the wiring exposed
A disconnected harness hanging out of a ceiling box is a shock hazard. It's also an open circuit that can break the interconnect chain for every other alarm in the house. If you remove one unit, cap the wires properly or replace the alarm the same day.
Painting over a smoke alarm
Paint clogs the sensing chamber and blocks the vents. A painted alarm may fail to detect smoke entirely, or it may sound constantly because the sensor is contaminated. Never paint an alarm, and never paint the ceiling with the alarm still mounted.
Replacing one alarm with a different brand
Interconnect compatibility is brand and model specific. A new Kidde head on a First Alert base won't communicate, and the traveler wire becomes useless. You end up with one alarm that works alone while the rest of the house thinks everything is fine.
If you're switching brands, replace the entire chain at once. It costs more upfront and it's the only way to keep the interconnect working.
Mixing old and new units on the same circuit
Even within the same brand, an old unit and a new unit may not speak the same interconnect language. Manufacturers change protocols between generations. If you're replacing one alarm, check that the new model is compatible with the older units still on the circuit.
When in doubt, replace the whole set. It's usually cheaper than the diagnostic time you'll spend chasing a chain that won't talk.
Forgetting to test the interconnect after a replacement
The test button on the new unit proves the new unit works. It doesn't prove the chain works. Walk the house and confirm every alarm sounds when you press one test button.
That single check catches most installation errors.
Mounting an alarm too close to the kitchen or bathroom
Per NFPA 72, keep smoke alarms at least 10 feet from cooking appliances and at least 3 feet from a bathroom door. Too close to the kitchen, and every pancake breakfast becomes a nuisance alarm. Too close to the bathroom, and shower steam sets it off.
Repeated nuisance alarms lead directly to the first mistake on this list. People disable the alarm because it cries wolf. Placement is what prevents that spiral.
Using the wrong battery type
Alkaline and lithium batteries behave differently. Some alarms are designed for one and not the other. Rechargeable batteries are a bad fit for smoke alarms because they self-discharge and can read low under load.
Use the battery type the manufacturer specifies. That's in the manual, and often printed inside the battery compartment.
Ignoring a real trip because nothing is visibly burning
A smoldering fire can produce smoke for hours before it becomes visible. If an alarm trips and nothing obvious explains it, look harder. Check outlets, appliance cords, dryer vents, and anything warm to the touch.
The alarm did its job. Don't dismiss it because you can't see the cause yet.
Waiting for a failure instead of replacing on schedule
The 10-year replacement rule exists so you never have to troubleshoot a dead sensor. Replace on schedule and you skip most of the scenarios in this guide entirely. It's cheaper, it's safer, and it takes about two minutes per unit.
Code, Compliance, and Landlord Rules You Can't Skip
A red blinking light is a device issue. What you do about it can become a code issue, and sometimes a legal one. That's especially true if you rent, if you own a multi-unit building, or if the alarm in question sits in a commercial space.
Here's the practical version of the rules, without the legalese.
NFPA 72 and the dedicated circuit requirement
NFPA 72, the National Fire Alarm and Signaling Code, sets the baseline for how smoke alarms are powered and installed in the US. It calls for AC-powered smoke alarms to sit on a dedicated branch circuit that serves nothing else. The circuit also has to be unswitched, so nobody can kill power to the alarms with a wall switch.
Manufacturer installation instructions repeat that requirement in nearly identical language. If your alarms share a circuit with a bedroom outlet or a hallway light, you're outside the spec. That's a wiring problem, not an alarm problem.
NFPA 101 and the Life Safety Code
NFPA 101 covers life safety in buildings, including where alarms go and how many you need. Residential occupancies have their own chapter, and it aligns with NFPA 72 on spacing and interconnect.
For a single-family home, the practical rules are simple. Alarms go inside every sleeping room, outside each sleeping area, and on every level of the home. Interconnected units are required in new construction and in most major renovations.
UL 217 and UL 2034
UL 217 is the listing standard for residential smoke alarms. UL 2034 covers carbon monoxide alarms. A unit that carries neither mark shouldn't be on your ceiling.
The 8th edition of UL 217 tightened both smoldering fire detection and cooking nuisance resistance. Newer alarms are better on both fronts, which is one more reason the 10-year replacement rule matters. An alarm built to an older edition behaves differently from a current one.
State and local adoption
NFPA 72 and NFPA 101 are model codes. They don't apply on their own. Your state or city adopts a version of them, sometimes with amendments.
That's why requirements vary so much from one zip code to the next.
If you're selling a home or pulling a renovation permit, the inspector will be looking at your local version, not the national one. When in doubt, call your local building department or fire marshal. They answer these questions all day.
Landlord and tenant responsibilities
In most US jurisdictions, the landlord owns the smoke alarms and carries the legal duty to keep them working. The tenant's job is usually limited to testing the alarms and reporting problems. Tenants generally can't be charged for a normal end-of-life replacement.
Here's the part that matters for this topic. If your wired alarm is blinking red and you rent, that's a maintenance request, not a DIY project. Report it in writing, note the date, and let the landlord handle the replacement.
Removing the alarm yourself could put you in violation of your lease.
Accessibility rules for hearing-impaired occupants
The ADA and ICC A117.1 both address alarms for people who can't hear a standard 85-decibel horn. In accessible dwelling units, that usually means a visual alarm, a strobe, or a bed shaker.
If your household includes someone with hearing loss, a blinking LED is not the same thing as a visual alarm. A proper visual notification appliance meets specific flash intensity and timing requirements. A status LED on a standard alarm doesn't come close.
Workplace requirements under OSHA
If you're dealing with a commercial building rather than a home, OSHA sets its own rules for employee alarm systems under 29 CFR 1910.165. Commercial fire alarm devices follow different standards and different maintenance cycles. Don't apply residential troubleshooting logic to a commercial panel.
Disposal of ionization alarms
Ionization smoke alarms contain a trace amount of americium-241, a radioactive isotope. The amount is tiny and the units are safe to live with. Disposal rules vary, though.
Some US states allow normal trash, and others require hazardous waste handling.
Check with your local waste authority before you toss an old ionization unit in the bin. Many manufacturers also run take-back programs.
The UK and Ireland
Smoke alarms in the UK follow BS EN 14604 for the device itself and BS 5839-6 for system design in dwellings. BS 5839-6 uses grades. Grade D1 means mains-powered with a sealed, tamper-proof backup.
Grade D2 means mains-powered with a replaceable backup battery.
Carbon monoxide alarms follow BS EN 50291. Combination units have to meet both standards, which is one reason their diagnostic codes run longer.
For rented homes in England, the Smoke and Carbon Monoxide Alarm (Amendment) Regulations 2022 require at least one smoke alarm on each storey, plus a CO alarm in any room with a fixed combustion appliance. Scotland goes further, with interlinked alarms across the property and a heat alarm in the kitchen.
Ireland's Technical Guidance Document B sets the requirements for dwellings, and it leans on the same BS EN standards as the UK. Aico, as the trading name of Ei Electronics, dominates this market.
Canada, Australia, and New Zealand
Canadian alarms are certified to CAN/ULC-S531. Provincial building codes govern installation, and they generally mirror the NFPA approach: interconnected, mains-powered, with battery backup.
Australia uses AS 3786 for smoke alarms. Queensland has some of the strictest residential rules in the country, requiring photoelectric alarms that are interconnected, mains-powered, and backed by a 10-year battery. New Zealand follows NZS 4514 for domestic smoke alarms, and the rules are broadly similar.
| Region | Key standard | Common requirement |
|---|---|---|
| US | UL 217, UL 2034, NFPA 72 | Mains-powered, interconnected, battery backup |
| UK | BS EN 14604, BS 5839-6, BS EN 50291 | Grade D1 or D2, mains-powered |
| Ireland | TGD B, BS EN standards | Mains-powered, interconnected |
| Canada | CAN/ULC-S531 | Mains-powered, interconnected, backup battery |
| Australia | AS 3786 | Mains-powered, interconnected, 10-year backup |
| New Zealand | NZS 4514 | Domestic smoke alarm requirements |
Why the regional split matters for your blink code
A unit sold in the UK will not use the same LED logic as a unit sold in the US, even from the same parent company. If you've moved into a home with imported or builder-grade hardware, that's worth knowing before you assume a pattern means one thing.
The safe move is always the same. Find the model number. Look up the manufacturer's own documentation for that exact model and that region.
The blink code follows the standard the unit was built to, not the one you're most familiar with.
When to Call an Electrician, Your Landlord, or Your Local Fire Marshal
Not every red blink is a DIY job. Here's the decision logic, laid out plainly.
Call the manufacturer's support line when
You can't identify the blink pattern, you've lost the manual, and the model number is legible. Most support lines will decode the pattern over the phone in a few minutes. Kidde, First Alert, USI, Aico, and FireAngel all run consumer support.
This should be your first call for any pattern you can't match to a known code. It costs nothing and it's faster than guessing.
Call an electrician when
The alarm has no AC power despite a live breaker, or the breaker trips when the alarms are on the circuit, or you've found scorched or loose wiring at the ceiling box. Those are electrical faults, not alarm faults.
Also call an electrician if the circuit feeding the alarms is shared or switched. Correcting that is a wiring job, and it usually means running a dedicated line.
Don't poke around inside a live 120-volt junction box if you're not confident. The cost of an electrician's visit is a fraction of the cost of a mistake.
Call your landlord when
You rent. Full stop. The alarm is the landlord's equipment and the landlord's legal responsibility in nearly every jurisdiction.
Report the blinking unit in writing, note the date, and keep a copy.
If the landlord doesn't respond and the alarm is chirping, your local housing authority or building department is the next step. Most municipalities treat non-working smoke alarms as a habitability issue.
Call your local fire marshal when
You need a code interpretation, you're dealing with a multifamily building, or you want to know exactly what your jurisdiction requires. Fire marshals and building departments are the Authority Having Jurisdiction, usually shortened to AHJ. Their reading of the code is the one that counts.
This is also the right call if you're in a rental and the landlord is dragging their feet. Fire marshals take smoke alarm complaints seriously.
Call 911 when
The alarm is in full continuous mode and you see or smell smoke, or you can't account for the source and something feels wrong. Get out first, call from outside, and stay out.
| Situation | Who to call |
|---|---|
| Blink pattern you can't identify | Manufacturer support line |
| No AC power at the alarm, breaker fine | Licensed electrician |
| Shared or switched alarm circuit | Licensed electrician |
| Rental property, alarm failing | Landlord, in writing |
| Landlord not responding | Housing authority or fire marshal |
| Code or permit question | Local building department or fire marshal |
| Continuous alarm with smoke or CO | 911, from outside |
The one thing not to do
Never pull a hardwired alarm off the ceiling and leave the harness dangling. That's an exposed conductor at 120 volts, and it breaks the interconnect chain for every other alarm in the house. If you have to remove a unit, turn off the breaker first, then cap the wires properly.
Maintenance That Keeps the Light Green and the Alarm Working
Almost every problem in this guide can be prevented with a handful of habits. None of them take long.
Test every alarm once a month
Press and hold the Test/Silence button on each unit until the horn sounds. It takes about 10 seconds per alarm. This is the single highest-value thing you can do, and it's the step most households skip.
While you're up there, glance at the LED. A normal status light means you're fine. Anything else gets logged for follow-up.
Replace backup batteries once a year
Even if the alarm isn't chirping, swap the backup battery annually. Pick a date you'll remember, like when you change the clocks or the first weekend of a specific month. Mark it on the calendar.
If your alarms have sealed 10-year lithium backups, skip this step and note the manufacture date instead. That's your replacement clock.
Dust the sensing chamber twice a year
Turn off the breaker. Twist the head off. Unplug the harness.
Use compressed air or a vacuum with a soft brush attachment on low. Blow out the chamber gently and put the unit back.
Never use water, never spray anything into the chamber, and never scrub the sensor. Dust is the enemy. Abrasion is worse.
Check the interconnect chain after any replacement
Press the test button on one alarm and walk the house. Every other alarm on the circuit should sound within a few seconds. If one doesn't, that unit has a problem and it needs attention.
This check catches more installation errors than any other single step.
Log the manufacture dates
Write down the date stamp on each alarm and stick the list somewhere you'll find it. When one unit hits 10 years, its siblings from the same install are right behind it. Replacing the whole set at once is cheaper and faster than chasing failures one by one.
Watch for environmental stressors
Coastal air accelerates corrosion in the sensing chamber. Humid climates do the same. In cold regions, winter brownouts and outages stress backup batteries.
In warm regions, insects nesting in the chamber cause false alarms.
If you live in one of those environments, shorten your dusting interval and keep a closer eye on nuisance alarms.
| Task | Frequency | Time needed |
|---|---|---|
| Press Test/Silence on every alarm | Monthly | About 10 seconds each |
| Replace backup battery | Annually | 2 minutes per unit |
| Dust the sensing chamber | Every 6 months | 5 minutes per unit |
| Verify interconnect chain | After any replacement | 2 minutes |
| Check manufacture dates | Annually | 5 minutes total |
| Replace the alarm head | Every 10 years | 2 minutes per unit |
Never paint an alarm, and never cover it
Paint clogs the vents and contaminates the sensor. Covers block smoke from reaching the chamber. Both turn a working alarm into a decorative object.
If you're painting a ceiling, take the alarm down first, then reinstall it once the paint is fully dry.
After any renovation, retest everything
Drywall dust is brutal on sensing chambers. After any sanding, demo, or major project, pull each alarm, clean it, and retest the full interconnect chain. A unit that was fine before the renovation can start faulting within days.
Keep the alarm on your recall radar
Check your model numbers against the CPSC recall list once a year. It takes five minutes and it occasionally turns up a free replacement. Recalls are one of the few failure modes you can't prevent with maintenance.
Frequently Asked Questions
Why is my hardwired smoke detector blinking red every 30 seconds?
On many hardwired models, a slow red blink roughly every 30 to 60 seconds is normal AC power indication. First Alert and BRK units in particular often use this pattern to show the unit is running on mains power. Check your model's manual before assuming something is wrong.
What does a red blinking light mean if the alarm isn't beeping?
No chirp usually means no fault. Alarm memory and normal power indication are both silent. A fault code almost always comes with chirps.
If your unit is blinking with no sound, it's likely telling you it tripped at some point or that it has power.
Can I just take down a hardwired smoke detector that keeps blinking?
No. Removing an alarm leaves live wiring exposed and breaks the interconnect chain for every other unit in the house. If the alarm is at end of life, replace it.
If it's a nuisance alarm, fix the placement or clear the memory instead.
How do I know if my wired smoke alarm needs a new battery or full replacement?
Check the manufacture date first. If the unit is 10 years old or more, replace the whole alarm. If it's newer, count the chirps.
One chirp every 30 to 60 seconds means low battery. Eight chirps in a burst means end of life.
Why is only one alarm in my house blinking red?
That unit is the one that tripped. Hardwired alarms share a traveler wire, so one detection triggers the whole chain. The originating alarm holds the event in memory and keeps its LED blinking so you can identify it.
Press and hold Test/Silence to clear it.
Is a red blinking light on a smoke detector ever an emergency?
Only if the horn is sounding continuously. A blinking LED alone is a status signal, not an alarm. If the horn is blaring and you see or smell smoke, evacuate and call 911 from outside.
Otherwise, treat the blink as a diagnostic message and work through the code.