Your Polaroid is blinking orange because the camera is flagging a problem, not because it's dead. On i-Type bodies like the Polaroid Now and the OneStep 2, an amber light almost always points to one of three things: a low internal battery, a film pack that isn't seated properly, or a camera stuck in a state it can't escape on its own. Most of these clear up in under five minutes, with no tools and no repair bill.
Manufacturer specifications indicate the internal battery takes roughly one to two hours to charge over USB-C. A healthy cell runs around 15 packs of film before it needs a top-up. Polaroid doesn't publish one universal blink code for every model, so the pattern matters as much as the color.
Quick Answer
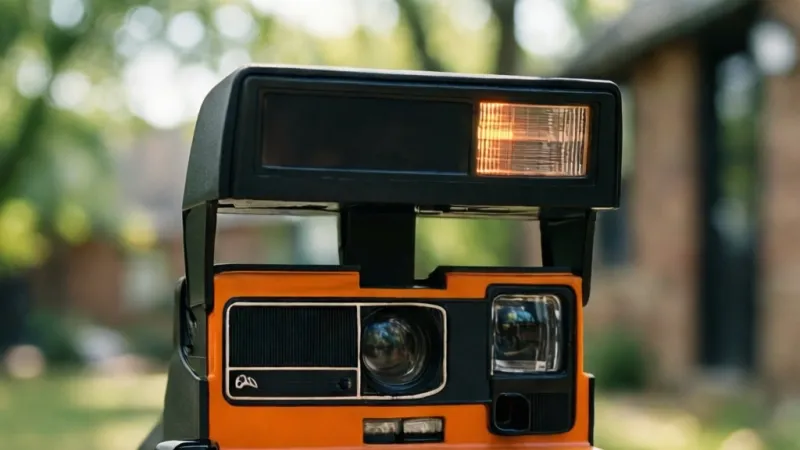
A blinking orange light on a Polaroid usually means low battery. It can also mean the film pack isn't seated right. Sometimes the camera is stuck in Bluetooth pairing mode.
Charge the camera for one full hour first. Then reseat the film pack and power cycle the camera.
Why Your Polaroid Is Blinking Orange (And Why It's Usually Fixable)
That little light on the front of your camera isn't decoration. It's a diagnostic channel, and Polaroid squeezed several jobs into one LED. Battery state, film state, and Bluetooth state all report through the same bulb.
When it flashes amber, the camera is telling you one of those three systems has a problem.
The reason this is usually fixable comes down to who owns the fault. Two of the three systems are entirely in your hands: the battery you charge and the film pack you load. Only the third, a hardware fault, needs Polaroid involved.
In our research across owner reports and manufacturer documentation, the vast majority of orange-light cases resolve without a repair.
The three families of cause
Almost every orange light traces back to one of these:
- Power. The internal lithium cell is low, deeply discharged from months in a drawer, or not accepting charge from the cable or adapter you're using.
- Film. The pack isn't seated, the dark slide never ejected, a frame jammed at the slot, or the pack's own battery is flat on 600 and SX-70 film.
- Connection. The camera is sitting in Bluetooth pairing mode waiting for an app that never showed up.
The architecture split that changes everything
Here's the part most generic advice misses. Polaroid cameras come in two electrical designs, and they fail in completely different ways.
On modern i-Type bodies, the battery lives inside the camera and charges over USB-C. The film pack is just film. On vintage 600 box cameras and the SX-70, the battery lives inside the film pack itself, and the camera has no internal cell at all.
A dead 600 pack can look exactly like a dead camera.
If you own a modern body, charge it. If you own a vintage one, swap the film pack. Same symptom, opposite fix.
What the light is actually reporting
| Cause family | What you'll typically see | Typical fix time |
|---|---|---|
| Low battery | Slow amber blink, camera sluggish or unresponsive | 1 to 2 hours of charging |
| Film fault | Amber blink plus no ejection or a jammed frame | 2 to 10 minutes |
| Pairing stuck | Amber or alternating blink, camera awake but idle | Under 1 minute |
| Hardware fault | Rapid amber or red blink, no change after charging | Support ticket |
Why guessing wrong costs real money
A single pack of Polaroid film runs about eight photos. In the US, that pack usually lands between $20 and $26. UK buyers pay roughly £18 to £22.
If you assume the camera is broken and start pulling the pack apart, you've likely ruined it.
Worse, a torn frame left inside the body can foul the rollers. That turns a two-minute fix into a camera that eats every subsequent pack. Slow down, and work through the branches in order.
One safety note worth stating plainly. The internal cell in modern Polaroids is lithium-based. Never puncture, crush, or heat it, and stop charging immediately if the body feels swollen or unusually hot.
When a battery reaches end of life, dispose of it through a proper e-waste channel rather than household trash. The EPA's recycling guidance covers how to find local drop-off options.
Match the Light to Your Camera: Now, Now+, OneStep, Go, Flip, and Vintage 600
Before you diagnose anything, confirm your camera actually has the light you're staring at. This sounds obvious. It isn't.
Half the confusion online comes from people applying modern i-Type advice to a 40-year-old SX-70, or the reverse.
Which models have a front status light
| Camera family | Film it takes | Where the power comes from | Front orange light |
|---|---|---|---|
| Polaroid Now, Now+, Now+ Gen 2, Now+ Gen 3 | i-Type or 600 | Internal USB-C battery | Yes |
| Polaroid OneStep 2, OneStep+ | i-Type or 600 | Internal USB-C battery | Yes |
| Polaroid Go, Go Gen 2 | Go film only | Internal USB-C battery | Yes |
| Polaroid Flip | i-Type or 600 | Internal USB-C battery | Yes |
| Polaroid Lab | i-Type | Internal USB-C battery | Yes, but it's a printer |
| Vintage 600 box cameras | 600 | Battery inside the film pack | No |
| Polaroid SX-70 | SX-70 | Battery inside the film pack | No |
Modern i-Type bodies: Now, OneStep, Go, and Flip
These are the cameras people mean when they search this question. All of them carry a rechargeable internal battery, charge over USB-C, and use a front-facing LED as their main status output. The Now+ and OneStep+ add a Bluetooth radio and app control.
That introduces the pairing failure mode that plain i-Type bodies don't have.
The Flip, Polaroid's newer folding model, follows the same logic. Same USB-C charging, same front indicator, same three cause families.
Polaroid Go and Go Gen 2
The Go is a different animal in one important way. It takes Go film, which is smaller and comes 16 frames to a pack instead of eight. Go film has no battery in the pack, so the camera is the only power source.
That means the Go is more sensitive to a low cell than its bigger siblings. If your Go is blinking orange, charging it is almost always the first correct move.
Polaroid Lab
Worth flagging because it trips people up. The Lab isn't a camera. It's a desktop printer that exposes phone photos onto i-Type film using a lens array and a phone screen.
It has a status LED and an internal battery, but the failure modes are different.
A blinking light on a Lab usually points to charging, film loading, or the phone app losing its connection. Don't follow camera-specific steps on a Lab.
Vintage 600 and SX-70: the light you're seeing isn't the same light
This is the single biggest source of bad advice on the topic. Vintage 600 box cameras and the SX-70 have no front status LED. What they do have is a small LED inside the viewfinder, and it does exactly one job.
It tells you the flash is charging and ready.
It's typically red or amber, and it blinks while the flash capacitor fills. That's normal behavior, not a fault. If you're seeing a blinking light in the viewfinder of an SX-70, your camera is working correctly.
If a vintage body genuinely isn't firing, the problem is mechanical or electrical, and the fixes are entirely different. Batteries in the pack, dirty rollers, sticky shutters, and failed capacitors all live in that world. Nothing about modern blink-pattern troubleshooting applies.
Read the Blink Pattern First: Solid, Slow, Rapid, and Double-Blink
The color tells you which system is unhappy. The pattern tells you how unhappy. That distinction is what separates a two-minute fix from a wasted film pack.
A practical trick: film the light with your phone in slow motion, then play it back. Counting a fast blink by eye is genuinely hard. Getting the count wrong sends you down the wrong branch.
Pattern reference table
| Pattern | Most commonly reported meaning | First move |
|---|---|---|
| Solid green | Ready, charged, film loaded | Shoot |
| Slow green blink | Charging or processing | Wait |
| Solid amber | Low battery or charging in progress | Plug in |
| Slow amber blink | Low battery, camera may refuse to fire | Charge fully |
| Rapid amber blink | Film fault, pairing fault, or jam | Open the film door and inspect |
| Double blink, then pause | Reported on app-connected models as a pairing or connection state | Check the app |
| Blinking red | Critical battery or a hardware fault | Charge, then contact support |
Polaroid doesn't publish one universal code table covering every generation. Treat the above as the pattern most owners report. Your model's manual is the final word, and it's usually a two-page PDF on Polaroid's site.
What green, orange, and red actually mean on each model
On modern i-Type bodies. Green means go. Amber means caution, and in practice it nearly always means power or film. Red means stop, and it usually means the battery has dropped below a usable threshold or the camera has hit a fault it can't clear.
On the Go and Go Gen 2. Same color logic, but the smaller battery means amber arrives faster. A Go that's been sitting for a month will often greet you with amber before you've taken a single shot.
On app-connected models. The Now+, OneStep+, and Flip add a fourth state. When the camera is broadcasting for a Bluetooth connection, the light behaves differently from normal operation. If you've recently opened the Polaroid app, that's your likely culprit.
On vintage bodies. None of this applies. A viewfinder light blinking on an SX-70 or a 600 box camera is the flash charging. Leave it alone and take the photo.
The distinction people miss: blinking versus pulsing
A blink is discrete. The light goes fully off, then fully on. A pulse is a gentle fade, and it usually signals an in-progress state like charging or processing rather than an error.
If your light is fading in and out smoothly while the camera sits on a USB-C cable, that's charging behavior. Let it finish. Don't unplug and start troubleshooting something that isn't broken.
The 60-Second Check: Charge, Power Cycle, Then Look Again
Before you go anywhere near the film door, run this sequence. It resolves a large share of orange-light cases on its own, and it costs you nothing but a couple of minutes.
The four-step sequence
- Plug in and watch. Connect the camera to a known-good USB-C cable and a wall adapter rated at 5V/2A or higher. Watch the light for 30 seconds. If it changes to a charging state, you've found your answer.
- Let it charge properly. Give it a full hour minimum. A deeply discharged cell can take the full one to two hours to reach green.
- Power cycle. Once it's off the cable, hold the shutter button for around 10 seconds to force a restart. Some models have a dedicated power switch, so use that if yours does.
- Check the film door. Open it, look for a torn or jammed frame, then close it firmly and listen for the latch.
What each step rules out
| Step | Time | What it rules out |
|---|---|---|
| Plug in and watch | 30 seconds | Dead cable, dead adapter, dead battery |
| Full charge | 1 to 2 hours | Deep discharge from long storage |
| Power cycle | 10 seconds | Stuck firmware or pairing state |
| Film door check | 1 minute | Jammed frame, unseated pack, missing dark slide |
Two quick notes on charging
Use a cable you've actually tested on another device. A surprising number of orange-light cases come down to a charge-only cable that never carried power properly, or a USB port on a laptop that can't deliver enough current.
Keep the camera at room temperature while it charges. Lithium cells charge poorly when cold. A camera that's been in a car overnight may refuse to take a charge until it warms up.
The Orange Light Decision Tree: Pick Your Branch
Now the branching logic. Three questions, asked in order, will land you on the right fix.
The three questions that narrow it down every time
Question 1: Does the light change when you plug it in?
- Yes, it shifts to a charging state. This is a power problem. Go to Branch 1.
- No change at all. Suspect the cable, the adapter, or a deeply discharged cell. Try a different cable and adapter before anything else.
- Light goes out entirely. That's usually good. It means the camera is drawing power.
Question 2: After charging, does the camera eject anything when you close the film door?
- Yes, a dark slide comes out. The camera is reading the pack correctly. If the light is still amber, suspect the pack's age or the temperature.
- No ejection, light still amber. This is a film fault. Go to Branch 2.
- Grinding or partial ejection. Stop immediately. You have a jam, and forcing it will damage the rollers.
Question 3: Does the light settle if you move away from your phone or close the app?
- Yes. You were stuck in a Bluetooth pairing state. Go to Branch 3.
- No, and the camera is cold or the film is old. Go to Branch 4.
- No, and none of the above applies. You may have a genuine hardware fault.
Routing table
| Symptom pattern | Branch | Most likely cause |
|---|---|---|
| Amber light, camera won't fire, was stored for months | Branch 1 | Deeply discharged battery |
| Amber light, no dark slide ejected, film door recently opened | Branch 2 | Unseated pack or missing dark slide |
| Amber light after opening the Polaroid app | Branch 3 | Stuck pairing or failed firmware update |
| Amber light in cold weather or with expired film | Branch 4 | Temperature or film chemistry |
| Rapid amber or red, unchanged after full charge | Hardware | Fault needing support |
One rule that overrides the tree
If you ever see the battery swelling, smell something sharp, or feel unusual heat around the body, stop. Unplug it, don't charge it again, and contact Polaroid support. No troubleshooting step is worth pushing through a failing lithium cell.
Branch 1: It Won't Charge or the Light Never Turns Green
If the light stays amber no matter how long you leave it plugged in, you have a charging problem. The camera isn't reaching the voltage it needs to report ready. There are only a handful of reasons this happens, and you can work through them in order.
Start with the cable and adapter
Most charging failures we see reported trace back to the cable, not the camera. USB-C cables vary wildly in what they can carry. A charge-only cable, or one rated for low current, may never deliver enough juice.
Try a cable you've confirmed works with another device. Then try a different wall adapter. Look for one rated at 5V/2A or higher.
Laptop USB ports are often the weakest link. They can cap output well below what a Polaroid needs. A dedicated wall adapter is almost always the better call.
Rule out a deep discharge
If your camera sat in a drawer for six months or more, the cell may have dropped below the threshold where it can even register as charging. Sometimes it looks completely dead for the first 20 minutes.
Leave it plugged in for a full hour before deciding anything. The first 30 minutes can look like nothing is happening. That's normal for a deeply discharged lithium cell.
Check the charging port
Look inside the USB-C port with a light. Pocket lint, dust, and debris are common. A clogged port prevents the cable from seating fully.
Never scrape the port with metal. Use a dry, soft-bristled brush or a wooden toothpick. If you see corrosion or a bent pin, stop and contact support.
Temperature matters more than you'd think
Lithium cells don't charge well when cold. A camera left in a cold car overnight may refuse to accept a charge until it warms up. Bring it indoors and let it sit for an hour before plugging in.
Heat is the opposite problem. A camera that's been in direct sun may hit a thermal cutoff. Let it cool to room temperature first.
What to try if nothing works
Work through this in order:
- Swap to a known-good USB-C cable
- Swap to a wall adapter rated at 5V/2A or higher
- Try a different wall outlet
- Leave it plugged in for two full hours
- Try charging in a room at normal room temperature
- Look inside the port for debris
When it's the battery, not the cable
If the light never changes after two hours on a known-good setup, the cell may have reached end of life. Lithium cells lose capacity over time. A camera that's five or six years old and has been used heavily may simply need service.
One warning sign to take seriously. If the body feels swollen or unusually hot to the touch, stop charging immediately. Don't try to force it.
Contact Polaroid support and follow their instructions for handling a failed cell.
Charging time expectations
| Situation | Typical charge time |
|---|---|
| Normal top-up from amber | 30 to 60 minutes |
| Full charge from empty | 1 to 2 hours |
| Deep discharge from months in storage | Up to 3 hours, may look dead for the first 20 to 30 minutes |
| Cold camera | Add 30 to 60 minutes of warm-up time |
Branch 2: The Film Pack Is the Problem: Dark Slide, Seating, Jams, and Dead Pack Batteries
If your camera charged fine but the light is still amber, film is the next suspect. This is the most common branch after charging, and also the one where people damage their cameras most often. Go slow.
What the dark slide does
Every new film pack ships with a black card on top. That's the dark slide. It protects the first frame from light until you load the pack and close the door.
The camera's first job after you close the film door is to eject that slide. If it doesn't eject, the camera doesn't know a pack is loaded. That triggers a warning state.
If you reinsert a partly used pack, the dark slide is already gone. The camera may still read it fine. But if the counter and the pack disagree, odd behavior follows.
The seating problem
A pack that isn't seated all the way down will trigger amber. It has to sit flush, with the notch aligned to the camera's guide. Push it in until you feel it settle.
Then close the film door firmly. Listen for the latch. A door that doesn't fully latch is a common cause of film-related warnings.
How to inspect without making it worse
Open the film door in dim light. Bright sunlight can fog an exposed frame. If you're indoors, keep the pack shaded with your hand.
Look for:
- A frame that's torn or folded at the ejection slot
- Film sticking out at an odd angle
- Debris in the film chamber
- Rollers that look coated or gritty
- The pack sitting higher than it should
If you see a torn frame, don't pull it hard. Gently work it free with your fingers only.
When the pack has its own battery
On 600 and SX-70 film, the battery lives inside the pack. A flat pack battery means the camera has no power at all. The camera can look completely dead.
You can't test the pack battery directly without equipment. The practical test is to swap in a fresh, in-date pack. If the camera springs to life, the old pack was the problem.
This is why vintage 600 cameras and SX-70 bodies behave so differently from modern i-Type bodies. The battery in a pack that's sat on a shelf for years can quietly drain.
The film counter mismatch
Modern i-Type cameras track how many frames you've shot. Open the film door mid-pack and that count can desync. The camera may then behave oddly.
Some models reset the counter when the door closes. Others don't. If the counter reads wrong, the safest move is to finish the pack, then load a fresh one.
Grinding, clicking, or partial ejection
Stop immediately if you hear grinding. That's the motor fighting a jam. Forcing it will strip gears or scratch the rollers.
Open the door carefully. Remove the pack if you can. Look for a bent or torn frame at the slot.
If you can't free it by hand, don't use tools. Contact Polaroid support.
What to try, in order
- Open the door in dim light and inspect the pack
- Reseat the pack firmly and close the door
- Listen for the dark slide ejecting
- Watch the light for 10 seconds after closing
- If still amber, try a fresh pack
- If a fresh pack works, the old pack was the fault
- If a fresh pack also fails, the camera has a fault
Film handling basics
Film is light-sensitive and heat-sensitive. Keep packs sealed until you're ready to shoot. Store them cool and dry, around 13 to 21 °C.
Expired film can still work, but the results get unpredictable. Colors shift, contrast drops, and the chemistry may behave oddly during ejection. That can look like a camera fault when it isn't.
Branch 3: Stuck in Bluetooth Pairing or a Failed Firmware Update
If your camera has an app, this branch is worth checking. The Now+, OneStep+, and Flip all connect to the Polaroid app over Bluetooth. That connection adds a failure mode the plain i-Type bodies don't have.
How pairing mode looks
When the camera is broadcasting for a connection, the light behaves differently from normal operation. It may blink in a pattern that doesn't match the battery or film states.
If you recently opened the app, that's a strong clue. The camera may still be waiting for a handshake that never completed.
Breaking out of pairing mode
The simplest fix is usually a power cycle. Hold the shutter button for around 10 seconds to force a restart. Or use the power switch if your model has one.
Then walk away from your phone or close the app completely. Give the camera 30 seconds. If the light settles into normal behavior, you were stuck in pairing.
Failed firmware updates
Firmware updates over Bluetooth are convenient until they aren't. If the update is interrupted, the camera can end up in a state where it's neither updating nor ready.
Signs of a failed update:
- The light blinks in an unusual pattern
- The camera won't respond to the app
- Normal functions stop working
- The app shows an error or won't reconnect
How to recover from a failed update
Try this sequence:
- Close the app completely on your phone
- Power cycle the camera
- Reopen the app and let it detect the camera
- If it prompts for the update again, complete it in one go
- Keep your phone close during the update
- Don't let the screen lock mid-update
If the camera won't reconnect, you may need to forget the device in your phone's Bluetooth settings and pair fresh.
App version mismatch
An outdated app can fail to talk to a camera running newer firmware. Check your app store for updates. Then check Polaroid's site for the latest firmware notes.
Sometimes the app is newer than the camera. In that case, the app may prompt you to update the firmware first. Follow that prompt.
When Bluetooth isn't the problem
Not every amber light on an app-connected camera is a pairing issue. If the camera was fine before you opened the app and the light is the same slow amber you saw before, it's probably still a battery or film issue.
Use the blink pattern as your guide. Pairing states tend to look different from battery states. If you're unsure, close the app and see if the pattern changes.
Quick reference
| State | Light behavior | Fix |
|---|---|---|
| Broadcasting for pairing | Unusual pattern, camera idle | Power cycle and close the app |
| Paired and connected | Steady or slow pulse | Normal, no action |
| Failed firmware update | Erratic or stuck pattern | Power cycle, reconnect, complete update |
| App can't find camera | No change from normal | Forget device, pair fresh |
Branch 4: Cold, Heat, and Expired Film, When the Camera Is Fine and the Film Isn't
Sometimes the camera is doing exactly what it should. The film is the problem. This branch covers the conditions that make film behave badly, and how to tell them apart from a real camera fault.
Cold weather effects
Polaroid film is designed to work in a fairly narrow temperature band. Manufacturer guidance puts the sweet spot around 13 to 28 °C, which is roughly 55 to 82 °F. Below that, the chemistry slows down.
What you'll see in the cold:
- Colors come out muted or shifted
- Development takes much longer
- The camera may struggle to eject cleanly
- Frames can come out partially developed
If you're shooting outdoors in winter, keep the camera inside your jacket between shots. Body heat helps.
Heat and humidity
Heat is worse than cold for film. A pack left in a hot car can be ruined in an afternoon. The chemistry degrades fast above 30 °C.
High humidity is its own problem. It can cause the pack to warp or the film to stick. If you live somewhere tropical, store your film in a sealed container with a desiccant pack.
Expired film
Film has a shelf life. Most Polaroid packs carry a use-by date around 12 months from manufacture. Past that, results get unpredictable.
Expired film can still produce interesting images. But the colors shift, contrast drops, and the pack may fail mid-shoot. That failure can look like a camera fault.
If your camera is charged and the pack is seated but the light is still amber, check the date on the box.
Storage that actually works
Where you keep your film matters more than most people think:
- Cool and dry, around 13 to 21 °C
- Away from direct sunlight
- Sealed until you're ready to use it
- Out of the fridge if you plan to shoot within the hour
- Never in a car, glovebox, or hot garage
If you store film in the fridge, let it come to room temperature before loading. Condensation inside the pack can cause problems.
Airport scanners
X-ray scanners at airports can affect unexposed film. The effects vary, but the safest move is to ask for a hand check. In the US, TSA will hand-inspect film on request.
If you're traveling with film, keep it in your carry-on and ask politely at security. Don't put it in checked luggage, where scanners are stronger.
When it's the film, not the camera
A quick test. Swap in a fresh, in-date pack. If the camera works fine, the old pack was the issue.
If the fresh pack also triggers amber, the camera needs a closer look.
That single test rules out a lot of guesswork. It's worth keeping one spare in-date pack on hand for exactly this reason.
Temperature and time quick reference
| Condition | Typical effect | What to do |
|---|---|---|
| Below 13 °C | Slow development, muted colors | Warm the camera between shots |
| 13 to 28 °C | Normal operation | Shoot as usual |
| Above 30 °C | Fast degradation, odd colors | Move indoors or shade the camera |
| High humidity | Warping, sticking | Seal film with a desiccant |
| Expired film | Shifted colors, possible failure | Swap in a fresh pack |
| X-ray exposure | Fogging or color shifts | Request a hand check |
How to Reset and Reseat a Film Pack Without Scratching Your Rollers
This is the single most important skill for Polaroid owners. Do it right and you'll save yourself a camera. Do it wrong and you can scratch the rollers, which are the parts that press the chemistry through the film.
Scratched rollers mean every future photo has streaks.
Before you open the door
Make sure the camera is off or asleep. Some models have a power switch. Others go to sleep after a period of inactivity.
You don't want the motor to fire while your fingers are inside.
Find a spot with dim, indirect light. Direct sunlight can fog an exposed frame in seconds. If you can't avoid bright light, shield the film chamber with your body.
Step-by-step reseating
- Open the film door using the latch. Don't force it.
- Note the position of the pack before you move it.
- Lift the pack straight up and out. No twisting, no prying.
- Look inside the chamber. Note any debris, torn film, or odd smells.
- Inspect the rollers. They should be clean, smooth, and free of grit.
- Check the pack. The dark slide should be on top on a fresh pack.
- Lower the pack back into the chamber. Align the notch to the guide.
- Push down until it seats fully. You should feel it settle.
- Close the door firmly. Listen for the latch.
- Watch the light for 10 seconds. It should shift state.
What not to do
- Never use metal tools inside the film chamber
- Never pull a torn frame hard
- Never force the pack if it won't seat
- Never open the door in bright sun
- Never press on the rollers with your fingers
- Never turn the camera on mid-service
Cleaning the rollers
Rollers accumulate residue over time. A gentle clean every few packs keeps them working well. Use a dry, lint-free swab or a soft cloth.
If the residue is stubborn, a tiny amount of isopropyl alcohol on a swab works. Let it evaporate fully before loading film. Never soak the rollers or drip liquid into the body.
If a frame is jammed
A jam is different from a reseat. If film is stuck at the slot, stop. Don't pull it hard.
Try this:
- Turn the camera off
- Open the film door slowly
- Look at where the film is stuck
- Gently free it with your fingers only
- If it won't move, close the door and contact support
Forcing a jam is how rollers get scratched and gears get stripped.
Reset behaviors by model
Some cameras reset the film counter when you open and close the door. Others keep counting. This varies by model.
If your camera doesn't reset, and you've reloaded a partly used pack, the counter may be off. That's cosmetic. It doesn't affect shooting, though it can look alarming.
After the reseat
Once the pack is back in and the door is closed, watch the light. On a fresh pack, the camera should eject the dark slide within a few seconds. If it does, the pack is reading correctly.
If it doesn't eject and the light stays amber, the pack may be faulty or the camera may have a mechanical issue. Try a fresh pack before concluding anything. And if the light settles to green after a reseat, you've solved it.
Take the shot.
i-Type vs 600 vs SX-70 vs Go: Why the Wrong Film Triggers Warning Lights
Film compatibility is where a lot of orange lights get born. Polaroid makes four current film formats, and they aren't interchangeable. Load the wrong one and the camera will complain in exactly the way we've been discussing.
The four formats side by side
| Format | Fits which cameras | Battery in pack? | Frames per pack |
|---|---|---|---|
| i-Type | Now, Now+, OneStep 2, OneStep+, Flip, Lab | No | 8 |
| 600 | Vintage 600 box cameras, and modern i-Type bodies | Yes | 8 |
| SX-70 | Polaroid SX-70 and other vintage folding bodies | Yes | 8 |
| Go | Polaroid Go and Go Gen 2 only | No | 16 |
What happens when you mix them up
i-Type film in a vintage 600 camera. The camera has no internal battery. With no battery in the pack, it's completely dead. No light, no shutter, nothing.
This isn't an orange light problem. It's a "camera won't turn on" problem.
600 film in a modern i-Type body. This usually works. The camera already has its own battery, and it will simply ignore the pack's cell. Some owners report the pack feels slightly thicker, but Polaroid designs modern bodies to accept both.
SX-70 film in an i-Type body. This is the classic mismatch. SX-70 film is ISO 160, while i-Type and 600 are ISO 640. The camera's exposure system expects the faster film.
You'll get overexposed, washed-out shots, not an orange light.
Go film anywhere except a Go. It's a different size entirely. It won't fit. Don't force it.
Why the wrong film can still trigger amber
Even when the format is technically compatible, the camera has to read the pack. It reads the pack through a combination of physical contacts and the frame counter. If the pack's contacts don't line up, or the counter reads wrong, the camera may flag a warning.
Expired packs can also cause this. The chemistry degrades, the pack may warp slightly, and the contacts may not seat properly. The camera reads "pack not detected" and lights up amber.
The one-pack test that settles it
Keep a fresh, in-date pack of the correct film for your camera. When an orange light appears, swap to that pack. If the camera works, your old pack was the problem.
If it still blinks amber, the camera has a fault.
This single test saves you from chasing ghost causes. It costs one pack, but it rules out the entire film branch in under two minutes.
Reading the film box
Every Polaroid film box carries a few key bits of information:
- The format (i-Type, 600, SX-70, Go)
- The frame count
- The manufacturing or expiry date
- The ISO rating
- Storage temperature guidance
If you're ever unsure, the box is the answer. Don't rely on the shape of the pack alone.
Mistakes That Make an Orange Light Worse (And Cost You a Film Pack)
Most orange-light situations are recoverable. A few common mistakes turn a simple fix into a damaged camera or a ruined pack. Here's what to avoid.
Mistake 1: Opening the film door in bright light
Film is light-sensitive. Open the door in direct sun and you can fog an exposed frame in seconds. Always find shade or dim indoor light before inspecting a pack.
Mistake 2: Forcing a jammed frame
If film is stuck at the ejection slot, don't pull. Pulling tears the frame. The torn piece can foul the rollers, and then every future photo has streaks.
Work it free with your fingers only, or leave it for support.
Mistake 3: Using metal tools inside the chamber
A screwdriver or tweezers might seem like a good idea. It isn't. Metal scratches the rollers and can bridge electrical contacts.
Use fingers or a plastic tool if you must.
Mistake 4: Assuming the camera is dead
A camera with an amber light is not dead. It's telling you something. Charging it, reseating the pack, or power cycling fixes the majority of cases.
Skipping these steps wastes a repair trip.
Mistake 5: Reusing an expired pack
An expired pack is unpredictable. It may work for a few frames and then fail. It may trigger warning lights.
If the box date has passed, don't build your troubleshooting around it.
Mistake 6: Charging with the wrong cable or adapter
Charge-only USB-C cables and weak laptop ports are common culprits. If your camera isn't charging, test the cable and adapter on another device first. Then try a wall adapter rated at 5V/2A or higher.
Mistake 7: Ignoring temperature
Cold slows the chemistry. Heat degrades the film. Shooting outside the recommended range will produce odd results and can trigger warnings.
Keep the camera and film in the 13 to 28 °C window where possible.
Mistake 8: Opening the door mid-pack
Every time you open the door, you risk desyncing the frame counter and exposing a frame. If you must open it, do it in dim light and be quick. Close it firmly.
Mistake 9: Skipping the power cycle
A stuck firmware state or a hung pairing session often clears with a simple restart. Hold the shutter button for about 10 seconds, or use the power switch. It's free and it takes seconds.
Mistake 10: Assuming every Polaroid is the same
A Polaroid Now, an SX-70, and a Polaroid Go behave differently. Advice for one may damage another. Always confirm your exact model before acting.
Cost of getting it wrong
| Mistake | Typical cost |
|---|---|
| Ruined film pack | $20 to $26 in the US, £18 to £22 in the UK |
| Scratched rollers | Camera service or replacement |
| Torn frame in the chamber | Support ticket, possible repair |
| Wasted repair trip | Shipping and weeks without the camera |
When It's a Real Hardware Fault, and How to Talk to Polaroid Support
Sometimes it isn't the battery, the film, or the app. Something inside the camera has failed. Knowing the signs saves you time and helps you get the right support.
Signs of a genuine hardware fault
- The light stays amber after two full hours on a known-good charger
- A fresh, in-date pack also triggers amber
- The camera makes grinding or clicking sounds during ejection
- The light shows rapid amber or red and won't change
- The film door won't latch, or the latch is broken
- The battery swells, the body deforms, or the camera runs hot
Any of these points to a fault the standard branches won't fix.
What to gather before contacting support
Polaroid support will ask for specifics. Having them ready speeds up the process:
- The exact model and generation (for example, "Polaroid Now+ Gen 2")
- The serial number, usually on the underside or inside the film door
- The blink pattern and color you're seeing
- When the problem started
- What you've already tried
- Whether the film pack is fresh and in-date
- A photo or short video of the light behavior
How to describe the blink pattern
Saying "it blinks orange" isn't enough. Support needs detail. Try describing it like this: "The light blinks amber twice, pauses for one second, then repeats." Or: "The light is a slow amber blink, roughly one flash per second."
If you can, film it in slow motion on your phone. That gives support an exact pattern to work from.
What Polaroid can do
Depending on warranty status and the fault, Polaroid may offer:
- A firmware update if the camera is app-connected
- A repair through an authorized service partner
- A replacement under warranty
- Troubleshooting steps specific to your model
Warranty coverage varies by region and by purchase date. Keep your receipt. For cameras bought new, most Polaroid warranties run 12 months from purchase.
When it's not worth repairing
If the camera is well out of warranty and the fault is major, repair costs can approach the price of a new body. That's a judgment call. For a basic Now or OneStep 2, replacement is often the simpler path.
For a vintage SX-70, a specialist repair may be worth it because the camera itself is valuable.
Third-party repair options
Some camera repair shops specialize in Polaroid and SX-70 bodies. These are worth considering for vintage cameras. For modern i-Type bodies, Polaroid's own service network is usually the best route.
If you're shipping a camera with a lithium battery, transport regulations apply. The UN 38.3 testing standard governs how lithium cells can be shipped. Most couriers will ask about batteries at the counter.
Storage, Charging, and Film Care Habits That Keep the Light Green
The best fix for an orange light is not having one. A few habits keep your camera and film in good shape.
Charging habits
Charge your camera before storage, not after. A lithium cell left at low charge for months degrades faster than one kept topped up. Aim for around 50 to 80 percent before long storage.
Charge with a proper wall adapter, not a laptop port. Use a USB-C cable you've tested. Avoid charging in extreme heat or cold.
Don't leave the camera plugged in indefinitely. Once it's green, unplug it. Trickle charging over days isn't good for the cell.
Film storage
Film lives longest in cool, dry, dark conditions. Around 13 to 21 °C is ideal. Keep packs sealed until you're ready to shoot.
If you store film in a fridge, let it reach room temperature before loading. Condensation inside the pack can cause issues. That takes about an hour for a standard pack.
Never store film in a car, a glovebox, or a hot garage. A single afternoon of heat can degrade a pack.
Camera storage
When you're not shooting, store the camera without film if the break is longer than a few weeks. That reduces pressure on the rollers and keeps the battery from discharging into an idle film pack.
Keep the camera in a dry place. Humidity can affect the electronics over time. A padded case or a simple cloth bag works fine.
Shooting habits
Warm the camera between shots in cold weather. Body heat helps. Keep spare packs inside your jacket, not in a cold bag.
Avoid shooting in direct sun with the film door open. Find shade or move indoors. If you must open the door outdoors, shield the chamber with your body.
Don't leave a partly used pack in the camera for months. Film degrades once the seal is broken. Use it up or store it cool.
A simple monthly check
Once a month, do a quick pass:
- Check the battery level
- Look inside the film door for debris
- Wipe the rollers with a dry swab if needed
- Confirm your film stash is in date
- Update the app if you use one
That's five minutes. It prevents most of the situations we've walked through.
Maintenance schedule
| Task | Frequency |
|---|---|
| Charge the camera | Before and after long storage |
| Wipe the rollers | Every few packs |
| Check film dates | Monthly |
| Update the app | When updates are released |
| Full battery top-up | If stored for over a month |
| Camera body wipe-down | Monthly or after outdoor use |
Frequently Asked Questions
Why is my Polaroid blinking orange?
A blinking orange light almost always means a low internal battery, a film pack that isn't seated properly, or a stuck pairing state. On vintage 600 and SX-70 bodies, the viewfinder light blinking is the flash charging, which is normal.
How long should I charge a Polaroid camera?
Give it a full one to two hours on a wall adapter rated at 5V/2A or higher. A deeply discharged cell can take up to three hours and may look dead for the first 20 to 30 minutes.
What does it mean if the orange light won't stop blinking?
If the light stays amber after two full hours on a known-good charger, and a fresh in-date pack also triggers it, you likely have a hardware fault. Contact Polaroid support with your model, serial number, and a video of the blink pattern.
Can I use 600 film in a Polaroid Now?
Yes. Polaroid Now, Now+, OneStep 2, OneStep+, and Flip bodies accept both i-Type and 600 film. The camera ignores the battery inside a 600 pack because it has its own rechargeable cell.
Why does my Polaroid blink orange after loading new film?
The camera is usually waiting for the dark slide to eject, or it hasn't read the pack correctly. Open the film door, reseat the pack until it clicks, then close the door firmly. The dark slide should eject within a few seconds.
Is it safe to keep using my camera with an orange light?
Only after you've identified the cause. If the light is from a low battery or a seating issue, it's safe once fixed. If the body feels hot or swollen, stop immediately.
Don't charge or use a camera with a failing lithium cell.