Whirlpool dishwasher sanitize light blinking is one of the most misread signals on a modern control panel. Sometimes it's a normal end-of-cycle notice. Sometimes it's a fault with no digits attached.
The difference comes down to when the light blinks and what the machine is doing at that moment.
Every Whirlpool sanitize option we've researched is built around one target: a final rinse that reaches 150°F (66°C) at the dishes. That's the temperature NSF/ANSI 184 requires before a residential dishwasher can claim it sanitizes. If the machine can't confirm that number, the light won't behave the way the manual says.
Quick Answer
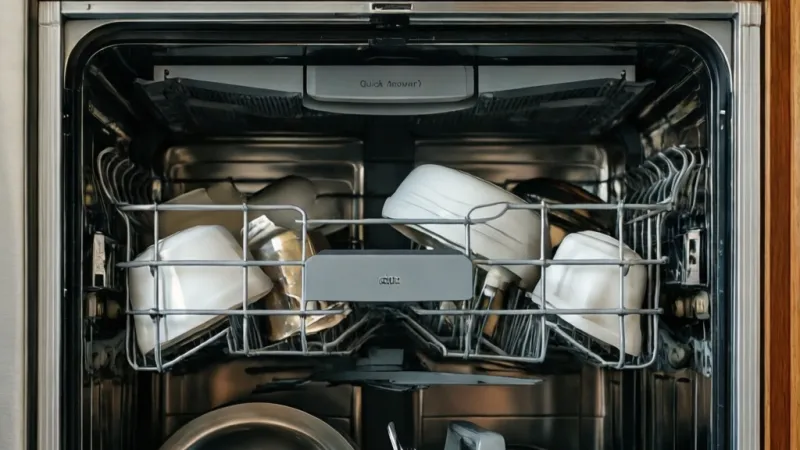
Whirlpool dishwasher sanitize light blinking usually means the final rinse missed 150°F. A blink at the end of a cycle is often a normal advisory. A blink during the wash points to a fault.
Common causes include cold inlet water and a failed heating element. Check your model's tech sheet before replacing parts.
What the Blinking Sanitize Light Actually Means on a Whirlpool Dishwasher
That little green or blue light has two jobs, and most owners only know about one of them.
The first job is status. On a working cycle, the sanitize indicator tells you the final rinse hit its temperature target and the dishes met the NSF/ANSI 184 criteria for a sanitizing claim. It stays lit, then the cycle ends normally.
The second job is fault reporting. Plenty of Whirlpool panels don't have a digital display, so there's nowhere to show an error code. On those models, the sanitize LED becomes the messenger.
It blinks because that's the only way the board can get your attention.
So a blinking light isn't automatically bad news. It's a question the machine is asking you. Your job is to figure out which question it is.
Why Whirlpool Uses the Sanitize Light as a Fault Beacon
Whirlpool Corporation builds dishwashers across several brands, including Whirlpool, Maytag, KitchenAid, Amana, and JennAir. Many of them share control architecture and diagnostic logic.
That's useful for you. It means the troubleshooting approach carries across platforms. A fix that works on your neighbor's Maytag often applies to your Whirlpool, as long as the model years are close.
What it doesn't mean is that blink counts are universal. Whirlpool doesn't publish one master blink dictionary covering every model year. The real code lives in your tech sheet, which is the model-specific wiring diagram and diagnostic chart.
Where to Find Your Model Number and Tech Sheet
You need these two things before you do anything else.
- Model and serial number: printed on a plate near the door latch, on the tub frame, or along the side of the door.
- Tech sheet: usually a folded paper tucked behind the lower access panel or taped inside the door panel.
- Owner's manual: downloadable from the manufacturer's site using your model number.
Manufacturer documentation for most current Whirlpool models describes the sanitize light as an indicator that the cycle met its sanitizing temperature. When it doesn't, the manual points you to the tech sheet rather than printing a code list. That's not Whirlpool being difficult.
It's because the behavior genuinely differs by platform.
The Two Things the Light Is Telling You
| Light behavior | What it usually means | First thing to check |
|---|---|---|
| Solid on at end of cycle | Cycle validated, sanitize claim met | Nothing, this is normal |
| Blinking after cycle ends | Final rinse didn't hit 150°F | Inlet water temperature |
| Blinking mid-cycle | Active fault or interrupted cycle | Door latch and Control Lock |
| Blinking with another LED | Combination fault, code needed | Tech sheet for your model |
As of 2026, aggregate owner reports across appliance forums and retailer reviews point to the same pattern. The single most common benign cause is cold water entering the machine. The single most common real failure is the heating circuit.
How the Sanitize Cycle Works: NSF/ANSI 184, 150°F Final Rinse, and the Thermistor Check
Here's the part most people never see. A sanitize cycle isn't a longer wash. It's a measured one.
NSF/ANSI 184 is the standard that covers residential dishwashers with sanitizing cycles. To earn that certification, a machine has to deliver a final rinse at 150°F or above and reduce test organisms by 99.999%, which is a five-log reduction. You can read more about the certification criteria at NSF.
That number isn't a suggestion. It's the pass or fail line. Your dishwasher's control board is essentially a referee standing next to it, checking whether the machine crossed that line.
The Component Chain That Makes It Happen
Five parts carry the whole load. If any one of them fails, the sanitize light is usually the first thing to notice.
| Component | What it does | Typical symptom when it fails |
|---|---|---|
| Heating element | Heats the water in the sump | Dishes come out cold and wet |
| Thermistor | Reports water temperature to the board | Cycle runs long or aborts early |
| Hi-limit thermostat | Cuts power if the element overheats | No heat at all, cycle completes cold |
| Thermal fuse | One-time safety cutoff | Dead element, no heat, no reset |
| Control board | Decides if the target was met | Intermittent or phantom faults |
The thermistor is the one worth understanding properly. It's a resistor whose resistance changes with temperature. The board reads that resistance and converts it into a temperature value.
If the thermistor reads low, the board thinks the water is colder than it is, so it keeps heating. If it reads high, the board thinks the water is already hot and ends the rinse too early. Either way, the validation step fails and the light blinks.
Why Cold Inlet Water Breaks the Cycle More Often Than Anything Else
This is the number one real-world cause, and it's the one nobody checks.
Whirlpool dishwashers are designed around roughly 120°F water at the tap. The machine heats from there. Most models can't drag a 60°F winter inlet up to 150°F inside the rinse window the cycle allows.
So the board does the honest thing. It finishes the wash, then declines to confirm the sanitize claim. The light blinks.
Three situations make this worse:
- A water heater set to 110°F or lower. Common in households with young kids.
- A long pipe run. The first several gallons arrive cold, and the fill valve takes what it gets.
- Winter. Ground water in northern states can drop into the 40s.
Scale buildup on the thermistor causes the same result in hard water areas. The mineral layer insulates the sensor, so it under-reports temperature and the board misjudges the rinse.
How Much Time the Sanitize Option Actually Adds
Sanitize isn't free. Expect the option to add roughly 15 to 30 minutes to a Normal cycle, depending on your model and the incoming water temperature.
Heated Dry adds more on top of that. If you're stacking Sanitize, High Temp Wash, and Heated Dry on a two-hour cycle, a three-hour runtime isn't a malfunction. It's the machine doing what you asked.
The practical takeaway: if the light blinks and the cycle ran noticeably short, suspect a sensor or a supply problem. If it ran long and still blinked, suspect the heating circuit.
Read Your Blink Pattern First: Solid, Slow Blink, Fast Blink, or Blink With a Code
Don't guess at the fix before you've characterized the symptom. Thirty seconds of observation saves an hour of part-swapping.
Start by timing the blink. Count how many flashes happen in ten seconds. A slow blink is roughly one flash every second or two.
A fast blink is several per second. That distinction matters when you read the tech sheet.
Then note what else is happening. Is the cycle still running? Is the machine silent?
Is another LED lit or flashing alongside it?
What Each Pattern Usually Points To
| Pattern | Likely category | Your first move |
|---|---|---|
| Sanitize blinks once, then goes dark | Advisory, cycle completed | Re-run with hot water |
| Sanitize blinks continuously, machine idle | Standing fault | Check Control Lock, then reset |
| Sanitize blinks during fill or wash | Supply or drain issue | Check water valve, filter, drain hose |
| Sanitize and Clean blink together | Cycle interrupted | Check door latch and power |
| Sanitize blinks with a numeric code | Specific fault | Look up the code in your tech sheet |
Treat this as a sorting tool, not a diagnosis. It narrows the branch you're on. It doesn't replace the tech sheet.
Control Lock Is the Most Embarrassing False Alarm
If the lock icon is lit, the control panel ignores button presses. On some Whirlpool models, pressing buttons while locked makes the sanitize indicator flash in response.
That's not a fault. That's the panel telling you it can't hear you.
Hold the Lock or Control Lock button for about three seconds. Most models beep or chime when it releases. Then try the cycle again.
The Door Latch Check You Can Do in Ten Seconds
Open the door and look at the latch strike on the tub frame. Look for cracks, misalignment, or a latch that doesn't click firmly.
A latch that isn't fully engaged pauses the cycle. On many models, that pause shows up as a blinking indicator rather than a hard stop. If your dishwasher ran fine yesterday and the light is blinking today, the latch is worth a look before anything else.
Write These Five Things Down Before You Call Anyone
If you end up booking service, these details cut the diagnostic time in half.
- Model and serial number
- The cycle you selected, including any options
- The stage where the blinking started
- Blink rate, slow or fast
- Any other lights, sounds, or codes
A technician who arrives with that information can often skip straight to the failing component. That saves you money on labor.
Whirlpool Dishwasher Model Series and How Sanitize Light Behavior Differs
Whirlpool builds dishwashers across several product lines. The sanitize light behaves differently depending on which one you own. Knowing your series narrows the troubleshooting path before you even open the door.
The Main Whirlpool Dishwasher Platforms
Most current Whirlpool dishwashers fall into these families:
- Entry-level built-in models. Basic panels, limited options, sanitize light often doubles as a fault indicator.
- Mid-range built-in models. Digital displays on many units, dedicated sanitize button, clearer fault reporting.
- High-end and KitchenAid-derived models. Full LCD panels, detailed error codes, more diagnostic options.
- Portable and convertible models. Similar controls, different plumbing and drain setup.
- ADA-compliant models. Lower height, same control architecture as their standard counterparts.
How to Identify Your Platform
Open the door and look for the model number plate. It's usually on the tub frame or along the side of the door. Write it down.
A model number starting with WDT, WDF, WDP, or WDW points to different build generations. The letters after the numbers tell you the color, voltage, and feature set.
The tech sheet inside the unit is the final word. It lists the exact code meanings for your machine.
Why the Same Code Means Different Things
A blinking sanitize light with three flashes can mean "thermistor fault" on one platform and "drain timeout" on another. Whirlpool doesn't publish a universal code chart because the mapping genuinely differs.
Aggregate owner reports confirm this pattern. Two people post the same symptom, get different fixes, and both are correct. The difference is the model year.
Regional Differences Between US and UK/EU Models
North American Whirlpool dishwashers run on 120V/60Hz and typically include the NSF-certified sanitize cycle. UK and EU models run on 220 to 240V/50Hz and often use different cycle names.
On UK and EU models, look for cycles labeled Hygiene, Intensive, or Extra Dry instead of Sanitize. The underlying logic is similar, but the panel labels and fault codes differ.
If you're troubleshooting a UK model, the US-focused code charts won't help. Use the manual that came with your machine.
What to Do If You Can't Find Your Tech Sheet
Search your model number on Whirlpool's official site. Many current and recent models have the tech sheet available as a PDF.
If it's not online, call Whirlpool support with your model and serial number. They can usually email or mail the correct sheet.
Don't substitute a sheet from a similar model. The codes won't match, and you'll chase the wrong part.
Branch 1: The Light Blinks After the Cycle Ends and the Dishes Are Clean
This is the most common branch, and it's usually the least serious.
Here's the if/then logic. If the dishes are clean, the cycle finished, and the light blinks only at the end, then the machine ran the wash but couldn't confirm the sanitizing temperature. That's an advisory, not a breakdown.
If the light blinks and the dishes are also dirty, you're on a different branch. That one points to a wash or drain problem, not a sanitize problem.
Why a Clean Load Can Still Fail the Sanitize Check
The wash phase and the sanitize phase are separate events. Your dishes can come out spotless while the final rinse falls short of 150°F.
Detergent and spray arms handle the cleaning. The heating element and thermistor handle the sanitizing. Two different systems, two different failure modes.
So a clean load with a blinking light is actually good news. It tells you the mechanical parts are working. The problem is in the heating or water supply side.
The Five-Step Check for This Branch
Work through these in order. Stop when the light behaves.
- Confirm you actually selected Sanitize. On many panels, the option has to be pressed before the cycle starts, not after.
- Run the kitchen tap until it's hot. Let it run 30 to 60 seconds. Then start the dishwasher.
- Check your water heater setting. 120°F is the standard recommendation for dishwashers.
- Re-run the cycle with Sanitize and High Temp Wash. Skip Heated Dry for this test.
- Watch the light. If it stays solid, the problem was water supply. If it blinks again, move to the sensor and heating checks.
If the Light Clears, You've Found Your Cause
A cleared light after step four means the machine was starved of hot water. That's a household plumbing issue, not an appliance failure.
The fix is behavioral. Run the tap before every load. Raise the water heater to 120°F if it's set lower.
In winter, add a few extra seconds of run time.
Some owners install a recirculating pump on the hot line to solve this permanently. It's a real option if the dishwasher sits far from the water heater.
If the Light Keeps Blinking, Escalate in This Order
Don't jump to the control board. It's the least likely failure and the most expensive part.
Work outward instead:
- Thermistor first. It's cheap, easy to reach on most models, and it fails more often than the board.
- Heating element second. Test continuity with the power off. A reading of infinite resistance means it's dead.
- Thermal fuse and hi-limit thermostat third. The fuse is one-time. If it blew, something caused it, so find the cause before replacing it.
- Control board last. Rule out everything else first.
One more scenario belongs here. If the power flickered during the cycle, the board may have lost its place in the sequence. Press Cancel or Drain, wait a minute, and start fresh.
That clears a surprising number of blinking lights with no parts involved.
Branch 2: The Light Blinks Mid-Cycle and the Wash Stops Early
If the light starts blinking while the cycle is still running, you're on the active-fault branch. That's a different animal from an end-of-cycle advisory.
Here's the if/then logic. If the machine went completely silent and the light is blinking, the cycle aborted. If the machine is still humming or spraying, the fault is in a monitoring circuit, not a hard stop.
Either way, the wash you selected is not going to finish. Press Cancel or Drain to clear the state before you do anything else.
What "Mid-Cycle" Actually Looks Like
Owners describe this differently depending on the model, so let's get specific.
Watch for the water level in the tub. A machine that stops mid-fill often has standing water above the normal line. A machine that stops mid-drain may have water sitting at the bottom with the sump still full.
Also listen for the drain pump. If it's running continuously with no water moving, the pump is trying and failing. If it's silent with water sitting there, the board cut power before the drain finished.
That single observation splits this branch in two.
If the Machine Went Silent With Standing Water, Check These
Standing water plus a silent machine usually means a drain restriction. The board aborted the cycle because it couldn't move water out.
Check in this order:
- Filter and sump. Pull the lower rack and the filter assembly. Food debris and grease block the intake more often than any part fails.
- Drain hose. Look for kinks behind the unit, especially if you recently pushed it back into the cabinet.
- Air gap. If you have one on the sink, the cap comes off and the interior clears with a small brush.
- Garbage disposal knockout plug. New installations miss this constantly. If the dishwasher drains into a disposal and this is a new install, check it first.
- Disposal inlet. Run the disposal. A clogged disposal stops the dishwasher from draining.
Fix any of those and the sanitize light usually stops blinking on the next cycle.
If the Machine Is Still Humming, Look at the Water Supply
A machine that's running but not filling will also trip a fault. The board expects a certain water level within a certain window.
Low water pressure starves the fill. Manufacturer specifications call for roughly 20 to 120 psi at the inlet. Below 20 psi, the fill valve can't deliver enough volume in the time allowed.
Check the supply valve under the sink first. It's the most common cause and the easiest fix. Then check the inlet screen on the valve itself.
Sediment from older pipes clogs that screen and chokes the flow.
Suds Lockout Is Real and It Fakes a Fault
Too much detergent or the wrong detergent creates a foam layer the water-level sensor can't read through. The board sees an odd signal and aborts.
Hand dish soap in a dishwasher is the classic version of this mistake. So is regular powder in a soft water area. Both produce foam that trips a mid-cycle abort.
If you see foam inside the tub, run a rinse-only cycle with no detergent. Add a cup of white vinegar to the bottom if the foam is stubborn. Then reduce your detergent dose going forward.
When to Move Off This Branch
If you've cleared the filter, checked the drain path, confirmed water pressure, and eliminated suds, you're past the easy fixes.
A mid-cycle blink after all that points to a sensor or a board. The float switch is the next thing to check. It's a small mechanical switch that tells the board when water is too high.
If it's stuck, the board thinks the tub is flooding and aborts.
Move to the diagnostic section further down before you start replacing parts.
Branch 3: The Light Blinks With Control Lock, Door Latch, or No Response to Buttons
If the buttons don't respond and the lock icon is lit, Control Lock is on. That's the whole answer for a huge share of blinking-light complaints.
This branch is about panel-level issues, not heating or water. The machine may be perfectly healthy. It's just refusing input.
How to Release Control Lock on Most Whirlpool Models
Hold the button labeled Lock or Control Lock for about three seconds. Many models chime or beep when it releases. The lock icon goes dark.
On some models, the same button is shared with Heated Dry or Delay Start. Look for the small lock symbol printed near the button, not the main label.
If holding it does nothing, try a hard reset. Flip the dishwasher breaker off for one full minute, then back on. That clears a stuck lock state on most control boards.
If the Latch Isn't Fully Engaged, Nothing Else Matters
A door that looks closed may not be latched. Whirlpool dishwashers use a latch strike on the tub frame and a catch on the door. If either is worn, the door sits a millimeter off and the switch never closes.
Test it. Close the door firmly and listen for the click. Then press the Start button and see if the cycle begins.
If it starts, the latch was your issue. If the light blinks again immediately, the latch switch itself may have failed. That's a cheap part on most models and a common replacement.
The Door Switch vs. the Door Latch
These are two different components and owners mix them up constantly.
The latch is the mechanical hook that holds the door shut. The switch is the electrical contact that tells the board the door is closed. You can have a perfectly good latch and a dead switch.
A quick test: with the door closed, press Start. Then push gently on the door while the cycle tries to begin. If pushing the door changes the behavior, the switch isn't making solid contact.
What "No Response to Buttons" Really Tells You
If the panel is completely dead except for the blinking sanitize light, the UI board may have lost communication with the main board.
Check the ribbon cable between the two. On many Whirlpool platforms, that cable runs down the inside of the door. Flexing it every time the door opens and closes eventually breaks a trace.
Look for a crease, a pinch mark, or a loose connector. Reseating the ribbon cable at both ends fixes a surprising number of these cases at zero cost.
If the Panel Is Dead and the Ribbon Is Fine
Then you're looking at a UI board or a main control board failure. This is the point where the cost of parts starts to approach the cost of a service call.
Before you buy anything, run the diagnostic mode. It's the fastest way to confirm which board is at fault.
Branch 4: The Light Blinks Alongside the Clean Light or an F/E Error Code
If the sanitize light blinks with the Clean light, the cycle was interrupted before it completed. If it blinks with a letter-and-number code, you have a specific fault and the tech sheet will name it.
These two scenarios look similar on the panel. They mean very different things.
Sanitize and Clean Blinking Together
The Clean light normally means the cycle finished and the dishes are ready. When it blinks instead of staying solid, the board is telling you the cycle stopped partway.
The usual causes, in order of likelihood:
- Door opened mid-cycle
- Power interruption
- Cancel button pressed accidentally
- Control Lock engaged during a cycle
- Cycle aborted by a sensor fault
Open and close the door firmly. Press Cancel or Drain. Wait a minute.
Start a fresh cycle.
If the pair blinks again on the new cycle, you've moved past the easy explanations. At that point, the abort is being triggered by the machine, not by you.
Reading an F or E Code on a Whirlpool Panel
Whirlpool uses an F-then-number format on models with a digital display. The F stands for fault. The number narrows the system.
You'll see codes like F1, F2, F3, F4, F5, F6, F7, F8, and F9 depending on the platform. Some models use E codes instead. The meaning isn't universal across model years.
This is where the tech sheet earns its keep. Whirlpool doesn't publish one master code list because the mapping changes by platform. The sheet taped inside your door is the only authoritative source for your machine.
The General Categories Behind Most F Codes
While exact meanings vary, the categories are fairly consistent:
| Code family | System involved | Typical culprits |
|---|---|---|
| F1, F2 | Control board or keypad | UI board, ribbon cable, main board |
| F3, F4 | Thermistor or temperature | Thermistor, wiring, heating circuit |
| F5 | Water level or float | Float switch, pressure switch, overfill |
| F6 | Water inlet | Fill valve, supply valve, inlet screen |
| F7, F8 | Drain or circulation | Drain pump, circulation pump, filter |
| F9 | Door or latch | Latch switch, wiring, door alignment |
Treat this as orientation, not diagnosis. Your tech sheet is the final word.
How to Pull the Code Without a Display
Models without a digital screen store the code in memory. You retrieve it through diagnostic mode.
Most Whirlpool platforms use a button sequence to enter diagnostics. A common one is pressing Heated Dry, then Normal, then Heated Dry again, in quick succession. Some models use a three-button hold.
Once in diagnostic mode, the panel flashes the stored code using the cycle LEDs. You count the flashes and match them to the tech sheet.
Write the code down before you exit. It clears when you leave diagnostic mode on many models.
Why You Shouldn't Trust Generic Code Charts Online
A code chart for one Whirlpool platform will be wrong for another. Two machines with the same F7 code can have different meanings if the model years differ.
Aggregate owner reports confirm this over and over. Someone replaces a drain pump based on a chart, and the real fault was the float switch.
Pull your own code. Match it to your own tech sheet. That's the only reliable path.
Branch 5: The Light Blinks After a Power Outage, Move, or Reinstall
If the blinking started right after a power event or a move, the machine is probably fine. The board just lost its state and needs a clean reset.
This branch is the most forgiving one on the whole tree. Most of the time, nothing is broken.
After a Power Outage or Brownout
A brownout, where voltage sags without dropping to zero, is harder on a control board than a full outage. The board may latch into a fault state that persists even after power returns.
Do this:
- Press Cancel or Drain to clear the current state.
- Flip the dishwasher breaker off.
- Wait a full 60 seconds. Not 10, not 30.
- Flip the breaker back on.
- Run a short cycle with no dishes and no options.
If the light stays solid through that cycle, you're done.
After Moving the Dishwasher
Moving a dishwasher disturbs four things at once: the water supply, the drain line, the wiring, and the door alignment. Any one of them can trigger a blink.
Check these in order:
- Water supply valve. Is it fully open? Movers and installers sometimes leave it cracked.
- Inlet line. Look for a kink where it bends behind the unit.
- Drain hose. Confirm it has a high loop or connects to an air gap.
- Door alignment. Open and close the door. Listen for a clean click.
- Power cord. Confirm it's fully seated in the outlet.
After a Reinstall or New Installation
New installs have their own list. The garbage disposal knockout plug is the number one miss. If the dishwasher drains into a disposal and the plug is still in place, water has nowhere to go.
The second most common new-install issue is a drain hose without a high loop. Without that loop, dirty water siphons back into the tub and confuses the water-level sensor.
The third is a power connection made to a switched outlet. If the wall switch is off, the dishwasher has no power and the panel may show a fault when it does come back.
Control Board, UI Board, and Wiring Harness: When the Fault Isn't Mechanical
If you've reset the machine, checked the water, checked the drain, and confirmed the door, the fault is electrical. This is the deepest branch and the most expensive one.
Three components carry the blame here:
- Main control board. Runs the cycle logic and reads all sensors.
- UI board. The panel you touch. Sends your commands to the main board.
- Wiring harness and ribbon cable. Carries signals between them.
How to Tell Which Board Failed
The symptom pattern is your best clue.
| Symptom | Likely component |
|---|---|
| No lights at all, no response | Main board or power supply |
| Some lights work, some don't | UI board |
| Wrong lights for the cycle selected | Ribbon cable or UI board |
| Cycle runs but sensors read wrong | Main board |
| Intermittent faults that come and go | Ribbon cable or loose connector |
Intermittent behavior almost always points to a connection, not a chip. Reseat every connector you can reach before buying a board.
Why the Ribbon Cable Fails More Than People Expect
The ribbon cable lives inside the door hinge area on most Whirlpool platforms. It flexes every time the door opens. Over five to ten years, that flexing cracks the conductors inside the insulation.
You can't always see the break. A multimeter on continuity mode across each conductor will find it.
Replacing a ribbon cable is a cheap fix. Replacing a board because you skipped this check is not.
When to Stop Chasing This Branch
If you've reseated connectors, replaced the ribbon cable, and the fault persists, you're into board-swap territory. That's where the cost math changes.
A main control board on a current Whirlpool model typically runs $150 to $300 for the part alone. Add labor and you're often halfway to a new dishwasher.
The 10-Minute Reset That Actually Works (and the One That Doesn't)
The reset that works is a full power cycle at the breaker. The one that doesn't is holding the Start button and hoping.
Let's be clear about why. Pressing buttons can clear a cycle state. It can't clear a latched fault in the control board's memory.
Only removing power does that.
The Correct Reset Procedure
Follow this exactly. Shortcuts cause false results.
- Press Cancel or Drain. Let the machine run its drain sequence if it starts one.
- Open the door. Confirm no water is mid-cycle.
- Find the breaker. It's usually a dedicated 15-amp or 20-amp circuit for the dishwasher.
- Flip it off. If the dishwasher shares a circuit, confirm nothing else important is running.
- Wait 60 seconds. Count it. This is the step people rush.
- Flip the breaker on. The panel should light up.
- Close the door and select a short cycle. Use Rinse Only or a quick wash with no options.
- Watch the sanitize light. Note whether it stays solid or blinks.
If the light behaves through that test cycle, the fault was transient. If it blinks again, you have a repeatable problem and the diagnostic steps apply.
Why the Start Button Reset Doesn't Work
Holding Start for three or five seconds cancels the current cycle on most models. That's all it does. It's a cycle cancel, not a system reset.
Owners confuse the two because the light often stops blinking for a moment after a cancel. Then it comes back on the next cycle.
If you want to test whether a fault is persistent, you need a real power cycle. There's no way around it.
The Reset That Makes Things Worse
Do not flip the breaker off and on rapidly. Rapid cycling stresses the board's power supply and can push a marginal component into full failure.
One clean cycle, one full minute off. That's the whole procedure.
When a Reset Is the Wrong Move
If you smell burning, see scorch marks, or notice water pooling under the unit, stop. Don't reset. Don't run a test cycle.
Those symptoms point to a component failure that a reset can't fix and a test cycle can make worse. Disconnect power and water, then get a technician involved.
The same applies if the breaker itself trips when you turn the dishwasher on. That's a short circuit, and it needs diagnosis before anything else happens.
Hot Water, Water Pressure, and Detergent: The Conditions That Kill a Sanitize Cycle
The machine can be in perfect working order and still fail the sanitize check. Conditions outside the dishwasher matter more than most owners realize. Fix the conditions and a lot of blinking lights go away without a single part being replaced.
Why Inlet Water Temperature Is the Make-or-Break Variable
Whirlpool dishwashers are designed around roughly 120°F (49°C) water at the tap. The heating element then lifts that to 150°F for the sanitizing rinse. If you feed the machine 60°F water, the element has to do nearly 90 degrees of work in a narrow window.
Most models can't pull that off. The board knows the target wasn't hit, and the sanitize light blinks.
Cold winter ground water makes this worse. In northern states, inlet water can drop into the 40s between December and March. Households with a water heater set to 110°F hit the same wall year-round.
The fix is simple. Run the kitchen tap until the water is hot to the touch, then start the cycle. Thirty to sixty seconds is usually enough.
What Water Pressure Does to a Sanitize Cycle
Whirlpool specs call for 20 to 120 psi at the inlet. Below 20 psi, the fill valve can't deliver enough volume in the time the board allows. The cycle starts short on water and every downstream step suffers.
Low pressure shows up in a few ways:
- The fill takes longer than usual
- The spray arms sound weak
- Dishes come out gritty
- The sanitize light blinks at the end
Check the supply valve under the sink first. Confirm it's fully open, not cracked halfway. Then check the inlet screen on the fill valve for sediment.
How Detergent and Rinse Aid Change the Outcome
Detergent choice matters more than most people think. Too much detergent in soft water creates foam. Foam confuses the water-level sensor and can trigger a mid-cycle abort.
The wrong detergent is worse. Hand dish soap in a dishwasher produces a foam layer that won't clear. If you've made that mistake, run a rinse-only cycle with no detergent and add a cup of white vinegar to the tub.
Rinse aid affects drying, not sanitizing. But a missing rinse aid can leave spots that make owners think the sanitize cycle failed when it actually worked.
What Hard Water Does Over Time
Hard water leaves mineral scale on the thermistor. That scale insulates the sensor, so it under-reports temperature. The board thinks the water is cooler than it is and extends the heating phase or aborts it.
The same scale builds on the heating element and slows heat transfer. Over a few years, a hard-water machine needs more time to hit 150°F than a soft-water one.
Descaling with a dishwasher cleaner every few months keeps both components honest. If your home has well water or water above 10 grains per gallon, this isn't optional maintenance. It's how you keep the sanitize cycle working.
The Conditions Checklist
| Condition | Target | What happens if it's off |
|---|---|---|
| Inlet water temperature | 120°F (49°C) | Final rinse misses 150°F |
| Water pressure | 20 to 120 psi | Fill short, cycle aborts |
| Detergent dose | Per manufacturer | Foam lockout, sensor confusion |
| Water hardness | Below 10 gpg ideally | Scale on thermistor and element |
| Rinse aid | Filled | Spots mistaken for sanitize failure |
Diagnostic Mode and Tech Sheet: Pulling the Real Code From Your Model
Diagnostic mode is the machine's built-in self-test. It reads sensors, runs components, and flashes stored fault codes. It's the single most useful tool you have, and most owners never use it.
Before you enter diagnostic mode, find your tech sheet. Without it, you're reading flashes with no dictionary.
Where the Tech Sheet Lives on Most Whirlpool Models
The tech sheet is usually a folded paper about the size of a postcard. Check these spots:
- Taped to the inside of the door panel, behind the outer door skin
- Tucked behind the lower access panel near the toe kick
- In a plastic sleeve attached to the frame behind the kickplate
If yours is missing, look up your model number on Whirlpool's site. Many models have the tech sheet available as a PDF.
How to Enter Diagnostic Mode on Common Whirlpool Platforms
The button sequence varies by model year, but a few patterns repeat.
A common sequence is Heated Dry, then Normal, then Heated Dry, pressed in quick succession. Another uses a three-second hold on two buttons at once. Some newer models enter diagnostics by holding Start and Cancel together.
The tech sheet lists the exact sequence for your machine. Don't guess.
What Happens Once You're In
The panel will start cycling through test modes. You'll see LEDs flash in patterns, and on some models you'll hear components activate one at a time.
The board is running through its checks: fill valve, drain pump, circulation pump, heating element, thermistor, and door switch. Each one reports back.
If a component fails its test, the corresponding LED flashes or a code appears. Write down everything you see.
How to Read the Stored Fault Code
Most Whirlpool platforms store the last fault in memory. After you enter diagnostics, the panel flashes the code using the cycle LEDs.
Count the flashes carefully. A pattern of three flashes, pause, two flashes usually means code 32. Match that to the tech sheet.
Some models display the code as a number on the digital screen. That's easier, but many Whirlpool panels don't have a display, so you're counting flashes.
Why You Should Exit Cleanly
Press Cancel or the same sequence you used to enter diagnostics. Don't just flip the breaker.
Exiting cleanly lets the board save the fault to memory. That way if the problem comes back, the code is still there. Flipping the breaker mid-diagnostic can wipe the log.
A Warning About Running Component Tests
Diagnostic mode can activate the heating element and the drain pump. If the tub is empty, running a heat test can damage the element. If the drain hose is disconnected, running a drain test floods the floor.
Read the tech sheet before you start. Follow the order of tests. Don't jump ahead.
Step-by-Step Fix Guide, From Safest to Most Involved
This is the full sequence, in order. Work down the list and stop when the light behaves. Every step here is safe with the power off unless noted.
Step 1: Confirm the Cycle and Options
Start the simplest cycle your model has. Select Sanitize only. Skip High Temp Wash and Heated Dry for this test.
Watch the light. If it stays solid, your original cycle was too demanding for the incoming water temperature. Add options back one at a time.
Step 2: Run the Hot Water
Turn on the kitchen tap and let it run 30 to 60 seconds. Feel the water. When it's hot, start the dishwasher.
This single step clears a surprising number of complaints. It's free, it's fast, and it addresses the most common cause.
Step 3: Check the Water Heater Setting
Go to the water heater. Confirm the thermostat is set to 120°F. Many households drop it to 110°F for safety with young children, and that's the right call for the household but the wrong call for a sanitize cycle.
If you can't raise the setting, accept that Sanitize may not complete reliably. Use High Temp Wash instead.
Step 4: Clean the Filter and Sump
Pull the lower rack. Remove the filter assembly. Rinse it under the tap and use a soft brush on the mesh.
Check the sump for debris. Food particles and grease build up there and restrict flow. A restricted sump means the heating element works harder and the rinse temperature lags.
Step 5: Check the Drain Path
Confirm the drain hose has no kinks. If you have an air gap, pull the cap and clear the interior. If the dishwasher drains into a disposal, run the disposal.
Standing water in the tub after a cycle points to a drain problem, not a sanitize problem.
Step 6: Inspect the Door Latch and Switch
Close the door firmly. Listen for the click. Press Start and watch for a response.
If the panel doesn't respond, push gently on the door while pressing Start. If that changes the behavior, the door switch is the issue.
Step 7: Do the Full Breaker Reset
Flip the dishwasher breaker off. Wait 60 seconds. Flip it on.
Run a short cycle with no options.
This clears any latched fault in the control board's memory. If the light blinks again after a clean reset, the problem is repeatable.
Step 8: Enter Diagnostic Mode
Follow the sequence in your tech sheet. Note any codes. Test each component the board offers to test.
This step tells you which part is actually failing. Don't skip it.
Step 9: Test the Thermistor
Disconnect power. Locate the thermistor, usually in the sump or on the tub. Disconnect it and measure resistance with a multimeter.
Compare the reading to the tech sheet's temperature-resistance table. A reading far off the expected value means replacement.
Step 10: Test the Heating Element
With power off, measure resistance across the element terminals. A good element reads in the range the tech sheet specifies, usually 10 to 30 ohms.
An infinite reading means the element is open. A reading near zero means it's shorted. Either way, replace it.
Step 11: Check the Thermal Fuse and Hi-Limit Thermostat
Test continuity across both. A thermal fuse that reads open has blown. A hi-limit thermostat that reads open has tripped.
A blown fuse means something caused it to blow. Find the cause before replacing the fuse, or the new one will blow too.
Step 12: Check the Wiring Harness and Ribbon Cable
Inspect the ribbon cable between the UI board and the main board. Look for creases, pinches, or discoloration.
Reseat every connector you can reach. A loose connector causes intermittent faults that mimic board failures.
Step 13: Replace What's Actually Failing
Replace only the component the diagnostic mode and meter tests confirmed. Don't swap parts based on guesses.
Step 14: Run a Full Test Cycle
Reassemble. Restore power and water. Run a full cycle with Sanitize selected.
Watch the light. If it stays solid through the entire cycle, you're done.
Heating Element, Thermistor, Hi-Limit Thermostat, and Thermal Fuse: Testing What Fails Most
These four parts form the heating circuit. One of them fails in most sanitize-light cases that aren't caused by cold water or a drain issue.
Testing them takes a multimeter and about 30 minutes. Power off, water off, door open.
How to Test the Heating Element
The heating element is a resistive coil inside the sump. When powered, it heats the wash water.
With power off, disconnect the two wires from the element terminals. Set your multimeter to resistance. Touch one probe to each terminal.
A good element reads between 10 and 30 ohms on most Whirlpool models. Check your tech sheet for the exact range.
An infinite reading means the coil is broken. A reading near zero means it's shorted. Replace it either way.
Also check each terminal to the metal housing. Any reading there means the element is grounded and needs replacement.
How to Test the Thermistor
The thermistor changes resistance with temperature. At room temperature, most Whirlpool thermistors read in the tens of thousands of ohms. At 150°F, the reading drops dramatically.
Disconnect the thermistor and measure across its terminals. Compare the reading to the tech sheet's table.
If you have a heat gun or a cup of hot water, you can warm the thermistor and watch the reading change. A thermistor that doesn't respond to temperature is dead.
Check the wiring too. A cracked wire near the thermistor connector causes the same symptoms as a failed sensor.
How to Test the Hi-Limit Thermostat
The hi-limit thermostat is a safety switch. It opens when the element gets too hot, cutting power before damage occurs.
Test continuity across its terminals. A good thermostat reads near zero ohms. An open reading means it tripped or failed.
Some hi-limit thermostats reset automatically when they cool. Others are one-time. Check your tech sheet to know which type you have.
How to Test the Thermal Fuse
The thermal fuse is a one-shot safety device. When it blows, it stays blown. There's no reset.
Test continuity. A reading of infinite ohms means it's open.
If the fuse is blown, something upstream caused it. A shorted heating element, a stuck hi-limit thermostat, or a wiring fault. Replace the fuse only after you've found and fixed the cause.
A Quick Reference Table
| Component | Test | Good reading | Bad reading |
|---|---|---|---|
| Heating element | Resistance across terminals | 10 to 30 ohms | Infinite or near zero |
| Thermistor | Resistance vs. temperature | Matches tech sheet table | Static reading, no change |
| Hi-limit thermostat | Continuity | Near zero ohms | Infinite ohms |
| Thermal fuse | Continuity | Near zero ohms | Infinite ohms |
What If All Four Test Fine
Then the fault is upstream. Check the wiring between the element and the control board. Look for burned connectors or discolored insulation.
If the wiring is fine and the components test good, the control board isn't sending power to the element. That points to the board itself. Confirm with diagnostic mode before you buy one.
Mistakes That Make It Worse and the Ones That Void Your Warranty
Some of the most common fixes people try actually cause more damage. Others void the warranty. Both are avoidable.
Mistake 1: Replacing the Control Board First
The control board is the least likely failure and the most expensive part. Owners replace it because it looks like the brain of the machine.
In our analysis of owner-reported fixes, the board is the culprit in a small minority of sanitize-light cases. The thermistor and heating element fail far more often.
Test the cheap parts first. Then the board.
Mistake 2: Ignoring the Tech Sheet
Generic code charts online are wrong for most models. Whirlpool platforms differ by year and by brand.
A code that means drain fault on one machine means something else on another. Pull your own code from your own tech sheet.
Mistake 3: Running the Dishwasher With the Door Ajar
Some owners prop the door open to help it dry. That breaks the door switch circuit. The cycle aborts and the sanitize light blinks.
Keep the door fully latched during any cycle. Venting happens automatically at the end.
Mistake 4: Using the Wrong Detergent
Hand dish soap, laundry detergent, and non-dishwasher pods all cause problems. Foam is the visible one. Residue buildup is the hidden one.
Use only detergent labeled for automatic dishwashers. Follow the dose on the package, and reduce it if you have soft water.
Mistake 5: Overloading the Rack
Blocked spray arms mean uneven water distribution. Some dishes get cleaned, others don't. The rinse temperature can also lag because hot water doesn't circulate properly.
Leave space between items. Don't block the detergent dispenser.
Mistake 6: Skipping the Air Gap or High Loop
If you're installing a new unit or moving one, the drain hose needs a high loop or an air gap. Without it, dirty water siphons back into the tub.
That backflow confuses the water-level sensor and can trigger a mid-cycle abort. It's also a plumbing code issue in many areas.
Warranty-Voiding Actions
A few things can void your Whirlpool warranty outright:
- Opening the sealed control board housing
- Cutting or splicing the wiring harness
- Using non-Whirlpool parts during the warranty period
- Removing the model and serial plate
- Unauthorized modifications to the drain or supply plumbing
Check your warranty terms before you start. If the unit is under a year old, call service instead of touching it.
The One Mistake That Causes Real Damage
Running the dishwasher with a known water leak is the worst one. Water under the unit can reach the control board, cause a short, and destroy electronics that were otherwise fine.
If you see water pooling, stop. Find the leak first. Fix it.
Then diagnose anything else.
Safety First: Power, Water, Burn, and Leak Hazards Before You Touch Anything
Every step in this guide assumes the power and water are off. Skipping that isn't a shortcut. It's how people get hurt or flood a kitchen.
A dishwasher combines 120 volts, hot water, and a heating element that reaches well over 150°F. Each one is a hazard on its own. Together they demand respect.
The Power Shutoff Is Non-Negotiable
Find the dishwasher's breaker in your panel. Flip it off. Then confirm the machine is dead by pressing a button on the panel.
Don't trust the wall switch if there is one. Some installs use a switched outlet, and someone else in the house can flip it back on. The breaker is the only reliable cutoff.
Per the National Electrical Code, dishwashers must be on a dedicated circuit with proper grounding. If your install uses an extension cord or a shared circuit, that's a code violation and a fire risk. The full requirements are outlined at NFPA.
GFCI and AFCI Protection Matter More Than You Think
Modern kitchens require GFCI protection for outlets near water. Some jurisdictions now require AFCI protection as well. Both exist to prevent shocks and electrical fires.
If your dishwasher outlet isn't protected, that's worth fixing. A licensed electrician can add protection at the panel or at the outlet itself.
Never bypass a GFCI that keeps tripping. It's doing its job. Find the fault.
Water Shutoff Before Any Plumbing Work
Turn off the supply valve under the sink before you disconnect anything. Then open the dishwasher's fill line at the lowest point to relieve pressure.
Have towels and a shallow pan ready. Even a closed valve leaves water in the line, and that water has to go somewhere.
Burn Hazard From the Heating Element
The heating element stays hot for several minutes after a cycle ends. It sits at the bottom of the tub, right where your hands go when you're cleaning the filter.
Wait at least 15 minutes after a cycle before reaching into the sump. If you're testing the element, let the machine cool completely first.
Water Leak and Flood Risk
A slow leak under a dishwasher can run for weeks before you notice it. By then, the subfloor and cabinets may be damaged.
After any repair, run a short cycle and check for drips at every connection. Look at the supply line, the drain hose, and the pump housing. Dry everything first so a new leak is visible.
Detergent and Chemical Safety
Dishwasher detergent is caustic. It can burn skin and eyes on contact. Keep it away from children and pets.
Never mix detergents or add bleach to a dishwasher cycle. Some combinations release dangerous fumes.
The Sanitize Cycle Is Not Medical Sterilization
NSF/ANSI 184 confirms a 99.999% reduction of test organisms. That's not the same as the sterilization an autoclave provides.
For everyday dishes and utensils, it's more than enough. For medical equipment or infant feeding items during illness, follow your healthcare provider's guidance instead.
Maintenance That Keeps the Sanitize Light Quiet Long-Term
Most sanitize-light complaints come back because the underlying cause was never addressed. Maintenance prevents that.
The Monthly Checklist
These five tasks take about 15 minutes total.
- Pull the filter and rinse it under warm water
- Wipe the door gasket with a damp cloth
- Check the spray arm holes for debris
- Run a rinse-only cycle with a cup of white vinegar
- Confirm the rinse aid reservoir is filled
Doing this once a month keeps scale and grease from building up.
The Quarterly Deep Clean
Every three months, go further.
- Remove the filter assembly and soak it in warm soapy water
- Scrub the sump with a soft brush
- Run a dishwasher cleaner tablet through a hot cycle
- Inspect the drain hose for kinks or cracks
- Check the door hinge for play
If you have hard water, do this every other month instead.
The Annual Water Heater Check
Set a reminder once a year to confirm your water heater is at 120°F. Households change settings for various reasons and forget to change them back.
A water heater that drifts below 120°F will quietly kill your sanitize cycle. You won't notice until the light blinks.
Maintenance Schedule at a Glance
| Task | Frequency | Time |
|---|---|---|
| Rinse filter | Monthly | 5 minutes |
| Wipe door gasket | Monthly | 2 minutes |
| Vinegar rinse cycle | Monthly | Cycle time |
| Deep clean and descale | Quarterly | 30 minutes |
| Water heater check | Annually | 5 minutes |
| Door hinge and latch inspection | Annually | 10 minutes |
What Maintenance Won't Fix
Maintenance prevents supply-side and buildup problems. It won't fix a failed thermistor, a blown thermal fuse, or a dead control board.
If you've kept up with maintenance and the light still blinks, you're past the maintenance stage. Move to diagnostic mode.
Real Scenarios: Cold Winter Inlet, Well Water, and a Dishwasher That Ran Fine Yesterday
These three patterns show up constantly in owner reports. Each one has a different root cause and a different fix.
Scenario 1: The Cold Winter Inlet
A homeowner in Minnesota runs a sanitize cycle in January. The sanitize light blinks at the end. The dishes are clean, but the light won't stay solid.
The ground water temperature in that region drops to around 40°F in winter. The dishwasher fills with 40°F water. Even with the heating element running full power, the final rinse tops out near 130°F.
The board won't confirm a sanitize claim it can't verify. The light blinks.
The fix is behavioral. Run the kitchen tap for a full minute before starting the cycle. That flushes the cold water from the line and brings 120°F water to the inlet.
The cycle completes and the light stays solid.
Some owners add a recirculating pump on the hot line. That's a real solution for households with long pipe runs. It costs a few hundred dollars installed and eliminates the problem permanently.
Scenario 2: The Well Water Buildup
A household on well water runs sanitize cycles for two years without issue. Then the light starts blinking intermittently.
Well water often runs above 15 grains per gallon of hardness. Over time, mineral scale coats the thermistor. The sensor under-reports temperature because the scale insulates it from the water.
The board sees a lower reading than reality and keeps the heating element running longer. Sometimes it overcorrects and aborts the cycle. Either way, the light blinks.
The fix is descaling. A dishwasher cleaner tablet run through a hot cycle removes the scale. Replacing the thermistor is the permanent fix if the scale has been there long enough to damage the sensor.
Prevention is key. Households on well water should descale every other month, not quarterly.
Scenario 3: The Dishwasher That Ran Fine Yesterday
A Whirlpool dishwasher works perfectly for years. One morning the sanitize light starts blinking mid-cycle and the machine stops.
This pattern usually points to a sudden component failure, not a gradual one. The most common candidates are the thermal fuse, the door latch switch, or a wiring connector.
A thermal fuse blows when something causes excess current. The heating element shorting to ground is the classic cause. The fuse does its job by cutting power, but the machine won't run until you find and fix the underlying fault.
A door latch switch fails after years of use. The plastic actuator wears down. The switch stops making solid contact.
The board sees an open door and aborts the cycle.
A wiring connector works loose from vibration or heat cycling. The board loses a sensor signal and flags a fault.
Each of these has a specific diagnostic path. The tech sheet and a multimeter will tell you which one you're dealing with.
How to Tell Which Scenario You're In
| Clue | Likely scenario |
|---|---|
| Blinks only in cold months | Cold inlet water |
| Blinks intermittently, machine is older | Scale on thermistor |
| Blinks suddenly after years of working | Component failure |
| Blinks after a power event | Latched fault, needs reset |
| Blinks with standing water | Drain restriction |
Match your situation to the clue. Then follow the corresponding branch earlier in this guide.
What to Do When the Light Still Blinks After Every Fix
You've reset the machine. You've run hot water. You've cleaned the filter and checked the drain.
You've tested the thermistor and the heating element. The light still blinks.
That's frustrating. It also narrows things down considerably.
Recheck the Basics You Might Have Skipped
Before assuming a deeper fault, confirm these:
- The water supply valve is fully open, not cracked
- The drain hose has a proper high loop or air gap
- The disposal knockout plug is removed (if applicable)
- The door latch clicks firmly every time
- The detergent is correct for your water hardness
- The rinse aid reservoir is filled
- Nothing is blocking the spray arms
A surprising share of persistent faults trace back to one of these.
Re-Enter Diagnostic Mode and Note Everything
Run diagnostic mode again. This time, write down every flash pattern and every component that fails its test.
If a component passes one run and fails the next, you have an intermittent fault. Those usually point to a wiring issue, not a failed part.
Check every connector between the failing component and the control board. Reseat each one. Look for discoloration, corrosion, or a loose pin.
The Intermittent Fault Problem
Intermittent faults are the hardest to diagnose because they don't show up on demand. The machine works, then it doesn't, then it works again.
Common causes:
- A cracked solder joint on the control board
- A ribbon cable with a broken trace that only opens when the door moves
- A thermistor with a hairline crack that opens at temperature
- A wire connector that vibrates loose during the wash cycle
If you can't reproduce the fault on demand, replace the cheapest suspect first. That's usually the thermistor or the ribbon cable.
When the Board Is the Only Thing Left
If every sensor tests good, every connector is clean, and diagnostic mode keeps flagging a fault with no clear cause, the control board is the likely culprit.
Confirm before you buy. Some boards can be sent out for repair at a fraction of replacement cost. That's worth checking if the part is over $200.
The Last Resort Before Replacement
If you've replaced the thermistor, the heating element, and the control board, and the light still blinks, something else is going on.
Check the incoming voltage at the outlet. A dishwasher running on low voltage can behave erratically. A licensed electrician can verify this in a few minutes.
Also check the ground connection. A missing or poor ground causes strange board behavior that mimics component failures.
DIY Repair vs. Service Call: Costs, Part Prices, and When to Stop
The math on dishwasher repair is straightforward once you know the numbers. What most owners get wrong is guessing at the diagnosis, then paying for a part that wasn't the problem.
Get the diagnosis first. Then decide who does the work.
What the Parts Actually Cost
These are typical US prices for common Whirlpool dishwasher components as of 2026. Ranges reflect model variation and where you source the part.
| Part | Typical cost | Skill level | Time to replace |
|---|---|---|---|
| Thermistor | $15 to $40 | Easy | 20 minutes |
| Thermal fuse | $10 to $25 | Easy | 15 minutes |
| Hi-limit thermostat | $15 to $35 | Easy | 15 minutes |
| Door latch switch | $20 to $50 | Easy | 25 minutes |
| Fill valve | $30 to $70 | Easy | 30 minutes |
| Heating element | $40 to $90 | Moderate | 60 minutes |
| Drain pump | $60 to $120 | Moderate | 45 minutes |
| Circulation pump | $80 to $160 | Moderate | 75 minutes |
| Ribbon cable | $20 to $50 | Moderate | 40 minutes |
| UI board | $100 to $200 | Moderate | 30 minutes |
| Main control board | $150 to $300 | Moderate | 45 minutes |
Parts from the manufacturer cost more than aftermarket equivalents. For a machine still under warranty, use OEM parts only. For an older unit, aftermarket is a reasonable trade-off.
What a Service Call Actually Costs
A technician visit runs $100 to $150 in most US markets. That covers the diagnostic. Parts and labor come on top.
A typical repair on a mid-range Whirlpool dishwasher lands between $200 and $450 all-in. A main control board replacement can push past $500 with labor.
Emergency or weekend rates run higher. So do calls in rural areas where travel time is longer.
When DIY Makes Sense
Do it yourself when:
- The part costs under $100
- Diagnostic mode pointed to a specific component
- You're comfortable with a multimeter
- The tech sheet is in hand
- The unit is out of warranty
- You can reach the part without pulling the machine out
Thermistors, thermal fuses, door switches, and fill valves all fit this profile. They're accessible, cheap, and easy to test.
When to Call a Pro
Call a technician when:
- The unit is under warranty (DIY can void it)
- The fault points to the main control board
- You smell burning or see scorch marks
- The breaker trips when the machine runs
- Water is leaking from inside the cabinet
- Diagnostic mode gives conflicting codes
- The repair cost exceeds half the price of a new unit
The Break-Even Point Most Owners Miss
A Whirlpool dishwasher typically lasts 8 to 12 years with normal use. If yours is 10 years old and needs a $300 repair, you're spending a third of a new unit's price on a machine that's already near end of life.
If it's 3 years old and needs the same repair, fix it. You've got years of service left.
Age plus repair cost plus likelihood of a second failure. That's the whole calculation.
Repair or Replace: Making the Call on an Aging Whirlpool Dishwasher
This is the question that matters most when the repair quote lands. Here's how to think about it without emotion.
The 50 Percent Rule
If the repair cost is more than half the price of a comparable new dishwasher, replace it. That's the standard rule of thumb in appliance repair.
A mid-range Whirlpool dishwasher runs $500 to $900 as of 2026. A $450 repair on a $600 machine is past the line.
The Age Factor
Modern dishwashers last 8 to 12 years on average. Past year 10, the failure rate climbs noticeably.
If your machine is 12 years old and needs a $200 repair, you're buying time, not value. If it's 4 years old and needs the same repair, fix it without hesitation.
What You Gain With a New Unit
New Whirlpool dishwashers use significantly less water and energy than units from a decade ago. Federal efficiency standards have tightened more than once since 2010.
A new unit also brings:
- A full manufacturer warranty
- Updated diagnostic features
- Quieter operation
- Better rack configurations
- Modern sanitize cycle validation
What You Lose With a New Unit
You lose the familiarity of your current machine. You also spend money on installation, which runs $150 to $400 depending on the setup.
If your current dishwasher is built into custom cabinetry, a new unit may require trim kit adjustments. Those add cost.
The Decision Matrix
| Situation | Recommendation |
|---|---|
| Under 5 years old, repair under $250 | Repair |
| Under 5 years old, repair over $400 | Get a second opinion |
| 5 to 10 years old, repair under $300 | Repair |
| 5 to 10 years old, repair over $400 | Lean replace |
| Over 10 years old, any repair over $250 | Replace |
| Any age, water damage or electrical fire risk | Replace |
The One Case Where Replacement Is Always Right
If the machine has caused water damage to the floor or cabinets, replace it. The cost of fixing the water damage already exceeds the value of the old unit.
The same goes for any machine that has tripped the breaker or shown signs of electrical failure. Safety beats economics every time.
How to Get the Most From a New Purchase
Measure your cabinet opening before you shop. Standard is 24 inches wide, 34 inches tall, and 24 inches deep. ADA and portable models differ.
Check the EnergyGuide label. Lower annual kilowatt-hours means lower operating cost over the life of the unit.
Look for a model with a documented NSF/ANSI 184 sanitize cycle if that feature matters to you. Not every dishwasher has one.
Preparing for a Service Call: What to Document and What to Expect
A well-prepared service call is a shorter service call. That saves you money on labor and gets you back to clean dishes faster.
The Documentation a Technician Wants
Have these ready before the technician arrives:
- Model and serial number
- The cycle you selected, including options
- The exact stage where the blinking started
- Blink rate and pattern
- Any error codes from diagnostic mode
- What you've already tried
- Any parts you've already replaced
- Purchase date and warranty status
A technician who has this in hand can often skip the exploratory phase and go straight to testing.
What the Technician Will Actually Do
Expect a structured diagnostic sequence:
- Verify the complaint by running a cycle
- Enter diagnostic mode on the machine
- Test each component in the heating circuit
- Test the water supply and drain path
- Confirm the failing part with a meter
- Quote the repair before doing the work
If the technician skips diagnostic mode and jumps straight to a part replacement, ask why. A good technician tests before replacing.
Questions to Ask Before Approving the Repair
Ask these before you say yes to the work:
- What part failed, and how did you confirm it?
- Is this an OEM part or aftermarket?
- What's the warranty on the repair itself?
- Is there anything else showing signs of wear?
- What would you do if this were your machine?
A technician who can answer all five clearly is worth keeping.
What the Bill Should Include
A proper invoice lists the diagnostic fee, the part number, the part cost, and the labor. It should also show any warranty on the repair.
Keep the invoice. If the same fault returns within the warranty window, you'll need it for a free re-repair.
How Long the Repair Usually Takes
A straightforward part swap takes 30 to 60 minutes once the technician is on site. A control board replacement takes about the same.
If the machine has to be pulled out from under the counter, add 20 to 30 minutes. If the drain or supply plumbing is difficult to access, add more.
Most service calls are done within 90 minutes from arrival to departure.
Frequently Asked Questions
Why does my Whirlpool dishwasher sanitize light blink three times?
A three-blink pattern usually points to a specific stored fault, not a universal meaning. Whirlpool uses blink counts differently across platforms, so three flashes on one model can mean something else on another. Pull the tech sheet for your model number and match the pattern to the code chart.
Don't trust a generic online list.
Can I run a Whirlpool dishwasher without the sanitize option?
Yes. The sanitize option is optional on every Whirlpool model. The machine runs a normal wash, rinse, and dry cycle without it.
You lose the NSF/ANSI 184 sanitizing claim, but the dishes still come out clean. Use High Temp Wash if you want extra heat without the sanitize validation step.
Why does the sanitize light blink on my Whirlpool but not my old dishwasher?
Newer Whirlpool models validate the sanitize cycle electronically. They confirm the final rinse hit 150°F before lighting the indicator. Older machines often used a mechanical thermostat with no feedback to the panel.
Your new dishwasher isn't more fragile. It's just more honest about what it can confirm.
Does the blinking light mean my dishes aren't clean?
No. Cleaning and sanitizing are two different stages. Detergent and spray arms handle cleaning.
The heating element and thermistor handle the sanitizing rinse. Dishes can be perfectly clean while the sanitize validation fails. If the light blinks and the dishes look clean, focus on the heating circuit and water supply, not the wash cycle.
How do I clear the sanitize light on a Whirlpool dishwasher?
Press Cancel or Drain first. Then flip the dishwasher breaker off for a full 60 seconds. Flip it back on and run a short cycle with no options.
If the light stays solid through that cycle, the fault was transient. If it blinks again, the problem is repeatable and diagnostic mode is your next step.
Do UK and EU Whirlpool dishwashers have the same sanitize option?
Not always. NSF/ANSI 184 is a North American standard, so the branded sanitize cycle is primarily a US and Canada feature. UK and EU Whirlpool models run at 220 to 240 volts and often use different cycle names, such as Intensive or Hygiene.
The troubleshooting logic is similar, but the panel labels and codes differ.
Decision Guide: What to Do Next Based on Your Exact Symptom
Use this as your final sorting tool. Find the row that matches your situation. Follow the action.
| Your symptom | First action | If it doesn't clear |
|---|---|---|
| Blinks after cycle, dishes clean | Run hot tap, rerun with Sanitize only | Test thermistor and heating element |
| Blinks mid-cycle, water standing | Clear filter, check drain hose and disposal | Check float switch and drain pump |
| Blinks with lock icon lit | Hold Control Lock for 3 seconds | Breaker reset for 60 seconds |
| Blinks with Clean light | Press Cancel, restart cycle | Check door latch and door switch |
| Blinks with F or E code | Enter diagnostic mode, read code | Match code to tech sheet |
| Blinks after power outage | Breaker reset, run test cycle | Enter diagnostic mode |
| Blinks after move or reinstall | Check supply valve, drain loop, door alignment | Check disposal knockout plug |
| Blinks with no other symptoms | Breaker reset, run Rinse Only | Pull and test the heating circuit |
| Blinks and machine is dead | Check breaker and outlet | Test main control board |
| Blinks with burning smell | Disconnect power immediately | Call a technician |
The One Rule That Saves the Most Money
Test the cheap parts before the expensive ones. The thermistor, thermal fuse, and door switch cost under $50 combined. The control board costs ten times that.
Diagnostic mode tells you which system failed. A multimeter confirms which component. Buy the part only after both point to the same answer.
When to Stop and Call a Professional
Stop if the breaker trips when the dishwasher runs. Stop if you see scorch marks or smell burning. Stop if the unit is under warranty.
Stop if you can't read the tech sheet or use a multimeter.
A technician costs $100 to $150 for the visit. That's cheap compared to a misdiagnosis that damages the board or floods a floor.
The Bottom Line
A blinking sanitize light is almost never a mystery once you know which branch you're on. Nine times out of ten it comes down to cold inlet water, a clogged drain path, or a failing thermistor. Fix the cause and the light goes solid.