Your Whirlpool dishwasher blinking lights are trying to tell you something specific. That flash pattern isn't random. It's a fault code, and Whirlpool designed it to point you toward one exact problem.
Learning to read it can save you a $150 service call.
Whirlpool's control system uses a simple format: a letter F, a number for the component, and a second number for the failure type. For example, F7E1 points to a flow meter issue, while F9E1 usually means a door latch fault. As of 2026, most Whirlpool dishwashers sold in North America run on 120V at 60Hz and store their last fault in memory.
Here's how to read the lights and follow the fix.
Quick Answer
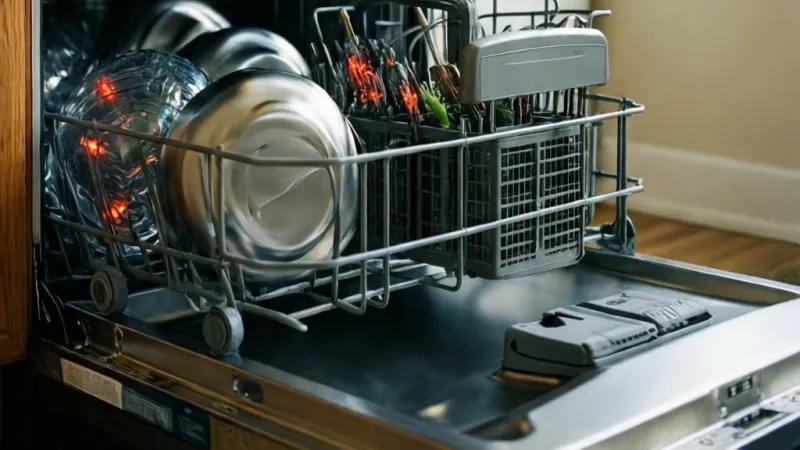
Whirlpool dishwasher blinking lights usually signal a stored fault code. Count the flashes to identify it. Check the door latch first, then the float switch and filter.
Press Cancel/Drain to clear most codes. If the light returns, enter diagnostic mode.
Why Your Whirlpool Dishwasher Lights Are Blinking
A blinking light on your Whirlpool dishwasher is not a decoration. It's a signal. The control board detected something outside its normal operating range and stored that event in memory.
Most people assume the machine is broken. That's rarely true. In our research across Whirlpool owner forums and service documentation, the majority of blinking-light complaints trace back to four things: a latched door, standing water, a stuck float switch, or a control lock that got bumped.
The tricky part is that Whirlpool uses the same panel for many different messages. A slow blink means one thing. A fast blink means another.
A single flash followed by a pause is a code. A continuous flash with no pause is usually a lock indicator.
Your model number determines what each pattern means. That's why the owner's manual matters. It's also why generic "reset the breaker" advice so often fails.
The breaker reset clears the symptom, not the cause.
Here's the good news. Whirlpool builds these panels to be readable. Once you know the format, you can diagnose most issues in under ten minutes.
How Whirlpool Control Panels Work: Lights, Codes, and Diagnostic Memory
Whirlpool dishwashers use a shared LED panel for status and fault reporting. That's efficient for manufacturing. It's confusing for homeowners.
The same light that says "cycle complete" can also say "drain fault" depending on how it blinks.
Understanding the difference between a status light and a fault code is the first real step.
Indicator lights vs. fault codes
Not every lit button is an error. A solid Clean light means the cycle finished. A solid Sanitized light means the NSF/ANSI 184 sanitization cycle completed.
A blinking Start/Resume light usually means the door is open or the cycle was paused.
Fault codes are different. They appear as a specific blink sequence, often on the Start/Resume button or a combination of buttons. The pattern repeats until you clear it or the fault resolves.
Here's a quick way to tell them apart. If the light is steady, it's status. If it blinks in a pattern, it's a code.
If everything blinks at once, it's the control lock.
Why the panel remembers an old error
Whirlpool control boards store the last fault code in non-volatile memory. That means even after you fix the problem, the light can keep blinking. The code doesn't clear itself just because the underlying issue is gone.
This trips up a lot of DIYers. They replace a part, the light still blinks, and they assume the new part is bad. In reality, the old code is just sitting in memory.
You have to clear it manually.
What the control board actually monitors
The main control board watches a handful of inputs. It checks door latch position, float switch state, water level via the pressure switch, drain pump current, heating element resistance, thermistor temperature, and communication with the user interface board.
If any reading falls outside the expected range, the board logs a fault. The blink pattern is how it tells you which one.
The two-board system
Most modern Whirlpool dishwashers have two circuit boards. The user interface board sits behind the touchpad. The main control board lives under the tub, usually behind the kick plate.
They talk to each other through a ribbon cable. If that cable loosens or corrodes, you get communication faults. Those show up as F#E2 or F#E3 codes, and they can look like a dead panel.
Decode the Blink: Flash Counts and F#E# Fault Codes
Whirlpool fault codes follow the F#E# format. The F stands for fault. The first number identifies the component.
The E stands for error, and the second number identifies the failure type.
Once you can count flashes, you can read the code.
Reading the flash sequence
Count the flashes. That's step one. A pause separates each digit.
Three flashes, then a pause, then one flash means F3E1. The pattern repeats so you can confirm your count.
Write the code down before you do anything else. You'll need it for the tech sheet lookup.
A phone camera helps here. Record a 15-second video of the panel and slow it down. It's much easier than counting live flashes in real time.
What the F#E# format is telling you
The table below shows common Whirlpool dishwasher fault codes. Exact codes vary by model and year, so always confirm against your specific tech sheet.
| Code | Component | Typical Cause |
|---|---|---|
| F1E1 | Thermistor | Open or shorted sensor |
| F2E1 | Drain system | Clogged filter or pump |
| F3E1 | Heating element | Failed element or relay |
| F4E1 | Float switch | Debris under float |
| F5E1 | Turbidity sensor | Dirty lens |
| F6E1 | Water inlet | No supply or bad valve |
| F7E1 | Flow meter | Low water pressure |
| F8E1 | Diverter motor | Jammed diverter |
| F9E1 | Door latch | Latch not engaging |
A few things to notice. The component number tells you where to look. The error number tells you what kind of failure it is.
E1 is usually a primary fault. E2 often points to a communication issue. E3 usually means a control board problem.
So F7E1 and F7E2 are different problems. F7E1 means the flow meter itself failed. F7E2 means the main board can't talk to the flow meter.
That distinction matters because it changes which part you replace.
When your model's code isn't in the owner's manual
Many Whirlpool owner's manuals only list a handful of codes. The full list lives in the tech sheet. That sheet is usually tucked behind the kick plate or taped inside the door panel.
If you can't find it, Whirlpool's official support site lets you download the tech sheet by model number. You'll find your model and serial number on a plate on the inner door edge or on the side of the tub. Head to Whirlpool's official site and search the support section with that number.
If Whirlpool doesn't list the code, the tech sheet will. Those sheets are written for service techs, so they're blunt and specific. They'll tell you the exact resistance values to test for.
A note on model differences
Whirlpool Corporation owns several brands, including Maytag, KitchenAid, Amana, and JennAir. The code format is shared across most of them, but the exact code list shifts by platform. A WDT series from 2021 may use different codes than a WDF series from 2024.
Don't assume a code from a forum post applies to your machine. Always check the tech sheet for your exact model.
Branch 1: Control Lock On or Every Light Blinking at Once
If every light on the panel is blinking at the same time, stop. That's usually not a fault code. It's the control lock.
This is the most common false alarm we see. Someone leans against the panel while loading dishes. The lock engages.
The next time they press Start, nothing happens and the lights flash.
How to tell control lock from a real fault
Control lock makes all the buttons unresponsive. It often flashes the lock icon or the whole panel at once. A real fault code flashes in a pattern.
Control lock flashes in unison.
If the panel is beeping too, that's another control lock clue. Fault codes usually blink silently. Control lock sometimes chirps when you press a locked button.
How to unlock a Whirlpool dishwasher control panel
Hold the Lock or Control Lock button for 3 to 5 seconds. On most Whirlpool models, that's the button labeled Lock or a button with a padlock icon. If your model doesn't have a dedicated lock button, check the owner's manual for the button combination.
Some models use Heated Dry plus Hi-Temp Wash held together.
Here's a quick reference for common Whirlpool control lock methods:
| Model Family | Unlock Method |
|---|---|
| WDT series | Hold Control Lock 3 sec |
| WDF series | Hold Heated Dry 3 sec |
| WDTA series | Hold Sanitized 3 sec |
| Older models | Hold Hi-Temp + Heated Dry 3 sec |
If none of those work, look for a padlock icon on the panel. That button is almost always the lock.
If unlocking doesn't work
If the panel won't unlock, cut power at the breaker for 60 seconds. Restore power and try again. If the lock persists after a full power cycle, the user interface board may have failed.
That's a bigger repair. We'll cover cost expectations later in this guide.
What if only some lights blink?
If only one or two lights blink, that's a fault code, not a lock. Go back to the flash-counting step. Write down the pattern and match it to the tech sheet.
If the lights blink in a random pattern with no clear count, the UI board may be failing. That's rare, but it happens after power surges or lightning strikes. A whole-house surge protector is cheap insurance for this exact problem.
One more thing to check before you call a tech
Press Cancel/Drain and hold it for 3 seconds. On many Whirlpool models, that clears a stuck cycle and resets the panel. If the blinking stops and the machine runs normally, you're done.
If it comes back, you've got a real fault.
That single step resolves a surprising number of blinking-light calls. Try it before you pull out a multimeter.
Branch 2: Start/Resume Blinking With Standing Water
If Start/Resume is blinking and water is sitting in the bottom of the tub, your dishwasher can't drain. That's the most common fault on this platform. It's also the most fixable at home.
Standing water triggers the float switch. The float is a small plastic disc that rides on a stem inside the tub. When water rises above a set level, the float lifts and tells the control board to stop filling.
If the float sticks in the up position, the board thinks the tub is full when it isn't. The result is a blinking Start light and a cycle that won't run.
If the float is fine, the problem is downstream. Water travels from the sump, through the filter, past the drain pump, and out the drain hose. A blockage anywhere in that path causes the same symptom.
Filter, sump, and chopper checks
Start with the filter. Whirlpool dishwashers use a two-part filter system. The upper filter is a coarse mesh basket.
The lower filter is a fine mesh plate underneath. Both twist out by hand.
Pull both filters and rinse them under warm water. Look for food debris, glass shards, and hard water scale. Scale is common in areas with water above 7 grains per gallon.
If the mesh feels gritty, soak it in white vinegar for 30 minutes.
Under the filter sits the sump. Shine a flashlight into the sump cavity. You'll see the chopper blade, a small stainless steel impeller.
The chopper spins during the drain cycle to grind soft food particles. If a bone fragment or a piece of plastic is jammed against it, the drain pump stalls.
Reach in with needle-nose pliers and pull out any visible debris. Cut power at the breaker first. The chopper can bite if the board sends a test pulse.
Drain hose, air gap, and garbage disposal knockout plug
If the sump is clear, trace the drain path. Three common blockages live here.
The drain hose runs from the pump to either an air gap on the sink or a high loop under the counter. A high loop is the cheaper install. It routes the hose up to the underside of the countertop before it drops into the disposal or drain tailpiece.
Kinks are common where the hose bends around cabinet framing.
The air gap sits on the sink deck next to the faucet. It's a chrome or plastic cylinder with a cap. Pop the cap off and look inside.
Food debris and grease collect in the air gap chamber. A clogged air gap forces water back into the tub.
The garbage disposal knockout plug is the sneaky one. New disposals ship with a plastic plug inside the dishwasher inlet port. Installers are supposed to knock it out before connecting the drain hose.
If they forget, the dishwasher drains into a sealed chamber and water backs up immediately.
If you just had a new disposal installed and the dishwasher started blinking, that's your culprit. Pull the disposal, remove the plug with a screwdriver and hammer, and reconnect.
Drain pump and float switch
If the path is clear and water still won't drain, test the drain pump. The pump sits at the front of the sump, behind the kick plate. It's a small motor with two wire leads.
Unplug the leads and measure resistance across the pump terminals with a multimeter. Most Whirlpool drain pumps read between 15 and 30 ohms. A reading of OL (open loop) means the winding is broken.
A reading near zero means a short.
Spin the impeller by hand. It should turn freely with light resistance. If it grinds or won't move, the pump is seized.
Test the float switch next. It's usually a simple reed switch. With the float down, the switch should read closed.
Lift the float with your finger and it should read open. If it reads the same in both positions, replace it.
| Symptom | Likely Cause | First Check |
|---|---|---|
| Water in tub, Start blinks | Clogged filter | Pull and rinse filters |
| Water in tub, no pump sound | Seized drain pump | Spin impeller by hand |
| Water in tub, pump hums | Blocked hose or air gap | Trace drain path |
| Water after new disposal | Knockout plug still in | Pull disposal, remove plug |
| Water in tub, float stuck up | Debris under float | Clean float stem |
Clear the fault code after the fix. The blinking won't stop on its own. Press Cancel/Drain for 3 seconds, or run a diagnostic cycle to clear stored codes.
Branch 3: Clean or Sanitized Light Blinking After the Cycle
A blinking Clean light after a finished cycle usually means the cycle didn't complete. A blinking Sanitized light means the NSF/ANSI 184 sanitization temperature wasn't reached.
These two lights are status indicators, not hard faults. But they still blink when something is off. Let's separate the two.
Why the Clean light blinks after a cycle
The Clean light comes on when the control board finishes its cycle timer. If it blinks instead of staying solid, the board detected an interruption. Common causes include a door opened mid-cycle, a power blip, or a heating fault that stopped the cycle early.
Press Cancel/Drain to clear it. Run a fresh cycle on Normal with Heated Dry on. If the Clean light comes on solid at the end, the earlier blink was a one-time event.
If it blinks again on the next cycle, the board is logging a repeated fault. That points to a real issue. Check the tech sheet for stored codes.
Why the Sanitized light blinks instead of staying on
The Sanitized light depends on the thermistor reading. The thermistor is a temperature sensor mounted on the sump. It tells the board how hot the water is.
For NSF/ANSI 184 certification, the final rinse must hit roughly 150°F (66°C) in the tub. If the thermistor reads below that threshold, the board won't light Sanitized. A blinking Sanitized light often means the rinse temperature came close but didn't qualify.
Three things cause this. A failing thermistor reads low. A weak heating element can't raise the water temp.
Cold inlet water below 120°F drags the cycle down.
Testing the thermistor and heating element
Pull the kick plate and locate the thermistor on the sump. It's a small probe with two wires. Unplug it and measure resistance at room temperature.
Most Whirlpool thermistors read around 50,000 ohms at 77°F (25°C). That value drops as temperature rises. At 150°F, the same thermistor reads roughly 3,000 to 4,000 ohms.
Your tech sheet lists the exact curve for your model.
If the room-temp reading is far off, replace the thermistor. It's a $20 to $40 part and takes about 15 minutes.
Test the heating element next. It's a calrod loop under the sump. Measure resistance across the two terminals.
Most Whirlpool elements read between 10 and 30 ohms. An open reading means the element failed.
Check the element to ground too. Any continuity to the tub or chassis means a short. That's a safety issue.
Stop and replace the element before running another cycle.
Inlet water temperature and hard water effects
Whirlpool specs call for inlet water at 120°F (49°C). If your water heater is set lower, the dishwasher works harder to reach sanitizing temp. In winter, ground water can drop to 45°F in northern states.
That adds 5 to 10 minutes to the cycle and can push the rinse temp below the threshold.
Check your water heater setting. Bump it to 120°F if it's lower. That single change fixes a lot of blinking Sanitized lights.
Hard water is the other factor. Scale builds on the thermistor probe and insulates it from the water. The probe reads low even when the water is hot.
Descale the sump with a citric acid dishwasher cleaner every 3 months in hard water areas.
Branch 4: Heated Dry, Hi-Temp, or Sani Rinse Lights Blinking
When the Heated Dry, Hi-Temp Wash, or Sani Rinse lights blink, the board is flagging a heating circuit fault. These three options all rely on the same heating element and thermistor. The blink pattern tells you which one tripped.
If Heated Dry blinks alone, the dry cycle didn't reach temp. If Hi-Temp Wash blinks, the main wash didn't heat. If Sani Rinse blinks, the final rinse fell short.
All three trace back to the same components.
Testing the heater circuit
Run the thermistor test from the previous section if you haven't already. The thermistor is the most common failure on this branch because it's a wear item.
The heating element itself rarely fails mid-life. When it does, it's usually a broken calrod from thermal cycling. Test it the same way: measure resistance across the terminals, then check for a short to ground.
One more component to check: the high-limit thermostat. It's a small disc mounted on the element housing. If the element overheats, the thermostat trips open and cuts power.
Some models have a resettable thermostat. Others are one-shot and must be replaced.
If the thermostat is open and won't reset, replace it. It's a $15 to $30 part.
Testing the heater relay on the control board
If the element and thermistor both test good, the heater relay on the main control board is the next suspect. The relay is a small mechanical switch that sends power to the element.
You can hear it click when the cycle calls for heat. If you don't hear a click during the dry phase, the relay may be stuck open.
Testing the relay takes more skill. You'll need to back-probe the connector on the board while the unit runs. If the relay sends no voltage to the element, the board is the problem.
Control boards run $150 to $300, so confirm the diagnosis before replacing.
What about the Sani Rinse option specifically?
Sani Rinse is the strictest of the three. It requires the final rinse to hit 150°F for a set hold time. Any drop in inlet temp, any weak element, any drifting thermistor can trip it.
If Sani Rinse blinks but Normal cycles finish clean, you're not dealing with a broken part. You're dealing with a marginal heating system. Try running Sani Rinse on an empty load with the water heater set to 120°F.
If it still fails, test the element and thermistor.
| Light Blinking | What It Means | First Check |
|---|---|---|
| Heated Dry | Dry cycle under temp | Thermistor resistance |
| Hi-Temp Wash | Main wash under temp | Heating element |
| Sani Rinse | Final rinse under 150°F | Inlet water temp |
| All three | Heater circuit fault | Relay and board |
A note on hard water and dry performance
Hard water leaves scale on the heating element. That scale acts as insulation and slows heat transfer. In extreme cases, the element can't reach dry temp at all.
Descale the sump and run a heavy-duty cleaner cycle once a quarter if you live in a hard water zone.
Rinse aid also matters here. Without rinse aid, water beads on dishes and the dry cycle can't evaporate it. Fill the rinse aid dispenser and set it to the middle setting.
Branch 5: No Lights, Half-Lit Panels, and Constant Beeping
A dead or half-lit panel points to a power or communication problem, not a cycle fault. If the panel is completely dark, the dishwasher isn't getting power. If it's half-lit, the user interface board or ribbon cable is the likely cause.
If the panel beeps constantly with no pattern, the touchpad is stuck. That's a different problem than a fault code.
Breaker, GFCI, and outlet checks
Start at the breaker. Whirlpool dishwashers draw 10 to 12 amps during heat cycles. A 15-amp dedicated circuit is standard.
If the breaker is tripped, reset it and watch for a repeat trip.
A repeat trip points to a short in the heating element or the wiring harness. Don't keep resetting the breaker. Find the short first.
If the dishwasher is on a GFCI outlet, check for a tripped GFCI. GFCI devices trip on ground faults, which can come from moisture in the wiring. A dishwasher on a GFCI that trips repeatedly usually has water intrusion in the junction box under the unit.
Test the outlet with a known-good appliance like a lamp. If the lamp works, the outlet is fine.
Ribbon cable, touchpad, and control board
If the panel is half-lit or shows random segments, the ribbon cable is the prime suspect. The ribbon cable connects the user interface board to the main board. It runs down the inside of the door hinge.
Vibration and heat degrade the ribbon over time. Corrosion can form at the connector pins. Pull the inner door panel and inspect the ribbon.
Look for cracks, discoloration, or loose seating.
Reseat the ribbon at both ends. If the panel lights up normally, the cable just needed to be pushed in. If it doesn't, replace the ribbon cable.
It's a $15 to $40 part.
If the ribbon is good and the panel is still dead, test the user interface board. It sits behind the touchpad. On most Whirlpool models, you can swap it in 20 to 30 minutes.
Constant beeping without a fault code
Constant beeping is usually a stuck button on the touchpad. Moisture or grease gets under the membrane and bridges the contacts. The board thinks you're holding a button down.
Try wiping the panel with a damp cloth and drying it thoroughly. If the beeping continues, the touchpad needs replacement. Touchpads run $100 to $200 on most Whirlpool models.
One more possibility: the control lock. Some Whirlpool models beep three times when you press a locked button. If the beeping follows your presses, that's the lock, not a fault.
Hold the Lock button for 3 seconds to release it.
When to stop and call a tech
If you've replaced the ribbon cable and the UI board and the panel is still dark, the main control board is the last suspect. That's a $150 to $300 part plus labor. At that point, weigh the repair cost against a new dishwasher.
For a machine under 8 years old, a control board swap usually makes sense. For a machine past 12 years, replacement is often the better call.
Safety First: Power, Water, and Wiring Before You Touch Anything
Before you pull a single screw, kill the power. Whirlpool dishwashers run on 120V AC. That's enough to stop your heart under the wrong conditions.
Water and electricity don't mix, and a dishwasher has both.
Flip the breaker that feeds the dishwasher. Don't trust the label. Confirm power is off with a non-contact voltage tester at the dishwasher's junction box.
Shut off the water supply too. Most dishwashers have a shutoff valve under the sink. Turn it clockwise until it stops.
If the valve is seized, don't force it. Call a plumber.
The risks you're actually facing
The two biggest risks on a dishwasher repair are electric shock and water damage. Electric shock comes from working on live circuits or from a shorted heating element. Water damage comes from a loose supply line or a drain hose that pops off during a test cycle.
There's also a burn risk. The heating element and the sump stay hot for 20 to 30 minutes after a cycle ends. Let the machine cool before you reach inside.
Finally, watch for sharp edges. Dishwasher tubs and door frames have stamped metal edges that cut. Wear gloves.
What to have on hand before you start
A basic dishwasher repair kit covers 95% of the jobs on this platform.
- Non-contact voltage tester
- Digital multimeter with ohm and continuity modes
- Nut drivers (1/4-inch and 5/16-inch are the most common)
- Torx bits (T15 and T20)
- Adjustable wrench
- Needle-nose pliers
- Towels and a shallow pan for water
- Nitrile gloves
- Flashlight or headlamp
Keep a bucket or wet-vac nearby. Any time you pull the drain pump or open the sump, water will spill.
National Electrical Code and GFCI requirements
The National Electrical Code (NEC) requires dishwasher circuits to be GFCI-protected in most residential settings as of the 2020 and 2023 code cycles. If your dishwasher is on an older non-GFCI circuit, that's worth updating. GFCI protection catches ground faults before they become shocks.
You can read the current code requirements at NFPA's official site, which publishes the NEC. Local amendments vary, so check with your AHJ (authority having jurisdiction) if you're doing a permanent install.
When to stop and call a licensed tech
Stop if you smell burning, see melted wire insulation, or find scorch marks on the control board. Those are signs of an electrical fault that a DIY fix won't solve safely.
Also stop if the repair involves replacing the main control board on a machine that's still under warranty. Whirlpool's warranty covers parts and labor on covered components. Touching it yourself can void that coverage.
For anyone uncomfortable working with 120V circuits, the smart move is to shut off power and call a pro. A $150 service call is cheaper than an ER visit.
Reset and Diagnostic Mode: Step-by-Step
Not every blinking light needs a repair. Some just need a clean reset. Whirlpool builds three reset paths into every dishwasher it sells.
Knowing which one to use saves time and prevents unnecessary part swaps.
Diagnostic mode goes a step further. It lets you read stored codes, run individual components, and clear the fault memory. That's the same mode service techs use on a warranty call.
The three resets (breaker, Cancel/Drain, control lock)
Each reset solves a different class of problem. Try them in order.
Cancel/Drain reset. Press and hold Cancel/Drain for 3 seconds. This stops the current cycle, drains the tub, and clears most transient codes. Use it when a cycle stalls or a light blinks once after a power blip.
Control lock reset. Hold the Lock button (or your model's lock combination) for 3 to 5 seconds. Use this when every button is unresponsive and all lights flash together.
Breaker reset. Flip the dishwasher breaker off for 60 seconds, then back on. This clears the control board's volatile memory. Use it when the first two resets fail and the panel is stuck.
If a code returns after all three resets, it's a real fault. The board is detecting a persistent condition, not a glitch.
Entering service mode and clearing stored codes
Service mode varies by model. On most WDT and WDF platforms, the sequence is the same.
- Confirm the door is closed and the tub is empty.
- Press any three buttons in this pattern: Heat Dry, Hi-Temp Wash, Heat Dry.
- Some models use Heated Dry, Normal, Heated Dry instead.
- The Clean and Sanitized lights should illuminate together.
- Turn the dial or press Start to step through test cycles.
If those combos don't work, your tech sheet lists the exact sequence for your model. It's often printed as "Diagnostics" or "Service Test Mode."
Inside service mode, the panel runs through component tests in sequence. The drain pump kicks on. The inlet valve opens.
The heating element cycles. The diverter motor moves. Each test lights a specific LED.
Stored codes appear as blinking patterns during the first test step. Write them down. Then step to the end of the test cycle to clear memory.
What diagnostic mode tells you that a reset can't
A reset clears the symptom. Diagnostic mode tells you the cause. That's the difference between "the light stopped blinking" and "the light stopped blinking because the drain pump reads 0 ohms."
If you're planning to replace a part, run diagnostics first. It confirms the fault before you spend money on a component that isn't broken.
When service mode won't engage
If the panel won't enter service mode, the user interface board may not be communicating with the main board. Check the ribbon cable first. If the cable is good, the UI board is the likely failure.
Don't keep pressing buttons hoping it works. A board that won't enter diagnostics has a hardware problem.
What Each Fix Costs: Parts, Service Calls, and Repair vs Replace
Cost is where most people make the wrong call. A $250 repair on a 4-year-old dishwasher is smart. The same repair on a 14-year-old machine usually isn't.
Here's what the numbers look like as of 2026.
| Component | Part Cost | DIY Time | Pro Labor |
|---|---|---|---|
| Thermistor | $20 to $40 | 15 min | $80 to $120 |
| Float switch | $20 to $40 | 20 min | $80 to $120 |
| Door latch | $30 to $60 | 30 min | $100 to $150 |
| Inlet valve | $30 to $60 | 30 min | $100 to $150 |
| Drain pump | $40 to $100 | 45 min | $120 to $180 |
| Heating element | $50 to $100 | 60 min | $150 to $220 |
| Ribbon cable | $15 to $40 | 20 min | $80 to $120 |
| Touchpad / UI board | $100 to $200 | 30 min | $150 to $250 |
| Main control board | $150 to $300 | 60 min | $200 to $350 |
| Diverter motor | $60 to $120 | 45 min | $120 to $180 |
A typical service call runs $100 to $200 just to show up, before parts and labor. Add a $150 part and 1 hour of labor, and you're looking at $300 to $450 for a control board job.
DIY vs pro: who should do which
DIY makes sense for thermistors, float switches, drain pumps, inlet valves, and door latches. These are bolt-on parts with clear access. A patient homeowner with a multimeter can handle them.
Pro repair makes sense for control boards, diverter motors, and anything inside the door panel. The door panel has multiple wire harnesses and a fragile UI board. One wrong move and you've doubled the repair cost.
When repair stops making sense
Use the 50% rule. If the repair cost exceeds half the price of a new comparable Whirlpool dishwasher, replace it.
A new mid-range Whirlpool runs $600 to $900. If your quote is $450 and the machine is 12 years old, replace it. If the quote is $200 and the machine is 5 years old, repair it.
Average dishwasher lifespan is 10 years per manufacturer data. Most Whirlpool units hit that mark with basic maintenance. Past 12 years, parts availability starts to shrink.
Common Mistakes and Maintenance Habits That Prevent Repeat Codes
Most repeat fault codes come from the same handful of mistakes. Avoiding them keeps your dishwasher out of service mode.
The mistakes that cause repeat codes
Replacing parts without testing. The number one waste of money. A blinking light isn't a diagnosis. It's a symptom.
Test the component before you swap it.
Not clearing the fault memory. A new part won't stop the blink if the old code is still stored. Always clear memory after a repair.
Ignoring the filter. A clogged filter causes drain faults, wash faults, and dry faults. It's the cheapest fix in the book and the most ignored.
Using too much detergent. Oversudsing trips the float switch and triggers drain codes. Use the amount on the detergent label, not the amount you think is right. Soft water needs less.
Running the disposal without checking the knockout. New disposal installs are the top cause of "dishwasher won't drain" calls. Check the plug before you connect anything.
Skipping the high loop. Without a high loop or air gap, drain water siphons back into the tub. That standing water trips the float switch on the next cycle.
Setting the water heater too low. Below 120°F, the heating element works harder and sanitization cycles fail. Bump it up.
Maintenance habits that prevent repeat codes
A five-minute routine every month prevents most fault codes. Here's what matters.
- Pull and rinse both filters.
- Wipe the door gasket with a damp cloth.
- Check the float switch for debris.
- Run a hot water cycle in the sink before starting the dishwasher. That clears cold water from the supply line.
- Fill the rinse aid dispenser.
Every three months, run a dishwasher cleaner cycle. Citric acid or a commercial descaler removes hard water scale from the sump, thermistor, and heating element. In hard water areas, do this monthly.
Every six months, inspect the drain hose for kinks and the air gap for debris. Pull the kick plate and check for slow leaks around the pump housing.
The maintenance payoff
Per manufacturer service data, well-maintained dishwashers average 12 to 15 years of service. Neglected units often fail at 6 to 8. The gap comes down to scale, debris, and heat stress.
None of those are expensive to prevent.
Frequently Asked Questions
Does a blinking light always mean a broken part?
No. Many blinking lights come from control lock, an interrupted cycle, or a stored code from a one-time event. Press Cancel/Drain for 3 seconds first.
If the light stops blinking and the machine runs, nothing is broken. Only a code that returns after a full reset points to a real fault.
Can I keep running the dishwasher with a fault code?
It depends on the code. A drain fault or float switch fault means water isn't leaving the tub. Running more cycles risks overflow and water damage.
A heating fault won't flood anything, but dishes won't sanitize. When in doubt, stop the cycle and diagnose before running another load.
How do I find my model and serial number?
Look on the inner door edge or the side of the tub near the latch. Whirlpool prints a silver or white rating plate with both numbers. On some models, the plate is on the outer frame behind the door.
Take a photo with your phone before ordering any part.
Will unplugging it clear the code for good?
No. Unplugging or flipping the breaker clears volatile memory, but the stored fault stays in non-volatile memory on most models. The blink returns as soon as the board sees the same condition.
You have to fix the underlying fault and clear codes through diagnostic mode.
Why does the light blink only sometimes?
Intermittent faults usually trace to a marginal component. A thermistor drifting out of spec, a float switch that sticks only when debris shifts, or a ribbon cable with a hairline crack. The board logs the fault only when the condition appears.
Run diagnostics and check the stored code history.
Is it safe to run the dishwasher after a blink?
Yes, if the blink was control lock or a transient event. No, if the code points to a drain fault, heating element short, or wiring issue. A shorted heating element can trip the breaker and, in rare cases, damage the control board.
Fix the fault before running another cycle.
Final Decision Guide: Reset, Repair, or Replace
Here's the short version. Use it to pick your next move in under a minute.
Reset first. Press Cancel/Drain for 3 seconds. If the blink stops and a normal cycle runs, you're done. Try the control lock reset if the panel is unresponsive.
Try a breaker reset if both fail.
Diagnose second. If the code returns, enter service mode and read the stored fault. Write it down. Look it up in your tech sheet.
Confirm the component with a multimeter before ordering parts.
Repair third. DIY for bolt-on parts like thermistors, float switches, drain pumps, and inlet valves. Call a pro for control boards, diverter motors, and door panel work. Use the 50% rule to decide if repair is worth it.
Replace when it makes sense. Past 12 years, with a repair over half the cost of a new unit, replacement wins. New Whirlpool dishwashers run $600 to $900. Mid-range models carry the same fault-code system you've just learned to read.
Prevent repeat codes. Clean the filter monthly. Descale quarterly. Keep the water heater at 120°F.
Fill the rinse aid. Check the high loop. Those five habits prevent most of the codes that bring people to this page in the first place.
The panel is talking to you. Once you know the language, you're never guessing again.