If you're seeing an iMac blinking folder with question mark, your Mac powered on but couldn't find a bootable system to start from. That's the whole message. The hardware woke up, the firmware did its job, and then the startup disk either wasn't there, wasn't readable, or wasn't bootable.
In our research, this symptom splits into two broad camps: a software or partition problem you can fix yourself, and a hardware fault that needs service. Apple's own startup documentation treats the folder with a question mark as a startup disk detection failure. It's listed separately from the prohibitory sign.
Knowing which branch you're on changes everything about what you do next.
Quick Answer
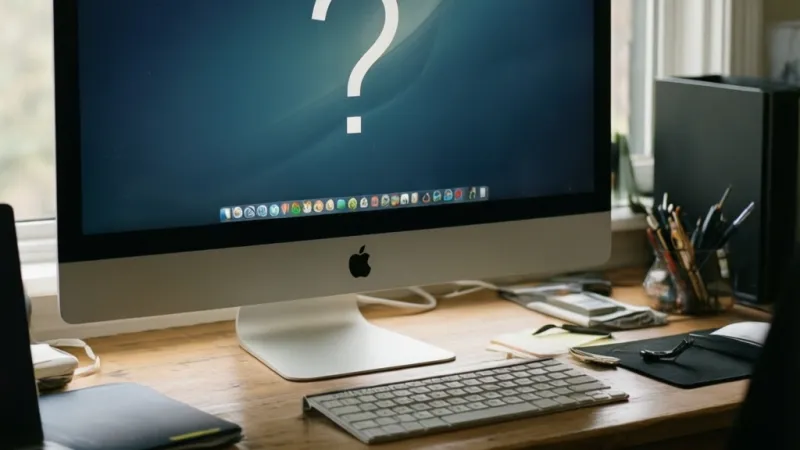
The blinking folder means your iMac can't find a startup disk. Hold Option at restart to open Startup Manager. If no volume appears, boot into macOS Recovery with Command R.
Run Disk Utility First Aid on the internal drive. Back up before erasing anything.
What the Blinking Folder With a Question Mark Actually Means
This icon is not an error code. It's the firmware telling you it finished looking and gave up.
When you press the power button, the Mac runs a fixed sequence. Firmware initialises the hardware, then scans attached storage for a valid bootable system. On Intel iMacs, that's the Boot ROM handing off to the EFI firmware, which looks for a boot.efi file on a GUID-partitioned volume.
On Apple Silicon iMacs, the Boot ROM in the Secure Enclave starts a chain that runs through the Low-Level Bootloader and iBoot.
Either way, if that chain can't find a valid system volume, you get the folder.
The icon itself has changed over the years. Mac OS X 10.6 Snow Leopard and earlier showed a flashing question mark on a floppy disk. From OS X 10.7 Lion onward, Apple swapped the floppy for a folder with a question mark.
Same message, new artwork. If you're on a 2012 or newer iMac, you'll see the folder version.
Here's the part that matters for diagnosis. The firmware doesn't tell you why it failed. A dead drive, a corrupted partition map, a broken Fusion Drive, a loose cable, and a half-written macOS update all produce the exact same screen.
The boot sequence, and where it breaks
Think of the boot process as a relay race with four legs. Break any leg and the whole thing stops.
- Firmware handoff. The Boot ROM wakes the hardware and loads the EFI firmware (Intel) or the boot chain (Apple Silicon).
- Volume discovery. The firmware reads the partition map looking for a volume marked as bootable.
- Boot loader execution. It finds
boot.efion the EFI System Partition and runs it. - Kernel and system load. The boot loader hands control to the macOS kernel, which mounts the system volume and starts the login window.
The blinking folder fires at leg two or three. That's the key insight. If you saw an Apple logo before the folder appeared, the firmware got further along.
If the folder appears instantly with no Apple logo, the firmware never found anything to hand off to.
On many recent Macs, the icon sits on screen for roughly 30 seconds and then the machine attempts Internet Recovery on its own, provided a network is available. That automatic fallback is worth knowing. It doesn't mean the Mac is fixing itself.
It means the firmware is offering you a rescue path.
Blinking folder vs. prohibitory sign vs. stuck progress bar
These three symptoms look similar to a worried owner. They are not the same problem, and they don't lead to the same fix.
| On-screen symptom | What it usually means | Where to start |
|---|---|---|
| Folder with a question mark | No bootable system found | Startup Manager, then Recovery |
| Prohibitory sign (circle with a slash) | A system was found but it's incompatible or damaged | Reinstall macOS, check version compatibility |
| Apple logo with a progress bar that stalls | Boot started, then hung partway through | Safe Mode, then Recovery |
| Kernel panic (multi-language restart message) | Software or hardware crash after boot began | Safe Mode, review recent changes |
| Black screen, no chime, no fan | Power, display, or logic board fault | Apple Diagnostics, then service |
The folder means "I looked and found nothing." The prohibitory sign means "I found something and refused to run it." Those are genuinely different failures.
If your screen shows the folder and nothing else, and it repeats after every restart, you're almost certainly dealing with a storage or partition issue. If it happened once and then the Mac booted normally, you may have caught a transient firmware hiccup.
One more distinction worth holding onto. The folder with a question mark can appear before the Apple logo, or after it. Before means the firmware never located a system.
After means the boot loader ran, the system volume started to mount, and then something failed. That timing narrows the fault considerably.
Check These Three Things Before You Touch Anything
Stop. Before you open Disk Utility or reinstall anything, answer three questions. Each one changes the correct path forward, and skipping them is how people turn a recoverable iMac into a wiped one.
In our research, the single most expensive mistake in this scenario is erasing a drive before confirming whether the data on it exists anywhere else. It takes about two minutes to check. It can cost you years of files if you don't.
Do you have a current backup?
Find out whether a real backup exists, and when it was last written.
- Time Machine. Look at the external drive or network volume you use. When did the last backup complete? A backup from six months ago is not a current backup.
- iCloud Drive and Desktop & Documents sync. If Desktop & Documents syncing was enabled, your files may already be in iCloud. Check on another device.
- Cloud services. Dropbox, Google Drive, OneDrive, and similar tools often hold the working copies of your important files.
- A cloned drive. If you used a tool like Carbon Copy Cloner or SuperDuper in the past, check whether that clone is current.
If the answer is yes, and the backup is recent, you have room to be aggressive. You can reinstall, erase, and restore without losing sleep.
If the answer is no, your strategy changes completely. You do not erase anything. You get the data off first, using Target Disk Mode, Share Disk, or an external boot.
We cover those routes in detail later.
What changed right before it happened?
The event that preceded the failure usually points straight at the cause.
| Recent event | Likely cause | Priority action |
|---|---|---|
| macOS update or upgrade | Half-written system volume, failed install | Reinstall macOS in place |
| Power cut or forced shutdown | Corrupted volume metadata | Disk Utility First Aid |
| Drive replacement or upgrade | Partition map or cable issue | Check Startup Manager and connectors |
| FileVault enabled recently | Boot volume locked or key mismatch | Boot from external installer |
| Third-party kernel extension or beta profile | Incompatible system software | Safe Mode, then remove |
| Nothing at all, just stopped | Hardware fault, often the drive | Apple Diagnostics |
Write down what you remember. The exact timing helps if you end up talking to a technician.
Which iMac and which macOS version are you on?
You can't check About This Mac if the machine won't boot, so grab the serial number instead.
On every iMac, the serial number is laser-etched on the underside of the stand foot. Tilt the machine carefully and look. You can also find it on the original box, on the invoice, or in your Apple Account purchase history.
Once you have it, Apple's Check Coverage page will tell you the exact model and year. That matters more than you'd think.
As of 2026, the current macOS release line uses Apple's year-based numbering, so you'll see names like macOS 26 Tahoe rather than a sequential number. Older iMacs can't run newer releases, and Internet Recovery will only ever offer the newest version your specific model supports.
The model also determines which recovery tools exist. Intel iMacs have NVRAM and SMC resets, Target Disk Mode, and, on 2018 and later models, a T2 Security Chip with its own Startup Security Utility. Apple Silicon iMacs have none of those things.
They use Share Disk, a boot policy setting, and DFU restore instead.
Get the model wrong and you'll waste an hour hunting for a key combination that doesn't exist on your machine.
Which iMac You're On: Intel, Apple Silicon, or Fusion Drive
Three variables decide your entire troubleshooting path. Processor family, security chip generation, and internal storage type. Get these right and the rest of the process falls into place.
Intel iMacs (2012 to 2020), including T2 models
Intel iMacs from 2012 through 2020 give you the widest set of recovery tools. They also have the most moving parts.
- NVRAM reset. Hold Option, Command, P, and R together at startup. This clears stored settings including the startup disk selection.
- SMC reset. On an iMac, unplug the power cord, wait 15 seconds, plug it back in, then wait 5 seconds before powering on. The SMC controls power, fans, and drive detection.
- Local Recovery. Hold Command and R at startup. This needs an intact Recovery partition on the internal drive.
- Internet Recovery. Hold Option, Command, and R. This downloads the latest macOS your model supports. Hold Shift, Option, Command, and R instead to get the version that shipped with the Mac.
- Target Disk Mode. Hold T at startup to mount the iMac as an external drive on another Mac.
- Startup Security Utility. On 2018 and later Intel iMacs with a T2 chip, this lives in Recovery and controls whether external boot is allowed.
That T2 chip detail trips people up constantly. If Startup Security is set to Full Security, the iMac may refuse to boot from a USB installer or an external drive, even a perfectly good one. You have to lower it to Reduced Security first, from within Recovery.
Apple Silicon iMacs (M1, M3, M4)
Apple Silicon iMacs are simpler in some ways and more restricted in others. There's no NVRAM to reset and no SMC to reset. The system handles that automatically.
To reach Recovery, shut the Mac down completely, then press and hold the power button until you see "Loading startup options." Release. You'll get a screen with a gear icon labelled Options, plus any bootable volumes.
- Local Recovery only. There's no Internet Recovery. The recoveryOS lives on the internal storage and is paired with the boot volume.
- Share Disk. This replaces Target Disk Mode. Boot into Recovery, choose Share Disk, then connect the iMac to another Mac with a USB-C or Thunderbolt cable.
- Boot policy. Recovery lets you set Full Security or Reduced Security. Reduced Security is required if you want to boot from an external drive or run older kernel extensions.
- DFU restore. If the firmware itself is damaged, you need Apple Configurator on a second Mac and a specific cable. This is the deepest level of repair available.
One important limitation: if the internal SSD has failed on an Apple Silicon iMac, there's no user-replaceable path. The storage is soldered to the logic board. Recovery and repair mean a board-level service, not a drive swap.
Fusion Drive vs. SSD-only vs. HDD-only internals
Fusion Drive is a specific and important case. It combines a small SSD and a large hard drive into a single logical volume. macOS manages which files live where.
The problem is that Fusion Drive is only as reliable as its weakest half. If either the SSD or the HDD develops faults, or if the logical volume that ties them together gets corrupted, the whole thing can collapse. You get the blinking folder, and Disk Utility may show two separate physical drives instead of one combined volume.
That split state is bad news for data recovery. When a Fusion Drive breaks apart, the files are typically striped across both drives, and neither half is readable on its own.
Apple shipped Fusion Drive across a large portion of the 2012 to 2019 iMac lineup. It was a standard configuration, not an exotic option, so there are a lot of these machines still in daily use.
| Storage type | Common iMac years | Failure behaviour | Recovery difficulty |
|---|---|---|---|
| Fusion Drive (SSD + HDD) | 2012 to 2019 | Either half failing can break the logical volume | High, needs both drives intact |
| SSD only | 2017 onward, all Apple Silicon | Usually clean failure or controller fault | Moderate |
| HDD only | Pre-2012, some budget configs | Mechanical failure, clicking, spin-down | Moderate, often physically recoverable |
If you're not sure which you have, boot into Recovery and open Disk Utility. A Fusion Drive shows as one volume with a combined capacity. A split Fusion Drive shows as two separate drives with mismatched sizes.
Start Here: The Startup Manager Test
This is your first diagnostic step, and it takes about ten seconds. Startup Manager asks the firmware a single question: can you see anything bootable?
Here's the procedure. Shut the iMac down completely. Don't just restart.
Choose Shut Down from the Apple menu if you can, or hold the power button until it powers off. Wait a few seconds. Press the power button, then immediately press and hold the Option key.
Keep holding. Don't tap it repeatedly. Hold it until you see a screen showing available startup volumes.
On an Intel iMac, this screen appears within a few seconds. On an Apple Silicon iMac, you hold the power button instead, from a fully shut-down state, until "Loading startup options" appears.
Key combinations that matter
This table is the backbone of the entire decision tree. Bookmark it mentally.
| Keys held at startup | What it opens | Notes |
|---|---|---|
| Option | Startup Manager | Lists all bootable volumes |
| Command and R | Local macOS Recovery | Requires an intact Recovery partition |
| Option, Command, and R | Internet Recovery, latest compatible macOS | Requires a network connection |
| Shift, Option, Command, and R | Internet Recovery, macOS that shipped with the Mac | Requires a network connection |
| Shift | Safe Mode | Loads a minimal system, skips third-party extensions |
| Command and V | Verbose mode | Shows boot text instead of the Apple logo |
| Command and S | Single-user mode | Intel only |
| D | Apple Diagnostics | Runs a hardware test |
| Option and D | Apple Diagnostics over the internet | Requires a network connection |
| T | Target Disk Mode | Intel only |
| N | NetBoot | Legacy, rarely relevant now |
Two of these deserve a warning. Single-user mode and Verbose mode are diagnostic tools, not repairs. They show you what's happening, but they won't fix a corrupted volume.
And on any Mac with FileVault enabled, some of these combinations behave differently because the system volume is encrypted until you authenticate.
What the volume list tells you in five seconds
The Startup Manager screen is a fast, honest answer. Read it carefully.
- Your internal drive appears with a name. Excellent news. The firmware can see a bootable system. Try selecting it.
- Nothing appears except a Wi-Fi picker. The firmware found no bootable volume at all. That points to partition damage, drive failure, or a cable fault.
- Only an external installer or "EFI Boot" appears. Your internal drive isn't bootable, but the firmware is working fine.
- A volume appears but is greyed out. It's detected but not bootable. Often a damaged system volume or a locked FileVault volume.
- Two internal drives appear instead of one. Strong signal of a split Fusion Drive.
- The screen shows a globe icon instead of a volume list. The Mac has fallen through to Internet Recovery automatically.
Write down exactly what you see before you touch anything. It's the most useful single piece of information you'll gather.
Branch A: A Bootable Volume Shows Up
If your internal drive is listed in Startup Manager, you're in the better branch. It usually means the drive is physically alive and the firmware can read its partition map.
Select the volume with the arrow keys and press Return. Then wait. Boot takes longer than usual in this situation, so give it a couple of minutes before deciding it's failed.
Selecting it and confirming the fix
If the Mac boots normally, here's what likely happened. The startup disk setting in NVRAM got confused, or the firmware picked a different volume than the one you wanted.
Fix it properly so it doesn't recur.
- Open System Settings, then General, then Startup Disk.
- Select your internal drive and authenticate.
- Restart to confirm the Mac boots from the right volume.
On an Intel iMac, it's also worth resetting NVRAM at this point. Hold Option, Command, P, and R at startup and keep holding for about 20 seconds, until you hear a second startup chime or see the Apple logo appear twice.
That clears the stored startup disk preference and forces the firmware to re-detect. In our research, this single step resolves a meaningful share of one-off blinking folder incidents on Intel machines.
When it shows up but still won't boot
You select the volume. The screen flashes. Then the folder comes back.
This is a specific failure mode and it tells you something useful. The firmware can read the partition map, so the drive's structure is at least partly intact. But the boot loader or the system volume itself is damaged.
Here's your sequence from this point.
- Restart and hold Command and R to enter Recovery. If your Mac is Apple Silicon, hold the power button instead.
- Open Disk Utility from the Recovery utilities window.
- Select View, then Show All Devices, so you can see the physical drive and not just the volumes.
- Select the top-level physical drive, then click First Aid.
- Run First Aid on the container or volume below it as well.
- Read the result text carefully.
If First Aid reports the volume "appears to be OK," move to reinstalling macOS over the existing system. A reinstall in place keeps your user data and replaces the system files. That fixes a lot of failed updates.
If First Aid reports it "could not be repaired," stop. Don't erase. Move to data extraction first.
There's one more scenario worth flagging. Sometimes the volume appears in Startup Manager and boots fine, but only until you shut down. Next time, the folder is back.
That pattern points to a failing drive that works when warm, or a loose internal connector. Neither is a software problem, and neither will be fixed by reinstalling macOS.
If you can boot at all, even from an external drive, back up immediately. Every successful boot might be the last one.
Branch B: Nothing Shows Up, So Head Into Recovery and Disk Utility
If Startup Manager lists no bootable volume at all, recovery mode is your next stop. It runs from a separate partition or a paired recovery volume, so it can still work when your main system won't.
Recovery gives you four utilities: Disk Utility, Reinstall macOS, Restore from Time Machine, and Safari for looking things up. You'll spend most of your time in the first two.
Local Recovery (Command R) vs. Internet Recovery (Option Command R)
Local Recovery is faster and needs no network. Internet Recovery is slower but works when the Recovery partition is missing or damaged.
| Feature | Local Recovery | Internet Recovery |
|---|---|---|
| Keys at startup | Command and R | Option, Command, and R |
| Requires network | No | Yes, wired or Wi-Fi |
| Source of files | Recovery partition on internal drive | Apple's servers |
| macOS version offered | The one already on the drive | Latest your model supports |
| Typical wait | Under a minute to load | 30 minutes to several hours |
| Works if drive is dead | No | Yes, if firmware is healthy |
On Apple Silicon iMacs, there's no Internet Recovery at all. You hold the power button from a shut-down state until "Loading startup options" appears, then choose Options.
If you're on Intel and want the macOS version that originally shipped with your iMac rather than the newest one, hold Shift, Option, Command, and R together. That's useful when a newer release is causing the trouble in the first place.
Running First Aid on the right volume, in the right order
Order matters here. Running First Aid on the wrong layer can report a clean bill of health while the real damage sits one level up.
- In Recovery, open Disk Utility from the macOS Utilities window.
- Click View in the menu bar, then choose Show All Devices.
- In the sidebar, select the top-level physical drive, the one showing the capacity and model number.
- Click First Aid, then Run.
- When it finishes, select the container or volume indented beneath it.
- Run First Aid again on that layer.
- Repeat for any individual volumes inside the container.
First Aid checks and repairs directory structures, partition maps, and APFS container metadata. It can't repair physical damage. It also can't repair a volume that's so badly corrupted it can't be mounted.
Apple's own guidance on startup problems puts Disk Utility First Aid first for a reason. It's non-destructive, it's fast, and it rules out a large share of software causes before you go near a reinstall.
Reading the result: repaired, unmounted, or "could not be repaired"
Three outcomes, three different paths.
- "First Aid process has completed successfully" or "appears to be OK." The volume is structurally sound. Move to Reinstall macOS over the existing system. Your user data stays put.
- Volume is greyed out and won't mount. Try selecting the volume and clicking Mount. If it fails, the directory damage is severe. Go to data extraction before anything else.
- "First Aid process has failed" or "could not be repaired." Stop. Do not erase. This is the point where people destroy their own data.
- SMART status reads "Failing." The drive is reporting its own imminent death. Power it down and plan a data recovery route.
That third outcome deserves emphasis. A failed First Aid on a drive that still holds your only copy of your files is a signal, not a setback. It means the filesystem is damaged beyond what macOS can fix in place.
In our research, the recovery labs consistently report that failed DIY repair attempts, especially repeated erase-and-retry cycles, reduce the amount of recoverable data. Every write to a damaged drive overwrites something.
Resetting NVRAM and SMC (Intel only) — when it actually helps
NVRAM reset helps when the startup disk setting itself is the problem. That means the drive is fine but the firmware keeps looking in the wrong place.
Hold Option, Command, P, and R at startup. Keep holding for about 20 seconds, until you hear a second startup chime or see the Apple logo appear and disappear twice. Then release.
SMC reset helps when the symptom looks like power or detection trouble. On an iMac, unplug the power cord, wait 15 seconds, plug it back in, wait 5 more seconds, then power on. The SMC handles drive detection and power delivery to storage.
Neither reset will fix a dead drive or a corrupted filesystem. They're targeted tools, not general cures. If you've already confirmed a First Aid failure, skip them and move to data extraction.
Apple Silicon iMacs have no NVRAM or SMC reset. The system manages both automatically, and the equivalent actions are a full shutdown or a DFU restore.
Branch C: Recovery Is Blocked
If Recovery refuses to load or won't let you do anything, something is actively preventing it. That's a different problem from a missing startup disk.
Four things commonly block recovery access. A firmware password, a restrictive boot policy, Activation Lock, or a missing Recovery partition. Each has its own workaround.
Firmware password and Startup Security Utility
A firmware password stops the Mac from booting anything except the designated startup disk. It also blocks Startup Manager, Recovery, and Target Disk Mode.
If you set it yourself, enter it when prompted. If you inherited the machine, you need the original owner to remove it, or you need proof of purchase and a visit to an Apple Store or Apple Authorized Service Provider. There's no legitimate bypass.
On Intel iMacs from 2018 onward, there's a second layer. The T2 Security Chip runs a Startup Security Utility, reachable from Recovery under the Utilities menu. Its default setting, Full Security, blocks booting from external media.
To boot from a USB installer or external drive on a T2 iMac, you need to lower that setting to Reduced Security first. You'll be asked to authenticate, and on some models you'll also need to allow booting from external media explicitly.
This catches people out constantly. They build a perfectly good bootable installer, plug it in, and nothing happens. The drive isn't broken.
The security policy is doing its job.
Activation Lock and a previous owner's Apple Account
Activation Lock ties a Mac to the Apple Account that last enabled Find My Mac. If the machine is locked, recovery and reinstall may complete but the Mac will demand the original credentials on first boot.
There's no workaround, and there shouldn't be. This is an anti-theft feature.
If you bought the iMac second-hand, contact the seller immediately. They can remove the device from their account at iCloud.com or from Find My on another Apple device. Ask them to do it while you're on the phone.
If the seller is unreachable, your options are limited to a refund claim or, if the sale was fraudulent, a report to your local consumer protection agency. Apple won't remove Activation Lock without proof of ownership.
Missing Recovery partition and the bootable USB workaround
If the internal Recovery partition is gone, Internet Recovery is your fallback on Intel Macs. On Apple Silicon, a missing recoveryOS is more serious and usually needs a DFU revive.
When neither works, a bootable USB installer solves it. You need a second Mac, a USB flash drive of at least 16GB, and the macOS installer.
- On the working Mac, download the macOS installer from the Mac App Store.
- Open Terminal.
- Run the
createinstallmediacommand against your USB drive. Apple publishes the exact syntax for each macOS version, and it's worth copying it verbatim rather than typing from memory. - Wait for the process to finish. It takes 10 to 30 minutes depending on the drive.
- Plug the USB into the iMac and hold Option at startup.
- Select the installer volume.
On a T2 Intel iMac, remember to set Startup Security to Reduced Security first. Otherwise the installer won't appear in Startup Manager at all.
Branch D: First Aid Fails or SMART Says Failing
If First Aid can't repair the volume or the drive reports a failing SMART status, you're in hardware territory. Software fixes won't help from here.
SMART stands for Self-Monitoring, Analysis and Reporting Technology. It's a monitoring standard built into most drives. It watches for warning signs like rising error rates, bad sectors, and mechanical stress.
When it reports "Failing," the drive is telling you it expects to die.
Failing drive symptoms: clicking, spin-downs, SMART warnings
Listen to the machine. Mechanical hard drives that are dying often make themselves known.
- Clicking or ticking. The read/write head is struggling to position itself. This is a classic mechanical failure signature.
- Repeated spin-up and spin-down. The drive can't maintain rotation speed.
- A drive that's warm but silent. It may not be spinning at all.
- Intermittent success. The Mac boots sometimes and not others, usually depending on temperature.
- Grinding or screeching. The heads may have made contact with the platter. Stop powering it on immediately.
SSDs fail differently. You usually get no noise at all. Instead the drive disappears entirely, or it reports a controller fault, or the machine freezes partway through boot.
If you hear clicking or grinding, stop. Every power cycle is another chance for the heads to damage more of the platter surface. A professional data recovery lab with a cleanroom can often still read a drive that's been powered down early.
Fusion Drive split and broken APFS containers
A split Fusion Drive shows up in Disk Utility as two separate internal drives rather than one combined volume. The SSD half and the HDD half have lost their logical link.
This is bad news. On a Fusion Drive, files are spread across both halves, with frequently used data on the SSD and the rest on the HDD. The logical volume stitches them together.
Break that link and neither half makes sense on its own.
Apple's documentation confirms that a split Fusion Drive needs to be rebuilt, which erases both halves. There's no repair option that keeps the data. If your files matter, get them off first, and accept that this often means a specialist.
A corrupted APFS container is a different flavour of the same headache. You may see the physical drive fine, the container present, but the volume inside it unmounted and unrepairable. Snapshots may or may not help.
Time Machine backups, if they exist, are the cleaner route.
SATA flex cable and NVMe connector faults on Intel iMacs
Not every failure is the drive. On Intel iMacs, the SATA flex cable that connects the drive to the logic board is a known weak point. It runs behind the display and can develop intermittent contact through heat cycling over years of use.
The symptom is frustratingly inconsistent. The Mac boots sometimes, not others. Disk Utility may see the drive, then lose it.
First Aid may pass, then fail on the next attempt.
A failing cable produces the same blinking folder as a failing drive. The only way to tell them apart is to test the drive in another enclosure or replace the cable and see if the problem goes away.
NVMe drives on later Intel iMacs sit in a slot on the logic board. A loose connector or a damaged slot produces similar symptoms. This is not a user-serviceable repair on most iMac models because it requires removing the display, which is adhered to the chassis.
If you're not comfortable with that, this is where a technician earns their fee.
Running Apple Diagnostics and reading the reference codes
Apple Diagnostics gives you a hardware verdict. Hold D at startup on an Intel iMac, or Option and D for the internet version. On Apple Silicon, hold the power button and follow the startup options path.
The test takes 2 to 5 minutes. It returns either "No issues found" or a reference code.
| Code pattern | Subsystem | What it usually points to |
|---|---|---|
| NDD | Storage | Drive, cable, or controller fault |
| PPT | Power | Power supply or power delivery |
| VFD | Display | Display or graphics |
| MEM | Memory | RAM fault |
| TNF | Thermal | Fan or temperature sensor |
The exact code matters less than the category. An NDD code alongside a blinking folder confirms a storage problem. A PPT code suggests the drive may never be getting power in the first place.
Write the code down. If you end up booking service, the code tells the technician where to start, and it can save you a diagnostic charge.
Apple Silicon iMacs: DFU Restore and Startup Security
Apple Silicon iMacs handle firmware recovery differently from anything Intel offered. There's no Internet Recovery, no NVRAM to clear, and no Target Disk Mode.
Instead there's a Device Firmware Update mode, usually called DFU. It's the deepest level of recovery available to a Mac owner, and it's the only path when the firmware itself is corrupted.
Revive vs. restore in Apple Configurator
You'll need a second Mac running Apple Configurator, plus a specific cable. Apple's documentation specifies a USB-C to USB-C cable for most Apple Silicon Macs, though some models require a different arrangement. Check your exact model before you start.
Two options appear in Configurator.
- Revive. Reinstalls the firmware and recoveryOS without touching your data. Use this first. It's non-destructive.
- Restore. Wipes the Mac completely, including the internal storage. This is the last resort.
Always try Revive first. It fixes a surprising number of firmware-level problems and leaves your files alone.
The process requires a precise sequence of button presses and cable insertions, and the timing window is short. Apple publishes the exact steps per model. Getting it wrong just means starting over, so it's not dangerous, only tedious.
Boot policy, paired recoveryOS, and Reduced Security trade-offs
Apple Silicon Macs pair the boot volume with the recoveryOS. If that pairing breaks, the Mac won't boot from the internal drive, and you'll get the blinking folder or a startup options screen with no usable volume.
Recovery on Apple Silicon lets you set the security policy. Full Security is the default and the most protective. Reduced Security allows external boot and older kernel extensions.
Reduced Security is what you need if you want to run a bootable installer or recover data by booting from an external drive. Set it, do your work, then set it back to Full Security afterwards. Leaving it reduced long-term weakens your protection against firmware-level attacks.
There's also a Permissive Security option on some models. That allows unsigned kernel extensions and is intended for development work. It's not something a typical owner should enable.
One hard limitation worth stating plainly. On an Apple Silicon iMac, the internal SSD is soldered to the logic board. If that storage has genuinely failed, there's no drive to swap and no external recovery path that reads it.
The fix is a board-level repair, and the data on the internal drive is usually gone.
That makes backups non-negotiable on these machines. There's no second chance.
Getting Your Data Off Before You Erase Anything
If your files aren't backed up, data extraction comes before every other repair step. Nothing else matters until the data is safe.
This is the rule that separates a frustrating afternoon from a permanent loss. Reinstalling macOS over an existing system usually preserves data. Erasing a drive never does.
Target Disk Mode (Intel)
Target Disk Mode turns the iMac into an external drive. Another Mac reads it like any other connected disk.
- Shut the iMac down completely.
- Connect it to a second Mac with a Thunderbolt or USB-C cable.
- Press the power button and immediately hold T.
- Wait for a FireWire, Thunderbolt, or USB icon to appear on the iMac's screen.
- On the second Mac, open Finder. The iMac's volumes should appear in the sidebar.
- Copy your files to the second Mac or to an external drive attached to it.
Target Disk Mode is blocked by a firmware password and by Full Security on T2 machines. If you have neither, it's the fastest extraction route available.
Apple Silicon replaced Target Disk Mode with Share Disk, sometimes labelled Mac Sharing Mode.
- Shut the iMac down.
- Hold the power button until "Loading startup options" appears.
- Select Options, then Continue.
- Authenticate with an admin account.
- Choose Share Disk from the utilities.
- Select the volume you want to share, then click Start.
- Connect to a second Mac with a USB-C or Thunderbolt cable.
- The shared volume appears on the second Mac's desktop.
Share Disk requires the internal storage to be at least partially readable. If the drive has genuinely failed, this won't help, and you're into specialist territory.
Booting from an external installer to copy files
If the internal drive mounts but won't boot, you can boot from an external installer and use Disk Utility or Terminal to copy files off.
From Recovery's Terminal, the diskutil list command shows every attached volume and its identifier. You can then mount a volume with diskutil mount and copy files with standard Unix commands.
This approach is slower and more technical than Target Disk Mode. It's the right call when the internal drive is readable but the boot loader is broken.
When to stop and call a data-recovery lab instead
Stop and call a professional if any of these apply.
- The drive makes clicking, grinding, or screeching noises.
- The drive doesn't appear in Disk Utility at all, on any machine.
- A Fusion Drive has split and the data is business-critical.
- The data is irreplaceable: family photos, legal records, client work with no other copy.
- You've already attempted a repair and made things worse.
Data recovery labs work in cleanroom environments and charge accordingly. Expect quotes in the hundreds to low thousands of dollars for mechanical recovery. That sounds steep until you compare it to the cost of losing the files entirely.
The rule of thumb from the recovery industry is simple. The more times you power on a failing drive, the less there is to recover. If the data matters, stop early.
Reinstall In Place vs. Erase and Reinstall
These two options sound similar and behave nothing alike. One keeps your files. The other destroys them.
Picking the wrong one is the single most common way people lose data during this whole process.
Reinstall in place replaces macOS system files while leaving your user data, apps, and settings where they are. Erase and reinstall wipes the drive first, then installs a clean system. Both end with a working Mac.
Only one of them preserves what was on the disk.
What each one does to your files
The distinction comes down to what gets overwritten.
- Reinstall in place. The installer writes a fresh copy of the system volume. Your home folder, documents, photos, and app data stay untouched. Applications are preserved, though some may need updating afterwards.
- Erase and reinstall. Disk Utility removes the APFS container and every volume inside it. Every file is gone before the installer even starts. The result is a Mac that boots to Setup Assistant, exactly as it left the factory.
The macOS installer itself is designed to preserve data by default. You have to go out of your way to erase first. That default exists for good reason.
Choosing based on backup status and drive health
Work through these conditions in order. The first one that matches decides your path.
- Drive passes First Aid and you have a backup. Reinstall in place. Fastest route, lowest risk.
- Drive passes First Aid and you have no backup. Still reinstall in place. The installer won't touch your data. But back up the moment the Mac boots.
- Drive fails First Aid and you have a backup. Extract nothing, erase and reinstall. The filesystem is damaged beyond repair.
- Drive fails First Aid and you have no backup. Do not erase. Go back to the data extraction routes: Target Disk Mode, Share Disk, or an external installer.
- SMART reports Failing. Stop. No reinstall will help a dying drive. Plan a replacement or a recovery lab.
That third scenario is where the erase decision is genuinely safe. You have a verified copy elsewhere, so the drive's contents are expendable.
Restoring afterward with Time Machine or Migration Assistant
Once the Mac boots again, you have two ways to get your data back.
| Method | Best for | What it moves | Typical time |
|---|---|---|---|
| Time Machine restore | Full system recovery | Everything: system, apps, files, settings | 1 to 6 hours |
| Migration Assistant | Moving from another Mac or a clone | Users, apps, files, network settings | 1 to 4 hours |
| Manual copy from backup | Just your documents and photos | Whatever you select | Varies |
Time Machine restore happens during Setup Assistant, before you create a new account. Migration Assistant runs after setup, from Applications then Utilities. If you're restoring to the same Mac you backed up, Time Machine is usually cleaner.
One caveat. If your backup was made on an older macOS version, restoring it to a newer system can bring along incompatible settings. Fresh install plus a manual file copy avoids that, at the cost of reconfiguring apps by hand.
Mistakes That Turn a Fixable iMac Into a Dead One
Some of these cost you an afternoon. Others cost you everything on the drive. Read this section before you touch anything, not after.
In our research, the pattern is consistent. People who damage their own machines during this process almost always do it in the first ten minutes, acting on the first fix they find.
Erasing before backing up
This is the big one. Disk Utility's Erase button is right there in Recovery, it's easy to reach, and it looks like the obvious solution to "no bootable volume found."
It isn't. Erase removes the APFS container, and with it every volume, every snapshot, and every file. There's no undo.
Recovery tools that claim to restore erased drives work sometimes and fail often, and they never recover everything.
The rule is simple. If you haven't confirmed a working backup, erase is off the table. Full stop.
Repeatedly powering on a physically failing drive
Every power cycle spins up a mechanical drive and moves the read/write heads. If those heads are already struggling, each attempt risks scraping more of the platter.
A drive that clicks and then boots on the fifth try is telling you it's dying. It's not telling you to keep trying.
Power it down. Leave it off. If the data matters, that's the moment to call a recovery lab.
A cleanroom recovery on a drive that was powered off early costs far less than one on a drive that's been cycled twenty times.
Assuming reinstall means wipe
It doesn't. Apple's installer is explicitly designed to upgrade in place. But the confusion is understandable, because so much older advice says "reinstall the OS" when it means "erase and reinstall."
If you're following a guide that says reinstall, check whether it also says erase. If it does, and you have no backup, stop following that guide.
Third-party cleaner tools and forced shutdowns mid-update
Two habits cause a disproportionate share of these failures.
- Running "optimiser" or "cleaner" utilities that touch system directories. These tools sometimes remove files the boot process needs. The damage shows up on the next restart.
- Force-shutting down during a macOS update. The system volume gets rewritten in stages. Interrupt it partway and you can end up with a half-written boot loader. That's a textbook blinking folder.
The fix for both is the same. Let updates finish. Skip the tools that promise to speed up your Mac by deleting things.
Ignoring the signs of a failing drive
A drive rarely dies without warning. It gives you weeks or months of hints first.
- Slower boot times than a month ago.
- Spinning beachballs during simple tasks.
- Files that take longer than they should to open.
- Occasional boot failures that resolve on retry.
- SMART status flipping to "Failing" in Disk Utility.
Each one is a prompt to back up and replace. People who act on the first hint rarely see the blinking folder at all.
Costs, Timelines, and When to Hand It to a Pro
The cost of fixing this ranges from nothing to several thousand dollars. What you pay depends almost entirely on whether the problem is software or hardware, and whether the data is intact.
Knowing the rough numbers helps you decide when DIY stops being worth your time.
Apple Store vs. Authorized Service Provider vs. independent shop vs. recovery lab
Four routes, four very different price points and capabilities.
| Route | Typical cost | Turnaround | Best for |
|---|---|---|---|
| Apple Store Genius Bar | Free diagnosis, $100 to $600+ for repair | 3 to 10 days | In-warranty or AppleCare+ machines |
| Apple Authorized Service Provider | Similar to Apple Store | 2 to 7 days | Same coverage, often faster locally |
| Independent repair shop | $80 to $400 | 1 to 3 days | Out-of-warranty machines, older iMacs |
| Data recovery lab | $300 to $2,500+ | 5 to 21 days | Failing drives, split Fusion Drives, critical data |
The Genius Bar diagnosis is free in most regions. That's worth using even if you plan to repair elsewhere. You get a confirmed fault diagnosis without spending anything.
What each path typically costs and how long it takes
For an out-of-warranty Intel iMac, an SSD or HDD replacement at an independent shop usually lands between $150 and $400 including parts. The labour is the bulk of it, because the display has to come off to reach the drive.
A logic board replacement is a different tier entirely. Expect $500 to $900, and on older models the part may no longer be available at all.
Software-only fixes cost nothing but your time. Recovery, Disk Utility, and reinstall are all built in.
Data recovery is the outlier. Mechanical recovery in a cleanroom runs into the thousands for complex cases. Logical recovery, where the drive is healthy but the filesystem is damaged, is usually much cheaper, often a few hundred dollars.
Vintage and obsolete models: what Apple will and won't service
Apple classifies products by age. Vintage means roughly 5 to 7 years since Apple stopped selling them. Obsolete means longer than that.
- Vintage. Apple Stores and Authorized Service Providers may still service it, subject to parts availability.
- Obsolete. No hardware service from Apple at all. Independent shops are your only option, and they're limited by parts too.
A large number of iMacs still in daily use, particularly 2013 to 2017 models, are already vintage or obsolete as of 2026. That doesn't make them unrepairable, but it does mean the Apple route is closed.
For those machines, an independent shop or a DIY repair is the realistic path. The Right to Repair rules in many US states and the UK's consumer protection framework both support third-party repair, and the FTC's guidance on warranty and repair is worth reading if a manufacturer pushes back on outside service.
Preventing the Next Blinking Folder
You can't eliminate every cause. Hardware fails, updates go wrong, and drives wear out. But you can make sure that when it happens, it's an inconvenience rather than a disaster.
Almost everything in this section costs little or nothing. It just needs doing before you need it.
Time Machine and a tested restore
Time Machine is built into macOS and needs only an external drive. Apple's official backup guidance recommends keeping at least one local backup and, ideally, a second copy off-site.
The part most people skip is the test. A backup you've never restored from is a hope, not a plan.
- Plug in an external drive of at least twice your internal capacity.
- Turn on Time Machine in System Settings.
- Let the first backup complete, which can take several hours.
- Once a month, open a few files directly from the backup to confirm they're readable.
- Once a year, do a full test restore to a spare drive if you can.
A tested backup turns this entire problem into a two-hour restore. That's the whole payoff.
Keeping a bootable macOS installer USB on hand
A bootable installer works when Recovery doesn't. It's the tool that saves you when the internal recovery partition is gone.
Building one takes about 20 minutes on a working Mac. You need a USB flash drive of 16GB or more and the macOS installer from the App Store. Apple publishes the exact createinstallmedia command for each release.
Label the drive, store it somewhere dry, and rebuild it after each major macOS upgrade. An installer from three versions back won't help you.
Free space, surge protection, and safe update habits
Three small habits cover a surprising amount of ground.
- Keep 10 to 15 percent of the internal drive free. macOS needs working room for swap files, snapshots, and updates. A drive that's 98 percent full is a drive that's about to have problems.
- Use a surge protector or a UPS. Power cuts mid-write are a classic cause of corrupted volume metadata. An uninterruptible power supply gives the Mac time to shut down cleanly.
- Don't force a shutdown during an update. The progress bar can sit still for several minutes. That's normal. Give it at least 30 minutes before you conclude it's stuck.
None of this is dramatic. It's just the difference between a bad day and a lost decade of photos.
Frequently Asked Questions
Can I fix this without losing my files?
Usually, yes. If the drive is healthy and only the system volume is damaged, reinstalling macOS over the existing system keeps your files. If the drive has failed, extract data first using Target Disk Mode, Share Disk, or an external installer.
Only erase once you've confirmed a working backup.
Why did it happen right after a macOS update?
A failed or interrupted update leaves the system volume half-written, so the firmware can't find a bootable system. Power cuts, forced shutdowns, and running out of disk space mid-install are the usual culprits. A reinstall in place fixes it and keeps your data.
Will reinstalling macOS delete my data?
No. A standard reinstall replaces the system files and leaves your user data, apps, and settings alone. Data is only lost if you erase the drive first.
The installer's default behaviour is to upgrade in place, so you have to deliberately choose Erase to lose anything.
How do I know if it's the drive or the logic board?
Run Apple Diagnostics by holding D at startup. An NDD code points to storage, which usually means the drive or its cable. A PPT code points to power delivery, which is a board-level issue.
If Disk Utility can't see the drive at all, suspect hardware over software.
Does this happen on M-series iMacs too?
Yes, but the causes differ. Apple Silicon iMacs have no Internet Recovery and no Target Disk Mode. If the paired recoveryOS breaks or the boot policy is wrong, you'll get the same blinking folder.
Recovery needs a power-button hold, and firmware repair needs DFU mode via Apple Configurator.