Your Synology NAS has power, the blue light is blinking, and nothing shows up on the network. That is the classic synology blinking blue light problem, and it can mean anything from a healthy boot in progress to a dead power brick or a failed mainboard. The light alone does not tell you which.
What tells you is timing, fan noise, beeps, and which LED is actually blinking.
Here is the part most people miss. On nearly every Synology DiskStation, the blue LED sits inside the power button. It is not the STATUS LED.
Synology publishes a separate LED table for each model in its hardware installation guides, and a healthy boot on a modern unit typically finishes in 60 to 180 seconds depending on drive count. Everything below follows that logic: identify the light, then work the branches.
Quick Answer
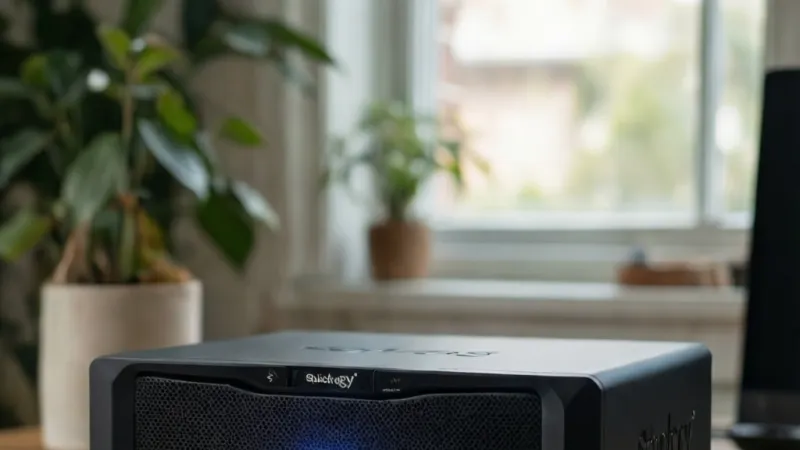
A synology blinking blue light usually means the NAS is booting. It can also signal hibernation wake or a stuck boot. Check your model's LED table first, since blink behavior varies.
A normal boot finishes in about three minutes. If it still blinks, test the power adapter.
What the Blinking Blue Light on Your Synology NAS Actually Means
Start with the light itself. On most Synology DiskStation and RackStation units, the blue LED is built into the power button. It confirms the board is receiving power.
It is not the same indicator as the STATUS LED, which sits separately on the front panel and reports system health.
That distinction matters more than anything else in this article. If you read the blue power light as a system status light, you will misdiagnose the problem every time. DSM, short for DiskStation Manager, is Synology's operating system.
It runs from an internal boot device, not from your data drives.
So the blue LED is really answering one question. Is power reaching the mainboard? It is not answering whether DSM loaded, whether your volume is healthy, or whether your drives are fine.
Those are STATUS LED and DISK LED jobs.
What the blue power LED is telling you
Think of the blue LED as a power-delivery indicator with three states.
- Solid blue: the unit is powered on and the board has completed its power-on self-test. If nothing else is wrong, you have a running NAS.
- Slow, steady blink: the board has power but the boot sequence has not finished. This covers normal boot, hibernation wake, and a stalled boot.
- No light at all: no power is reaching the board. That is an adapter, cable, or outlet problem, not a blinking-light problem.
A slow blink is the one people write in about. It looks identical whether the unit is 40 seconds into a healthy boot or has been frozen for six hours.
Blue power LED versus STATUS LED versus DISK LEDs
The table below reflects the general pattern across Synology's consumer and prosumer lines. Treat it as a starting point, not gospel. Synology changes LED behavior between hardware generations, so always confirm against your own model's hardware installation guide.
| LED | State | What it generally means |
|---|---|---|
| Blue (power button) | Solid | Powered on, board POST complete |
| Blue (power button) | Blinking | Power present, boot not finished |
| STATUS | Green, solid | System and volume normal |
| STATUS | Green, blinking | Booting, shutting down, or hibernating |
| STATUS | Orange, solid | Volume degraded |
| STATUS | Orange, blinking | Volume crashed |
| STATUS | Red, solid or blinking | Fan failure, overheating, or no drives detected |
| DISK (per bay) | Dark | No drive detected in that bay |
| DISK (per bay) | Green, flickering | Drive activity, which is normal |
Read your unit against that table before you touch anything. If your STATUS LED is solid green and only the blue power light is blinking, you are almost certainly in a boot or hibernation-wake state. If STATUS is orange or red, your problem is a volume or thermal issue, and the power-adapter branch is the wrong tree to climb.
The three branches hiding behind one blink
Nearly every blinking-blue case lands in one of three buckets.
- Normal boot in progress. The unit is doing exactly what it should. Wait.
- Hibernation wake. The unit slept, something woke it, and it is spinning drives back up. This can take longer than a cold boot on large volumes.
- Stalled boot. The board has power but something upstream of DSM is broken. Power delivery, boot device, RAM, or mainboard.
Bucket three is where the real troubleshooting lives. The next four sections walk you through separating them.
Step One: Find Your Exact Model and Read Its LED Table
Do not troubleshoot a Synology NAS without knowing its exact model number. "DiskStation" is a product family, not a model. A DS220j and a DS1821+ behave nothing alike, and their LED tables do not match.
The model number is printed on a sticker on the bottom or rear of the chassis. It looks like DS918+, DS1520+, RS1221+, or DS220j. Grab it before you do anything else.
Where to find the official LED table for your unit
Synology publishes a hardware installation guide for every model it ships. Each guide contains the LED indicator table for that specific unit, plus the beep code definitions. You can find them through the Synology Knowledge Center at kb.synology.com.
Search your model number, open the hardware installation guide, and jump to the LED indicator section. It takes two minutes and it prevents an hour of guessing.
What to write down before you start
Keep a simple record. You will want it if you end up opening a support ticket.
| Item | Where to find it | Why it matters |
|---|---|---|
| Exact model number | Sticker on bottom or rear | Determines the correct LED table |
| Serial number | Same sticker | Required for warranty and RMA |
| Adapter output rating | Printed on the power brick | You need a matching replacement |
| Blink duration so far | Time it yourself | Separates normal boot from a stall |
| STATUS LED color and state | Front panel | Rules out volume and thermal faults |
| Beep pattern | Listen at power-on | Single beep versus repeated beeps mean different things |
| Number of drives installed | Physical count | Boot time scales with drive count |
Two minutes of note-taking here saves you from the most common mistake in this whole process. That mistake is assuming a blinking light means the same thing on every Synology unit.
Why model matters more than most guides admit
Older two-bay and four-bay units often run from an external 12V DC power brick. Many eight-bay and rackmount units use an internal power supply. The failure patterns are completely different.
External-brick units tend to fail at the brick. Internal-PSU units tend to fail at the board or the PSU module itself. Same symptom, different repair.
You cannot pick the right branch without the model number.
The 5-Minute Triage Map: Normal Boot, Hibernation Wake, or Stuck Boot
Here is the decision tree. Work it top to bottom and stop as soon as you get a clear answer.
Step 1: Time the blink
Start a timer the moment you press the power button. If you did not see the button press, note the time you first noticed the blink.
Under three minutes is normal for most units. Between three and ten minutes is possible on large volumes with many drives, especially after an unclean shutdown. Past ten minutes with no network presence is a stall.
Step 2: Check the fan
Put your hand near the rear exhaust. Can you feel airflow? Can you hear the fan?
- Fan spinning: the board has power and the boot sequence is running. Keep waiting.
- Fan not spinning: power is reaching the LED but not driving the system. Jump to the power adapter section.
A fan that spins up briefly and then stops is a different signal. That usually points to a power supply that cannot hold voltage under load.
Step 3: Listen for beeps
Most Synology units emit a single short beep at power-on. That beep is the board confirming POST. If you hear it, the mainboard is alive.
No beep plus no fan spin is a strong indicator that the unit is not reaching POST at all. One beep followed by nothing for twenty minutes points to a boot device or DSM problem instead.
Step 4: Check network presence
Look at the LAN LED on the NAS and the corresponding port on your router. Then try three discovery methods.
- Open Synology Assistant on a computer on the same subnet.
- Visit find.synology.com in a browser.
- Check your router's client list for the NAS's MAC address or hostname.
If any of those three find the unit, your hardware is fine and your problem is software. If none of them find it after ten minutes, you are in a hardware branch.
The triage table
| Fan spinning? | Beep heard? | Network visible? | Likely branch | Next action |
|---|---|---|---|---|
| Yes | Yes | Yes | Healthy boot or DSM issue | Wait, then check Assistant |
| Yes | Yes | No | Boot stall, network or DSM | Try Web Assistant, then DSM reinstall |
| Yes | No | No | Boot device or board fault | Check RAM, then support ticket |
| No | No | No | Power delivery failure | Test adapter and outlet |
| No | Yes | No | Intermittent power or PSU fault | Swap adapter, test under load |
That table covers roughly nine out of ten cases we see described in user reports. Work the row that matches your situation.
Blinking Under 5 Minutes With Fan Spin and a Beep: What's Normal Here
If your unit is under five minutes in, the fan is spinning, and you heard a beep, you are probably fine. Resist the urge to hit the reset button. That instinct causes more damage than any hardware fault in this article.
Here is what a normal boot actually looks like on a Synology NAS.
The normal boot sequence
- You press the power button. The blue LED comes on.
- The fan spins up. You may hear a single short beep.
- The blue LED blinks steadily while the bootloader loads.
- The STATUS LED blinks green as DSM starts.
- Drive LEDs begin flickering as volumes mount.
- The blue LED goes solid. The STATUS LED goes solid green. The unit is up.
Steps three through five are where the blinking lives. On a two-bay unit with one drive, that window is often 45 to 90 seconds. On an eight-bay unit with eight drives and a large Btrfs volume, expect two to three minutes.
Typical boot times by configuration
| Configuration | Typical cold boot | Typical wake from hibernation |
|---|---|---|
| 2-bay, 1 drive | 45 to 90 seconds | 20 to 45 seconds |
| 4-bay, 4 drives | 90 to 150 seconds | 40 to 90 seconds |
| 8-bay, 8 drives | 2 to 3 minutes | 1 to 2 minutes |
| Any unit, unclean shutdown | Add 2 to 5 minutes | Not applicable |
Those figures come from aggregate user reports and Synology's own guidance. An unclean shutdown, meaning a power cut or a hard reset rather than a proper shutdown, triggers a filesystem check on the next boot. That check can add several minutes.
First-time setup and DSM installation
If the NAS is brand new or you just reinstalled DSM, expect a longer blink. The unit has no DSM on it yet, so it sits in a discoverable state waiting for Synology Assistant or Web Assistant to find it.
In that state, the STATUS LED typically blinks green and the blue power LED blinks too. That is correct behavior, not a fault. Open Synology Assistant, follow the prompts, and the lights settle once DSM finishes installing.
Hibernation wake looks like a boot
HDD hibernation puts drives to sleep to save power and reduce wear. When something wakes the NAS, the blue LED blinks while drives spin back up.
Wake takes 20 to 90 seconds depending on drive count and drive type. Large enterprise drives spin up slower than desktop drives. If you have hibernation enabled and you see a blink after idle periods, that is your answer.
Volume expansion, RAID rebuild, and background tasks
Some operations keep the unit busy for hours while DSM is technically running. A RAID rebuild, a volume expansion, a data scrubbing job, or a large backup job can all keep drive LEDs busy and the system under load.
In these cases the blue LED usually goes solid and the STATUS LED stays green. If your blue LED is still blinking after ten minutes while a rebuild is running, something else is wrong. Rebuilds do not block boot.
Blinking Blue With No Network Presence: Power Adapter and Outlet Checks
Now the hardware branch. Your unit is not appearing on the network, the blink has run past ten minutes, and the fan is either silent or behaving oddly. Power delivery is the first thing to test, because it is the cheapest fix and the most common one.
What the adapter actually needs to deliver
Synology external power adapters output 12V DC. Wattage varies by model, typically somewhere between 60W and 100W for consumer and prosumer units. The connector type also varies.
Some models use a standard barrel jack. Others use a four-pin DIN connector.
You cannot substitute an adapter with the wrong voltage, the wrong polarity, or the wrong connector. A 19V laptop brick on a 12V NAS will damage the board. Check the label on your existing adapter and match it exactly.
| Spec | What to check | Why |
|---|---|---|
| Output voltage | 12V DC on most models | Wrong voltage damages the board |
| Output amperage | Printed on the brick | Under-rated adapters sag under load |
| Connector type | Barrel jack or 4-pin DIN | Physical fit and pinout must match |
| Polarity | Center-positive on most units | Reversed polarity can kill the board |
| Certification mark | UL, CE, or UKCA | Confirms basic safety testing |
If you are buying a replacement, look for a UL listing mark or the equivalent regional certification. UL Solutions publishes the safety standards behind those marks at ul.com, and a certified adapter is worth the small price difference.
The five-minute adapter test
- Unplug the NAS from the wall.
- Unplug the adapter from the NAS.
- Inspect the adapter cable for kinks, cuts, or a loose barrel connector.
- Check the adapter's own LED if it has one. No light on the brick usually means the brick is dead.
- Plug the adapter into a different outlet, ideally on a different circuit.
- Reconnect and power on. Watch the blue LED and listen for the fan.
If the blue LED comes on but the fan never spins, the adapter is delivering some voltage but not enough current. That is a classic failing-brick symptom.
Testing with a multimeter
If you own a multimeter, you can confirm the adapter in under a minute. Set it to DC voltage, probe the barrel connector's inner and outer contacts, and read the output.
A healthy 12V adapter should read between 12.0V and 12.6V with no load. Anything below 11.5V is suspect. Anything fluctuating by more than half a volt is failing.
Do not open the adapter housing. Do not probe a live unit with the case off. Mains voltage inside a sealed brick is lethal.
Outlet, surge strip, and UPS checks
It sounds obvious, and it still catches people. Test the outlet with a lamp or a phone charger. Surge strips and cheap power strips fail more often than people expect, especially after a brownout.
If the NAS is on a UPS, check the UPS status light and try a different outlet on the UPS. A UPS with a failing battery can pass dirty power that a NAS power supply will not tolerate.
When the adapter is fine but the unit still will not boot
Swap in a known-good adapter of the correct spec. If the unit still blinks with no fan spin and no beep, you are past the power-delivery branch.
At that point, the likely candidates are the internal power supply on larger units, the CMOS or RTC coin battery on older models, a failed boot device, incompatible RAM, or a mainboard fault. Power off, unplug from the wall, and work through the bare-unit POST test in the next section.
One safety note before you go further. Never pull drives out of a powered NAS. Never open the chassis with the power cable connected.
And if the unit is under warranty, check the terms before you unscrew anything, because some regions treat an opened chassis as a warranty issue.
Blinking Blue With No Fan Spin, No Beep: The Bare-Unit POST Test
If the fan never spins and you never heard a beep, the unit is not reaching POST. POST stands for power-on self-test, the firmware check the mainboard runs before it hands control to the bootloader. No POST means the fault sits below DSM, below your drives, and below your network.
This is the branch where you strip the unit down. The goal is simple. Find the smallest configuration that powers on, then add parts back one at a time.
Safety rules before you open anything
Unplug the power cable from the wall. Not from the NAS, from the wall. Then press and hold the power button for five seconds to drain residual charge from the capacitors.
Work on a hard, non-carpeted surface. Touch bare metal on the chassis before you touch any component. That discharges static.
An anti-static wrist strap makes this easier if you have one.
If the unit is under warranty, check the terms first. Some regions treat an opened chassis as a warranty issue. When in doubt, open a support ticket before you pick up a screwdriver.
Step 1: Label and remove the drives
Pull every drive out of its bay. Don't skip this and don't rush it.
Write the bay number on a sticky note and attach it to each drive. Or photograph the bays before you pull anything. Drive order matters for some RAID configurations, and you don't want to guess later.
Set the drives aside on a clean, dry surface. Don't stack them. A drive that survived a failed boot can still die from a short fall onto a desk.
Step 2: Remove third-party RAM
If you added RAM that didn't come from Synology, take it out. Keep the original module if you still have it, or run with no RAM installed if the board has soldered memory.
Incompatible or failing SO-DIMM modules are a genuinely common cause of a no-POST state. The unit powers on, the LED lights, and nothing else happens. This shows up most on models where users upgraded to higher-capacity modules outside the compatibility list.
Step 3: Power on the bare unit
With no drives and no third-party RAM, plug the adapter back in and press power.
- Fan spins and you hear a beep: the board is alive. Move to Step 4.
- Fan spins but no beep: partial power. Try a known-good adapter before you blame the board.
- Nothing happens at all: the fault is the adapter, the internal PSU, or the mainboard. Move to Step 5.
A bare unit that POSTs cleanly is good news. It means your data is almost certainly fine and your problem is a component you can swap.
Step 4: Add components back one at a time
This is the slow part, and it's worth doing properly.
- Add the original Synology RAM module. Power on. Does it POST?
- If yes, add the drives back in their labeled bays. Power on again.
- If yes, let the volume mount and check DSM for volume health.
- If any step fails, you just found your culprit.
If the unit POSTs without drives but not with them, the problem may be a single bad drive or a power draw issue. Test one drive at a time to isolate it.
Step 5: What a bare unit that won't POST means
| Symptom on bare unit | Most likely cause | Next step |
|---|---|---|
| No fan, no beep, no LED | Dead adapter or internal PSU | Test adapter with multimeter, swap if possible |
| LED on, no fan, no beep | Adapter sagging under load, or board fault | Swap adapter, then open support ticket |
| Fan spins, no beep | Boot device or board fault | Try known-good adapter, then support ticket |
| Fan spins, one beep, no output | Boot device fault | Attempt DSM reinstall before replacing hardware |
| Fan spins, repeated beeps | Thermal or fan fault | Check fan cable, clear dust, test in a cool room |
On units older than about four years, replace the CMOS or RTC coin battery before you conclude anything. A dead CR2032-class battery can block a clean POST on some models. It costs about a dollar and takes two minutes.
When to stop and open a support ticket
If the bare unit won't POST with a known-good adapter, original RAM, and no drives, you're done diagnosing. That's a board-level fault.
Open a Synology support ticket and include your model, serial number, blink timing, beep pattern, and the bare-unit results. That level of detail moves you through triage much faster.
Out of warranty? Don't panic. The next few sections cover the specific hardware failures behind this symptom, plus the recovery paths that don't need the original chassis to work.
Blinking Blue After a Power Cut, Brownout, or Interrupted Firmware Update
Not every blinking-blue case is a hardware failure. A power event or a botched update can leave a perfectly healthy NAS stuck in a boot loop. The fix is usually software, and the risk is usually data.
Unclean shutdown: the most common cause
An unclean shutdown is any power loss that skips the normal shutdown sequence. A blackout, a yanked cable, a tripped breaker, or a UPS that ran flat all count.
When DSM boots after an unclean shutdown, it runs a filesystem check. On ext4 that check is fairly quick. On Btrfs it can take longer, especially on a large volume.
Expect the blue LED to blink for two to five minutes in that state. On an eight-bay unit with a 40TB volume, it can run closer to ten. Let it finish.
If the blink continues past fifteen minutes with no network presence, the filesystem check has probably stalled. That's a recovery scenario, not a waiting scenario.
What a brownout does to your hardware
A brownout is a sustained voltage dip, not a full outage. Your NAS doesn't shut down cleanly. It browns out, meaning the power supply sees a voltage it can't regulate.
Adapters and internal PSUs handle brownouts badly. The damage is cumulative and often invisible. A unit that survived three brownouts may fail on the fourth with no obvious trigger.
Symptoms after a brownout include a blinking blue light with no boot, a fan that spins up and dies, and an adapter that reads low on a multimeter. If your area has unstable power, a UPS isn't a luxury. It's the cheapest insurance you can buy for a NAS.
Interrupted firmware update: the worst-case software scenario
If the blink started right after a DSM update, treat it differently. An interrupted firmware update can corrupt the DSM partition on the boot device.
The unit still has power and the mainboard still works. DSM just can't load. That's why the blue LED blinks forever while nothing appears on the network.
Recovery is possible in most cases. Synology Assistant can often see the unit in a recoverable state even when the web interface and SSH are gone.
The recovery path by scenario
| Scenario | Likely state | Recovery route |
|---|---|---|
| Power cut during normal use | Filesystem check running | Wait up to 15 minutes |
| Power cut during a DSM update | DSM partition corrupt | Synology Assistant reinstall |
| Brownout, no boot since | Adapter or PSU damaged | Swap adapter, then reassess |
| Interrupted update, unit discoverable | Recoverable in Assistant | DSM reinstall, keep volume |
| Interrupted update, unit invisible | Boot device fault | Support ticket, data recovery path |
Should you use a UPS?
Yes, if your NAS holds anything you can't recreate. A line-interactive UPS with USB signaling lets DSM shut the unit down cleanly when the battery runs low. That one feature prevents most of the damage described above.
Look for a UPS with a USB or serial data port and confirmed Synology compatibility. Pure standby units without signaling will keep the NAS alive but won't trigger a clean shutdown.
Size the UPS by your NAS's real draw, not the marketing number on the box. A four-bay unit with four drives typically idles under 40W and peaks higher during spin-up.
Older Units and the Intel C2000 and Apollo Lake LPC Clock Bug
This is the failure that catches experienced users off guard. The unit runs perfectly for two years, then one morning it blinks blue and never boots again. No warning, no SMART errors, no drive problems.
What the LPC clock bug actually is
Intel shipped a family of low-power chips with a known degradation issue in the LPC clock circuit. LPC stands for Low Pin Count, a legacy bus that connects the chipset to the boot firmware.
Over time, the clock signal weakens. When it drops below the threshold the board needs, the system stops booting. The CPU is fine, the RAM is fine, the drives are fine.
The board simply can't start.
The affected families are the Atom C2000 series, which includes Avoton and Rangeley, and separately the Apollo Lake Celeron J-series. Intel published product change notifications and errata for both, and the details are still listed on Intel ARK.
Which Synology models are affected
Synology never published a single master list. The pattern follows the CPU family, not the model name. Broadly:
- Atom C2000 units: several Plus and rackmount models from the 2015 and 2016 generations.
- Apollo Lake units: several 2017 and 2018 Plus models, including popular four-bay and five-bay units.
Check your model's CPU on Synology's product spec pages. If your unit runs a C2000 or an Apollo Lake Celeron, this failure mode is on the table.
The timeline you should expect
Aggregate user reports cluster around 18 to 24 months of continuous runtime. Some units fail at 14 months. Some run for six years without an issue.
It's a degradation curve, not a countdown timer.
That timeline matters for warranty. Synology extended warranty coverage on affected C2000 units in many regions. If your unit falls inside that window, open a ticket before you spend money on anything else.
| Factor | C2000 units | Apollo Lake units |
|---|---|---|
| Typical failure window | 18 to 24 months runtime | 18 to 24 months runtime |
| Symptoms | Blinking blue, no boot, no beep | Same, often intermittent first |
| Warranty extension | Offered in many regions | Region-dependent, ask support |
| Repair options | Board-level repair, RMA, replace | Board-level repair, RMA, replace |
How to tell this apart from a power fault
Run the bare-unit POST test first. If the unit fails to POST with a known-good adapter and no drives, and the CPU family matches, the LPC clock bug is a strong candidate.
One tell is intermittent booting in the weeks before total failure. The unit boots on the fifth try one day and the second try the next. Then it stops booting entirely.
What to do if you think this is your problem
Open a Synology support ticket with your serial number and symptoms. Ask directly whether your model is covered under any extended warranty program.
If the unit is out of coverage, you have three realistic options. Board-level repair by a specialist shop is often the cheapest. Replacement with a current model is the most future-proof.
Drive migration into a new chassis is the fastest route back to your data.
Third-party repair shops do handle this specific fault. They replace or reinforce the clock circuit on the board, which is a real repair rather than a workaround.
Ask about warranty coverage on the repair itself before you ship anything. A repaired board that fails again in six months is a different conversation than one with a twelve-month guarantee.
Reset Mode 1 vs. Reset Mode 2: What Each One Really Does to Your Data
The reset button is the most dangerous button on a Synology NAS. It's also the one people press first. Read this section before you touch it.
On most DiskStation models, the reset button is a small recessed pinhole on the rear panel near the LAN ports. You need a paperclip or a SIM tool to press it. That recess is deliberate.
It's meant to slow you down.
On some rackmount units, the reset button sits on the front panel behind a small cover. Check your model's hardware installation guide for the exact location.
Reset Mode 1: the safe one
Mode 1 resets the administrator password, the network configuration, and the auto-block list. It doesn't touch your data. It doesn't touch your shared folders.
It doesn't reinstall DSM.
To trigger Mode 1, hold the reset button for about four seconds. You'll hear one beep. Release immediately after the beep.
After a Mode 1 reset, the admin password reverts to default, the NAS picks up a DHCP address, and any blocked IP list is cleared. Users, groups, and shared folder permissions stay exactly as they were.
Reset Mode 2: the one that can cost you data
Mode 2 resets the system to defaults and reinstalls DSM. Synology's own documentation warns this can result in data loss. That warning isn't boilerplate.
To trigger Mode 2, hold the reset button past the first beep and keep holding until you hear a second one. That's roughly ten seconds total. Release after the second beep.
The exact outcome depends on your model and DSM version. On some units Mode 2 preserves the volume and reinstalls DSM. On others it wipes configuration and data.
Don't gamble on which one you have.
| Feature | Reset Mode 1 | Reset Mode 2 |
|---|---|---|
| Hold time | About 4 seconds, one beep | About 10 seconds, two beeps |
| Admin password | Reset to default | Reset to default |
| Network settings | Reset to DHCP | Reset to default |
| Auto-block list | Cleared | Cleared |
| Users and groups | Preserved | Removed |
| Shared folders | Preserved | Removed |
| DSM installation | Untouched | Reinstalled |
| Data risk | None | Can result in data loss |
When to use Mode 1
Use Mode 1 when you've forgotten the admin password, when the NAS has an IP conflict on your network, or when you've locked yourself out with the auto-block feature. Those are the three problems it solves.
Mode 1 is also the correct first move if the unit boots but you can't log in. It's reversible and low risk.
When Mode 2 is actually appropriate
Mode 2 fits exactly one situation. You're handing the NAS to someone else, or you're decommissioning it, and you've already backed up everything you care about.
That's it. If you're troubleshooting a boot problem, Mode 2 isn't the answer. Reinstalling DSM through Synology Assistant is a safer route that gives you far more control.
Back up before you press anything
If the unit boots at all, copy your critical data off before you reset anything. Connect over the network, pull what matters, and only then consider a reset.
If the unit doesn't boot, leave the reset button alone. A non-booting unit won't be fixed by a reset, and a Mode 2 reset on a unit with a hardware fault just removes your recovery options.
DSM Is Gone but the Hardware Is Alive: Reinstall and Recovery Paths
This is the good branch. The unit powers on, the fan spins, you hear the beep, and the blue light either goes solid or keeps blinking. Something in the software stack is broken, but the hardware is fine.
How you know you're on this branch
The clearest sign is discovery. Synology Assistant or find.synology.com can see the unit even though the web interface won't load. That single fact tells you the network stack and the boot firmware are working.
Open Synology Assistant and note the status it reports. That status word tells you exactly what to do next.
| Assistant status | What it means | Correct action |
|---|---|---|
| Not installed | DSM is missing from the boot device | Fresh DSM install |
| Recoverable | DSM is corrupt but the volume is intact | Reinstall DSM, keep data |
| Configuration lost | System partition damaged | Reinstall DSM, check volume after |
| Migratable | Drives came from another NAS | Run migration wizard, never initialize |
| Connection failed | Network path blocked, not a NAS fault | Check subnet, firewall, and cable |
Reinstalling DSM without losing your volume
This is the standard recovery path for a corrupted DSM partition. It reinstalls the operating system on the boot device and leaves your data volume alone.
- Download Synology Assistant and the correct DSM .pat file for your model from the Synology Download Center.
- Run Synology Assistant on a computer on the same subnet as the NAS.
- Select your NAS and click Install.
- Point it at the .pat file you downloaded.
- Follow the wizard and choose the option that keeps your data when prompted.
- Let the unit reboot. The blue LED will blink during the install, which is expected.
Don't pull power during the install. Don't click around in Assistant while it runs. Let it finish.
The migration path when the chassis is dead
If the original NAS won't POST, you can move the drives into a compatible Synology chassis and migrate. That's the fastest route back to your data in most cases.
Compatibility matters. The target NAS must support migration from your source model. Synology publishes a migration compatibility table in its Knowledge Center, so check it before you buy anything.
Put the drives in the new chassis in the same bay order if you can. Power on. Synology Assistant will report the volume as migratable.
Run the migration wizard and choose to keep the existing data.
Never click Initialize. Initialize wipes the drives. It's the single easiest way to turn a recoverable situation into permanent data loss.
When migration isn't an option
If the target chassis won't accept your drive set, or the volume is already damaged, you have two remaining paths.
The first is reading the drives on a Linux machine. Synology volumes use ext4 or Btrfs, both of which Linux can mount. You'll need enough SATA ports and the right tools.
This works cleanly for simple volumes and gets complicated with SHR and RAID.
The second is a professional data recovery lab. That's the right call for RAID arrays with multiple failed drives or for physically damaged disks. It's expensive, often four figures, and it's the last resort rather than the first.
If you go the Linux route, work on a copy. Never mount a degraded array read-write on a machine you don't fully control. One bad write can finish off a volume that was still recoverable.
Getting Your Data Back: Drive Migration, Linux Mounting, and Recovery Labs
A dead NAS chassis is not a dead data set. Synology drives use standard SATA connections and store data in ext4 or Btrfs filesystems. That means your data is readable outside the original unit, provided you approach it the right way.
Pick your recovery route based on three things. How urgent is the data, how complex is the volume layout, and how much are you willing to spend. The table below sets out the realistic options.
| Route | Best for | Typical cost | Risk level |
|---|---|---|---|
| Migrate drives to a compatible Synology | Simple volumes, SHR, RAID 1 or 5 | Cost of a new or used NAS | Low |
| Mount drives on Linux | Single drives, JBOD, simple RAID | Your time, plus SATA hardware | Medium |
| Professional recovery lab | Multi-drive RAID with failures, physical damage | Four figures and up | Low, but expensive |
Drive migration into another Synology
This is the cleanest route, and it's the one to try first. Synology supports moving a drive set from one NAS to another, as long as the target model is compatible.
Check the migration compatibility table in the Synology Knowledge Center before you buy a target chassis. A DS220j cannot accept drives from an eight-bay unit, and some newer models won't accept volumes from much older ones.
Install the drives in the target unit. Keep them in the same relative order if the bay count matches. Power on.
Open Synology Assistant and look for a Migratable status.
Run the migration wizard. Choose the option to keep existing data. Do not initialize.
Initializing wipes the drives and turns a ten-minute recovery into a permanent loss.
Mounting Synology drives on Linux
When migration isn't available, a Linux machine can read the drives directly. Ext4 volumes are straightforward. Btrfs needs the btrfs-progs package.
SHR and RAID add a layer of complexity because you need to assemble the array first.
The general flow looks like this.
- Connect all drives from the volume to the Linux machine. You need every drive in the set, not just one.
- Identify the drives with lsblk or similar tools.
- Assemble the array with mdadm if it's a Linux RAID or SHR layout.
- Activate any LVM volume group with vgchange.
- Mount the filesystem read-only.
Mount read-only. That's not optional. A read-write mount on a degraded array can corrupt metadata you still need.
Synology's SHR is built on Linux mdadm and LVM underneath. The layout is recoverable, but it isn't obvious. If you're not comfortable with mdadm, use a dedicated recovery tool or stop and hand it to a lab.
When to call a professional lab
A lab is the right call when multiple drives have failed, when a drive makes clicking or grinding noises, or when the volume was encrypted and the key is lost. Those are cases where DIY attempts can make things worse.
Expect to pay from around a thousand dollars for a straightforward logical recovery, and several thousand for clean-room work on physically damaged drives. Business-critical data often justifies it. A personal photo library is a harder call.
For business data, ask about chain of custody and a written no-data-no-fee policy before you ship anything. Reputable labs offer both.
The one rule that matters most
Never format a drive to "test" whether it's working. Formatting is the fastest way to destroy a recoverable volume. If a drive spins up and shows up in your OS, leave it alone and treat it as evidence, not as a blank disk.
Mistakes That Turn a Fixable NAS Into a Dead One
Most of the units that arrive at repair shops in unrecoverable condition weren't killed by hardware. They were killed by what the owner did next. Here's what to avoid, in rough order of how often it happens.
Pressing Reset Mode 2 when you meant Mode 1
The single most damaging mistake on this list. Mode 2 reinstalls DSM and can remove users, shared folders, and configuration. On some models it can take data with it.
If you're troubleshooting a boot problem, the reset button is almost never the answer. Reinstall DSM through Synology Assistant instead. It's more controlled and it preserves your volume in most cases.
Pulling drives out while the unit is powered
Hot-swapping is fine when DSM is running normally and the volume is healthy. It is not fine when the NAS is mid-boot, mid-rebuild, or stuck. Pulling a drive during those states can corrupt the array.
If you need to test drives, power down first. Then pull them.
Clicking Initialize on a Migratable volume
Synology Assistant will offer to initialize a volume it sees as Migratable. Do not take that offer. Initialize means wipe.
Migration means keep.
The wording is close enough that people click the wrong one under pressure. Read the button text twice before you commit.
Formatting drives on a PC to check them
Plugging a NAS drive into a Windows machine and letting Windows offer to format it is a data-loss event waiting to happen. Windows doesn't read ext4 or Btrfs natively, so it sees an unrecognized disk and suggests formatting it.
Decline the prompt. Use a Linux machine, or use a read-only ext4 or Btrfs driver for Windows. Never let the OS format anything until you've extracted what you need.
Power-cycling repeatedly to see if it helps
Twenty power cycles in ten minutes does not help. It stresses the power supply, the drives, and the board. If a unit doesn't POST on the second or third try, stop and diagnose.
Repeated cycling on a unit with a failing power supply is one of the fastest ways to finish it off.
Opening the chassis without static precautions
ESD damage is invisible. A board that fails three weeks after you touched it with a charged hand usually won't get traced back to that moment. Use an anti-static strap or touch grounded metal before you work inside the unit.
Using the wrong power adapter
We've covered this, and it's worth repeating. Wrong voltage, wrong polarity, or wrong connector kills boards. Match the label on the original adapter exactly.
Buying a replacement before trying recovery
Replacement hardware can wait a day. Data can't. If the old chassis won't boot, get the drives out and into a recovery path before you spend money on a new NAS.
Assuming RAID is a backup
RAID protects against drive failure. It does not protect against a dead chassis, a ransomware event, accidental deletion, or a corrupted volume. A RAID array with no separate backup is one bad day away from total loss.
Not documenting anything before you start
Photograph the bays. Write down the serial numbers. Note the blink timing and beep pattern.
That record is worth more than you think when you open a support ticket or hand the unit to a repair shop.
RMA, Board Repair, or Replace: Deciding on an Out-of-Warranty Unit
Once you've confirmed a board-level fault, you have three options. Each makes sense in different situations, and the right call depends on warranty status, data urgency, and budget.
Step 1: Check warranty status before anything else
Look up your model and serial number on the Synology Product Support Status page. That page tells you the original warranty end date and whether the model is still supported.
As of 2026, standard warranty is typically two years on value models, three years on Plus models, and five years on select XS and rackmount units. Regional consumer law can extend those minimums, particularly in the EU and UK.
Step 2: Check for extended coverage
If your unit runs an Intel Atom C2000 CPU, ask support directly about extended warranty coverage. Synology extended coverage on affected units in many regions, and the extension isn't always obvious from the status page.
For Apollo Lake units, coverage is more region-dependent. It's worth the two minutes to ask.
Step 3: Compare the three options
| Option | Typical cost | Turnaround | Best for |
|---|---|---|---|
| RMA under warranty | Free, you pay shipping | Two to six weeks | Units still covered, non-urgent data |
| Third-party board repair | Lower than a new NAS | One to three weeks | Out-of-warranty units, specific known faults |
| Replace with a new NAS | Full retail price | Same week | Old units, upgrade opportunity, no repair path |
RMA: what to expect
Open a ticket through Synology's support portal. Include your model, serial number, symptoms, blink timing, beep pattern, and the bare-unit test results. That level of detail usually speeds up the approval.
If approved, you'll ship the unit to a regional service center. Synology may repair or replace it. In most cases the drives stay with you, and you migrate them into the repaired or replacement unit when it arrives.
Back up your data before you ship anything if the drives are readable. Don't send drives to a service center unless support specifically asks.
Third-party board repair
Specialist shops handle the C2000 and Apollo Lake clock faults regularly. The repair involves replacing or reinforcing the affected circuit on the board, and it's a genuine fix rather than a workaround.
Ask three questions before you commit. What's the warranty on the repair? How many of these units have you done?
What happens if the board is unrepairable?
A shop that answers all three clearly is worth the shipping cost. One that dodges them isn't.
Replacement: when it's the right call
Replace when the unit is well out of warranty, the repair cost approaches half the price of a new NAS, or you were already considering an upgrade for capacity or performance reasons.
When you replace, buy a model that supports migration from your current one. That single check turns a replacement into a data recovery event.
The decision shortcut
If the unit is under warranty, RMA. If it's out of warranty and the CPU family matches a known fault, get a repair quote. If the repair quote is high or the unit is old, replace and migrate.
Whichever route you take, do the recovery first. Get your data off the drives before the hardware leaves your hands.
Preventing the Next Blinking Blue Light: Backups, UPS, and Long-Term Care
Most of the failures in this article are preventable, or at least survivable. A few habits and a small amount of hardware change the odds dramatically.
Follow the 3-2-1 backup rule
Three copies of your data. Two different storage types. One copy off-site.
That's the standard, and it exists because every other protection eventually fails.
For a Synology NAS, that typically means the NAS itself as copy one, an external USB drive or second NAS as copy two, and a cloud target as copy three. Hyper Backup handles the off-site leg cleanly.
The backup is only real if you've tested a restore. Schedule one a year at minimum. Restore a folder, open a file, confirm it works.
Add a UPS with USB signaling
A UPS does two things for a NAS. It rides out short outages, and it tells DSM to shut down cleanly when the battery gets low. The second feature is the one that prevents the damage.
Look for a line-interactive UPS with a USB data port and confirmed Synology compatibility. Size it by your NAS's real power draw, not the marketing number on the box.
Monitor drive health with SMART
DSM runs SMART tests and reports on drive health in Storage Manager. Check it monthly. Watch Reallocated Sector Count, Current Pending Sector, and UDMA CRC Error Count.
A drive with growing reallocated sectors is on its way out. Replace it before it takes the volume with it.
Keep firmware current, but not immediately
Update DSM when the release has been out for a few weeks and the community hasn't reported problems. Updating on day one exposes you to any bugs that slipped through testing.
Back up your configuration before every DSM update. Synology lets you export the system config, and that export is a lifesaver if an update goes wrong.
Clean the airflow path
Dust clogs heatsinks and fans, and heat kills electronics. Power down once a year, open the unit if you're comfortable, and clear dust from the fan and intake. If the fan is noisy or slow, replace it.
Ambient temperature matters too. A NAS in a closed cabinet in a warm room runs hotter than the spec sheet assumes.
Replace the CMOS battery on older units
The coin battery on the mainboard lasts roughly five to seven years. A dead one can block a clean POST on some models. It costs about a dollar and takes a few minutes to swap.
If your unit is past four years old and you're opening it for a clean anyway, replace the battery while you're in there.
Keep a spare adapter
External power adapters fail more often than anything else in the system. If your unit uses one, buying a spare of the correct spec is cheap insurance. Store it somewhere cool and dry.
Shut down properly before power events
If you know a storm is coming or an electrician is working on the house, shut the NAS down from DSM first. That one habit prevents most unclean-shutdown recovery scenarios.
Frequently Asked Questions
What does a blinking blue light on a Synology NAS mean?
On most Synology units, the blue LED sits in the power button and indicates power delivery. A blink usually means the boot sequence hasn't finished. It can also mean hibernation wake or a stalled boot.
The STATUS LED and DISK LEDs tell you more about system health.
How long should the blue light blink before I worry?
On a two-bay unit, a normal boot finishes in 45 to 90 seconds. An eight-bay unit with a large volume can take two to three minutes. After an unclean shutdown, add a few minutes for the filesystem check.
Past fifteen minutes with no network presence, it's stalled.
Can I fix a stuck Synology NAS without losing data?
Yes, in many cases. Reinstalling DSM through Synology Assistant preserves the data volume. Migrating drives to a compatible Synology chassis also preserves data.
The two things that destroy data are clicking Initialize on a migratable volume and triggering Reset Mode 2.
No, not for a boot problem. Reset Mode 1 clears the admin password and network settings, and it's low risk. Reset Mode 2 reinstalls DSM and can remove users, shared folders, and data.
Neither mode fixes a hardware fault, and Mode 2 can make recovery harder.
Is my data safe if the NAS won't boot?
Usually yes. The drives hold your data, not the chassis. Standard SATA drives with ext4 or Btrfs filesystems are readable outside the NAS.
Move them to a compatible Synology unit or mount them on Linux. Never format a drive to check whether it's working.
Which Synology models are affected by the Intel C2000 and Apollo Lake bug?
The fault follows the CPU family, not the model name. Units running Intel Atom C2000 chips or Apollo Lake Celeron J-series chips are the ones to check. Look up your model's CPU on Synology's spec pages.
If it matches either family, the LPC clock bug is a real possibility.