You walk past the fridge, glance at the control panel, and there it is: a Samsung refrigerator blinking red light that definitely wasn't there yesterday. Your stomach drops. You start doing the math on a new fridge.
Take a breath. In our review of Samsung's own support documentation and model manuals, that red LED is almost always a status indicator, not a death sentence. It's telling you something specific: the ice maker is switched off, the water filter is past its roughly 300-gallon service life, or the panel is sitting in Demo Mode.
Here's how to figure out which one you're staring at.
Quick Answer
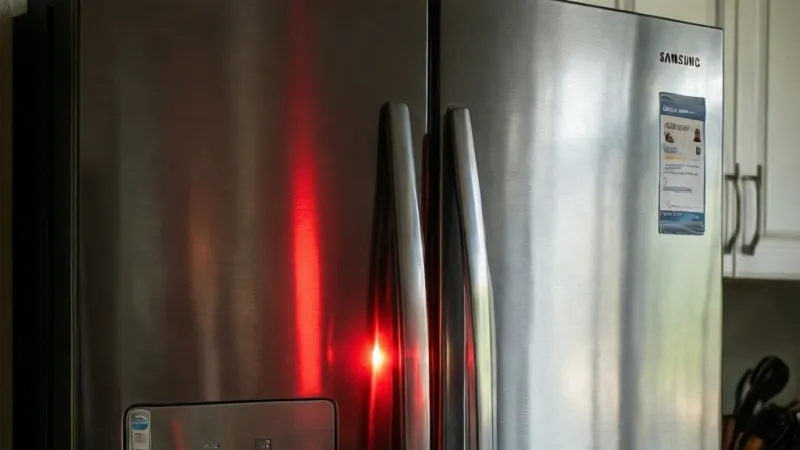
A Samsung refrigerator blinking red light usually means a status change, not a failure. The Ice Max light turns red when the ice maker is off. The filter light blinks when the water filter is past due.
Demo Mode blinks red when the fridge isn't cooling. Count the blinks, note which light it is, then reset and retest.
Why Your Samsung Fridge Is Showing a Blinking Red Light
Your Samsung refrigerator doesn't beep at you when something needs attention. It lights up. That small LED cluster on the control panel is the fridge's main communication channel, and red is the color it uses when it wants you to look.
Here's the part most people miss. On Samsung models, a red LED is a status indicator first and a fault indicator second. In our review of Samsung's support documentation, the vast majority of red-light complaints trace back to three ordinary states: ice maker off, water filter past due, or the panel stuck in Demo Mode.
None of those three mean the fridge is broken. Not one of them requires a service call.
Red Is Samsung's Attention Color, Not a Danger Signal
Think about how red works everywhere else in your life. Red means stop, danger, failure, low battery. So when a red light appears on an appliance, your brain jumps straight to worst case.
Samsung's convention is different. On these refrigerators, red simply means "something here needs your input." That's it.
The fridge uses blue for active functions like Power Cool or Power Freeze. It uses amber or orange for a filter that's due. Red sits in the middle, covering both "switched off" and "count this blink pattern." That's the trap.
Two completely different meanings share one color.
The Two Kinds of Red Light
There are really two categories of red light on a Samsung fridge. Telling them apart is the whole game.
Status red. A steady red light next to a labeled button (Ice Max, Ice Off, Door Alarm) means that function is currently off or needs a nudge. Press the button, the light changes, you're done.
This is the boring, common case.
Fault red. A blinking red light that returns after a reset, or one paired with a warm compartment or a frozen-up ice maker, is a genuine fault. This is the rare case, and it's the one that needs real diagnostics.
If you can tell which of those two you're looking at, you've solved most of the problem before touching a single button.
Why Samsung Uses Lights Instead of Beeps
Samsung moved away from loud error beeps on most modern refrigerators for a simple reason: noise complaints. A fridge that beeps every time a door is ajar or a filter runs long becomes a nuisance in an open-plan kitchen.
LEDs solve that. They're silent, low-power, and visible from across the room. The tradeoff is that they require interpretation.
A beep is unmistakable. A small red dot next to a button is not.
That's why so many people end up searching for answers at 11 p.m. with a flashlight pointed at the control panel. The fridge is trying to tell you something. It's just speaking in shorthand.
How Your Samsung Fridge Talks to You
Samsung gives you up to four channels for information. Not every model has all four.
- The control panel LEDs. The primary channel. Ice Max, Water Filter, Door Alarm, and Power Cool each have their own light on most models.
- The digital display. On models with a temperature readout, fault codes show up as flashing digits or alphanumeric strings like 22E or 39E.
- SmartThings. The companion app pushes notifications for some faults and filter reminders on Wi-Fi connected models.
- Smart Check. A self-diagnosis feature that flashes a code pattern you photograph with your phone. It's built into many models from roughly 2015 onward.
Older Samsung fridges may only have the panel LEDs. Newer Family Hub models add a touchscreen with on-screen messages. The core logic stays the same: light on, light blinking, or code shown.
Why the Red Light Shows Up When Nothing Seems Wrong
You open the fridge. It's cold. The freezer is frozen.
The ice maker is making ice. And yet, a red light.
Nine times out of ten, the answer is embarrassingly simple. Someone bumped the Ice Max button. Or the water filter hit its 300-gallon mark and the fridge is politely nagging you.
Or the panel got knocked into Demo Mode during a power flicker.
Here's a detail that trips people up. The water filter indicator on most Samsung models is a timer, not a sensor. It counts down roughly six months or 300 gallons (1,136 liters) from the last reset, whichever comes first.
It has no idea whether the filter is actually clogged. It just knows time has passed.
Same story with the Ice Max light. It's wired to the ice maker's power state, not to whether the ice maker is working. If the switch is off, the light is red.
The ice maker could be in perfect condition and the light would still be red.
When a Blinking Red Light Really Is a Fault
The red light crosses into genuine-fault territory when any of these are true:
- The light returns within 24 hours of a reset.
- Two or more LEDs blink at the same time.
- The digital display shows an alphanumeric code like 22E, 39E, 40E, 41E, 84E, or 88E.
- The fridge compartment stays above 40°F (4.4°C) after several hours.
- The freezer stays above 0°F (-18°C) after several hours.
- The ice maker hasn't produced ice in 24 hours despite the light being cleared.
- You hear the compressor cycling on and off rapidly.
If you check off any of those, stop treating this as a light problem. You're now troubleshooting a cooling or ice maker fault, and the next sections walk you through it.
One safety note worth flagging early. If the fridge has been warm for more than two hours, the food inside may be unsafe. The USDA food safety guidance is blunt on this: perishables left above 40°F for more than two hours should be thrown out.
When in doubt, toss it.
Which Red Light Are You Actually Looking At? Ice Max, Filter, Door Alarm, or Display Digits
Before you press anything, figure out which light is red. This is the single most important step, and it's the one people skip. Resetting the panel before you've identified the light wipes the diagnostic clue you needed.
Look at the control panel. Find the small red LED. Now read the label printed next to it.
That label is your starting point.
The Ice Max Light
The Ice Max light sits next to the Ice Max or Ice Maker button on most Samsung French door and 4-Door Flex models. When it glows red or blue (the color varies by model year), it's telling you the ice maker's power state.
A red Ice Max light usually means the ice maker is switched off. That's it. No fault.
Someone pressed the button, or a power cycle flipped the default state.
Press and hold the Ice Max button for about 3 seconds. The light should change color or turn off. If it does, you're done.
If it stays red and the ice maker still won't run, move to the blink-counting step in the next section.
The Water Filter Light
The water filter indicator is usually a small LED near the Water or Filter button, or on the dispenser itself. On most Samsung models it's on a timer, not a sensor.
A red or amber filter light means the fridge thinks the filter is past its service interval. That interval is roughly six months or 300 gallons (1,136 liters), whichever comes first.
Replace the filter, then reset the indicator. The reset is almost always a 3-second hold on the Water or Filter button. On some models you hold two buttons at once, like Ice Type and Water.
Check your manual for the exact combo.
Here's the annoying part. If you don't reset the indicator after changing the filter, the light stays on. The fridge has no way to know you swapped it.
It's just counting time.
The Door Alarm Light
The Door Alarm light is a red LED next to the Alarm or Door Alarm button. When it's on steady, the door alarm feature is enabled. That's normal and expected.
When it blinks, a door has been open too long. The fridge beeps and flashes to get your attention. Close the door firmly and the blinking stops.
If the light blinks with the doors fully shut, you've got a door switch or gasket problem. Check the gasket for gaps. Press on the door and see if the light goes out.
If it does, the door isn't sealing, and the fridge is telling you the truth.
The Digital Display Digits
On models with a temperature display, a fault doesn't always show as a light. It shows as flashing digits or an alphanumeric code.
A flashing temperature reading usually means the compartment is outside its set range. Give it a few hours to recover after a door-open event or a power outage. If it stays flashing, it's a real cooling problem.
An alphanumeric code like 22E, 39E, 40E, 41E, 84E, or 88E is a specific fault. Those codes point to particular subsystems: ice maker fan, defrost sensor, communication error, and so on. We cover them in the next section.
Quick Identification Table
| What you see | What it usually means | First action |
|---|---|---|
| Steady red next to Ice Max | Ice maker is switched off | Hold Ice Max 3 seconds |
| Red or amber next to Water/Filter | Filter past service interval | Replace filter, then reset |
| Blinking red next to Door Alarm | Door open or not sealing | Close door, check gasket |
| Flashing temperature digits | Compartment out of range | Wait 4 hours, recheck |
| Alphanumeric code on display | Specific fault | Note code, see next section |
| All LEDs blinking together | Panel or board fault | Hard reset, then call service |
Why Model Year Matters
Samsung has changed its panel layouts repeatedly over the last decade. A 2014 RF series looks nothing like a 2022 Bespoke 4-Door Flex. Button positions, light colors, and hold times all shift between generations.
That's why the manual for your exact model number matters more than any general guide. The model plate is inside the fridge, usually on the upper left wall or on the door frame. Write that number down before you do anything else.
If you've lost the manual, Samsung's support site at samsung.com lets you download it by model number. It takes two minutes and saves an hour of guessing.
Count the Blinks First: What Blink Patterns and Error Codes Tell You
If your red light is blinking rather than steady, you're in the diagnostic zone. The blink pattern is a code. Count it before you do anything else.
Here's how. Watch the light for a full 30 seconds. Note whether it blinks once, twice, three times, or continuously.
Then note whether the pattern repeats after a pause.
Write the count down. Take a photo or a short video if that's easier. You'll want it when you call service.
Why Counting Beats Guessing
Samsung's self-diagnosis system reports faults as blink sequences and alphanumeric codes. Each sequence maps to a specific subsystem.
If you reset the fridge before counting, you erase the code. The light may clear for a day and then come back, and you'll have lost your one clean read.
A technician who arrives with a code in hand can often bring the right part on the first visit. A technician who arrives without one has to run the diagnosis from scratch, which can mean a second trip and a second diagnostic fee.
Reading the Blink Pattern
Most Samsung fault codes use a counted-blink format. The light flashes a set number of times, pauses, then repeats.
- One blink, pause, repeat. Often a defrost or temperature sensor fault.
- Two blinks, pause, repeat. Commonly an ice maker or fan issue.
- Three blinks, pause, repeat. Frequently a communication or board fault.
- Continuous rapid blinking. Usually a panel or display error.
- Multiple LEDs blinking at once. Almost always a main board issue.
Model-specific manuals have the exact mapping. The patterns above reflect the common convention across Samsung's French door and side-by-side lines, but always confirm against your model's documentation.
The Alphanumeric Error Codes
On models with a digital display, faults often show as a short alphanumeric string instead of a blink count. These are the ones our research most commonly sees reported.
| Code | Common meaning | Typical subsystem |
|---|---|---|
| 22E | Ice maker sensor or fan fault | Ice maker assembly |
| 39E | Ice maker function error | Ice maker or control board |
| 40E | Ice maker error (variant) | Ice maker assembly |
| 41E | Ice maker error (variant) | Ice maker or wiring |
| 84E | Defrost or temperature sensor fault | Defrost system |
| 88E | Communication error between boards | Main PCB or display board |
Codes vary by model and firmware version. A code that means one thing on a 2016 RF28 means something else on a 2021 Bespoke. Don't act on a code from a forum post without confirming it against your own manual.
Running Smart Check
Smart Check is Samsung's built-in self-diagnosis tool. It's available on most models built from around 2015 onward. You'll see a small Smart Check icon or label near the display.
Here's the flow:
- Press and hold the Smart Check button (or the button combo your manual lists) for about 5 seconds.
- The display shows a blinking pattern or code on the panel.
- Open the SmartThings app on your phone.
- Point the camera at the blinking code.
- The app decodes it and shows you the fault.
If your fridge isn't Wi-Fi connected, Smart Check still works. The app reads the visual code from the panel. You don't need the fridge online for this.
If your model doesn't have Smart Check, skip straight to the manual's error code table. The blink count is still your best clue.
When Blink Counting Isn't Enough
Sometimes the light blinks but no code appears, or the code doesn't match anything in the manual. That happens more often than you'd think.
In that case, look for corroborating symptoms. Is the fridge warm? Is the freezer warm?
Is the ice maker frozen solid? Is the compressor running constantly, or not at all?
Those physical symptoms narrow the fault faster than the light alone. A blinking red light plus a warm fridge points at the sealed system or the compressor. A blinking red light plus a working fridge points at the ice maker or a sensor.
Write down both the code and the symptom. That combination is what a technician actually needs to bring the right part.
Demo Mode: The One Red Light That Isn't a Breakdown
Demo Mode is the single most misdiagnosed red light on a Samsung refrigerator. It looks like a total failure. It isn't.
It's a showroom setting that got left on.
In Demo Mode (also called Showroom Mode), the fridge runs its lights and panel but shuts down the compressor and fans. The display blinks. The interior stays dark and warm.
To a panicked owner, it looks exactly like a dead fridge.
How Demo Mode Gets Switched On
Demo Mode is designed for retail floors. It lets a store display a fridge without burning electricity on cooling.
It gets left on in real homes more often than you'd think. Common triggers include:
- A new fridge delivered straight from a showroom floor without a factory reset.
- A power surge or brownout that flips the panel's state.
- Accidental button combos during cleaning or a kid mashing the panel.
- A control board replacement where the technician didn't exit service mode.
If you just moved into a home with a Samsung fridge already installed, and the fridge has never cooled, Demo Mode is your first suspect.
How to Tell Demo Mode From a Real Failure
The tell is simple. In Demo Mode, the interior lights work, the panel responds to button presses, and the display blinks. But the fridge is silent and warm.
In a real cooling failure, the compressor usually tries to run. You'll hear it click on and off. Or you'll hear nothing at all, but the interior will still be cool for the first few hours.
A useful test: open the fridge door and listen. In Demo Mode, there's no fan hum and no compressor sound. In a real failure, you'll often hear something trying and failing.
How to Exit Demo Mode
The exit combo varies by model. Most Samsung French door and 4-Door Flex models use one of these:
- Press and hold Ice Type and Fridge buttons together for 5 to 8 seconds. Watch the display. It should flash and then return to normal.
- Press and hold Power Cool and Power Freeze together for 5 seconds. Some side-by-side models use this combo.
- Press and hold the Energy Saver button for 5 seconds. Common on older models.
- Hold the Freezer and Fridge temperature buttons together for 3 to 5 seconds. Used on several RF series.
After the hold, the panel should show a normal temperature reading. The compressor should kick on within a few minutes. Give it 4 to 6 hours to reach set temperature.
If none of the combos work, your exact model number will tell you the right sequence. It's in the manual, on Samsung's support site, or on the printed quick-start card that shipped with the fridge.
What If It Won't Come Out of Demo Mode
If you've tried every combo and the fridge stays in Demo Mode, you've got a board or firmware issue. That's rare, but it happens.
At that point, a hard reset is the next step. Unplug the fridge or trip its dedicated breaker for 10 minutes. Plug it back in.
Wait 5 minutes before touching the panel.
If it's still in Demo Mode after that, it's a service call. Don't keep mashing buttons. You can accidentally trigger other service modes that are harder to exit.
The Quick Checks: Ice Maker Off, Filter Past Due, Door Ajar
If you've identified the light but you're not sure it's a fault, run these three checks. They cover the vast majority of red-light cases. Each one takes under five minutes.
Check 1: Is the Ice Maker Actually On?
This is the number one cause of a red Ice Max light. It's also the number one reason people call a technician for nothing.
Here's the flow:
- Open the fridge door and look at the ice maker housing.
- Find the on/off switch or the Ice Max button on the panel.
- Press and hold the Ice Max button for about 3 seconds.
- Watch the indicator light change.
- Close the door and wait 12 to 24 hours.
- Check for fresh ice in the bin.
If ice appears within 24 hours, you're done. If the light clears but no ice shows up, the ice maker itself has a problem. Move on to ice maker troubleshooting.
One more thing. If the ice maker has a physical test button on the housing, you can press it to run a test cycle. You should hear the ice maker cycle through a harvest.
If it's silent, the ice maker or its fan has failed.
Check 2: Is the Water Filter Past Due?
The water filter indicator is the second most common red light. It's almost always a timer, not a sensor.
Here's the flow:
- Note when you last changed the filter. If it's been over six months, that's your answer.
- Locate the filter. On most Samsung French door models it's inside the fridge on the upper right or in the left crisper area. On side-by-side models it's often in the grille at the bottom.
- Twist out the old filter and twist in a new one. Samsung's own filters are the safest fit, but compatible third-party filters work too.
- Run 2 to 3 gallons of water through the dispenser to flush the new filter. This clears carbon fines and air.
- Press and hold the Water or Filter button for 3 seconds to reset the indicator.
- If your model uses a two-button combo, check the manual.
The light should turn off or change color. If it stays red after a genuine filter change and a reset, the indicator circuit has a fault. That's rare but fixable.
Check 3: Is a Door Actually Ajar?
A door that isn't sealing properly will trip the Door Alarm and, in some cases, trigger temperature warnings.
Here's the flow:
- Push each door firmly closed. Listen for the latch click.
- Look at the gasket. Any visible gap, tear, or curling is a problem.
- Slide a dollar bill between the gasket and the frame. Close the door. Try to pull the bill out.
- If it slides out easily, the gasket isn't sealing there.
- Check the door bins. An overstuffed shelf can prop the door open a fraction of an inch.
A gasket that fails the dollar-bill test needs replacing. Gaskets are cheap, usually under $50, and most are user-replaceable with a screwdriver and 20 minutes.
If the door seals fine but the light still blinks, the door switch itself may have failed. That's a small part, but it requires panel access to replace. Unplug the fridge before you open anything.
A Fourth Quick Check: Power and Ambient Temperature
Two more things worth ruling out before you escalate.
Recent power event. A brownout, storm, or breaker trip can leave the panel in a weird state. Unplug the fridge for 10 minutes.
Plug it back in. Wait 5 minutes. Then recheck the light.
This clears transient glitches at zero cost.
Ambient heat. A fridge in a garage or a hot kitchen can trip alarms in summer. Samsung's standard models are rated for roughly 50°F to 110°F (10°C to 43°C) ambient.
Push past that and the fridge struggles. If the light only appears on hot days, you've found your pattern.
If a garage install is the issue, look for a model rated "garage ready." Standard fridges aren't built for temperature swings, and no reset will fix physics. As of 2026, Samsung and most other brands clearly label which models carry that rating, so it's worth checking before you buy a second unit for the garage.
Soft Reset vs. Hard Reset vs. Smart Check
You've identified the light. You've counted the blinks. Now you need to clear whatever's stuck and see if it stays cleared.
Three tools do that job, and they're not interchangeable.
A soft reset clears the panel state without cutting power. A hard reset cuts power entirely and forces the control board to reboot from scratch. Smart Check runs the fridge's built-in self-diagnosis and hands you a fault code.
Each one answers a different question.
Here's the order that saves the most time. Soft reset first. Smart Check second.
Hard reset third, but only if the first two don't tell you anything useful.
Soft Reset: The Button Hold
The soft reset is a button combo that tells the control board to clear its current state. It doesn't cut power. It doesn't erase stored fault codes on most models.
On most Samsung French door and 4-Door Flex refrigerators, you hold two panel buttons together for 3 to 5 seconds. Common combos include Ice Type plus Fridge, or Power Cool plus Power Freeze. Your manual lists the exact pair for your model.
You'll know it worked when the display flashes and then resets to normal temperature readings. If nothing flashes, you're holding the wrong combo. Try another pair from your manual.
Use a soft reset when the light appeared after a power flicker or a cleaning session. It's the least invasive option and it costs you 30 seconds.
Hard Reset: The Full Power Cycle
The hard reset is the one everyone knows. Unplug the fridge or flip its dedicated breaker. Wait.
Plug it back in.
The wait time matters more than people think. Ten minutes is the standard, not two. That's how long it takes for the control board's capacitors to fully discharge and the board to lose its volatile memory.
Here's the flow:
- Unplug the fridge, or trip the breaker labeled for the kitchen circuit.
- Wait a full 10 minutes. Set a timer if you'll get distracted.
- Plug it back in, or reset the breaker.
- Wait 5 minutes before touching the panel. The board runs a self-test on startup.
- Check the light. Note whether it's steady, blinking, or gone.
Use a hard reset for transient glitches, post-storm weirdness, or a panel that's frozen and unresponsive. It's also the fix for a fridge stuck in a weird mode you can't identify.
Don't use a hard reset as your first move. It erases the blink pattern you might have needed.
Smart Check: The Built-In Diagnostic
Smart Check is Samsung's self-diagnosis feature. It's on most models built from around 2015 onward. You'll see a Smart Check icon or label on the panel.
Here's how it works. You trigger the diagnostic from the panel. The display shows a blinking code.
You open the SmartThings app, point your phone camera at the code, and the app decodes it.
The fridge doesn't need to be Wi-Fi connected for this. Smart Check reads the visual pattern. The app does the translation.
Use Smart Check when you have a blinking light and you want a specific fault code before calling anyone. It's the single most useful tool in this whole process. A technician who arrives with a code in hand can often bring the right part on the first visit.
Side-by-Side Comparison
| Method | What it does | Time | When to use it |
|---|---|---|---|
| Soft reset | Clears panel state, no power cut | 30 seconds | Light appeared after a minor event |
| Smart Check | Runs self-diagnosis, returns a code | 2 minutes | You have a blinking light or code |
| Hard reset | Full board reboot, erases volatile memory | 15 minutes | Panel frozen, glitch won't clear |
The Right Order
Run them in this sequence. Soft reset first, because it's fast and harmless. Smart Check second, because it gives you information you'll need later.
Hard reset last, because it wipes clues.
If the light returns after all three, you're not dealing with a glitch. You're dealing with a fault, and the next section walks through what each outcome means.
The Three Branches: What Happens After You Reset
Everything up to this point has been preparation. This section is where the diagnosis actually happens. The result of your reset tells you which branch you're on, and each branch has its own path.
Read the branch that matches your outcome. Don't read all three unless you're genuinely unsure.
Branch 1: The Light Clears and Stays Off
This is the good outcome, and it's the most common one by a wide margin. The reset cleared a transient state and the fridge is fine.
If the light stays off for 48 hours, you're done. Nothing else to do. Note what triggered it in the first place so you can avoid a repeat.
Most Branch 1 cases trace back to one of these: a brief power flicker, a button that got bumped, an ice maker switched off during a vacation, or a filter timer that hit its mark. None of those are faults. All of them resolve with a reset or a filter change.
Check the ice maker after 24 hours. If it's producing ice, the system is healthy. If it isn't, you're actually on Branch 2, even though the light cleared.
Branch 2: The Light Comes Back Within 24 Hours
The light returned. That's your signal that this isn't a glitch. Something in the fridge is genuinely reporting a fault, and the board keeps flagging it.
Here's what to do next:
- Note how long it took to return. Two hours is different from 22 hours.
- Note whether the blink pattern is the same as before.
- Run Smart Check if you haven't already.
- Write down the code or blink count.
- Check the fridge and freezer temperatures with a thermometer, not your hand.
- Look for other symptoms: ice maker not producing, unusual noises, frost buildup.
A light that returns within two hours points to an active fault the board detects on every startup. A light that returns after 20 hours often points to a sensor drifting out of range as the fridge cycles.
Either way, you now have enough information to either diagnose it yourself or brief a technician. Both options are covered in the next two sections.
Branch 3: Red Light Plus a Warm Fridge or Freezer
This is the branch that matters most, and it's the one where you stop troubleshooting and start protecting your food.
A red light plus a warm compartment means the fridge isn't cooling properly. That's a real problem with real consequences. Per USDA food safety guidance, perishable food left above 40°F (4.4°C) for more than two hours should be discarded.
Check temperatures properly. Put a fridge thermometer in a glass of water in the middle of the fridge compartment. Put a second one in the freezer.
Wait an hour. Read them.
If the fridge reads above 40°F or the freezer reads above 0°F, here's your flow:
- Under 4 hours warm: Move perishables to a cooler with ice. The food is likely still safe.
- Over 4 hours warm: Discard meat, dairy, eggs, and cooked leftovers. When in doubt, throw it out.
- Freezer still at 0°F but fridge warm: This points at the evaporator fan, the defrost system, or an air damper between compartments.
- Both compartments warm: This points at the compressor, the sealed system, or the main board.
Don't keep opening the doors to check. Every door open lets cold air out and warm air in. Tape a note on the door if you need to stop the household from peeking.
Branch 3 Sub-Pattern: Warm Fridge, Cold Freezer
This specific pattern deserves its own mention because it's so common and so often misdiagnosed.
If your freezer is at 0°F but the fridge compartment is warm, the compressor is working. The problem is air movement. On Samsung Twin Cooling Plus models, the two compartments have separate evaporators and fans.
On single-evaporator models, a damper controls how much cold air reaches the fridge.
The usual suspects are the evaporator fan in the fridge compartment, the air damper, or a blocked air vent behind the crisper drawers. A fan that's failed will often make a buzzing or grinding noise before it stops entirely. A blocked vent is often just a bag of groceries pushed against the back wall.
Check the vents first. It's free and takes 30 seconds. Then listen for the fan.
Branch 3 Sub-Pattern: Both Compartments Warm
Both warm is the serious one. The compressor isn't running, or it's running but not moving refrigerant.
Listen to the back of the fridge. A healthy compressor makes a steady low hum. A failing one clicks on and off every few minutes.
A dead one is silent.
If the compressor is silent and the fridge is warm, the issue is usually the start relay, the overload protector, or the compressor itself. If it's clicking repeatedly, the start relay is the most common culprit. That's a $30 to $60 part and a reasonably common DIY replacement on older models.
If the compressor hums but nothing gets cold, you've likely got a sealed system issue: a refrigerant leak, a restriction, or a failed compressor. That's not a DIY job. It requires EPA Section 608 certification to handle refrigerant legally in the US.
Call a technician.
DIY vs. Authorized Service: What's Safe to Touch and What Isn't
The line between "you can fix this" and "call someone" isn't about difficulty. It's about safety and warranty. Some jobs are genuinely easy and safe.
Others can hurt you or void your coverage.
Here's the honest breakdown.
Safe DIY Jobs
These are the ones you can do yourself with basic tools and no special certification.
- Replacing the water filter. Twist out, twist in, flush, reset. Five minutes.
- Resetting the filter or Ice Max indicator. Button hold. Thirty seconds.
- Cleaning the condenser coils. Vacuum and brush. Twenty minutes.
- Replacing a door gasket. Screwdriver and 20 to 30 minutes per door.
- De-icing a frozen ice maker. Warm water, towels, patience.
- Replacing the ice maker assembly. More involved, but doable on many models with a screwdriver and a model-specific video.
- Replacing the start relay on the compressor. A $30 to $60 part on older models. Unplug first.
- Checking and cleaning the defrost drain. Often just a clogged drain line.
Jobs That Require a Technician
These involve either high voltage, refrigerant, or a sealed system. Don't touch them.
- Any sealed system work. Refrigerant lines, compressor replacement, leak repair, or filter-drier swaps. This requires EPA Section 608 certification in the US. Doing it without certification is illegal, and doing it badly can release flammable refrigerant into your home.
- Main control board replacement on most modern models. Board swaps look simple but involve line voltage and firmware pairing on some models.
- Inverter compressor diagnostics. The inverter board holds a charge even after unplugging. It can shock you.
- Defrost heater or defrost sensor replacement. These sit behind panels that expose wiring.
- Any repair under active warranty. Doing it yourself voids the coverage on that component.
The Flammable Refrigerant Warning
This one deserves its own callout. Newer Samsung refrigerators use R-600a (isobutane) as a refrigerant. It's efficient and environmentally friendly.
It's also flammable.
You cannot legally buy, handle, or charge R-600a without proper certification in the US, and the EPA's SNAP program sets strict charge limits and ventilation requirements for these systems. If your fridge uses R-600a and you puncture a line, you've created a genuine fire risk.
Check your model's rating plate. It lists the refrigerant type and charge. If it says R-600a or R-290, sealed system work is technician-only, full stop.
How to Find an Authorized Samsung Technician
If you're going the service route, use Samsung's own network. Here's why.
An authorized technician has access to Samsung's service bulletins, firmware tools, and genuine parts. They can also perform warranty repairs without you paying upfront and claiming back later.
To book one, go to the Samsung support site, enter your model number, and follow the service request flow. Have your model number, serial number, purchase date, and the fault code ready. That combination gets you a faster booking and often a first-visit fix.
If you're outside warranty, an independent appliance tech can be cheaper. Ask specifically whether they work on Samsung inverter compressors before you book. Not all independents do.
What a Fix Should Cost: Diagnostics, Parts, and Warranty Coverage
Cost is where people get blindsided. The difference between a $0 fix and a $900 fix usually comes down to which branch you're on and whether you're in warranty.
Here's what our research shows across common repair scenarios as of 2026. Prices vary by region, model, and labor rate.
Cost Breakdown by Repair Type
| Repair | Typical part cost | Typical labor | Total range |
|---|---|---|---|
| Water filter replacement | $40 to $70 | $0 (DIY) | $40 to $70 |
| Filter indicator reset | $0 | $0 (DIY) | $0 |
| Door gasket replacement | $30 to $60 | $0 to $150 | $30 to $210 |
| Ice maker assembly | $150 to $300 | $100 to $200 | $250 to $500 |
| Start relay replacement | $30 to $60 | $0 to $150 | $30 to $210 |
| Evaporator fan motor | $50 to $120 | $150 to $250 | $200 to $370 |
| Main control board | $150 to $350 | $150 to $250 | $300 to $600 |
| Defrost heater or sensor | $30 to $80 | $150 to $250 | $180 to $330 |
| Sealed system repair | $150 to $500 | $400 to $800 | $550 to $1,300 |
| Compressor replacement | $250 to $600 | $400 to $900 | $650 to $1,500 |
The Diagnostic Fee
Most authorized service calls charge a diagnostic fee whether or not you proceed with the repair. That fee typically runs $75 to $150 in the US. Some companies waive it if you approve the repair on the same visit.
Ask about the fee before you book. And ask whether it's credited toward the repair. That one question can save you $100.
What Your Warranty Actually Covers
Samsung's standard warranty structure on most refrigerators looks like this.
- One year, parts and labor. Covers everything from the date of purchase.
- Five years, sealed system, parts and labor. Covers the compressor, evaporator, condenser, and connecting tubing.
- Up to ten years, Digital Inverter Compressor, parts only. Labor is on you after year five.
The parts-only clause on the compressor is the one that catches people out. A ten-year compressor warranty sounds generous until you get a $600 labor bill to install the free part.
Check your own paperwork. Terms vary by model, region, and purchase date. If you bought an extended warranty through the retailer, that runs separately and often covers labor.
When Repair Doesn't Make Financial Sense
Here's a rough rule. If the repair costs more than half the price of a comparable new fridge, replace it. If the fridge is over 12 years old and the repair is over $500, replace it.
A sealed system repair on a 15-year-old fridge is almost never worth it. A $50 gasket on a 6-year-old fridge always is.
One more factor. If the same fridge has needed two or more repairs in the last three years, you're on a treadmill. Cut your losses.
Mistakes That Turn a Ten-Minute Fix Into a $400 Repair
Most red-light problems are cheap to fix. The expensive ones are usually caused by something the owner did, not by the fridge itself. Here are the ones we see most often.
Resetting Before Counting the Blinks
This is the single biggest mistake. The blink pattern is your only diagnostic clue, and a reset erases it.
If you reset first and the light comes back a day later, you're starting from zero. Count first. Reset second.
Assuming Red Means Broken
Red is Samsung's attention color, not its failure color. A steady red light next to Ice Max means the ice maker is off. That's it.
People who skip the identification step call technicians for a switched-off ice maker. That's a $100 diagnostic fee for a 3-second button press.
Ignoring the Model Number
Samsung's button combos, blink codes, and panel layouts vary wildly between model years. A combo that works on a 2016 RF28 does nothing on a 2022 Bespoke.
Write down your model number before you start. It's inside the fridge on the upper left wall or on the door frame. Every piece of advice you find online is only useful if it matches your model.
Mashing Buttons to Find the Fix
Random button mashing is how fridges end up in service modes that are hard to exit. Some of those modes disable cooling entirely, and the exit combo is buried in the service manual.
If you don't know the combo, look it up. Don't guess.
Changing the Filter Without Resetting the Indicator
The filter light is on a timer. It has no sensor. If you swap the filter and don't reset the indicator, the light stays on and you'll assume the new filter failed.
Reset the indicator every time. It's a 3-second hold on the Water or Filter button.
Replacing Parts Before Diagnosing
Throwing a $300 control board at a problem that's actually a $40 thermistor is an expensive habit. Diagnose first. Buy parts second.
Smart Check and the blink code exist precisely so you don't have to guess. Use them.
Working on a Plugged-In Fridge
Unplug the refrigerator before removing any panel. Line voltage and charged capacitors sit behind the control housing, and the inverter board can hold a charge after the plug is pulled.
This isn't a warning for the overly cautious. It's a genuine shock risk, and it's the reason technicians discharge boards before touching them.
Running a Standard Fridge in a Garage
Standard refrigerators are rated for roughly 50°F to 110°F ambient. A garage that hits 105°F in summer or 20°F in winter pushes past that range.
The fridge will struggle, trip alarms, and eventually fail. If you need a garage unit, buy one rated "garage ready." No reset fixes physics.
Leaving Food in a Warm Fridge to See If It Recovers
If the fridge has been above 40°F for more than two hours, the food is compromised. Waiting to see if it cools down just adds hours to the danger window.
Move what you can to a cooler with ice. Discard what you can't verify. Food poisoning costs more than groceries.
Skipping the Recall Check
Certain Samsung refrigerator models have been recalled in the past for electrical short hazards. Before you spend money on a repair, check your model number against the CPSC recall database at cpsc.gov.
If your model is under recall, the manufacturer may cover the repair regardless of warranty status. That's a five-minute check that can save you hundreds.
Recalls, Flammable Refrigerant, and Food Safety When the Fridge Runs Warm
There are three things in this topic that can genuinely hurt you or cost you real money. A recall you didn't check. A refrigerant you didn't know was flammable.
And food you ate because the fridge felt cold enough. All three deserve their own attention.
Check Your Model Against the CPSC Recall Database
Certain Samsung refrigerator models have been recalled in the past for electrical short hazards. The fault could cause overheating or, in rare cases, a fire.
The check takes five minutes. Go to cpsc.gov, enter your model number, and see if anything comes back. Your model number is on the rating plate inside the fridge, usually on the upper left wall or the door frame.
If your model is under recall, the manufacturer may cover the repair regardless of warranty status. That's a real benefit, and it's one most owners never claim because they never look.
Do this before you spend money on any repair. It's the single highest-value five minutes in this entire process.
R-600a Is Flammable. Here's What That Means for You
Newer Samsung refrigerators use R-600a (isobutane) as a refrigerant. It's efficient, it has a low global warming potential, and it's flammable.
The charge in a household fridge is small, usually under 150 grams. Under normal operation, that's safe. The risk appears when the sealed system is opened.
If a line is punctured, cut, or brazed without proper ventilation, isobutane can accumulate and ignite. That's why the EPA's SNAP program sets strict charge limits and room-size ventilation requirements for these systems.
You cannot legally buy, handle, or charge R-600a in the US without proper certification. The EPA Section 608 program governs this, and sealed system work on a flammable-refrigerant fridge is technician-only, full stop.
Check your rating plate. It lists the refrigerant type. If it says R-600a or R-290, don't touch the sealed system.
The Food Safety Rule That Actually Matters
Perishable food left above 40°F (4.4°C) for more than two hours should be discarded. That's the USDA guidance, and it's not negotiable.
The tricky part is that you can't feel the difference between 38°F and 45°F with your hand. A fridge that feels cold can still be in the danger zone.
Use a thermometer. Put one in a glass of water in the middle of the fridge compartment and another in the freezer. Wait an hour and read them.
This is the only way to know for sure.
Here's the discard list if the fridge has been warm for more than four hours:
- Raw and cooked meat, poultry, and seafood
- Milk, cream, yogurt, and soft cheese
- Eggs, both in shell and out
- Cooked leftovers of any kind
- Cut fruit and vegetables
- Cream-based dressings, sauces, and desserts
The freezer is more forgiving. A full freezer holds a safe temperature for about 48 hours if the door stays shut. A half-full freezer holds for about 24 hours.
If ice crystals are still present and the food still feels refrigerator-cold, it can usually be refrozen or cooked.
When in doubt, throw it out. A case of food poisoning costs far more than a grocery run.
Other Safety Basics Worth Knowing
A few more items that apply to any Samsung refrigerator repair.
- Unplug before opening any panel. Line voltage and charged capacitors sit behind the control housing.
- Don't run the fridge off an undersized extension cord. Use a dedicated grounded circuit.
- UL 250 is the safety standard covering household refrigerators in the US. A unit that meets it has been tested for electrical and mechanical safety.
- Give the fridge clearance. Most models need at least an inch behind and beside the unit for airflow. Blocked vents make the compressor work harder.
- Don't ignore a burning smell. If you smell hot plastic or electrical burning, unplug the fridge and call service. Don't keep running it.
Maintenance That Keeps the Lights Off for Good
Most red lights come back because the underlying task never got done. A filter that was reset but never replaced. A gasket that was checked but never changed.
Here's the maintenance rhythm that keeps the panel dark.
The Maintenance Calendar
| Task | Frequency | Time needed |
|---|---|---|
| Replace water filter | Every 6 months or 300 gallons | 5 minutes |
| Clean condenser coils | Every 6 to 12 months | 20 minutes |
| Check and clean door gaskets | Every 3 months | 5 minutes |
| Clean ice maker and bin | Every 3 months | 15 minutes |
| Check defrost drain line | Every 6 months | 10 minutes |
| Vacuum behind and beside the unit | Every 6 months | 10 minutes |
| Verify fridge and freezer temps | Monthly | 5 minutes |
| Inspect door bins and shelves | Monthly | 2 minutes |
Water Filter Replacement Done Right
Replace the filter every six months or 300 gallons, whichever comes first. The indicator is on a timer, so it will nag you even if the filter still flows fine.
Twist out the old filter and twist in the new one. Run two to three gallons of water through the dispenser to flush carbon fines and air. Then reset the indicator with a three-second hold on the Water or Filter button.
If you don't reset the indicator, the light stays on and you'll think the new filter failed. It didn't. The fridge just doesn't know you swapped it.
Condenser Coils: The Most Skipped Job
The condenser coils sit behind the fridge or under the front grille, depending on the model. Dust and pet hair build up on them over time, and that buildup makes the compressor run hotter and longer.
Unplug the fridge. Pull it out from the wall. Vacuum the coils with a brush attachment.
Use a coil brush for the gaps. Push the fridge back, leaving an inch or two of clearance.
This one job extends compressor life more than any other maintenance task. It's also the one nobody does.
Door Gaskets: Check Them Quarterly
A failing gasket lets cold air escape and warm, humid air in. That drives up energy use and triggers temperature alarms.
Run the dollar-bill test. Slide a bill between the gasket and the frame. Close the door.
Try to pull the bill out. If it slides out easily, that section isn't sealing.
Clean gaskets with warm soapy water and a soft cloth. Skip the harsh cleaners, which dry out the rubber. A gasket that fails the test needs replacing, and most are user-replaceable with a screwdriver.
Ice Maker Care
Frost and scale build up inside the ice maker over time. That causes freeze-ups, jammed harvest cycles, and eventually the ice maker faults we covered earlier.
Empty the bin and wash it with warm soapy water every three months. Check the ice maker housing for frost bridging across the arm or the mold. If you see a solid block, de-ice it with warm water and towels.
Never use a knife or an ice pick.
If your model has a water filter feeding the ice maker, a clogged filter can also slow ice production. Change the filter on schedule and the ice maker gets the water flow it needs.
Vacation and Long-Absence Setup
Heading away for a month or more? Do this before you go.
- Empty the fridge and freezer of perishables.
- Turn off the ice maker and empty the bin.
- Shut off the water supply line to the fridge.
- Leave the doors propped slightly open to prevent mold and odors.
- Unplug the fridge if the absence is longer than a few months.
If you're leaving for just a week, leave it running. A running fridge uses less energy than re-cooling a warm one.
Power Surge Protection
A surge protector rated for appliances is cheap insurance for the control board. Boards are the most expensive common repair, and surges are one of the leading causes of board failure.
Look for a surge protector with a joule rating of at least 1,000 and a connected-equipment warranty. Plug the fridge into that, not directly into the wall.
If your area gets frequent brownouts, this matters more. Brownouts are harder on electronics than clean outages.
Frequently Asked Questions
What does a blinking red light on a Samsung refrigerator mean?
A blinking red light usually signals a status change, not a failure. The Ice Max light blinks when the ice maker is off. The filter light blinks when the water filter is past due.
A counted blink pattern paired with a warm compartment points to a real fault. Count the blinks before resetting anything.
How do I reset the red light on my Samsung refrigerator?
Start with a soft reset. Press and hold the button pair your manual lists, usually Ice Type plus Fridge, for three to five seconds. If that fails, run Smart Check for a fault code.
As a last resort, unplug the fridge for ten minutes. Always count the blinks before you reset.
Why is my Samsung fridge blinking red and not cooling?
A red light plus a warm fridge points to a cooling fault. Check whether the freezer is still at 0°F. A cold freezer with a warm fridge usually means a failed evaporator fan or a blocked air damper.
Both compartments warm points to the compressor or the sealed system. Call a technician.
Is a blinking red light dangerous?
Not usually. Most blinking red lights are status indicators for a switched-off ice maker or a filter past due. The one real risk is food safety.
If the fridge has been above 40°F for more than two hours, discard perishables. Sealed system work involving flammable refrigerant is technician-only.
How long should a Samsung fridge take to cool after a reset?
Give it four to six hours to reach set temperature after a hard reset. A full cooldown from room temperature can take up to 24 hours. Check with a thermometer in a glass of water, not your hand.
If it hasn't cooled within 24 hours, you have a genuine fault.
Will my Samsung warranty cover a red light repair?
It depends on the cause. The standard one-year warranty covers parts and labor on most failures. The sealed system carries five years, and the Digital Inverter Compressor carries up to ten years parts only.
Filters, gaskets, and cosmetic issues are usually excluded. Check your own paperwork.
Decision Guide: Your Next Move at a Glance
Here's the whole thing on one page. Find your situation, follow the row.
| Your situation | What it means | What to do next |
|---|---|---|
| Steady red light next to Ice Max | Ice maker is switched off | Hold Ice Max for 3 seconds |
| Red or amber light next to Water/Filter | Filter past service interval | Replace filter, then reset indicator |
| Blinking red next to Door Alarm | Door open or not sealing | Close door, run the dollar-bill test |
| Display blinking, fridge silent and warm | Demo Mode | Hold the exit combo from your manual |
| Light cleared after reset, stays off 48 hours | Transient glitch | Done. Note the trigger and move on |
| Light returned within 24 hours | Active fault | Run Smart Check, note the code |
| Red light plus warm fridge, cold freezer | Airflow problem | Check vents, listen for the evaporator fan |
| Red light plus both compartments warm | Compressor or sealed system | Call an authorized technician |
| Light returns after every reset | Persistent fault | Book service with the code in hand |
| Fridge has been warm over 4 hours | Food safety risk | Discard perishables, then diagnose |
If you're on the fence about whether to call someone, ask one question. Does the fridge hold temperature? If yes, you're probably dealing with a sensor, an ice maker, or a filter timer, and you can work through it yourself.
If no, stop guessing and book a technician.
One last thing. Write your model number, serial number, and purchase date somewhere you can find them. Tape them inside a kitchen cabinet if that helps.
When a fault does happen, having those three details ready turns a frustrating phone call into a five-minute booking.
The light is rarely as bad as it looks. Identify it, count it, reset it, and test. That sequence solves the overwhelming majority of cases.
And when it doesn't, you'll know exactly which branch you're on and who to call.