A Ninja mixer blinking power light is almost never a mystery code you need a secret chart to crack. In most cases, the machine is telling you one of three things: the lid isn't locked, the jar isn't seated, or the motor is too hot to run. That's the good news.
The bad news is that Ninja uses the same blinking light for several different conditions across dozens of models.
Manufacturer specifications indicate most Ninja blender bases draw between 900 watts and 1500 watts. Per UL 982, the standard covering household motor-operated food-preparing appliances, that kind of load requires both a thermal cutout and a lid interlock. As of 2026, Ninja's lineup spans the Professional, Mega Kitchen System, Foodi Power Blender, Auto-iQ, and Nutri Ninja families, and reset routines differ between them.
So the fastest path forward is to work through the conditions in order.
Quick Answer
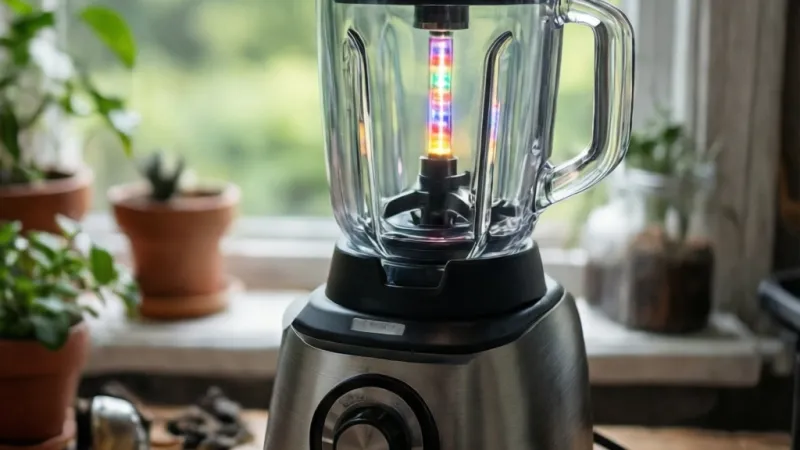
A Ninja mixer blinking power light usually means a locked-out safety feature. The lid may not be locked, or the jar may sit off-center. The motor may have tripped its thermal cutout.
Unplug the base and let it cool 15 to 30 minutes. Then reseat the jar and lid and try again.
Why Your Ninja Mixer's Power Light Is Blinking and What It Usually Means
Ninja blender bases don't run on a universal error code system. The light on your control panel is a status indicator, not a diagnostic readout. It tells you whether the unit is powered, whether the interlock is satisfied, and whether the motor is allowed to spin.
That's why two owners with the same symptom can have completely different problems. One has a lid that's a few degrees off its lock. The other has a motor that just finished pulsing through frozen fruit for four straight minutes.
Same blink, different fix.
Solid Light vs Blinking Light vs Flashing Pattern
A steady light and a blinking light mean different things. So does a light that blinks once versus one that pulses continuously.
| Light behavior | What it usually means | Your first move |
|---|---|---|
| Solid light, motor runs | Normal power-up or program ready | Select a speed or press Start |
| Solid light, no motor | Interlock not satisfied | Reseat the jar and lock the lid |
| Slow blink, no motor | Standby or paused Auto-iQ program | Press Start once |
| Rapid blink during use | Overload or thermal cutout | Unplug, reduce the load, cool 15 to 30 minutes |
| Blink then shutdown after a few seconds | Blade assembly or gasket fault | Check blade seating and the rubber gasket |
| Blink after cleaning | Moisture in the base or control panel | Dry fully and wait 24 hours |
Light color matters less than people assume. Many Ninja bases use blue LEDs, and some Foodi and Auto-iQ models shift to red or amber during a lockout. Aggregate user reviews suggest color varies by production year, not by fault type.
The Three Usual Suspects: Lock, Load, and Heat
Almost every blinking-light complaint traces back to one of these three conditions:
- Lock. The lid tab isn't depressing the interlock plunger in the base. This is the single most common cause.
- Load. The jar is packed too tight, the liquid level is too low, or the blade is buried in frozen fruit with nothing to circulate.
- Heat. The motor has hit its thermal protector after a long or heavy run. It needs to cool before it will restart.
If you've ruled out all three and the light still blinks, you're in electrical-fault territory. That's a much smaller category, and we'll get to it later.
When the Blink Pattern Is Model-Specific
Here's where things get annoying. Ninja doesn't publish a single blink-pattern chart that covers the whole range. The behavior is tied to the control board in your specific base.
- Auto-iQ and Intelli-Sense models often blink the program button you selected, which reads like an error but is usually a paused cycle.
- Ninja Foodi Power Blender and Power Mixer System units tie the light to the smart screen and the vessel recognition sensor.
- Ninja Professional and Mega Kitchen System bases typically use a simple power button light with no pattern logic at all.
- Nutri Ninja and Ninja Fit bases are the simplest of the group. Blink almost always means the cup isn't fully seated on the motor base.
Ninja publishes model-specific manuals and support articles on its official site. Dig out your model number before you call anyone. It's printed on the rating label under the base.
How the Ninja Safety Interlock and Overload Protector Work
Two safety systems sit between you and a spinning blade. Understanding them makes the blinking light much easier to read. Neither system is complicated once you see what each one is guarding against.
Lid Lock, Jar Seat, and Blade Alignment Sensors
The lid interlock is a mechanical tab that presses a spring-loaded plunger in the motor base. When the plunger is depressed, a microswitch closes and tells the control board the lid is on. No switch closure, no motor power.
On most full-size Ninja blenders, the lid twists into a locked position with a visible arrow or alignment mark. On Nutri Ninja and Ninja Fit models, the whole cup twists onto the base instead. Either way, the principle is identical: the machine won't run unless the switch is pressed.
The jar seat matters too. A pitcher that's sitting a few millimeters off-center can lift the base enough that the plunger never fully engages. That's why a blender can feel locked and still blink at you.
Thermal Cutout and Motor Overload Protection
The thermal cutout is a bimetallic protector wired into the motor circuit. It opens when the windings reach a set temperature and closes again once things cool down.
Most self-resetting protectors used in small kitchen motors open somewhere between 100°C and 150°C, depending on the model. When it opens, the control board loses its motor circuit. The board stays powered, so the light stays on and blinks instead of going dark.
Some cheaper or older units use a one-shot thermal fuse instead. A fuse doesn't reset. If yours has blown, the blender will never run again without a repair.
Why the Mixer Refuses to Start Even When Powered
The mixer won't start because the control board is powered but the motor circuit is blocked. Those are two separate circuits on every modern Ninja base.
Power reaches the board the moment you plug in. That's why the light comes on and the buttons respond. The motor circuit stays open until the interlock closes and the thermal protector is closed.
Blinking is the board saying "I'm awake, but I'm not allowed to spin."
That distinction saves you a lot of wasted troubleshooting. If the buttons light up, your outlet, cord, and plug are fine. The problem is downstream of the board.
UL 982, the safety standard for household motor-operated food-preparing appliances, is maintained by UL Solutions. It's the reason these interlocks exist in the first place.
First Checks: Outlet, Cord, GFCI, and Breaker
Work through power delivery before you touch anything else. It takes two minutes and rules out a whole category of causes. If the control panel lights up normally, you can usually skip straight past this section.
Test the Outlet With Another Appliance
Plug a lamp, kettle, or phone charger into the same outlet. If it works, the outlet is fine and you can move on.
If nothing works in that outlet, you've found the problem. Blenders pull a lot of current, and a worn outlet can fail under load while still running a small device. Try a different outlet on a different circuit.
Check for a Tripped GFCI or Breaker
A GFCI outlet has reset and test buttons between the two receptacles. Press reset. If it clicks and holds, you've restored power.
If the GFCI trips again the moment you plug the blender in, stop. That's a ground fault, and it points to moisture or damaged wiring inside the base. Don't keep resetting it.
Check your breaker panel too. A 1500W blender running on a 15-amp circuit alongside a microwave or kettle can trip the breaker. If it trips immediately with nothing else running, the blender itself is the suspect.
Inspect the Cord, Plug, and Cord Wrap
Look for these specific things:
- Fraying or nicks along the cord, especially near the strain relief where it exits the base.
- A warm or discolored plug after a short run, which suggests resistance in the connection.
- Bent prongs that don't make solid contact.
- A cord that's been tightly wrapped around the base for years, which can break conductors internally.
If the cord is damaged, stop using the blender. Cord replacement on a Ninja base isn't a user-serviceable job on most models.
Voltage and Region: Get This Right Before Anything Else
Voltage mismatch is a quiet killer, and it's more common than people think with secondhand units and online marketplace purchases.
| Region | Standard voltage and frequency | Notes |
|---|---|---|
| United States, Canada | 120V, 60Hz | Most Ninja bases sold here are 120V only |
| United Kingdom, EU, Australia | 220V to 240V, 50Hz | EU and UK models are built for this range |
| Japan | 100V, 50Hz or 60Hz | A US 120V model will underperform and may not start |
Never run a 1500W blender on a travel converter rated below the blender's wattage. A 500W converter will trip, overheat, or fail outright. If you've moved a US model to a 240V country, don't plug it in with an adapter.
That's how motors and control boards die.
Lid Lock, Jar Seating, and Blade Alignment
This is where most blinking lights get fixed. Take your time here, because "it looks locked" and "it is locked" aren't the same thing.
How to Reseat the Jar and Lid Correctly
Follow these steps in order:
- Unplug the base. Always. It costs you nothing and removes any chance of the motor kicking on mid-adjustment.
- Lift the pitcher straight up and set it aside.
- Check the base collar for crumbs, dried smoothie residue, or a warped gasket ring.
- Set the pitcher down flat on the base collar, then press down gently until it seats.
- Place the lid on and rotate it until the lock arrow lines up with the mark on the handle.
- Press down on the lid while turning, if your model uses a press-and-twist lock.
- Plug in and press Start. If the light goes solid and the motor runs, you're done.
For Nutri Ninja and Ninja Fit models, skip the pitcher steps. Twist the cup onto the base until it stops, then press down firmly. The cup must be fully threaded, not just snug.
Blade Assembly and Gasket Placement
The blade assembly sits inside the pitcher and threads onto the bottom collar. A missing or pinched gasket causes two problems at once. It leaks, and it can lift the blade assembly just enough to break the seal that the base expects.
Check these points:
- The rubber gasket is seated flat in its groove, with no twists or folds.
- The blade assembly is hand-tight. Overtightening crushes the gasket.
- The blade spins freely when you turn it by hand. A seized bearing means a new blade assembly.
- The stacked blade or Pro Extractor Blades are fully clicked into the spindle if your model uses removable blades.
What a Loose or Dirty Interlock Looks Like
The interlock plunger lives in a recess at the top of the motor base. It's a small plastic pin or tab that moves up and down when you press it with a finger.
Inspect it for:
- Dried food or smoothie residue packed around the pin, which stops it from travelling fully.
- Sticky residue from a spill that dried inside the recess.
- A pin that doesn't spring back when you press and release it.
- Cracks in the surrounding plastic from a dropped pitcher.
Clean the recess with a damp cloth and a soft brush. Let it dry completely before plugging back in. Never pour water into the base or rinse it under a tap.
Overheating vs Overloading: Which One Is Triggering the Blink?
These two get blamed for each other constantly, and the fix is different for each. The blink pattern won't tell you which one you're dealing with. Your nose, ears, and memory of the last five minutes will.
Signs of an Overheated Motor
Overheating is a temperature problem. The motor got hot, the thermal protector opened, and the base needs to cool.
- A warm or hot base near the vents, sometimes uncomfortably so.
- A faint hot-plastic or electrical smell with no burning edge to it.
- The blink started mid-run after a minute or more of continuous blending.
- It happened with a normal-sized batch, not an overloaded one.
- The unit restarts fine after 20 to 30 minutes of rest.
Kitchen temperature matters here. A base sitting next to a running oven in a 32°C kitchen will trip sooner than the same base in a cool room.
Signs of an Overloaded Batch
Overloading is a load problem. The motor is straining because the ingredients are too dense, too dry, or too tightly packed.
- The blade stopped turning while the motor was still trying.
- The blink appeared within seconds of starting, not minutes.
- The jar is packed above the max line or the liquid level is too low.
- You're working with frozen fruit, ice, nut butter, or stiff dough.
- A smaller batch blends without any blink at all.
If a half-full jar runs perfectly and a full jar blinks every time, you've found your answer. It's the load, not the machine.
| Factor | Overheating | Overloading |
|---|---|---|
| When the blink starts | After 60 seconds or more of running | Within seconds of starting |
| Base temperature | Warm to hot | Usually cool |
| Smell | Faint hot plastic or electrical | None |
| Batch size | Normal | Above the max line or too dense |
| Fix | Cool 15 to 30 minutes | Remove ingredients, blend in batches |
| Repeats if you ignore it? | Yes, faster each time | Yes, every time |
How Long to Cool Down Before Resetting
Manufacturer guidance across Ninja's blender range commonly cites 15 to 30 minutes of cooling before a thermal cutout resets. In our review of owner reports, most successful restarts happen between 20 and 30 minutes.
Here's how to cool it properly:
- Unplug the base. Don't just switch it off.
- Empty the jar so the motor isn't sitting under a warm load.
- Move the base to a cool, dry spot away from the stove.
- Leave the lid off so heat escapes the jar area.
- Wait the full 30 minutes the first time, even if you're impatient.
- Test with a small batch of soft ingredients before going back to frozen fruit.
If the blink returns within seconds of a cold start, cooling isn't your problem. That points to the interlock or an electrical fault instead.
Blinking After Cleaning, a Power Outage, or Storage
This section covers blink triggers that have nothing to do with load or heat. They're easy to miss because the machine was working fine right before.
Why a Blinking Light Appears After Cleaning
Moisture is the number one post-cleaning cause. Water gets into the base collar, the interlock recess, or the control panel seam.
Even a few drops bridging the interlock contacts will make the board think the lid isn't locked. The light blinks, the motor stays dead, and nothing looks wrong.
Never immerse the motor base. Ninja manuals are explicit on this. Wipe the base with a damp cloth only, and dry it straight away.
Wait a full 24 hours before powering up if you suspect moisture. A hair dryer on a cool setting can help, but keep it at least 15cm from the plastic.
Power Surges, Outages, and Control Board Resets
A power cut mid-blend can leave the control board in a half-set state. When power returns, the board boots into a lockout and blinks.
This is more common on Auto-iQ and Foodi models with touchscreen panels. The board stores the interrupted program state and waits for a clean start.
Unplug the base for 60 seconds. That's long enough for the capacitors to discharge and the board to reset cleanly. Then plug back in and press Start.
A whole-house surge can also damage the board's logic without blowing a fuse. If the blink starts right after a storm or a brownout, that's the likely cause.
First-Use Checks After Long Storage
A blender that's been in the cupboard for a year has its own set of blink triggers. Run through these before you assume the worst.
- Stiff interlock plunger. The spring can seize from dust. Press it a few times with a finger to free it.
- Cracked gasket. Rubber dries out and splits. A cracked gasket leaks and can lift the blade assembly.
- Dust in the vents. Blow it out with compressed air before running the motor.
- Sticky buttons. Residue from old spills can make the panel register phantom presses.
Run a small batch of water first. If the light stays solid through a 10-second pulse, you're good to go.
Does a Blinking Light After Cleaning Mean the Base Is Ruined?
No. In most cases it just means the base is still wet. Let it air-dry for 24 hours in a warm room.
If the blink persists after a full dry, moisture has likely reached the control board itself. That's a repair, not a reset. Stop using the blender and get it looked at.
Model-Specific Blink Patterns: Auto-iQ, Foodi, Professional, and Nutri Ninja
Ninja's range is wide, and the blink logic isn't shared across it. Here's how the main families behave.
Auto-iQ and Intelli-Sense Light Sequences
Auto-iQ models run preset programs. The button you press lights up and pulses during the cycle.
A blinking program button usually means the cycle is paused. Press Start once and it resumes. That's not an error at all.
A fast blink that won't stop often means the vessel recognition sensor can't see the jar. Reseat the pitcher and make sure the lid is locked.
Intelli-Sense bases read the attachment you've fitted and adjust the program. If the sensor contacts are dirty, the base can't identify the vessel and locks out.
Ninja Foodi Power Blender and Power Mixer System
The Foodi Power Blender uses a smart screen rather than a single button. Blink behavior shows up as a flashing icon or a repeating prompt.
On the Power Mixer System, the base drives multiple attachments. The dough hook and the blender pitcher use different interlock paths.
If the light blinks only with one attachment, the fault is in that attachment, not the base. Swap attachments and test. That single step tells you a lot.
Foodi models also have a vessel sensor in the base collar. Residue on that sensor is a common cause of a persistent blink.
Ninja Professional, Mega Kitchen System, and Nutri Ninja
These three families are the simplest to diagnose. Use the table below to match your model to the likely cause.
| Family | Typical blink meaning | Reset method |
|---|---|---|
| Ninja Professional | Interlock not satisfied or thermal trip | Reseat, then cool 15 to 30 minutes |
| Mega Kitchen System | Bowl or pitcher not seated, or blade not clicked in | Reseat vessel, check blade spindle |
| Nutri Ninja | Cup not fully threaded onto base | Twist cup until it stops, press down |
| Ninja Fit | Cup misalignment | Re-thread cup, check gasket |
| Ninja Blast cordless | Low battery or cup not locked | Charge fully, then reseat cup |
Ninja Professional and Mega Kitchen System bases rarely use multi-color patterns. The light is usually a simple blue LED.
Nutri Ninja and Ninja Fit units don't have a lid at all. The cup is the lid. That's why a loose cup thread causes more blink complaints on these models than any other single issue.
Step-by-Step Reset Workflow for a Blinking Ninja Mixer
This is the sequence that fixes the majority of cases. Work through it in order. Don't skip steps because you think you already know the cause.
Step 1: Unplug, Cool, and Clear the Load
Pull the plug from the wall. Not the switch, the plug.
Empty the jar into a bowl and set the contents aside. If the batch is dense, split it into two smaller loads.
Set the base on a dry counter away from the stove, oven, or any heat source. Leave the lid off the jar.
Wait a full 30 minutes if the motor felt warm. Wait 10 minutes if it didn't.
Step 2: Inspect Every Interlock Point
Check these in order. One of them is usually the culprit.
- The interlock plunger at the top of the base. Press it with a finger. It should spring back smoothly.
- The base collar. Wipe out any crumbs or dried residue with a damp cloth.
- The pitcher's lock tab. Look for cracks or wear.
- The blade assembly gasket. It should sit flat with no twists.
- The blade spindle. Spin it by hand. It should turn freely.
If the plunger doesn't spring back, you've found the fault. A stuck plunger means a service call on most models.
Step 3: Follow the Model-Specific Reset
Most Ninja bases reset by unplugging. Some Foodi and Auto-iQ units have a dedicated reset sequence.
| Model family | Reset procedure |
|---|---|
| Professional / Mega Kitchen System | Unplug 60 seconds, plug back in, press power |
| Auto-iQ / Intelli-Sense | Unplug 60 seconds, reseat vessel, press the program button |
| Foodi Power Blender | Unplug 60 seconds, reseat vessel, tap the screen to wake |
| Nutri Ninja / Ninja Fit | Unplug 60 seconds, twist cup fully onto base, press Start |
| Ninja Blast cordless | Charge to full, then press and hold power for 3 seconds |
If your manual lists a specific reset, follow that. Model-specific instructions override any general advice.
Step 4: Reassemble, Plug In, and Test Safely
Put the jar on the base. Press down until it seats. Fit the lid and lock it.
Plug the cord back in. Watch the light. A solid light is good.
A blink means you haven't cleared the condition.
Run a small test batch. Use a cup of water and a handful of soft fruit. Keep it on the lowest speed.
If the blender runs clean for 15 seconds, try a slightly bigger load. If it blinks again, stop and move to the electrical fault section.
When the Blinking Light Points to a Real Electrical Fault
This is the smaller category, but it's the one that matters most for safety. If you see any of the signs below, stop using the blender.
Burned Smell, Sparking, or Tripped Breaker
A burned smell is a hard stop. So is any spark, pop, or flash from the base.
If the breaker trips the moment you plug the blender in, that's a short circuit. Don't reset the breaker and try again. Unplug the blender and get it checked.
A GFCI that trips repeatedly points to a ground fault. Moisture inside the base or damaged wiring are the usual causes.
Per U.S. Consumer Product Safety Commission guidance, any appliance showing these signs should be taken out of service. You can check the CPSC recall database to see if your model has a known fault.
Damaged Cord, Plug, or Control Panel
Look for these specific faults. Each one points to a different repair.
- A cord that's warm to the touch after a short run. That's resistance, not normal heat.
- Discolored or scorched prongs. Replace the plug or the cord.
- A control panel that flickers or responds to buttons you didn't press.
- A light that blinks with the blender unplugged. That's a capacitor issue, and it's rare. It needs service.
- A base that hums but won't spin. The motor is trying to run against a locked rotor.
Cord replacement isn't a DIY job on most Ninja bases. The cord is sealed into the housing and the warranty is void if you open it.
Voltage Mismatch and Converter Problems
Running a 120V Ninja on a 240V supply will destroy the board and motor in seconds. There's no reset for that.
A 240V model on a 120V supply behaves differently. It may power on and blink without ever running. The motor never gets enough voltage to start.
Travel converters are the trap here. A 1500W blender needs a converter rated well above 1500W. A cheap 500W converter will trip, overheat, or fail.
Check the rating label under the base. It lists the exact voltage, frequency, and wattage. Match that to your supply.
If they don't match, don't plug it in.
Common Mistakes That Keep the Power Light Blinking
Most repeat blink problems come down to user error, not a broken machine. Here are the ones we see most often in owner reports.
Forcing the Lid or Bypassing the Interlock
Never tape, wedge, or jam the interlock plunger down. That defeats the exact safety feature that stops the blade spinning with the lid off.
If the lid won't lock without force, something is wrong. A warped lid, a cracked tab, or a misaligned gasket are all common causes.
Forcing the lid also wears the lock tab. Over time it stops engaging at all. Then you're replacing the lid, not just reseating it.
Overfilling or Using the Wrong Blade
Filling above the max line is the fastest way to trip the thermal cutout. There's no headroom for the motor to recover.
Using the wrong blade causes the same problem from the other direction. A dough blade in a smoothie jar won't circulate the load. The motor strains and the light blinks.
Check the max line. Check the blade type against your manual. Then check the liquid level.
Thick blends need more liquid than thin ones.
Resetting Too Soon or Ignoring the Manual
Pressing Start every 30 seconds while the thermal protector is still open does two things. It wastes your time. And it can shorten the protector's life.
Wait the full cool-down. Then wait another 5 minutes. A protector that trips at 100°C doesn't reset at 90°C.
The other big mistake is skipping the manual. Ninja publishes model-specific guidance on its support pages. A 60-second read often saves an hour of guessing.
If your model number isn't on the rating label, look inside the lid or on the base underside. Every Ninja blender has one. Without it, you're troubleshooting blind.
Test With a Small Batch: How to Confirm It's Fixed
Don't jump straight back to a full jar of frozen fruit. That's how you turn a five-minute fix into a repeat failure. Prove the machine works with a light load first.
Start With Soft Ingredients and Low Speed
Use a cup of water and a handful of soft fruit. A banana or a few strawberries are ideal.
Set the blender to its lowest speed or the gentlest Auto-iQ program. Press Start and let it run for 10 to 15 seconds.
Watch the light, not the blades. A steady light through the full run is your pass. A blink at any point means the condition is still live.
What a Good Test Run Looks Like
You're checking four things during the test:
- The light stays solid for the whole cycle.
- The motor sound is even, with no surging or stuttering.
- The blade spins freely, with no grinding or scraping.
- No smell, no heat, and no vibration that walks the base across the counter.
If all four check out, increase the load gradually. Add ice or frozen fruit in small amounts over the next few blends.
When a Second Failure Means Stop Using It
One blink after a fix can be a fluke. A blocked plunger that moved back into place, for example. Two blinks in a row on a light load is a pattern, not a fluke.
Stop blending and unplug the base if any of these happen:
- The light blinks again within 10 seconds of starting a light load.
- The base gets hot on a 15-second run.
- You smell anything electrical.
- The breaker or GFCI trips during the test.
At that point you're past home troubleshooting. Move to the warranty and support section below.
Warranty, Replacement Parts, and Contacting Ninja Support
If the fault keeps returning, warranty is your best path. Ninja's standard coverage is more generous than most people assume, but the clock starts on the purchase date, not the first blink.
Model Number, Serial Number, and Proof of Purchase
Support will ask for three things. Have them ready before you call or open a ticket.
- Model number. Printed on the rating label under the base or on the back of the unit.
- Serial number. Usually on the same label, sometimes inside the lid area on older models.
- Proof of purchase. A receipt, order confirmation, or bank statement showing the date and retailer.
Ninja's warranty typically runs 1 year from the purchase date on standard blender models. Some Foodi and higher-tier units carry longer terms. Manufacturer specs confirm the exact period varies by model and region.
Register your blender on Ninja's official site soon after purchase. Registration doesn't extend the warranty, but it does make claims faster when something goes wrong.
Warranty Coverage vs Out-of-Warranty Repair
Know what's covered before you get your hopes up. The distinction matters.
| Issue | Usually covered | Usually not covered |
|---|---|---|
| Motor failure in normal use | Yes | No |
| Thermal cutout that won't reset | Yes | No |
| Control board fault | Yes | No |
| Cracked pitcher from a drop | No | No |
| Worn blade assembly | Sometimes | Often |
| Damage from wrong voltage | No | No |
| Damage from immersion in water | No | No |
| Normal cosmetic wear | No | No |
A blinking light caused by a genuine internal fault is usually a warranty case. A blinking light caused by a cracked lid or a warped gasket is not. Those are user-replaceable parts.
Replacement Base, Jar, Blade, and Service Options
Ninja sells replacement parts through its official site and through authorised retailers. Aggregate listings suggest the following rough price bands as of 2026:
- Replacement pitcher or jar: $30 to $60 depending on capacity and model.
- Replacement blade assembly: $20 to $40.
- Replacement lid: $15 to $30.
- Replacement motor base: $70 to $150, and often close to the cost of a new unit.
- Gasket and seal kits: $8 to $15.
A new base is rarely worth it if the blender is out of warranty. You're paying most of the price of a new machine for one part. Replace the whole unit instead.
If you're in the EU or UK, your statutory rights sit on top of the manufacturer warranty. Under the Consumer Rights Act 2015 in the UK, goods must be of satisfactory quality and fit for purpose. That protection can extend well past the first year.
Safety Warnings: Voltage, Water, Blades, and Interlock Bypass
This section matters more than any reset trick on this page. A blender has a spinning blade and a high-current motor in the same housing. Get it wrong and you're risking a shock, a cut, or a fire.
UL, ETL, CE, and UKCA Electrical Safety
Look for a certification mark on the rating label. It tells you the appliance was tested to a recognised standard.
- UL 982 covers household motor-operated food-preparing appliances in North America. It's the standard behind the lid interlock and thermal cutout on your Ninja.
- ETL is an equivalent North American mark issued by Intertek.
- CE is the European conformity mark for health, safety, and environmental protection.
- UKCA is the post-Brexit UK equivalent of CE.
If your blender has no certification mark at all, treat it with suspicion. That's common with grey-market imports and cheap marketplace knockoffs.
GFCI, Cord, and Wet-Hand Precautions
Kitchen outlets within 6 feet of a sink should be GFCI-protected. That's a code requirement in most US jurisdictions. If yours isn't, get an electrician to fit one.
Keep these rules in mind every time you use the blender:
- Never handle the plug with wet hands. Water plus 120V is a shock risk.
- Never immerse the motor base in water or put it in a dishwasher. Wipe it only.
- Keep the cord away from the sink, the hob, and any hot surface.
- Unplug before cleaning the base or the blade assembly.
- Don't run the cord under a rug or across a walkway where it can be damaged.
Blade Handling and Child Safety
The blades are the sharpest thing in your kitchen. Treat them like you'd treat a chef's knife.
- Never touch the blade edge with bare fingers, even when it looks dull.
- Handle the blade assembly by the hub, not the blades.
- Wash blades carefully with a long-handled brush, not a sponge.
- Store blades out of reach of children, ideally in a locked cupboard.
- Keep the blender unplugged when it's not in use if you have small kids.
Never bypass the interlock. Taping the plunger down, wedging the lid, or running the blender with the lid off defeats the one safety feature that stops the blade spinning near your hand. It also voids the warranty on every Ninja model we've reviewed.
If you've had a shock, a burn, or a deep cut from the blender, seek medical attention first. Then report the incident to the manufacturer and, in the US, to the CPSC.
FAQs About Ninja Mixer Blinking Power Lights
Why does the light blink and then stop?
The light stops blinking once the condition clears. A thermal cutout resets itself after cooling, so the blink ends on its own. A lid or jar issue clears the moment you reseat the vessel.
If the blink ends without you doing anything, cooling was the cause.
Can I still use the mixer if it blinks once?
No. A single blink still means the safety system has locked out the motor. Running it in that state won't work, and forcing it can damage the control board.
Reseat the vessel, check the load, and let it cool if the base feels warm.
Does unplugging it reset the Ninja mixer?
Yes, in most cases. Unplugging for 60 seconds discharges the control board and clears a stuck program state. It won't fix a thermal cutout, which needs 15 to 30 minutes to cool.
It also won't fix a lid or jar that isn't seated properly.
What if the blinking starts after cleaning?
Moisture is the likely cause. Water in the interlock recess or around the control panel seam can bridge the contacts and trigger a lockout. Dry the base thoroughly and leave it 24 hours in a warm room before trying again.
Is a blinking power light covered by warranty?
It depends on the cause. An internal fault like a failed control board or a motor issue is usually covered. A cracked lid, a warped gasket, or damage from wrong voltage isn't.
Have your model number, serial number, and proof of purchase ready when you contact support.
Can I use a travel converter with a Ninja blender?
Only if the converter is rated well above the blender's wattage. A 1500W blender needs a converter rated at 1800W or higher. A cheap 500W converter will overheat or fail.
Better still, buy a model built for your local voltage.
Decision Guide: Reset It, Repair It, or Replace It?
You've checked the lid, the jar, the load, and the heat. You've unplugged, cooled, and reseated. Now you need a clear call.
Use this section as your final decision point.
Reset at Home If the Fix Is Lid, Load, or Heat
Reset it yourself when the blink traces back to one of these three:
- The lid or cup wasn't locked. Reseat and retest.
- The jar was overloaded. Blend in smaller batches.
- The motor was hot. Cool for 15 to 30 minutes and try a light load.
- Moisture got in after cleaning. Dry fully for 24 hours.
These four cover the large majority of blinking-light cases. If the blender runs clean after a light test batch, you're done.
Repair or Claim Warranty If the Fault Repeats
Escalate if the blink returns under normal use. That means the fault is internal, not user error.
Claim warranty if the unit is within its coverage period and the fault isn't from misuse. Have your documents ready and expect to ship the unit or take it to an authorised service point.
Go for a paid repair only if the unit is high-end, out of warranty, and the fault is isolated. A control board replacement on a premium Foodi model can still make sense. On a basic 900W Professional, it usually doesn't.
Replace the Base When Repair Costs Exceed Value
Replace the whole blender when the numbers don't work. A replacement base often costs $70 to $150. That's close to the price of a new mid-range unit with a fresh warranty.
Use this quick rule:
| Situation | Best move |
|---|---|
| Blink fixed by reseating or cooling | Reset at home |
| Blink returns on a light load | Claim warranty if covered |
| Out of warranty, base fault | Replace the unit |
| Out of warranty, lid or jar fault | Buy the replacement part |
| Burned smell, spark, or shock | Stop using it and replace |
Safety always wins the tiebreak. If the base has ever sparked, smoked, or shocked you, don't repair it and don't pass it on. Unplug it, retire it, and dispose of it through your local WEEE or e-waste channel.
No reset trick is worth a house fire.