The Daikin AC not working light blinking issue is one of the most common HVAC callouts homeowners run into. Your indoor unit is broadcasting a fault signal through that LED, and how it blinks narrows down the cause fast. Read it correctly and you'll know whether to reset a breaker or pick up the phone.
Daikin split systems flash the green operation LED in repeating cycles, and each cycle maps to a stored fault code. Per Daikin's published service documentation, codes like A5 (freeze protection), U4 (indoor-outdoor communication fault), and U0 (refrigerant shortage) account for a large share of residential callouts. Most boards hold the last four to five fault codes in memory, so you can often retrieve the history even after a power cycle.
Here's how to read what your system is telling you, step by step.
Quick Answer
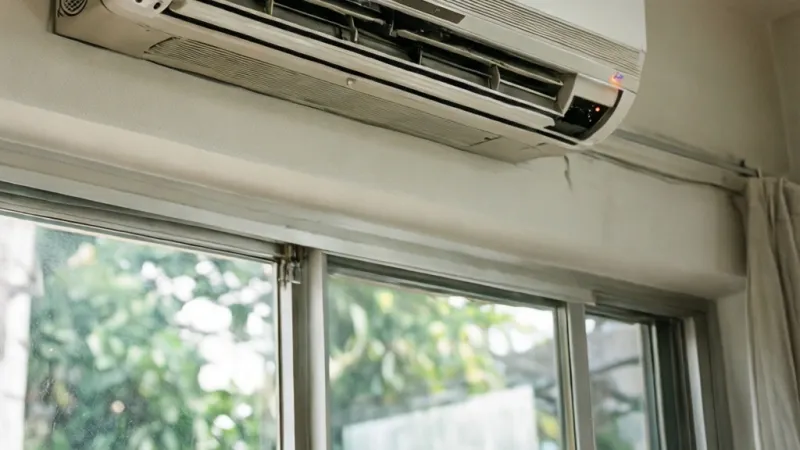
A blinking light on your Daikin AC signals a stored fault code. Count the blinks in each repeating cycle. Match that number to your model's error chart.
A 10-minute breaker reset clears power-glitch faults. If the blink returns, call a technician.
Why Your Daikin AC Light Is Blinking and What It's Really Telling You
A blinking LED on a Daikin indoor unit isn't a malfunction light in the ordinary sense. It's a diagnostic output. The system detected something outside its normal operating window, logged a fault code, and started flashing the light so you'd notice.
Daikin splits and multi-splits use the indoor LED, the remote controller display, and the outdoor PCB together as a fault-reporting chain. The indoor light gets your attention. The remote or wired controller gives you the actual alphanumeric code.
The outdoor board confirms which side of the system failed.
That's why "the light is blinking" alone doesn't tell you much. You need two more pieces of information: the blink pattern, and what the rest of the unit is doing while it blinks.
| What you see | What it usually means | First action |
|---|---|---|
| Green LED blinking in cycles | Active fault code stored | Count blinks, retrieve code from remote |
| Green LED solid, no cooling | Fan running, compressor idle | Check mode and setpoint |
| Orange timer LED blinking slowly | Timer active or defrost cycle | Wait 10 minutes, recheck |
| No LED, unit dead | No power at indoor unit | Check breaker and isolator |
| Red LED on outdoor PCB | Outdoor-side fault | Read 7-segment display |
Why a Reset Sometimes Seems to Fix It
A breaker reset clears fault memory on some models and restarts the control sequence. If the fault was a one-off power glitch or a voltage sag, the system runs normally afterward.
If the underlying cause is still there, the light blinks again. Usually within minutes. That's your signal that the reset was cosmetic, not a repair.
What the Blink Is Not
A blinking light is not automatically a dead compressor or a refrigerant leak. In our review of Daikin service documentation, most blink-code callouts trace back to clogged filters, drifting thermistors, or communication wiring. Those are far cheaper fixes than a compressor swap.
The other thing a blinking light is not: model-agnostic. A code that means "indoor thermistor fault" on one Daikin series can map to something different on another. Always check the chart for your exact model number before assuming anything.
How Daikin's Blink and Error Code System Actually Works
Daikin uses a layered diagnostic system. Understanding the layers saves you from chasing the wrong one.
Layer one is the LED. Layer two is the remote controller code. Layer three is the outdoor PCB, which on many systems shows a two-digit fault on a 7-segment display.
Skipping layer two and jumping straight to "it's probably the compressor" is how people waste money.
Green Operation LED vs Orange Timer LED vs Outdoor 7-Segment Display
Each indicator means something different. Confusing them is one of the most common homeowner mistakes.
| Indicator | Colour | What it reports |
|---|---|---|
| Indoor operation LED | Green | Power state and active faults |
| Indoor timer LED | Orange | Timer function or defrost cycle |
| Outdoor PCB display | Red / 7-segment | Fault code on the outdoor side |
| Wired controller screen | LCD | Full alphanumeric fault code |
| Daikin One thermostat | LCD / app | Fault alert with code and history |
The green operation LED is your primary fault indicator. When it blinks, the indoor control board has detected an abnormality somewhere in the system. It doesn't yet tell you where.
The orange timer LED usually relates to the timer function or the defrost cycle. A slow orange blink during heating season is often normal. If it blinks while cooling and the timer is off, treat it as a fault.
The outdoor PCB is the technician's view. Many Daikin outdoor units have a 7-segment display that shows the fault code directly. That's the fastest read on a real fault, and it's the one a service tech will check first.
Why Blink Count Matters More Than the Blink Itself
On models that use blink count, the number of flashes in each repeating cycle points to a code family. One blink, three blinks, five blinks, each maps to a different fault group.
But here's the catch. Not every Daikin model encodes the fault in the blink count. On many residential splits, the blink just says "there's a fault, go read the remote." The remote is where the actual code lives.
So the workflow is: note the blink pattern, retrieve the stored code from the remote or PCB, then match that code to your model's chart. Skip the middle step and you'll guess wrong more often than not.
How Daikin Stores Fault History
Most Daikin indoor and outdoor boards keep the last four to five fault codes in memory. On many models that memory survives a power cycle.
That matters for intermittent faults. A unit that blinks once, runs fine for a week, then blinks again is logging the same code each time. A technician can pull the history and see the pattern instead of waiting around for a live failure.
If you're troubleshooting over several days, write down the code every time it appears. The repeats are more useful than a single reading.
Where to Read the Code: Remote, Wired Controller, or Outdoor PCB
There are three places to read a Daikin fault code. Which one you use depends on your controller type and how comfortable you are opening panels.
| Controller type | How to retrieve | What you get |
|---|---|---|
| ARC-series wireless remote | Hold CANCEL ~5 seconds | Stored code on remote LCD |
| Wired controller (BRC series) | Service menu or fault screen | Full code plus timestamp |
| Outdoor PCB | Power on, watch 7-segment | Live or stored outdoor code |
| Daikin One thermostat | Alert menu or app | Code plus diagnostic history |
Retrieving Stored Codes on ARC-Series Remotes
ARC-series wireless remotes are the most common on Daikin residential splits. The retrieval procedure is simple and worth memorizing.
- Point the remote at the indoor unit.
- Press and hold the CANCEL button for about 5 seconds.
- Watch the remote display. The stored code appears as a letter-number pair.
- Write the code down before it clears.
- Press CANCEL again to exit diagnostic mode.
If nothing shows, the remote may be out of range, the batteries may be weak, or your model may not support remote code retrieval. In that case, move to the wired controller or the outdoor PCB.
Reading the Outdoor PCB Error Memory
For technicians and confident DIY-ers, the outdoor PCB is the ground truth. You'll need to remove the service panel, which means powering the unit down first.
- Switch off the breaker and confirm with a voltage tester.
- Wait at least 5 minutes for capacitors to discharge.
- Remove the outdoor service panel.
- Locate the 7-segment display or LED cluster on the main PCB.
- Power the unit back on and watch the display during startup.
- Record the two-digit code shown.
- Some boards cycle through history automatically. Others need a button press.
Do not touch the PCB while power is live. Do not short test points with a screwdriver. If you're not comfortable working around mains voltage and charged capacitors, stop here and call a licensed tech.
Wired Controllers and Daikin One Thermostats
Wired controllers like the BRC series and the Daikin One smart thermostat display fault codes directly on screen. On the Daikin One, the code usually appears under a service or alert menu.
As of 2026, Daikin One and Daikin One+ thermostats also push fault alerts to the Daikin Comfort Control app. That's the easiest path if your system is paired. You'll get the code without touching a panel.
The Two Variables That Decide Everything: Blink Pattern and Unit Behaviour
Two pieces of information determine your next move. The blink pattern tells you which fault family you're in. The unit's behaviour tells you how urgent it is.
Combine them and you get a decision, not a guess.
| Blink pattern | Unit behaviour | Likely branch | Next step |
|---|---|---|---|
| Any blink | Completely dead, no fan | Power or PCB | Check breaker and isolator |
| Any blink | Fan runs, no cooling | Refrigerant or compressor | Retrieve code, call tech |
| Any blink | Breaker trips repeatedly | Electrical fault | Leave breaker off, call tech |
| Slow orange blink | Heating, fan paused | Defrost cycle | Wait 10 minutes |
| Fast green blink | Fan runs briefly then stops | Sensor or comms | Retrieve code from remote |
If the Unit Is Completely Dead
No light, no fan, no sound. That points to a power-side problem, not a control fault.
Check the breaker first. Check the isolator switch next. Then check whether the remote is set to a mode that keeps the unit off.
If power is confirmed at the indoor unit and nothing happens, the indoor PCB or the power supply circuit is the likely culprit.
If the Fan Runs but There's No Cooling
This is the classic blinking-light, warm-air scenario. The indoor fan works, the compressor doesn't, or refrigerant isn't moving.
Common codes here are U0 (refrigerant shortage), E3 (high pressure), E4 (low pressure), and E5 (compressor overload). None of those are DIY fixes. Call a technician with EPA Section 608 certification.
If the Breaker Trips Repeatedly
Repeated tripping is a hard stop. Do not keep resetting the breaker.
A tripping breaker points to a short, a failed capacitor, a failing compressor, or a wiring fault. Each reset pushes current through a fault that may be getting worse. Leave the breaker off and get a technician out.
If the Blink Is Slow and Orange
Slow orange blinking during heating season is usually the defrost cycle. The outdoor coil is thawing, and the indoor fan pauses or slows. It should clear within 3 to 10 minutes.
If it blinks orange during cooling, check your timer settings. If the timer is off and it still blinks orange, treat it as a fault and retrieve the code.
Branch 1: The Unit Is Completely Dead, No Light at All
If your Daikin indoor unit shows no light, no fan, and no sound, you're not in a fault-code situation yet. You're in a power situation. The system can't report a fault because it isn't running at all.
Start at the breaker. Find the circuit feeding the indoor unit and the outdoor unit. Many installs use a dedicated double-pole breaker for the outdoor side and a separate feed for the indoor.
One can trip without the other.
Then check the isolator switch. Daikin outdoor units typically have a weatherproof isolator within sight of the unit. If that switch is off, the indoor unit may still have power while the outdoor side stays dark.
Some systems won't start until both sides see voltage.
If the Breaker Is On and the Unit Is Still Dead
Work through these in order. Each step rules out one layer before you spend money on parts.
- Confirm the remote is set to a live mode (COOL or HEAT, not FAN or OFF).
- Check the indoor unit's power LED. No LED means no low-voltage supply at the board.
- Test the indoor terminal block for line voltage. You should see 208 to 230 V in North America or 230 V in the UK and EU.
- Inspect the indoor PCB fuse for continuity. A blown fuse points to a downstream short.
- Check the varistor. A scorched or cracked varistor usually means a voltage spike took out the board.
- Look for rodent damage on the interconnecting cable between indoor and outdoor.
If line voltage is present but the board is silent, the indoor PCB is the likely failure. If line voltage is missing, the problem is upstream: breaker, isolator, wiring, or a loose terminal.
When to Stop and Call
Stop immediately if you smell burning, see scorch marks, or find melted insulation. Those are fire-risk indicators, not diagnostic puzzles.
Do not replace a PCB on a hunch. A failed PCB is often a symptom, not the cause. If a compressor, fan motor, or shorted capacitor is pulling too much current, a fresh board will fail the same way.
Lockout and tagout matter here. Power the unit down at the breaker. Confirm dead with a voltage tester.
Capacitors on the outdoor board can hold a dangerous charge for several minutes after shutdown, so wait at least five minutes before opening any panel.
Branch 2: Light Blinks but the Indoor Fan Still Runs
If the indoor fan spins but the light blinks, you're looking at a control or sensor fault rather than a power fault. The board is alive and reporting. That's good news, because the system is telling you where to look.
The most common culprits in this branch are clogged filters, a drifting or open thermistor, and indoor-outdoor communication faults. All three are cheaper to fix than a compressor.
Start With the Free Checks
Before you retrieve codes, do the two-minute visual pass. It clears a lot of faults on its own.
- Pull the filters and hold them up to a light. If you can't see through them, clean or replace them.
- Check the indoor coil for ice. A frosted coil points to airflow restriction or low refrigerant.
- Look at the outdoor unit. Is the fan spinning? Is the coil blocked with leaves, grass, or lint?
- Confirm the setpoint is actually below room temperature in cooling mode.
If the coil is iced over, switch the unit to fan-only mode and let it thaw. Don't chip at the ice. You'll bend fins and make things worse.
If the Filter Was Clean and the Coil Was Clear
Now retrieve the stored code from your remote. Hold CANCEL for about five seconds on ARC-series controllers and note the letter-number pair that appears.
| Code | Likely meaning | If/then action |
|---|---|---|
| A1 | Indoor PCB or room thermistor fault | Test the thermistor against the manual's chart |
| A5 | Freeze protection or low refrigerant | Check airflow first, then call a tech |
| C4 | Indoor heat exchanger thermistor fault | Test thermistor, replace if open |
| C5 | Indoor heat exchanger thermistor (secondary) | Same as C4 |
| C9 | Suction pipe thermistor fault | Outdoor-side check |
| U4 | Indoor-outdoor communication fault | Inspect S1/S2/S3 wiring and terminals |
| UA | Installation mismatch or capacity fault | Check indoor/outdoor model pairing |
If the code points to a thermistor, the test is straightforward for a tech. Disconnect the sensor and measure resistance. At 25 °C, most Daikin thermistors read close to 10 kΩ.
A reading of zero or infinite means the sensor is dead.
If the code is U4, look at the interconnecting cable. Loose terminals, corrosion, or a nicked conductor can break communication without tripping the breaker. Tighten terminals and inspect for green corrosion, especially in coastal installs.
If Nothing You Do Clears the Blink
Then the fault is real and repeatable. Note the code, note how long it takes to reappear after a reset, and hand that information to a technician. A code plus a timeline is worth more than a vague "it's blinking."
Branch 3: Fan Runs, No Cooling: Compressor, Refrigerant, or Sensor Fault
If the indoor fan runs and the air stays warm, the compressor isn't running or refrigerant isn't moving. This branch has the highest stakes, because two of the three possibilities can damage the compressor if you keep running the unit.
The three main suspects are a compressor fault, a refrigerant shortage, and a sensor or pressure switch fault. Codes E3, E4, E5, E6, U0, and L5 all live in this branch.
What Each Code Points To
| Code | Meaning | Severity |
|---|---|---|
| U0 | Refrigerant shortage | High. Leak likely |
| E3 | High pressure abnormality | High. Blocked coil or overcharge |
| E4 | Low pressure abnormality | High. Leak or restriction |
| E5 | Compressor overload | High. Compressor stress |
| E6 | Compressor startup lock | High. Possible seized compressor |
| L5 | Inverter overcurrent | High. Power module or compressor |
| H6 | Position detection fault | High. Compressor or inverter board |
| H9 | Outdoor air thermistor fault | Moderate. Sensor fix |
If You See U0, E4, or E3
Stop running the unit. A refrigerant shortage means the compressor is running without enough cooling and lubrication. Keep it running and you risk seizing it, which turns a leak repair into a full system replacement.
Refrigerant work is not a DIY job. Under EPA Section 608, handling refrigerant in the US requires certification. In the UK and EU, F-Gas regulations apply.
Venting refrigerant to atmosphere is illegal in most jurisdictions and carries fines.
Call a technician and tell them the code. If it's U0 or E4, mention that you suspect a leak so they bring a leak detector and gauges on the first visit.
If You See E5, E6, or L5
These point to the compressor or its drive electronics. A technician will check compressor amp draw against the nameplate RLA, test the inverter module, and confirm whether the compressor starts at all.
An E6 startup lock can sometimes be a failed capacitor rather than a dead compressor. That's a cheap fix if caught early. Running the unit through repeated failed start attempts is what turns a capacitor job into a compressor job.
If the Code Points to a Sensor
H9, C4, and C5 are the friendlier outcomes here. A thermistor that reads open or shorted is a replaceable part, and the repair is usually quick. If the sensor reads correctly but the code persists, the issue moves to the board or the wiring harness.
Why "Just Run It Anyway" Is the Wrong Move
A system that's short on refrigerant or overloading its compressor will get worse, not stabilize. Every hour of runtime on a U0 or E5 fault adds wear to the most expensive component in the system. Shut it down, pull the code, and get it looked at.
Branch 4: Breaker Trips, Resets, Then Trips Again
If your breaker trips, you reset it, and it trips again, treat that as a hard stop. Do not keep resetting it. Each reset pushes current through a fault that's likely getting worse, and repeated trips can damage the compressor or start a fire.
A breaker that trips immediately points to a dead short. A breaker that trips after a few minutes points to an overload or a thermal issue. Both need professional diagnosis.
What Causes Repeat Tripping
| Cause | Timing | Typical indicator |
|---|---|---|
| Shorted compressor winding | Trips instantly | Very low resistance to ground |
| Failed run capacitor | Trips after seconds to minutes | Swollen or leaking capacitor |
| Short in interconnecting cable | Trips instantly | Damaged insulation, rodent damage |
| Faulty outdoor PCB | Variable | Burnt smell, visible damage |
| Undersized breaker | Trips under heavy load | Trips only during peak heat |
| Loose terminal | Intermittent | Heat marks at the terminal block |
If You Smell Burning or See Smoke
Get away from the unit and cut power at the main panel. Don't open the outdoor unit. Don't touch the breaker.
Burning smells near HVAC equipment mean an electrical fire risk, and that's a call for a licensed electrician or HVAC tech, not a homeowner.
If the Trip Is Intermittent
Intermittent trips are the hardest to diagnose because they don't reproduce on demand. Keep a log. Note the time of day, outdoor temperature, and how long the unit ran before tripping.
An intermittent trip during peak afternoon heat often points to a marginal breaker or a compressor drawing high amps as it ages. An intermittent trip during startup points to a capacitor or a compressor that's beginning to fail.
What Not to Do
Do not swap in a larger breaker. The breaker is sized to protect the wiring and the equipment. Oversizing it removes the protection and creates a genuine fire hazard.
Do not bypass the breaker to "test" the unit. That's how house fires start.
Do not reset the breaker more than once. If it trips twice, stop and call a tech.
Branch 5: Is That Blink Just Defrost Mode?
If the blink is slow and orange during heating season, it's probably the defrost cycle, not a fault. Defrost is normal. The outdoor coil collects frost during heating, and the system periodically reverses to melt it off.
During defrost, the indoor fan slows or stops, and the outdoor unit may steam or drip. The cycle typically runs 3 to 10 minutes, then the system returns to normal heating.
How to Tell Defrost From a Fault
| Sign | Defrost (normal) | Fault |
|---|---|---|
| LED colour | Orange, slow blink | Green, fast blink |
| Season | Heating mode | Any mode |
| Indoor fan | Slowed or paused | Running or stopped unpredictably |
| Duration | 3 to 10 minutes | Persistent |
| Sound | Whoosh or gurgle at reversal | Grinding, buzzing, or silence |
| Clears on its own | Yes | No |
If the blink clears within 10 minutes and the unit resumes heating, it was defrost. Nothing to fix.
If the Orange Blink Persists
A defrost cycle that runs longer than 15 minutes, repeats constantly, or leaves the unit stuck in defrost points to a real problem. Common causes are a faulty outdoor coil thermistor, a blocked outdoor coil, or a reversing valve issue.
Check the outdoor coil first. If it's packed with leaves, cottonwood fluff, or grass clippings, airflow drops and defrost logic gets confused. A coil cleaning often fixes persistent defrost faults.
If the coil is clean and the orange blink still won't clear, retrieve the code. Outdoor thermistor faults (H9 and related codes) are common here and are replaceable parts.
What If It Blinks Orange in Cooling Mode?
That's not defrost. The timer LED behaves differently in cooling, and an orange blink with the timer off means a fault. Retrieve the code from the remote or wired controller and treat it like any other fault.
Cold-Climate Considerations
Heat pumps in cold climates run defrost more often. That's expected. If you're in a region that regularly drops below freezing, expect several defrost cycles per hour during the coldest days.
A heat pump that spends more time defrosting than heating may be low on refrigerant, oversized for the load, or suffering from a failing defrost sensor. That's a technician conversation, not a homeowner fix.
Decoding Your Code: A1, A5, C4, E7, U0, U4 and the Rest
Once you've pulled the code from your remote or the outdoor PCB, you need to know what it means. Daikin uses a letter-number system where the letter points to the fault family and the number narrows it down. A quick rule of thumb: codes starting with A or C are usually indoor-side sensor or board faults.
Codes starting with E, F, or H are outdoor-side faults. Codes starting with U are system-level faults, often communication or refrigerant related.
Here's the full picture, grouped by what each code family actually tells you.
Sensor and Thermistor Codes
Sensor codes are the friendliest ones on the list. A thermistor is a small temperature-sensing resistor. When one drifts or fails open, the board loses its temperature reference and throws a fault.
| Code | Sensor involved | Typical symptom |
|---|---|---|
| A1 | Indoor room thermistor or indoor PCB | Unit runs erratically or won't start |
| C4 | Indoor heat exchanger thermistor | Freeze protection triggers early |
| C5 | Indoor heat exchanger thermistor (secondary) | Same family as C4 |
| C9 | Suction pipe thermistor | Poor cooling, compressor cycling |
| H9 | Outdoor air thermistor | Defrost logic fails, heating suffers |
| J3 | Discharge pipe thermistor | High discharge temp, compressor protection |
| J6 | Outdoor heat exchanger thermistor | Defrost or pressure faults |
Testing a thermistor is simple for a technician. Disconnect it, measure resistance at a known temperature, and compare to the chart in the service manual. A reading of zero ohms or infinite resistance means the sensor is dead.
A reading that's off by 20 percent or more usually means drift, which causes subtle faults that don't always trigger a code.
If the sensor tests fine but the code persists, the problem moves to the wiring harness or the PCB itself. Corroded connector pins are a common cause in humid or coastal installs.
Communication and Power Codes
These codes mean the indoor and outdoor units aren't talking properly, or power isn't reaching the right place. They're common after storms, brownouts, and rushed installs.
| Code | Meaning | First check |
|---|---|---|
| U4 | Indoor-outdoor communication fault | S1, S2, S3 terminal wiring |
| U2 | DC voltage or power supply abnormality | Supply voltage, outdoor PCB |
| UA | Indoor-outdoor model mismatch | Confirm paired model numbers |
| UF | Installation mismatch, piping or wiring | Confirm pipe sizes and cable spec |
| UH | System or refrigerant address fault | Multi-split addressing setup |
| P4 | Outdoor unit sensor or PCB fault | Outdoor board, thermistor loop |
U4 is the one you'll see most often. On a typical Daikin split, three conductors run between the indoor and outdoor units, labelled S1, S2, and S3. S1 and S2 carry power, and S3 carries the communication signal.
A loose screw terminal on S3, a nicked conductor, or green corrosion at the connector will break communication without ever tripping the breaker.
If you're comfortable with basic electrical checks, power the unit down and inspect those terminals. Tighten any loose screws and look for discoloration. If the terminals look clean and tight and U4 still appears, the fault is likely on one of the two PCBs.
UA and UF are different. Those usually appear right after a new install or after a unit swap. They mean the indoor and outdoor units don't match in capacity or type, or the piping and wiring don't meet spec.
That's a conversation with whoever did the install.
Refrigerant and Pressure Codes
These are the codes that matter most for your wallet. They point to refrigerant loss, pressure problems, or compressor stress, and they get expensive fast if you ignore them.
| Code | Meaning | Urgency |
|---|---|---|
| U0 | Refrigerant shortage | High, leak likely |
| E3 | High pressure abnormality | High, blocked coil or overcharge |
| E4 | Low pressure abnormality | High, leak or restriction |
| E5 | Compressor overload | High, compressor stress |
| E6 | Compressor startup lock | High, possible seized compressor |
| E7 | Outdoor fan motor fault | Moderate, fan or board |
| F3 | Discharge pipe overheat | High, refrigerant or compressor issue |
| L5 | Inverter overcurrent | High, power module or compressor |
| H6 | Position detection fault | High, compressor or inverter board |
U0 is the code that should make you stop running the unit immediately. It means the system has detected low refrigerant, which almost always means a leak somewhere in the circuit. Running a compressor with insufficient refrigerant charge removes the cooling and lubrication it needs.
A $400 leak repair can turn into a $2,500 compressor replacement if you keep running it.
E3 and E4 are pressure faults. E3 points to high pressure, often from a blocked outdoor coil, a failed outdoor fan, or an overcharged system. E4 points to low pressure, which overlaps heavily with U0.
Both need gauges and a certified technician.
E5, E6, H6, and L5 are compressor and inverter codes. Sometimes the fix is a capacitor or the inverter board. Sometimes it's the compressor itself.
Either way, this is technician territory.
E7 is the exception. It points to the outdoor fan motor, which is a replaceable part and rarely damages anything else. If your outdoor fan isn't spinning and you see E7, the fan motor or its capacitor is the likely culprit.
Safe DIY Checks: Reset, Filters, Coils, and Outdoor Airflow
Some checks are genuinely safe for a homeowner. Others are not. The line is simple.
If it involves opening a panel, touching a capacitor, or handling refrigerant, it's a technician job. Everything else you can do yourself.
Here's the safe list, in the order that makes sense.
- Confirm the remote is in the right mode and the setpoint is correct.
- Switch the breaker off for 5 to 10 minutes, then back on.
- Clean or replace the indoor filters.
- Inspect the indoor coil for ice and let it thaw in fan-only mode if needed.
- Clear debris from around the outdoor unit and check the coil fins.
- Verify the outdoor fan spins when the unit runs.
- Retrieve and record the fault code.
That sequence takes maybe 30 minutes and clears a good share of blink-code complaints. Clogged filters alone cause a lot of A5 freeze-protection faults.
How to Reset a Daikin AC Properly
The reset people get wrong most often is the impatient one. Flip the breaker off and immediately back on, and the board never fully clears its state. Capacitors are still charged, and the fault memory can survive.
Do this instead. Switch the breaker off at the panel. Wait a full 5 to 10 minutes.
Then switch it back on and let the system run through its startup sequence without touching the remote. Give it a few minutes to settle before you judge whether the fault returned.
If the light blinks again within 10 minutes, the fault is real and repeatable. That's useful information, not a failure. Write down the code and how long it took to come back.
Cleaning Filters and Coils the Right Way
Filters get pulled, rinsed under lukewarm water, and left to dry fully before going back in. Damp filters encourage mold and restrict airflow. If your filters are the disposable type, replace them rather than washing them.
The indoor coil is behind the filter. If it's frosted, don't scrape it. Switch the unit to fan-only and let it melt.
Once it's clear, clean the coil with a soft brush or a coil cleaner made for indoor units.
The outdoor coil is where airflow matters most. Leaves, grass clippings, cottonwood fluff, and dryer lint all pack into the fins. Rinse the coil from the inside out with a garden hose on low pressure.
High pressure bends the fins and makes things worse.
Where DIY Stops: Refrigerant, Capacitors, and Mains Voltage
Three things end your DIY journey. Refrigerant, capacitors, and live mains voltage.
Refrigerant handling requires EPA Section 608 certification in the US and F-Gas certification in the UK and EU. Venting refrigerant is illegal in most places and carries real fines. There's no safe homeowner workaround.
Capacitors hold a charge after power is removed. On a Daikin outdoor board, that charge can sit at several hundred volts for minutes after shutdown. Touching the wrong terminal can stop your heart.
If you don't own a properly rated discharge tool and know how to use it, keep the panel closed.
Mains voltage at 208 to 230 V is lethal. Terminal blocks, PCB test points, and compressor leads all sit at line voltage when the unit is powered. If you need to test anything beyond the breaker and the isolator, hire someone.
Mistakes That Cost You Money and Can Void Your Warranty
Most of the expensive outcomes we see in Daikin fault cases come from a handful of repeat mistakes. None of them are complicated. All of them are avoidable.
Resetting the breaker over and over. A breaker that trips twice is telling you something is wrong. Every extra reset pushes current through a fault that's likely worsening. This is how capacitor jobs become compressor jobs.
Replacing the PCB first. A dead board is usually a symptom. If a fan motor, capacitor, or shorted winding caused the failure, the new board dies too. Diagnose the cause before replacing the part.
Ignoring a refrigerant code. U0, E4, and F3 don't fix themselves. Running the unit with low charge destroys the compressor through heat and lack of lubrication.
Clearing the fault memory before writing the code down. Once it's cleared, it's gone. Note the code, the date, and how long it took to reappear.
Using non-Daikin parts. Aftermarket boards and sensors sometimes work. Often they don't, and they almost always void the warranty on the affected component.
Letting an unqualified person touch the refrigerant circuit. In the US, that's a Section 608 issue. In the UK and EU, it's F-Gas. Beyond the legal side, a bad recharge or a missed leak means the fault returns within weeks.
Chipping ice off the indoor coil. You'll bend fins and create a refrigerant leak. Thaw it with airflow instead.
Blocking the outdoor unit. Stacking items against the outdoor unit or boxing it in for noise reasons kills airflow. High-pressure faults follow.
Skipping annual maintenance. A unit that gets a yearly clean and check throws far fewer fault codes. Filter and coil maintenance is the cheapest reliability upgrade you can buy.
What Voids a Daikin Warranty
Daikin residential warranties typically cover parts for 10 to 12 years when the system is registered, with labour coverage varying by region and program. The exclusions are where people get caught out.
- Work performed by a non-licensed technician
- Use of non-genuine or unapproved parts
- Damage from power surges or improper voltage
- Refrigerant loss from a leak that was never repaired
- Installation that doesn't meet local code or Daikin's own spec
- Failure to perform recommended maintenance
Keep your service records. If you ever need a warranty claim, a dated invoice showing annual maintenance is worth more than any argument.
When to Call a Daikin Comfort Pro and What to Tell Them
Call a technician when the fault involves refrigerant, compressor, PCB, or mains electrical work. Also call if the code returns after a proper reset, if the breaker trips twice, or if you smell burning. Those are hard stops, not judgment calls.
Daikin maintains a network of factory-trained dealers and technicians, and you can find your local one through Daikin's official site. Using a Daikin-trained tech matters for warranty claims and for getting the right diagnostic tools on the first visit.
What to Tell the Technician
The more precise your handoff, the faster the diagnosis. Give them these six things.
- The exact fault code from the remote or PCB
- How many times the light blinks per cycle
- What the unit does when it faults (fan runs, fan stops, breaker trips)
- How long after startup the fault appears
- Whether the fault is constant or intermittent
- Your indoor and outdoor model numbers
A technician who knows the code and the symptom before arriving can bring the right parts. That often saves a second visit and a second callout fee.
What a Typical Repair Costs
Prices vary by region, but here's a realistic range for common Daikin faults. These are ballpark figures for parts and labour on a residential split.
| Repair | Typical cost range |
|---|---|
| Diagnostic visit | $80 to $150 |
| Filter and coil clean | $100 to $250 |
| Thermistor replacement | $150 to $350 |
| Outdoor fan motor replacement | $350 to $700 |
| PCB replacement (indoor or outdoor) | $500 to $1,200 |
| Refrigerant leak search and repair | $400 to $1,500 |
| Compressor replacement | $1,500 to $3,000 |
The pattern is obvious. Sensor and cleaning jobs are cheap. Compressor and refrigerant jobs are not.
That's why catching a fault code early matters so much.
Warranty Coverage on Parts and Labour
Daikin's residential warranty structure usually separates parts from labour. Parts coverage commonly runs 10 to 12 years on registered systems. Labour coverage is shorter, often 1 to 2 years, and sometimes sold as an extended plan.
What that means in practice: a compressor failure in year 8 might be covered for the part but not the labour. A thermistor in year 3 is usually covered for both. Read your specific warranty document, because terms differ by product line and region.
Keep the registration confirmation. Unregistered systems often fall back to a much shorter base warranty.
Frequently Asked Questions
Why is my Daikin AC light blinking but still cooling?
A blinking light with cooling still working usually means a non-critical sensor fault or a communication warning. The system is running in a degraded mode. Retrieve the code from your remote and note it.
If cooling performance drops or the code changes, call a technician before it becomes a bigger repair.
What does a blinking green light on a Daikin AC mean?
A blinking green operation LED means the indoor board has logged a fault code. It doesn't identify the fault by itself. Count the blinks per cycle, then pull the stored code from an ARC-series remote by holding CANCEL for about five seconds.
Match that code to your model's chart.
Can I reset my Daikin AC myself to clear the blinking light?
Yes, and it's safe. Switch the breaker off for 5 to 10 minutes, then back on. Let the system run its startup sequence untouched.
If the light stays off, the fault was a power glitch. If it blinks again within 10 minutes, the fault is real and needs diagnosis.
How much does it cost to fix a blinking light fault?
It depends entirely on the code. A dirty filter or a thaw clears it for free. A thermistor replacement runs $150 to $350.
A PCB is $500 to $1,200. A compressor is $1,500 to $3,000. Diagnose first, then talk cost.
Don't replace parts on a guess.
Is a blinking Daikin light dangerous?
Usually not, but two situations are. A breaker that trips repeatedly is a fire risk, so leave it off and call a tech. A refrigerant code like U0 or E4 can destroy the compressor if you keep running the unit.
Both warrant shutting the system down rather than waiting.
How long can I run my Daikin AC with a blinking fault light?
Run it only long enough to retrieve the code and confirm the symptom. If the code points to a sensor and the unit is cooling, a short run is fine. If the code is U0, E4, E5, E6, or L5, shut it down immediately.
Those faults damage the compressor with every hour of runtime.