You walk into the kitchen and your Maytag dishwasher lights are blinking. The cycle has stopped, there may be water in the tub, and the panel is flashing like it wants an answer. Here's the good news.
Those blinks aren't random. Maytag uses its indicator lights as a diagnostic language, and reading it correctly usually points you straight at the fault.
The catch is that the meaning shifts by model. A 2015 MDB console and a 2024 MDFS unit can flash the same light for completely different reasons. Under UL 749, the safety standard covering household dishwashers, these machines are built to halt safely rather than keep running with a fault.
So the panel stops and waits for you.
Quick Answer
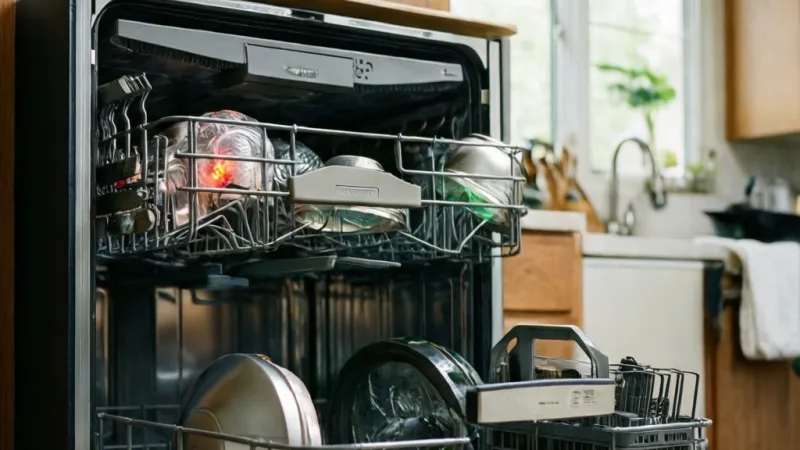
Blinking lights on a Maytag dishwasher mean the board stopped the cycle. It logged a fault and is waiting for you. The blink pattern tells you which fault.
Count the flashes and note which light is blinking. A hard reset clears the code but not the cause. Most cases trace to the door latch, float switch, heater, or thermistor.
How Maytag Blink Codes Actually Work
Maytag dishwashers don't have a chatty display. Most models have a strip of indicator lights and a few buttons. When something goes wrong, the central control unit (CCU) cuts the cycle and flashes one or more of those lights instead of printing a code.
Think of it as a low-bandwidth alarm system. The board only has a handful of lights to work with, so it encodes the fault in the pattern. How many times a light flashes.
How long it pauses. Whether one light blinks alone or two blink together.
That encoding is deliberate. A dishwasher lives in a wet, hot, vibration-heavy box. A full LCD screen would fail fast in that environment.
Simple LEDs survive for years and cost little to replace. So the trade-off is readability for durability.
The practical consequence is this. You can't diagnose a Maytag from the light colour alone. You need three pieces of information before anything else matters.
- Which light is flashing (Start/Resume, Clean, Sanitized, Add Dish, or the padlock)
- How many flashes in the repeating sequence
- When it started (mid-cycle, at startup, after a power cut, or right after install)
Get those three and you're most of the way to an answer. Skip them and you're guessing.
Maytag is part of the Whirlpool Corporation family, which also builds Whirlpool, KitchenAid, Amana, and JennAir dishwashers. Those brands share a lot of control architecture. So a fault pattern documented for a Whirlpool unit often maps closely to your Maytag.
It's a useful shortcut when your own manual has gone missing.
Blink Count vs. Numeric F and E Codes
Some Maytag models show a letter and number on a small display. You'll see things like F1, F2, F7, F8, E1, or E4. Those are direct fault codes, and they're much easier to work with.
The rest of the lineup only blinks. No digits, no letters, just a light going on and off in a rhythm.
Here's the if/then logic:
- If your panel has a numeric display, write down the exact code. That code points to a specific component.
- If your panel has no display, count the flashes instead. The count is your code.
- If the whole panel cycles through every light in sequence, that's usually a startup self-test, not a fault. Leave it alone for 30 seconds.
- If a single light blinks and the machine does nothing else, the board has halted and is waiting for input.
One more thing worth knowing. Many Maytag boards store the last fault in memory even after the light stops blinking. That's why a technician can often pull a code for a problem that happened three days ago.
On models with a diagnostic mode, you can access that stored history yourself.
Why Your Model Number Changes Everything
Blink patterns are not universal across the Maytag lineup. This is the single biggest source of bad advice online.
A pattern that means "thermistor fault" on one board can mean "drain timeout" on another. The firmware changed, the light layout changed, and the encoding changed with it. As of 2026, Maytag's active lineup spans the MDB, MDFS, MDTS, and WDT series, plus older JDB units still running in plenty of kitchens.
Each series has its own service documentation. Each one maps lights to faults differently.
So before you act on anything you read, confirm your model. Two minutes with a flashlight beats two hours chasing the wrong part.
There's a second reason the model matters. Part numbers change between series even when the part looks identical. A door latch from an MDB won't necessarily fit an MDFS.
A control board almost never crosses over. Ordering by "Maytag dishwasher control board" without a model number is how people end up with a non-returnable part sitting on the counter.
Step 1: Find Your Model Number and Tech Sheet
Everything in this workflow depends on your model number. So that's where we start. No diagnosis happens before this step.
Pull the dishwasher door open and look at the edges. On most Maytag units the model and serial plate sits on the tub frame, on the left or right side of the opening. On some models it's on the inner edge of the door itself.
On a few, you'll find it behind the kick plate at the bottom front.
It's a silver or white sticker with two long alphanumeric strings. The model number is the shorter one. It usually starts with letters like MDB, MDFS, MDTS, JDB, or WDT, followed by digits and more letters.
Write it down exactly. Every character matters. A single digit off and you're looking at the wrong wiring diagram.
Now go find the tech sheet. This is the folded paper or card that came with the machine, and it's the document that actually tells you what the blink codes mean. Manufacturers tuck it in a few predictable places.
- Behind the kick plate, often in a plastic pouch taped to the frame
- Taped inside the door panel or on the inner cabinet wall
- Inside the control panel housing, on newer models
- In the paperwork packet if you still have it
If yours is gone, Maytag's official support site lets you look up the manual and wiring diagram by model number at maytag.com. That's the fastest route. Third-party scans are hit and miss, and older ones sometimes cover a different revision of the same model.
Here's the if/then for this step:
| Situation | What To Do |
|---|---|
| You found the tech sheet | Read the fault chart before touching anything else |
| Tech sheet is missing | Pull the manual by model number from Maytag's site |
| Model plate is unreadable | Photograph it under bright light, then clean gently with a dry cloth |
| You can't find the plate at all | Check the kick plate area and the door inner edge last |
One caution. Don't scrub that sticker with a wet rag. The ink lifts off older labels fast, and once the model number is gone you've made your own repair much harder.
While you're down there, take a photo of the plate with your phone. You'll want it when you're ordering parts or posting on a forum. It also helps if you end up calling a technician, because the first question they'll ask is the model number.
Decoding the Pattern: Which Light, How Many Flashes, How Fast
Now the actual decoding. Stand in front of the panel with the power on and just watch for a full minute. Don't press anything yet.
Pressing buttons can clear the pattern or change it.
Count the flashes in one complete cycle. A cycle is the flashes plus the pause, repeating. So if the light goes blink-blink-blink, pause, blink-blink-blink, pause, your count is three.
Time the pause too. A short pause between flashes within a group is different from the long pause between groups. The long pause is the separator.
That's how you know where one count ends and the next begins.
Watch for a second light joining in. On some faults, two lights alternate. On others, one blinks while another stays solid.
That combination is part of the code.
Here's the honest caveat. There is no universal Maytag blink chart. Anyone who hands you a fixed list of "7 flashes means X" is guessing.
What follows is what the individual lights commonly indicate across the platform, and what to check first.
| Indicator Light | What It Usually Signals | First Thing To Check |
|---|---|---|
| Start/Resume | Cycle never began, door not latched, or control lock engaged | Door latch alignment and the padlock button |
| Clean | Cycle completed, or a stored fault on certain boards | Run a rinse cycle and see if it clears |
| Sanitized | Sanitize cycle didn't reach target temperature | Incoming water temperature and the heating element |
| Add Dish | Door was opened mid-cycle | Close the door firmly and press Start once |
| Control Lock (padlock) | Panel is locked, buttons are ignored | Hold the lock button for 3 to 5 seconds |
| Multiple lights cycling | Startup self-test or a board-level fault | Wait 30 seconds, then check for a repeating single pattern |
If your model has a numeric display, use the code instead. Common ones on Maytag and its Whirlpool-platform siblings include F1 or F2 (control board communication), F7 (heating circuit), F8 (diverter or wash motor), and E1 or E4 (thermistor or temperature sensing). Match the exact code to your tech sheet, because the letters aren't perfectly consistent across series.
Clean, Sanitized, Start/Resume, and Add Dish Indicators
Each light has its own personality. Knowing what each one is responsible for narrows things down fast.
Start/Resume is the workhorse. It blinks when the machine wants permission to run. If the door isn't latched, or control lock is on, or the cycle was interrupted, this is the light that complains.
It's also the light that blinks during a pause. So a blinking Start/Resume isn't automatically a fault.
Clean usually means the cycle finished. On some boards it doubles as a fault indicator when it blinks in a pattern instead of staying solid. Solid means done.
Blinking means look closer.
Sanitized lights up when the final rinse hit the sanitizing temperature. If it never comes on and the cycle seems short, the machine likely isn't heating. That points at the element, the hi-limit thermostat, or the thermistor.
Add Dish appears on models with a mid-cycle loading feature. If it blinks, the door was probably opened and the cycle is paused. Close it and press Start.
Control Lock is the padlock icon. When it's lit or blinking, the keypad is disabled. This one fools more people than any other.
A locked panel looks exactly like a dead machine.
Solid vs. Flashing vs. Cycling Lights
Three different behaviours, three different meanings.
- Solid light: normal operation or a completed state. A solid Clean light is not a problem.
- Flashing single light: an active fault or a paused cycle waiting for input.
- Cycling lights in sequence: a self-test, a demo mode, or a board that's lost its mind after a power event.
That third one deserves attention. If every light on the panel runs a lap and then repeats, you're likely watching a self-test. Give it 30 seconds.
If it never settles, cut power at the breaker for two minutes and restore it. If it still cycles after that, the control board is the prime suspect.
One more pattern worth naming. A light that flashes once every few seconds, slowly and steadily, is often a standby or door-ajar indicator rather than a fault. Fast repeated flashing is the one that means trouble.
Model Series Deep Dive: What Changes Between MDB, MDFS, MDTS, JDB, and WDT
Maytag's model prefixes aren't decoration. They map to different build generations, different control architectures, and often different fault behaviour. Knowing which family your machine belongs to narrows the diagnostic window before you even open the door.
The MDB series is the long-running workhorse. It spans many production years and revisions, so two identical-looking MDB units can hide completely different boards. Older MDB builds often use simpler consoles with fewer indicators.
Newer MDB revisions share electronics with the broader Whirlpool platform.
The MDFS and MDTS series are the newer stainless-focused lines. They tend to have sleeker top-control or front-control consoles with more indicators and clearer fault reporting. On these, you'll sometimes see numeric codes instead of pure blink patterns.
The JDB series covers older Jenn-Air-derived and budget builds. These are mechanically simpler and often use a mechanical timer or a very basic electronic board. Blinking on a JDB usually means one of a short list of faults.
The WDT prefix appears on Maytag units sold through specific retail channels. Functionally they share the same platform electronics as the MDB and MDFS lines. The difference is usually cosmetic and console layout rather than core control logic.
Here's the practical takeaway.
| Series | Typical Console | Fault Reporting Style |
|---|---|---|
| MDB | Front or top control, varies by year | Blink patterns, some with codes |
| MDFS | Top control, modern styling | Blink patterns plus numeric codes |
| MDTS | Front control, stainless focus | Blink patterns plus numeric codes |
| JDB | Older builds | Limited blink patterns |
| WDT | Retail-channel variant | Same as MDB and MDFS platform |
Why does this matter for a blinking panel? Because the same light can carry two different meanings across series. A Clean light blink on an older MDB might mean a heating fault.
On a newer MDFS, the Clean light is more likely to indicate a cycle status or a drain issue.
The only reliable source is the tech sheet for your exact model number. Not the series. Not the year.
The model number, character for character.
One more note. Whirlpool Corporation has revised board firmware repeatedly over the years without changing the model number. Two units with identical plates can behave differently if one shipped with newer firmware.
When you buy a replacement board, it typically ships with the latest firmware for that part number. That's usually an improvement, but it can change how the panel reports faults going forward.
Branch A: Control Lock and Door Latch Fixes That Cost Nothing
This is where you start, every single time. Two of the most common causes of a blinking Maytag panel cost nothing to fix. Rule them out before you spend a dollar or pick up a screwdriver.
The if/then is simple. If the padlock icon is lit or blinking, it's control lock. If the panel is unlocked but the machine won't start, it's the latch.
If both check out clean, move to the next branch.
Clearing Control Lock
Control lock stops the buttons from responding, which is useful when you've got kids or you're wiping the panel down. It also looks exactly like a breakdown.
Here's the sequence:
- Find the button with the padlock icon, or the button labeled Control Lock or Lock.
- Press and hold it for 3 to 5 seconds.
- Watch for the padlock light to go out.
- If nothing happens, try the same hold on the Start/Resume button. Some models pair lock with Start.
- If the panel still won't respond, kill power at the breaker for 60 seconds, then restore it.
On most Maytag consoles, a 3-second hold does it. Some older boards want a full 5 seconds. Give it the longer hold if the short one does nothing.
If the lock clears and the panel lights go back to normal, you're done. That was the whole fault. No part, no cost, no technician.
Checking the Door Latch
The latch has to close a switch before the board will run a cycle. That switch is a mechanical contact in a wet environment, and it wears out.
Open the door and look at the latch mechanism on the top edge of the tub. Then look at the strike on the door itself. You're checking three things.
- Alignment: does the strike line up with the latch without you forcing it?
- Movement: does the latch move freely when you push it with a finger?
- Damage: any cracks, bent metal, or plastic that's gone brittle and white?
Now close the door firmly and listen. You want a clean, solid click. A soft or mushy close usually means the latch isn't fully engaging, and the board will keep blinking Start/Resume forever.
Try this test. Close the door, then press it inward with your hand while pressing Start. If the cycle begins only when you apply pressure, the latch or the strike is out of adjustment.
That's a confirmed latch problem.
Some Maytag models let you adjust the strike position with a screwdriver. Others need the latch assembly replaced. A latch switch is one of the cheaper parts on the machine, and on many models it's accessible from the door edge without pulling the unit out.
One thing to check before you buy anything. Look at the wire harness running from the latch into the door. Rodents chew it, and vibration rubs it through.
A damaged harness mimics a failed latch perfectly.
Before you go further into the machine, know this. Dishwashers combine 120 volts and standing water in the same box. Before you pull the kick plate or reach near any wiring, cut power at the breaker, not just at the panel button.
And check your model against the recall database at the U.S. Consumer Product Safety Commission before you repair or resell it, since recalls sometimes cover the exact control board or harness you're about to touch.
Branch B: It Died After a Storm, Power Surges, Brownouts, and Control Board Faults
This branch is easy to spot because you already know the trigger. A storm rolled through. The lights flickered.
The power came back. Now the panel is doing something strange.
If the blinking started within a day or two of a power event, the control board moves to the top of the suspect list. That's your if/then. Power event plus new blinking equals board, unless a hard reset clears it.
Why Surges Kill Dishwasher Boards
The CCU is a small computer sitting inside a hot, damp cabinet. It has no real surge protection of its own. When the grid spikes or sags, that voltage rides straight into the board.
Two things go wrong. A surge can blow a component outright, usually a capacitor or a relay driver. A brownout, where voltage drops and stays low for a second or two, is sneakier.
The board's logic can lose its place mid-cycle and reboot into a confused state.
The brownout case is often fixable. The board is fine, it just needs a clean restart. The surge case usually isn't.
Something on the board is dead.
There's a third scenario that catches people out. A storm knocks out power for hours. When it comes back, the dishwasher wakes up mid-program and the panel flashes.
Nothing is broken at all. The machine just doesn't know where it was.
The Two-Minute Breaker Reset
Before you buy anything, do this properly. A quick off-and-on won't cut it.
- Find the breaker feeding the dishwasher and switch it fully off.
- Wait a full two minutes. Not thirty seconds.
- Switch it back on and close the door.
- Watch the panel for a full minute without pressing anything.
- If it settles into a normal idle state, run a short cycle and watch the whole thing.
Why two minutes? The board holds a small charge that keeps its memory alive for a while after power drops. A short interruption doesn't clear that memory.
Two minutes drains it and forces a genuine cold start.
If the blinking stops and the machine runs normally, you had a brownout or an interrupted cycle. Nothing to fix.
If the blinking returns immediately, and especially if it returns as the same pattern, the fault is real.
Symptoms That Point Straight at the Board
Some failures are unmistakably board-level. Watch for these.
- Every light cycles in sequence and never settles
- Buttons do nothing at all, not even a beep
- The panel is dark but the machine hums or fills
- The display shows garbled or partial characters
- Blinking starts the instant power is restored, before any button press
- The same fault code returns after a confirmed reset, twice
Any two of those together and you're looking at a control board replacement.
Before you commit, check one thing. A shorted component elsewhere in the machine can drag the board down and make it look guilty. A failed heating element, a seized drain pump, or a rubbed wire harness can all take the board with them.
Replacing the board without finding the root cause means you'll be replacing it again.
Board Replacement, Costs, and What It Involves
A Maytag dishwasher control board is not a cheap part. Depending on your series, expect the board itself to sit in the higher band of dishwasher parts. Labour adds more if you don't do it yourself.
Access varies a lot by model. On front-control units, you typically remove the outer door panel and the board sits behind it. On top-control units, you remove the inner door panel and the console comes apart from there.
Either way you're working around a ribbon cable and a bundle of connectors.
A few practical notes from what the service documentation shows.
- Photograph every connector before you unplug it
- The ribbon cable between keypad and board is fragile and easily creased
- Boards ship without firmware learning, so the first cycle after install may behave oddly
- Some models require a calibration or test cycle after replacement
One honest warning. Board swapping is the single most common DIY mistake on this platform. People replace the board, the blinking stops for a week, then it comes back because the actual fault was the keypad or the thermistor.
Diagnose first. Buy second.
Branch C: Standing Water or No Fill, Float Switch, Drain Pump, and Inlet Valve
This branch has a physical tell. Open the door. Is there water sitting in the bottom?
If yes, you're in the drain or fill side of the machine. If the tub is bone dry and the machine never filled, you're on the inlet side. Either way the panel blinks because the cycle couldn't complete.
The Flood Float Switch
Every dishwasher has a flood float. It's a small plastic disc or cup in the tub base that rides on a stem. If water rises past a safe level, the float lifts and trips a switch.
That switch cuts the fill and tells the board to stop.
It exists so your kitchen doesn't flood. It's a safety device, not a convenience feature.
A stuck float is one of the most common causes of a blinking panel with water in the tub. Two things go wrong. Debris or grease can jam the float in the raised position.
Or the switch itself fails and reports "raised" when the float is sitting flat.
Test it like this.
- Kill power at the breaker.
- Reach into the tub base and find the float.
- Lift it gently with a finger and let it drop. It should move freely with a light click.
- If it's stuck, clean around the stem with warm water and a soft brush.
- If it moves freely but the fault persists, the switch is the suspect.
Never bypass a flood float to make the machine run. If it's tripping, something is putting water where water shouldn't be. Bypassing it turns a blinking light into a flooded floor.
Drain Pump and Drain Hose Blockages
If the float is fine and there's still standing water, the machine couldn't drain. That means the drain path is blocked or the pump isn't running.
Work the path in order. It's almost always the cheapest thing first.
| Check | What To Look For | Fix |
|---|---|---|
| Air gap or disposal knockout | Plug still in the disposal inlet | Knock the plug out with a hammer and punch |
| Drain hose | Kinks, crushed sections, or a loop sitting below the tub | Reroute so the hose rises before it drops |
| Sump and filter | Glass, bones, grease, or a broken dish shard | Remove and clean by hand |
| Drain pump impeller | Won't spin, or spins with grit in it | Clear debris or replace the pump |
| Check valve | Stuck open or jammed | Clean or replace |
That first row matters more than people realise. On a new install where the dishwasher drains into a garbage disposal, the disposal's drain plug is often still in place. The machine tries to drain into a sealed port and fails every time.
It's a five-minute fix that looks like a major fault.
If the sump is clear, the hose is clear, and the pump hums but doesn't move water, the impeller is likely broken or the pump has seized. That's a replacement part, and on most Maytag models it's accessible from inside the tub after pulling the filter assembly.
No Fill at All, Inlet Valve and Water Supply
Flip it around. The tub is dry. The cycle starts, then stops, then blinks.
Start at the wall. Is the supply valve actually open? It sounds obvious, but a valve that got bumped during a kitchen remodel causes more service calls than it should.
Then check the supply line for kinks. Then look at the inlet screen.
The inlet valve has a small mesh screen where the supply line connects. Sediment, especially in well-water households, clogs that screen over time. Flow drops, the machine never reaches its fill level within the expected window, and the board times out and blinks.
Cleaning the screen is a fifteen-minute job. Shut the water off at the angle stop first. Unscrew the supply line, pull the screen with needle-nose pliers, rinse it under a tap, and put it back.
If the screen is clean and you still get no water, test the valve. With power off and the meter set to resistance, a healthy solenoid reads a finite resistance across its terminals. An open reading means the coil is dead and the valve needs replacing.
One more possibility. If the machine fills, runs briefly, then stops and blinks, you may have a pressure switch or fill-level sensor fault rather than a supply problem. The board thinks the tub is full when it isn't, or vice versa.
Branch D: Dishes Come Out Wet or Cold, Heating Element, Hi-Limit, and Thermistor
This is the branch where the machine technically works. It fills, it washes, it drains. It just doesn't heat.
Dishes come out wet and cool, and the Sanitized light never comes on.
That's a heating circuit fault. On Maytag and its platform siblings, this is one of the most frequently reported code families.
The Heating Circuit, Three Parts That Fail Together
The heating circuit has three main components. Any one of them can take down the whole thing.
The heating element sits in the tub base. It's a resistive coil that heats the wash water and helps dry the dishes. Elements fail by opening up internally, which breaks the circuit entirely.
They can also develop a partial short, which is more dangerous because it may still draw current.
The hi-limit thermostat is a safety cutout wired in series with the element. If the element gets too hot, the thermostat opens and stays open. It's there to prevent a fire.
Once it trips, it usually doesn't reset.
The thermistor is the temperature sensor. It's a resistor that changes value with heat. The board reads its resistance to decide when the water is hot enough.
A drifted thermistor tells the board the water is hotter or colder than it really is.
Testing the Heating Element and Thermistor
You'll need a multimeter. Power off at the breaker first, every time.
For the element, disconnect both leads and measure resistance across the terminals. A healthy element reads a low, finite resistance. An open reading means it's dead.
Also check each terminal to the tub ground. Any continuity there means the element is shorted and must be replaced before you run the machine again.
For the thermistor, you're comparing its reading to the value on your tech sheet at a known temperature. Room temperature readings are the easiest reference. If the number is wildly off, or the reading jumps around while you watch it, replace it.
For the hi-limit, measure across its terminals. A closed circuit reads near zero. An open circuit means it tripped and needs replacing.
A shorted heating element is a genuine fire and shock risk, not just an inconvenience. If your meter shows continuity between an element terminal and ground, stop. Don't run the machine.
Replace the element and inspect the wiring for heat damage before restoring power.
Why Hard Water Accelerates This Failure
If you're on well water or live in a hard water region, this branch is going to find you more often. Scale builds on the element surface, insulates it, and forces it to run hotter to do the same job. Hotter running shortens its life.
The same scale coats the thermistor and throws off its readings. The board gets bad temperature data and either under-heats or over-heats the cycle.
There's a practical fix that costs nothing. Run a monthly cycle with a dishwasher cleaner or a cup of white vinegar in an empty machine on the hottest setting. It won't undo years of buildup, but it slows the accumulation.
On a machine you've just repaired, it's the difference between getting five years out of the element and getting two.
New Install Blinking: Installation Faults That Mimic Component Failures
If the blinking started within the first week of a new install, suspect the install before you suspect the machine. A large share of "new dishwasher fault" calls turn out to be installation mistakes. The machine is telling the truth.
Something in the system isn't working. It just isn't a broken part.
Start with the disposal knockout. If the dishwasher drains into a garbage disposal, the disposal has a plug inside its inlet port that has to be knocked out before you connect the hose. If it's still there, the machine tries to drain into a sealed wall and fails every cycle.
That single oversight accounts for a big portion of drain-fault complaints on new installs. It looks exactly like a failed drain pump. It isn't.
Then check the drain hose routing. The hose needs to rise to a high point before it drops into the sink drain or disposal. If it sags below the tub level, water siphons back into the machine after the cycle.
The float lifts, and the panel blinks.
Next, verify the electrical connection. A dishwasher should be on its own dedicated circuit. If it shares a circuit with a microwave or a countertop appliance, voltage sags during high-draw moments can confuse the board.
On a GFCI-protected circuit, a nuisance trip also cuts power mid-cycle and leaves the panel flashing when power returns.
Then check the water supply. Is the angle stop fully open? A half-open valve can allow enough flow for a fill, but not enough to reach the target level within the expected time.
The board times out and blinks.
Levelling matters too. A dishwasher that isn't level can leave standing water in the sump even when the drain works. The float sees the residual water and trips.
Check the levelling legs and confirm the unit doesn't rock when you push a top corner.
Here's a quick checklist for the first-week blinking panel.
- Disposal knockout removed
- Drain hose has a high loop
- Supply valve fully open
- Machine on a dedicated circuit
- Unit level front to back and side to side
- Door closes with a solid click and no rubbing
If all six are clean and the panel still blinks, you're dealing with a genuine fault and the earlier branches apply.
One caution for new installs. Don't assume the factory shipped a perfect unit. Aggregate user reviews on newer Maytag models occasionally report boards that fail within the first month.
If the machine blinks immediately on first power-up and the install checks out, that's a warranty claim, not a repair. Call Maytag before you open anything.
Keypad, Ribbon Cable, and Touch Panel Failures: When the Board Isn't the Problem
The control board gets blamed for everything. Plenty of the time, the real failure is upstream of it in the keypad, the ribbon cable, or the touch panel. Those three components fail far more often than most people realise.
The keypad sits on the front of the console and takes the brunt of daily use. Moisture, grease, and repeated presses wear it down. On membrane-style panels, the conductive traces behind the buttons can crack or corrode.
When that happens, presses don't register, or they register as the wrong button.
A classic symptom. You press Start and nothing happens, but pressing another button works fine. Or pressing one button triggers the action of a different one.
That's the keypad, not the board.
The ribbon cable is the flat, flexible connector that carries signals between the keypad and the board. It's thin, and it's fragile. It can crease, crack at the fold, or pull loose from its connector.
A damaged ribbon cable mimics a dead keypad or a dead board perfectly.
Here's how to tell them apart.
| Symptom | Likely Part |
|---|---|
| Some buttons work, others don't | Keypad membrane |
| Wrong button triggers the wrong function | Keypad or ribbon |
| No response from any button, but panel lights work | Ribbon cable |
| Panel lights work, machine runs on its own | Board |
| Intermittent response when pressing near a specific area | Keypad |
Testing is straightforward but requires disassembly. Power off at the breaker. Open the console.
Check the ribbon cable's connector at both ends. Look for corrosion, a lifted latch, or a crack in the flex.
If the ribbon looks fine, the keypad is the suspect. On many Maytag models, the keypad and the outer console panel ship as a single assembly. That means a keypad failure is often a console replacement, which isn't cheap.
Here's a tip worth knowing. A moisture-damaged keypad sometimes recovers after a few days of drying. If the fault appeared right after someone wiped the panel with a wet cloth, or after a leak ran down the front, kill power and let the console dry for 48 hours before you buy anything.
It's a free test and it works more often than you'd expect.
What about touch panels on newer Maytag units? These use capacitive sensing rather than physical buttons. They're more reliable for mechanical wear but more sensitive to moisture and static.
A wet finger or a humid kitchen can cause phantom presses. If your newer unit blinks intermittently with no clear pattern, dry the panel and try again.
The bottom line for this branch. If the panel lights respond normally but the buttons don't, don't buy a board. Check the keypad and the ribbon first.
That's where the fault usually lives.
Regional and Voltage Differences: How Maytag Panels Behave Outside North America
Maytag dishwashers are designed primarily for the North American market. That's 120 volts at 60 hertz on a dedicated 15 or 20 amp circuit. If you're in the US or Canada, that's your baseline.
Maytag units do get exported and sold in other markets, though the lineup is smaller than what you'll find in North America. When they do, they run on different electrical standards.
In the UK and much of Europe, the grid is 230 volts at 50 hertz. In Australia and New Zealand, it's 230 to 240 volts at 50 hertz. In Japan, it's a split system with 100 volts at 50 or 60 hertz depending on the region.
Why does this matter for a blinking panel? Because the fault behaviour changes with the electrical environment. A few things shift.
- Cycle timings change because the heater behaves differently at 230V. A heating fault may show up later or not at all.
- Fault thresholds on the board are calibrated to the regional voltage. A board set for 230V may misread signals on a 120V supply, and vice versa.
- Surge and brownout behaviour differs. European grids tend to be more stable, but brownouts still happen during storms and grid events.
- Service documentation is region-specific. A European tech sheet may not match the fault chart in a US manual even for a similarly named model.
If you're troubleshooting a Maytag outside North America, get the local manual. Don't assume a US model's fault chart applies. The blink patterns may look the same, but the underlying codes can map differently.
There's also a practical parts issue. Control boards and keypads are region-specific. A 120V board won't work on a 230V supply, and vice versa.
If you're ordering a replacement part from an overseas seller, confirm the voltage rating on the part number before you pay.
For UK and EU readers, the consumer protection framework also differs. In the UK, the Consumer Rights Act 2015 gives you statutory remedies for faulty goods that sit alongside any manufacturer warranty. Similar consumer guarantees apply in Australia under the Australian Consumer Law.
If your Maytag is blinking because of a defect and it isn't ancient, check those rights before you accept a paid repair.
Hard Reset vs. Diagnostic Mode: Clearing a Code Isn't Fixing It
Two different tools, two different jobs. People mix them up constantly, and it costs them.
A hard reset wipes the board's working memory and forces a cold start. It's a blunt instrument. It doesn't tell you anything.
Diagnostic mode does the opposite. It asks the board what it remembers. It pulls stored fault codes and lets you run individual components to see which one fails.
Use the reset to clear a transient fault. Use diagnostic mode to find a real one.
When to Stop Resetting
The reset procedure itself is covered in Branch B, and doing it right matters. But the follow-up matters more.
Watch where in the cycle the blinking returns. Blinking immediately after power-up means a hard fault the board detects at startup. Blinking ten minutes in means a fault that only shows under heat or under load.
Blinking at the end means a drain or dry fault.
If the fault returns the same way twice after two proper resets, stop resetting. You're not fixing anything. You're erasing evidence.
Entering Service Mode on Maytag Consoles
Diagnostic mode entry varies by series, and this is where your tech sheet earns its keep. The exact button sequence is model-specific, and guessing can put the machine into a state you don't want.
The general pattern on Maytag and Whirlpool-platform consoles runs like this. With the door closed, press a specific sequence of buttons, usually three to five presses across two or three buttons, within a short window. The panel responds by lighting all indicators or showing a code.
Once you're in, you can typically step through stored faults and run component tests. You'll be able to fire the drain pump, the fill valve, and the heater individually. That's how you confirm which part is actually dead rather than guessing from the blink pattern alone.
Two cautions. Don't run the heater test with the tub empty for more than a few seconds. And don't leave the machine in diagnostic mode.
Exit properly, or power-cycle it at the breaker when you're done.
If your model's sequence isn't in your manual, don't improvise. Button-mashing on a live control board can clear calibration data or put the unit into a mode that needs a technician to exit.
Reading Your Maytag Wiring Diagram Without a Tech Background
The wiring diagram looks intimidating at first. It's a dense page of lines, symbols, and abbreviations. But you don't need to read all of it.
You need to find the one circuit you're testing and trace it from end to end.
Start by locating the legend. Every Maytag diagram has one, usually in a corner. It maps each symbol to a component name.
A resistor symbol is the heating element. A coil symbol is a solenoid, which is your inlet valve or drain pump. A switch symbol is a door latch or a float.
Then find the connector labels. Each plug on the board has a designation, often a letter and number like P1, P2, or CN1. The diagram shows which wire goes where.
If you know the fault is on the heating circuit, you trace from the board's heater pin through the hi-limit thermostat, through the element, and back to the board's common.
Here's the practical shortcut. Don't read the whole diagram. Read the circuit.
- Identify the component you suspect
- Find its symbol on the diagram
- Trace the wires forward to the board and back to ground
- Note every connector and switch in that path
Every connector in that path is a potential failure point. Rubbed wires, corroded terminals, and loose plugs all show up as open circuits that look like a failed part.
Colour codes matter too. In North American Maytag units, you'll commonly see black for line voltage, white for neutral, green or bare for ground, and various colours for switched legs. European units follow different conventions, usually brown for live, blue for neutral, and green with yellow stripes for earth.
Get this wrong and you'll misread which wire is hot.
If your tech sheet is missing, the diagram is often printed on the back of it or folded inside the kick plate area. Maytag's official support site has diagrams by model number. Take a photo of the diagram with your phone before you start working.
You'll want to zoom in on sections while you're crouched in front of the machine.
One honest note. If you can't read the diagram after ten minutes of trying, don't force it. The diagram is a tool, not a test.
A technician with the right training reads it in two minutes. You might spend two hours and still guess wrong. Knowing your limit here saves money.
Multimeter Basics for Maytag Diagnosis: What to Measure and What the Numbers Mean
A basic digital multimeter is the single most useful tool for this job. It costs less than one service call. If you own one and know four settings, you can diagnose most of the faults in this article yourself.
The four settings you need are resistance, continuity, AC voltage, and DC voltage. That's it. Everything else is a bonus.
Set the meter to resistance for testing parts that aren't powered. This is how you check the heating element, the thermistor, and the inlet valve coil. You're looking for a finite reading that falls within the range your tech sheet specifies.
Set the meter to continuity for checking switches and wiring paths. A healthy closed circuit beeps or reads near zero ohms. An open circuit reads OL or shows no beep.
Door latches, float switches, and hi-limit thermostats are all continuity tests.
Set the meter to AC voltage for checking whether power is reaching a component. This is a live test, so treat it with respect. You're looking for roughly 120 volts AC on North American models at the point where a component should be receiving power.
Set the meter to DC voltage for checking the control board's low-voltage outputs. On most Maytag boards, you'll see 5 volts DC or 12 volts DC feeding sensors and the display. If that's missing, the board isn't powering up properly.
Here's what typical readings tell you.
| Reading | What It Means |
|---|---|
| Open circuit (OL) on a heating element | Element is burned out and needs replacing |
| Near zero ohms on a heating element | Element is shorted, which is a fire risk |
| Continuity between element terminal and ground | Element is shorted to ground, replace immediately |
| Thermistor reading far off the tech sheet value | Sensor has drifted and needs replacing |
| Thermistor reading jumping around | Sensor is failing intermittently |
| No continuity across a hi-limit thermostat | Thermostat has tripped and won't reset |
| No AC voltage at a component that should be running | Board isn't sending power, or the circuit is broken upstream |
| AC voltage present but component doesn't run | Component itself has failed |
Before any resistance or continuity test, kill power at the breaker and confirm with the meter that the circuit is dead. Test the meter on a known live outlet first so you know it's working. A meter with a dead battery reads open on everything and will convince you every part is broken.
Never test resistance on a live circuit. You'll get garbage readings and you may damage the meter.
For temperature-dependent parts like the thermistor, note the ambient temperature when you test. A thermistor's resistance changes with heat. Compare your reading to the value on the tech sheet at that temperature, not to a value you remember from a video.
If you're new to the meter, practice on a known-good appliance first. Test a lamp cord for continuity. Test an outlet for AC voltage.
Get comfortable with the readings before you trust them on a dishwasher.
Intermittent Blinking: Chasing a Fault That Comes and Goes
An intermittent fault is the hardest kind to diagnose. The machine blinks for a day, then runs fine for a week. You open it up and everything tests healthy.
Then it blinks again the moment you close the door.
Here's the if/then for intermittent faults. If the fault appears under heat, suspect a component that changes with temperature. If it appears under vibration, suspect a loose connection.
If it appears after a power event, suspect the board. If it appears randomly, suspect a harness or a solder joint.
Heat-related faults are the most common. A heating element with a hairline crack can test fine when cold and open up when hot. A thermistor can drift at high temperatures but read perfectly at room temperature.
A control board with a cold solder joint can fail once it warms up.
Vibration-related faults come next. Dishwashers shake during the wash cycle. A terminal that's tight when you push on it can loosen under vibration.
A wire that looks fine when the machine is off can rub against a sharp edge and short only when the tub is full of water and the pump is running.
Power-event faults are usually board-level. A brownout can leave the board's memory in a state that fails intermittently until the board is fully reset or replaced.
Chasing an intermittent fault means changing your test approach. Static testing won't find it. You need to test under the conditions that trigger it.
- Run the machine and test components while it's hot, using proper safety precautions
- Wiggle connectors gently while watching the meter or the panel
- Note the exact moment the fault appears in the cycle
- Log every occurrence for a week and look for a pattern
- Check for water intrusion in the console, especially after a leak or a spill
The log is the most valuable tool here. If the fault appears at minute 38 of every cycle, that's heat or a specific phase of the wash. If it appears randomly, that's a connection.
There's a limit to how far this is worth chasing. If you've spent two weekends on an intermittent fault and you're no closer, the money you've saved on a service call is gone. A technician with a stored-code reader can find in twenty minutes what takes a homeowner a month.
Blinking After a Repair: What to Check Before You Call the Fault Fixed
You replaced a part. The blinking stopped. You ran a cycle.
It worked. Is the fault actually fixed? Not always.
Plenty of repairs look successful for a few cycles and then fail again.
First, run three full cycles, not one. The first cycle after a repair runs on a partially warmed-up system. Faults that only show under heat or under load often hide in cycle one and appear in cycle two or three.
If you've replaced a heating element or a thermistor, three cycles is the minimum.
Second, watch the panel during each cycle. Note whether any light blinks, even briefly. A light that flashes once and clears is the board logging a transient.
If it happens twice, the underlying fault is still there.
Third, check the areas around the repair for new issues. New parts sometimes reveal old problems.
- A new drain pump can expose a partially blocked hose that the old pump was masking
- A new control board can reveal a failing keypad that the old board was tolerating
- A new heating element can expose a failing hi-limit thermostat that tripped the old element
Here's a checklist for post-repair verification.
| Check | Why It Matters |
|---|---|
| Three full cycles with no blinking | Confirms the fault isn't heat or load dependent |
| Sanitized light comes on | Confirms the heating circuit works end to end |
| Tub is dry at cycle end | Confirms drain and float are healthy |
| No water under the unit | Confirms gaskets and hose connections |
| No unusual smell or noise | Confirms the new part isn't binding or overheating |
| Fault memory cleared | Confirms you're not seeing a stored old code |
If the blinking returns after a repair, don't assume the new part failed. Ask what changed. Did you disturb a connector?
Did you re-route a wire? Did the new board ship with different firmware than the old one?
One common post-repair trap. A new board can throw codes for components it now detects as out of spec, even if the old board tolerated them. That's not a new failure.
It's the new board doing its job. If a fault appears only after a board swap, test the flagged component before you blame the board.
Finally, document the repair. Write down the model number, the part you replaced, the date, and the symptom. If the fault returns in six months, that note saves you from starting the whole diagnosis over.
If you've done three clean cycles and the machine still blinks intermittently, you're likely chasing an intermittent connection rather than a failed part. A wiggle test on connectors while the machine runs, done safely with the panel closed and power managed through the breaker, can reveal a loose terminal that a static test won't.
Mistakes to Avoid Before You Touch a Screw
Most failed DIY dishwasher repairs don't fail because the person lacked skill. They fail because of a handful of predictable errors. Here's the list.
Water, 120 Volts, and the Parts That Hold a Charge
Dishwashers are one of the few appliances that combine mains voltage and standing water in the same enclosure. Treat that seriously.
- Cut power at the breaker, not at the panel button. The panel button leaves the board energized.
- Shut off the water at the angle stop before disconnecting any line.
- Expect capacitors on the control board to hold a charge after power-down. Don't touch the board's underside with bare fingers.
- Wear shoes, not socks, on a wet floor.
- Never work on the machine with the door open and the unit still plugged in.
What Voids Your Warranty and What Doesn't
Under the Magnuson-Moss Warranty Act, doing your own repair doesn't void your warranty by itself. What voids it is damage you cause while doing the repair. So if you crack the control board prying it out, that's on you.
A few practical rules.
- Keep your receipts for any parts you buy
- Photograph the failed part before you remove it
- Don't remove or deface the model and serial plate
- If the unit is under a service contract, call first and ask before you open anything
Also worth checking. If your machine is covered by a Maytag factory warranty, the labour is often included. On a control board replacement, that can be the difference between a free repair and a few hundred dollars out of pocket.
It takes one phone call to find out.
The Part-Swapping Trap
This is the big one. Here's the pattern.
The panel blinks. The owner reads that a control board fixes most blinking faults. They buy a board.
They install it. It works for a week. Then the same fault returns and takes the new board with it.
What actually happened is that a failed heater, a rubbed harness, or a bad keypad was pulling the board down. The board was a victim, not a cause.
The fix is boring but it works. Test components before replacing them. Confirm the fault with a meter or diagnostic mode.
Replace one part at a time and re-test. And if you replace a board, inspect everything that connects to it before you power up.
Parts, Costs, and When a Service Call Beats DIY
Not every repair is worth doing yourself. Here's a realistic look at where the money goes.
| Part | Typical DIY Difficulty | Notes |
|---|---|---|
| Door latch switch | Easy | Often accessible from the door edge |
| Thermistor | Easy to moderate | Usually in the tub base, accessible after filter removal |
| Inlet valve screen | Easy | Clean, don't replace, in most cases |
| Drain pump | Moderate | Sump access, some models need the unit pulled |
| Heating element | Moderate | Tub base access, gasket reseal required |
| Hi-limit thermostat | Moderate | Wired in series with the element |
| Control board | Moderate to hard | Console disassembly, fragile ribbon cable |
| Wire harness | Hard | Requires tracing and often pulling the unit |
The general rule from aggregate repair-forum data is that if the part costs less than a service call's trip charge, DIY is worth attempting. If the part is a control board and you're not comfortable with console disassembly, the maths flips.
A few signs you should stop and call someone.
- You've replaced two parts and the fault persists
- You can smell burning or see scorch marks anywhere
- Water is leaking from a location you can't identify
- The unit is under warranty or a service contract
- You can't safely reach the breaker or the water shutoff
There's no shame in that call. A technician with the right meter and a stored-code reader will often diagnose in twenty minutes what takes a homeowner a weekend.
Repair or Replace? Making the Call on an Older Maytag Dishwasher
At some point every repair question becomes a replacement question. Here's how to make that call without guessing.
Start with the age of the machine. A dishwasher typically lasts 8 to 12 years with reasonable care. If yours is past year 10 and you're facing a control board replacement, the maths usually favours replacement.
Then look at the cost of the repair against the cost of a new unit. The rough rule most appliance technicians use is this. If the repair costs more than half the price of a comparable new dishwasher, replace it.
Then factor in what else is likely to fail soon. A 12-year-old machine with a failed board probably also has a tired drain pump, a worn door spring, and a latch that's on its way out. Replacing the board alone means you'll be back in there within a year.
Here's a quick comparison table for the common decision points.
| Situation | Repair | Replace |
|---|---|---|
| Under 5 years, board failed under warranty | Yes | No |
| 6 to 9 years, single cheap part failed | Yes | Usually not |
| 6 to 9 years, control board failed | Depends on cost | Sometimes |
| 10 to 12 years, heating element failed | Maybe | Often better |
| 12 years plus, any major fault | Rarely | Yes |
| Any age, water damage to the board | No | Yes |
| Any age, tub or door seal cracked | Rarely | Yes |
Water damage changes everything. If water has reached the control board, the whole console is compromised. Even if you replace the board, the new one sits in a wet environment and fails again.
Repair only makes sense if you also find and fix the leak source.
There's also an energy angle. A current ENERGY STAR qualified dishwasher uses under 4 gallons per cycle. A unit from 15 years ago could use two to three times that.
Over a year, the difference in running cost is real, though it rarely pays for a new machine on its own.
One more consideration. If the unit is part of a kitchen renovation that's already underway, replacing now is cheaper than replacing later. The labour to remove and reinstall is already being paid for.
If you decide to replace, dispose of the old unit properly. Many municipalities have appliance recycling programmes, and retailers often haul away the old unit for free with a new purchase. Check your local waste authority for the rules where you live.
Water Damage, Insurance, and Safety Notices: What to Do When a Fault Becomes a Leak
A blinking panel that stays blinking is an inconvenience. A blinking panel that's paired with water on the floor is a different problem. That's when the stakes go from annoying to urgent.
The first move is always the same. Cut power at the breaker. Then shut off the water at the angle stop under the sink.
Do both before you investigate anything.
A dishwasher that leaks can push water into the cabinet base, under the floor, and into the ceiling of the room below. By the time you see water on the kitchen floor, the damage underneath is often worse than what's visible.
Here's what to check first.
- The door gasket, especially if it's cracked or compressed
- The door latch, which can fail to seal if it's out of alignment
- The sump gasket and the filter housing seal
- The drain hose connection at the disposal or sink drain
- The inlet valve and supply line connections
- The float switch, which may be stuck and allowing an overflow
If you find water, dry the area thoroughly and run a fan for at least 24 hours before restoring power. Water and electronics don't mix, and a board that got wet can fail weeks later.
Document everything if the damage is significant. Photograph the leak source, the water on the floor, and any damage to cabinets or flooring. Call your insurance company before you throw anything away.
Most homeowner policies cover sudden accidental water damage from an appliance, though they may not cover gradual leaks you should have noticed.
Here's a rule that matters. Never leave a leaking dishwasher running unattended, even for a short cycle. The float switch is a backup, not a guarantee.
If it's the float that's failed, you've lost your last line of defence.
Check for recalls too. The U.S. Consumer Product Safety Commission maintains a public database of appliance recalls at cpsc.gov).
Some dishwasher recalls cover control boards and wiring harnesses that can overheat and cause fires. If your model is on a recall list, the manufacturer typically repairs or replaces the affected part at no cost.
Don't ignore a burning smell. If you notice a hot plastic or electrical smell near the dishwasher, kill the power and leave it off. A shorted heating element or a failing board can cause a fire.
That's not a fault to diagnose later. That's a fault to address now.
For UK readers, electrical safety notices are published by the Office for Product Safety and Standards. For Australian readers, Product Safety Australia maintains a similar recall register. Check the register for your region before you repair or resell any dishwasher that's shown signs of overheating.
Maintenance That Keeps the Blinking From Coming Back
Every fault in this article has a maintenance angle. Do these and you'll see far fewer blinking panels.
- Clean the filter and sump monthly. Grease and food debris are the leading cause of drain faults.
- Run a hot cycle with a dishwasher cleaner every month or two.
- Check the drain hose for kinks and the air gap for blockages twice a year.
- Wipe the door gasket and check the latch alignment every few months.
- Confirm the machine is on a dedicated circuit, ideally GFCI protected per NFPA 70.
- After any power outage, let the machine sit for a minute before pressing anything.
- If you live in a storm-prone area, consider a whole-house surge protector. It's cheaper than one control board.
- Don't overload the top rack against the spray arm. Blocked arms cause wash faults that look like sensor failures.
None of that takes more than a few minutes a month. All of it extends the life of the parts that fail most.
There's one habit worth building. After every cycle, glance at the panel before you walk away. A light that's still blinking is telling you something.
Catching it early means fixing a cheap part instead of a control board.
Frequently Asked Questions
Why are my Maytag dishwasher lights blinking?
The blinking means the control board halted the cycle after detecting a fault. It's a diagnostic signal, not a random malfunction. The specific pattern tells you which system failed.
Count the flashes and note which light is blinking, then check your model's tech sheet.
What does it mean when the Clean light blinks on a Maytag dishwasher?
A solid Clean light means the cycle finished. A blinking Clean light on most Maytag boards indicates a stored fault rather than a completed cycle. On some models it signals a heating or sanitizing fault.
Check whether the dishes came out hot and dry.
How do I reset a Maytag dishwasher with blinking lights?
Cut power at the breaker for a full two minutes, then restore it. Close the door and wait 60 seconds without pressing anything. If the blinking stops, run a short test cycle.
If the same pattern returns twice, the fault is real and needs diagnosis.
What does it mean if all the lights are blinking at once?
All lights cycling together usually means a startup self-test or a board that lost its place after a power event. Give it 30 seconds to settle. If it never settles after a proper two-minute reset, the control board is the prime suspect.
Can I use my Maytag dishwasher if the lights are blinking?
Not safely, in most cases. The board stopped the cycle for a reason. If the fault involves the heating element, a shorted element is a fire risk.
If it involves the flood float, running it risks a leak. Diagnose first, then run it.
How much does it cost to fix a blinking Maytag dishwasher?
It depends entirely on the fault. A control lock or door latch fix costs nothing. A latch switch or thermistor is one of the cheaper parts.
A control board sits at the high end of dishwasher parts, plus labour if you hire out. Diagnose before you buy anything.
Decision Guide: Match Your Symptom to Your Next Move
Here's the whole workflow compressed into one table. Find your symptom, follow the row.
| Your Symptom | Most Likely Cause | Your Next Move |
|---|---|---|
| Padlock light on, buttons dead | Control lock engaged | Hold the lock button 3 to 5 seconds |
| Start/Resume blinking, no cycle | Door not latched | Check latch alignment and strike |
| Blinking started after a storm | Brownout or board fault | Two-minute breaker reset, then recheck |
| Standing water in the tub | Drain blockage or float switch | Clear sump, hose, and disposal plug |
| Dry tub, no fill, blinking | Inlet screen, supply valve, or inlet valve | Check valve open, clean screen |
| Dishes cold and wet, no Sanitized light | Heating circuit fault | Test element, hi-limit, and thermistor |
| Every light cycling endlessly | Control board | Confirm reset twice, then replace board |
| Same fault returns after new part | Wrong diagnosis or damaged harness | Stop swapping parts, test the circuit |
| Blinking right after a new install | Install error | Check disposal knockout and drain loop |
| Blinking returns after a repair | Intermittent fault or wrong part | Run three cycles, then retest the circuit |
The short version. Rule out control lock and the latch first, because they're free. Then do a proper two-minute reset, because it costs nothing and settles a lot.
Then find your model number and tech sheet before you buy a single part.
Most blinking Maytag panels come down to four things. A latch that isn't closing, water that won't drain, a heater that won't heat, or a board that took a hit from the grid. Work them in that order, from cheapest to most expensive, and you'll fix the right thing the first time.