A red light blinking on your ceiling at two in the morning gets your attention fast. If you've got a Firex smoke alarm blinking red, the light itself isn't the fault. It's a status code, and the blink pattern is telling you what the alarm thinks is wrong.
Firex is a legacy brand now owned by Kidde. Documentation for both lines describes the same core signals. A green LED confirms AC power.
A red LED covers alarm and memory states. Some units add an amber LED for trouble. Under UL 217, the standard for residential smoke alarms, units must signal internal faults rather than fail quietly.
So one red light can mean several different things, and the pattern is what separates them.
Quick Answer
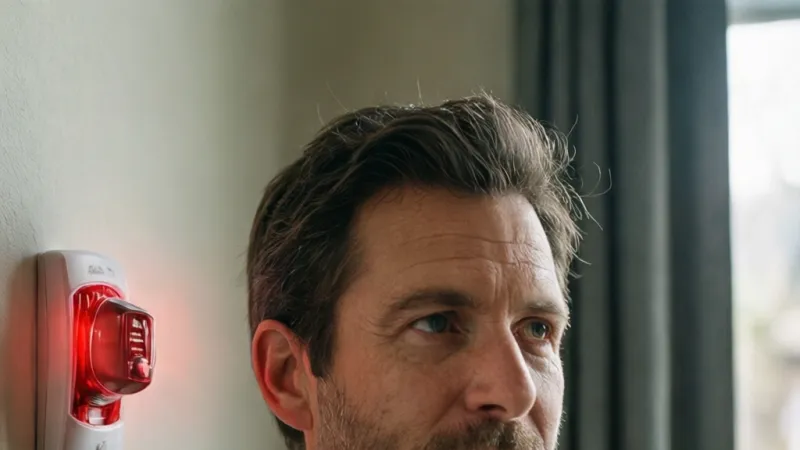
A blinking red LED on a Firex smoke alarm signals a status change. The most common cause is a failing backup battery. AC power loss, alarm memory, and sensor faults also trigger it.
Count the seconds between blinks. Note whether a chirp follows.
First, Confirm What You're Actually Looking At (Red vs. Green vs. Amber)
Before you do anything else, figure out which light is blinking. Most people glance up, see a colored dot, and assume it's the one they read about online. On a two or three LED alarm, that's an easy way to chase the wrong problem for an hour.
Firex and Kidde alarms typically carry two or three separate indicators. Each one reports a different thing, and they can blink at different rates at the same time.
| LED Color | What It Reports | Typical Behavior |
|---|---|---|
| Green | AC mains power present | Slow, steady pulse, often about once a minute |
| Red | Alarm state, alarm memory, or (on some models) low battery | Varies from a single pulse to rapid bursts |
| Amber or Yellow | Internal trouble or sensor fault | Intermittent blink, often paired with a chirp |
The green LED is the one people confuse most often. If green is pulsing slowly and steadily, your hardwired alarm has mains power. That's good news.
It rules out a tripped breaker before you've even gone downstairs.
Why the color matters more than the blink rate alone
A red blink and a green blink at the same interval mean completely different things. Green says power is fine. Red says something needs attention.
On many Firex and Kidde units, the red LED doubles as the alarm horn indicator. It flashes when the horn sounds, and it keeps flashing afterward to show that an alarm event happened. That's called alarm memory.
Some models use red for low battery instead of amber. Others reserve red purely for alarm events and put every fault on amber. That's exactly why the model number matters so much.
There's no single universal color code across the Firex line, because the brand spanned roughly two decades of design changes.
If you only see one light and it's red
Then you're on the diagnostic path, not the normal-operation path. A steady or slow green pulse means the unit is healthy. A red blink of any kind means the alarm wants you to do something.
One exception worth knowing. Some older Firex units use a red LED as the normal power indicator. If yours does, check the manual or the label on the back before you assume anything is wrong.
That single detail has sent plenty of people on unnecessary trips to the hardware store.
A quick safety check before you climb up there
Don't stand on a rolling office chair. Use a step ladder, and get someone to spot you. If the alarm is hardwired, don't yank it off the bracket to see what's going on.
Also, never pull the battery out just to stop a chirp. We'll cover the safe version of that step later, but keep it in mind now.
The Four Blink and Chirp Combinations and What Each One Means
This is the heart of the whole diagnosis. The blink rate narrows the cause, and the chirp confirms it. Read both together, never one alone.
Grab your phone and time the intervals. Ten seconds of counting beats an hour of guessing.
| Blink + Sound Pattern | Most Likely Cause | Urgency |
|---|---|---|
| Red blink, no sound, about once a minute | Normal power or standby indication | None |
| Red blink with a chirp every 30 to 60 seconds | Low backup battery, or AC power loss | Fix within a day |
| Red blinks in short bursts (often 3 at a time) | Alarm memory after a real or nuisance trigger | Low, self-clearing |
| Rapid or continuous red blink with full alarm sound | Active alarm condition | Act immediately |
Red Blink, No Sound, About Once a Minute
A red blink with no sound at all is usually the least worrying pattern. On a lot of Firex and Kidde models, this is the normal standby pulse.
If your unit uses red as its power indicator, a single pulse per minute means everything is fine. If your unit uses green for power, a silent red pulse is more likely a stored memory state or a slow-blink fault indicator.
Here's the test. Press and hold the test button for a few seconds. If the horn sounds at full volume and the unit goes quiet afterward, you're almost certainly looking at a normal or cleared state.
If the silent red blink continues past 24 hours and the test works fine, check your manual to confirm which color your model uses for power.
Red Blink With a Chirp Every 30 to 60 Seconds
This is the pattern that wakes people up, and it's the most common reason anyone searches for help. A single chirp roughly every minute, paired with a red blink, almost always points to the backup battery.
On hardwired alarms, the backup battery takes over when mains power drops. A weak 9V or AA cell will chirp to tell you it's fading. On battery-only units, the same chirp means the primary battery is nearly dead.
There's a second possibility here. If your alarm is hardwired and the breaker or a wall switch has cut power, the unit runs on backup until that battery drains, then starts chirping. So if a fresh battery doesn't fix it, go check the breaker before you buy another battery.
Manufacturer specs for most residential alarms put the low-battery chirp at 30 to 60 second intervals. End-of-life chirps use the same rhythm, which is why the age of the unit matters so much.
Red Blink in Short Bursts (Alarm Memory)
Short bursts of red blinks, usually three in a row every 40 seconds or so, mean alarm memory. The unit is telling you it sounded recently.
This happens after a real fire event, and it happens after nuisance triggers too. Burnt toast, a steamy shower, or a candle near the sensor will all leave that memory behind.
On many Kidde and Firex models, the memory clears itself after roughly 24 hours. Pressing the hush or test button usually clears it faster. Either way, this pattern is informational, not a fault.
Don't ignore it completely, though. If the alarm triggered while nobody was home, walk the house and look for a real cause before you dismiss it.
Rapid or Continuous Red Blink With Full Alarm Sound
A rapid red blink plus the horn is an active alarm. Stop reading and act.
Listen to the pattern. Three beeps, a pause, then three more is the Temporal-Three pattern for smoke. Four beeps, a pause, then four more is Temporal-Four, which is the carbon monoxide signal on combination units.
Get everyone outside. Call the fire department from outside the building, not from the hallway. If it turns out to be burnt toast, you've lost ten minutes.
If it doesn't, you've done the right thing.
Never silence an alarm and go back to bed to see if it happens again. That's the single most dangerous habit in home fire safety.
Check the Model Number and Manufacture Date Before You Touch Anything
Firex made alarms for a long time, and the LED behavior changed across generations. The only way to read your specific unit correctly is to identify it first.
This takes about two minutes and saves a lot of wrong turns. As of 2026, the Firex brand itself is discontinued, and current support runs through Kidde.
Where to find the model number and date
The model number and date code are on the back of the alarm, not the front. You'll have to remove the unit from its bracket to read them.
On most models, look for a label with the model number, a manufacture date, and sometimes a replace-by date. The date is often stamped or printed as a month and year, or as a short code.
Write both down. You'll want them if you call Kidde support or search a recall database.
Why the manufacture date matters so much
Smoke alarms have a service life, and it isn't infinite. The sensing chamber degrades, and the electronics drift. The National Fire Protection Association advises replacing smoke alarms every 10 years from the manufacture date.
That 10-year clock is the reason a lot of red-blink problems have no battery-based fix. Once a unit hits end of life, it will chirp and blink on a schedule no matter how fresh the battery is.
Manufacturers build in an end-of-life signal specifically so you can't miss it. It looks a lot like a low-battery chirp, which is exactly why so many people replace batteries they didn't need to replace.
| Situation | What It Means | What To Do |
|---|---|---|
| Unit under 10 years old | Still within service life | Diagnose the fault normally |
| Unit at or past 10 years | End of service life | Replace the alarm |
| Date label unreadable | Age unknown | Treat as expired and replace |
| Unit has a yellow cap on the sensor | Possible recalled unit | Check the CPSC recall list |
Check the recall database while you're at it
Several Kidde and Firex alarm batches have been recalled over the years. The most well known involved a yellow plastic cap left on the sensor, which can stop the unit from detecting smoke at all.
Search your model number against the U.S. Consumer Product Safety Commission recall database. It takes thirty seconds and it's free.
If your model comes up, stop troubleshooting and get a replacement. A recalled alarm isn't a repair job.
Branch 1: Low Battery or Backup Battery Failure
This is the most common branch by a wide margin. If you have a red blink plus a chirp every minute or so, start here.
The logic is simple. If the chirp stops after a fresh, correctly installed battery, you're done. If it doesn't, move to Branch 2.
Which battery does your alarm actually take
Don't guess. The wrong cell either won't fit or won't hold proper voltage.
| Alarm Type | Typical Battery | Notes |
|---|---|---|
| Hardwired with replaceable backup | 9V alkaline or AA alkaline | Replace yearly |
| Hardwired with sealed backup | Sealed lithium pack | Not user replaceable |
| Battery-only | 9V or AA alkaline | Replace yearly, or when chirping |
| Sealed 10-year battery-only | Sealed lithium | Replace the whole alarm at end of life |
If your alarm has a sealed lithium backup, you cannot fix a low-battery chirp with a battery swap. That unit is telling you it's done. Replace it.
Step by step: replacing the backup battery safely
- Tell everyone in the house what you're doing, so nobody panics when the alarm chirps during the swap.
- Cut power at the breaker if the unit is hardwired. This protects you and the electronics.
- Twist or press the release tab and pull the alarm away from the mounting bracket.
- Unplug the wiring harness from the back of the unit.
- Remove the old battery and note its orientation.
- Wait about 30 seconds. This lets the unit reset.
- Install the new battery, matching the polarity exactly.
- Reconnect the harness, remount the alarm, and restore power.
- Press and hold the test button until the horn sounds.
- Write the replacement date on the battery or on the unit's label.
That last step sounds fussy. It isn't. It's the difference between remembering and guessing next year.
If the chirp comes back within a day
Then the battery wasn't the problem. Two things to check next.
First, confirm the new battery is actually good. A cell that sat in a drawer for three years can be weak out of the pack. Test it with a multimeter or swap in one you know is fresh.
Second, check the battery contacts. Corrosion or a bent spring clip will cause an intermittent connection that mimics a dead battery. Clean the contacts with a dry cloth and gently bend the clip back into shape.
If a verified-fresh battery and clean contacts still chirp, the problem is upstream. Head to Branch 2.
Branch 2: AC Power Loss, Breaker, Switch, or Wiring
If a fresh battery doesn't stop the red blink and chirp, the alarm isn't getting mains power. This branch applies to hardwired units only.
The logic here is a chain. If the breaker is on and the circuit is live, then check the switch. If the switch is on, then check the wiring and the interconnect.
Start at the breaker panel
Go to your electrical panel and look for a tripped breaker. A tripped breaker sits in the middle position, not fully on and not fully off.
Reset it by pushing it fully off, then fully on. If it trips again immediately, stop. You have a circuit fault, and that's an electrician's job.
Also check for a GFCI or AFCI outlet upstream on the same circuit. A tripped GFCI will kill power to everything downstream, including your smoke alarms.
Check whether the alarm is on a switched circuit
This one catches people constantly. Some older homes have smoke alarms wired to a circuit that also feeds a light switch. Flip the switch off, and the alarms lose mains power.
Walk around and check every switch near the alarm circuit. If you find one that controls the alarms, tape it in the on position or label it clearly.
Better still, have an electrician move the alarms to an unswitched circuit. Alarms should never be on a switch you can accidentally bump.
Inspect the wiring harness and interconnect
Once power is confirmed at the breaker, look at the alarm itself.
- Kill the breaker again before you touch any wiring.
- Pull the alarm off the bracket and unplug the harness.
- Look at the connector for bent pins, corrosion, or scorch marks.
- Check that the wires are seated firmly in the connector.
- On interconnected systems, look for the red traveler wire. A loose traveler wire can cause odd behavior across every alarm in the house.
- Re-seat the connector firmly and remount the alarm.
If the connector shows heat damage or melted plastic, stop and call an electrician. That's a fire risk, not a DIY repair.
When the whole system is interconnected
On an interconnected setup, one faulty alarm can make every unit in the house blink and chirp. That's confusing, and it's a common reason people replace the wrong unit.
The fix is to isolate. Disconnect one alarm at a time from the harness, then restore power and see whether the fault clears. This is slow work, but it beats replacing five alarms to fix one.
Most hardwired interconnect systems support up to around 24 devices on a single circuit. Check your specific manual before adding or swapping units, because mixing incompatible models can break the interconnect entirely.
If the fault follows a single unit no matter where you plug it in, that unit is the problem. Replace it. If the fault stays with the wiring, you're looking at a circuit issue and you should bring in an electrician.
Branch 3: Alarm Memory After a Real or Nuisance Trigger
If your red light blinks in short bursts rather than a steady rhythm, you're looking at alarm memory. The unit is telling you it sounded recently, and it wants you to know which unit it was.
This is the most misunderstood pattern on the whole list. People see a blinking red light and assume something is broken. Usually, nothing is.
The alarm did its job, and now it's keeping a receipt.
How alarm memory actually works
On most Firex and Kidde units, the red LED blinks in groups of three after an alarm event. That burst repeats roughly every 40 seconds. On an interconnected system, only the unit that actually detected the smoke shows this pattern.
That last part is the useful bit. If five alarms went off but only one has a blinking red light, that's your source. It tells you which room to investigate.
What triggers alarm memory in the first place
Real smoke, obviously. But the far more common cause is a nuisance trigger. Here's what sets them off.
- Burnt toast or a smoking pan near a kitchen alarm
- Steam from a long shower or a boiling pot
- A candle burning close to the sensor
- Dust kicked up during renovation or vacuuming
- Aerosol sprays, hairspray, or air freshener near the unit
- A sudden temperature swing that pushes humidity into the chamber
If your alarm went off while you were cooking, that's the whole story. Clear the memory and move on.
When to take alarm memory seriously
Don't just clear it and forget it. If the alarm triggered while nobody was home, walk the house before you dismiss it.
Check for scorched outlets, a fridge or dryer running hot, or anything that smells burnt. Check the attic and basement if you have them. Smoke travels, and the alarm that fired might not be the one closest to the problem.
If you find nothing and the pattern doesn't come back, you're fine. If it fires again within a few days with no obvious cause, move to Branch 4.
Clearing alarm memory the right way
- Make sure the air is clear and there's no smoke or steam present.
- Press and hold the test button until the horn sounds, then release.
- Wait 30 seconds and watch the LED.
- If the short bursts stop, the memory is cleared.
- If they continue, press the hush button once and wait again.
- If it still blinks in bursts after an hour, the unit may be stuck in a fault state.
On some models, the only way to clear memory is to kill power at the breaker for a full minute. That's a legitimate step, but it also resets the unit's internal clock on some models. Check your manual first.
The difference between memory and a stuck alarm
Memory blinks in bursts and then stops. A stuck alarm keeps sounding or keeps blasting the horn in cycles. Those are different problems.
If the horn fires without any smoke present and won't stop, don't keep pressing hush. Disconnect the unit from its harness and get it out of the house. That's a genuine failure, and it needs a replacement, not a reset.
Branch 4: Sensor Fault, Dust, Insects, or a Left-On Yellow Cap
If a fresh battery didn't fix it and the breaker is fine, you're probably looking at a sensor problem. This branch covers the physical stuff inside the unit.
The good news is that some of these are fixable in ten minutes. The bad news is that one of them is a recall issue, and you need to know which one you have.
Dust, cobwebs, and insects in the sensing chamber
The sensing chamber is a small, dark, open space inside the alarm. Air drifts through it constantly. So does everything else in the air.
Over time, dust builds up on the chamber walls. Spiders love it. So do small beetles and ants.
When debris blocks the chamber, the alarm either misfires or fails to detect properly.
The fix is simple. Take the unit down, kill power first if it's hardwired, and vacuum the chamber opening with a soft brush attachment. Don't use a shop vac.
The suction is too strong and can damage the sensor.
Once a month is plenty. Once every three months is the minimum most manufacturers suggest.
The yellow cap problem
Some Firex and Kidde alarms shipped with a yellow plastic cap over the sensor. It's a shipping cover meant to protect the chamber before installation. It has to come off.
If it stays on, the alarm cannot detect smoke. It will still test fine because the test button bypasses the sensor on many models. That's the dangerous part.
A batch of these units was recalled because of exactly this issue. If you see a yellow cap on your alarm, stop and check your model number against the CPSC recall list before you do anything else.
How to tell a sensor fault from a low battery
The two sound similar, and that's the problem. Here's how to separate them.
| Signal | Low Battery | Sensor Fault |
|---|---|---|
| Chirp interval | Every 30 to 60 seconds | Often irregular, or every 30 to 60 seconds |
| Red or amber LED | Red on some models | Usually amber or yellow |
| Response to test | Horn sounds normally | Horn may sound weak or fail |
| Fix | New battery | Clean chamber or replace unit |
| Recurs after battery swap | No | Yes, often within hours |
If you swapped the battery and the chirp came back within a day, it's not the battery. Look at the sensor.
Cleaning the chamber safely
- Kill power at the breaker if the unit is hardwired.
- Remove the alarm from its bracket and unplug the harness.
- Take it outside or over a bin, so you're not blowing dust back into the room.
- Use a vacuum with a brush attachment on low suction.
- Vacuum the openings on the side and face of the unit.
- Wipe the outer housing with a dry or barely damp cloth. Never wet the inside.
- Let it sit for a few minutes to make sure it's fully dry.
- Reconnect, remount, restore power, and test.
Don't use compressed air. It pushes debris deeper into the chamber instead of pulling it out.
When cleaning doesn't fix it
If you've cleaned the chamber and the fault pattern returns within a day or two, the sensor is failing. There's no repair for that. Replace the unit.
Sensor failure is one of the reasons the 10-year replacement rule exists. The chamber degrades with age even if you keep it spotless. Past a decade, cleaning buys you time you don't really have.
Branch 5: End of Service Life and When No Battery Swap Will Fix It
If your alarm is 10 years old or older, this is likely your answer. No battery, no reset, and no cleaning will fix an expired unit. It's designed to tell you it's done.
Manufacturers build in an end-of-life signal specifically so the alarm can't quietly stop working. It chirps and blinks on a schedule until you replace it. That's the point.
How the end-of-life signal behaves
The pattern looks almost identical to a low battery chirp. That's intentional, because it gets your attention. The difference is what happens after you swap the battery.
On a low battery, the chirp stops. On end-of-life, it comes back within minutes to hours. Some units also show a distinct blink pattern or a specific chirp sequence, usually described in the manual.
Sealed 10-year units are the clearest case. There's no battery to replace. When the sealed lithium cell runs down, the whole alarm is finished.
How to confirm the unit has expired
Check the back label. You're looking for a manufacture date or a replace-by date. Here's the rule.
- If the manufacture date is 10 or more years ago, replace it.
- If the label is missing or unreadable, treat it as expired.
- If the unit has a replace-by date and you've passed it, replace it.
- If you can't tell, replace it. A new alarm costs less than almost any other home safety purchase.
Don't try to squeeze another year out of a chirping expired unit. It's not detecting reliably at that point. It's just making noise.
What to buy as a replacement
Match the power type and the mounting setup. If the old unit is hardwired, get a hardwired replacement with the same interconnect wiring. If it was battery-only, a sealed 10-year battery unit is the easiest upgrade.
Photoelectric sensors are less prone to nuisance alarms near kitchens and bathrooms. Ionization sensors respond faster to flaming fires. Dual-sensor units cover both, and they cost a bit more.
If the old unit was a combination smoke and carbon monoxide alarm, replace it with another combination unit. Don't downgrade to smoke-only just because the wiring is easier.
The replacement timeline
- Note the model number, power type, and interconnect style of the old unit.
- Buy a replacement that matches all three.
- Kill power at the breaker before you start.
- Remove the old unit and unplug the harness.
- Check whether the new unit's harness matches the old connector.
- If it matches, plug in, mount, restore power, and test.
- If it doesn't match, use the adapter included with the new unit, or have an electrician rewire.
- Write the install date on the new unit.
- Test every interconnected alarm in the house, not just the new one.
That last step matters. On an interconnected system, a new unit can fail to sync with old ones if the models aren't compatible.
The Step-by-Step Fix: From Breaker Off to Final Test
Here's the full sequence in one place. Use it when you've narrowed down the branch and you're ready to act.
It assumes you're working on a hardwired unit. If yours is battery-only, skip the breaker steps and start at step 4.
Before you touch anything
- Tell everyone in the house what you're doing. Alarms will chirp during the process.
- Grab a step ladder, a flashlight, and a fresh battery of the correct type.
- Have your phone handy to look up the model number if needed.
- Note the exact blink pattern and chirp interval before you start. You'll want it if the problem comes back.
The actual fix sequence
- Go to the breaker panel and switch off the circuit feeding the alarms.
- Confirm the alarms are dead by pressing test. No horn means power is off.
- Remove the alarm from its mounting bracket. Twist counterclockwise, or press the release tab, depending on the model.
- Unplug the wiring harness from the back of the unit.
- Remove the old backup battery and set it aside.
- Wait 30 seconds to let the unit fully discharge.
- Inspect the battery contacts for corrosion. Clean with a dry cloth if needed.
- Vacuum the sensing chamber openings with a soft brush attachment.
- Install the new battery, matching polarity.
- Plug the harness back in firmly.
- Remount the alarm on the bracket and twist or click it into place.
- Restore power at the breaker.
- Press and hold the test button until the horn sounds.
- Release and listen. A single beep or silence means the test passed.
- Wait five minutes and watch the LED. A slow green pulse means normal operation.
The final test you shouldn't skip
Press and hold test on every alarm in the house, one at a time. On an interconnected system, pressing test on one unit should trigger all of them. That's how you know the interconnect is working.
If only the unit you pressed sounds, the interconnect is broken. That's a wiring issue. Bring in an electrician.
If all of them sound but one sounds weak, that unit's horn is failing. Replace it.
What fixed actually looks like
A healthy hardwired alarm shows a slow green pulse, roughly once a minute. No chirping, no red blink, no amber light. Pressing test gives a loud, full-volume horn.
Give it 24 hours. If the chirp or red blink comes back within that window, you didn't fix it. Go back to the branch you were on and check the next item.
Swapping a Legacy Firex Unit for a Current Kidde Replacement
Firex as a standalone brand is gone, and current support runs through Kidde. If your unit has reached end of life, you're not replacing like for like. You're moving to a current product.
That's usually straightforward, but two things trip people up. The harness connector and the interconnect signal.
Matching the wiring harness
The harness is the plug that connects the alarm to the ceiling wiring. Older Firex harnesses don't always match current Kidde harnesses, even when the wiring itself is identical.
Here's how to check before you buy.
- Take the old alarm down and look at the connector shape.
- Count the pins and note their arrangement.
- Check the new unit's box or product page for harness compatibility.
- Many current Kidde units ship with an adapter that fits older Firex-style plugs.
- If no adapter is included and the shapes don't match, you'll need to rewire the connector.
Rewiring a harness is a small job for an electrician. It's not a job for someone who's never worked inside a junction box.
The interconnect compatibility issue
On a hardwired interconnected system, all alarms talk to each other over a traveler wire. Older Firex units and current Kidde units sometimes use different signaling.
The result is that your new alarm works fine on its own, but doesn't trigger the others. Or worse, it triggers them randomly.
If you're replacing one unit on a system of several, replace them all at the same time. That's the cleanest path, and it also resets the 10-year clock across the board.
If replacing all of them isn't in the budget right now, check the new unit's documentation for backward compatibility with your existing models. Kidde publishes this information for most current products.
What to keep and what to replace
| Component | Keep or Replace | Why |
|---|---|---|
| Mounting bracket | Often replace | New units usually include a matched bracket |
| Wiring harness | Keep if it matches | Adapters are available for many older plugs |
| Junction box wiring | Keep | Only an electrician should touch this |
| Backup battery | Replace | Always start fresh with a new unit |
| Interconnect traveler wire | Keep | Same wire, as long as the units are compatible |
The upgrade worth considering
If you're already replacing an expired unit, a sealed 10-year battery model removes the annual battery ritual entirely. No more chirping at 2 a.m. because a 9V cell gave up.
A combination smoke and CO alarm in the hallway outside bedrooms is another upgrade worth making during a swap. It costs a bit more, but it covers a hazard a smoke-only unit ignores completely.
Whatever you choose, write the install date on the back of the new unit. Ten years from now, that label is what tells the next person, or you, when it's due.
Hardwired vs. Battery-Only vs. Interconnected: Which Branch You're On
The power type of your alarm changes the entire diagnostic path. A red blink on a battery-only unit points somewhere very different than the same blink on a hardwired one.
Figure out which system you have before you start swapping parts. It takes thirty seconds and it saves you from chasing the wrong fault.
Battery-only alarms
Battery-only units have no connection to your home's electrical system. The entire unit runs on a 9V, AA, or sealed lithium cell.
If a battery-only alarm blinks red and chirps, the cause is almost always the battery itself. There's no breaker to check and no wiring to inspect. The only other possibility is a sensor fault or end of life.
Sealed 10-year units are a subset of this category. You can't swap the battery, so any low-battery or end-of-life signal means the whole alarm is finished.
Hardwired alarms with a backup battery
These are the most common alarms in homes built after the mid-1980s. They run on mains power and fall back to a backup cell when power drops.
A red blink here can mean three things. The backup battery is dying. The mains power is cut.
Or the unit itself is faulty. That's why the branch order matters.
Check the breaker first. Then check the battery. Then look at the sensor.
Doing it in that order saves you from buying batteries you didn't need.
Interconnected systems
Interconnected alarms are hardwired together, usually with a red traveler wire, so all of them sound at once. Some newer systems use wireless RF interconnect instead of a physical wire.
The diagnostic twist here is that one faulty unit can make the whole system misbehave. A single alarm with a bad sensor can trigger every other unit in the house.
When you troubleshoot an interconnected system, isolate one unit at a time. Pull it off the harness, restore power, and see if the fault clears. That tells you whether the problem is the unit or the wiring.
How to tell which one you have
Pull the alarm off its bracket and look at the back. That's the fastest way to know for sure.
| What You See | System Type | What It Means |
|---|---|---|
| Wires going into a harness plug | Hardwired | Has mains power and probably a backup battery |
| No wires, just a battery compartment | Battery-only | Runs entirely on the battery |
| Wires plus a third red or orange wire | Interconnected hardwired | Talks to other alarms in the house |
| Wires plus a radio module or antenna | Wireless interconnect | Talks to other alarms without a traveler wire |
If you're not sure, don't guess. The model number on the back label will tell you exactly what you're working with.
What changes for each type
The fix steps differ more than people expect. Here's the short version.
- Battery-only: replace the battery, or replace the alarm if it's sealed or expired.
- Hardwired: check the breaker, then the backup battery, then the sensor.
- Interconnected: isolate one unit at a time to find the fault source.
- Wireless interconnect: check that all units are paired and within range of each other.
Get the type wrong and you'll spend an hour on a problem that isn't there. Get it right and most red blink issues resolve in under ten minutes.
Mistakes That Make It Worse (Including Pulling the Battery to Stop the Noise)
Most of the frustration around a blinking alarm comes from one or two wrong moves. Avoid these and the whole process gets shorter.
Some of these mistakes are just annoying. One of them is genuinely dangerous. We'll start with that one.
Pulling the battery to silence the chirp
This is the big one. It's also the most common response, especially at 2 a.m.
Removing the battery stops the noise. It also leaves your home without working smoke detection. If a fire starts while the alarm is sitting on a counter with no battery, you have no warning.
The NFPA and every manufacturer we've reviewed say the same thing. Never remove a battery to silence an alarm. Fix the cause or replace the unit, but keep the alarm powered.
If you truly can't fix it tonight, swap in a sealed 10-year unit. It's cheap, it takes ten minutes, and it ends the problem.
Pressing hush over and over
The hush button is designed to silence nuisance alarms for a few minutes. It's not a diagnostic tool.
If you're pressing hush three or four times a night, the alarm is telling you something. Either the sensor needs cleaning, or the unit is placed too close to a cooking appliance or bathroom.
Repeated hushing masks the problem instead of fixing it. And on some models, repeated hush events put the unit into a deeper silence mode that's harder to clear.
Standing on a chair or a box
A fall from a chair while holding a smoke alarm is a real injury risk. It happens more than people think.
Use a step ladder. Have someone spot you. If the alarm is high on a vaulted ceiling, get the right ladder before you start.
While you're up there, don't yank the unit off the bracket. Most models twist off or have a release tab. Forcing them breaks the mounting bracket and sometimes the harness connector.
Painting over or covering the alarm
Paint clogs the sensing chamber and blocks airflow. So does a plastic bag, a shower cap, or a piece of tape over the vents.
If you're painting a room, remove the alarm entirely and store it somewhere clean. Don't just cover it. The paint mist gets into the chamber anyway and can trigger a permanent fault.
The same goes for a bag over the alarm during construction. Dust gets in, and the unit either misfires or fails to detect.
Ignoring the model number
Replacing a unit without checking the model number is how people end up with a mismatched harness. It's also how they miss a recall notice.
The model number takes ten seconds to find. It's on the back of the alarm. Write it down, then search it against the recall database before you buy a replacement.
Assuming every red blink is a battery problem
This is the mistake that costs the most time. Not every red blink is a low battery. Some are memory.
Some are faults. Some are end of life.
If you swap a battery and the chirp comes back within a day, you didn't fix it. Stop swapping and go back to the branch you were on.
Mixing old and new alarms on one interconnect
Replacing one unit on a five-unit interconnect system often causes more problems than it solves. Older and newer models sometimes use different signaling.
The result is alarms that don't trigger each other, or ones that trigger randomly at 3 a.m. If you're replacing one, replace them all at once.
Skipping the test after the fix
A test button press takes five seconds. It confirms the horn works, the power is connected, and the unit is ready.
Skip it and you're guessing. Press and hold test on every alarm in the house, and make sure interconnected units all sound together.
Blink Code Quick-Reference Table and Maintenance Schedule
Keep this section handy. It's the fastest way to translate a blinking light into an actual cause.
Print it, screenshot it, or bookmark it. It covers the patterns most Firex and Kidde units use, though exact behavior varies slightly by model.
The full blink code reference
| Pattern | Sound | Meaning | Action |
|---|---|---|---|
| Green pulse, about 1 per minute | None | Normal AC power | None |
| Red pulse, about 1 per minute | None | Standby or normal power on red-LED models | Check manual, likely fine |
| Red blink plus chirp every 30 to 60 seconds | Single chirp | Low backup battery, or AC power loss | Replace battery, check breaker |
| Red bursts, often 3 every 40 seconds | None | Alarm memory | Clear with test or hush, or wait 24 hours |
| Amber or yellow blink plus chirp | Single chirp | Sensor fault or internal trouble | Clean chamber, replace if it returns |
| Red rapid blink plus full horn | T3 or T4 pattern | Active smoke or CO alarm | Evacuate and call emergency services |
| Chirp that returns after battery swap | Single chirp | End of life, or a real fault | Check manufacture date, replace if expired |
Model-specific behavior does vary. If your unit does something not on this list, the manual is the final word.
What each chirp pattern means in plain terms
A single chirp roughly every minute is the standard something-needs-attention signal. It covers low battery, end of life, and some faults.
Three beeps in a row, repeated, is the smoke alarm signal. That's the Temporal-Three pattern defined in UL 217.
Four beeps in a row, repeated, is the carbon monoxide signal on combination units. That's Temporal-Four, defined in UL 2034.
If you hear four beeps and you have a fuel-burning appliance or an attached garage, get outside and call the fire department. Don't try to air out the house first.
Monthly maintenance
Once a month, press and hold the test button on every alarm. Confirm the horn sounds at full volume.
On interconnected systems, pressing test on one unit should trigger all of them. If any unit stays silent, that's a fault worth investigating.
Vacuum the sensor openings with a soft brush attachment once a month if you have pets or live in a dusty area. Once every three months is fine otherwise.
Annual maintenance
Replace the backup battery once a year, unless your unit uses a sealed 10-year cell. A good habit is to do it when you change your clocks for daylight saving.
If you've had a nuisance alarm in the past year, clean the chamber thoroughly. If you've had more than three, look at the placement. The alarm may be too close to a kitchen or bathroom.
Ten-year maintenance
Replace the entire alarm every 10 years from the manufacture date. That's the rule from the NFPA, and it applies even if the unit still seems to work.
Write the install date on the back of the new unit when you mount it. That way, the next person, or you ten years from now, knows exactly when it's due.
If you have a mix of old and new alarms in the house, put a note on your calendar for the oldest one. When it expires, consider replacing the whole set at once.
Safety, Codes, and Recalls You Should Know About
A blinking alarm is a safety device doing its job. What you do next matters more than the blink itself.
These are the codes, standards, and safety rules that govern residential smoke alarms in the US and UK. They're not optional reading if you're troubleshooting a unit that may not be detecting properly.
The standards behind your alarm
UL 217 is the standard for residential smoke alarms in the US. It covers detection performance, alarm signaling, and fault reporting.
UL 2034 covers carbon monoxide alarms. Combination smoke and CO units are tested against both.
NFPA 72 is the installation and placement standard. It defines where alarms go, how many you need, and how they should be interconnected.
In the UK, BS 5839-6 covers fire detection in dwellings. Building Regulations Approved Document B sets the requirements for new builds and major renovations.
Placement rules that prevent nuisance alarms
Where your alarm sits affects how often it false alarms. Placement rules exist for a reason.
- Keep alarms at least 10 feet from cooking appliances.
- Keep them at least 3 feet from bathroom doors.
- On a wall, mount them 4 to 12 inches down from the ceiling.
- Avoid dead air spaces in corners where smoke won't reach the sensor.
- Put one alarm inside every bedroom.
- Put one alarm outside each sleeping area.
- Put at least one alarm on every level of the home.
If your alarm keeps triggering in the kitchen, move it. Don't just hush it every time you cook.
The 10-year replacement rule
Smoke alarms have a service life of 10 years from the manufacture date. That's not a marketing rule. It's a safety standard based on sensor degradation.
The sensing chamber collects dust and contaminants over time. The electronics drift. By year ten, the unit is no longer reliably detecting smoke at the levels it was tested against.
Replace the whole alarm at the 10-year mark. A fresh battery doesn't reset the clock.
Recalls worth checking
Several Kidde and Firex alarm batches have been recalled. The two most common issues were a yellow plastic cap left on the sensor and a faulty silence button.
The yellow cap blocks smoke from reaching the sensor. The unit still passes the test button, which is what makes it dangerous.
The silence button issue could cause the alarm to fail to sound during a real fire. That recall covered millions of units.
Go to the U.S. Consumer Product Safety Commission site and search your model number. It's free and it takes thirty seconds.
If your unit is recalled, stop troubleshooting and replace it.
UK-specific requirements
If you're in the UK, the rules are different. England requires smoke alarms on every level of a rented home, and carbon monoxide alarms in rooms with a fixed fuel-burning appliance.
Scotland goes further. Since February 2022, all homes in Scotland must have interlinked alarms, and the standard covers both smoke and heat detection.
Wales and Northern Ireland have their own variations. If you rent, your landlord is responsible for meeting the standard. If you own, it's on you.
FAQs: Firex Red Light Blinking
These are the questions that come up most often, and they deserve short, direct answers. If you've already worked through the branches above, most of these will feel familiar.
Why is my Firex smoke alarm blinking red but not beeping?
A red blink with no sound is usually normal standby or a stored alarm memory. On some Firex models, the red LED is the power indicator, not a fault light. If the blink continues past 24 hours with no chirp and the test button works, it's almost certainly not a fault.
How do I know if my Firex alarm has reached end of life?
Check the manufacture date on the back label. If the unit is 10 years old or older, it's past its service life. It will chirp and blink no matter how fresh the battery is.
Sealed 10-year units have no replaceable battery, so end of life means replacing the whole alarm.
Can I disconnect the alarm to stop the blinking?
No. Disconnecting a smoke alarm leaves your home without working fire detection. If the chirp won't stop and you can't fix it tonight, replace the unit with a sealed 10-year model.
It costs less than a takeaway meal and takes about ten minutes to install.
What does it mean if the red light blinks in short bursts?
Short bursts, often three blinks at a time, mean alarm memory. The unit is telling you it sounded recently. This happens after a real fire event or a nuisance trigger like burnt toast.
It usually clears on its own within about 24 hours, or you can clear it with the test or hush button.
How do I find the model number on my Firex alarm?
The model number is on the back of the unit, not the front. Remove the alarm from its bracket to read it. Look for a label with the model number, manufacture date, and sometimes a replace-by date.
Write it down before you call support or check for recalls.
What's the difference between a red blink and an amber blink?
Red typically signals an alarm event, alarm memory, or low battery. Amber or yellow usually indicates an internal fault or sensor trouble. The exact behavior varies by model, so check your manual.
If amber is blinking, cleaning the sensor chamber is the first thing to try.
Why does my alarm chirp again after I replace the battery?
If the chirp returns within a day, the battery wasn't the problem. Check the breaker if the unit is hardwired. If the unit is 10 years old or more, it's at end of life and needs replacing.
A dirty sensor chamber can also cause persistent chirping.
Can I just take the battery out to stop the chirp?
Absolutely not. Removing the battery silences the alarm, but it also leaves your home unprotected. Every major fire safety organization warns against this.
Fix the cause, or replace the unit tonight if you can't fix it.
My alarm went off and now the red light blinks. Is it broken?
No, it's working as designed. That's alarm memory, and it's the unit telling you it sounded. If the trigger was cooking, steam, or a candle, clear the memory and move on.
If nobody was home when it fired, walk the house and look for a real cause before you dismiss it.
Decision Guide: Fix It Yourself, Replace It, or Call Someone
By now you've narrowed down the cause. The last question is who should do the work. Here's the honest answer for each situation.
Most red blink problems fall into the DIY bucket. A few need a replacement. A smaller number need an electrician.
Sorting that out takes about a minute.
If the cause is a battery or alarm memory
Fix it yourself. This is the simplest branch on the whole list.
- Swap the backup battery if it's replaceable.
- Press and hold test to clear memory.
- Vacuum the sensor chamber if you've had nuisance triggers.
You don't need tools beyond a step ladder and a soft brush vacuum attachment. Total time: about ten minutes.
If the unit is 10 years old or older
Replace it. Don't try to repair an expired alarm.
The sensor degrades with age, and no amount of cleaning brings it back. A new alarm costs between roughly $15 and $45 depending on the type. A combination smoke and CO unit runs higher.
If the old unit is hardwired and the new one uses the same harness, this is still a DIY job. Match the power type, match the interconnect style, and you're done.
If the breaker keeps tripping
Call an electrician. A breaker that trips repeatedly points to a circuit fault, not an alarm fault.
Don't keep resetting the breaker and hoping it holds. A circuit that's tripping is a fire risk in its own right. An electrician can trace the fault and fix it properly.
The same goes for any wiring that shows heat damage, melted insulation, or scorch marks at the harness connector.
If the harness doesn't match the new alarm
This one's a judgment call. Some current Kidde units ship with an adapter that fits older Firex harnesses. If yours does, it's a DIY swap.
If there's no adapter and the connector shapes don't match, you're looking at rewiring the harness. That means working inside the ceiling junction box. It's a small job for an electrician, and a risky one for anyone who hasn't done it before.
If the alarm is on a switched circuit
Call an electrician to move it. Smoke alarms should never be on a switch you can accidentally flip.
In the meantime, tape the switch in the on position and label it clearly. That's a stopgap, not a fix. The permanent answer is rewiring the alarms to an unswitched circuit.
If you're in a rental
Your landlord is responsible for the alarm in most jurisdictions. In the UK, the Smoke and Carbon Monoxide Alarm (Amendment) Regulations 2022 put the duty squarely on landlords.
Report the fault in writing. If it's not fixed within a reasonable time, contact your local council or housing authority. Don't remove or disconnect the alarm yourself.
Thatcan put your deposit and your safety at risk.
The one-minute decision table
| Situation | Who Should Fix It |
|---|---|
| Battery chirp, replaceable cell | You, in ten minutes |
| Alarm memory after cooking | You, press test |
| Unit 10+ years old | You, replace the unit |
| Breaker trips repeatedly | Electrician |
| Harness doesn't match, no adapter | Electrician |
| Alarm on a switched circuit | Electrician |
| Recalled unit | You, replace it now |
| Rental property | Landlord, in writing |
When to stop and call someone immediately
Two situations mean you stop and get help now.
If the alarm is sounding with no smoke present and won't stop, disconnect it from the harness and get it out of the house. A stuck horn is a genuine failure, and a replacement is the only real fix.
If you smell burning near the alarm, an outlet, or the breaker panel, get everyone outside and call the fire department from outside the building. Don't investigate a burning smell indoors, and don't wait to see whether the alarm resets itself.