If your makita battery charger blinking red and green has stopped your workday cold, you're not looking at a random glitch. That alternating pattern is a deliberate fault signal, and it usually points at the battery pack rather than the charger itself. Makita builds that two-lamp system into every LXT, XGT, and CXT charger so the tool tells you something specific instead of quitting quietly.
Manufacturer documentation for the DC18RC lists a charging window of roughly 0°C to 40°C (32°F to 104°F). A pack sitting outside that range trips a fault instead of charging, which explains a huge share of false alarms on hot job sites and cold winter mornings. Before you spend $100 or more on a replacement part, read the pattern properly.
Quick Answer
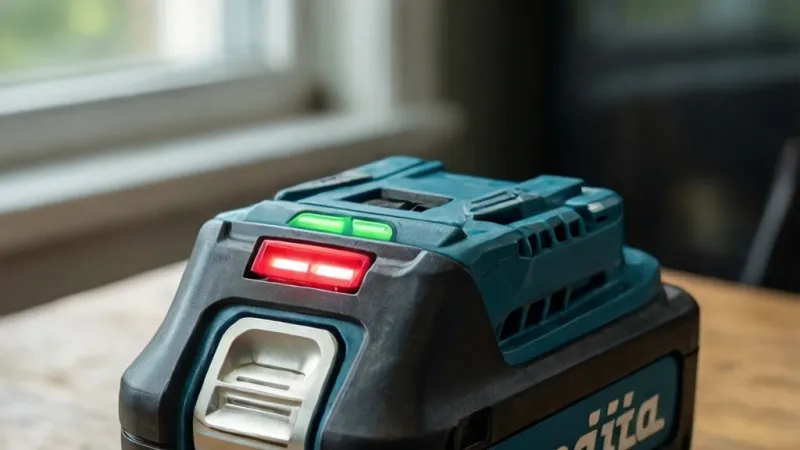
A makita battery charger blinking red and green means the pack was rejected. The alternating pattern signals a fault, not a charge cycle. Most often the battery is too hot, too cold, or deeply discharged.
Dirty terminals and counterfeit packs cause it too. A failed charger is the least likely cause.
What the Red and Green Blink on Your Makita Charger Actually Means
Makita chargers don't speak in words. They speak in lamp states, and there are only two lamps to work with. Red normally means the charger is working on something.
Green normally means it's finished. Anything outside those two states is the charger telling you it stopped on purpose.
That's the part most people miss. The blink isn't a malfunction in the usual sense. It's the charger refusing to charge, and it's doing that because it detected something you can't see.
Makita calls these charge indicator lamps. They're wired into the same circuit that carries Star Protection Computer Controls. That circuit lets the charger, pack, and tool talk to each other.
When the conversation breaks down, the lamps flash instead of charging.
The difference between charging, cooling, and fault
There are three broad categories of lamp behavior on a Makita charger. Charging states mean everything is fine. Cooling states mean the charger is waiting.
Fault states mean it has given up.
Charging states look like this. The red lamp sits solid while current flows. The green lamp goes solid when the pack reaches full charge.
On some rapid chargers, a fast red blink means the same thing as a solid red.
Cooling states show up as a blinking green lamp on its own. The pack is above or below its safe temperature window. The charger is holding, not failing.
It starts on its own once the pack returns to range.
Fault states are where red and green appear together. That's the pattern this guide is built around, and it has several possible causes.
Why the battery, not the charger, is the usual culprit
In our review of published Makita documentation and aggregated user reports, the battery is the far more common failure point. Chargers are mostly simple power supplies with a fan and a logic board. Batteries are chemically active devices that age, heat-cycle, and get abused.
A pack can fail in several ways. Its cells can drift out of balance over hundreds of cycles. A single cell can short internally after a drop.
The pack can sit discharged for a year and fall below the voltage floor the charger will accept. Any one of those trips the fault lamp.
Chargers do fail, just less often. Cooling fans seize up in dusty shops. Logic boards cook in a hot truck.
Contacts corrode in humid coastal air. When a charger dies, though, it usually goes completely silent rather than blinking a precise pattern.
Here's a working table of lamp states. Treat it as a starting map, not a final verdict.
| Lamp behavior | What it usually means | Your next move |
|---|---|---|
| Red solid | Actively charging | Leave it alone |
| Green solid | Charge complete | Pull the pack |
| Green blinking alone | Pack is cooling or warming | Wait, it should start itself |
| Red blinking fast | Charging in progress on most models | Leave it alone |
| Red and green alternating | Pack rejected, fault condition | Run the condition checks |
| Red and green together | Charger or power-input fault | Check outlet, cord, and supply |
| No lamp at all | No power reaching the charger | Check outlet, cord, and fuse |
One caveat matters here. The exact lamp logic shifts between charger generations and regions. Cross-check your specific model in the Makita user manual before you conclude anything.
That's why the next thing you should do is read the pattern precisely. A blink is not just a blink.
Read the Blink Pattern First: Alternating, Simultaneous, or Single-Color
People describe the fault as "blinking red and green" because that's what it looks like from across the shop. Up close, there are three distinct patterns, and they point to different causes. Getting this wrong sends you down the wrong diagnostic path.
Watch the charger for a full 30 seconds before you touch anything. Note the order of the flashes. Note whether both lamps light at once or take turns.
Note whether the pattern repeats at a steady rhythm or stutters.
Alternating red and green: the pack has been rejected
Alternating means red, then green, then red, then green, in a steady back-and-forth. This is the classic battery fault signal on LXT chargers. The charger completed its handshake with the pack and decided the pack is not safe or not viable to charge.
If you see alternating, assume the battery is the problem until you prove otherwise. That assumption is correct far more often than not. It covers deep discharge, cell imbalance, a failed cell, a counterfeit pack with no communication chip, and a genuine Makita pack that has reached end of life.
There's one important exception. A pack that is simply too hot or too cold can trigger an alternating pattern on some models rather than the blinking-green cooling signal. So temperature always gets ruled out first.
Red and green at the same time: usually a charger or power-input fault
Simultaneous means both lamps light together, then both go dark, then both light again. That's a different animal. This pattern usually means the charger can't complete a proper charge cycle, or it isn't getting clean power.
Common causes on this branch include a failing charger logic board, a seized cooling fan triggering a thermal fault, an undersized inverter feeding the charger, or a long thin extension cord dropping the voltage too far. The DC18SE 12V car charger adds its own twist, because a weak car battery produces exactly this pattern.
If both lamps light together, move the charger to a different outlet on a different circuit before you do anything else. If the pattern follows the outlet, you've found your answer.
Solid red, solid green, and green-only blinking
Solid red is normal. The charger is pushing current into the pack. Charge times vary by capacity, from about 15 minutes for a 1.5 Ah BL1815 up to roughly 55 minutes for a 6.0 Ah BL1860 on a DC18RC.
Solid green is also normal. The pack is full and the charger has stopped. Pull the pack and get back to work.
Blinking green on its own is the cooling signal. The charger is waiting for the pack to reach a safe temperature. On a hot day this can take 20 to 40 minutes.
On a cold morning it can take longer.
No lights at all, and the power-up self-test flash
No lamps means no power is reaching the charger at all. Check the outlet first with something else plugged in. Then check the charger's power cord for damage.
Some models also have an internal fuse that can blow.
Many Makita chargers run a brief self-test when you plug them in. You may see a quick flash of both lamps, or a short sequence, before they settle. That's normal and it isn't a fault.
It's the charger confirming its own circuitry is alive.
Now that you can name the pattern, you need to know which charger you're holding. The lamp logic is not universal across the lineup.
Identify Your Charger: DC18RC, DC18RD, DC18SF, and XGT Models Read Differently
Makita has sold a lot of chargers over the years, and they don't all speak the same language. The DC18RC is the one most people own, but it's far from the only one. Reading the model number off the label takes ten seconds and saves a lot of guessing.
As of 2026, Makita's cordless lineup splits into three platforms. LXT runs at 18V and is the largest by install base. XGT runs at 40V and uses a completely different battery interface.
CXT runs at 12V max for compact tools. Each platform has its own chargers with its own indicator conventions.
| Model | Platform | Bays | Indicator notes |
|---|---|---|---|
| DC18RC | 18V LXT | 1 | The most common unit. Red and green LED pair. Built-in fan. |
| DC18RD | 18V LXT | 2 | Dual port. Charges two packs at once at the same per-port rate. |
| DC18SF | 18V LXT | 4 | Four-bay shop rack. Per-pack times stretch when all bays are loaded. |
| DC18RA | 18V LXT | 1 | Older single-bay variant, still in wide circulation. |
| DC18SD | 18V LXT | 1 | Entry-level, slower charge rates. |
| DC18SE | 18V LXT | 1 | 12V car charger. Very sensitive to low supply voltage. |
| DC18WA / DC18WC | 18V LXT | 1 | Compact and rapid variants with similar logic. |
| DC40RA | 40V XGT | 1 | XGT rapid charger. Different lamp layout entirely. |
| DC40RB / DC40RC | 40V XGT | 1 | Higher-output XGT variants. |
| DC24SC / DC10WD | 12V CXT | 1 | CXT platform chargers. Smaller packs, shorter cycles. |
Why the same fault looks different on a DC18RC versus a DC40RA
The DC18RC uses a two-lamp red and green system that most people recognize. The XGT chargers use a different indicator arrangement, often a single multi-color lamp or a bar of segments. A fault on a DC40RA might show as a red blink rather than an alternating red-green.
That difference matters because advice written for the DC18RC doesn't transfer cleanly to XGT. If you own both platforms, learn each one's signals separately. Don't assume the pattern you saw on your old 18V charger means the same thing on your 40V unit.
Older DC18RA, DC18SD, and the DC18SE 12V car charger
The older single-bay chargers follow broadly the same fault logic as the DC18RC. The main difference is charge speed and the absence of a cooling fan on some entry-level units. No fan means heat builds up more slowly in the pack but also clears more slowly.
The DC18SE deserves its own mention. It runs off a 12V vehicle supply, which is a much less stable input than a wall outlet. A car battery sitting at 11.8V, a long run of thin cable, or a cigarette lighter socket with a poor connection all produce fault patterns that look exactly like a dead battery.
If you're charging in a vehicle and seeing a fault, test the supply voltage first. That one check eliminates a whole category of false diagnoses.
With the charger identified and the pattern named, it's time to start ruling conditions out. Temperature comes first, and it catches the most people.
Condition Check 1: Is the Pack Just Too Hot or Too Cold?
Yes, and it's the single most common cause of a false fault alarm. A pack that's outside its safe charging temperature triggers the fault signal, and the pack itself is completely fine. This is where most unnecessary battery purchases come from.
Makita's published charging window sits at roughly 0°C to 40°C, or 32°F to 104°F. Below freezing, the chemistry inside a lithium-ion cell won't accept charge safely. Above 40°C, charging accelerates internal degradation and risks a thermal event.
The charger is protecting the pack, not rejecting it.
So the first question is always this. Where has that pack been sitting for the last few hours?
Hot truck beds, unshaded job sites, and closed garages
Heat is the more common half of the problem in most of the world. A black truck bed in direct summer sun can hit 70°C or higher. A closed garage with no ventilation traps heat all afternoon.
A pack left on the dashboard is worse still.
In our review of aggregated user reports, summer heat faults cluster heavily in the southern US, Australia, and the Middle East. The pattern is consistent. Pack gets hot, charger refuses it, owner assumes the pack is dead, owner buys a new one that does exactly the same thing next week.
The fix is boring and it works. Move the pack into shade or an air-conditioned space. Give it 30 to 60 minutes.
Try again. If it charges normally, the pack was never broken.
Cold is the mirror image. A pack that's been in an unheated truck overnight at -15°C will not charge, and it shouldn't. Forcing charge into a frozen lithium-ion cell causes something called lithium plating, which permanently reduces capacity.
Cold lockouts are extremely common in Canada, the northern US, and Scandinavia from November through March. Crews pull a pack out of a cold truck, drop it on the charger, and see a fault. Nothing is wrong.
The pack just needs to warm up.
Bring the pack indoors. Let it sit at room temperature for 30 to 60 minutes. A pack that's been at -15°C may need closer to 90 minutes to fully equalize.
Then retry the charge.
The 30 to 60 minute temperature reset that fixes most false alarms
This is the highest-value step in the whole diagnostic process, and it costs nothing. Do it before anything else, even before you clean the terminals.
- Remove the pack from the charger completely.
- Move both the pack and the charger to a room between 15°C and 25°C (59°F to 77°F).
- Let them sit for at least 30 minutes. Go with 60 if the pack was extreme.
- Reinsert the pack fully until it clicks.
- Watch the lamps for a full 30 seconds.
If the charger moves to a solid red lamp, you're done. The fault was thermal and it has cleared.
If the fault returns after a proper temperature reset, move on to the next condition. The problem is physical, not environmental, and it's usually in the contacts.
Condition Check 2: Dirty Terminals, Bent Signal Pins, and Star Protection Errors
The second most common cause is contamination or physical damage at the contact interface. This is where the charger and pack actually meet, and it's where the communication happens. Any interruption there reads as a fault.
Makita packs have two types of contacts. The large power terminals carry the charging current. The smaller signal pins carry the Star Protection data.
The power terminals are forgiving. The signal pins are not.
A charger that can't complete the Star Protection handshake will refuse the pack, and it will show a fault rather than a charge. That's by design. The system exists to stop non-genuine or damaged packs from being charged.
Where dust, sawdust, and drywall compound actually cause trouble
Dust is the enemy here, and certain trades produce more of it than others. Carpenters generate fine sawdust that packs into the charger rails. Drywall crews produce gypsum powder that turns into a paste when it meets humidity.
Concrete cutters produce abrasive silica dust that scores the contacts over time.
Masonry and concrete work is the worst case. That dust is alkaline, abrasive, and it gets everywhere. A charger left open on a concrete site will accumulate enough contamination in a month to start throwing faults.
Landscaping adds a different problem. Grass clippings and soil hold moisture against the contacts, which accelerates corrosion. A charger stored in a damp shed over winter often develops green corrosion on the terminals by spring.
Cleaning contacts safely with isopropyl alcohol and a soft brush
Cleaning is straightforward, but it needs to be done with the charger unplugged and the pack removed. Never clean a live charger.
- Unplug the charger from the wall.
- Remove the battery and set it aside.
- Blow out loose dust with compressed air, held at a slight angle.
- Dip a cotton swab in 90% or higher isopropyl alcohol.
- Wipe the charger contacts gently. Don't scrub hard.
- Use a second dry swab to remove residue.
- Repeat on the battery's power terminals and signal pins.
- Let everything air dry for at least 10 minutes before reconnecting.
For stubborn oxidation, a light pass with a pencil eraser works well on the power terminals. Go easy. You're removing corrosion, not metal.
Avoid anything abrasive on the small signal pins. Those pins are thin, plated, and easy to damage permanently. A bent pin means a dead pack or a dead charger, depending on which side bent.
Inspecting the small signal pins that carry Star Protection
Look closely at the signal pins on both sides of the interface. They should be straight, clean, and springy. On the charger side, they should depress and return smoothly.
Look for these specific problems:
- A pin that's bent sideways and no longer lines up with its mate
- A pin that's stuck in the depressed position
- Green or white corrosion on the pin surface
- A pin that has snapped off entirely
- Melted or discolored plastic around the pin housing
Any of those means the communication circuit is compromised. A bent pin on the pack side usually kills that pack. A bent pin on the charger side usually kills that charger.
Neither is a cheap fix.
Why heavy dielectric grease on signal pins backfires
You'll find advice online telling you to coat the contacts in dielectric grease to prevent corrosion. That advice is half right and half dangerous.
A thin film on the large power terminals is fine in humid or coastal environments. It keeps moisture off the metal. But heavy grease on the small signal pins is a genuine problem.
Grease is an insulator. If it bridges two signal pins, the charger reads a communication error and refuses the pack.
If you do use grease, apply it sparingly and keep it away from the signal contacts entirely. A toothpick's worth is plenty. More is not better here.
One more thing worth knowing. Fault detection and protection circuitry in genuine Makita packs and chargers is built to meet recognized battery safety standards, including UL 2054 for cells and packs and UL 2595 for battery-powered tools and chargers. That's a big part of why the charger refuses a suspect pack instead of pushing current into it anyway.
The refusal is the safety feature working.
If temperature and contacts both check out and the fault persists, you're into deeper territory. The next likely culprits are deep discharge and failed cells.
Condition Check 3: Deep Discharge, Failed Cells, and Packs That Sat Dead for a Year
Deep discharge is the slow killer. It doesn't show up on a job site. It shows up after a pack has been sitting in a garage or a shed for months, forgotten.
Lithium-ion cells don't like being left empty. Every Makita pack has a protection circuit that cuts off output when voltage drops too low. That protects the cells in the short term.
Leave it long enough and the cells drift down anyway, past the point where a normal charge will recover them.
How a pack falls below the charger's voltage floor
Every Makita charger has a minimum voltage it will accept. If the pack sits below that floor, the charger won't even try. It flashes a fault instead.
That floor exists for good reason. Pushing current into a deeply discharged lithium-ion cell can cause internal short circuits. The safest response is refusal.
So if you see alternating lamps on a pack that hasn't been used in six months, this is your prime suspect. The pack is not dead. It's stranded below the recovery threshold.
Cell imbalance versus one genuinely dead cell
A pack with five good cells and one weak cell behaves almost identically to a pack with a dead cell. The charger sees the same voltage anomaly. It throws the same fault.
Cell imbalance develops slowly. Cells age at slightly different rates depending on heat exposure and cycle count. After a few hundred cycles, the spread widens.
The charger's balancing circuit can only correct so much.
A genuinely dead cell is different. It usually follows a drop, a hard impact, or a manufacturing defect. It shows up suddenly, often on a pack that was working fine the day before.
The two look the same to the charger. They look very different to a service center with proper test equipment.
What a multimeter reading tells you and what it can't
A multimeter gives you the pack's total terminal voltage. That's one number. It tells you whether the pack is above or below the charger's acceptance floor.
What it can't tell you is whether the cells inside are balanced. It can't tell you if one cell is failing. It can't tell you the internal resistance, which is the real indicator of pack health.
If you do measure, use the main power terminals only. Don't probe the signal pins. A slipped probe can bridge contacts and damage the protection circuit.
For reference, an 18V LXT pack at rest usually reads around 20V when fully charged. A pack reading below roughly 12V to 14V is likely below the recovery threshold. Below 10V, the pack is usually beyond saving.
Why memory effect is the wrong rabbit hole
Nickel-cadmium batteries had a real memory effect. Lithium-ion does not. The chemistry is completely different.
If you've read advice about fully draining a pack to reset it, ignore it. That advice was written for NiCd tools from the 1990s. Applying it to a lithium-ion Makita pack will push it into deep discharge faster.
The correct habit is the opposite. Charge lithium-ion packs before they're fully empty. Store them at 40% to 60%.
Avoid leaving them dead for extended periods.
If a pack has been sitting dead for over a year, deep discharge is the leading explanation. If it hasn't, move on to the next check.
Condition Check 4: Genuine Makita Packs versus Aftermarket versus Counterfeit
Genuine Makita packs are built to communicate. They carry a chip that talks to the charger through the Star Protection protocol. That handshake is not optional.
Aftermarket packs fall into two broad categories. Some include a compatible communication chip. Most don't.
Counterfeit packs, the ones dressed up to look like genuine Makita products, almost never do.
If the charger can't complete the handshake, it refuses the pack. That's the fault pattern you're seeing.
| Pack type | Communication chip | Typical charger response |
|---|---|---|
| Genuine Makita LXT | Yes, with Star Protection | Charges normally |
| Quality aftermarket | Sometimes, often partial | Charges, or intermittent faults |
| Cheap aftermarket | Usually none | Rejects with fault pattern |
| Counterfeit Makita | Almost never | Rejects with fault pattern |
How a clone pack fails the communication handshake
The handshake happens in the first second or two after the pack seats. The charger sends a signal. The pack responds with its identity, temperature, and cell data.
If the response doesn't match expectations, the charger stops.
A clone pack can fail in several ways. It might not respond at all. It might respond with data the charger considers out of range.
It might respond correctly at first and then drop out mid-charge.
That last case is the most frustrating. The pack starts charging, then faults a few minutes in. Users assume the charger is bad.
It's the pack's chip failing under load.
Marketplace listings, rental yards, and secondhand packs
Counterfeit packs flow into the market through three main channels. Online marketplaces are the biggest. Listings use photos of genuine packs and ship a clone.
Price is the tell. A new 5.0 Ah LXT pack for $30 is not genuine.
Rental yards are a second source. Packs get mixed between customers. Some come back counterfeit, and they end up in the rental fleet.
If a rental pack faults your charger, don't assume your charger is at fault.
Secondhand purchases are the third. A used pack from a marketplace seller might be genuine, worn out, or a clone. There's no way to tell from a photo.
If it faults immediately on a known-good charger, you have your answer.
What a counterfeit costs you in warranty coverage
Using a non-genuine battery typically voids the warranty on the charger and the tool it powers. Makita's terms cover genuine Makita products. A clone pack is not a Makita product.
That means a fault traced to a counterfeit pack is your problem, not Makita's. You'll pay for the diagnostic, the repair, and the replacement.
There's a safety angle too. Genuine Makita packs are built to meet recognized standards such as UL 2054 for battery packs and UL 2595 for battery-powered equipment. Those standards cover cell-level protection, thermal cutoff, and short-circuit resistance.
A counterfeit pack has no such certification. The UL Solutions certification database is the place to verify whether a product actually holds a listed mark.
The practical rule is simple. If a pack faults on a known-good charger and it wasn't bought from an authorized Makita dealer, treat it as suspect. Don't keep retrying it.
Condition Check 5: Power Source, Extension Cords, Inverters, and the DC18SE Car Charger
The charger needs clean power. It's a sensitive electronic device running a switching power supply. Feed it dirty or low voltage and it will fault.
This is the check most people skip, because the wall outlet seems like a constant. It isn't. Outlets on the same circuit as a table saw drop hard when the saw kicks on.
Generators produce noisy power. Inverters produce modified sine waves that some chargers won't accept.
If the fault pattern is simultaneous lamps rather than alternating, this check moves to the top of the list.
Undersized inverters and long thin extension cords
A DC18RC draws a few hundred watts during rapid charging. That's a modest load, but it's a load with a sharp inrush current. An undersized inverter will sag under that inrush and drop out.
The symptoms look exactly like a charger fault. The charger starts, the lamps flash, then the pattern goes to a fault state. Sometimes it resets and tries again in a loop.
Extension cords cause a similar problem through voltage drop. A 100-foot run of 16-gauge cord at 10 amps loses several volts. The charger sees the drop as a supply fault and stops.
The rule is simple. Use the shortest, thickest cord you can. Go with 12-gauge for anything over 25 feet.
Skip the cord entirely if you can reach the outlet.
Weak car batteries and 12V charging faults
The DC18SE runs off a vehicle's 12V supply. That's a far less stable input than a wall outlet. A healthy car battery sits around 12.6V at rest.
A weak one sits at 11.8V or lower.
If the car battery is weak, the charger will fault. The symptoms are the same simultaneous-lamp pattern you'd see from an undersized inverter. The fix is to run the engine while charging, or charge from a wall outlet instead.
Cigarette lighter sockets add another variable. Many are fused at 15 amps, and the contact quality varies. A loose plug will cause intermittent faults that come and go with vibration.
120V versus 230V charger variants and cheap voltage converters
Makita sells region-specific charger variants. North American models take 120V at 60Hz. UK, EU, and Australian models take 220V to 240V at 50Hz.
The two are not interchangeable.
Plugging a 120V charger into a 230V supply will destroy it immediately. Plugging a 230V charger into a 120V supply simply won't work, and it may fault.
Cheap travel converters make things worse. A basic step-down transformer might handle the voltage but not the current draw. The charger pulls more than the converter can supply, the voltage sags, and the fault appears.
If you've moved regions and your charger is behaving strangely, check the input rating on the label first. It's printed right next to the model number.
The Swap Test: Isolating Whether It's the Battery or the Charger
By this point you've ruled out temperature, contacts, deep discharge, counterfeit packs, and power supply. If the fault is still there, you need to isolate the component. The swap test does that.
The swap test works because you're changing one variable at a time. A known-good pack in a suspect charger. Then a suspect pack in a known-good charger.
The two results together tell you exactly which part failed.
You need a second working pack or a second working charger to run it. Most Makita owners have at least one of each.
Step 1: known-good pack into the suspect charger
Take a pack you're confident works. It charged normally last week. It's genuine.
It's at room temperature.
Insert it into the suspect charger. Watch the lamps for a full 30 seconds.
If it charges normally, the charger is fine. The fault is in the original pack. Move to step 3.
If it faults, the charger is suspect. Move to step 2 to confirm.
Step 2: suspect pack into a known-good charger
Take the pack that faulted and put it in a charger you trust. Ideally a different model, or at least a different unit.
Watch the lamps for 30 seconds.
If it charges normally, the original charger is failing. The pack is fine.
If it faults, the pack is failing. The original charger may be fine.
If both the pack and the charger are suspect at this point, you have a double failure, which is rare but possible. In that case, test each component against a third known-good partner.
Step 3: reading the two results together
Here's the full logic in one table.
| Step 1 result | Step 2 result | Verdict |
|---|---|---|
| Charged normally | Not tested | Pack is bad |
| Faulted | Charged normally | Charger is bad |
| Faulted | Faulted | Pack is bad, or both are bad |
| Charged normally | Faulted | Pack is bad |
| Faulted | Not tested | Test in step 2 |
The most common outcome is that the pack is bad. Chargers fail less often.
When a swap test is inconclusive
Sometimes both tests pass, but the original combination still faults. That points to an intermittent problem. Loose terminals, a hairline crack in a housing, or a marginal power supply can all cause this.
Try the original pair again after 30 minutes. If it faults a second time, the issue is real but intermittent. In that case, replace the cheaper component first.
A charger is usually cheaper than a pack on the LXT platform.
If the fault moves with the pack, it's the pack. If it moves with the charger, it's the charger. That's the whole point of the test.
The Decision Tree: What to Do for Every Blink Pattern and Outcome
Everything so far has been diagnosis. This is where it turns into action. Work down the branches in order.
Stop at the first one that matches your situation.
Branch A: temperature lockout
If the pack was hot or cold when it faulted, this is your branch. Move the pack and charger to a room between 15°C and 25°C. Wait 30 to 60 minutes.
Reinsert.
If it charges, you're done. Nothing is broken. Change your storage habits so the pack doesn't sit in a hot truck or a freezing shed.
If it faults again at room temperature, move to branch B.
Branch B: contamination or signal-pin fault
If the terminals were dirty or the signal pins looked damaged, this is your branch. Clean both sides with isopropyl alcohol and compressed air. Inspect the pins under good light.
If the pins are straight and clean, retry the charge. If it works, the problem was contamination.
If a pin is bent or broken, the component on that side is done. A damaged pack needs replacing. A damaged charger needs replacing.
Neither is a DIY repair.
Branch C: dead or deeply discharged pack
If the pack hasn't been used in months and reads below 14V, this is your branch. Try a charger with a refresh or maintenance mode if you have one. Some Makita chargers will attempt a slow recovery charge on a low pack.
If that doesn't work, the pack is beyond DIY recovery. An authorized service center can test it, but replacement is usually the answer.
Branch D: charger-side or power-side failure
If both lamps light together, or the fault follows the outlet, this is your branch. Test on a different circuit. Try a shorter, thicker extension cord.
Test the supply voltage.
If the fault persists on clean power from a different outlet, the charger is the problem. Replace it or send it in for service.
Branch E: still failing after everything
If you've run every check and the fault remains, escalate. Contact Makita customer support or an authorized service center.
In the US, Makita's support line is 1-800-4MAKITA (1-800-462-5482). Have your charger model, pack model, and purchase date ready. If the unit is within the three-year LXT warranty window, the repair or replacement may be covered.
Don't keep cycling a suspect pack on a suspect charger. Repeated fault attempts don't fix anything. They just wear the contacts and waste your time.
Mistakes That Cost You a Battery, a Charger, or $150
Replacing parts before you diagnose is the expensive habit. Everything below is something real users do that turns a free fix into a paid one.
Replacing the wrong component before running the swap test
The swap test costs five minutes. A wrong replacement costs $60 to $200. Skip the test and you're guessing, and the odds aren't in your favor.
Most fault patterns trace back to the pack. Buy a charger first and you'll often still have the problem. Then you buy a pack too.
Run the test. It exists precisely so you don't have to guess.
Forcing a pack that won't seat
If the pack won't click in, don't push harder. Something is misaligned, and force will bend the signal pins. That turns a working pack into a dead one.
Pull the pack out and look at the rails. Check for debris, a bent pin, or a cracked housing. Clear the obstruction and try again with light pressure.
If it still won't seat, stop. A pack that won't seat has a physical problem that force won't solve.
Throwing away a pack that's still under warranty
Makita covers LXT batteries for three years in the US. That's a long window. Plenty of packs get binned well inside it.
If you bought the pack in the last three years, check the warranty before you replace it. Keep your receipt. The purchase date matters more than the pack's condition.
A covered pack that fails gets replaced or repaired at no cost. That's the whole point of paying for genuine Makita gear.
Buying a cheap clone charger with no UL listing
A third-party charger might be a third of the price. It also might not have the protection circuitry a genuine unit has. That's not a small difference.
A charger is a power supply pushing serious current into a lithium pack. It needs proper overcurrent, overvoltage, and thermal protection. A cheap clone may skip all three.
Look for a UL listing mark. If the charger doesn't carry one, that tells you something.
Leaving packs on the charger indefinitely in a hot shop
The charger stops charging when the pack is full. That part is true. But the pack still sits in a warm environment, and heat accelerates capacity loss.
A pack left on a charger in a hot garage for weeks ages faster than one stored properly. It won't fail overnight. It'll just die sooner than it should.
Pull the pack when the green lamp goes solid. Store it somewhere cool.
Safety: Swollen Packs, Thermal Runaway, and What You Never Open
Everything in this section is non-negotiable. Lithium-ion packs store a lot of energy in a small space. When something goes wrong, it goes wrong fast.
Stop-work signs: swelling, hissing, smoke, heat
Stop immediately if the pack is swollen, hissing, smoking, or hot to the touch. Those are the warning signs of an internal fault that can escalate to thermal runaway.
Move the pack away from anything flammable. Get it outdoors if you can do that safely. Don't put it in a vehicle.
Don't carry it into a building.
Call emergency services if you see smoke or flames. Lithium fires behave differently from ordinary fires and need a different response.
Why disassembling a lithium-ion pack is a genuine fire risk
Opening a pack exposes you to live cells wired in series. A slipped tool can short the pack instantly. The result is a violent release of heat and gas.
There's no DIY fix inside a Makita pack that's worth that risk. Cells are spot-welded in place. Balancing circuits are potted.
You can't repair either one at a workbench.
If a pack is faulty, replace it or send it to an authorized service center. Don't open it.
Lithium battery fire response at home and on site
A small single-cell fire can sometimes be smothered with a fire blanket or dry chemical extinguisher. A full pack fire is a different situation. These fires produce their own oxygen and can reignite after being knocked down.
Evacuate first. Call the fire service. Let them handle it.
On a job site, the priority is the same. Get people away from the pack. Keep it clear of other flammable materials.
Don't breathe the smoke, which carries hydrogen fluoride and other toxic compounds.
The NFPA publishes guidance on lithium-ion battery safety and fire response. Worth reading before you need it, not after.
UL 2054, UL 2595, IEC 62133, and UN 38.3 in plain terms
These standards are the reason a genuine pack behaves predictably and a counterfeit might not.
- UL 2054 covers the safety of lithium-ion cells and battery packs.
- UL 2595 covers battery-powered tools and their chargers.
- IEC 62133 is the international safety standard for secondary lithium cells and packs.
- UN 38.3 is the transport testing standard for lithium batteries.
A genuine Makita pack and charger are built to meet these standards. A clone pack has no verifiable certification. That difference matters when something goes wrong.
Disposal rules and the Call2Recycle drop-off network
Lithium-ion batteries don't belong in household trash. Most US states and all EU member states prohibit putting them in the bin. They can short in a garbage truck and start a fire.
In the US, Call2Recycle runs a drop-off network with thousands of locations. Big-box retailers often accept packs at the customer service desk. Check the site for the nearest point.
In the UK and EU, retailers that sell batteries are generally required to take them back. Tape the terminals with electrical tape before you drop a pack off. That prevents a short in transit.
Warranty, Service Centers, and Replacement Costs: Fix or Replace?
The economics of the decision matter. A charger is usually cheaper than a pack. That shapes the order in which you replace things.
| Component | Typical replacement cost (USD) | Warranty (US, LXT) |
|---|---|---|
| DC18RC charger | $60 to $100 | 3 years |
| DC18RD dual charger | $150 to $200 | 3 years |
| DC18SF four-bay charger | $250 to $400 | 3 years |
| BL1830 3.0 Ah pack | $80 to $120 | 3 years |
| BL1850 5.0 Ah pack | $100 to $150 | 3 years |
| BL1860 6.0 Ah pack | $130 to $180 | 3 years |
| XGT 40V packs | $180 to $350 | 3 years |
Prices shift with sales, regional pricing, and kit versus bare-tool packaging. Treat those figures as rough guides, not quotes.
Makita's three-year LXT coverage and what voids it
Makita's US warranty covers LXT tools, batteries, and chargers for three years from the date of purchase. The coverage is against defects in materials and workmanship.
It does not cover normal wear, physical damage, or damage from misuse. Opening a pack voids it. Using a non-genuine battery with a Makita charger typically voids the charger's coverage too.
Keep your receipt. Without proof of purchase, the warranty period is often measured from the manufacturing date instead, which costs you time.
Makita has a service center locator on its official site. Enter your postcode and it returns the nearest authorized location.
Some centers take walk-ins. Others prefer you ship the unit in. Call ahead to check their process and turnaround.
Expect days to a couple of weeks for a repair.
For warranty claims, bring the receipt and the failed component. If the repair is covered, you pay nothing. If it isn't, they'll quote you before proceeding.
When a $60 part beats a $200 guess
If the swap test points to the charger, replace the charger. It's the cheaper component and the diagnosis is confirmed.
If it points to the pack, check the warranty first. A covered pack costs you nothing but time. An out-of-warranty pack is a straight replacement.
The worst outcome is replacing both parts when only one failed. That's exactly why the swap test matters.
Maintenance Habits That Keep the Blinking From Coming Back
Most fault patterns are preventable. These habits won't eliminate every failure, but they'll cut the frequency significantly.
Storing packs at 40% to 60% charge in a cool, dry spot
Lithium-ion cells age fastest at full charge and at high temperature. Storing at 40% to 60% slows that aging. Storing somewhere cool and dry slows it further.
If a pack won't be used for more than a month, run it down to roughly half charge first. Then store it where the temperature stays between 10°C and 25°C.
Avoid both extremes. Don't store packs fully charged in a hot garage. Don't store them fully dead in a freezing shed.
Rotating packs and labelling them by purchase date
If you own several packs, rotate them. Hammering one pack while three sit idle shortens your fleet's overall life.
Label each pack with its purchase date using a paint pen or a strip of tape. When a pack starts faulting, you'll know immediately whether it's an old one or a recent buy.
Age matters for warranty claims too. A labelled pack tells you at a glance whether it's still covered.
Monthly bay cleaning for dusty trades
If you work with wood, drywall, or concrete, clean your charger bays monthly. Dust builds up faster than you'd expect, and it's the leading cause of terminal faults in those trades.
Unplug the charger. Blow out the bays with compressed air. Wipe the contacts with a dry swab.
Ten minutes a month is enough.
Landscapers and anyone working near water should add a corrosion check. Look for green or white deposits on the terminals.
Charging times for BL1815 through BL1860 and XGT packs
Knowing the expected charge time tells you when something is off. A pack that should charge in 30 minutes and takes 90 is telling you something.
| Pack | Capacity | Approx. charge time (DC18RC) |
|---|---|---|
| BL1815 | 1.5 Ah | ~15 min |
| BL1820 | 2.0 Ah | ~20 min |
| BL1830 | 3.0 Ah | ~22 min |
| BL1840 | 4.0 Ah | ~30 min |
| BL1850 | 5.0 Ah | ~45 min |
| BL1860 | 6.0 Ah | ~55 min |
XGT packs charge on a different curve. A DC40RA takes roughly 28 minutes for a 2.5 Ah pack and around 45 minutes for a 4.0 Ah.
If a pack consistently takes far longer than those figures, its internal resistance has climbed. That's a sign of an aging pack heading toward failure.
Frequently Asked Questions
Why does my Makita charger blink red and green alternately?
Alternating red and green means the charger rejected the pack. The usual causes are temperature extremes, dirty terminals, deep discharge, or a counterfeit battery. Run the temperature reset first, then clean the contacts, then test the pack in a known-good charger.
Can a blinking charger be fixed, or is it dead?
Usually it isn't the charger at all. The pack is the more common failure point. If the swap test shows the fault follows the charger, then the charger needs replacing or servicing.
A charger fault is rarely repairable at home.
Does an aftermarket battery cause the red and green blink?
Often, yes. Most aftermarket and counterfeit packs lack the Star Protection communication chip. The charger can't complete the handshake, so it refuses the pack.
If a pack faults on a known-good charger and it isn't genuine Makita, that's almost certainly the cause.
How long should I wait before retrying a hot pack?
Give it 30 to 60 minutes in a room between 15°C and 25°C. A pack that's been in direct summer sun may need the full hour. A pack that's been in a freezing truck overnight may need 90 minutes to warm through.
My charger blinks red and green with a brand-new battery. What now?
Check the battery's authenticity first. Counterfeit packs are common in online marketplace listings. If the pack is genuine and still faults, run the swap test.
A brand-new genuine pack that faults on a known-good charger should go back to the dealer.
Is it safe to leave a Makita battery on the charger overnight?
It isn't dangerous, but it isn't ideal either. The charger stops when the pack is full. The pack still sits at whatever temperature the room is.
Heat ages cells, so pull the pack when the green lamp goes solid and store it somewhere cool.