If your Logitech mouse blinking red has you convinced the thing is dead, take a breath first. Most of the time that light is a low-battery warning, not a death sentence. The LED sits on the top shell of most models and it changes color to tell you something specific about power or connection state.
Rechargeable models like the MX Master 3 and the G502 Lightspeed typically flash red when the internal lithium-polymer cell drops below a set threshold. AA-powered mice such as the M185 and M325 blink red when the battery hits roughly 10 percent remaining. Logitech publishes these LED behaviors in its official support documentation, and they vary by product family.
So the fix depends entirely on which mouse you own and when the blink appears.
Quick Answer
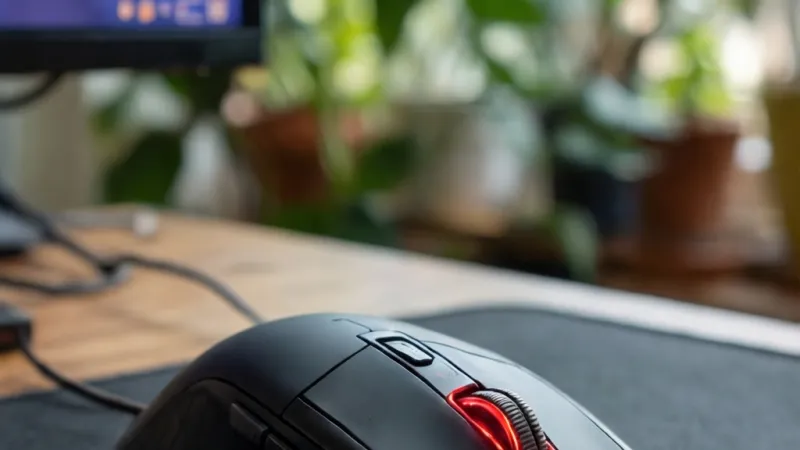
A red blink on a Logitech mouse almost always means low battery. Recharge the mouse or swap the AA or AAA cells. If the light stays red while charging, the cable or port is the problem.
A red glow underneath the mouse is just the optical sensor. That is normal, not a fault.
Why Your Logitech Mouse Is Blinking Red: What the LED Is Actually Telling You
The LED on a Logitech mouse is a status light, not decoration. It reports one of three things: battery level, charging state, or pairing activity. Which one it reports depends on where the light sits and when it fires.
On most Logitech mice the status LED lives on the top shell, near the scroll wheel or the Easy-Switch button. A separate red glow underneath the mouse is the optical sensor doing its job. Mixing those two up is the single most common reason people think their mouse is broken.
Solid Red vs Slow Blink vs Fast Blink vs Pulse
Logitech doesn't publish one universal blink code across every model. The behavior shifts by product family, firmware version, and whether the mouse is plugged in. Even so, the patterns cluster into a few recognizable groups.
| LED Behavior | Most Likely Meaning | Commonly Reported On |
|---|---|---|
| Solid red, brief, then off | Battery confirmed low at power-on | M185, M310, M325 |
| Slow red blink, about once per second | Battery low, roughly 10 percent or less | M525, M705, M720 |
| Fast red blink | Battery critically low, or pairing timeout | M325, MX Anywhere 2S |
| Pulsing red while plugged in | Charging in progress | MX Master 3, MX Anywhere 3 |
| Solid red while plugged in | Charging fault or unsupported charger | G304, G502 Lightspeed |
| Red glow under the shell | Optical sensor illumination, normal | Nearly all optical models |
User reports and Logitech's own support pages describe these patterns, but the exact timing is not standardized. A slow blink on one model can be a fast blink on another. That's why the model number matters more than the blink speed.
Some users describe a red and green alternating blink. That's usually a mouse sitting right at the edge of its battery threshold, flickering between states. It almost always resolves with a fresh charge or a new cell.
Battery LED vs Optical Sensor Glow
Flip the mouse over and look at the underside. If the red light is coming from the sensor window, that's just infrared or visible red light used to track movement across the surface. It's normal and it never means anything is wrong.
The status LED is different. It's on top, usually behind a small translucent window, and it only lights up in response to a state change. If your mouse tracks fine but the top light is red, you have a battery or connection issue.
If the mouse won't track and the only red you see is underneath, you have a surface or sensor problem instead.
Here's a quick way to tell them apart without turning the mouse over:
- Top LED red, cursor still moves: battery or pairing issue.
- Top LED red, cursor frozen: pairing or receiver issue.
- Bottom glow only, cursor frozen: sensor or surface issue.
- Both lights on, cursor frozen: try a different surface first.
That last case catches people out. Glass, high-gloss desks, and dark fabric can all confuse an optical sensor. A plain mat or a sheet of paper underneath the mouse solves it in seconds.
First Checks: Is the Red Blink Coming From the Mouse, Receiver, or Charging Port?
Before you replace anything, work out which device is actually blinking. Logitech's Unifying receiver and the newer Logi Bolt receiver both have their own LEDs. So does the charging port area on some models.
If the light is on the mouse, you're looking at a battery or pairing message. If it's on the receiver, the problem sits between the receiver and the computer. If it's near the charging port, the cable or the port itself is the suspect.
Mouse LED vs Unifying Receiver LED
The Unifying receiver is the small USB-A dongle with the orange star logo. It blinks when it's in pairing mode and goes solid when a device connects. It does not blink red during normal use.
The Logi Bolt receiver is the newer dongle, available in USB-A and USB-C. It has a similar pairing blink pattern. Neither receiver uses red as a low-battery signal, because neither one has a battery inside it.
So if you see red, look again at where it's coming from. Nine times out of ten it's the mouse, not the dongle. A receiver LED that stays dark usually means the port isn't delivering power, which points at the computer side.
USB Port, Hub, and Cable Quick Tests
Charging faults show up as a red light that won't clear. Run these tests in order.
- Plug the cable directly into the computer, not a hub or a monitor.
- Try a different USB port, ideally one on the back of a desktop tower.
- Swap the cable for a known-good one that carries data, not just power.
- Check the connector for lint, bent pins, or a loose fit.
- Test the mouse on a second computer to rule out a driver problem.
USB 3.0 ports and unpowered hubs can also kick out 2.4 GHz interference. That's a known issue with high-speed USB signaling, and the FCC has published guidance on unintentional radiators for exactly this reason. Moving the receiver to a front port, or using the short extender cable that ships with many Logitech mice, often fixes stutter and connection drops.
One quick test worth running: unplug everything else from the USB hub and try the mouse alone. If the red blink disappears, the hub is the culprit. Replace it with a powered hub or plug straight into the machine.
Model Check: How Logitech M185, M325, M705, MX Master, and G-Series Handle Red Blinks
Logitech's lineup splits cleanly into two camps. There are the AA or AAA battery mice, and there are the rechargeable lithium-polymer mice. The red blink means something slightly different in each.
Getting the model right matters because the fix is different. An M185 with a red blink needs a new AA cell. An MX Master 3 with a red blink needs a USB-C cable.
Treating one like the other wastes time and can send you down the wrong troubleshooting path.
Battery-Powered Models
These run on disposable or rechargeable AA and AAA cells. The red LED is a straight battery gauge.
| Model | Battery | Rated Life | Red Blink Meaning |
|---|---|---|---|
| M185 | 1 x AA | Up to 12 months | Battery at roughly 5 to 10 percent |
| M187 | 1 x AAA | Up to 6 months | Battery low |
| M220 | 1 x AA | Up to 18 months | Battery low |
| M310 | 2 x AA | Up to 18 months | Battery low |
| M325 | 1 x AA | Up to 18 months | Battery low, replace soon |
| M330 | 1 x AA | Up to 24 months | Battery low |
| M525 | 2 x AA | Up to 36 months | Battery low |
| M705 Marathon | 2 x AA | Up to 36 months | Battery low |
| M720 Triathlon | 1 x AA | Up to 24 months | Battery low or pairing fault |
| G304 / G305 | 1 x AA | Up to 250 hours | Battery low |
Those rated life numbers assume alkaline cells and about two hours of daily use. Heavy use, high DPI settings, and the sensor running constantly will shorten them. A gaming mouse left on overnight can drain a fresh AA in a couple of weeks.
If you're swapping batteries and the light comes back red within days, the mouse isn't the problem. You're either using weak cells, cheap cells, or cells that have been sitting in a drawer past their date.
Rechargeable MX and G-Series Models
The MX Master 2S, MX Master 3, MX Master 3S, MX Anywhere 2S, MX Anywhere 3, MX Vertical, MX Ergo, G502 Lightspeed, G Pro Wireless, G703, G903, and G604 all use built-in lithium-polymer cells. On these, a red blink is a charge reminder, not a battery swap.
A few of these behave differently from the rest.
- The G304 and G305 take a single AA but report through G HUB, so a red blink can also mean the software lost the device.
- The G502 Lightspeed has a dedicated battery LED that pulses during charging and goes solid when full.
- The MX Master 3 and 3S support quick charge, rated at about 3 minutes for a full day of use.
- The MX Anywhere 3 uses USB-C and charges faster than the older micro-USB MX Anywhere 2S.
As of 2026, Logitech's own support documentation is the fastest way to confirm exact LED behavior for your model. Look up your product on Logitech Support and check the LED section of the setup guide. That beats guessing from forum posts, which often mix up different model generations.
Firmware also changes LED behavior. A mouse that blinked one way in 2019 may blink differently after a firmware update delivered through Logi Options+ or G HUB. If your mouse started behaving oddly right after a software update, that's your first clue.
Battery-Powered vs Rechargeable: Which Fix Path You Should Take
The first fork in the road is battery type. It decides whether you're buying cells or hunting for a cable. Everything downstream follows from that one detail.
If your mouse takes AA or AAA cells, go to the battery path. If it has a sealed internal battery and a charging port, go to the charging path. If it's a G304 or G305, you're on the battery path but you should also check G HUB.
AA/AAA Battery Mice
Start by swapping in fresh cells. Use the right size and the right chemistry.
- Match the size exactly. A AA in a AAA slot won't make contact.
- Check the polarity markings on the battery door. Reversed cells can look fine and still fail.
- Don't mix old and new cells in a two-battery mouse.
- Don't mix alkaline with NiMH in the same compartment.
- Wipe the contacts with a dry cloth if you see any white or green residue.
Voltage matters more than most people realize. Alkaline AA cells deliver 1.5V. Standard NiMH rechargeables deliver 1.2V.
Some Logitech mice read that lower voltage as a dying battery and flash red early, even when the cell is fully charged.
If you want to use rechargeables, look for low-self-discharge NiMH cells with a high milliamp-hour rating. They work, but expect the low-battery warning to arrive sooner than the rated life suggests. Many users report the warning appearing at roughly 60 to 70 percent of the alkaline-rated timeline.
Corroded contacts are another common cause. Leaked alkaline cells leave a crusty residue that blocks current. A cotton swab dipped in white vinegar can clean light corrosion, but let it dry completely before inserting new cells.
Heavy corrosion means the mouse is probably done.
| Chemistry | Nominal Voltage | Rechargeable | Notes for Logitech Mice |
|---|---|---|---|
| Alkaline AA/AAA | 1.5V | No | Standard, longest rated life |
| NiMH AA/AAA | 1.2V | Yes | May trigger early low-battery warning |
| Lithium AA/AAA | 1.5V | No | Longer shelf life, higher cost |
| Lithium-polymer (built-in) | 3.7V | Yes | Sealed, charge via USB |
Built-In Lithium-Polymer Mice
Plug the mouse in with the cable that came in the box. Give it 2 to 6 hours for a full charge, depending on the model and the port's power output.
Quick-charge behavior is common on the MX line. Logitech rates some MX models at roughly 3 minutes of charging for a full day of use, and about 70 days on a full charge. Those figures assume eight hours of daily use at default settings and with the backlight off.
While charging, watch the LED. A pulse means it's taking a charge. Solid red for more than a few minutes usually means the cable, the port, or the wall adapter is the problem, not the battery.
A note on chargers. A standard 5V USB port is fine. Fast-charge wall adapters that push higher voltage over USB-C Power Delivery may not negotiate correctly with older mice.
If your mouse won't charge on one adapter but charges fine on another, that's why. Stick to a plain 5V output.
Battery swelling is the one scenario where you should stop immediately. If the mouse shell is bulging, the bottom won't sit flat, or the device feels unusually warm while charging, unplug it. A swollen lithium-polymer cell is a fire risk.
Do not puncture it, do not squeeze it back into shape, and do not keep charging it. Dispose of the mouse at a proper e-waste facility.
Decision Branch: Red Blink While Charging vs Red Blink During Normal Use
This is the branch that saves the most time. When the blink happens tells you almost as much as the blink itself.
If the light is red while the mouse is plugged in, the fault is in the charging chain. If the light is red while the mouse is unplugged and in use, the fault is in the battery or the pairing. Those are two different troubleshooting paths, so pick the right one before you start.
| Situation | What It Points To | First Thing to Try |
|---|---|---|
| Red blink while plugged in | Cable, port, or adapter | Swap the cable |
| Solid red while plugged in | Charging fault | Try a different USB port |
| Red blink while unplugged and in use | Low battery | Charge or replace cells |
| Red blink with fresh battery | Pairing or receiver | Re-pair the device |
| Red blink only on one computer | Driver or software | Reinstall Logi Options+ or G HUB |
| Red blink after a drop | Physical damage | Inspect the shell and port |
Red Blink While Plugged In
Work through this if/then sequence.
- If the light pulses red and then turns white or green, the mouse is charging normally. Leave it alone.
- If the light stays solid red for more than 10 minutes, try a different cable.
- If a new cable doesn't help, try a different USB port or a plain 5V wall adapter.
- If the light still won't change, inspect the charging port for debris or bent pins.
- If the port looks damaged, stop. Further charging attempts can worsen a swollen cell.
A red blink while charging on a G-series mouse often points to G HUB not recognizing the device. Reinstalling the software or updating firmware usually clears it. The same applies to Logi Options+ on the MX line, where a stale device profile can report incorrect battery state.
One more possibility: the mouse is already fully charged and the LED is reporting something else entirely. Some models flash red when the firmware update is pending or when the device has lost its pairing while docked. Open the Logitech software and check the device status page before assuming a hardware fault.
Red Blink When Unplugged or Idle
This is the classic low-battery signal. On most models it means the cell has dropped to roughly 10 percent or less.
Replace or recharge the battery, then watch the light. If it goes out or turns green, you're done. If it keeps blinking red with a fresh battery, the problem is upstream.
That upstream problem is usually pairing. Bluetooth LE devices drop their bond when the host changes, when the OS updates, or when the mouse sits unused for a long stretch. The Bluetooth SIG maintains the core specification that governs how these bonds are established and re-established.
A lost bond is a normal part of that lifecycle, not a hardware failure.
Re-pairing fixes it. Hold the Easy-Switch or Connect button for about 3 seconds until the LED blinks rapidly, then add the device again in your OS Bluetooth settings. On Unifying and Logi Bolt receivers, use the Logitech Unifying Software or the Logi Bolt pairing tool instead.
If the mouse pairs and then drops again within minutes, move the receiver closer and try the extender cable.
Low Battery Fixes: Replace, Recharge, and Check Battery Contacts
Start with the battery path that matches your mouse. If it takes AA or AAA cells, swap them. If it has a sealed cell and a charging port, plug it in.
The wrong path wastes 20 minutes and can mask the real fault.
A fresh set of cells or a full charge clears the red blink in the large majority of cases. User reports and Logitech support documentation back this up. The blink is designed to nag you before the mouse actually dies.
Replace, Recharge, or Both?
Use this quick logic before you touch anything.
- Battery door on the bottom: swap the cells.
- Charging port on the front edge: plug in a cable.
- Both present (rare, mostly older hybrids): try the cable first.
- No door, no port, sealed shell: the cell is internal and non-user-serviceable.
That last case is uncommon on Logitech consumer mice, but it does exist on a few older travel models. If you're in that bucket, the mouse has reached end of life unless Logitech offers an out-of-warranty replacement.
Step-by-Step: Replacing AA or AAA Cells
Power the mouse off before opening the door. It sounds obvious, but a live sensor can misread a half-inserted cell and throw a false low-battery blink.
- Slide the power switch to Off.
- Open the battery door on the underside.
- Note the polarity markings stamped inside the compartment.
- Remove the old cells and set them aside.
- Wipe the metal contacts with a dry lint-free cloth.
- Insert new cells, matching the + and, marks exactly.
- Close the door until it clicks.
- Slide the switch back to On.
If the mouse still blinks red after that, the cells aren't the problem. Move to the connection branch below.
Step-by-Step: Charging a Rechargeable Logitech Mouse
Use the cable that came with the mouse when you can. A generic USB-C cable will usually work, but some cheap cables are charge-only and won't let the software see the device.
- Plug the cable into the mouse first, then into the computer.
- Watch the LED. A pulse means charging.
- Leave it for 2 to 6 hours for a full charge.
- On MX models, 3 minutes gets you roughly a full day.
- Unplug once the LED turns white or green.
If the LED stays solid red for more than 10 minutes while plugged in, unplug and try a different cable and port. That pattern almost always points at the cable, not the battery.
Cleaning Battery Contacts and the Compartment
Leaked alkaline cells leave a chalky white or crusty green residue. That residue blocks current and can make a fresh battery read as dead. It's one of the most overlooked causes of a stubborn red blink.
| Residue Type | Likely Source | Safe Cleaning Method |
|---|---|---|
| White powder | Alkaline leak, dried | Dry cotton swab, then white vinegar on a swab |
| Green crust | Copper corrosion | Isopropyl alcohol on a swab |
| Sticky film | Old cell wrap adhesive | Warm water on a swab, then dry fully |
| Black soot | Burnt contact, rare | Stop, replace the mouse |
Let the compartment dry completely before inserting new cells. Moisture plus voltage equals corrosion, and you'll be back here in a week.
Do Rechargeable Batteries Cause False Red Blinks?
Yes, they can. Standard NiMH cells deliver 1.2V, while alkaline cells deliver 1.5V. Some Logitech mice read that 0.3V gap as a low battery and flash red early.
Low-self-discharge NiMH cells work better than older high-capacity ones. They hold their voltage more steadily under load. Even so, expect the warning to show up sooner than the rated life suggests.
Many users report it at roughly 60 to 70 percent of the alkaline timeline.
If the early warning bothers you, stick with alkaline or 1.5V lithium AA cells. Lithium AA cells cost more but last longer in cold rooms and rarely leak.
Connection Branch: Unifying Receiver, Logi Bolt, and Bluetooth Red Blink Issues
If the battery is fine and the red blink persists, the fault is on the connection side. Logitech uses three main wireless methods, and each one has its own re-pairing routine. Picking the wrong one leaves you clicking buttons that do nothing.
The good news is that re-pairing is quick. Most users finish in under two minutes once they know which tool to open.
Unifying Receiver: Re-Pairing with Logitech Unifying Software
The Unifying receiver is the older 2.4 GHz dongle with the orange star. It can hold up to six compatible devices on one receiver.
- Download and install Logitech Unifying Software from Logitech Support.
- Plug the receiver into a working USB port.
- Open the software and click Advanced.
- Power the mouse off, then back on.
- Hold the Connect button on the mouse for about 3 seconds.
- Wait for the software to detect the device.
- Follow the on-screen steps to pair.
If the software can't see the receiver at all, the dongle or the port is the issue. Try a different port before you assume the receiver is dead.
Logi Bolt: Re-Pairing the Newer Dongle
Logi Bolt is Logitech's newer wireless protocol, and it uses a different pairing tool. The dongle looks similar to a Unifying receiver but has a hexagon logo instead of a star. They are not interchangeable.
- Open Logi Options+ on your computer.
- Go to the Add Device screen.
- Select the Logi Bolt receiver option.
- Follow the prompts to put the mouse in pairing mode.
- Hold the Easy-Switch button until the LED blinks fast.
- Wait for the software to confirm the connection.
Logi Bolt is designed for enterprise deployments, so it enforces stronger encryption than the older Unifying protocol. That's a plus for security, but it also means older Unifying devices won't pair with a Bolt receiver.
Bluetooth: Re-Pairing on Windows, macOS, and iPadOS
Bluetooth LE pairing is handled by the operating system, not Logitech software. The steps vary slightly by platform.
- Windows 11: Settings, Bluetooth and devices, Add device, Bluetooth.
- macOS: System Settings, Bluetooth, then click Connect next to the mouse.
- iPadOS: Settings, Bluetooth, tap the mouse name.
- Chrome OS: Settings, Bluetooth, then pair.
Put the mouse into pairing mode first by holding the Easy-Switch or Connect button until the LED blinks fast. Then trigger the OS scan.
If the mouse pairs and then drops within minutes, the bond is unstable. Remove the device from the OS list completely, then re-pair from scratch. Leaving a half-broken entry in the list confuses the stack.
Easy-Switch Channels: How They Work
The Easy-Switch button on MX and M720 mice cycles through three channels. Each channel can be paired to a different device, like a work laptop, a home desktop, and a tablet.
A common mistake is pairing on channel 1 and then switching to channel 2, which was never paired. The mouse then blinks red or green because it has no host to talk to. Press the Easy-Switch button to cycle back to the paired channel, or hold it to pair the empty one.
Which Connection Should You Use?
| Connection | Best For | Pairing Tool | Latency |
|---|---|---|---|
| Unifying receiver | Older Logitech mice, multi-device setups | Logitech Unifying Software | Low |
| Logi Bolt | Newer mice, enterprise security | Logi Options+ | Low |
| Bluetooth LE | Travel, tablets, no dongle wanted | OS Bluetooth settings | Slightly higher |
For gaming, use the receiver. For travel and tablets, Bluetooth is more convenient. For mixed work setups, a Unifying or Bolt receiver with Easy-Switch is hard to beat.
Step-by-Step Workflow to Clear a Blinking Red Light on a Logitech Mouse
Here's the full sequence in one place. Work top to bottom and stop as soon as the blink clears. Skipping steps usually costs more time than it saves.
This workflow assumes the mouse is powered on and the LED is blinking red. It covers battery, connection, software, and hardware in the order that fixes the most cases fastest.
The Full 10-Step Workflow
- Step 1: Confirm the red light is the top status LED, not the bottom sensor glow.
- Step 2: Check the power switch is fully in the On position.
- Step 3: Identify your mouse model and battery type.
- Step 4: Replace AA/AAA cells or plug in the charging cable.
- Step 5: Watch the LED for 60 seconds. Does it clear, pulse, or stay solid red?
- Step 6: If it clears, you're done. If not, move on.
- Step 7: Re-pair the mouse using the correct tool for your connection type.
- Step 8: Restart the computer and test the mouse again.
- Step 9: Update firmware through Logi Options+ or G HUB.
- Step 10: Test the mouse on a second computer to isolate hardware vs software.
If the mouse works fine on a second computer, the problem lives on the first one. That points at drivers, USB power, or Bluetooth stack issues. If it fails on both, the mouse itself is the suspect.
Step Overview Table
| Step Range | Focus Area | Typical Time |
|---|---|---|
| 1 to 3 | Identification and setup check | 2 to 3 minutes |
| 4 to 6 | Battery and charging | 5 to 10 minutes, longer if charging |
| 7 to 8 | Connection and restart | 3 to 5 minutes |
| 9 | Software and firmware | 5 to 15 minutes |
| 10 | Cross-device test | 5 minutes |
Total time for most users: 15 to 30 minutes. Firmware updates can stretch that if the download is slow.
When to Stop and Escalate
Stop the workflow if any of these happen.
- The mouse shell is bulging or warm to the touch.
- You see smoke, a burnt smell, or discolored plastic near the charging port.
- The charging port is physically damaged or loose.
- Battery corrosion has eaten into the contact metal.
- The mouse has been dropped or exposed to liquid.
Any of those means hardware damage, not a configuration problem. More troubleshooting won't help. Move to the support and warranty path instead.
Software and Firmware: Logi Options+, G HUB, SetPoint, and Driver Conflicts
Software causes fewer red blinks than most people assume, but it causes the confusing ones. A stale driver or a half-finished firmware update can make a healthy mouse report the wrong battery state. That's when the red blink lies to you.
Logitech has shipped three main software platforms over the years. Each one covers a different generation of products.
| Software | Covers | Current Status |
|---|---|---|
| Logi Options+ | MX, Ergo, and most modern productivity mice | Active |
| Logitech G HUB | G-series gaming mice and keyboards | Active |
| Logitech SetPoint | Legacy mice, pre-2015 mostly | Legacy, still available |
| Logitech Options | Older MX and M-series | Superseded by Options+ |
If you're running SetPoint on a modern MX mouse, that's likely part of the problem. SetPoint doesn't know about newer battery reporting protocols. It can show a stale battery percentage and trigger false low-battery warnings.
Updating Firmware Through Logi Options+ or G HUB
Firmware fixes have solved LED behavior bugs on several Logitech models over the years. A mouse that blinks red at 40 percent battery on old firmware may report correctly after an update.
- Open Logi Options+ or G HUB.
- Click on your device to open its settings.
- Look for a firmware update banner or a settings entry.
- Start the update and leave the mouse plugged in or on.
- Don't unplug or power off during the update.
- Wait for the confirmation message.
Firmware updates on wireless mice usually take 2 to 5 minutes. If the mouse loses power mid-update, it can end up in a bootloader state that only Logitech support can recover. Plug in a rechargeable mouse before starting, and use fresh cells in a battery-powered one.
Driver Conflicts and Reinstalls
Windows sometimes holds onto old HID drivers after a Logitech software uninstall. That ghost driver can fight with the new install and cause odd LED behavior.
- Uninstall Logi Options+ or G HUB through Windows Settings.
- Open Device Manager and expand Mice and other pointing devices.
- Right-click any Logitech entries and uninstall them.
- Restart the computer.
- Download the latest installer from Logitech Support.
- Install and re-pair the mouse.
On macOS, the equivalent is removing the app, clearing the login items, and reinstalling. The system extension for Logi Options+ sometimes needs to be re-approved in Privacy and Security settings after a major OS update.
When Software Is the Wrong Fix
Software won't fix a dead battery, a broken cable, or a damaged sensor. If the red blink persists after a fresh battery and a clean re-pair, don't keep reinstalling software. You're past the point where it can help.
A useful test: plug the mouse into a computer that has never had Logitech software installed. If it works there as a basic HID device, the mouse hardware is fine. That narrows the fault to your main machine's software stack.
Reset, Re-Pair, and Power-Cycle: When These Actually Help
Resets fix weird states, not dead hardware. If the mouse has a valid battery and a valid receiver, a reset clears stuck flags in the mouse's internal controller. That's what the red blink sometimes is: a stuck low-battery flag that never cleared.
Knowing which reset to run saves you from doing the wrong one. Some models respond to a power switch flip. Others need a battery pull or a button combo.
Soft Reset: Power Switch Cycle
The soft reset is the gentlest option. It clears the mouse's volatile state without touching its pairing memory.
- Slide the power switch to Off.
- Wait 10 seconds.
- Slide it back to On.
- Watch the LED for 5 seconds.
If the light goes out or turns green, you're done. If it blinks red again, the low-battery condition is real and you need to charge or replace cells.
Hard Reset: Battery Pull or Button Combo
The hard reset wipes more state. On some models it also clears the current pairing, so be ready to re-pair afterward.
- Power the mouse off.
- Open the battery door and remove the cells.
- Wait 30 seconds.
- Reinsert the cells and close the door.
- Power on and watch the LED.
On rechargeable models without a battery door, hold the Easy-Switch or Connect button for 10 to 15 seconds while the mouse is on. The LED will blink rapidly to confirm the reset. Then re-pair the mouse with your computer.
Reset Methods by Model Family
| Model Family | Soft Reset | Hard Reset |
|---|---|---|
| M185, M220, M310, M325, M330 | Power switch cycle | Battery pull |
| M525, M705, M720 | Power switch cycle | Battery pull |
| MX Master 2S, 3, 3S | Power switch cycle | Easy-Switch hold, 10 to 15 seconds |
| MX Anywhere 2S, 3 | Power switch cycle | Easy-Switch hold |
| G304, G305 | Power switch cycle | Battery pull |
| G502 Lightspeed, G Pro Wireless | Power switch cycle | Power button hold, 10 seconds |
After a hard reset, always re-pair. The mouse has forgotten the host and won't reconnect on its own.
Does a Reset Ever Make Things Worse?
Rarely, and only in one scenario. If the mouse is mid-firmware-update, a reset can brick it. Never reset during an update.
Wait for the update to finish, then reset if you still need to.
Otherwise, resets are safe. They don't touch firmware, they don't erase onboard profiles on most models, and they don't void the warranty.
Hardware Warning Signs: Charging Port, Cable, Sensor, and Drop Damage
Once you've ruled out battery, pairing, and software, the red blink points at hardware. This is the point where more troubleshooting can actually make things worse. A damaged charging port or a swollen cell won't heal with another reset.
Look for physical clues first. Run your finger along the mouse shell, check the port opening, and tilt the mouse under a light. Cracks, looseness, and discoloration are your signals.
Charging Port and Cable Problems
Charging ports fail in predictable ways. The connector loosens, the internal pins bend, or lint and dust pack into the opening. Any of those can cause a red blink that never clears while plugged in.
- Loose fit: the cable wiggles when connected. The port's internal solder joints may have cracked.
- No light at all when plugged in: the cable or the port is dead.
- Light flickers on and off: intermittent contact, often lint or a bent pin.
- Solid red while charging: the mouse sees power but the charge circuit isn't accepting it.
Try a different cable first. USB-C and micro-USB cables fail more often than people expect, especially cheap charge-only cables that carry no data. If a known-good cable still won't charge the mouse, the port is the suspect.
You can inspect the port with a bright light and a magnifying glass. Look for bent pins, dark burn marks, or a wobbly connector block. Don't poke anything metal into the port.
You'll short the contacts and turn a repairable fault into a dead board.
Micro-USB ports are more fragile than USB-C. They're rated for fewer insertion cycles and they wear out faster. If you have an older MX Anywhere 2S or a G-series mouse with micro-USB, treat the port gently.
Plug in from the front, not at an angle.
Sensor Lens, Tracking Surface, and Physical Damage
The optical sensor sits in a small window underneath the mouse. If that window is scratched, dirty, or blocked, tracking fails. The red glow you see is the sensor's illumination LED, and it's normal.
Clean the sensor window with a dry microfiber cloth. Don't use alcohol on the lens, and don't spray anything into the opening. A soft brush works well for dust in the corners.
The tracking surface matters more than most users realize. Glass, mirrored desks, glossy laminate, and dark fabric all cause tracking failures. A plain mouse pad or a sheet of white paper under the mouse solves it in seconds.
Physical damage from drops shows up as a cracked shell, a rattling noise when you shake the mouse, or a button that sticks. Internal damage to the PCB or the sensor module can't be fixed with software. If the mouse rattles and the red blink won't clear, the mouse is done.
Liquid damage is the worst case. Even a small spill can corrode the board over days. If the mouse got wet, unplug it immediately and don't power it on.
Rice doesn't fix electronics. Proper drying takes days, and even then, corrosion may have already started.
Mistakes to Avoid When Troubleshooting a Blinking Red Logitech Mouse
Most failed troubleshooting attempts come down to a handful of repeated errors. Avoiding them saves time, money, and occasionally a mouse that would have worked fine.
The biggest one is jumping to conclusions. The red blink has several meanings, and assuming the worst leads to unnecessary replacements.
Assuming the Mouse Is Dead
A red blink is not a death signal. It's a status message. On nearly every Logitech model, red means low battery or a pairing issue, not hardware failure.
Users who replace the mouse immediately often find the new one blinks red within weeks. That's because the underlying cause was never the mouse. It was a dying battery, a weak USB port, or a broken pairing bond.
Run the full workflow before you buy a replacement. Fifteen minutes of troubleshooting beats a $40 to $100 replacement you didn't need.
Using the Wrong Battery or Charger
Battery chemistry matters more than people think. NiMH rechargeables run at 1.2V, which some Logitech mice read as low. Mixing old and new cells in a two-battery mouse causes the same false warning.
Cheap batteries are another trap. Discount-brand AA cells often deliver less capacity than the label claims. They can drop below the low-battery threshold within days.
On the charging side, fast-charge wall adapters can confuse older mice. A standard 5V USB port works fine. USB-C Power Delivery adapters that push higher voltages may not negotiate correctly with mice that predate the PD spec.
Other Common Mistakes
- Ignoring the model number and applying the wrong fix.
- Reinstalling software before checking the battery.
- Forgetting to remove the old Bluetooth entry before re-pairing.
- Using a USB hub when a direct port would work.
- Leaving the mouse in pairing mode and walking away.
- Assuming a firmware update will fix a physical fault.
- Throwing away the receiver because the mouse was replaced.
- Skipping the cross-device test that would isolate the fault.
That last one is worth repeating. Testing the mouse on a second computer takes five minutes. It tells you whether the problem lives in the mouse or in your main machine.
Mistake Impact Table
| Mistake | Typical Outcome | Time Lost |
|---|---|---|
| Replacing the mouse too early | Unnecessary purchase | $40 to $100 |
| Using weak or mixed batteries | Repeat red blink within days | 20 to 30 minutes |
| Reinstalling software first | No fix, wasted effort | 20 to 40 minutes |
| Skipping the cross-device test | Fault stays unisolated | Days of guessing |
| Ignoring a swollen battery | Safety risk, fire hazard | Not worth measuring |
Battery Safety and Warranty: Leaks, Swelling, Recycling, and When to Stop DIY
Battery problems are the one part of this topic where a wrong move can actually hurt you. Lithium-polymer cells can vent, catch fire, or rupture if they're damaged or overcharged. Alkaline leaks are less dramatic but still corrosive.
Take these warnings seriously. If anything looks wrong, stop and dispose of the battery or mouse properly.
Battery Leakage and Swelling
Alkaline cells leak when they're over-discharged, stored too long, or exposed to heat. The residue is potassium hydroxide, a caustic material. It burns skin and eyes on contact.
If you find leaked batteries in your mouse, wear gloves. Use a cotton swab dipped in white vinegar to neutralize the residue on the contacts. Let the compartment dry fully before inserting new cells.
Wash your hands afterward, even if you wore gloves.
Lithium-polymer swelling is more serious. The signs are a bulging shell, a bottom that no longer sits flat, a warm case while idle, or a faint sweet chemical smell. Any of those means the cell is failing.
Unplug the mouse immediately. Don't puncture the cell. Don't squeeze it back into shape.
Don't keep charging it. Move the mouse to a fire-safe area away from anything flammable, and take it to a proper e-waste facility.
Per UL 2054 and IEC 62133 testing standards, lithium cells must pass crush, overcharge, and thermal abuse tests before they reach consumers. Those tests assume the cell is undamaged. A physically damaged or swollen cell falls outside that safety envelope.
Recycling and Disposal
Never put lithium batteries or mice with built-in cells in your household trash. In the US, the EPA and state e-waste programs handle battery recycling. In the EU, the WEEE Directive requires manufacturers and retailers to take back electronic waste.
Retailers like Best Buy, Staples, and many hardware stores accept rechargeable batteries for recycling. Alkaline cells can often go in curbside battery recycling where available. Check your local rules, because they vary widely.
When shipping a device with a lithium battery, UN 38.3 rules apply. That's why you can't just drop a mouse in a padded envelope and mail it. If Logitech sends you a prepaid return label, follow their instructions exactly.
Warranty, Serial Number, and Support Ticket Prep
Logitech's warranty runs 1 to 3 years depending on the model. The MX Master line typically gets 1 year, while some M-series mice get 3. Check your specific product page for the exact term.
Your proof of purchase matters. So does the serial number, which is usually printed on the underside of the mouse or inside the battery compartment. Take a photo of both before you open a ticket.
- Serial number (photo or written down).
- Model number (for example, M720 or MX Master 3S).
- Purchase date and receipt.
- Description of the fault, including when the red blink started.
- Steps you've already tried.
- Photos or a short video of the red blink.
A clear ticket with all of that gets resolved faster. Vague tickets like "my mouse is broken" often bounce back with a request for more info, which adds days to the process.
The warranty won't cover physical damage, liquid damage, or a swollen battery caused by using the wrong charger. It also won't cover normal battery wear after the warranty period. If the mouse is out of warranty, replacement is usually the cheaper path.
When to Replace the Mouse vs Contact Logitech Support
This is the final fork. Sometimes the fix is a $3 battery. Sometimes it's a warranty claim.
Sometimes it's time for a new mouse.
Use the age of the device, the warranty status, and the nature of the fault to decide. A three-year-old M185 with a red blink is almost certainly a battery issue. A six-month-old MX Master 3S with a bulging case is a warranty claim.
Repair vs Replace Decision
| Situation | Best Path | Why |
|---|---|---|
| Fresh battery fixes the blink | Done | No further action needed |
| Blink returns within days on new cells | Check battery chemistry | Likely voltage mismatch |
| Blink only on one computer | Fix the computer side | Mouse is fine |
| Blink after drop or liquid | Replace the mouse | Internal damage, not repairable |
| Swollen case or warm shell | Stop using, contact support | Safety issue, possible warranty claim |
| Under warranty, no physical damage | Contact Logitech | Free replacement likely |
| Out of warranty, minor fault | Replace | Repair cost exceeds replacement |
| Out of warranty, cosmetic only | Keep using | No functional impact |
Repair isn't really an option for Logitech consumer mice. The internal components are soldered and not designed for user service. Third-party repair shops rarely take on these jobs because the parts aren't available.
That leaves two realistic paths: warranty replacement or buy a new mouse. If you're under warranty and the fault isn't from damage, Logitech will usually ship a replacement. If you're out of warranty, a new mouse is the practical answer.
What to Include in a Support Request
A well-structured support ticket moves faster. Here's what to include.
- Model name and number.
- Serial number.
- Proof of purchase.
- Clear description of the red blink behavior.
- What you've already tried (battery, re-pair, software, reset).
- Photos of the mouse, especially the LED and any damage.
- Your shipping address if you're in a supported region.
Logitech's support site has a product selector that routes you to the right team. Choose your model first, then open a ticket. That avoids the round-trip email asking you which mouse you have.
Response times vary. In our research, most users hear back within 1 to 3 business days. Warranty replacements typically ship within a week of approval.
When to Just Replace the Mouse
Some cases aren't worth the support back-and-forth. If the mouse is out of warranty, has physical damage, or is a low-cost model, replacement is faster and often cheaper.
A new M185 costs around $15 to $20. A new MX Master 3S runs $99 or more. The math is obvious for the budget models.
For premium mice, a warranty claim is usually worth pursuing if you're still covered.
If you're replacing, keep the old receiver if it still works. Unifying and Logi Bolt receivers can often pair with a new compatible mouse, which saves you from re-pairing everything else in your setup.
Logitech Mouse Blinking Red: Decision Guide and FAQs
Here's the whole troubleshooting path in one place. Match your symptom to the row, follow the action, and stop when the blink clears.
Quick Decision Guide by Symptom
| Symptom | Most Likely Cause | First Action |
|---|---|---|
| Red blink during use, mouse works | Low battery | Replace cells or charge |
| Red blink, mouse frozen | Battery dead or pairing lost | Charge, then re-pair |
| Red blink while plugged in | Cable or port fault | Swap cable and port |
| Solid red while charging | Charging circuit not accepting power | Try 5V adapter, inspect port |
| Red blink with fresh battery | Pairing or receiver issue | Re-pair with correct tool |
| Red blink on one computer only | Driver or USB power issue | Reinstall software, try new port |
| Red glow underneath only | Sensor illumination | Normal, no action needed |
| Red blink after a drop | Physical damage | Inspect and replace |
| Mouse warm or shell bulging | Swollen battery | Stop use, contact support |
Work down the list. If the first action doesn't clear the blink, move to the next row that matches your situation. Most users find their answer in the first three rows.
Frequently Asked Questions
What does it mean when a Logitech mouse is blinking red?
A red blink on a Logitech mouse almost always means the battery is low. On rechargeable models, it's a reminder to plug in. On AA or AAA models, it means the cell is nearing the end of its charge.
Occasionally, it signals a lost pairing.
How do I stop my Logitech mouse from blinking red?
Replace the battery or plug the mouse in to charge. If that doesn't clear it, re-pair the mouse using Logitech Unifying Software, Logi Options+, or your computer's Bluetooth settings. A firmware update through Logi Options+ or G HUB can also fix stuck LED behavior.
Why is my Logitech mouse blinking red even with a new battery?
Rechargeable NiMH cells run at 1.2V, and some Logitech mice read that as low. Try alkaline or 1.5V lithium cells. If the blink persists on fresh alkaline batteries, the issue is likely pairing or a stuck firmware flag, not the battery itself.
Is the red light under my Logitech mouse a problem?
No. That's the optical sensor's illumination LED, and it's completely normal. It lights up when the mouse is on and tracking.
The status LED on top is the one that reports battery and connection problems.
How long does a Logitech mouse battery last before the red blink?
It depends on the model. The M185 rates up to 12 months, the M325 and M705 rate up to 18 to 36 months, and the MX Master 3 rates about 70 days per charge. Heavy use and high DPI settings shorten those numbers.
Can a red blinking Logitech mouse be repaired?
Usually not. Logitech consumer mice aren't designed for user repair, and parts aren't sold separately. If the mouse is under warranty and shows no physical damage, contact Logitech for a replacement.
Out of warranty, replacement is typically cheaper than repair.