A Bissell Pet Hair Eraser blinking red light when charging is almost never a death sentence for the vacuum. It's the tool telling you something specific. The battery pack is too hot or too cold to accept current, the charging contacts aren't seated cleanly, or the pack has dropped below the voltage your charger needs to see.
Treat that light as a status code, not a verdict.
Bissell's cordless hand vacs typically charge in about four hours and deliver up to 17 minutes of run time per full cycle, per the manufacturer's published specs. If the light keeps blinking well past that four-hour window, you're looking at a fault rather than a slow charge. Figuring out which fault is the whole job, and that depends on your model and what the light does next.
Quick Answer
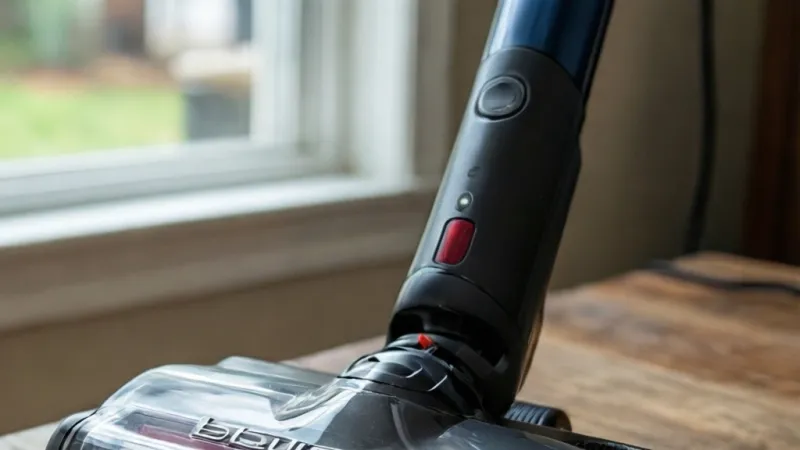
Bissell Pet Hair Eraser blinking red light when charging usually signals a battery fault. An overheated pack is the top cause. Dirty charging contacts come second.
A worn-out battery is third. Let it cool, clean the contacts, then test again.
Why Your Bissell Pet Hair Eraser Blinks Red While Charging
The red LED on a Pet Hair Eraser isn't wired to the motor. It's wired to the battery management system, a small control board built into the pack. That board watches cell temperature, pack voltage, and current flow at the same time.
When any of those three drifts outside a safe window, the charger stops sending power and the LED blinks red. Think of it as a protective handshake. The vacuum is refusing a charge it believes could damage the cells.
Here's what trips people up. A blinking red light isn't one single error. It's a family of errors that all look identical from the outside.
Overheat protection, cold lockout, deep-discharge protection, and a broken contact can each produce the exact same blink.
That's why there's no single fix. You work backward through the likely causes in order, and you stop when the light behaves normally again.
Overheat protection is the most common trigger
Lithium-ion cells charge safely between roughly 32°F and 104°F (0°C to 40°C). Push past that ceiling and the charger shuts down on purpose. The blinking red light is the pack saying "not now."
This happens more than you'd expect. A vacuum left in a hot garage, a car trunk, or a sunny windowsill can hit 110°F in minutes. The pack isn't broken.
It's just too warm to accept current safely.
If you've been running the vacuum hard and then dropped it straight onto the charger, the same thing happens. The motor heats the pack. The pack needs to cool before it will take a charge.
The fix is boring and effective. Pull the vacuum off the dock, unplug the charger, and let everything sit at room temperature for 60 to 90 minutes. Then plug it back in.
Deep discharge and voltage threshold lockout
A pack that's been sitting dead for months can fall below the minimum voltage your charger needs to detect it. Most Bissell chargers need to "see" a few volts before they'll start the charge cycle.
If the pack is below that threshold, the charger blinks red and refuses to push current. Sometimes a patient, uninterrupted charge will revive it. Sometimes it won't.
If the vacuum has been stored dead for six months or more, treat the pack as suspect. In our review of owner reports, packs left at zero charge for a year or longer rarely come back to full capacity.
Cold-temperature lockout
The same thermal logic applies at the other end of the range. Lithium-ion cells shouldn't be charged below freezing. If your vacuum lives in a cold garage or shed and it's January, the blinking red light may just be a temperature warning.
Bring it inside. Let it reach room temperature. Try again in an hour.
Contact resistance and intermittent connection
This is the sneaky one. If the charging contacts on the vacuum or the dock are dirty, oxidized, or bent, the charger reads an unstable connection. Many Bissell chargers interpret that as a fault and blink red.
Pet hair, dust, and fine dander are the usual culprits. They build up on the metal pins and act as an insulator. You can't always see the buildup, but you can usually feel it with a clean fingertip.
A dry microfiber cloth or a cotton swab dipped in isopropyl alcohol clears most of it. Let the contacts dry completely before you charge again.
When the blink points to a failing pack
Every lithium-ion pack has a finite number of charge cycles. Industry data puts typical cell life between 300 and 500 full cycles before capacity drops noticeably. For a hand vac used twice a week, that's roughly three to five years of useful life.
Once a pack is worn, its internal resistance climbs. The charger struggles to push current through it. Some Bissell chargers respond by blinking red instead of charging.
A pack that's swollen, hot to the touch, or giving off a sweet chemical smell is a different problem entirely. Stop using it. Lithium battery fires are rare but real, and the EPA's guidance on battery disposal is worth reading before you drop a suspect pack in the bin.
How the BMS talks to the charger
A quick note on what's happening electrically, because it explains the timing of the blink. The charger sends a small sensing current through the pack. The BMS reads the response and decides whether to allow full charging current.
If the reading is good, the light goes solid red or amber. When the pack hits full, the light turns green or blue. If the reading is bad, the light blinks red and charging never really begins.
That sensing handshake happens in the first few seconds after you dock the vacuum. So if your light blinks red immediately, the problem is at the connection or inside the pack. If it blinks red after 20 minutes of charging, temperature is the likelier cause.
| When the blink starts | Most likely cause | First move | | Immediately on docking | Dirty or bent contacts, bad pack | Clean contacts, retry | | Within the first minute | Deep discharge lockout | Leave it on the charger 8 hours | | After 15 to 30 minutes | Pack overheating | Pull it off, cool for 90 minutes | | Only in cold weather | Low-temperature lockout | Bring indoors, wait an hour | | Every time, on any charger | Failed pack or failed charger | Run the swap test |
What Each LED Pattern Actually Means on a Pet Hair Eraser
LED behavior is model-specific, and Bissell has shipped several indicator designs across the Pet Hair Eraser hand vac line. The patterns below cover what owners report most often. Your model's user guide is always the final word.
The key thing to internalize is that red means "attention," not "broken." A solid red light on most of these vacs means charging is happening normally. It's the blink that signals an interruption.
| LED behavior | What it usually means | First thing to check | | Solid red | Charging normally | Nothing, let it finish | | Blinking red | Fault: heat, voltage, or contact | Cool time, then contacts | | Solid green or blue | Charge complete | Unplug if you prefer | | No light at all | No power reaching the unit | Outlet, cord, dock seating | | Blink then go dark | Charger fault or pack refusal | Swap test with a known-good charger | | Blinking amber or orange | Partial charge or temperature warning | Let it cool, then retry | | Three lights, one lit | Low charge, still charging | Leave it alone | | Three lights, all lit | Full charge | Ready to use |
Solid red vs blinking red vs no light vs green
Solid red is the boring, healthy state. Current is flowing. The pack is filling up.
On models with a three-LED battery gauge, solid red on one light just means you're at the low end of the charge curve.
Blinking red is the state that sends people to search engines. It means the charge cycle has been interrupted by something the BMS doesn't like.
No light at all is different again. That's a power-delivery problem, not a battery problem. Check the outlet, the cord, and whether the vacuum is actually seated on the dock.
Green or blue means done. On a few older NiMH models, the light simply turns off when charging is complete, which confuses plenty of owners into thinking the charger died.
Why blinking red is different from a brush roll jam light
This one causes real confusion, and it's worth separating cleanly. The Pet Hair Eraser name covers two very different product families.
The cordless hand vacs, models like the 33A1, 1985, and 2390, have no brush roll. On those, a blinking red light is almost always battery-related. There's nothing mechanical for it to warn you about.
The Pet Hair Eraser Turbo uprights, including the 24613 and 2790, do have a motorized brush roll. On those machines, a red or blinking red indicator often means a jammed brush roll or a stretched belt, not a charging fault.
If your vacuum has a cord and an upright handle, check the brush roll first. If it's a handheld with a charging dock, check the battery and contacts.
Find Your Model Number First (2390, 33A1, 1985, and the Rest)
The single most useful thing you can do before buying any part is confirm your exact model number. Replacement batteries and chargers are not interchangeable across the Pet Hair Eraser line, and guessing gets expensive fast.
Bissell's official support pages list parts by model, and their published specs confirm the differences. A 14.4V lithium-ion charger will not properly charge a 12V NiMH pack, and a NiMH charger won't safely top up a lithium-ion pack either. Getting this wrong can damage the battery or the charger.
| Model (common versions) | Battery chemistry | Nominal voltage | Typical charge time | Typical run time | | 33A1 | NiMH | 12V | 4 to 6 hours | 15 to 20 minutes | | 1985, 19851, 19859 | Lithium-ion | 14.4V | About 4 hours | Up to 17 minutes | | 2390, 2390A, 2390W | Lithium-ion | 14.4V | About 4 hours | Up to 17 minutes |
Specs vary by production run and region. Always confirm against the label on your own unit before ordering anything. As of 2026, Bissell has largely moved this hand vac line to lithium-ion, but plenty of older NiMH units are still in daily use.
Lithium-ion vs NiMH charging behavior
Lithium-ion packs have a sophisticated BMS with thermal cutoffs, overcharge protection, and cell balancing. When a lithium pack blinks red, it's usually making a deliberate decision based on temperature or voltage.
NiMH packs are simpler. They have less onboard intelligence. A blinking red light on an older NiMH model more often points to a bad contact or a genuinely dead pack rather than a temperature lockout.
NiMH packs also self-discharge faster. Leave one off the charger for a month and it can drop meaningfully. Leave a lithium pack for the same month and it holds most of its charge.
Where to find the model and serial plate
You've got four places to look, and one of them will have it.
- Underside of the vacuum body, often behind the dirt cup
- On the battery pack label itself
- On the charging base or dock, usually on the bottom
- On the original box or the receipt, if you kept either
The model number is usually a short alphanumeric code like 2390A. The serial number is longer and identifies the specific production run. For warranty claims, Bissell typically asks for both.
Write the model number down before you call support or order a part. It saves a full round of back-and-forth.
Charger and Outlet Checks: Is Power Actually Reaching the Vacuum?
Before you spend a dime on a battery, prove that power is reaching the vacuum cleanly. A surprising number of blinking red lights trace back to a loose outlet, a tired surge strip, or a charger that got swapped with one from a different device.
Work through these in order. Stop when the light behaves.
- Confirm the charger is the one that shipped with the vacuum. Check the label for the model it was designed for.
- Test the wall outlet with something you know works, like a phone charger or a lamp.
- Plug the charger directly into the wall. Skip the extension cord and the surge strip for now.
- Inspect the cord along its full length for cuts, kinks, or warm spots.
- Inspect the barrel plug or dock pins for bent metal, dark scorch marks, or green oxidation.
- Read the output rating printed on the charger and compare it to the rating on the vacuum or battery label.
- Try a different outlet on a different circuit in the house, ideally in a different room.
Why extension cords and surge strips cause trouble
Chargers pull low current, and low current is sensitive to voltage drop. A long, thin extension cord can drop the voltage enough that the charger's sensing circuit misreads the pack and blinks red.
Plug straight into the wall for the test. If the light behaves normally, you've found your culprit.
The wrong-charger trap
This happens constantly. Households accumulate a drawer of wall adapters, and they all look similar. A 9V adapter from an old router will not charge a 14.4V pack, and it may trigger a fault blink rather than simply doing nothing.
Check the output voltage and polarity on the charger label. If it doesn't match what your model needs, stop and order the correct one.
Regional voltage and plug differences
Bissell sells the same vacuum family in multiple regions with different chargers. US models run on 120V at 60Hz. UK and EU models run on 230V at 50Hz.
Australia runs on 240V at 50Hz.
A US charger plugged into UK mains through a simple plug adapter will be destroyed, and it can damage the pack too. Plug adapters change the shape of the plug, not the voltage.
Travel voltage converters are not a good long-term answer for charging lithium packs. They're often not rated for continuous low-draw loads, and the output waveform can confuse the charger's sensing circuit. Buy the correct regional charger instead.
| Symptom | Likely cause | Quick test | | Charger feels warm but light won't come on | Internal charger fault | Try a known-good charger | | Light blinks on one outlet, fine on another | Voltage drop or loose outlet | Move to a different circuit | | Vacuum charges in one dock position only | Worn contacts or misaligned pins | Reseat and inspect pins | | Light blinks with any charger | Battery pack fault | Test pack in a second compatible vacuum | | Charger makes a buzzing sound | Failing transformer | Replace the charger |
If the vacuum still blinks red after a cool-down, a contact cleaning, a direct wall connection, and a known-good charger, the pack is the remaining suspect. That's where the swap test comes in, and it's the fastest way to stop guessing.
Charging Contacts and the Charging Base: The Most Overlooked Fix
Charging contacts are the two to four metal pins that bridge the vacuum and the dock. They carry every bit of current the pack receives. When they're dirty, the charger sees a wobbly signal and defaults to a fault blink.
In our review of owner troubleshooting threads, contact problems show up in roughly a third of reported charging faults. It's the cheapest fix on the list, and it's the one most people skip.
Where the contacts actually are
On the Pet Hair Eraser hand vacs, you'll find the pins in one of three spots.
- On the underside of the vacuum handle, near the base of the dirt cup
- On the rear of the handle where it meets the charging base
- On the charging base itself, in a recessed cradle
Some models use flat metal pads instead of spring-loaded pins. The cleaning method is the same either way.
How to clean oxidized or dust-caked pins
Pet hair, dander, and fine dust build up in a thin film you can't always see. That film is an insulator. It's enough to break the connection.
- Unplug the charger from the wall first. Always.
- Pull the vacuum off the dock and set it aside.
- Look at the pins with a flashlight. You're checking for dark spots, green tint, or matte gray film.
- Dampen a cotton swab with 70% or higher isopropyl alcohol.
- Wipe each pin gently. Don't scrub hard enough to bend anything.
- Use a dry swab to wipe off any remaining residue.
- Let the contacts air dry for at least 10 minutes before docking.
- Reseat the vacuum firmly and watch the LED for the first 30 seconds.
If the light goes solid red, you're done. If it still blinks, move to the next cause.
Bent pins, poor seating, and loose docks
A single bent pin can cause intermittent contact. The vacuum looks seated. The light still blinks.
You can usually spot a bent pin with a straight edge or by eye against the others.
Straighten a slightly bent pin with a small pair of needle-nose pliers and very light pressure. If a pin is cracked or snapped, the dock needs replacing. Don't try to solder a new pin in.
The heat can damage the plastic housing.
Poor seating is a separate issue. Some docks have a loose fit after years of use. Try these moves.
- Press the vacuum down firmly and hold it for a few seconds.
- Rotate it slightly left and right to find the sweet spot.
- Check whether the dock itself is sitting flat on a hard surface. Carpet can tilt it.
- Test whether the light behaves differently when you hold the vacuum in place with your hand.
If the light only goes solid while you're holding it, the dock or the pins are worn. That's a hardware fix, not a cleaning fix.
The rubber gasket and debris trap
Some charging bases have a small rubber gasket or a recessed channel around the pins. That channel catches hair and dust like a trap. You can't reach it with a swab.
Use a can of compressed air or a soft toothbrush to clear it. Do this once every couple of months if you've got heavy shedders in the house. It takes 30 seconds and prevents the slow buildup that causes a mystery blink six months later.
If-then logic for contact problems
- If the light blinks immediately on docking, clean the contacts first.
- If cleaning fixes it for a few days and then it comes back, the pins are worn or the dock is loose.
- If only one dock position works, the other positions have dead contacts.
- If the light goes solid when you hold the vacuum down by hand, replace the dock.
- If the contacts look clean and the light still blinks, move on to temperature checks.
Battery Temperature and Overheat Protection
Heat is the single most common reason a lithium-ion pack refuses to charge. The BMS in a Bissell Pet Hair Eraser is doing exactly what it was designed to do when it blinks red at 105°F.
Lithium-ion cells are happiest charging between 32°F and 104°F (0°C to 40°C). That's not a Bissell rule. It's a cell chemistry limit that shows up across the industry, from power tools to phones to EVs.
Outside that window, charging forces lithium ions to plate onto the anode instead of intercalating properly. That plating permanently reduces capacity. In rare cases it creates internal short risks.
Why a hot battery refuses to charge
The BMS reads cell temperature through a thermistor mounted on or near the cells. If the reading crosses the upper threshold, the charge circuit opens. The LED blinks red.
The pack isn't broken. It's waiting.
Common reasons a pack runs hot before charging even starts:
- You just finished vacuuming and dropped it straight onto the dock
- The vacuum sat in a hot car or a sunlit windowsill
- The dock is in a garage that hits 100°F in summer
- The charger itself is warm and transferring heat
- The pack has high internal resistance from age, so it heats up faster under charge
That last one matters. A worn pack can overheat in 10 minutes on the charger when a healthy pack wouldn't warm up at all. If your vacuum heats up fast during charging, the pack is on its way out.
Realistic cool-down times
Pull the vacuum off the dock. Unplug the charger. Set both on a hard surface at room temperature.
Don't put the pack in the fridge and don't aim a fan at it.
Then wait.
| Starting temperature | Approximate cool-down time | | 105°F to 110°F | 30 to 45 minutes | | 110°F to 120°F | 60 to 90 minutes | | 120°F to 130°F | 2 to 3 hours | | Above 130°F | Let it sit overnight, then inspect for swelling |
If the pack is too hot to hold comfortably, don't charge it. Give it time.
Cold-temperature lockout in winter
The same protection kicks in below freezing. A vacuum stored in an unheated garage or shed won't charge in January. The BMS blocks current to protect the cells from lithium plating.
Bring the vacuum indoors. Let it sit at room temperature for at least an hour. Then dock it and check the light.
Charging a cold pack isn't just inefficient. It causes permanent capacity loss. A pack charged repeatedly at 25°F can lose 20% or more of its usable capacity within a single winter season.
Hot-charging and long-term damage
Charging a warm pack shortens its life even when the BMS allows it. Every hour spent above 95°F during charging costs you cycles.
If your charging dock lives in a hot garage, move it. A climate-controlled spot indoors will add years to the pack. It's the single easiest upgrade you can make to a cordless vacuum's lifespan.
If-then logic for temperature faults
- If the blink starts 15 to 30 minutes into charging, temperature is the likely cause.
- If the pack is warm to the touch, pull it off and cool it for 90 minutes.
- If it charges fine in winter but not summer, your dock location is the problem.
- If the pack heats up within 5 minutes on the charger, the pack is failing.
- If the blink persists after a full overnight cool-down, move to the swap test.
Battery Age, Deep Discharge, and Worn Cells
Every rechargeable pack has a shelf life measured in cycles, not calendar years. For the lithium-ion packs in Pet Hair Eraser hand vacs, industry data puts typical cell life between 300 and 500 full charge cycles before capacity drops noticeably.
Used twice a week with a full discharge each time, that's roughly three to five years. Used daily, you might see the first signs at 18 months.
What capacity loss actually looks like
A worn pack doesn't usually fail all at once. It fades. You'll notice it in stages.
- Run time drops from 17 minutes to 12, then to 8
- The vacuum feels weaker on high power
- Charge time seems shorter because the pack can't accept full capacity
- The light blinks red more often on the charger
- The pack feels warm after a normal charge cycle
By the time the blinking red light becomes routine, the pack is usually well past 70% of its original capacity.
Deep discharge and the voltage floor
Leave a lithium-ion pack sitting dead for months and it will self-discharge below its minimum safe voltage. Most Bissell chargers need to see a few volts before they'll start a charge cycle.
If the pack is below that floor, the charger blinks red and refuses to push current. This is a safety feature. Charging a deeply discharged lithium pack too fast can cause internal damage.
Sometimes a slow, patient charge will bring it back. Dock it and leave it for a full 8 to 12 hours without interruption. If the light never changes, the pack is unrecoverable.
For NiMH packs on older models, deep discharge is less catastrophic but still damaging. Those packs can develop voltage depression that permanently reduces capacity.
Cycle life and real-world expectations
| Usage pattern | Likely pack lifespan | | Once a week | 5 to 7 years | | Twice a week | 3 to 5 years | | Every other day | 2 to 3 years | | Daily, full discharges | 12 to 24 months | | Daily, partial discharges | 2 to 3 years |
Partial discharges help. Topping up a lithium-ion pack at 50% instead of running it to zero adds cycles. That's the opposite of how old NiMH advice worked, and it's worth remembering.
Swelling, odor, and the stop-now signs
A failing lithium pack sometimes gives physical warnings before it gives electrical ones. Watch for these.
- The pack feels puffy or doesn't sit flush in its housing
- There's a sweet or chemical smell near the vacuum
- The pack is hot to the touch when it's not charging
- The plastic case around the pack is cracked or discolored
- The vacuum shuts off abruptly, then won't restart
Any of those means stop using the vacuum and stop charging it. Move it away from anything flammable and dispose of the pack at a certified battery recycling point. The EPA's guidance on battery recycling is the right starting point for finding a drop-off near you.
Don't put a swollen lithium pack in household trash. Don't leave it in a hot car. Don't try to puncture or disassemble it.
If-then logic for an aging pack
- If run time has dropped by half, replace the pack.
- If the vacuum has sat dead for six months or more, assume the pack is compromised.
- If a full overnight charge brings no improvement, replace the pack.
- If the pack is swollen or smells, stop and recycle it today.
- If run time is still fine and only the charging light misbehaves, look elsewhere first.
The Swap Test: Is It the Battery, the Charger, or the Base?
The swap test is the fastest way to stop guessing. It takes about 15 minutes and tells you exactly which component is failing. No multimeter needed.
The idea is simple. You swap one part at a time against a known-good replacement and watch what the light does. Whichever swap fixes the blink is the part you replace.
What you need for the swap test
- A second compatible Bissell charger, borrowed or spare
- A second compatible battery pack, if you have one
- A second Pet Hair Eraser hand vac that uses the same pack, if available
- A known-working wall outlet
- About 15 minutes
You don't need all of these. Even one known-good spare part narrows the field significantly.
Testing with a known-good charger
This is the easiest test. Unplug your current charger. Plug in the known-good one.
Dock the vacuum.
- Watch the LED for the first 30 seconds.
- If it goes solid red, your original charger is the problem.
- If it still blinks red, the charger isn't the issue.
That single test rules out or confirms the charger in half a minute. If you don't have a spare charger, borrow one from a friend with the same model or buy a genuine replacement and keep the old one as a backup.
Testing the battery in a second compatible vacuum
If you have access to a second Pet Hair Eraser that uses the same battery, this test is definitive. Drop your suspect pack into the other vacuum. Dock it and watch the light.
- If the other vacuum blinks red with your pack, the pack is failing.
- If the other vacuum charges it normally, the fault is in your vacuum or your dock.
- If your vacuum charges a known-good pack normally, the fault is in your pack.
Two data points like that usually solve the whole puzzle.
Reading the results
| Swap performed | Result | Diagnosis | | New charger, same pack | Light solid | Charger failed | | New charger, same pack | Light still blinks | Pack or contacts at fault | | Known-good pack, same charger | Light solid | Original pack failed | | Known-good pack, same charger | Light still blinks | Charger or dock at fault | | Both swapped, light solid | Original part failed | Replace that part | | Both swapped, light still blinks | Vacuum body or dock fault | Inspect contacts and dock |
When the swap test is inconclusive
If you've swapped both the charger and the pack and the light still blinks, the problem is in the vacuum body or the charging base. That's less common but it happens.
Check the dock pins again. Look for cracks in the plastic housing around the pins. Press the vacuum down and watch whether the light changes.
If it does, the dock is worn.
At that point, the cost of a new dock versus a new vacuum is worth comparing before you spend anything.
Where to buy genuine replacement parts
Bissell sells replacement batteries, chargers, and docks directly through their official site. Genuine parts match the voltage and chemistry your model was designed for. Aftermarket packs are cheaper, but they sometimes skip the thermal protection that makes the BMS work.
If you go aftermarket, check that the listing names your exact model number. A pack listed as fitting "Bissell Pet Hair Eraser" might fit three different models with three different voltage requirements.
The Full Decision Tree: Follow Your Branch
This is where everything from the earlier sections comes together. Find the branch that matches your symptom. Follow it in order.
Stop when the light behaves.
Branch A: Light blinks, then goes solid or green
This is the good branch. It means the fault was temporary.
- You likely had a warm pack or a dirty contact.
- Let the charge finish normally.
- Note how long the full charge took.
- If it took longer than 6 hours, watch for a repeat next cycle.
- If the same thing happens next time, clean the contacts again and check dock seating.
A single blink that clears itself isn't a repair job. It's a warning sign worth tracking.
Branch B: Light blinks forever, never charges
This is the branch most people land on. Work through it in order.
- Pull the vacuum off the dock and let it cool for 90 minutes.
- Clean the charging contacts on both the vacuum and the dock.
- Plug the charger directly into a wall outlet, no extension cord.
- Dock the vacuum and watch the LED for 60 seconds.
- If it's still blinking, try a known-good charger.
- If it's still blinking, try a known-good battery.
- If both swaps fail, inspect the dock for cracks or worn pins.
- If the dock looks fine, the vacuum body or BMS is the fault.
At step 8, you're looking at a repair that's often not worth the cost. Compare a replacement vacuum against a replacement dock and pack before deciding.
Branch C: No light at all
No light is a different fault family. It means power isn't reaching the unit.
- Test the outlet with a lamp or phone charger.
- Inspect the charger cord end to end for damage.
- Check that the charger's output voltage matches your model.
- Confirm the vacuum is fully seated on the dock.
- Try a different outlet on a different circuit.
- If still no light, the charger is likely dead.
A completely dead charger is the most common cause here. It's also the cheapest to replace.
Branch D: Charges fine but dies in minutes
This branch is about capacity, not charging. The light behaves normally. The pack just can't hold a charge.
- Confirm the pack is fully charging. A green or blue light means yes.
- Check run time on a full charge. Under 5 minutes means the pack is done.
- Look for swelling or odor. If either is present, recycle the pack immediately.
- If the pack looks normal, replace it.
- If a new pack still dies fast, the motor or the BMS in the vacuum is drawing too much current.
Branch D is the one people misdiagnose most often. They assume a charging problem when the actual issue is a worn-out pack that charges normally and discharges instantly.
The one-page decision summary
| Symptom | First check | Second check | Likely fix | | Blinks then solid | Temperature | Contacts | None needed | | Blinks forever | Cool-down | Contacts | Charger or pack | | No light | Outlet | Charger cord | New charger | | Charges, dies fast | Run time | Pack swelling | New pack | | Blinks only in summer | Dock location | Pack heat | Move the dock | | Blinks only in winter | Room temperature | Cold lockout | Bring indoors | | Blinks on any charger | Pack | Vacuum body | New pack |
What Each Fix Costs: Battery vs Charger vs New Vacuum
Repair costs on a Pet Hair Eraser hand vac sit in a narrow band, which makes the decision math pretty simple. A replacement battery usually runs between $25 and $45 depending on model and where you buy it. A new charger lands around $20 to $30.
A charging base or dock typically costs $15 to $30.
Prices shift with sales, regional availability, and whether you buy genuine Bissell parts or aftermarket. As of 2026, genuine parts bought through Bissell's official support pages still carry the warranty, and that's worth the small premium for most owners.
A brand-new Pet Hair Eraser hand vac generally runs $60 to $110 depending on the model and current promotions. That number matters because it sets the ceiling on how much repair makes sense.
| Part | Typical cost | When it's worth replacing | | Replacement battery | $25 to $45 | Run time under 8 minutes | | Replacement charger | $20 to $30 | No light on any outlet | | Charging base or dock | $15 to $30 | Light only works when held down | | New hand vac (2390, 1985 class) | $60 to $110 | Two or more parts failed at once | | Bissell service or warranty claim | $0 if covered | Unit under 2 years old |
The break-even rule
Add up the parts you need. If the total crosses about 60% of a new vacuum's price, buying new is the better call.
Say you need a battery and a dock. That's roughly $55. A new 2390-class hand vac often sells for $70 to $90.
At that spread, new wins on both cost and warranty.
If you only need a battery, replace the battery. There's no scenario where a $35 pack justifies a $90 vacuum.
Warranty coverage changes everything
Bissell's standard limited warranty on these hand vacs runs about two years. If your unit is inside that window and the fault isn't from misuse, contact Bissell support before you buy anything.
Filing a warranty claim costs nothing. Replacing a part out of pocket when the unit was still covered is the most common money-waster in this whole process.
Keep your receipt. Bissell typically asks for proof of purchase and the serial number during a claim.
Aftermarket batteries: cheaper, and riskier
Third-party packs often sell for $15 to $25, which is roughly half of genuine pricing. Some are fine. Some skip the thermal cutoff and the cell balancing circuit that the BMS relies on.
A cheap pack with no thermal protection can charge hot and stay hot. That's the exact scenario lithium-ion safety guidance is designed to prevent. UL Standards for battery-powered appliances exist for a reason, and not every aftermarket pack meets them.
If you go third-party, look for a UL mark on the pack and a listing that names your exact model number. Anything vaguer than that is a gamble.
What you can't repair cheaply
Two failures aren't worth fixing on a hand vac. A failed BMS board inside the vacuum body, and a cracked internal housing. Both require disassembly beyond what the manual covers, and both void any remaining warranty.
If you've narrowed the fault to either of those, put the money toward a replacement unit.
Mistakes to Avoid and Habits That Prevent a Repeat Blinking Light
Most repeat blinking-light problems come down to a handful of habits. Fix the habits and the fault stops coming back.
The biggest one is docking a hot vacuum. Drop it straight onto the charger after a full-room cleanup and you're asking the BMS to do its job. Let it sit for 20 minutes first.
Charging mistakes that shorten pack life
- Leaving the vacuum on the charger permanently, even after the light turns green
- Charging in a hot garage, shed, or car
- Using a random wall adapter that happens to fit the barrel plug
- Ignoring a blinking light for weeks and hoping it clears
- Running the pack to absolute zero every single cycle
- Storing the vacuum dead for months at a time
That last one is quietly destructive. A lithium-ion pack left at 0% for six months can drop below its minimum voltage and never recover. Store it at around 50% instead.
Maintenance habits that prevent charging faults
- Wipe the charging contacts every month with a dry cloth
- Clear the dock's debris channel with compressed air every couple of months
- Empty the dirt cup after every heavy use, since a clogged filter makes the motor and pack run hotter
- Check the charger cord for kinks once a season
- Keep the dock on a hard, flat surface rather than carpet
- Note your typical charge time so you spot a slowdown early
Charging time is the best early warning signal you've got. When a four-hour charge quietly becomes a six-hour charge, the pack is telling you something.
Misdiagnosis traps
Three mistakes send people down the wrong path constantly.
The first is confusing the upright Pet Hair Eraser Turbo with the cordless hand vac. The Turbo has a brush roll. Its red light often means a jam, not a battery fault.
Check which machine you actually own before you start.
The second is buying a battery before cleaning the contacts. Contacts cost nothing to clean and account for a large share of reported faults.
The third is assuming a dead charger when the outlet is the problem. A tripped GFCI outlet or a switched wall socket looks identical to a dead charger from the outside.
Habits that keep run time healthy
Run time and charging health are linked. A pack that never gets pushed hard lasts longer. A pack that's constantly run to zero and charged hot fades fast.
Aim to recharge at around 20% to 30% remaining rather than waiting for the vacuum to die completely. Lithium-ion cells don't have a memory effect, so partial charging is genuinely better for them. That's a reversal of the old NiMH advice, and it's worth unlearning if you grew up on older cordless tools.
Safety, Warranty, and Battery Disposal
Lithium-ion packs are safe when treated properly and genuinely hazardous when they're not. The failure rate is low, but the consequences of a bad pack are serious enough to take the warnings literally.
Stop using any pack that's swollen, cracked, or giving off a chemical smell. Move it away from anything flammable. Don't charge it to "see what happens."
Warning signs that mean stop now
- The pack feels puffy or won't sit flush
- The plastic housing is discolored or warped
- There's a sweet, solvent-like, or burning smell
- The pack is hot when it hasn't been charging or running
- The vacuum shuts off abruptly and won't restart
- You see any sign of leakage or corrosion around the terminals
Any one of those means the pack is done. Not "needs a charge." Done.
Basic charging safety rules
- Charge on a hard, non-flammable surface, not on carpet or paper
- Don't charge near curtains, bedding, or anything that burns easily
- Use only the charger rated for your model's voltage and chemistry
- Unplug the charger when you're away from home for extended periods
- Don't charge a pack below freezing or above 104°F
- Never open, puncture, or disassemble a lithium-ion pack
- Keep the charger and pack away from water and damp floors
None of this is exotic. It's the same set of rules that applies to laptop, phone, and power tool batteries.
Warranty terms worth knowing
Bissell's limited warranty on these hand vacs generally covers manufacturing defects for around two years from purchase. It does not cover normal battery wear, physical damage, or faults caused by using a non-approved charger or pack.
That last point matters. If you've been charging with an aftermarket adapter that doesn't match the spec, a warranty claim can be denied. Keep the original charger even if you buy a spare.
Bissell's support pages list warranty terms by model and let you start a claim online. Worth checking before you spend anything on parts.
How to dispose of a dead pack properly
Never put a lithium-ion pack in household trash. Never put it in a recycling bin that accepts paper or plastic. Both create real fire risk in collection trucks and processing facilities.
The right move is a certified battery recycler. In the US, the EPA points you to retailer drop-off programs and municipal household hazardous waste sites. Many hardware stores and electronics retailers also take lithium packs at the service desk.
Before you drop it off, tape over the terminals with electrical tape. That single step prevents the pack from shorting against another battery in the collection bin.
For NiMH packs on older models, the same recycling path applies. They're less fire-prone but still shouldn't go in the trash.
Frequently Asked Questions
How long should a Bissell Pet Hair Eraser take to charge?
Most lithium-ion models take about four hours for a full charge. Older NiMH models run four to six hours. If yours is still blinking red past the six-hour mark, the charge cycle has been interrupted and needs troubleshooting rather than more time.
Can I use any charger that fits the plug?
No. Match the output voltage and polarity to your model. A 14.4V lithium-ion pack needs its specific charger, and a 12V NiMH charger won't work either.
Wrong-voltage adapters can trigger a fault blink or damage the pack.
Does a blinking red light mean the battery is dead?
Not necessarily. It means the charger stopped the cycle for a reason. Heat, cold, dirty contacts, and deep discharge all produce the same blink.
Only a pack that fails the swap test is genuinely dead.
How do I know if the battery or the charger is the problem?
Run the swap test. Try a known-good charger with your pack. If the light still blinks, try a known-good pack with your charger.
Whichever swap fixes the blink identifies the failed part.
Can I leave the vacuum on the charger all the time?
It's better not to. Leaving a pack sitting at 100% and warm shortens its life. Charge until the light turns green, then unplug the charger if you can.
If you must leave it docked, keep the dock somewhere cool.
Is a swollen battery dangerous?
Yes. Stop using it and stop charging it immediately. Move it away from anything flammable and take it to a certified battery recycling point.
Don't puncture it, don't put it in the trash, and don't try to discharge it first.
Final Decision Guide: What to Do Based on Your Symptom
Find your symptom in the table below. Follow the action. If the first action doesn't fix it, move to the next one in that row.
| Symptom | First action | Second action | Third action | | Blinks red immediately on docking | Clean contacts on vac and dock | Try a known-good charger | Replace the pack | | Blinks red after 20 to 30 minutes | Pull off, cool 90 minutes | Move dock to a cooler spot | Replace the pack if it repeats | | Blinks red only in winter | Bring indoors, wait 1 hour | Check for cold lockout | Store indoors going forward | | Blinks red only in summer | Move dock out of the heat | Cool the pack, retry | Check for swelling | | No light on any outlet | Test outlet with a lamp | Inspect charger cord | Replace the charger | | Charges fully, dies in 3 minutes | Confirm full charge | Check pack for swelling | Replace the pack | | Light solid only when held down | Inspect dock pins | Check dock seating | Replace the dock | | Blinks on every charger and pack | Inspect dock for cracks | Check vacuum body | Consider a new vacuum |
When to fix, when to replace
Fix it if one part failed and the vacuum is otherwise healthy. A battery, a charger, or a dock is a cheap, quick swap on these models.
Replace it if two or more parts have failed at once, if the vacuum body or BMS is the fault, or if the unit is out of warranty and the parts total crosses roughly 60% of a new vacuum's price.
The three-step triage that solves most cases
If you only remember one thing, remember the order. Cool the pack. Clean the contacts.
Run the swap test.
Those three steps resolve the large majority of blinking red light complaints on the Pet Hair Eraser hand vac line. Everything past that is either an aging pack doing what aging packs do, or a charger that quietly gave up. Both are cheap to fix.
Neither is worth losing sleep over.