A Denon receiver red blinking light almost always means the unit has entered protection mode. That's a safety circuit inside the amplifier, not a random software bug. It cuts power the moment it detects a shorted speaker wire, an unsafe speaker load, or too much heat.
The light is a clue, not a death sentence.
Denon groups these faults into a blink code, and most AVR-X and S-series models flash somewhere between one and eleven times depending on the cause. Speaker impedance plays a huge role. Standards like IEC 60268-5 allow a speaker rated at 8 ohms nominal to dip far below that at certain frequencies.
So the fix starts with reading the pattern, not replacing the receiver.
Quick Answer
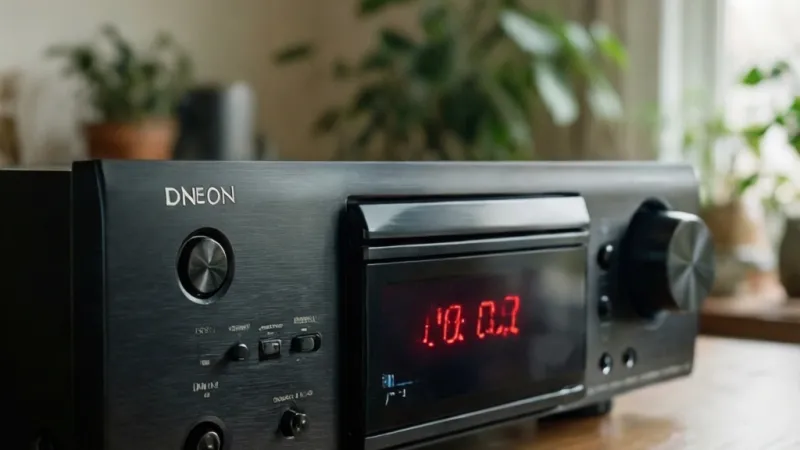
A Denon receiver red blinking light means protection mode has tripped. Unplug the receiver and wait 30 minutes. Disconnect every speaker wire.
Power on with no speakers attached. If it still blinks, the fault is internal.
What the Red Blinking Light on Your Denon Receiver Actually Means
Protection mode is the receiver's way of saving itself. When something looks wrong on the output side, the amplifier shuts down before damage spreads. You get a red LED instead of sound.
The circuit would rather annoy you than fry your receiver. That trade is deliberate.
Protection Mode Is a Safety Circuit, Not a Failure
Denon builds several layers of protection into every AVR. Overcurrent protection watches for too much current flowing through a speaker output. Thermal protection watches heat sink temperature.
DC offset protection watches for a dangerous DC voltage appearing at the speaker terminals.
Any one of those tripping puts the unit in standby with a blinking red light.
Here's the key distinction. A receiver that fails outright usually goes silent with no light at all, or a dead panel. A blinking red light means the processor is alive and the protection logic is doing its job.
What the Receiver Is Actually Protecting
Three things matter most, and they're all on the speaker side.
- Your speakers. A DC offset or runaway current can cook a voice coil in seconds.
- The amplifier channels. Output transistors are the most expensive parts to replace.
- Your home. Sustained overcurrent in a power supply is a fire risk, which is why safety standards like UL 62368-1 exist for audio and video equipment.
That last point isn't dramatic filler. It's why the receiver shuts down hard instead of limping along.
Standby Light vs Power Light: Which One Is Blinking?
People mix these up constantly, and it changes the diagnosis.
On most Denon AVRs, the power indicator sits near the power button and glows green or white when running. The standby indicator is usually a separate small LED. On some models they're the same lamp doing double duty.
If the light that blinks is the one that normally glows green during playback, you're looking at a protection trip. If a separate standby lamp is pulsing while the unit is off, that can simply mean the unit is in standby or updating firmware.
Check your model's owner's manual. Denon publishes model-specific layouts on denon.com, and the LED positions genuinely differ between the S-series and the AVR-X lineup.
Why Denon Blink Codes Vary by Model
There is no single Denon blink chart that covers every receiver ever made. The codes shifted across generations.
An AVR-X3800H from the current lineup doesn't necessarily flash the same number of times as a 2013 AVR-X2000 for the same fault. Firmware revisions have also changed behavior over the years.
What stays consistent is the logic. More blinks generally point deeper into the unit. Fewer blinks usually point at something on the speaker side.
As of 2026, Denon's official position is still that the owner's manual and authorized service documentation are the authoritative source for your specific model.
Before You Touch Anything: Safe Shutdown and Reading the Blink Pattern
This is where most people create a second problem. They start pulling speaker wires while the unit is plugged in and powered up. Don't do that.
A receiver in protection mode can still hold charge in its capacitors. Speaker terminals can still carry voltage. Treat it like any other mains-powered electronics repair.
Unplug First, Ask Questions Later
Pull the power cord from the wall before you touch a single speaker terminal. Not the standby button. The actual plug.
Then wait. Give the internal capacitors time to bleed down. A few minutes is fine for most tasks, though 30 minutes is the safer habit.
The 30-Minute Cooldown
Thermal trips need real cooling time. If the receiver shut down because it got too hot, ten minutes isn't enough.
Heat sinks hold temperature long after the fan stops. Powering back on too early just re-trips the same protection and tells you nothing useful.
Set a timer for 30 minutes. Go do something else. Then come back and start the diagnostic.
How to Count Blinks Accurately
The blink sequence usually starts the moment you press power. It runs for a few seconds, then the unit drops back to standby.
Watch the LED closely and count out loud. Record the number immediately, because the pattern repeats and it's easy to lose track.
If the unit blinks continuously without stopping, note that too. Continuous blinking is its own symptom.
What to Write Down Before You Start
A little note-taking saves you an hour of guessing.
- Exact blink count.
- Whether it blinks once on power-up or repeats in a loop.
- What you were doing when it first happened. Powering on, raising volume, switching inputs, connecting speakers.
- Any recent changes. New speakers, a move, a firmware update, a storm, a power cut.
- Whether the unit ever played normally before this started.
That last one matters more than people realize. A receiver that worked for three years and suddenly blinks is a different story from one that blinks the day you wired new ceiling speakers.
Tools You'll Actually Need
| Tool | Why You Need It | Notes |
|---|---|---|
| Digital multimeter | Measure speaker resistance and check for shorts | Any basic model with an ohms setting works |
| Small Phillips screwdriver | Loosen and tighten binding posts | Match the post size, don't force it |
| Flashlight or phone light | Inspect terminals inside a dark cabinet | Look for stray wire strands |
| Notepad or phone notes | Record blink counts and test results | Prevents repeat testing |
| Owner's manual | Model-specific blink and reset info | Download the PDF from Denon if yours is lost |
What You Should Not Do
A short list of moves that turn a cheap fix into an expensive one.
- Don't open the case. There are no user-serviceable parts inside, and you'll void the warranty.
- Don't keep power-cycling it hoping it clears. Each attempt stresses the same failing component.
- Don't reconnect all speakers at once when testing. You'll never isolate the culprit.
- Don't ignore a burning smell or visible scorch mark. Stop and get it serviced.
- Don't swap in a bigger fuse or bypass anything. That's how fires start.
Decode the Blink Count: What 1 to 11 Red Flashes Point To
Here's the honest version. Denon doesn't publish one universal public blink chart, and any article claiming otherwise is guessing. What we can do is map the patterns that service documentation and owner reports consistently point to, then tell you what to check first for each.
Use this as a diagnostic compass, not a verdict.
Why There's No Universal Denon Blink Chart
Blink codes are model and generation specific. The same fault can produce different counts on a 2015 AVR-X2200W versus a current AVR-X4800H.
The owner's manual for your exact model is the only fully authoritative source. Denon's support pages host manuals by model number.
That said, the underlying fault categories repeat across the lineup. That's what makes a general table useful.
The Blink Count Table
| Blinks | Most Commonly Associated Cause | Check First |
|---|---|---|
| 1 | Standby or power rail anomaly, sometimes an incomplete power-up | Power source, outlet, power cord, then a microprocessor reset |
| 2 | DC offset at the speaker output, often one failing amplifier channel | Disconnect all speakers, then test with no load |
| 3 | Overcurrent, typically a shorted speaker wire or low impedance load | Speaker wiring, stray strands, impedance setting |
| 4 | Amplifier channel fault or protection latch | Microprocessor reset, then service if it persists |
| 5 | Power supply or regulator issue | Service evaluation |
| 6 | Digital or HDMI board related fault | Service evaluation |
| 7 | Thermal or fan-related condition on some models | Ventilation, dust, clearance |
| 8 | Microprocessor or firmware fault | Microprocessor reset, firmware update |
| 9 | Internal communication fault between boards | Service evaluation |
| 10 | Internal fault, often power supply related | Service evaluation |
| 11 | Internal fault, often power supply related | Service evaluation |
Two warnings about that table. First, counts of six and above are frequently model-specific and shouldn't be treated as gospel. Second, a 2-blink and a 3-blink pattern on a modern AVR-X often both trace back to speaker wiring, so don't skip the wiring checks just because you counted two flashes.
How to Use the Table Without Guessing
Work from the outside in.
- Count the blinks and write the number down.
- Disconnect every speaker, subwoofer, and zone output.
- Power on with nothing connected.
- If it still blinks, the fault is inside the unit. Go to the no-speakers branch.
- If it powers up clean, the fault is in your wiring or speakers. Go to the wiring branch.
That single test splits the entire problem in half. Everything after it is refinement.
When the Blink Count Doesn't Match Anything
It happens more often than you'd think. Some units blink in irregular bursts. Some blink continuously.
In that case, ignore the count and follow the two-branch split above. A receiver that powers on with no speakers attached has a load problem. One that doesn't has an internal problem.
That binary result is more useful than a code you can't identify.
Branch 1: It Blinks Red With No Speakers Connected at All
This is the harder branch, and you should know that going in. If the receiver still enters protection with nothing attached to the speaker terminals, the fault lives inside the chassis.
The good news is that one or two things are still worth trying before you box it up.
What This Branch Tells You
It rules out your speakers, your wire, and your banana plugs. That's genuinely useful information, and it saves you from rewiring the whole room for nothing.
What's left is the amplifier section, the power supply, the microprocessor, or a board-level fault. Those are service territory.
There's one exception worth testing first. A corrupted microprocessor state can mimic a hardware fault, and a reset clears it.
Step 1: Reset the Microprocessor
Denon's microprocessor reset clears temporary settings and can release a latched protection state. The exact button combination varies by model.
Most AVR-X and S-series models use a combination of two front-panel buttons held while pressing power. Check your manual for the exact pair.
After the reset, the unit usually returns to factory defaults. You'll need to rerun Audyssey setup and re-enter your network and input settings.
If the red light is gone, you're done. If it comes back, move on.
Step 2: Try a Firmware Update Path
A failed or interrupted firmware update can leave the receiver in a weird state. Some models blink red as part of a failed update recovery.
Denon supports firmware updates over a wired network connection or by USB. A wired connection is more reliable than Wi-Fi for this.
Don't unplug the unit during an update, even if it looks frozen. That's how you turn a recoverable situation into a service visit.
Step 3: Check Heat and Ventilation
Even with no speakers connected, a receiver can trip on thermal protection. Idle heat is lower, but it isn't zero.
Check the basics. Is there at least 4 inches of clearance above the unit? Is it inside a closed cabinet with no airflow?
Is the top panel warm to the touch within a minute of powering on?
If the top panel gets hot fast with nothing connected, the fan or thermal path is suspect. That's a service item.
If It Still Blinks With Nothing Connected
At this point, stop troubleshooting and call it. You're looking at a failed amplifier channel, a power supply fault, or a board-level issue.
Denon's authorized service network is the right route, especially inside warranty. Opening the case yourself voids coverage and gains you nothing, since the fault is almost certainly not something you can repair at home.
Repair Cost Reality Check
Prices vary by region and model tier. These ranges reflect typical out-of-warranty service quotes.
| Scenario | Typical Cost Range | Notes |
|---|---|---|
| Warranty repair | $0 | Denon's standard AVR warranty is generally 2 to 3 years depending on region |
| Out-of-warranty diagnostic | $50 to $150 | Often credited toward the repair |
| Amplifier channel or board replacement | $150 to $400 | Higher on 9-channel and 11-channel models |
| Power supply repair | $200 to $500 | Parts availability drives the number |
| HDMI board replacement | $200 to $450 | Common on older units |
| Shipping both ways | $40 to $120 | Depends on weight and distance |
A simple rule. If the repair quote passes roughly half the price of a comparable new receiver, replace it. Labor rates and parts scarcity only get worse on older units.
Branch 2: It Only Blinks After You Connect or Rewire Speakers
This is the branch you want. It means the receiver is fine and something in your wiring or your speakers is pulling it into protection.
Most of the time it's a stray wire strand. Sometimes it's a 4-ohm speaker load on a receiver set for 8 ohms. Occasionally it's a dead speaker.
The Three Wiring Faults That Trip Protection
Nearly every case in this branch comes down to one of these.
- A short. A stray strand of wire touches the adjacent terminal, the chassis, or another wire. Current flows where it shouldn't and overcurrent protection trips.
- A low impedance load. Two pairs of speakers wired in parallel on one channel can drop the load to 2 or 3 ohms. That's below what most AVRs handle safely.
- A failing speaker. A damaged voice coil or crossover can present a near-short to the amplifier.
Finding a Stray Strand
Look at every binding post on the back of the receiver. Then look at every speaker terminal.
You're hunting for one thin copper strand bridging the positive and negative posts. It takes almost nothing. A single strand can do it.
Unscrew each binding post, pull the wire out, and inspect the stripped end. Twist the strands tight before reinserting. If you're using banana plugs, check that the plug body isn't touching the neighboring terminal.
Testing Speaker Resistance With a Multimeter
This is the single most useful test in this whole article. It takes five minutes and tells you whether a speaker is shorted.
Here's the process.
- Unplug the receiver from the wall.
- Disconnect the speaker from the receiver at both ends.
- Set the multimeter to its lowest ohms range.
- Touch the probes together and note the reading. That's your lead resistance, usually 0.2 to 0.5 ohms.
- Touch one probe to the speaker's positive terminal and the other to the negative.
- Read the value and subtract the lead resistance.
Test each speaker the same way. Write down every number.
Reading the Ohms Table
DC resistance isn't the same as nominal impedance. A healthy speaker reads roughly 70 to 80 percent of its rated impedance on a multimeter.
| Speaker Rated Impedance | Healthy DC Reading | Suspicious | Likely Fault |
|---|---|---|---|
| 8 ohms | 6 to 7.5 ohms | Under 5 ohms | Shorted or damaged |
| 6 ohms | 4.5 to 5.5 ohms | Under 4 ohms | Shorted or damaged |
| 4 ohms | 3 to 3.8 ohms | Under 2.5 ohms | Shorted or damaged |
| Any rating | Stable reading above 1 ohm | Reading under 1 ohm | Near short, do not reconnect |
| Any rating | OL or infinite | No reading at all | Open voice coil or broken wire |
A reading under 1 ohm means stop. Don't connect that speaker to the receiver.
Speaker Pairs, Bi-Amp Mode, and Zone 2/3
Multi-zone and A/B speaker setups are a common trigger, and people rarely see it coming.
Running two pairs of 8-ohm speakers on the same channel in parallel drops the load to 4 ohms. Two pairs of 6-ohm speakers drops it to 3 ohms. Some receivers handle that.
Many don't, at least not at high volume.
Bi-amp mode is another one. If you've wired speakers for bi-amping but haven't changed the amp assignment in the setup menu, the receiver will drive both terminal pairs and trip protection.
Zone 2 and Zone 3 outputs are the third culprit. A short in a long run to a second room is easy to miss because you can't see the far end of the cable.
The Impedance Setting Most People Get Wrong
Denon receivers let you set speaker impedance in the setup menu, usually 4 ohms, 6 ohms, or 8 ohms. Most people leave it at 8 ohms and never think about it again.
If your speakers are genuinely 4-ohm, set it to 4 ohms. That setting limits output voltage to keep the amplifier inside safe operating limits.
Be aware of the trade-off. The 4-ohm setting can reduce maximum output on some models. That's the price of safe operation, and it's cheaper than a new amplifier board.
Fixing It for Good
Once you've found the fault, prevent a repeat.
- Trim speaker wire cleanly and twist the strands before inserting.
- Switch to banana plugs or pin connectors where the terminal design allows.
- Keep positive and negative runs separated and never let them cross bare.
- Recheck the impedance setting after any speaker change.
- Leave at least 4 inches of clearance above the receiver.
- Add a quality surge protector at the outlet.
Small habits, big payoff. Most repeat protection trips trace back to one of these six things.
Branch 3: It Plays Fine, Then Blinks Red Mid-Movie or When You Turn It Up
A receiver that trips during playback is telling you something specific. The load or the heat builds up over time, then crosses a threshold. That's different from a unit that refuses to start at all.
The trigger usually reveals the cause. Note what you were doing at the moment of shutdown.
Why Timing Matters More Than the Blink Count Here
A trip at 20 minutes into a quiet scene points at heat. A trip at the exact moment a bass drop hits points at current draw. A trip on the same channel every time points at a speaker or an amplifier channel.
If it only dies when you push the volume past a certain point, the problem is almost always the load. Either the impedance is too low or a channel can't deliver the current the speakers are asking for.
The Heat Buildup Scenario
Thermal protection is the most common cause of mid-movie shutdowns. Heat sinks in an AVR-X or S-series receiver are designed to dissipate a fixed amount of power.
Put the unit in a closed cabinet and that design margin disappears. Add a summer afternoon and no air conditioning, and you've got a recipe for thermal trips.
Signs that heat is your problem:
- Shutdown happens 15 to 45 minutes after power-on, never immediately.
- The top panel is hot to the touch, sometimes uncomfortably so.
- It runs longer with the cabinet door open.
- Cooler weather reduces or eliminates the issue.
- The unit restarts fine after a cooldown, then trips again later.
If three or more of those match, treat it as a thermal case.
Ventilation and Clearance Rules That Actually Work
Denon's own setup guidance calls for several inches of clearance above the receiver. The exact figure varies by model, so check your manual. Four inches is a reasonable floor.
Beyond clearance, air has to move. A shelf with a solid back traps heat. A glass-front cabinet with no vents is basically an oven.
What actually helps:
- Open the cabinet door during long viewing sessions.
- Cut vent holes in the cabinet back if you can.
- Add a quiet cabinet fan kit. These run on USB or a wall adapter.
- Keep the receiver off the top of other heat-producing gear.
- Leave at least two inches on each side, not just the top.
A single quiet fan moving air through a cabinet can drop internal temperatures enough to stop thermal shutdowns entirely. That's often cheaper than any repair.
Dust, Fan Failure, and the Heat Sink
Dust acts like a blanket on a heat sink. It also clogs fan blades and intake vents over time.
Unplug the unit and look at the vents with a flashlight. If you see a grey mat of dust, that's part of your problem.
You can vacuum external vents with a soft brush attachment. Don't open the case to clean inside, and don't spray anything into the vents. Compressed air blown into a powered-off unit can push dust deeper or damage components.
On models with an internal fan, listen for it. If the fan never spins up during heavy playback, that's a service item.
Volume-Dependent Trips: The Impedance Signal
If the receiver only shuts down at high volume, heat is probably not the main issue. Current draw is.
Lower impedance means more current for the same voltage. More current means more heat in the output stage. Push a 4-ohm load hard enough and the amplifier hits its protection limit.
Run this check.
- Turn the volume down to a comfortable level.
- Play the same content that triggered the shutdown.
- If it survives, note the volume position where it fails.
- Check the speaker impedance setting in the setup menu.
- Check whether you're running two pairs of speakers on one channel.
Two pairs of 8-ohm speakers in parallel presents roughly 4 ohms. Two pairs of 6-ohm speakers presents roughly 3 ohms. That's where many AVRs start tripping.
Bass-Heavy Content and the LFE Load
Movies with heavy low-frequency effects put extra demand on the amplifier. This is especially true when the subwoofer is small or crossed over too high.
If your front speakers are handling bass they shouldn't, they pull more current. Setting the crossover to 80 Hz and letting a capable subwoofer do the low-end work reduces the load on the receiver.
Speaker size settings matter too. Setting speakers to "Large" when they're bookshelf models sends full-range signal to them. That's more current, more heat, and more protection trips.
When It's an Amplifier Channel, Not the Load
Sometimes the load is fine and the channel is failing. A weak output transistor or a drifting bias can trip protection under normal conditions.
Tell-tale signs:
- It trips on one specific channel regardless of speaker.
- Swapping speakers between channels doesn't change which one fails.
- It trips at low volume now, not just high volume.
- It tripped during playback for weeks before it stopped powering on at all.
That pattern points to service. No amount of rewiring fixes a failing amplifier channel.
Thermal Safety and Standards
Consumer audio gear sold in the US has to meet safety standards covering temperature rise and fire containment. UL 62368-1 is the current standard for audio, video, and information technology equipment. You can read the framework at UL Solutions.
The practical takeaway: if the receiver smells hot, shows discoloration, or trips repeatedly without load, stop using it. That's not a firmware quirk. That's the safety circuit doing its job for a reason.
Branch 4: It Blinked Red After a Firmware Update, Power Outage, or Move
This branch covers the "it worked yesterday" cases. Something changed, and the receiver hasn't recovered. The fix depends on what changed.
Start by being honest about the timeline. When exactly did it last work?
Firmware-Related Lockups
A firmware update interrupted midway is the classic cause here. The receiver's microprocessor is left with incomplete instructions, and protection logic can misfire.
Denon supports firmware updates two ways. Over a wired network connection, or from a USB drive formatted correctly. Wired is more reliable because Wi-Fi can drop mid-update.
If your unit froze or lost power during an update, don't power-cycle it repeatedly. Give it a full 30 minutes unplugged, then power it back on and see if it resumes or enters recovery.
Some models will complete the update on the next boot. Others need a USB recovery update with the same firmware version you were installing.
How to Update Firmware Safely Going Forward
The rules are simple and worth following every time.
- Use a wired ethernet connection if the model supports it.
- Never unplug the receiver during an update, even if the screen freezes.
- Don't update during a thunderstorm or a known brownout window.
- Keep a USB drive with the correct firmware file as a backup.
- Confirm the firmware version in the setup menu after the update completes.
Denon publishes firmware files and update instructions per model on denon.com. Use the exact file for your model number.
Surge, Lightning, and Unstable Mains Power
A power surge can damage the power supply or the protection circuit itself. Lightning is the worst case. Even a nearby strike can induce a spike through the mains or the cable line.
If the red light appeared right after a storm or a grid event, the fault is likely hardware. A surge that got past a cheap power strip may have hit the standby power supply or the main rectifier.
What to check first:
- Did other electronics in the room get damaged too?
- Was the receiver on a surge protector at all?
- Did the house lose power before the light appeared?
- Is the outlet itself still delivering correct voltage?
If the receiver is the only casualty, a surge suppressor with a high joule rating and a connected-equipment warranty is worth adding. A whole-home surge device at the panel is better still if you're in a lightning-prone area.
A UPS with automatic voltage regulation helps in regions with frequent brownouts. A receiver that sees 95 volts instead of 120 can misbehave in ways that look like a fault.
The Move Scenario
Moving a receiver is riskier than people assume. It's a heavy box with boards mounted on standoffs. A drop or a hard knock can dislodge internal connectors.
Common post-move issues:
- A ribbon cable partially seated, causing a communication fault.
- A screw that worked loose and is now shorting something.
- A bent chassis that stresses a board.
- Speaker wires that got pulled loose and are now shorting at the terminal.
- HDMI cables that came loose during transit.
Before assuming the worst, recheck every external connection. Reinsert each speaker wire, re-seat each HDMI cable, and confirm the power cord is fully inserted at both ends.
If nothing external is wrong and the red light persists, an internal connector is the likely culprit. That's a service visit, not a DIY fix.
Shipping Damage and Warranty
If you shipped the receiver to a new address, note the condition of the box. Crushed corners and internal rattle are bad signs.
Most manufacturer warranties don't cover shipping damage. But if a carrier handled the shipment, there may be a claim path. Photograph the box before opening if you suspect damage.
For warranty service on a moved unit, you'll generally need proof of purchase and the original purchase date. Registering the product with Denon when new makes this smoother.
Speaker Impedance, Bi-Amp Mode, and Zone 2/3: The Settings That Trigger Protection
Impedance is the number that determines how hard your receiver has to work. Get it wrong and protection mode becomes a recurring event.
This section covers the three settings most likely to cause it.
4-ohm vs 6-ohm vs 8-ohm Loads
Nominal impedance is a label. It's not a constant value.
A speaker rated at 8 ohms nominal can dip to 5 or even 4 ohms at certain frequencies. A speaker rated at 4 ohms nominal can dip to 2.5 ohms in the bass region. The IEC 60268-5 standard defines how these ratings are measured, and the minimum impedance is often the more revealing number.
Small bookshelf speakers and in-wall models are the usual offenders. They trade efficiency for size, and their impedance curves get ugly in the low end.
How to Tell What Your Speakers Actually Are
Check the back of the speaker or the label near the terminals. Look for a nominal impedance rating, usually 4, 6, or 8 ohms.
Then check the specifications page for the minimum impedance. If the manufacturer doesn't list it, a multimeter reading gives you a rough idea. Anything below 4 ohms at DC is worth treating as a 4-ohm-or-lower load.
If you're running two pairs on one channel, do the math.
| Speaker Pair Configuration | Combined Load | Receiver Risk |
|---|---|---|
| One pair at 8 ohms | 8 ohms | Low |
| One pair at 4 ohms | 4 ohms | Moderate, set to 4 ohms |
| Two pairs at 8 ohms in parallel | 4 ohms | Moderate, set to 4 ohms |
| Two pairs at 6 ohms in parallel | 3 ohms | High, likely to trip |
| Two pairs at 4 ohms in parallel | 2 ohms | Very high, do not attempt |
Series wiring raises the load instead of lowering it, but it degrades sound quality and isn't a real fix for most setups.
The Impedance Selector: What It Actually Does
Denon receivers offer an impedance setting in the setup menu, typically 4 ohms, 6 ohms, or 8 ohms. The default is usually 8 ohms.
Setting it lower limits the supply voltage to the output stage. That keeps the amplifier inside safe operating limits at the cost of some maximum output.
Use the correct setting for your speakers. If you're running 4-ohm speakers, set 4 ohms. Don't leave it at 8 ohms because you think it sounds better.
The difference is a few decibels of headroom versus a service bill.
Bi-Amp, A/B Speaker Pairs, and Multi-Zone Wiring
Bi-amp mode uses two amplifier channels per speaker. It can sound better in the right setup. It also doubles the current demand per speaker if you haven't told the receiver what you're doing.
The fix is in the setup menu. You have to change the amp assignment to bi-amp mode. If you wire for bi-amping but leave the receiver in normal mode, it drives both terminal pairs and often trips protection.
A/B speaker pairs are a simpler trap. Running both pairs at once halves the load. Most receivers can handle two pairs of 8-ohm speakers at moderate volume.
Push the volume and the load dips, and the receiver shuts down.
Zone 2 and Zone 3 outputs add another set of speakers to the same power supply. If the second zone has a short or a low-impedance speaker, it can pull the whole receiver into protection. Long cable runs to a second room also increase resistance, which makes the amplifier work harder for the same output.
When to Add an External Amplifier
If you're running 4-ohm speakers at high volume, or you want a 7-channel bed plus four height channels driven hard, an external amplifier is the honest answer. Use the receiver's pre-outs to send signal to the external amp and let it handle the heavy lifting.
Some AVR-X models support this with full pre-out sets. Others only have pre-outs for certain channels. Check your model's back panel before assuming you can offload everything.
An external amp doesn't just prevent protection trips. It usually sounds cleaner at high volume because the receiver's own amplifier isn't being pushed to its limits.
Step-by-Step: Isolating a Shorted Speaker Wire or a Failing Amp Channel
This is the methodical version of the wiring branch. Work through it in order and you'll find the fault. Skip steps and you'll chase ghosts.
Plan on 30 to 60 minutes for a full sweep of a 5.1 or 7.1 system.
Before You Start
Unplug the receiver. Disconnect every speaker, subwoofer, and zone cable from the back panel. Set the disconnected wires aside where they can't touch each other or anything metal.
Have your multimeter ready with a fresh battery. Grab a notepad. You'll want to record a reading for every speaker.
Testing One Channel at a Time
The principle is simple. Add one speaker at a time and see when the receiver trips.
Here's the sequence.
- With no speakers connected, plug the receiver in and power on.
- If it powers up clean, move to step 3. If it still blinks, stop. The fault is internal.
- Power off and unplug again.
- Connect only the front-left speaker.
- Power on and check the light.
- If it's clean, power off, unplug, and add the front-right.
- Repeat for center, surrounds, and any height or zone speakers.
The moment the receiver trips, you've found the problem channel. That speaker or that wire is the culprit.
Using a Multimeter on Speaker Terminals
This is the test that separates a bad speaker from a bad cable.
- Disconnect the suspect speaker from both ends.
- Set the meter to the lowest ohms range.
- Touch the probes together. Record the reading as your lead resistance.
- Touch one probe to the positive terminal and one to the negative.
- Subtract the lead resistance from the reading.
Then test the cable itself. With both ends disconnected, touch one probe to the positive wire at one end and the other probe to the positive wire at the other end. You should read close to zero.
Repeat for the negative.
Now test for a short between positive and negative in the same cable. If you get a reading under 1 ohm, the two conductors are touching somewhere along the run. Replace the cable.
Reading the Results
| Multimeter Reading | What It Means | Action |
|---|---|---|
| 6 to 7.5 ohms on an 8-ohm speaker | Healthy | Reconnect |
| 4.5 to 5.5 ohms on a 6-ohm speaker | Healthy | Reconnect |
| 3 to 3.8 ohms on a 4-ohm speaker | Healthy | Reconnect |
| Under 1 ohm | Near short | Do not reconnect |
| OL or infinite | Open circuit | Check wire, then speaker |
An open circuit on the speaker itself usually means a blown voice coil or a broken tinsel lead. That speaker needs repair or replacement.
The Swap Test for Failing Amp Channels
If a speaker reads healthy but the receiver still trips on that channel, swap the speaker to a different channel. Power off and unplug first.
If the trip follows the speaker, the speaker is the problem. If the trip stays on the original channel, the amplifier channel is the problem. That's the moment you stop troubleshooting and start looking at service options.
Pre-Out Test With an External Amplifier
If your model has pre-outs, you can test whether the fault is in the power stage or the preamp stage. Connect the suspect channel's pre-out to an external amplifier and drive a known-good speaker from it.
If the external amp plays fine, the receiver's power stage is at fault. If the signal is distorted or absent, the problem is upstream in the preamp section. Both outcomes point to service, but they narrow down the repair.
The Headphone Test
Plug in headphones and see if the receiver still trips. On most models, plugging in headphones disconnects the speaker outputs.
If the receiver runs fine with headphones connected, the fault is on the speaker side. If it still trips, the fault is inside the unit.
Microprocessor Reset vs Factory Reset: Which One to Try, and When
These two resets are not the same thing. Confusing them wastes time or wipes settings you didn't want to lose.
Try the microprocessor reset first. It's less destructive and clears the faults that matter most for protection trips.
What a Microprocessor Reset Does
A microprocessor reset clears temporary state in the receiver's control chip. It can release a latched protection flag that's stuck in memory even after the underlying cause is gone.
It typically doesn't erase your speaker setup, network settings, or Audyssey calibration. Some models reset a subset of those. Behavior varies by generation.
This is the reset to try when the receiver trips for no obvious reason.
What a Factory Reset Does
A factory reset returns the receiver to the state it left the factory in. Everything goes. Speaker distances, levels, input names, network credentials, HEOS configuration, Audyssey results.
That's useful if you're selling the unit or if settings corruption is the suspected cause. It's overkill for a protection trip in most cases.
Button Combinations by Model Family
Exact combinations vary. The two constants are that you hold specific front-panel buttons and press power while holding them.
Common patterns on AVR-X and S-series models:
- Microprocessor reset: hold two front-panel buttons simultaneously while pressing power.
- Factory reset: hold two different front-panel buttons while pressing power.
- Some models use a recessed pinhole button or a menu-based reset.
Look up the exact pair for your model in the owner's manual. Guessing wrong can put the unit into a different service mode and make things worse.
Order of Operations
Follow this sequence.
- Unplug the receiver. Wait 30 minutes.
- Plug in and power on with no speakers connected.
- If it blinks, perform a microprocessor reset.
- Power on and check again with no speakers connected.
- If it still blinks, try a firmware update or recovery.
- If it still blinks, perform a factory reset as a last resort.
- If it still blinks after a factory reset with no speakers, it's a hardware fault.
Don't jump to the factory reset at step 2. You'll lose your calibration for nothing.
What to Do After a Reset
After a successful reset, the receiver will boot into its setup wizard. You'll need to:
- Reconnect speakers one at a time and confirm the light stays off.
- Rerun Audyssey MultEQ calibration.
- Re-enter network credentials if Wi-Fi was configured.
- Reassign inputs and rename sources.
- Recheck the impedance setting and amp assignment.
Take the reconnect slowly. If the red light returns during this process, you've found the fault. Note which speaker or setting triggered it.
When a Reset Makes Things Worse
Rarely, a reset can expose a fault that was being masked. If the receiver was limping along with a corrupted setting and the reset clears it, the underlying hardware problem may show up immediately.
That's not the reset causing damage. It's the reset removing a workaround.
If the unit trips during the setup wizard with nothing connected, don't keep resetting it. Power down, unplug, and contact Denon support or an authorized service center. Repeated resets on a failing unit stress the same components each time.
Heat, Dust, and Ventilation: Fixing Thermal Shutdown for Good
The earlier branch covered the diagnosis. This is the fix. If heat is driving your protection trips, the solution is airflow, not a new receiver.
Most thermal shutdowns trace back to one of four things. A closed cabinet, clogged vents, a dead fan, or a room that's simply too warm.
Cabinet Design and Retrofitting Airflow
A receiver in a closed cabinet with a solid back is being cooked. Air has nowhere to go. The heat sink warms the air, the warm air stays put, and the temperature climbs.
The fix depends on what you can modify.
- Solid back panel: cut a vent hole at the bottom and one at the top. Convection does the rest.
- Glass door: leave it open during long sessions. A cabinet with glass doors traps more heat than you'd expect.
- Open shelf: make sure the shelf above the receiver has at least 4 inches of clearance.
- Side panels: leave 2 inches on each side. Heat sinks radiate sideways, not just up.
If you can't modify the cabinet, move the receiver. A media console with an open front and a mesh back is a better home than a sealed armoire.
Active Cooling Options That Actually Help
Passive airflow only works when heat can escape. In a tight cabinet, you need a fan.
Cabinet fan kits come in several forms. Some mount at the top and pull hot air out. Others mount at the bottom and push cool air in.
The pull configuration is usually more effective because heat rises.
Look for a fan rated under 20 dBA. Quieter is better, and a quiet fan that runs continuously beats a loud one you turn off.
USB-powered fan kits are the easiest to install. They plug into the receiver's rear USB port on models that supply power, or into a separate USB adapter. Trigger-based kits that turn on with the receiver are more elegant, but they cost more.
A single 120mm fan moving 40 to 60 cubic feet per minute can drop cabinet temperatures by 10 to 20 degrees Fahrenheit. That's often the entire difference between tripping and not tripping.
How Often to Clean Dust
Dust is a slow problem. It builds up over months, then one day the receiver trips and you're confused.
Twice a year is a reasonable cleaning schedule. Once a year if the room is very clean. Quarterly if you have pets, if you smoke indoors, or if you live in a dusty climate.
Vacuum the external vents with a soft brush attachment. Work gently. Don't push dust into the chassis.
Never spray compressed air into the vents of a powered-off unit. It can push dust deeper into the boards and damage components. A vacuum pulls dust out.
Compressed air pushes it in.
When the Fan Is the Problem
Some AVR-X models have an internal fan that kicks in during heavy use. If that fan dies, thermal protection trips faster than it should.
Signs of a dead fan:
- The receiver gets hot faster than it used to.
- You hear no fan noise during heavy playback.
- Thermal trips started recently without any other change.
- The heat sink is hot to the touch after 20 minutes.
Replacing an internal fan is a service job. Don't open the case yourself. The fan sits near live components and the warranty doesn't cover user-opened units.
Room-Level Thermal Management
The room matters as much as the cabinet. A receiver in a 90-degree room will run hotter than one in a 70-degree room. That's physics.
Things that help at the room level:
- Air conditioning during summer viewing sessions.
- A ceiling fan or a small room fan pointed toward the equipment rack.
- Keeping the receiver away from other heat sources like cable boxes, game consoles, and lamps.
- Not stacking components directly on top of the receiver.
Stacking is a big one. A cable box sitting on top of a receiver blocks the vents and adds its own heat. Give every component its own shelf.
A Simple Long-Term Thermal Habit
Once you've solved the thermal problem, keep it solved.
- Check the vents every few months for dust.
- Confirm the cabinet fan is still spinning.
- Feel the top panel after a long movie. It should be warm, not hot.
- Clean the room's air filter if you have central air.
- Never block the top vents with a cloth, a remote, or anything else.
Small habits, and they cost nothing. Thermal shutdowns are almost entirely preventable once you know the pattern.
Mistakes That Keep the Red Light Blinking (and Cost You a Repair Bill)
Some mistakes just waste time. Others turn a $0 fix into a $400 repair. Here's what to avoid.
If you only remember one thing from this section, make it this: stop reconnecting everything at once. Isolate one variable at a time.
Reconnecting All Speakers at Once
This is the number one mistake. You fix something, plug all seven speakers back in, power on, and the light blinks again. Now you've learned nothing.
Connect one speaker. Power on. Check the light.
Power off. Add the next.
It's slower. It works.
Ignoring the Impedance Setting
Denon receivers default to 8 ohms. If your speakers are 4 ohms, that setting is wrong.
Leaving it at 8 ohms with a 4-ohm load pushes the amplifier harder than it should. The protection circuit may trip. Or worse, it may not trip fast enough and something inside cooks.
Set the impedance to match your speakers. Every time you change speakers, check it again.
Power-Cycling Instead of Diagnosing
Hitting power repeatedly hoping it clears is a bad habit. Each attempt sends current through the same fault path.
If the receiver trips three times in a row, stop. Unplug it. Do the diagnostic steps from the earlier branches before you try again.
Opening the Case to Look Inside
There are no user-serviceable parts in a Denon AVR. Opening the case voids the warranty. It also exposes you to stored voltage in the capacitors, even with the unit unplugged.
If you suspect a board-level fault, call a service center. Don't investigate it yourself.
Using a Cheap Surge Protector
A $15 power strip with a surge label is not real protection. It may absorb a small spike and die quietly. A large surge goes straight through.
Look for a surge protector with a high joule rating and a connected-equipment warranty. A UPS with automatic voltage regulation is better if you get brownouts.
Whole-home surge protection at the electrical panel is the strongest option. It protects everything in the house, not just the receiver.
Wiring Two Pairs of Speakers in Parallel
Two 8-ohm pairs in parallel makes a 4-ohm load. Two 6-ohm pairs makes 3 ohms. Two 4-ohm pairs makes 2 ohms, and that's a problem for almost any AVR.
If you want to run four speakers on two channels, use an external amplifier or a speaker selector with impedance protection. Don't just wire them up and hope.
Skipping the Blink Count
The blink count is a clue. Counting it takes ten seconds.
Write the number down. Even if you can't decode it, a service technician can use it. It also tells you whether the same fault is recurring or a new one has appeared.
Assuming It's Always a Firmware Bug
Firmware causes some protection trips. It does not cause most of them. Speaker wiring, impedance, and heat cause most of them.
Don't waste an hour on firmware recovery when a stray wire strand is the real problem. Do the physical checks first.
Using the Wrong Reset
The microprocessor reset and factory reset are different. Using the factory reset first wipes your Audyssey calibration, speaker distances, network settings, and input names.
Try the microprocessor reset first. Only move to a factory reset if the microprocessor reset doesn't help.
Replacing the Receiver Prematurely
A protection trip feels catastrophic. It usually isn't.
Most cases in our review of user reports trace back to wiring or impedance. Those cost nothing to fix. Replacing the receiver before you've done the basic diagnostics is the most expensive mistake on this list.
Repair or Replace? Warranty, Service Centers, and Realistic Costs
Sometimes the diagnosis points to hardware. Now you have a decision to make. The math depends on the age of the unit, the repair quote, and what a replacement would cost.
Denon Warranty Coverage
Denon's standard warranty on AVRs is generally 2 to 3 years, depending on the region and model tier. Some AVR-X models get 3 years. Entry-level S-series models often get 2.
The warranty covers manufacturing defects, not damage from surges, water, or user wiring mistakes. It also doesn't cover shipping damage unless you bought a carrier's insurance.
Keep your proof of purchase. Registering the unit with Denon when new makes warranty claims easier, especially if you've moved.
Finding an Authorized Service Center
Denon maintains a network of authorized service centers. Use the locator on denon.com to find the nearest one.
Authorized centers can perform warranty work. Unauthorized shops can't, and using one can void your coverage.
If you're out of warranty, you have more options. A good local electronics repair shop can often handle amplifier channel replacements and power supply work. Get a written estimate before authorizing anything.
Typical Repair Costs
These ranges reflect typical out-of-warranty quotes. Actual numbers vary by model, region, and parts availability.
| Repair Type | Typical Cost Range | Notes |
|---|---|---|
| Diagnostic fee | $50 to $150 | Often credited toward the repair if you proceed |
| Amplifier channel replacement | $150 to $400 | Higher on 9 and 11-channel models |
| Power supply repair | $200 to $500 | Parts availability is the wild card |
| HDMI board replacement | $200 to $450 | Common on older units |
| Microprocessor board replacement | $200 to $400 | Labor intensive |
| Full board replacement (any) | $300 to $600 | Depends on model tier |
| Shipping both ways | $40 to $120 | Based on weight and distance |
Add 10 to 20 percent for premium models like the AVR-X6800H. Parts are more expensive and often take longer to source.
The Repair vs Replace Math
Here's a simple rule. If the repair quote exceeds half the price of a comparable new receiver, replace it.
A $300 repair on a 3-year-old $500 receiver is a hard no. A $200 repair on a 2-year-old $1,200 receiver is an easy yes.
Two other factors matter.
- Age. Repairs on units over 7 years old tend to be the start of a pattern, not the end of one.
- Parts availability. If the part is discontinued, the repair may not be possible at all.
Refurbished and B-Stock Options
If you decide to replace, refurbished units from Denon's official outlet are worth considering. They carry a manufacturer warranty, usually shorter than new, but longer than nothing.
B-stock units are new items with cosmetic flaws. Functionally they're identical to new. The discount is often 20 to 30 percent.
Buying refurbished from a random marketplace seller is riskier. Stick to manufacturer-authorized sellers with a clear warranty path.
When to Cut Your Losses
Replace the receiver if any of these apply.
- The repair quote is more than half the cost of a new unit.
- The unit is more than 7 years old.
- The same fault has come back after a previous repair.
- Parts are no longer available.
- The unit has visible burn marks or a burnt smell.
A burned smell or scorch marks are a stop signal. Don't keep using a unit that's shown signs of internal fire damage. That's a safety issue, not just a performance one.
Stopping the Red Light From Coming Back: Wiring, Loads, and Power Habits
You've fixed it. Now keep it fixed. Most repeat protection trips come from a handful of habits that are easy to change.
Wiring Habits That Prevent Shorts
Good wiring is boring wiring. Clean ends, tight connections, no stray strands.
- Strip speaker wire to the length the terminal needs, no more.
- Twist the strands tightly before inserting.
- Use banana plugs or pin connectors where the binding posts allow them.
- Keep positive and negative runs separated along their length.
- Never run speaker wire under carpet where it can be crushed.
- Avoid running speaker wire parallel to power cables for long distances.
Banana plugs alone eliminate most stray-strand shorts. If your binding posts accept them, use them.
Load Planning Before You Buy Speakers
Check impedance before you buy, not after. A 4-ohm speaker on a receiver set for 8 ohms is a problem waiting to happen.
If you want 4-ohm speakers, either set the impedance correctly or plan for an external amplifier. Both work. Ignoring the mismatch doesn't.
The same goes for adding a second zone or a second pair. Do the load math before you wire, not after the light starts blinking.
Power Protection Worth Having
A receiver is an expensive thing to plug into a wall outlet with no protection.
- Use a quality surge protector with a high joule rating and a connected-equipment warranty.
- Consider a UPS with automatic voltage regulation if your area has brownouts.
- Whole-home surge protection at the panel is the strongest option.
- Unplug the receiver during extended absences and thunderstorms.
- Replace surge protectors after any significant surge event, even if they still work.
A surge protector is a consumable. It absorbs one big hit and then it's done. The cheap ones die silently.
Firmware Update Discipline
Firmware updates are usually safe. The rare failures are almost always caused by interrupted updates.
- Use a wired ethernet connection when the model supports it.
- Never unplug the receiver during an update.
- Don't update during a thunderstorm.
- Confirm the firmware version in the setup menu afterward.
- Keep a USB drive with the current firmware as a backup.
If an update fails, don't panic. Unplug for 30 minutes and try again. If it stays stuck, contact Denon support.
A Yearly Five-Minute Check
Once a year, do this quick pass.
- Vacuum the vents.
- Confirm the cabinet fan spins.
- Check the impedance setting in the setup menu.
- Look at the speaker terminals for corrosion or loose strands.
- Feel the top panel after 30 minutes of playback.
- Verify the firmware version is current.
Five minutes a year prevents most of the problems covered here.
Frequently Asked Questions
What does it mean if the red light blinks 2 times?
Two blinks most often points to DC offset at a speaker output. That usually means a failing amplifier channel. Disconnect all speakers and power on.
If it still blinks, the fault is internal. If it stops, the problem is on the speaker side.
Can a Denon receiver recover from protection mode on its own?
No. Protection mode is a latched state. It stays until you unplug the receiver, wait for the capacitors to discharge, and power back on.
It will trip again if the underlying cause hasn't been fixed.
How much does it cost to fix a Denon receiver in protection mode?
It depends on the cause. A shorted wire or wrong impedance setting costs nothing to fix. A failed amplifier channel typically runs $150 to $400.
A power supply or HDMI board repair runs $200 to $500. Diagnostics add $50 to $150.
Is it safe to keep using a receiver that blinks red?
No. The red light means the receiver detected a fault that could damage speakers, the amplifier, or create a fire risk. Stop using it until you've isolated the cause.
If it smells burnt or shows scorch marks, don't power it on again.
Will a factory reset fix a red blinking light?
Sometimes, but not often. A factory reset can clear a corrupted setting that's latching protection mode. It won't fix a shorted wire, a bad speaker, or a failing amplifier channel.
Try the microprocessor reset first, since it's less destructive.
Why does the red light only blink at high volume?
High-volume trips usually mean the amplifier is hitting its current limit. Common causes are low-impedance speakers, two pairs wired in parallel, or a failing amplifier channel. Check the impedance setting first.
If it's correct, test each speaker with a multimeter.