Breville espresso machine blinking lights are one of the most misunderstood signals in home coffee. They don't mean the machine is broken. They're a status language, and every model speaks a slightly different dialect.
Once you know the pattern, most fixes take minutes, not a trip to a repair shop.
Breville's user manuals split indicators into white operational LEDs and amber maintenance alerts. Most home models reach brew temperature in 30 to 60 seconds, and auto shut-off runs from 20 minutes to 3 hours. Here's how to read the signal, step by step.
Quick Answer: Match Your Blink Pattern to the Likely Fix
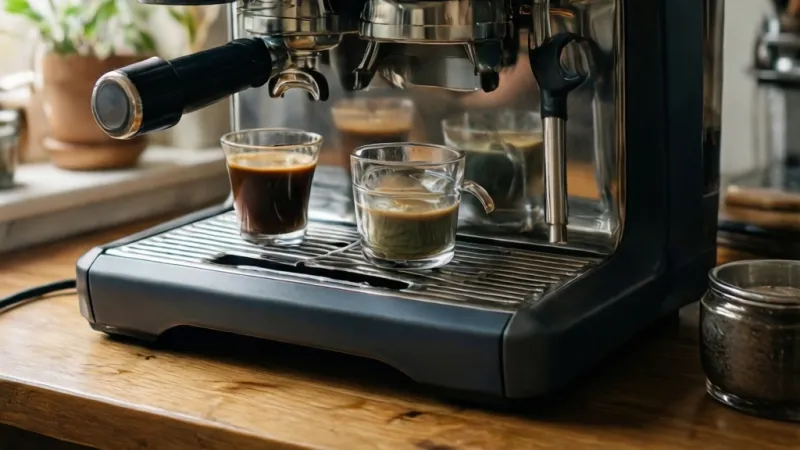
Breville espresso machine blinking lights usually signal a status, not a fault. A slow pulse often means the heating cycle is running. Steady amber means descale or clean is due.
A flashing water icon means the tank is low or unseated. All lights at once points to overheat or a control fault.
Why Your Breville Espresso Machine's Blinking Lights Are a Diagnostic, Not a Fault
Blinking LEDs on a Breville are intentional design. The control board uses them the way a car dashboard uses warning lamps. Each pattern tells you what the machine wants, whether that's water, heat, or a cleaning cycle.
The same machine uses different patterns for different conditions. A slow pulse on the power button is good news. It means the boiler is warming up.
The same button blinking rapidly could mean a fault. Color, speed, and location all carry meaning.
This is why "it's blinking" isn't enough information to troubleshoot. Two owners with the same model can see completely different behavior and need completely different fixes. One just needs to wait 40 seconds.
The other needs to run a descale cycle.
Breville and Sage are the same machines sold under different names. In the US, Canada, and Australia, the brand is Breville. In the UK and EU, the same hardware ships as Sage Appliances.
Model numbers match the same platform in most cases. So a BES870XL and a BES875UK are effectively the same Barista Express.
The user manual is your single best reference. Breville publishes one PDF per model, and the "Care and Cleaning" chapter usually has a light sequence table. If your manual is lost, the official support site hosts every version going back years.
One more thing worth knowing. Blinking behavior is sometimes a reminder, not an error. The descale LED starts flashing every 30 to 60 days on most home machines.
That's a nudge, not a fault. Ignore it long enough and it turns into a real performance drop in your espresso.
Step 1: Pin Down Your Breville or Sage Model Before You Touch Anything
Model matters more than most people realize. A Bambino Plus and a Dual Boiler share almost no light logic. The Bambino uses a small cluster of LEDs with blended patterns.
The Dual Boiler uses a pressure gauge, an LCD, and a separate descale indicator.
Get the model number off the machine first. It's on a silver sticker on the base or rear panel. It looks like BES450, BES870XL, BES878, BES920, or similar.
Snap a photo of the sticker so you don't have to crawl under the counter twice.
Here's the current Breville and Sage lineup as of 2026, grouped by light behavior:
| Family | Example Models | Indicator Style | Notes |
|---|---|---|---|
| Bambino | BES450, BES500 | Two LEDs (single + dual shot) | Fewest indicators. Blink codes overlap. |
| Barista Express | BES870, BES875 | Power, filter, clean/descale, pressure gauge | Analog gauge plus LEDs. |
| Barista Pro | BES878 | LCD plus button LEDs | Screen shows status text. |
| Barista Touch | BES880, BES881 | Touchscreen only | No discrete LEDs to read. |
| Infuser / Duo-Temp Pro | BES840, BES810 | Power, clean/descale, steam LEDs | Common descale-light complaints. |
| Dual Boiler | BES920 | LCD plus dedicated lights | Most granular fault reporting. |
| Oracle / Oracle Touch | BES980, BES990 | LCD plus multiple LEDs | Auto-everything. Rarely needs manual reset. |
| Café Roma | ESP8XL | Single power light | Older design, simple logic. |
Voltage also matters. US and Canadian units run on 120V. UK, EU, and Australian units run on 220, 240V.
The light logic is identical, but the internal components differ. Don't mix advice from one region with a machine from the other.
Every model's manual, parts diagram, and cleaning chart lives on Breville's official support site. UK and EU owners should check the Sage equivalent at sageappliances.com. Both sites list model-specific reset sequences, which are often the fastest path to clearing a stuck light.
Once you have the model, write it down. You'll need it for the rest of these steps. It also helps when you call support.
Breville's phone and chat teams ask for it first.
What Each Light Means: Power, Heating, Water Tank, Descale, Clean Me, and Steam
This is the heart of the diagnosis. Read the light first, then jump to the matching fix. If two lights are active at once, handle the one with the higher priority.
Descale and overheat outrank everything else.
Here's the fast reference:
| Light | Solid | Slow Blink | Fast Blink / Alternate |
|---|---|---|---|
| Power | Machine is on | Heating up | Standby, or fault |
| Water tank icon | Tank seated | Tank low or float stuck | Tank removed mid-cycle |
| Descale | Descale cycle running | Descale due | Cycle paused or interrupted |
| Clean Me | Cleaning cycle running | Cleaning due | Cycle incomplete |
| Steam | Steam ready | Steam heating | Steam blocked or tip clogged |
| 1 Cup / 2 Cup | Ready to brew | Pre-infusion | Group blocked or low pressure |
Now the detail on each.
Power Light: The Most Misread Signal on the Machine
A solid power LED means the machine is on and idle. That's normal. Nothing to do.
A slow pulse means the boiler is heating. On the Bambino, this takes 3 to 5 seconds on a warm machine, up to 30 seconds from cold. On the Dual Boiler, expect 8 to 15 minutes from a cold start because both boilers need to reach temperature.
A fast blink on the power button usually means standby. Breville machines drop into low-power mode after 20 minutes to 3 hours of inactivity, depending on your setting. Press any brew button to wake it.
If the power light blinks indefinitely and the machine never heats, that's a fault. Common causes are a stuck thermal fuse, a failed heating element, or a tripped overheat sensor. Move on to the "all lights blinking" section below.
Water Tank Icon: The Most Common False Alarm
Nine times out of ten, a flashing water icon means exactly one thing. The tank is low, or it's not seated properly. Pull the tank, check the float, and push it back in until you feel it click.
If the tank is full and the light still blinks, the float is stuck. The float sits on a magnetic reed switch at the bottom of the tank cavity. Hard water leaves mineral film that makes the float stick in the "empty" position.
Rinse the tank with warm water and a drop of dish soap. Then fill it halfway and tilt it gently a few times.
A less common cause is a failed reed switch. If the light blinks with a brand-new tank and the float moves freely, the sensor is the problem. That's a service call, not a DIY fix.
One quirk worth knowing. On the Barista Express and Infuser, the water icon also flashes when the machine is in pre-infusion purge mode after a descale. This is normal.
It stops once the tank is refilled and the machine is primed.
Descale Light: Twice the Frequency in Hard Water Areas
The descale light is a water hardness reminder, not a sensor reading. Breville's logic counts liters used and elapsed time since the last descale. On the default hardness setting, the light starts flashing every 30 to 60 days.
Hard water areas change that math fast. The U.S. Geological Survey classifies water above 120 mg/L as calcium carbonate as "hard." In those regions, which include London, much of the Midwest, and parts of the Southwest, the descale alert can trigger every 3 to 4 weeks.
The generation varies by model. The Barista Express and Infuser use a dedicated descale LED. The Bambino and Dual Boiler fold it into a combined service alert.
The Barista Touch shows a text prompt on the screen.
When the light flashes, run the descale cycle properly. Interrupting it is the number one cause of a stuck descale light. It also risks scale breaking loose and lodging in the solenoid valve, which turns a routine cleaning into a repair.
Clean Me Light: The Backflush Reminder
The Clean Me light is different from the descale light. Descale removes mineral scale from the boiler and water path. Clean Me is a backflush reminder for the group head, gasket, and shower screen.
Breville recommends a backflush every 1 to 2 weeks on a home machine used daily. That's roughly every 100 to 200 shots. The clean cycle uses a blind basket and a Breville-approved cleaning tablet.
If the Clean Me light won't reset after a completed cycle, you likely skipped a step. The machine needs a full rinse cycle after the clean cycle before it counts the task as done. Check the manual for your exact model's order of operations.
Steam Light: Usually Patience, Occasionally a Clog
A slow-blinking steam light means the steam wand is heating. On a single boiler machine, this can take 15 to 30 seconds after you pull a shot. That's normal.
The boiler has to switch from brew temperature to steam temperature.
A solid steam light means steam is ready. Pull the lever or press the button.
A fast blink usually means the steam tip is clogged or the machine hasn't finished purging. Remove the tip and soak it in warm water for 10 minutes. Use the small pin tool that came with the machine to clear the holes.
On dual boiler machines, the steam light should come on almost immediately. If it doesn't, the steam boiler may have tripped its own thermal cutout.
1 Cup and 2 Cup Buttons: When Brewing Goes Wrong
These two buttons double as status lights on most Barista series machines.
A slow blink during a shot means pre-infusion is running. Pre-infusion is the low-pressure wetting phase before full extraction. It lasts 4 to 8 seconds.
If both buttons blink together and nothing comes out, the group head is blocked or the pump is struggling. Check the shower screen for scale or coffee grounds.
If the buttons blink during a shot that started fine, that's usually a pressure or flow issue. Clean the shower screen, check the portafilter basket, and try a coarser grind.
All Lights Blinking at Once: Overheat Lockout and Thermal Cutoff
Simultaneous blinking on every LED is not a maintenance reminder. It's the machine telling you it entered a protective state. Breville's control board triggers this when the temperature sensor reads above its safe threshold, or when it detects a hardware fault it can't classify.
There are three distinct causes, and they need different responses.
Cause 1: Genuine Overheat. The machine has been running hot for too long. Maybe two people pulled back-to-back shots for 20 minutes on a single boiler. Maybe the steam wand was left on.
The thermal cutout trips as a safety feature.
Cause 2: Stuck Overheat Sensor. The boiler temperature is fine, but the sensor is reading wrong. This is common after a descale that didn't dry properly, or after moisture got into the control board area.
Cause 3: Blown Thermal Fuse. A one-time safety device has physically melted. The machine will not reset. This is a repair, not a fix.
Here's how to tell them apart, using classic if/then logic.
- If the machine was hot when the lights started blinking, unplug it. Wait 30 minutes. Plug it in and try again. If it works, it was Cause 1. Adjust your workflow so you're not running shots continuously for more than about 15 minutes.
- If the machine was cool when it started blinking, unplug it for 10 minutes and try again. If the blinking returns within 30 seconds, you're looking at Cause 2 or Cause 3.
- If the machine never heated at all and the lights came on as soon as you plugged it in, it's almost certainly Cause 3.
For Cause 2, the reset trick on most Barista series machines is: unplug, wait 60 seconds, plug back in while holding the 1 Cup and 2 Cup buttons. Hold both for 5 seconds after power-up. This forces the board through a soft reset.
For Cause 3, you're done with DIY unless you're comfortable opening the machine. The thermal fuse is a small component near the boiler. Replacing it requires a multimeter to test continuity.
Breville's official position is that opening the case voids warranty on in-warranty machines.
Here's the decision table:
| Symptom | Likely Cause | Action | Time |
|---|---|---|---|
| Blinked after heavy use, hot case | Overheat | Unplug 30 min | 30 min |
| Blinked on cool machine, resets, comes back | Sensor fault | Soft reset, then service | 10 min to 2 weeks |
| Blinked immediately on power-up, never heats | Thermal fuse | Repair | Service visit |
| Blinked after descale | Moisture in board | Dry 24 hours in warm room | 24 hours |
A safety note. Never bypass a thermal fuse. It exists to stop the machine from reaching temperatures that can melt internal parts or, in the worst case, scorch wiring.
Bypassing it turns a $15 part into a potential fire risk. If the fuse is blown, replace it, and investigate why it blew in the first place.
Water Tank Level and Float Sensor: The Most Common False Alarm
A flashing water icon with a full tank is the single most reported Breville false alarm. It's almost never the sensor. It's almost always the float, or the tank not sitting flush against the reed switch.
The float is a small foam or plastic bead that rises and falls with the water level. A magnet sits inside it. A reed switch in the tank cavity reads the magnet's position.
When the float drops, the switch opens and the light activates. When mineral film coats the float or the cavity wall, the float sticks. The magnet stays out of range.
The machine thinks the tank is empty.
Cost of the fix: nearly nothing. Two cents of dish soap and five minutes.
Here's the sequence we recommend, in order.
- Pull the tank out. Look at the bottom for the float. It should slide freely up and down its tiny rail.
- Fill the tank to the MAX line with cool water.
- Add one drop of mild dish soap. Swirl gently for 30 seconds.
- Rinse thoroughly. Any soap residue affects espresso taste.
- Refill with fresh water and seat the tank firmly. You should hear or feel a click.
- Check the float rises to the top of its travel when the tank is full.
If that clears the light, you had a stuck float. If not, move to the next test.
If the light is still blinking with a clean tank, dry the outside of the tank completely with a lint-free cloth. Moisture on the base of the tank can confuse the reed switch on older machines. Reinsert and wait 10 seconds.
If the light is still blinking after that, check for a pinched or kinked water line inside the cavity. On the Barista Express, a small silicone tube runs from the tank to the pump. If that tube was knocked loose during the last tank removal, the pump runs dry and the float stays up.
Reseat the tube on its barb.
If the light blinks only during brewing, that's often normal. Some models flash the water icon during pre-infusion. It stops at the end of the shot.
If none of the above work, the reed switch has failed. That's a $20 to $40 part on most models. It's a service call if you're not comfortable pulling the rear panel.
Here's the model-specific quirks worth knowing:
| Model | Known Quirk | Fix |
|---|---|---|
| Bambino / Bambino Plus | Tank light can blink if tank is 90% full | Top off all the way to MAX |
| Barista Express (BES870 / BES875) | Float sticks after descale cycles | Warm water rinse after every descale |
| Barista Pro / Touch | Tank sensor is optical, not magnetic | Clean the tank's clear plastic window |
| Dual Boiler (BES920) | LCD shows "Fill Tank" text plus light | Check the small inline filter in the tank too |
| Infuser / Duo-Temp Pro | Tank light and descale light can overlap | Clear the water light first |
The optical sensor on the Barista Touch is worth its own note. It reads a clear plastic strip on the tank. If coffee grounds or milk splatter cloud that strip, the sensor misreads.
A damp microfiber cloth solves it in 10 seconds.
Stuck in Descale Mode: How to Run and Reset the Cycle Properly
A stuck descale light after a completed cycle means the machine didn't register the full sequence. The control board counts valve states, pump activations, and elapsed time. Skip one step and it thinks you're still mid-cycle.
The descale cycle on most Breville machines runs 20 to 30 minutes. The Dual Boiler's two-boiler descale runs closer to 35 to 45 minutes. Cutting it short leaves scale loosened but not flushed out, which is worse than not descaling at all.
Here's the full sequence, based on the steps Breville documents in its user manuals.
- Empty the water tank completely.
- Mix Breville Descale Solution with 1 liter (about 34 oz) of fresh water.
- Pour the mixture into the tank and reinsert it.
- Place a large container (at least 1.5 L) under the group head. Also put a smaller cup under the steam wand.
- Enter descale mode. On the Barista Express, hold the Power and 1 Cup buttons together for 5 seconds. On the Dual Boiler, hold the 1 Cup button for 10 seconds. Your model's exact combination is in the manual.
- Let the cycle run. It pulses solution through the group head, then the steam wand, in two phases. Do not touch any button during this phase.
- When the machine prompts you to rinse, empty the tank and fill it with fresh water.
- Run the rinse cycle. It runs the full volume of the tank through the system twice.
- When the descale light goes solid or turns off, the cycle is done.
- Pull a blank shot and discard it. This clears any residual solution from the group.
If the light won't clear, the reset depends on your model. Here are the common ones as of 2026:
| Model | Descale Reset |
|---|---|
| Bambino / Bambino Plus | Hold 1 Cup and 2 Cup for 5 seconds after power-up |
| Barista Express | Hold Power and 2 Cup for 3 seconds |
| Barista Pro / Touch | Follow the on-screen "Descale Complete" prompt |
| Dual Boiler | Hold 1 Cup and Power for 5 seconds while plugged in |
| Infuser / Duo-Temp Pro | Hold Clean/Descale button for 5 seconds |
If none of those clear it, run a second rinse cycle. This is the most common fix for a stubborn light. The board sometimes needs a full extra rinse before it resets its counter.
Why You Shouldn't Use Vinegar
Vinegar is a popular home descaling hack. Breville specifically advises against it in the user manuals. Acetic acid attacks the silicone seals, gaskets, and O-rings inside the machine.
It also leaves a lingering taste in the steam wand that taints milk texture for weeks.
Use a citric-acid-based descaler, or Breville's own solution. Both are formulated for the seals and metals in the water path.
How Often to Descale by Water Hardness
The manual says every 3 months. That's an average. Hard water areas need it much more often.
The U.S. Geological Survey publishes a general hardness scale worth checking for your region.
| Water Hardness | Grains per Gallon | Descale Frequency |
|---|---|---|
| Soft | 0–3 | Every 4–6 months |
| Slightly hard | 3.5–7 | Every 3–4 months |
| Hard | 7–10.5 | Every 2–3 months |
| Very hard | 10.5+ | Every 4–6 weeks |
If you're in London, Phoenix, Las Vegas, or anywhere with limestone-heavy aquifers, treat your machine like it's in the very hard column.
What Happens If You Interrupt the Cycle
Interrupting mid-descale leaves solution in the boiler. That's a real problem. The citric acid keeps working on the seals while the machine sits.
It also leaves loose scale suspended in the water path, where it can lodge in the solenoid valve.
If you must interrupt, immediately run a full rinse cycle before using the machine again. Don't let it sit overnight.
Clean Me Light Won't Clear: Backflush, Rinse, and Reset Steps
The Clean Me light tracks shot count and elapsed time since the last backflush. It fires roughly every 100 to 200 shots on a home machine, or every 1 to 2 weeks with daily use. Clearing it correctly takes about 10 minutes.
The clean cycle is a backflush. Water is forced backward through the group head with a blind basket installed. This pushes coffee oils and grounds out of the shower screen, gasket, and three-way solenoid valve.
You will need:
- A blind basket (usually included with Breville machines, sometimes sold separately)
- One Breville cleaning tablet, or a comparable espresso-machine tablet
- The single-wall double basket removed from the portafilter
- A large bowl under the group head
Here's the sequence.
- Warm the machine and pull a blank shot to bring it to temperature.
- Remove the portafilter basket and insert the blind basket into the portafilter.
- Drop one cleaning tablet into the blind basket.
- Lock the portafilter into the group head.
- Enter clean mode. On the Barista Express and Infuser, press and hold the 1 Cup and 2 Cup buttons for 5 seconds. On the Bambino, hold both cup buttons. On the Dual Boiler, use the Clean menu on the LCD.
- The machine runs a 5-minute pulsed cycle. It forces water backward through the group.
- When the cycle ends, remove the portafilter. Rinse the blind basket and portafilter under warm water.
- Reinsert the portafilter with the blind basket. Run a rinse cycle (usually 5 to 10 seconds of group-head flow).
- Repeat the rinse until the discharged water runs clear.
If the Clean Me light won't clear, here's the if/then path.
- If you skipped the rinse step, run it now. This is the most common cause.
- If the light flashed during the clean cycle, you interrupted it. Run the full cycle again.
- If the light comes back within a few days, the group head gasket is likely worn. A worn gasket leaks pressure and throws off the solenoid logic.
- If the light blinks in a pattern you don't recognize, the warm-up wasn't complete. Let the machine heat for a full 30 seconds before re-entering clean mode.
A worn gasket is worth watching for. On machines over 3 years old, the group head gasket hardens and stops sealing properly. You'll see the symptom during normal shots too: water seeping around the portafilter edge.
A replacement gasket costs less than $10 and takes 5 minutes to swap.
If the clean cycle runs but no water comes out of the group, don't panic. Blind baskets don't discharge at the spout. Water recirculates internally.
You should hear the pump pulsing and the solenoid clicking. That's the sound of the cycle working.
Priming and Air Locks After a Descale, Refill, or Power Cut
No water coming through the group after a descale usually means the pump has an air lock. Air locks are the second most common cause of a blinking water icon behind a stuck float. They're also the easiest to fix without tools.
The symptom is specific. The pump sounds louder than normal. It hums without the usual gurgling tone.
No water reaches the group head even though the tank is full.
Here's the priming sequence for most Breville models.
- Fill the tank to MAX and seat it properly.
- Place a cup under the group head.
- Press the 1 Cup button. Let the pump run for 10 seconds. Even if nothing comes out, this starts drawing water.
- Stop the shot. Wait 5 seconds.
- Repeat the 10-second run three or four times.
- If water starts flowing, you're primed. Discard the first shot.
- If it still won't prime, fill the tank with warm (not hot) water. Warm water moves more easily through air pockets.
Some models have a dedicated prime mode. On the Bambino Plus, hold the steam lever and the 1 Cup button together for 5 seconds. On the Barista Express, use the hot water wand.
Open the hot water dial for 20 seconds with the tank full. That draws water through the boiler and pushes the air out.
How to Prevent Air Locks in the First Place
Air locks happen when the machine is run with a dry or low tank. They also happen if you unplug the machine mid-cycle, especially during pre-infusion or descaling.
Here are the habits that prevent them:
- Always top the tank before it hits the MIN line. Don't wait for the light.
- Never unplug during a descale or clean cycle.
- After removing the tank for refilling, prime with a 5-second blank shot when you reinstall it.
- Keep the tank seated with a firm click every time.
- After a power outage, run one blank shot before your first real shot.
When Priming Doesn't Work
If four or five priming attempts fail, the pump or the flow meter is the likely culprit. The flow meter counts water pulses. When it fails, the control board loses its reference and the pump runs without proper metering.
Diagnostic tell: the pump runs normally but the machine never registers water use. The descale counter doesn't increase even after 20 blank shots. That's a flow meter problem.
It's a service fix.
The pump itself is a vibration pump on most home Breville models. They typically last 3 to 5 years with daily use. A failing pump makes a rougher, more metallic sound than a healthy one.
Replacement pumps run $30 to $50 in parts, plus labor if you don't do it yourself.
Hard Water, Water Filters, and Your Water Hardness Setting
Hard water is the biggest long-term threat to a Breville espresso machine. It's also the cause behind 70 to 80 percent of descale-related blinking-light complaints we see in user forums. Scale builds on the heating element, the boiler walls, and the flow path.
Once it hardens, it insulates the boiler and forces it to work harder.
Every Breville with a descale function asks you to set a water hardness level. It's usually 1 to 5, where 1 is soft and 5 is very hard. Getting this wrong throws off the descale reminder.
If you set 1 in a very hard area, the light won't flash until months after descaling is actually due.
How to Test Your Water Hardness
Three methods work well.
- Test strips. Cheapest option. Dip in a water sample for 1 second, wait 30 seconds, compare to the color chart. Kits run $5 to $15.
- Municipal water report. Your water utility publishes annual water quality reports. They list calcium and magnesium in mg/L. Convert to grains per gallon by dividing by 17.1.
- Digital TDS meter. Measures total dissolved solids in ppm. Not a direct hardness reading, but a good proxy. Under 150 ppm is soft. Over 300 ppm is very hard.
Set your machine's hardness level based on the result. A TDS of 50 to 150 ppm maps to level 1 or 2. A TDS of 250 to 350 ppm maps to level 4.
Above 400 ppm, set 5 and consider filtering at the tap.
Do Breville Water Filters Actually Help?
Yes, but they have limits. The Breville ClaroSwiss filter (used on the Barista Express, Dual Boiler, and others) reduces scale, chlorine, and some heavy metals. It lasts about 2 months, or 60 liters of water, whichever comes first.
Filters work best as a supplement, not a replacement, for descaling. You still need to descale. The filter delays scale buildup but doesn't stop it entirely.
Filter replacement timing matters. A saturated filter does nothing except slow water flow. If your machine suddenly takes longer to draw water and the tank is full, check the filter first.
Bottled or RO Water: What Works and What Doesn't
Distilled and reverse osmosis water are too pure for an espresso machine. They lack the mineral content that helps conduct heat. Some machines read them as "no water" because the conductivity sensor can't detect them.
Bottled mineral water is usually a better option than hard tap water. Check the label. Aim for 50 to 150 ppm TDS.
That's the sweet spot for both espresso taste and machine health.
The most practical setup for hard water households is a small under-sink filter, or refilling with bottled water. Both reduce descale frequency dramatically. In very hard areas, we've seen descale intervals stretch from 4 weeks to 4 months with consistent filtered water.
Model-by-Model Blink Cheat Sheet: Bambino, Barista Express, Dual Boiler, and More
Every Breville platform has its own light vocabulary. This section is the quick-reference table you'll want to bookmark. Find your model, read the pattern, follow the fix.
Bambino and Bambino Plus (BES450, BES500)
The Bambino has the fewest indicators of any Breville. Just two LEDs on the single and double shot buttons. That makes diagnosis harder because patterns overlap.
A slow pulse on both buttons during warm-up is normal. It stops within 5 to 30 seconds. If the pulse continues past 60 seconds on a cold machine, the boiler thermistor is likely faulty.
Both buttons blinking together with the machine idle usually means the water tank isn't seated. Push it in until you feel the click. If the tank is full and clicked in, check the float.
A single button flashing rapidly during a shot means the pump is struggling. Coffee is too fine, or the basket is overfilled. Try a coarser grind and dose down by a gram.
Barista Express (BES870, BES875, BES880)
The Barista Express is one of the most common Breville machines in home kitchens. Its light logic is the most documented.
The power light pulses while heating, usually 30 to 60 seconds. The filter light (sometimes labeled "Clean/Descale") flashes every 30 to 60 days based on your hardness setting. The pressure gauge needle should sit at 12 o'clock during a shot.
If it drops below 9 bar, the machine isn't getting enough flow.
Both the 1 Cup and 2 Cup buttons flashing together while idle points to a fault condition. Try the soft reset: unplug, wait 60 seconds, plug in while holding both buttons. If the pattern returns, it's a hardware fault.
Barista Pro and Touch (BES878, BES880, BES881)
The Barista Pro and Touch use an LCD or touchscreen. This is a big advantage. Instead of guessing from LED patterns, you get actual text prompts like "Fill Tank" or "Descale Required."
If your screen is blank and only the button LEDs are flashing, the screen or ribbon cable has failed. That's a service issue.
Manual descale reset on the Barista Pro: enter the Settings menu, scroll to "Descale," and follow the on-screen prompts. There's no button combination to memorize.
Infuser and Duo-Temp Pro (BES840, BES810)
The Infuser is the machine most likely to trigger a false descale alert. Its descale counter is aggressive. In hard water areas, we've seen it flash every 2 to 3 weeks instead of the usual month.
The descale button on the Infuser sits on the left side of the control panel. It's a small round button with a water drop icon. When it blinks, the machine is due.
When it's solid, the cycle is running.
If the light won't reset after a completed descale, the machine wants one extra full rinse. Run the rinse cycle a second time. That's the fix roughly 80 percent of the time.
Dual Boiler (BES920)
The Dual Boiler has the most granular diagnostics of any home Breville. Its LCD shows fault codes that map directly to specific components.
The two most common text alerts are "Heating" and "Fill Tank." A persistent "Heating" message past 15 minutes on a cold machine points to a failed brew boiler element or thermistor.
The Dual Boiler is a dual-boiler design. Steam and brew temperatures are independent. A steam light that won't stop blinking while the brew side works fine usually means the steam boiler thermistor needs replacement.
Oracle and Oracle Touch (BES980, BES990)
The Oracle series does almost everything automatically. The grinding, dosing, tamping, and milk texturing are all handled by the machine. Light behavior is minimal because most status is on the LCD.
If the Oracle's lights flash during a shot, it's almost always a bean hopper or grinder issue. The machine won't pull a shot without a fresh dose. Check the hopper, then check the ground coffee chute for a blockage.
Café Roma and Older ESP Models
The Café Roma (ESP8XL) has a single power light. If it blinks, the machine is heating. If it stays off after plugging in, the thermal fuse has likely blown.
These are simple, old-school machines. There's no descale counter and no firmware reset.
Quick Cross-Model Comparison
| Model | Heating Time (Cold) | Descale Interval | Reset Method |
|---|---|---|---|
| Bambino | 3–5 sec | 60 days | Dual button hold |
| Barista Express | 30–60 sec | 30–60 days | Power + 2 Cup |
| Barista Pro / Touch | 30–60 sec | On-screen | Menu prompt |
| Infuser | 45 sec | 3–4 weeks (hard water) | Clean button hold |
| Dual Boiler | 8–15 min | 45–90 days | 1 Cup + Power |
When It's Hardware: Pump, Solenoid, Triac, Control Board, and Thermal Fuse
Once you've ruled out water, descaling, and cleaning, the problem is physical. Five components cause the vast majority of persistent blinking-light faults. Here's how to identify each one, and when to walk away.
The Thermal Fuse
The thermal fuse is a one-shot safety device. It sits near the boiler and melts open if the boiler exceeds its safe temperature. Once blown, the machine will not heat.
Ever. It needs physical replacement.
The tell is simple. The machine powers on, lights come up, but the boiler never warms. After 10 minutes, the group head is still cold to the touch.
No steam, no heat, no pressure.
Thermal fuses cost $5 to $15 in parts. Replacing one requires opening the case and using a multimeter to confirm continuity on the old fuse. If you're not comfortable with basic electronics, this is a service call.
Important warning: never bypass a thermal fuse with a jumper wire. It exists to prevent the boiler from reaching temperatures that can scorch wiring or melt internal plastic. A bypassed fuse is a genuine fire risk.
The Pump
Breville uses vibration pumps on almost every home model. They last 3 to 5 years with daily use. When they fail, the symptom is a loud, rough, metallic sound and no water flow.
A healthy pump makes a rhythmic hum with a slight gurgle. A failing pump sounds more like a dry rattle. If yours pumps but no water reaches the group, the problem could also be a clogged line or failed OPV.
The pump itself runs $30 to $50. It's a moderate DIY job if you're mechanically inclined. On the Barista Express, the pump is accessible from the rear panel.
The Solenoid Valve
The three-way solenoid valve releases pressure from the group head after a shot. It also controls the flow of water to the steam wand. When it fails, you'll notice several symptoms.
- Water drips from the group head continuously, even when idle
- The steam wand won't produce steam, or produces very weak steam
- The descale cycle runs but the machine doesn't register it as complete
- A click-click-click rhythm during a shot that shouldn't be there
Solenoid valves fail from scale or mineral buildup more than anything else. Regular descaling dramatically extends their life. Replacement parts run $25 to $60.
It's a service-call repair for most owners.
The Triac
The triac is a small solid-state switch on the control board. It modulates power to the heating element. When a triac fails, it usually fails closed, meaning the boiler keeps heating without regulation.
You'll see the light show that triggered this article. All lights blinking, machine hot to the touch, overheat protection tripped. Unplug immediately if this happens.
A stuck triac can drive the boiler past safe temperatures within minutes.
Triac replacement means a new control board. That's typically $120 to $250 in parts depending on model. Breville's repair center handles this.
Board swaps are rarely worth DIY for anyone without soldering experience.
The Control Board
The control board runs everything. It reads sensors, drives LEDs, controls the pump, and manages the descale counter. When it fails, symptoms vary wildly.
Common control-board failure signs include random light patterns, the machine losing its descale memory every power cycle, and buttons that respond intermittently or not at all.
Before assuming board failure, do a full hard reset. Unplug for 5 minutes. Hold the power button for 30 seconds while unplugged to drain any residual charge.
Then plug in and retest. That clears temporary firmware glitches.
Cost Comparison: DIY vs Service
| Component | Part Cost | DIY Difficulty | Typical Service Cost |
|---|---|---|---|
| Thermal fuse | $5–$15 | Moderate | $80–$150 |
| Vibration pump | $30–$50 | Moderate | $120–$200 |
| Solenoid valve | $25–$60 | Hard | $150–$250 |
| Triac / Control board | $120–$250 | Very hard | $250–$450 |
| Flow meter | $20–$40 | Moderate | $100–$180 |
If your machine is under 2 years old and still in warranty, stop before opening the case. Breville's warranty voids the moment you (or a non-authorized repairer) open the housing. Call support instead.
Mistakes That Keep the Lights Blinking Longer Than They Should
Most persistent blinking-light problems aren't hardware failures. They're user errors that keep the machine stuck in a cycle or a fault state. Here are the mistakes we see most often in aggregate user forums and support tickets.
Interrupting a Cycle
This is the number one cause of stuck lights. Descale and clean cycles are stateful. The machine tracks each phase.
Pull the plug mid-cycle and the machine boots up thinking it's still mid-descale.
If you've done this, run the full cycle again from the start. Do not try to skip to the rinse phase. The board needs to see every step.
Using the Wrong Descaler
Vinegar is the classic mistake. Breville's manuals specifically warn against it. Acetic acid attacks silicone gaskets and O-rings.
It also leaves a lingering flavor in the steam wand that ruins milk texture.
Lemon juice is another popular hack, and it's just as bad. Citric acid in a commercial descaler is formulated with buffering agents to protect seals. Straight lemon juice is not.
Use a purpose-made espresso descaler, or Breville's own solution. The few dollars you save aren't worth a $200 repair.
Skipping the Rinse After Descaling
Descaling is a two-part process. The clean removes scale. The rinse removes the descaler.
Skip the rinse and you leave citric acid sitting in the boiler and water lines.
The machine often detects this and keeps the descale light on. Run a full rinse cycle even if the light already cleared. Two rinses are better than one if you interrupted the descale at any point.
Topping Up the Tank Mid-Cycle
Never remove the water tank while a shot or cycle is running. On machines with a flow meter, this throws off the volume count. The machine may enter a fault state and blink all its lights.
If you must refill, wait for the shot to complete or press a stop button first. Then remove the tank and reseat it properly.
Ignoring the Water Hardness Setting
The default hardness setting is usually 3. If your water is actually level 5 (very hard), the descale counter runs on the wrong schedule. The light won't flash when it should.
Set the hardness correctly once, and the counter works properly. Recheck it after every descale if you've changed your water source or moved house.
Running Without a Water Filter in Hard Water Areas
The ClaroSwiss filter is optional on most Breville models. But in hard water areas, skipping it accelerates scale buildup by 3 to 4 times. Your descale light will flash every few weeks instead of every few months.
Filters cost about $15 to $20 each and last 2 months. That's roughly $100 per year. An out-of-warranty descale repair runs $150 and up.
The math works out.
Forgetting to Prime After Refilling
Every time you remove and reinstall the tank, a small air pocket enters the line. On most machines this self-clears. On some, it turns into a full air lock.
Get in the habit of pulling one blank shot after every tank refill. It takes 10 seconds and prevents the problem entirely.
Using the Wrong Voltage or Plug Adapter
This one is expensive. US machines run on 120V. UK and EU machines run on 220, 240V.
Plugging a 120V machine into 240V current will destroy the control board instantly. The lights may flash wildly before dying.
If you're moving between regions, buy a new machine. Step-down transformers work for some electronics but not Breville's heating circuit. Don't risk it.
Not Resetting After a Fault Clears
Some faults leave a "latched" error state even after the underlying issue is resolved. The light stays on until you clear it manually.
After fixing any fault, do a full power cycle. Unplug for 60 seconds, plug in, and run a test shot. If the light is still on, do the model-specific reset sequence from the earlier table.
Safety, Warranty, and When to Call Breville or Sage Support
Some blinking-light problems are safe to fix at home. Some aren't. Knowing which is which protects your machine, your warranty, and you.
Electrical Safety First
Always unplug the machine before any cleaning or maintenance that involves removing panels, tanks, or trays. Breville's manuals repeat this warning in every chapter for a reason.
Never immerse the machine body or the base in water. The descale and clean cycles involve water, but the electrical components sit behind sealed enclosures. A splash on the top of the machine is fine.
Submersion is not.
Wait 30 minutes after unplugging before opening anything. Capacitors on the control board hold a charge. It's not lethal on these machines, but it can give you an unpleasant jolt and damage sensitive components.
Burn and Steam Hazards
The steam wand produces steam at around 250°F (121°C) at the tip. Portafilters and group heads sit at 200°F (93°C). Both can cause serious burns.
When running a descale cycle, use a container with a handle. Water discharges hot. Don't use a thin mug or a glass that might crack.
Keep the steam wand pointed away from your face during purging. The initial burst often spits water before it becomes steady steam.
Warranty Terms by Region
Breville and Sage warranty coverage varies. As of 2026, most home espresso machines carry a 2-year warranty in the US, Canada, and Australia. UK and EU warranty periods are typically 2 years under consumer law, sometimes longer through extended registration.
| Region | Brand | Standard Warranty | Requires Registration? |
|---|---|---|---|
| US | Breville | 2 years | Recommended, not required |
| Canada | Breville | 2 years | Recommended |
| UK | Sage | 2 years | Yes for extended |
| EU | Sage | 2 years | Varies by country |
| Australia | Breville | 2 years | Recommended |
Warranty covers manufacturing defects. It does not cover scale damage, misuse, improper descaling, or voltage mishaps. Breville's service teams can usually tell the difference based on internal inspection.
Voiding Your Warranty
Opening the machine's case voids the warranty on in-warranty units. So does using non-approved descaling solutions. So does repairing the machine through an unauthorized third party.
If you're in-warranty and the light won't clear after the standard troubleshooting, stop. Call support. Don't open the case.
Breville and Sage Support Channels
Both brands offer phone, chat, and email support. Wait times vary by region and time of year. Fall and winter are the busiest because of holiday gifts.
Before you call, have these ready:
- Model number and serial number (on the silver sticker)
- Purchase date and proof of purchase
- Description of the blink pattern, including color and speed
- Steps you've already tried
- Photos or a short video of the blinking lights
A 10-second video of the light pattern is often the fastest way to a diagnosis. Support teams can identify the fault code from the pattern alone on most models.
Breville's official support portal at breville.com has model-specific manuals, parts diagrams, and cleaning guides. UK and EU owners should check the Sage equivalent.
When to Stop DIY and Book Service
Some faults are worth fixing yourself. Others aren't. Here's a simple rule.
If the fix requires only unplugging, cleaning, resetting, or refilling, do it yourself. If it requires opening the case, soldering, or replacing internal components, decide based on your comfort level and warranty status.
For out-of-warranty machines, get a quote before committing. If the repair quote exceeds 50 percent of a new machine's cost, buy new. A 5-year-old machine with a $300 repair bill is usually not worth it.
A 3-year-old machine with an $80 repair is.
For in-warranty machines, warranty covers it. Let Breville handle it.
Frequently Asked Questions
Why is my Breville espresso machine blinking all its lights at once?
All lights blinking usually means overheat protection or a thermal fault. Unplug the machine for 30 minutes. Let it cool completely.
Plug it back in. If the lights still flash immediately, the thermal fuse has likely blown. That's a service repair.
Why is my water tank light blinking when the tank is full?
The float inside the tank is stuck. Mineral film from hard water makes it stick in the empty position. Rinse the tank with warm water and a drop of dish soap.
Swirl gently, rinse thoroughly, and refill. The light should clear within 10 seconds of reseating the tank.
How do I reset the descale light on a Breville?
It varies by model. On the Barista Express, hold Power and 2 Cup for 3 seconds. On the Bambino, hold 1 Cup and 2 Cup for 5 seconds.
On the Barista Pro, use the on-screen menu. Check your model's manual for the exact sequence.
Can I use vinegar to descale my Breville?
No. Breville's manuals specifically warn against vinegar. Acetic acid damages silicone gaskets, O-rings, and seals.
It also leaves a taste in the steam wand. Use a citric-acid-based descaler or Breville's own descaling solution.
How often should I descale my Breville espresso machine?
Every 3 months on average. In hard water areas (above 120 mg/L calcium carbonate), descale every 4 to 6 weeks. Use your machine's water hardness setting to match the descale counter to your actual water.
Soft water can stretch it to 4 to 6 months.
Why does my Breville work fine but the lights keep blinking?
Blinking is sometimes a reminder, not a fault. The descale and clean indicators flash on a schedule, not on a sensor reading. If the machine brews and steams normally, run the recommended cycle and reset the counter.
If performance drops too, that's a real fault.