If your Bose QC earbuds blinking red and white has you stuck, you're looking at a status light Bose reserves for specific fault states. It isn't random. In our research across Bose owner's guides and aggregated user reports, this pattern points to one of four causes: a charging fault, a failed firmware update, a pairing error, or a hardware problem.
Which one you've got depends on when the light blinks and where you see it.
Bose rates the QuietComfort Earbuds and QuietComfort Ultra Earbuds at IPX4, which handles sweat and light rain but not a soak. That rating matters, because liquid ingress is one of the few physical triggers for this fault. The other triggers are electrical and software-related, and they're fixable in a set order.
Here's how to find your branch.
Quick Answer
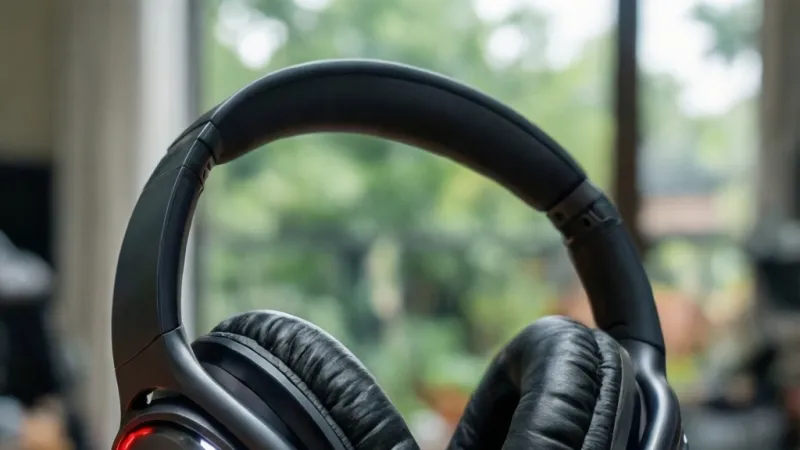
Bose QC earbuds blinking red and white point to an error state. Place both earbuds in the charging case. Charge the case for at least 30 minutes.
Then hold the case button for 30 seconds. If the blink continues, contact Bose support.
What the Red-and-White Blink Actually Means on Bose QC Earbuds
Bose uses a small set of LED colors and patterns to tell you what the earbuds are doing. The light isn't decoration. It's a status channel, and Bose documents every pattern in the owner's guide for each QuietComfort generation.
White is the normal color. Red is the fault color. When the two alternate, you've left the normal set and landed in an error or update state.
Here's the full map, pulled from Bose documentation and checked against aggregated owner reports.
| LED pattern | What it signals | Typical trigger |
|---|---|---|
| Solid white, brief | Powering on or fully charged | Normal operation |
| Slow blinking white | Pairing mode or firmware update running | Bluetooth pairing or app update |
| Slow blinking red | Low battery in the earbuds | Battery below roughly 20 percent |
| Solid red | Charging fault or temperature block | Case or earbud outside the charging range |
| Alternating red and white | Error state or interrupted firmware update | Charging fault, failed update, hardware fault |
Two things stand out from that table. First, red on its own is usually benign. It means low battery or a temperature block, and both resolve without intervention.
Second, red and white together is the only pattern that points to something you have to actively fix.
So what's happening inside the earbuds when they blink like this?
Why Bose Uses an Alternating Pattern Instead of a Single Color
An alternating red and white blink is Bose's way of saying it can't finish what it started. The earbud is trying to reach a known state and failing. That's why the light cycles instead of settling on one color.
In practice, that failure lands in one of four buckets:
- Charging fault. The earbud isn't drawing power correctly from the case, or the case isn't drawing power from the wall.
- Interrupted firmware update. The update started, the connection dropped, and the earbud is stuck mid-write.
- Pairing or communication error. The earbud and the case, or the earbud and your phone, have lost their handshake.
- Hardware fault. Battery degradation, a bent charging pin, or liquid ingress.
Each bucket has a different fix, and they aren't interchangeable. Resetting a battery fault won't help. Resetting a stuck firmware update usually will.
Does the Blink Mean the Same Thing on Every Model?
No. Bose has shipped three QuietComfort earbud generations, and the LED language shifted between them.
The original QuietComfort Earbuds lean on a case-mounted status light, with small lights on the earbuds themselves. The QuietComfort Earbuds II and QuietComfort Ultra Earbuds move almost all status reporting to a single LED on the front of the case.
Bose also pushes firmware updates that shift blink behavior over time. A pattern that meant one thing in 2021 can read differently on a 2026 build. As of 2026, the QuietComfort Ultra Earbuds are the current flagship, and they're the most likely to be running a recent firmware version.
That's why the model and firmware version matter before you start pressing buttons.
First Check: Is It the Earbud or the Charging Case Blinking?
Your first move is to identify which light is blinking, because the fix path splits from there.
Most people assume the earbuds are blinking. Often it's the case. That single mix-up sends people down the wrong troubleshooting path for an hour or more.
So do this before anything else:
- Take both earbuds out of the case. Set them on a clean, dry surface.
- Look at the case on its own in a dim room. Note the color and rhythm of any light.
- Put the earbuds back in and close the lid. Watch the case LED for 10 seconds.
- Open the lid and look at each earbud directly, not through the case window.
If the case LED blinks red and white with the earbuds out, the fault lives in the case or its charging circuit. If it only blinks once the earbuds are seated, the fault travels with the earbuds.
QuietComfort Earbuds vs QC Earbuds II vs QC Ultra LED Behavior
Bose publishes model-specific LED behavior on its official support site, and the three generations differ enough to matter.
| Model | Where the LEDs live | What red and white usually means |
|---|---|---|
| QuietComfort Earbuds (2020) | Status LED on the case, small LED on each earbud | Charging error or firmware fault |
| QuietComfort Earbuds II (2022) | Single LED on the case front | Charging error, temperature block, or failed update |
| QuietComfort Ultra Earbuds (2023) | Single LED on the case front | Update in progress, update failure, or charging fault |
Check the underside of the case lid or the Bose app for your exact model number. The original QC Earbuds and the QC Earbuds II look similar in photos but behave differently on a reset.
Case LED vs Earbud LED: Which Light You're Actually Looking At
The case LED is usually a small dot on the front face, sometimes sitting near the USB-C port. On the Ultra, it's tucked into the front lip.
In a dark room, the case LED can throw enough light to make the earbuds look like they're glowing too. Cover the case with your hand and check again.
The earbuds themselves only show a light when they're out of the case and awake. Once seated, they go dark and the case does the talking.
If you still can't tell, open the Bose app. It shows battery and connection status per earbud, which sidesteps the light entirely.
Quick Decision Chart: Match Your Blink Pattern to the Fix
Use the timing and context of the blink to pick your branch, not the color alone.
| When you see the blink | Most likely cause | First action |
|---|---|---|
| Right after placing earbuds in the case | Charging contact or battery fault | Clean contacts, charge 30 minutes |
| While the Bose app shows an update running | Interrupted firmware write | Keep app open, wait 30 minutes |
| During Bluetooth pairing | Pairing handshake failure | Forget device, re-pair |
| After sweat, rain, or a drop | Liquid ingress or physical damage | Dry 24 to 48 hours, then retest |
| On one earbud only, other is fine | Single earbud fault | Swap earbuds in the case to isolate |
| Constantly, for hours, in or out of case | Hardware fault | Reset, then contact Bose |
Here's the if/then logic behind that chart.
If the blink started within the last 15 minutes and the app was mid-update, treat it as a firmware problem. Go to the firmware branch.
If the blink started after a workout, a rainstorm, or a drop onto tile, treat it as liquid or impact damage. Stop charging immediately and let the unit dry.
If the blink was there from the moment you unboxed the earbuds, it's a defect. You should be on the phone with Bose, not troubleshooting.
If the blink shows up only when the earbuds are seated and disappears when you take them out, you're looking at a charging contact issue.
One more rule worth following. Give each software fix about 15 minutes before moving on. Give cleaning and charging about 30 minutes.
If you've run two full resets with no change, stop troubleshooting and start a warranty claim. You'll save an evening.
Branch 1: Blinking Red and White While Sitting in the Charging Case
This is the most common version of the problem, and it usually comes down to power delivery.
Work through these in order. Don't skip steps.
- Confirm the case has power. Plug the case into a known-good USB-C charger and watch the case LED for 30 seconds. No light at all means the case isn't receiving power.
- Swap the cable. USB-C cables fail more often than people expect, especially the thin ones bundled with cheap chargers.
- Swap the power source. Try a different wall adapter, then a different outlet. Avoid USB ports on laptops, which can under-deliver current.
- Clean the charging contacts. Both the pins inside the case and the contact pads on each earbud.
- Reseat the earbuds. Push them down until they click into place. A partially seated earbud can't charge and can trigger the fault light.
Battery Level, Charging Contacts, and the USB-C Port
Skin oils, sunscreen, and earwax transfer onto the contact pads every time you handle the earbuds. Over a few weeks, that film becomes an insulator.
Clean the pads with a dry cotton swab. A little isopropyl alcohol on the swab is fine, but let it evaporate completely before you seat the earbuds again. Never scrape the pins with metal.
The USB-C port on the case has its own failure mode: lint. Pocket lint packs into the port and stops the cable from seating fully. A wooden toothpick works well for clearing it.
A metal pin can short the contacts.
Temperature matters more than most people realize. Bose earbuds won't charge outside roughly 0°C to 45°C (32°F to 113°F). Below freezing or above that ceiling, the case blocks charging and throws a fault.
If you left them in a hot car, let them come back to room temperature before you plug anything in.
What a Healthy Charge Cycle Should Look Like
Knowing what normal looks like makes the fault obvious.
| Stage | Case LED | Approximate time |
|---|---|---|
| Empty to low | Slow pulsing red or amber | 0 to 15 minutes |
| Mid charge | Steady or pulsing white | 15 to 90 minutes |
| Full | Solid white, then off | 90 to 180 minutes |
| Fault | Alternating red and white | Within the first two minutes |
If your case hits that last row within two minutes of plugging in, stop. That's not a slow charge. That's a rejected charge.
Charge time varies by model. The original QuietComfort Earbuds and the QC Earbuds II take roughly 2 to 3 hours for a full case charge over USB-C. Playback runs about 6 hours per earbud charge on the original QC Earbuds, with the case adding two to three extra top-ups.
If you've swapped cables, swapped chargers, cleaned everything, and the case still blinks red and white, the fault is inside the case. That's a warranty conversation, not a DIY job. Opening the case voids coverage and risks the lithium-ion cell inside.
Branch 2: Blinking Red and White During a Firmware Update
A red-and-white blink during an update is expected, up to a point. It becomes a problem when it doesn't stop.
Firmware updates on QuietComfort earbuds run over Bluetooth from the Bose Music app or the Bose app. The earbuds have to stay in the case, the case has to stay near your phone, and the app has to stay in the foreground.
Break any one of those and the write can stall. The earbud then sits in a half-updated state, which is exactly what the alternating light reports.
Stuck Updates and How to Recover Them
Follow this sequence. It works on the original QC Earbuds, the QC Earbuds II, and the Ultra.
- Leave the earbuds in the case with the lid open.
- Keep your phone within a foot or two of the case.
- Open the Bose app and leave it on screen. Don't lock the phone. Don't switch apps.
- Give it 30 minutes. Some updates genuinely take that long over Bluetooth.
- If the light is still cycling after 30 minutes, force-close the app and reopen it.
- If the app shows the update as incomplete, run it again from the start.
- If the app won't reconnect at all, reset the earbuds, then re-pair.
Bluetooth Low Energy throughput is the bottleneck here. The Bluetooth SIG defines how these low-bandwidth transfers behave, and a multi-megabyte firmware payload over BLE can genuinely take 15 to 30 minutes. Interruptions from a locked screen, an incoming call, or a low phone battery can break the transfer partway through.
Keep the phone charged. Keep the case charged. Plug the case into USB-C during the update if you can.
Bose doesn't require it, but it removes one variable from a process that has plenty already.
If the update fails at the same point every time, check that your phone's operating system is current. Android and iOS releases occasionally change how background Bluetooth transfers behave, and an out-of-date phone can be the actual blocker.
Once the update completes, the light should settle to solid white, then go dark. If it keeps cycling after a clean update finishes, you've moved past firmware and into hardware territory. That needs Bose support.
Branch 3: Blinking Red and White When Pairing Over Bluetooth
A red-and-white blink during pairing means the handshake between the earbuds and your device failed. The earbuds are broadcasting, your phone is listening, and the two aren't agreeing on terms.
This is the branch where people waste the most time. Bluetooth failures look like hardware failures but almost never are. Most of the time, the fix is a clean re-pair, not a reset.
Bose Music App vs Bose App Detection
Bose rebranded its companion app in 2023. The old Bose Music app still works with the original QuietComfort Earbuds and the QC Earbuds II. The newer Bose app covers the QuietComfort Ultra Earbuds and has been backfilled to older models over time.
If you're running the wrong app for your model, pairing can fail silently. The earbuds blink red and white while the app sits there showing "searching."
Check which app you have installed, then check which one Bose lists for your specific model. As of 2026, the Bose app is the primary one for current hardware. The Bose Music app is still available but is being phased out.
Forget Device, Re-Pair, and Bluetooth Cleanup
Work through this sequence in order. Stop as soon as pairing succeeds.
- Open your phone's Bluetooth settings.
- Find the Bose entry and tap "Forget This Device" or "Unpair."
- Turn Bluetooth off, wait 10 seconds, turn it back on.
- Put both earbuds in the case and close the lid for 5 seconds.
- Open the lid and hold the case button until the LED starts a slow white pulse. That's pairing mode.
- Open the Bose app and add the earbuds as a new device.
If that fails, restart the phone and repeat. Bluetooth stacks on both Android and iOS occasionally hold stale connection data that only a reboot clears.
Why Bluetooth Pairing Fails in the First Place
The Bluetooth SIG defines how pairing works at the protocol level. A device broadcasts, a host responds, and they exchange keys. If either side holds an old key, the exchange dies.
Common triggers for that mismatch:
- The earbuds were paired to an old phone that still remembers them.
- The earbuds were paired to two devices at once and are confused about priority.
- The phone's Bluetooth cache is full of dead entries.
- Another Bluetooth device in range is interfering on the same band.
The 2.4 GHz band is crowded. Wi-Fi routers, microwaves, wireless mice, and even other people's earbuds compete for the same airspace. Move away from a router or a busy office desk before you retry pairing.
If you've paired to a laptop before and the laptop is in the room, turn its Bluetooth off. The earbuds may keep trying to reconnect to it instead of your phone.
Multi-Point and Priority Conflicts
The QuietComfort Ultra Earbuds support multipoint, which means they can hold two active connections at once. That's useful until it isn't.
If the earbuds keep flipping to a laptop or tablet you forgot about, the red-and-white blink can appear during the handoff. The earbuds are trying to negotiate priority and failing.
Open the Bose app and check the connected devices list. Remove anything you don't actively use. Fewer known devices means faster, cleaner pairing.
If multipoint isn't something you need, some models let you disable it in the app. That alone fixes a surprising number of pairing faults.
Branch 4: Blinking Red and White After Sweat, Rain, or a Drop
A red-and-white blink after moisture exposure means liquid has reached something it shouldn't have. Stop charging immediately. Power can turn a wet circuit into a dead one.
Bose rates the QuietComfort Earbuds line at IPX4. That covers sweat and light rain splashes, not submersion and not heavy downpours. The case has no IP rating at all, which is the part most people miss.
What IPX4 Actually Protects Against
IP ratings come from IEC 60529, the international standard for ingress protection. The "X" means the rating doesn't cover solids like dust. The "4" means it survives water splashing from any direction for at least 5 minutes.
That's it. A splash. Not a swim.
Not a shower. Not a wash under the tap.
So if your earbuds took a real soaking, a hard workout in humid conditions, or a drop into a puddle, IPX4 doesn't cover you. The red-and-white blink is Bose's way of telling you the internals are compromised.
Dry-Out Procedure: What to Do in the First 48 Hours
Follow this exactly. Don't improvise.
- Take the earbuds out of the case immediately. The case traps moisture.
- Pat each earbud dry with a lint-free cloth. Don't shake them.
- Remove the ear tips and set them aside to air dry separately.
- Place the earbuds and case in a dry room at room temperature with good airflow.
- Leave them alone for at least 24 hours. 48 is safer.
- Don't plug anything in during that window. Not the case, not the earbuds.
Once dry, charge the case alone first. If the case charges normally, seat the earbuds and watch the LED. If it settles into a steady white charge cycle, you may have dodged it.
If the red-and-white blink returns, the damage is done. Liquid ingress is not a DIY repair.
What Not to Do After Water Exposure
Heat and rice are the two worst things you can do here. Both are popular. Both can make it worse.
| Method | Why people try it | Why it's a bad idea |
|---|---|---|
| Hair dryer | Speeds up drying | Pushes water deeper and can warp plastic |
| Oven or microwave | "Bakes out" moisture | Ruins the battery and can cause a fire |
| Rice bag | Absorbs moisture | Rice dust gets inside and doesn't dry effectively |
| Shaking hard | Forces water out | Moves water into deeper components |
| Charging to test | Checks function | Can short the circuit and kill the earbud |
Airflow and time are the only tools that work. If you live in a humid climate, a room with a dehumidifier is better than a bathroom.
Impact Damage Looks the Same as Water Damage
A drop onto tile or concrete can crack the internal housing in a way that doesn't show on the outside. The red-and-white blink that follows can look identical to a liquid fault.
Check for these signs after any fall:
- A visible crack at the seam where the two halves of the earbud meet.
- A rattling sound when you gently tilt the earbud.
- A nozzle or ear tip that no longer sits flush.
- A charging pad that looks pushed in or bent.
Any of those means a hardware fault, not a software one. No reset will fix it.
Branch 5: One Earbud Blinks Red and White While the Other Works Fine
A single-earbud fault means the problem lives in that earbud, not in the pair or the case. Isolate it first, then decide whether it's firmware or hardware.
The two earbuds talk to each other over their own wireless link. One acts as the primary, the other as the secondary. If that link breaks, one side can get stuck in a fault state while the other carries on playing.
The Swap Test: Isolating Which Earbud Is at Fault
This test takes two minutes and tells you almost everything.
- Note which earbud is blinking (left or right).
- Take both out of the case and set them down.
- Put only the blinking earbud back in. Close the lid. Watch the LED.
- Take it out. Put only the working earbud in. Close the lid. Watch again.
- Then put both in together and watch one more time.
If the fault follows the blinking earbud, that earbud is the problem. If the fault only appears when both are seated, the issue is in how they're syncing with each other.
Firmware Desync Between Left and Right
Firmware updates run on both earbuds, but not always simultaneously. If one earbud updated and the other didn't, they can fall out of sync.
The symptom is usually a single earbud blinking red and white while the other stays quiet. The updated earbud is waiting for its partner to catch up.
The fix:
- Place both earbuds in the case.
- Open the Bose app and check for a pending update.
- Run the update with the case plugged into USB-C.
- Keep the phone and case within a foot of each other until it finishes.
- If the app shows both earbuds at the same firmware version and the blink persists, move on.
When One Earbud Is Genuinely Dead
If the swap test points to a single earbud and firmware is current, you're looking at a hardware fault. The battery in that earbud may have failed, or the internal charging circuit may be damaged.
Bose sells replacement earbuds for some models through its support channel. You'll need your model number and proof of purchase. Out-of-warranty replacement is usually cheaper than buying a fresh pair, but not by much.
One thing to check before you spend anything: verify the earbud is actually charging. Seat it in the case, close the lid, and wait 30 minutes. If the case LED never acknowledges it, the earbud isn't drawing power.
That confirms a hardware issue, not a software one.
The Reset Ladder: Reboot, Hard Reset, Factory Reset, Re-Pair
There are four levels of reset on Bose QuietComfort earbuds. They escalate in severity, and people jump straight to the top when they should start at the bottom.
Run them in order. Give each one a fair shot before moving up.
How Long to Hold the Case Button on Each Model
Hold times differ by generation, and using the wrong duration is why resets seem to "not work."
| Reset type | Hold time | What it clears |
|---|---|---|
| Soft reboot | 10 seconds | Temporary glitches |
| Hard reset | 20 to 30 seconds | Pairing list and connection state |
| Factory reset | 30 seconds, then app prompt | All settings and known devices |
| Re-pair | N/A | Nothing, but rebuilds the connection cleanly |
For the original QuietComfort Earbuds, the reset button is inside the case, usually near the hinge. For the QC Earbuds II and Ultra, the button is on the outside of the case, often near the USB-C port.
Press with a fingernail or a plastic tool. A metal pin can damage the button or short nearby contacts.
What Each Reset Level Actually Does
A soft reboot clears temporary memory. It's the equivalent of restarting your phone. Firmware stays.
Pairing stays. Bugs get flushed.
A hard reset wipes the pairing list and forces the earbuds back to a clean connection state. You'll need to re-pair everything afterward.
A factory reset goes further. It resets EQ settings, noise cancellation preferences, and any custom configurations you've saved in the app.
A re-pair isn't technically a reset. It's the step you take after one. Forget the device on your phone, put the earbuds in pairing mode, and start fresh.
When a Reset Won't Fix It (and Why)
Resets fix software states. They can't fix hardware. If you've run a full factory reset and the red-and-white blink is still there, the problem is physical.
Here's the honest test. After a factory reset, watch the earbuds for 5 minutes with nothing connected and no app running. If the light cycles during that window with zero interaction, you've ruled out software entirely.
At that point, stop resetting. Every additional reset just adds wear to the button and drains the battery. Call Bose support and start a warranty claim.
Cleaning Charging Contacts and Inspecting the USB-C Port
Dirty contacts are the single most common cause of a false charging fault. Cleaning them takes 5 minutes and costs nothing.
The earbud contact pads are small gold or silver dots on the underside of each earbud. The case has matching spring pins inside the slots. Both need to be clean and dry.
Tools and Materials You Actually Need
Skip the fancy cleaning kits. You need very little.
| Tool | Purpose |
|---|---|
| Dry cotton swabs | Removing oil and dust |
| Isopropyl alcohol (70% or higher) | Cutting through residue |
| Wooden toothpick | Clearing the USB-C port |
| Soft-bristle toothbrush | Loosening debris in the case slots |
| Lint-free microfiber cloth | Drying surfaces |
Don't use metal tools, paper towels, or household cleaners. Metal can scratch the plating off the contacts. Paper towels shed fibers that clog the port.
Step-by-Step Contact Cleaning
Follow this order. Do one earbud at a time so you don't mix them up.
- Take the earbuds out of the case.
- Dip a cotton swab in isopropyl alcohol. Blot it so it's damp, not wet.
- Wipe each contact pad on the earbud. Use a gentle circular motion.
- Let the earbud sit for 60 seconds so the alcohol fully evaporates.
- Use a dry swab on the case pins inside each slot.
- Brush the case slots with a soft toothbrush to loosen dust.
- Wipe the case interior with a microfiber cloth.
Never push liquid into the case. Alcohol on a damp swab is fine. A dripping swab is not.
Inspecting the USB-C Port
Shine a phone flashlight into the USB-C port on the case. You're looking for three things: lint, bent pins, and corrosion.
Lint is the most common issue. Pocket fuzz and fabric fibers pack into the port over months. Use a wooden toothpick to gently lift it out.
Work in small strokes.
Bent pins are less common but possible if you've forced a cable in the wrong way. Look for pins that sit at odd angles. A bent pin means the case needs service.
Green or white crust around the pins is corrosion. That's usually liquid damage. The case may still charge for a while, but the port will eventually fail.
Plan for a replacement.
A Quick Re-Test After Cleaning
Once everything is clean and dry, plug the case into USB-C. Watch the LED for 30 seconds.
A healthy case will show a slow pulse or steady light. A faulty one will start its red-and-white cycle within a minute or two.
If the case charges cleanly on its own, seat the earbuds one at a time. Watch for the LED to acknowledge each one. If it does, you've fixed it.
If not, you've narrowed the fault to a specific earbud.
Reading Firmware and Battery Status in the Bose App
The app tells you things the LED can't. If you're still guessing after the light checks, open the Bose app and read the actual numbers.
Firmware version, battery percentage per earbud, and connection state all live in the app. That data turns a vague "something's wrong" into a specific fault you can act on.
How to Find Your Firmware Version
Open the Bose app and select your earbuds from the device list. Tap the settings gear, then look for "Product Info" or "About." The firmware version sits there as a number like 2.0.7 or 4.1.2.
Write it down. Bose support will ask for it. So will any forum thread you post in.
If the app won't connect to the earbuds at all, that's a clue by itself. It usually means the earbuds are stuck in a fault state and aren't advertising over Bluetooth properly.
What the App Shows During a Fault
A healthy connection shows both earbuds with individual battery percentages. The case shows its own level. Everything matches what you'd expect.
A faulty connection looks different. You might see:
- Only one earbud listed. The other has dropped off the link.
- A battery percentage that doesn't change after 30 minutes in the case.
- A stuck "Updating" or "Connecting" message that never resolves.
- The earbuds showing as connected while the red-and-white blink continues.
That last one is the most confusing. The earbuds report a connection but sit in an error loop. In our research, that pattern almost always points to a firmware write that half-completed.
Checking Update History
The app logs recent firmware updates. If your earbuds updated within the last 24 hours and the blink started after, you've found your cause.
If the last update was months ago and the blink is new, firmware is unlikely to be the trigger. Shift your attention to charging, contacts, or hardware.
Firmware updates for QuietComfort earbuds roll out in waves. Not every region gets them at the same time. Bose pushes updates through the Bose app only, not through phone system updates.
When It's a Dead Battery or Hardware Fault, Not a Software Glitch
At some point, troubleshooting stops being useful. If you've cleaned the contacts, reset twice, and confirmed the firmware, the problem is physical.
Battery and hardware faults don't respond to software fixes. Recognizing them early saves you hours and protects the earbuds from further damage.
Signs the Battery Has Failed
Lithium-ion cells degrade with use. Most earbud batteries hold up for 300 to 500 full charge cycles before dropping to around 80 percent of original capacity. That's typically 18 to 24 months of daily use.
A failing battery shows up in specific ways:
- The earbud charges to 100 percent but dies within 30 minutes.
- One earbud drains much faster than the other.
- The case reports full but the earbuds won't charge.
- Charge time stretches from 2 hours to 5 or 6.
Any of those, paired with the red-and-white blink, points to cell degradation. No reset brings a worn cell back.
Swollen Battery: A Stop-Now Signal
A swollen battery is a safety issue, not a performance issue. Stop using the earbuds immediately.
Signs to watch for:
- The earbud no longer sits flush in the case.
- The case lid won't close fully.
- The earbud feels warm even when idle.
- A bulge or soft spot on the housing.
Lithium-ion cells that swell can rupture and ignite. Don't charge them. Don't press them back into shape.
Don't put them in the bin. Contact Bose support for safe disposal guidance, and check the U.S. Consumer Product Safety Commission for any active recalls on your model.
Overheating and Temperature Faults
Bose earbuds charge within a specific temperature range. Outside roughly 0°C to 45°C (32°F to 113°F), the case refuses to charge and throws a fault.
If the earbuds sat in a hot car or on a windowsill in direct sun, let them reach room temperature for an hour before retrying. Forcing a charge outside the range stresses the cell and can push a recoverable fault into permanent damage.
The red-and-white blink from a temperature block usually clears once the earbuds cool down. If it doesn't, the heat exposure caused lasting harm.
When to Stop Troubleshooting and Call Bose
Once you've exhausted the software fixes above, extra resets just add button wear and battery drain. Every additional charge cycle on a faulty cell shortens its life further.
At that stage, you're not fixing anything. You're burning time. Call Bose support and let them run diagnostics.
Repair, Replacement, and Warranty: What Bose Covers
Bose backs its earbuds with a limited warranty, but the terms and duration vary by region. Knowing what's covered before you call saves a lot of back-and-forth.
The standard Bose warranty runs 12 months from the date of purchase in most markets. It covers manufacturing defects, not damage you caused.
What's Covered vs What Isn't
This table reflects the general Bose warranty terms across major markets. Check your regional Bose support page for the exact wording that applies to you.
| Issue | Typically covered | Typically not covered |
|---|---|---|
| Dead earbud out of the box | Yes | N/A |
| Battery failure within 12 months | Yes | No |
| Firmware fault on current version | Yes | No |
| Liquid damage | No | Yes |
| Drop or impact damage | No | Yes |
| Normal battery degradation | No | Yes |
| Lost earbud or case | No | Yes |
| Cosmetic wear | No | Yes |
The warranty covers defects, not accidents. If the earbuds took a swim or a fall, you're outside coverage no matter how new they are.
Regional Warranty Differences
Consumer law varies a lot by country. Here's the short version.
| Region | Minimum legal protection | Notes |
|---|---|---|
| United States | 1 year (Bose limited warranty) | No federal extension beyond that |
| European Union | 2 years | Legal guarantee, applies regardless of Bose terms |
| United Kingdom | Up to 6 years | Consumer Rights Act 2015, depends on expected lifespan |
| Canada | 1 year | Provincial law may add protection |
| Australia | 2 years+ | Australian Consumer Law, "reasonable" lifespan |
If you're in the EU, UK, or Australia, you have rights beyond the Bose warranty. A retailer can't wave those away with a standard 12-month policy.
Filing a Warranty Claim: The Process
Bose handles claims through its regional support channels. The process is straightforward.
- Gather your proof of purchase. A receipt, order confirmation, or bank statement works.
- Note your model number, serial number, and firmware version.
- Contact Bose support by phone or through the official site.
- Describe the fault and the steps you've already tried.
- Get a case or RMA number before shipping anything.
- Follow the return instructions exactly. Bose usually provides a prepaid label for in-warranty returns.
Don't ship the earbuds without an RMA number. Unmarked returns get rejected or lost.
Out-of-Warranty Options
If you're past the warranty window, you have a few paths.
Bose sometimes offers a trade-in or replacement program for out-of-warranty units. The exact terms vary by region and model. Ask support directly, because these programs change quietly.
Buying a single replacement earbud is possible for some models, but not all. The earbuds are paired at the factory, so a replacement has to be matched to your existing unit. That's a support job, not a self-service one.
Third-party repair shops exist, but the sealed housing makes most repairs destructive. You'll usually pay close to the price of a new pair.
Mistakes That Make the Red-and-White Blink Worse
Most of the damage we see in aggregated user reports comes from well-meaning troubleshooting. People try the wrong fix first and turn a recoverable fault into a dead unit.
Avoid these.
Charging Wet Earbuds
This is the single biggest killer. A wet earbud plus power equals a shorted circuit. If the earbuds touched sweat, rain, or a spilled drink, dry them for 24 to 48 hours before they go anywhere near the case.
Using the Wrong Charger
Bose earbuds charge fine on standard USB-C. They don't need fast charging, and they don't like it. A 65W laptop charger can push more current than the case expects.
Use a standard 5V USB adapter when you can. Avoid charging from high-wattage laptop ports or fast-charge bricks unless the manufacturer explicitly supports it.
Resetting Over and Over
One reset is diagnostic. Five resets in a row is just abuse. The case button has a finite lifespan, and repeated presses can damage the internal switch.
If two resets don't fix it, a third won't either. Move on to the next branch.
Poking Around with Metal Tools
A paperclip in the USB-C port can short the pins. A metal pin on the charging contacts can scratch the gold plating off. Use wooden toothpicks or plastic spudgers, never metal.
Ignoring Temperature
People charge earbuds in hot cars, on sunny dashboards, and next to space heaters. All three can trigger a fault that looks like a battery failure. Let the earbuds sit at room temperature before you assume the worst.
Opening the Case or Earbuds
There's no user-serviceable part inside. The housing is sealed, the battery is soldered, and prying it open voids your warranty instantly. Even out of warranty, opening the case rarely ends well.
Skipping Firmware Updates
Bose fixes real bugs through firmware. If your earbuds are on a two-year-old build, you're running code that Bose has already replaced. Run the update before you assume hardware failure.
Buying Cheap Replacement Earbuds Online
Third-party "replacement" earbuds sold on marketplaces are usually counterfeit or pulled from broken pairs. They won't pair correctly, and they often fail within weeks. If you need a replacement, go through Bose.
Frequently Asked Questions
What does it mean when Bose QC earbuds blink red and white?
It means the earbuds are in an error state. Bose uses alternating red and white for faults it can't resolve on its own. The most common triggers are a charging fault, an interrupted firmware update, a pairing failure, or a hardware problem.
The timing of the blink tells you which one.
How do I fix Bose earbuds blinking red and white?
Start by cleaning the charging contacts and charging the case for 30 minutes. If that fails, run a hard reset by holding the case button for 30 seconds. If the blink continues after a full factory reset, the fault is hardware, and Bose support is your next step.
Can a red and white blink fix itself?
Sometimes, yes. A temperature block or a temporary charging glitch can clear on its own once conditions normalize. A firmware fault won't self-correct.
A hardware fault definitely won't. If the blink lasts more than an hour with no change, treat it as a real fault.
Why is only one earbud blinking red and white?
A single-earbud blink usually means that earbud has a firmware desync, a battery fault, or a damaged charging contact. Run the swap test to isolate it. If firmware is current and the earbud still won't charge, the fault is physical.
Is the red and white blink covered under warranty?
Yes, if it's caused by a manufacturing defect and you're within the warranty window. Bose's standard warranty is 12 months, though EU, UK, and Australian buyers have longer legal protections. Liquid damage and drops aren't covered, even on a new pair.
How long should I charge Bose earbuds before they work?
Give the case at least 30 minutes on a USB-C charger before you judge anything. A full charge takes roughly 2 to 3 hours depending on the model. If the red-and-white blink appears within the first two minutes of charging, that's a rejected charge, not a slow one.