A Streamlight charger blinking red is a fault signal, not a low-battery warning. Most people see the flashing light, assume the pack is finished, and order a replacement they never needed. The charger is flagging one specific problem.
Your job is to work out which one before you spend a cent.
Manufacturer specifications indicate Streamlight's lithium-ion packs charge to 4.2 volts and cut off near 2.5 volts per cell. Anything below that threshold usually won't wake up in a smart charger. That one number explains a lot of blinking red lights.
Here's how the fault actually works.
Quick Answer
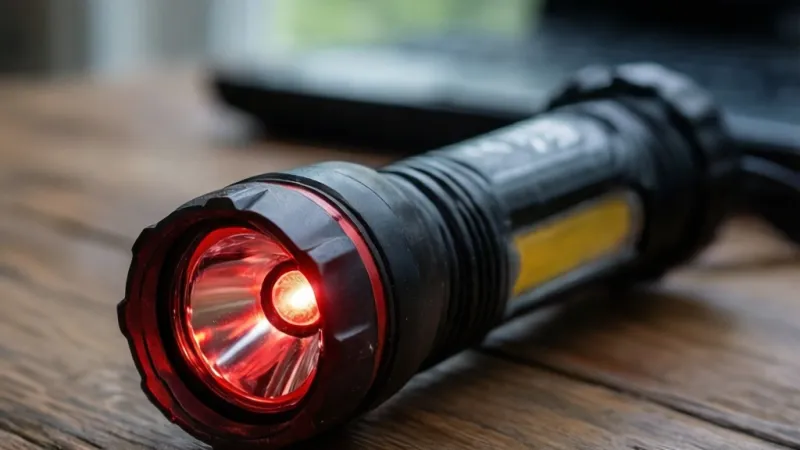
A blinking red Streamlight charger signals a charging fault. It rarely means the battery is dead. The charger has stopped the charge cycle.
Dirty contacts and a poorly seated pack are the usual causes. Thermal lockout, wrong chemistry, and over-discharged cells also trigger it.
Why Your Streamlight Charger Is Blinking Red (And Why "Bad Battery" Is Usually Wrong)
Streamlight cradles aren't dumb power supplies. They read the pack before they charge it. The controller checks voltage, current draw, and temperature, then decides whether to proceed.
Blinking red is the moment that check fails.
That's the key insight. The LED isn't reporting battery health. It's reporting that the charger refused to move forward.
Something in the chain broke the handshake, and the battery is only one suspect among several.
What the Charger Is Actually Telling You
Inside most Streamlight charging cradles sits a charge controller that watches three things: pack voltage, current, and temperature. It expects a pack inside a predictable voltage window. Read too low, too high, or unstable, and it stops.
Temperature gets the same treatment. A pack pulled straight off a light that's been running on high, or one left in a hot vehicle, can sit outside the safe charging range. The controller waits it out or faults.
Contact resistance matters just as much. A corroded contact looks like an open circuit to the controller. It genuinely can't tell the difference between a missing pack and a dirty one.
The Six Fault Categories Behind a Blinking Red LED
Almost every blinking red light traces back to one of these:
| Fault category | Typical trigger |
|---|---|
| Contact problem | Dirt, oxidation, or a pack that isn't seated |
| Chemistry mismatch | Li-ion pack in a NiCad-era bay, or an aftermarket 18650 that won't make contact |
| Over-discharge | Cell drained below the charger's wake-up threshold |
| Thermal lockout | Pack too hot or too cold to accept current |
| Worn-out pack | High internal resistance, aged or damaged cells |
| Charger or power fault | Dead adapter, blown 12V fuse, failed charger board |
Notice how only one of those rows is "the battery is dead." That's exactly why jumping to a replacement pack is a bad first move.
Why "Just Buy a New Battery" Costs You Money
OEM Streamlight replacement packs run roughly $25 to $80 depending on the model and chemistry. That's real money for a part that may be perfectly healthy.
Worse, a new pack won't fix a dirty cradle. It won't fix a blown fuse in your vehicle adapter. It won't fix a wall brick that can't deliver enough current.
You'll fit the fresh battery, watch it blink red again, and be exactly where you started, minus the cash.
There's a second cost too. Every unnecessary pack you buy and bin sends a lithium cell into the waste stream. Those need proper recycling, not a kitchen bin.
The One Time a Bad Battery Really Is the Answer
Sometimes the pack genuinely is finished. A cell that's been through 300 to 500 full charge cycles is near the end of its useful life. Internal resistance climbs, capacity fades, and the charger struggles to push current in.
Age isn't the only killer. A pack left fully discharged for months can drop below the point of recovery. So can one that's been cooked repeatedly in a hot car.
If the casing is bulging, cracked, or visibly deformed, stop. Don't charge it. Don't test it.
Don't put it back in the light. Lithium packs are built and tested to safety standards such as UL 2054 and IEC 62133-2. Those standards exist precisely because a damaged cell can vent or ignite under charge.
The UL standards program publishes the detail behind them.
Here's the honest summary: a worn pack is a real cause, but it's rarely the first one you should test for. Work through the cheap checks first.
Find Your Model First: Light, Battery, and Charger Numbers That Settle the Question
Every Streamlight charger has its own blink logic. A Strion cradle and a Stinger PiggyBack rack don't speak the same language. Neither does a four-bay bank charger bolted into a fire apparatus.
So the first real step is identification. You need three numbers: the light, the battery pack, and the charger.
Where to Find Each Number
| Component | Where to look | What you're hunting for |
|---|---|---|
| Flashlight | Head, body, or tailcap | Model name and number |
| Battery pack | Printed label on the pack itself | Streamlight part number, voltage, chemistry, mAh |
| Charger | Underside or back of the base | Charger model and rated input |
| Power adapter | Molded into the plug body | Output volts and amps |
Write all four down. You'll need them for the manual lookup and again if you end up calling support.
Why the Model Matters More Than You'd Think
Streamlight's rechargeable lineup as of 2026 spans several distinct charging systems. The Strion family uses a barrel-style charging ring and a drop-in cradle. The Stinger family uses a base-contact rack, often with a PiggyBack second bay for a spare pack.
Chemistry splits things further. Older Stinger packs ran nickel-cadmium. Current Streamlight packs are lithium-ion.
The two need completely different charge profiles, and a charger built for one will fault on the other.
Then there's the SL-B26 and similar 18650-based cells with onboard USB charging. Those skip the cradle entirely. If you're topping one up from a laptop port, you've just introduced a power problem the manual never mentions.
The Manual Is the Only Authority for Your Charger
Streamlight publishes an instruction sheet for every charger it sells. Those sheets list the exact LED codes for that specific model. If your sheet says three quick blinks means over-temperature, that's your answer.
No forum thread beats it.
The Streamlight product support pages host current manuals and a model lookup. Grab the sheet for your exact charger before you touch anything.
What to Write Down Before You Call Support
Having this ready turns a frustrating phone call into a two-minute conversation:
- Light model number
- Battery pack part number and chemistry
- Charger model number
- Adapter output rating (volts and amps)
- Approximate purchase date
- Exactly what the LED does, and how long it does it
- Whether the setup ever worked properly
Support can usually tell you within a minute whether you're looking at a warranty claim or a user fix.
What Each LED State Actually Means: Blinking Red vs. Solid Red vs. Green vs. Dark
Streamlight's convention across most rechargeable systems is straightforward. Solid red means charging. Solid green means done.
Blinking red means fault. Dark means no power at all.
That convention holds broadly, but the details shift between models. Some units blink amber instead of red. Some use a slow blink for a temperature hold and a fast blink for a hard fault.
The Four States at a Glance
| State | Typical meaning | First thing to check |
|---|---|---|
| Solid red | Charging normally | Nothing, leave it alone |
| Solid green | Charge complete | Whether the light actually runs at full output |
| Blinking red | Fault, charge aborted | Manual, contacts, seating, temperature |
| No LED | No power reaching the charger | Outlet, adapter, fuse, switch |
Treat this as a starting frame, not gospel. Your manual overrides it every time.
Blinking Red: Slow Blink vs. Fast Blink
If your model distinguishes blink rates, that distinction is worth knowing. A slow blink often means the charger is holding, waiting for a condition to clear. A fast blink usually means it has given up entirely.
Check your instruction sheet to confirm which applies to your unit. If the sheet only documents one blink pattern, treat it as a hard fault and work through the branches in order.
Solid Red That Never Turns Green
A steady red light that never resolves is a different animal. The charger is trying, but the charge never reaches completion. That usually points at a pack with high internal resistance, or a charger that can't reach termination voltage.
Give it a full overnight cycle in a steady bay before you conclude anything. Some Streamlight steady bays run around 10 hours. A quick glance after 20 minutes proves nothing.
Green the Instant You Drop It In
Instant green usually means the charger thinks the pack is already full. If the light clearly isn't running at full brightness, the pack may be reporting a false voltage. That's a battery-side problem, not a charger problem.
Test it by running the light until it dims noticeably. Then drop it back in. If you get instant green again, the pack has lost the ability to hold a real charge.
No LED at All
No light means no power is arriving. Check the outlet first, then the adapter, then any fuse in a 12V cord. It happens more often than you'd think that a "faulty charger" is plugged into a switched wall socket.
Try a different outlet on a different circuit. If the charger is dead on both, you've found your answer in under two minutes.
Don't Confuse the Charger LED With the Light's LED
Your flashlight has its own indicator, usually near the switch or tucked under the bezel. It reports remaining battery level while the light is in use. It has nothing to do with the charging cradle.
If the light's own LED is blinking while it sits in the cradle, you're reading the wrong indicator. Cover it or shift your eyes to the charger base.
The 60-Second Checks Before You Touch Anything Else
Before you clean anything or swap any parts, run the cheap checks. These take about a minute, and they eliminate the simplest possible causes.
Skipping this step is how people end up buying batteries they didn't need.
The Quick Pass
- Confirm the charger is plugged into a live outlet. Test the outlet with a lamp or phone charger.
- Check that the wall adapter is the one that shipped with the charger.
- On a 12V vehicle cord, check the fuse in the plug and the vehicle's accessory circuit.
- Note the rated output of your USB brick if you're charging an onboard-USB cell.
- Pull the pack out and drop it back in until you hear or feel a click.
- Switch the light on. If it won't run at all, you're dealing with a flat or dead pack.
- Watch the LED for a full 30 seconds. Some chargers blink briefly before settling into steady red.
- Move the whole setup to a normal room and try again.
Quick Check Reference
| Check | What good looks like | If it fails |
|---|---|---|
| Outlet | Another device powers on | Try a different circuit |
| Adapter | Correct volts and amps, undamaged | Swap for the OEM adapter |
| 12V fuse | Intact, correct rating | Replace with the same rating |
| USB supply | 1A or higher, stable | Use a known-good brick |
| Seating | Audible click, no gap | Reseat or check alignment |
Why the USB Port Matters More Than People Realize
Onboard-USB cells need a supply that can actually deliver. A 1A wall brick handles it fine. An old 0.5A laptop port often doesn't.
When the supply sags, the charge controller sees unstable input and stops. That looks identical to a battery fault from the outside. Try a known-good 1A or higher brick before you blame the cell.
The Room Temperature Reset
Heat and cold both trip chargers. Pull the pack out, set it on a bench, and give it 30 to 60 minutes at room temperature. Then try again.
This is the most common fix for lights that live in vehicles or on a truck dash. A pack that's been baking in a hot car won't charge, and no amount of contact cleaning will change that.
Cold does the same thing in the other direction. A light left in a freezing truck bed can fault on a winter morning and charge perfectly once it warms up indoors.
Branch 1: Dirty or Misaligned Charging Contacts
If the quick checks came back clean, contacts are your next stop. In our review of user reports, contamination and poor seating come up more often than every other cause combined.
It's also the cheapest thing to fix. A cotton swab and some isopropyl alcohol cost almost nothing.
How Streamlight Charging Contacts Work
Streamlight uses gold-plated contacts in most cradles and sleeves. Gold resists corrosion well, but the plating is thin. It doesn't take much to break the circuit.
On a Strion, the charging ring wraps around the barrel. On a Stinger, the contacts sit in the base of the light. Both designs depend on spring pressure to hold the connection.
Springs weaken over time. Contacts shift. A pack that used to seat with a firm click can start sitting a fraction of a millimeter high, and that's enough to fault.
What Actually Gets On Them
| Contaminant | Best cleaning method | What to avoid |
|---|---|---|
| Pocket lint and dust | Dry soft brush or compressed air | Metal picks |
| Skin oils and fingerprint film | 91% isopropyl alcohol on a swab | Water |
| Light oxidation | Pencil eraser, gentle pressure | Sandpaper, wire brushes |
| Sweat and salt corrosion | Isopropyl alcohol, then air dry | Acidic household cleaners |
| Dried mud or grit | Soft brush first, then alcohol | Scrubbing while wet |
How to Clean Charging Contacts Safely
- Remove the pack and unplug the charger from power.
- Wipe the contacts with a dry, lint-free cloth.
- For oily film, dampen a cotton swab with 91% isopropyl alcohol.
- Wipe in one direction. Don't scrub back and forth across the plating.
- For light oxidation, use a pencil eraser with light pressure.
- Let the alcohol flash off completely before reinserting anything.
- Reinsert the pack and watch the LED.
Never use water, metal files, or abrasive pads on charging contacts. Gold plating is measured in microns. You'll strip it in seconds and turn a cleaning job into a replacement job.
When It's Alignment, Not Dirt
If the contacts look spotless and the LED still blinks, check seating. Drop the pack in slowly and listen for the click. No click means it isn't home.
Look for a gap between the pack and the cradle. On a Strion sleeve, the charging ring has to sit fully inside the cradle opening. A few millimeters short and the circuit never closes.
Check the bay too. Multi-bay units often mix a fast bay and a steady bay, and some bank chargers are chemistry-specific. Dropping a pack into the wrong slot on a mixed bank will fault every time.
When Cleaning Doesn't Fix It
If the contacts are clean, the pack seats with a click, and the light still blinks, you've ruled out Branch 1. That's useful information.
Move on to chemistry and seating checks next. The problem is somewhere else in the chain, and you've just saved yourself a battery purchase.
Branch 2: When the Battery Isn't Seated or It's Sitting in the Wrong Bay
If the contacts are clean and the LED still blinks, seating is your next suspect. It sounds almost too simple to matter, but it's a genuine cause. Streamlight's charging systems depend on physical contact under spring pressure, and a fraction of a millimeter matters.
The click is the tell. If you don't hear or feel one, the pack isn't home yet.
How Seating Fails on Each Streamlight System
Each charging platform has its own failure mode. Knowing which one you're dealing with saves time.
| System | How the pack seats | Common seating failure |
|---|---|---|
| Strion cradle | Charging ring drops into the cradle opening | Sleeve not fully inserted, ring sits above the contact |
| Stinger rack | Light body drops into a base slot | Debris in the slot, light not pushed down fully |
| PiggyBack second bay | Spare pack drops into a rear slot | Pack inserted backwards or at an angle |
| Multi-bay bank charger | Pack clicks into a specific bay | Wrong bay for the pack's chemistry |
| Onboard USB cell | Direct cable connection | No seating issue, but the port can be obstructed |
Look at the gap between the pack and the cradle. If you can see daylight where the two meet, that's your problem.
The Wrong-Bay Trap on Multi-Bay Chargers
Bank chargers are where people get caught. A four-bay or six-bay unit often mixes fast-charge bays and steady-charge bays. Some models also restrict specific bays to specific chemistries.
Drop a lithium-ion pack into a bay built for nickel-cadmium and the charger will fault. It isn't broken. It's doing its job.
Check the labeling on the charger face. Most Streamlight bank chargers print bay function right next to each slot. If yours doesn't, the instruction sheet will spell it out.
Why a Strion Sleeve Is Easy to Get Wrong
The Strion uses a charging sleeve that surrounds the barrel. The contact ring has to sit fully inside the cradle opening for the circuit to close.
Because the sleeve is cylindrical, it can look seated when it isn't. Rotate the light slightly as you insert it. You'll usually feel it drop the last couple of millimeters.
Don't force it. If it won't go, something's blocking the cradle. Stop and look.
What to Do If Seating Keeps Failing
If the pack seats cleanly on the bench but faults in the cradle, the cradle is the problem. If it seats in one bay but not another, the bay is the problem.
Try this test. Insert the pack slowly, watching the LED. If it flickers between states as you move it, you've confirmed a contact or seating issue.
Repeat the insertion three or four times. If the fault is intermittent, you're chasing a mechanical problem, not a battery one.
When Seating Is Fine and the LED Still Blinks
Seating is now ruled out. Move on to chemistry. That's the next branch, and it catches a lot of people who bought an aftermarket cell to save a few dollars.
Branch 3: Chemistry Mismatch: Li-ion vs. NiCad vs. NiMH vs. Aftermarket 18650s
If your pack doesn't match your charger's chemistry, the charger will refuse it. That's not a defect. It's a safety feature.
Streamlight's rechargeable line spans three chemistries across several decades of production. Older Stinger models ran nickel-cadmium. Current packs are lithium-ion.
Nickel-metal-hydride shows up in some legacy and third-party cells.
Each chemistry has a different charge profile. Voltage endpoints differ. Charge termination methods differ.
The controller can't charge what it doesn't recognize.
The Three Chemistries Side by Side
| Chemistry | Nominal voltage per cell | Full charge voltage | Typical Streamlight use |
|---|---|---|---|
| Nickel-cadmium (NiCad) | 1.2V | ~1.45V per cell | Legacy Stinger and Strion packs |
| Nickel-metal-hydride (NiMH) | 1.2V | ~1.5V per cell | Some legacy and third-party packs |
| Lithium-ion (Li-ion) | 3.7V | 4.2V | Current Streamlight rechargeable packs |
A two-cell NiCad pack sits around 2.4 volts nominal. A single lithium-ion cell sits at 3.7 volts. The charger reads voltage first.
If the reading is outside its expected window, it faults.
The Aftermarket 18650 Problem
This one catches more people than any other chemistry issue. Streamlight's SL-B26 and similar cells use the 18650 form factor, which is a standard lithium-ion size. So people buy a cheaper aftermarket 18650 and drop it in.
It doesn't work. Here's why.
Streamlight cells are protected button-top 18650s. The protection circuit adds a small board at the negative end, and the button top adds a few millimeters of height. Both features are needed for the cell to make contact in a Streamlight bay.
Most aftermarket 18650s are unprotected flat-tops. They're shorter and the positive terminal is flat. They physically fit the bay but never touch the positive contact.
The charger sees an open circuit and blinks red. The cell isn't faulty. It just can't reach the contact.
How to Tell If You Have the Right Cell
Check the physical profile first. A Streamlight-compatible 18650 has a raised button on the positive end and a visible protection strip along the side.
Check the label second. It should list capacity in mAh, nominal voltage, and the manufacturer. Streamlight's own cells run around 2600 mAh.
Check the length third. Protected cells are slightly longer than unprotected ones. If yours drops in with room to spare, it's probably the wrong profile.
Why Mixing Cells in a Multi-Cell Pack Is Dangerous
If you're rebuilding or topping up a multi-cell pack, never mix old and new cells. Never mix capacities. Never mix chemistries.
Cells in series charge at the same current. A weaker cell hits full voltage first while the stronger one is still catching up. The charger sees the pack as full and stops.
The stronger cell stays undercharged.
The reverse is worse. Over time, the imbalance grows. The weak cell gets pushed past its limit and can vent.
This is exactly why UL 2054 exists as a pack-level safety standard. Packs are tested as systems, not as loose cells.
If the Chemistry Checks Out
If your pack is the correct chemistry, the correct physical profile, and an OEM or OEM-equivalent part, chemistry is ruled out. Move on to voltage.
That's where over-discharge lives, and it's a common outcome for lights that sit unused for months.
Branch 4: Over-Discharged Cells and the Charger's Wake-Up Threshold
A cell that's been sitting dead for months can drop below the point where a smart charger will touch it. This is called over-discharge, and it's one of the most common reasons a perfectly good pack won't charge.
Manufacturer specifications indicate lithium-ion cells cut off around 2.5 to 3.0 volts per cell. Below that, the internal chemistry starts to degrade. Copper shunts can form inside the cell.
Charging a cell in that state is genuinely unsafe.
Smart chargers know this. So they refuse. That's the blinking red light.
How Over-Discharge Happens
Over-discharge isn't a defect. It's an outcome of how the light was stored.
Common paths into over-discharge:
- A light left switched on in a drawer for weeks
- A pack stored out of the light for months with no top-up charge
- A parasitic drain in the light slowly pulling the cell down
- A pack that was never fully charged before long-term storage
- A light that sat in a vehicle unused through an entire season
Lithium-ion cells self-discharge slowly even when disconnected. Leave one long enough and it drifts below the threshold.
Why Some Chargers Try to Recover and Others Don't
Some Streamlight chargers attempt a gentle trickle charge on deeply discharged packs. If the voltage climbs back into range within a set window, the charger switches to normal charge.
Others don't. They read the voltage, decide it's out of spec, and fault immediately. No recovery attempt at all.
Which behavior you get depends on the charger model. Check your instruction sheet. If it documents a recovery mode, you might see a slow blink before the fault clears.
What Not to Do With an Over-Discharged Pack
Don't bypass the charger. Don't use a bench power supply to force current into a deeply discharged cell. Don't use a "battery rejuvenator" gadget from an online marketplace.
A lithium-ion cell below 2.0 volts can develop internal shorts as it charges. Those shorts produce heat. Heat produces venting.
Venting produces fire.
The cell might recover on a charger that supports it. It might not. Either way, forcing the issue is how people burn down garages.
How to Tell If a Pack Is Recoverable
Try a full charge cycle in the correct cradle, in a normal room, with a known-good adapter. Give it the full documented charge time, not twenty minutes.
If the LED goes solid red and completes to green, the pack recovered. Run the light and see how it performs. If runtime feels short, the pack lost capacity.
If the LED faults again after a full cycle, the pack is probably past recovery. A new OEM pack is the right call.
Storage Habits That Prevent Over-Discharge
Charge the pack to roughly 50 percent before long-term storage. Lithium-ion cells hold that state best.
Top it up every three to six months. Even a partial charge cycle resets the self-discharge clock.
Keep it at room temperature. A hot garage or a freezing shed accelerates the drift in both directions.
If you know a light won't be used for months, pull the pack out of the light. Parasitic drain is real, and some lights pull measurable current even when switched off.
If Voltage Checks Out
If the pack is the right chemistry, seats properly, and takes a charge without faulting, over-discharge is ruled out. Move to temperature.
Branch 5: Thermal Lockout: Hot Trucks, Hot Lights, and Cold Weather
Temperature is the branch that confuses people most. The charger faults, but the pack is fine. It's just too hot or too cold to accept current safely.
Lithium-ion cells have a narrow safe charging window. Manufacturer specifications and standards bodies generally place it between 0°C and 45°C (32°F to 113°F) for charging. Outside that range, the cell can plate lithium or degrade internally.
Streamlight's chargers monitor temperature and refuse to charge when the pack sits outside the safe band. Blinking red is the refusal.
Where Thermal Lockout Actually Happens
Thermal lockout is not a rare edge case. It's the daily reality for a lot of Streamlight owners.
| Situation | Typical pack temperature | What happens |
|---|---|---|
| Light running on high for 30 minutes | 40°C to 55°C (104°F to 131°F) | Charger faults until the pack cools |
| Vehicle dashboard in summer | 60°C to 70°C (140°F to 158°F) | Hard thermal lockout |
| Trunk of a patrol car, midday | 50°C to 65°C (122°F to 149°F) | Fault, sometimes intermittent |
| Winter truck bed | -10°C to 5°C (14°F to 41°F) | Fault until warmed indoors |
| Fire apparatus cab, post-call | 45°C to 60°C (113°F to 140°F) | Fault, resolves after cooldown |
Law enforcement and fire service users hit this constantly. A pack pulled off a light after a hot call goes straight into the cradle and faults. It's not broken.
It's hot.
Why the Charger Refuses Instead of Slowing Down
Some chargers can throttle charge current to manage heat. Others can't. Streamlight's smaller cradles generally can't, so they fault and wait.
Faulting is the safer outcome. A hot cell charged at full current can vent. That's why the refusal exists.
The Cooldown Test
Pull the pack out of the cradle. Set it on a bench in a normal room. Wait 30 to 60 minutes.
Then drop it back in. If the LED goes solid red, you've confirmed thermal lockout. Nothing needs replacing.
Do the same test in winter. Bring the pack indoors, let it reach room temperature, then charge it. Cold packs behave the same way.
Why This Matters More for Vehicle-Based Users
If you charge in a vehicle, the ambient temperature is the whole story. A dash-mounted cradle in July will fault on a pack that charges fine indoors.
Consider charging inside the cab with air conditioning running, or bring the pack indoors overnight. Hardwired apparatus chargers in fire service vehicles are often placed in conditioned compartments for exactly this reason.
Some departments rotate packs. One on the light, one on charge, one cooling. That rhythm sidesteps the thermal issue entirely.
When Thermal Lockout Isn't the Answer
If the pack sits at room temperature, the charger is in a normal room, and the LED still blinks, temperature is ruled out.
That leaves the pack itself. Move to internal resistance.
Branch 6: A Worn-Out Pack That Won't Take Current Anymore
This is the branch where "bad battery" finally becomes the right answer. But it should be the last one you test for, not the first.
A worn-out pack shows up as high internal resistance. The charger pushes current in, the pack's resistance turns it into heat, and the charger can't complete the cycle. The LED faults.
How Packs Wear Out
Lithium-ion packs typically manage 300 to 500 full charge cycles before capacity drops noticeably. After that, the decline accelerates.
Every cycle adds a thin layer of degradation to the cell's internal structure. That layer raises resistance. Higher resistance means less usable capacity and more heat during charge.
Nickel-cadmium packs have a different wear pattern. Older NiCad cells suffer from voltage depression, sometimes called memory effect, when repeatedly recharged before full discharge. NiMH packs lose capacity faster with age.
Signs You're Looking at a Worn Pack
Aggregate user reports point to a predictable set of symptoms:
- The light runs for only a fraction of its original runtime
- The pack gets noticeably warm during charge
- The charger takes much longer to reach green than it used to
- Solid red never resolves, or resolves then faults the next day
- The pack is three or more years old with regular use
- The pack was fine last month and now won't hold a charge
Any two of those together point strongly at a worn pack.
The Voltage Sag Test
A simple way to check a suspect pack is to run the light and watch brightness. A healthy pack holds near-full brightness for most of its runtime, then dims quickly at the end.
A worn pack starts dimming early. It sags under load because the internal resistance can't sustain current. If the light is noticeably dimmer than it used to be, the pack is the cause.
For a more precise check, a multimeter across the pack terminals right after a "full" charge tells the story. A healthy lithium-ion pack reads close to 4.2 volts. A worn one often reads 3.9 volts or lower, and drops fast under load.
OEM vs. Aftermarket Replacement Packs
| Option | Typical cost | Fit and contact quality | Warranty |
|---|---|---|---|
| Streamlight OEM pack | $25 to $80 | Guaranteed fit, correct protection profile | Covered under Streamlight warranty |
| Reputable third-party protected 18650 | $10 to $25 | Usually fits, quality varies | Third-party only |
| Cheap unprotected 18650 | $5 to $10 | Often won't make contact at all | None |
| Rebuilt pack from a service | $30 to $60 | Depends entirely on the rebuilder | Varies |
For a duty light or a light you depend on, the OEM pack is the low-risk choice. The price difference rarely justifies the risk.
When to Replace and When to Investigate Further
If the pack is over three years old, has thousands of cycles on it, and shows the symptoms above, replace it. That's a normal end-of-life situation.
If the pack is under a year old and faults, don't assume wear. Go back through the earlier branches. A young pack that faults usually has a contact, seating, chemistry, or thermal issue behind it.
If the pack is under two years old and genuinely failed, check the warranty. Streamlight's limited lifetime warranty covers the light, and batteries and chargers typically carry two-year coverage.
Recycling the Old Pack
Never put a lithium-ion pack in household trash. Never bin a nickel-cadmium pack either.
Call2Recycle operates a take-back network with drop-off points across North America. Many hardware stores, big-box retailers, and municipal transfer stations accept battery packs. Tape the terminals with electrical tape before you drop it off.
If the pack is swollen, deformed, or smells sweet, don't transport it casually. Contact your local hazardous waste facility or the retailer you bought it from for guidance. A vented lithium cell is a genuine fire risk in a car trunk.
Branch 7: The Charger Itself Has Failed and How to Prove It With a Swap Test
If you've worked through every earlier branch and the LED still blinks, the charger is now the prime suspect. That's the good news. Chargers fail less often than batteries, but they do fail.
The bad news is that a dead charger and a dead pack look identical from the outside. Both produce the same blinking red light. You need a controlled test to separate them.
Why Chargers Fail
Streamlight charging cradles are simple electronics, but they're not immortal. The common failure modes:
- Failed charge controller IC after a power surge or lightning event
- Worn spring contacts inside the cradle that no longer press firmly
- Cracked solder joints on the charging board from repeated vibration in a vehicle
- Damaged input jack from a cord yanked sideways too many times
- Corroded traces from moisture ingress in humid or marine environments
- Blown internal fuse that protects the board from a fault
Age matters too. A charger in daily duty for five years has done thousands of insert-and-remove cycles. Something will eventually give.
The Swap Test: The Only Reliable Method
The swap test isolates the fault. You change one variable at a time and watch what happens.
- Take your suspect pack and put it in a different, known-good charger of the same model.
- If it charges normally, your original charger is faulty.
- If it faults in the good charger too, your pack is the problem.
- Now take a known-good pack and put it in your original charger.
- If it faults, the charger is confirmed faulty.
- If it charges, both your original charger and original pack may be fine, and something else is wrong.
If you don't have a second charger on hand, borrow one. A colleague's cradle, a department spare, or a friend's identical unit all work. The test takes two minutes and settles the question.
When You Don't Have a Second Charger
No spare available? Try these partial tests instead.
Check the adapter first. Plug in a known-good adapter with matching volts and amps. If the fault clears, the adapter was the problem, not the charger or the pack.
Check the outlet second. A switched socket, a tripped GFCI, or a bad circuit can all look like charger failure. Test with a lamp or phone charger on the same outlet.
Check the 12V cord third. If you're charging in a vehicle, inspect the fuse in the plug. A blown 12V fuse kills the charger entirely with no visible sign.
Reading the Charger for Physical Clues
Look closely at the charger body. A cracked housing, a bent contact pin, or visible corrosion on the input jack are all red flags.
Smell it too. A burnt electrical smell from the charger is a hard stop. Unplug it, stop using it, and treat it as dead.
Check the spring tension on the cradle contacts. Press them gently with a non-metal probe. If they don't spring back, the contacts have collapsed and the charger needs replacing.
Warranty Coverage on Chargers
Streamlight's warranty typically covers chargers for two years from purchase. The light itself carries a limited lifetime warranty, but batteries and chargers are treated separately.
If your charger is within that window and it's genuinely failed, contact Streamlight support. Have your model numbers, purchase date, and a description of the fault ready. Most claims are resolved with a replacement unit.
If you're past the warranty window, a replacement charger is usually $30 to $60 depending on the model. That's still cheaper than replacing a light.
Mistakes That Make It Worse and the Ones That Cost You Money
Most people dealing with a blinking red light make one of a handful of predictable mistakes. The fix is usually simple once you know what not to do.
Here are the ones we see most often in user reports.
Mistake 1: Buying a New Battery First
This is the big one. A new OEM pack costs $25 to $80. If the real problem is a dirty contact or a thermal lockout, that money is wasted.
Worse, you'll fit the new pack, watch it blink red again, and now you're convinced the charger is dead too. The problem compounds.
Always run the free checks first. Cleaning costs pennies. A cooldown costs nothing.
The battery should be the last thing you replace, not the first.
Mistake 2: Forcing a Deeply Discharged Cell to Charge
Don't use a bench power supply. Don't use a "battery rejuvenator" from an online marketplace. Don't rig a jumper wire from a car battery.
A lithium-ion cell below 2.0 volts can develop internal shorts during charge. Those shorts generate heat. Heat causes venting.
Venting causes fire.
The charger is refusing for a reason. Respect the refusal.
Mistake 3: Using an Unprotected 18650
Streamlight cells are protected button-top 18650s. Most aftermarket cells are unprotected flat-tops. They physically fit but don't make contact.
Some users file down the contact or bend it upward to force a connection. That's a great way to short the cell. Stop.
Buy a protected button-top 18650 if you're going third-party. Or buy the OEM pack. The savings on a $5 cell aren't worth a fire.
Mistake 4: Mixing Old and New Cells in a Multi-Cell Pack
If you're rebuilding a Stinger or Strion pack, never mix cells of different ages, capacities, or chemistries. Cells in series need to match closely.
A mismatched pack charges unevenly. The weak cell gets pushed past its limit. The strong cell stays undercharged.
Over time, one of them vents.
Replace all cells at once or replace the whole pack.
Mistake 5: Cleaning Contacts With the Wrong Thing
Water, sandpaper, metal files, and abrasive pads all damage gold plating. Gold plating is measured in microns. You can strip it off in seconds.
Use isopropyl alcohol on a swab for oils and a pencil eraser for light oxidation. That's it.
Mistake 6: Charging in Extreme Temperatures
A pack in a 140°F truck or a 20°F tool bag won't charge, and the charger will fault. That's the charger protecting the cell, not the charger failing.
Let the pack reach room temperature before you charge it. This one habit prevents a huge share of blinking red lights.
Mistake 7: Assuming the LED Pattern Is Universal
Different Streamlight chargers use different LED codes. A slow blink on one model means "waiting." On another, it means "hard fault."
Read the instruction sheet for your specific charger. It takes thirty seconds and saves hours of guessing.
Mistake 8: Throwing a Faulty Pack in the Trash
Lithium-ion and nickel-cadmium packs are hazardous waste. They don't belong in household trash or general recycling.
A punctured lithium cell in a trash truck is a real fire risk. Tape the terminals, bag the pack, and take it to a battery drop-off point.
A Quick Cost Comparison of the Wrong Path
| Approach | Cost | Time | Outcome |
|---|---|---|---|
| Buy a new pack immediately | $25 to $80 | 2 to 5 days | Often doesn't fix it |
| Buy a new pack and new charger | $60 to $140 | 3 to 7 days | Overkill for a contact issue |
| Clean contacts and reseat | $0 to $5 | 5 minutes | Fixes the majority of cases |
| Cooldown and retry | $0 | 30 to 60 minutes | Fixes thermal faults |
| Proper diagnosis then one part | $0 to $80 | 1 to 5 days | Correct fix at minimum cost |
The pattern is obvious. Diagnosis is free. Replacement is not.
Safety, Warranty, and Recycling: What Not to Do With a Faulty Pack
A blinking red light is a warning sign, not a disaster. But there are real safety boundaries here, and crossing them is how people get hurt.
Take these seriously. Lithium cells store a lot of energy in a small package.
Warning Signs That Mean Stop Immediately
Stop using the pack and charger if you notice any of these:
- The pack casing is bulging, swollen, or deformed
- You can smell a sweet or solvent-like odor near the pack
- The pack is hot to the touch while sitting idle
- You see discoloration, blistering, or scorch marks on the pack or charger
- The pack rattles when shaken, suggesting internal damage
- Any liquid or residue has leaked from the pack
These signs point to a damaged cell. Don't charge it. Don't test it.
Don't put it back in the light. Isolate it outdoors on a non-flammable surface and contact a hazardous waste facility.
The Safety Standards Behind the Design
Streamlight packs and chargers are built to recognized safety standards. Knowing which ones helps you understand why the charger is so cautious.
| Standard | What it covers |
|---|---|
| UL 1642 | Safety of lithium cells |
| UL 2054 | Safety of lithium battery packs |
| IEC 62133-2 | Portable sealed secondary lithium cells and batteries |
| UN/DOT 38.3 | Lithium battery transport testing |
| ANSI/NEMA FL1 | Flashlight performance ratings |
The charger's fault behavior is a direct consequence of these requirements. Standards bodies like UL and IEC publish the technical detail behind them.
Charging Best Practices
Follow these to reduce the chance of a fault and extend pack life:
- Charge on a non-flammable surface like a metal bench or tile floor
- Don't leave a suspect pack charging unattended overnight
- Keep chargers away from flammable materials and clutter
- Use the OEM adapter or a matching replacement
- Charge at room temperature, not in extreme heat or cold
- Don't charge a pack you just pulled off a light that ran on high for a long time
None of these are dramatic. All of them matter.
Intrinsically Safe and Hazardous Location Lights
If you use an intrinsically safe Streamlight in a hazardous location, extra rules apply. These lights are rated for use in explosive atmospheres. Charging them in the wrong area defeats the rating.
Only charge IS-rated lights in approved areas with the correct charger. Some departments require charging in designated safe rooms. Follow your site's rules.
This is a legal and safety matter, not a suggestion.
Warranty: What's Covered and What Isn't
Streamlight's limited lifetime warranty covers the light body and most internal components. Batteries and chargers typically fall under a separate two-year term.
What's usually covered:
- Manufacturing defects in the charger or pack
- Premature failure of a pack well within its expected cycle life
- LED or switch failure on the light itself
What's usually not covered:
- Normal wear and tear on a pack past its cycle life
- Damage from water ingress outside the rated depth
- Physical damage from drops, crushing, or misuse
- Packs charged with non-OEM adapters
- Modifications or repairs by unauthorized parties
Have your purchase date and model numbers ready before you call. Support can usually tell you in a minute whether you have a valid claim.
Recycling: The Right Way to Dispose of a Pack
Never put a lithium-ion or nickel-cadmium pack in household trash. Never put it in curbside recycling either.
Call2Recycle runs a take-back network across North America. Drop-off points are common at hardware stores, big-box retailers, and municipal transfer stations.
Tape the terminals with electrical tape before transport. This prevents a short if the pack touches metal in a bag.
If the pack is swollen or damaged, don't transport it casually. Call your local hazardous waste facility first. They'll tell you how to package it safely.
Fire Service and Department-Level Considerations
Many fire departments have their own battery inspection and replacement schedules. A pack may be replaced on a fixed timeline regardless of how it performs.
If you're a fire service user, follow your department's policy. Don't rely on the warranty alone to decide when a pack comes out of service.
Some departments rotate packs on a schedule. Others use dedicated charging rooms. Follow the local procedure.
It exists for a reason.
Quick Decision Guide: Symptom to Cause to Fix
Here's the whole troubleshooting flow in one place. Match your symptom, read the likely cause, and try the fix before you buy anything.
Symptom Table
| Symptom | Most likely cause | First fix to try |
|---|---|---|
| Blinks red immediately on insertion | Contact issue or wrong chemistry | Clean contacts, confirm pack chemistry |
| Blinks red after a few seconds | Pack voltage out of range | Try a known-good pack, check for over-discharge |
| Blinks red only in a hot vehicle | Thermal lockout | Let pack cool to room temp, retry indoors |
| Blinks red only in cold weather | Thermal lockout | Warm pack indoors, retry |
| Blinks red, pack is new and OEM | Seating or wrong bay | Reseat, check bay labeling |
| Blinks red with an aftermarket 18650 | Wrong cell profile | Fit a protected button-top cell |
| Blinks red, pack is three years old | Worn pack | Replace with OEM pack |
| Blinks red with any pack in this charger | Charger fault | Swap test, check adapter and outlet |
| Solid red never turns green | Worn pack or weak charger | Full overnight cycle, then test runtime |
| Green immediately, light is dim | Pack reports false voltage | Run light to dim, retry, then replace pack |
| No LED at all | No power | Check outlet, adapter, 12V fuse |
The If/Then Flow
Follow this order. Stop as soon as the fault clears.
- If the LED is dark: check the outlet, adapter, and any 12V fuse. Try a different circuit.
- If the LED is solid red: wait. Some steady bays run around 10 hours.
- If the LED is solid green but the light is dim: run the light down, retry. If it happens again, replace the pack.
- If the LED blinks red: pull the pack and confirm it seats with a click.
- If seating is good: clean the contacts with isopropyl alcohol.
- If contacts are clean: confirm the pack chemistry matches the charger.
- If chemistry matches: let the pack reach room temperature and retry.
- If temperature isn't the issue: try a known-good pack in the same charger.
- If the known-good pack faults: the charger is faulty. Test the adapter and outlet next.
- If the known-good pack charges: your original pack is the problem. Replace it.
When to Stop and Call Support
Call Streamlight support if you've worked through the flow and the fault persists. Have your model numbers, purchase date, and LED behavior notes ready.
Call them sooner if the pack shows any physical damage, if the charger smells burnt, or if the pack gets hot during charge. Those are safety stops, not troubleshooting steps.
Frequently Asked Questions
Does a blinking red light mean the battery is dead?
No, not usually. A blinking red LED means the charger has aborted the charge cycle. The most common causes are dirty contacts, poor seating, thermal lockout, or a chemistry mismatch.
A genuinely dead pack is one possibility among many. Always rule out the cheap fixes first.
Can I reset a Streamlight charger to clear the fault?
Most Streamlight chargers don't have a reset button. The fault clears when the underlying condition does. Unplug the charger, pull the pack, wait 60 seconds, then plug back in.
If the fault returns with a good pack, the charger itself is the issue.
How long should a Streamlight pack take to charge?
Most single-bay cradles take three to five hours. Stinger PiggyBack fast bays run around 2.5 hours, and steady bays take about 10 hours. If your pack is still charging after 12 hours on a cradle rated for less, stop and investigate.
Why does my charger blink red only in my truck?
That's almost always thermal. A vehicle interior can hit 140°F or higher in summer, which is well above the safe charging range for lithium-ion cells. Bring the pack indoors, let it reach room temperature, then charge.
Cold winter temperatures trigger the same response.
Will an aftermarket 18650 work in my Streamlight?
Only if it's a protected button-top cell matching the OEM profile. Most aftermarket 18650s are unprotected flat-tops. They fit physically but don't make contact, so the charger faults.
Buy a protected button-top cell or the OEM pack.
Is it safe to keep using a pack that's blinked red a few times?
It depends on why. If the cause was a dirty contact or a temperature lockout, the pack is fine once the fault clears. If the pack is swollen, hot at rest, or smells unusual, stop using it.
Those are signs of a damaged cell and a genuine fire risk.