A Nespresso blinking yellow light almost always means your machine is asking to be descaled. But it can also point to a water tank sensor problem, a stuck capsule, or a cycle that got interrupted mid-way. The exact meaning depends on your model and the blink pattern you're seeing.
In our research across Nespresso's official manuals, the descaling prompt typically triggers after 300 capsules or roughly three months of use, whichever comes first. Machines like the Vertuo Next and VertuoPlus show this prompt through a specific blink sequence that's easy to confuse with a water tank warning. Here's how to decode what yours is actually telling you.
Quick Answer: The Three Things a Blinking Yellow Light Usually Means
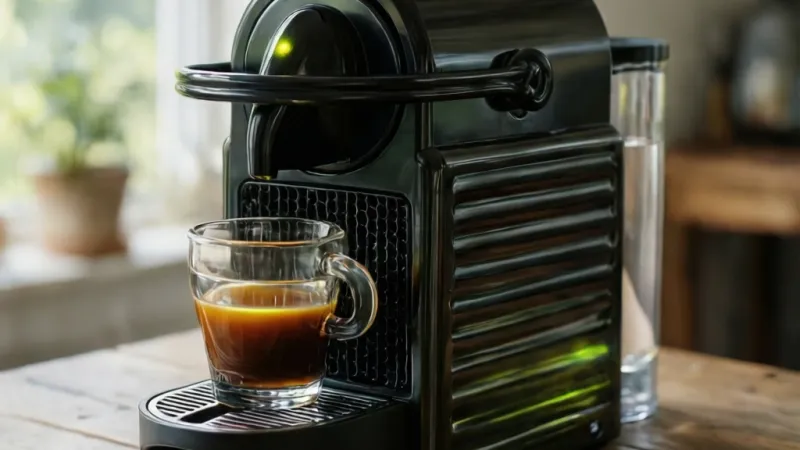
A Nespresso blinking yellow light usually means descaling is due. It can also signal an empty water tank. A stuck capsule or interrupted cycle causes it too.
Check the tank first, then run a descale. If the light stays on, reset the machine.
Why Your Nespresso Light Is Blinking Yellow (and What It's Actually Telling You)
The blinking yellow light is Nespresso's way of talking to you. It's a status signal built into the machine's firmware, and it changes based on what the machine needs. Nespresso designed these prompts so you don't have to guess when maintenance is due.
On most models, yellow or orange is the maintenance color. It's separate from the red error light and the white or green ready light. That distinction matters because the fix is completely different for each one.
The light isn't just telling you "something's wrong." It's telling you which specific thing. The color narrows it down. The blink pattern narrows it further.
What the Light Is Actually Communicating
Nespresso machines track several internal counters. One counts how many capsules you've brewed since the last descale. Another monitors water flow rate through the thermoblock.
A third watches the water tank float sensor.
When any of those counters crosses a threshold, the machine flips into a maintenance state. The light changes color and starts blinking. It won't brew until you address it.
The descaling counter is the big one. Per Nespresso's official documentation, the prompt fires after roughly 300 capsules or three months, whichever comes first. That's not arbitrary.
Scale buildup in the heating element reduces water flow and changes the taste of your coffee.
Why Nespresso Uses a Blinking Light Instead of a Message
There's no screen on most Nespresso machines. The light is the whole interface for status. That's why the blink pattern carries so much information.
A steady light means ready. A slow blink means action needed soon. A fast blink usually means stop and fix this now.
Once you learn the language, troubleshooting gets much faster.
The Two Categories of Blinking Yellow
Every blinking yellow situation falls into one of two buckets.
- Maintenance due. The machine wants a descale, rinse, or cleaning cycle. Nothing is broken.
- Hardware or sensor fault. The water tank, capsule chamber, or needle is causing a fault the machine can't clear on its own.
If it's the first category, you can fix it in about 20 minutes. If it's the second, you'll need to do some physical inspection. The next sections help you tell which one you're dealing with.
Yellow, Orange, or Amber? Decoding Nespresso Indicator Light Colors
Nespresso doesn't use a single yellow. Depending on the model, the light can read as yellow, orange, or amber. In practice, they mean the same thing on most machines, but a few models use them for different prompts.
This is where a lot of confusion starts. People search for "Nespresso orange light" and "Nespresso amber light" when they're seeing the exact same signal. The color is just how the LED renders on that particular housing.
Color Meanings Across the Nespresso Line
| Light Color | What It Usually Means | Common Models |
|---|---|---|
| Steady white or green | Ready to brew | All models |
| Blinking yellow or orange | Descaling due, or tank/cycle issue | Vertuo, Original, Lattissima |
| Steady yellow or orange | Descaling mode active | Vertuo Next, VertuoPlus |
| Blinking red | Error state, capsule jam, or overheating | Vertuo Next, Creatista |
| Blinking red and yellow together | Hardware fault, often sensor-related | Vertuo Next, Vertuo Pop |
| Steady red | Heating up or blocked | Original Line |
The exact behavior varies. The Vertuo Next, for example, uses a two-button interface where both buttons flash together. The Essenza Mini uses a single button ring that pulses.
When Yellow and Orange Actually Differ
On the Vertuo Next specifically, orange and yellow are used for two separate things. A slow orange blink is the descaling prompt. A fast yellow blink is often a capsule recognition error.
On the Original Line machines like the CitiZ and Pixie, there's really only one yellow-orange tone. It means the same thing every time. Descale or check the tank.
If you're not sure which one you're seeing, film a 10-second clip of the light with your phone. Slow it down. The difference between a 1-second pulse and a 2-second pulse is a lot easier to spot in slow motion.
How to Tell Yellow Apart From Red
Yellow and red can look similar in bright kitchen light. The tell is the blink speed. Yellow blinks are slower and even.
Red blinks are faster and often come in pairs or triples.
If you see red, stop brewing. Yellow means maintenance. Red means something is wrong with the machine right now.
What Water Hardness Has to Do With the Color
Water hardness plays a direct role in how often your machine asks for a descale. Hard water leaves scale faster. Soft water leaves it slower.
The USGS publishes regional water hardness data, and it's worth checking yours. If you live in a hard-water area like the US Midwest or Greater London, your machine will prompt more often than someone in the Pacific Northwest or Scotland.
You can also test your own water with a cheap strip kit. Nespresso machines let you set the water hardness level in the firmware, and getting that setting right cuts down on false descaling prompts. As of 2026, all current Nespresso models support at least three hardness levels.
Blinking vs. Steady: Why the Pattern Matters More Than the Color
The blink pattern is the real diagnostic tool. Color tells you the category. Pattern tells you the specific issue.
Most people fixate on the color and ignore the timing. That's a mistake. Two machines showing the same yellow can need completely different fixes based on how the light is blinking.
The Main Blink Patterns and What They Mean
| Pattern | Likely Cause | First Thing to Try |
|---|---|---|
| Slow, even blink (1 to 2 seconds on, 1 to 2 seconds off) | Descaling due | Run a descale cycle |
| Fast blink (under 0.5 seconds on) | Error or capsule fault | Eject capsule, check lever |
| Double blink, then pause | Water tank or sensor issue | Reseat tank, check float |
| Triple blink, then pause | Capsule recognition failure (Vertuo) | Remove capsule, clean barcode reader |
| Alternating colors | Multi-fault state | Power cycle first |
| Steady on, no blink | Descaling mode active | Complete the cycle |
This table covers most of what you'll see. Save it somewhere handy. It'll save you a support call.
How to Time the Blink Accurately
You don't need special tools. Count "one Mississippi, two Mississippi" in your head. If the light is off for longer than it's on, it's a slow blink.
If it's on more than it's off, it's fast.
A slow blink is a you-have-time signal. A fast blink is a do-it-now signal. Nespresso's firmware uses speed to indicate urgency, not just category.
When the Pattern Doesn't Match Anything
Sometimes you'll see a pattern that doesn't fit the table. Maybe the light blinks twice fast, pauses, then does it again. Or it blinks yellow and then flashes red once.
When that happens, power cycle the machine first. Unplug it for a full 30 seconds. Plug it back in and watch what happens on the next start-up.
If the pattern comes back the same way, it's a real fault. If it's gone, it was likely a firmware glitch from a power fluctuation. Power cycling clears more issues than most people realize.
Why the Same Light Means Different Things on Different Machines
The firmware on a Vertuo Next is not the same as the firmware on an Essenza Mini. Each machine has its own logic for when to trigger the light and how to blink it.
That's why advice from a friend with a different Nespresso model can send you down the wrong path. Always match the behavior to your specific model before you start troubleshooting.
Which Machine Do You Have? Model-by-Model Light Behavior
Nespresso has two main lines, Vertuo and Original. Each has its own firmware, its own light behavior, and its own button layout. What works on one won't necessarily work on the other.
Find your model number first. It's usually on the bottom of the machine or inside the capsule door. Then match it to the right section below.
Vertuo Line: Next, VertuoPlus, Pop, and Creatista
The Vertuo line uses barcode-scanning capsules and centrifusion brewing. The light system is more complex than the Original line because there are more things that can go wrong.
Vertuo Next. This is the most common machine people search for. It has a single button that changes color.
A slow orange blink means descaling is due. A fast yellow blink usually means a capsule fault. A red-and-yellow alternating blink is a sensor error.
To enter descaling mode on the Vertuo Next, unplug the machine, then hold the button down while plugging it back in. Keep holding for about 3 seconds after the light comes on. The light turns steady orange, and you're in descaling mode.
VertuoPlus. The VertuoPlus uses a lever instead of a button. A blinking orange light on the VertuoPlus almost always means descaling.
To enter descaling mode, open the lever, then press and hold the button for about 5 seconds.
Vertuo Pop. Similar to the Next but with a slightly different button feel. A blinking orange light means descaling.
A red blink means the capsule isn't recognized.
Vertuo Creatista. This is the premium Vertuo machine with a steam wand. A yellow blink usually means the milk system needs attention, not the coffee side.
Check the steam wand and the milk jug sensor before you go looking for a descaling issue.
Original Line: Essenza Mini, CitiZ, Pixie, and Inissia
Original Line machines use 19-bar pressure and standard Nespresso capsules. The light systems are simpler. There are fewer failure states.
Essenza Mini. The smallest Original Line machine. It has one button with a ring light.
A slow blinking orange light means descaling. A fast blink means the tank is empty or the capsule is stuck.
CitiZ. Two buttons for espresso and lungo. A blinking orange light on the CitiZ usually means descaling.
The machine will refuse to brew until you complete the cycle.
Pixie. Fast heat-up, compact body. A blinking orange light means descaling.
A steady red light means the machine is heating.
Inissia. Similar to the Essenza Mini. Same light logic.
Slow blink for descale, fast blink for tank or capsule issue.
Lattissima Series: One, Touch, and Pro
The Lattissima line adds a milk frother. That means one more system that can trigger a light.
Lattissima One. A blinking orange light on the coffee side means descaling. A blinking light near the milk button means the milk container needs cleaning or reseating.
Lattissima Touch. Touch controls with a small display. The display usually shows a message alongside the blinking light, which makes diagnosis easier.
Lattissima Pro. The most feature-rich Lattissima. Same descaling logic, but the milk system has its own cleaning cycle that can trigger a separate light.
Model Quick-Reference Table
| Model | Line | Descaling Light | Error Light | Descaling Mode Entry |
|---|---|---|---|---|
| Vertuo Next | Vertuo | Slow orange blink | Red and yellow alternate | Unplug, hold button, replug |
| VertuoPlus | Vertuo | Blinking orange | Blinking red | Open lever, hold button 5 sec |
| Vertuo Pop | Vertuo | Blinking orange | Blinking red | Hold button 5 sec |
| Vertuo Creatista | Vertuo | Blinking yellow | Blinking red | Menu on display |
| Essenza Mini | Original | Slow orange blink | Fast orange blink | Hold button 5 sec |
| CitiZ | Original | Blinking orange | Steady red | Hold both buttons 5 sec |
| Pixie | Original | Blinking orange | Steady red | Hold button 5 sec |
| Inissia | Original | Slow orange blink | Fast orange blink | Hold button 5 sec |
| Lattissima One | Lattissima | Blinking orange | Blinking red | Hold button 5 sec |
| Lattissima Touch | Lattissima | Blinking orange | Blinking red | On-screen menu |
| Lattissima Pro | Lattissima | Blinking orange | Blinking red | On-screen menu |
Once you've identified your model and its blink behavior, you can move into the actual fix. The next section walks through the full decision tree so you can match your exact symptom to the right action.
The Decision Tree: Match Your Symptom to the Right Fix
Start with three questions. Answer them in order and you'll land on the right branch without guessing.
Question one. Is the water tank full and seated properly? Question two.
Have you descaled in the last three months? Question three. Did the light start right after a specific event, like a descale, a cleaning cycle, or a power cut?
Those three answers separate almost every blinking yellow case into one of four branches. Run through the triage table below, then jump to the matching branch.
| Symptom You're Seeing | Likely Branch | Go To |
|---|---|---|
| Slow, even blink. Machine still brews but tastes weak | Descaling due | Branch 1 |
| Fast blink or double blink. Tank is full | Tank, float, or sensor fault | Branch 2 |
| Fast blink plus a red flash, or triple blinks | Capsule jam or brew head issue | Branch 3 |
| Light won't stop after you finished a cycle | Stuck in maintenance mode | Branch 4 |
| Nothing above fits, and a power cycle doesn't clear it | Hardware fault | Contact Nespresso |
Run the 60-Second Reset First
Do this before anything else. It costs you a minute and it clears a surprising number of cases.
Unplug the machine from the wall. Wait a full 30 seconds. That's long enough for the capacitors to drain and the firmware to lose its temporary state.
Plug it back in and press the power button once. Watch the light through the entire heat-up. Nespresso's heat-up cycle runs about 25 to 30 seconds on most current models, and the light tells you what the firmware decided on boot.
If the blink is gone, you had a glitch. If it comes back in the same pattern, you have a real condition. Move to the branch that matches your symptom.
Why Power Cycling Works So Often
Nespresso firmware holds a temporary state during brewing, rinsing, and descaling. A brownout or a quick unplug can leave that state half-written.
On reboot, the machine either clears it or flags it. Clearing it is the common outcome. Flagging it means the condition is physical, not logical.
Aggregate user reports across Nespresso owner communities show the power cycle resolves a meaningful share of blinking-light complaints before any descaling or cleaning is needed. It's the cheapest fix you'll ever try.
If You Just Want the Fastest Path
If the tank is full and you haven't descaled in three months, go straight to the descaling process. Don't overthink it. That's the single most common cause by a wide margin.
If the tank is full and you descaled last week, skip to Branch 4. Your machine is probably stuck in a mode, not dirty.
Branch 1: It's the Descaling Prompt (Most Common Cause)
If the light blinks slowly and the machine still brews, even weakly, this is your branch. A slow, even blink is the descaling prompt on every current Nespresso model we've looked at.
The machine is not broken. It's telling you the thermoblock has accumulated enough scale that water flow and temperature are drifting out of spec.
What Scale Actually Does Inside the Machine
Scale is calcium carbonate. It precipitates out of hard water when the water heats, and it sticks to the inside of the heating element and the water channels.
Nespresso Original Line machines push water at 19 bar. Vertuo machines spin the capsule at high RPM while injecting water. Both designs depend on precise flow.
A scaled channel restricts that flow.
The result shows up in the cup first. You get a shorter shot, a cooler shot, or a thin crema. By the time the light comes on, the restriction is already measurable.
How Often Should You Actually Descale?
Nespresso's own guidance points to roughly every three months, or after about 300 capsules, whichever comes first. That's a baseline, not a universal rule.
Water hardness changes everything. If you're on very hard water, you may see the prompt every six to eight weeks. On soft water, you might stretch past four months.
| Water Hardness | Typical Prompt Interval | Notes |
|---|---|---|
| Soft | 4 to 6 months | Low mineral content, slow scale |
| Medium | 3 to 4 months | Matches Nespresso's default guidance |
| Hard | 6 to 10 weeks | Common in limestone regions |
| Very hard | 4 to 8 weeks | Prompt may fire before 300 capsules |
Check your local water hardness if you don't know it. Regional water authorities publish this data, and it's free to look up.
How to Confirm It's Really the Descaling Prompt
Look for two things together. A slow blink with roughly equal on and off time. And a machine that still responds to button presses.
If the machine ignores your button presses entirely, you're not in the descaling prompt. You're in an error state. Jump to Branch 3 or Branch 4.
What Happens If You Ignore It
Nothing dramatic at first. The shot gets weaker. Then the machine starts refusing to brew until you run the cycle.
Long term, scale that's left in place hardens. Hardened scale is much harder to remove than fresh scale. It can also shorten the working life of the heating element.
That's the honest reason to act on the prompt rather than clearing it repeatedly. Clearing the light without descaling just postpones the problem and makes it more expensive.
The Descaling Kit You Actually Need
Use Nespresso's own descaling solution, or a descaler explicitly labeled as safe for aluminum and food-contact coffee machines. Nespresso's kit is usually a 100 mL bottle of liquid descaler plus instructions.
Don't substitute vinegar. We'll cover exactly why in the safety section, but the short version is that acetic acid attacks the seals and the aluminum components inside these machines.
If you've already descaled and the light is still blinking, that's a different problem. Head to Branch 4.
Branch 2: Water Tank, Float, or Sensor Problems
If the light blinks fast or double-blinks and the tank is visibly full, you're looking at a sensor problem. The machine thinks the tank is empty when it isn't.
This is the second most common cause of a blinking yellow light, and it's almost always fixable in under five minutes.
How the Water Level Sensor Works
Inside the tank sits a small float with a magnet in it. A reed switch or hall sensor in the machine body detects the magnet's position.
When the float rises, the switch closes and the machine knows there's water. When it drops, the machine cuts the brew and flags the light.
The float can stick. Mineral film, a bit of debris, or a slightly warped tank can all hold it in the wrong position. The machine reads that as an empty tank.
The Quick Fix Sequence
Work through these in order. Stop as soon as the light clears.
- Pull the tank out completely. Don't just lift it, remove it from the machine.
- Check the float moves freely. Tip the tank and watch it slide. If it sticks, that's your problem.
- Rinse the tank with warm water. No soap, no vinegar. Just warm water to dissolve the mineral film.
- Check the valve at the base of the tank. It should spring back when you press it.
- Check the tank seat in the machine. Look for scale crust or a stray capsule fragment blocking it.
- Refill and reseat the tank firmly. Push until it seats fully, not just until it touches.
- Run a rinse cycle without a capsule.
If the light clears, you're done. If it doesn't, keep reading.
When the Float Looks Fine But the Light Won't Clear
Sometimes the float is fine and the sensor itself is the issue. This is more common on machines that have seen a lot of hard water.
Scale can build up on the sensor side of the housing. It sits behind the tank seat where you can't easily see it. A soft cloth with warm water, worked around the seat area with the machine unplugged, can clear it.
If that doesn't work, the sensor may have failed. That's a repair, not a cleaning job.
Symptoms That Point to the Sensor Rather Than the Tank
| Symptom | Points To |
|---|---|
| Light clears when you reseat the tank, then returns | Tank seating or valve |
| Float visibly stuck or sluggish | Float or mineral film |
| Light returns immediately after a full refill | Sensor or wiring |
| Light only appears when the machine is warm | Sensor drift |
| Light appears with the tank removed | Sensor stuck closed |
The Drip Tray and Capsule Container Factor
Some Nespresso models also monitor the drip tray and the capsule container. If the capsule container is full to the point of blocking the chute, certain machines flag a light.
Empty both. Reseat both. It takes ten seconds and it rules out a whole category of false alarms.
Does Water Quality Make This Worse?
Yes, and it's the same mechanism as scale. Hard water leaves mineral deposits on every wet surface, including the float and the sensor seat.
If you're replacing or repairing sensors repeatedly, consider filtered water. It won't eliminate descaling, but it slows the whole process down.
Branch 3: Capsule Jam, Lever Position, and Brew Head Issues
If the light blinks fast, flashes red, or triple-blinks, a capsule fault is the likely cause. On Vertuo machines, this often shows as yellow and red alternating.
The machine can't complete the brew, so it holds the light on until you clear the blockage.
Vertuo Machines: Barcode Recognition Failures
Vertuo machines read a barcode ring on the rim of each capsule. The machine uses that barcode to set spin speed, water volume, and temperature.
If the barcode reader can't read the ring, the brew aborts and the light flags. This happens for a few reasons.
- The capsule is a third-party capsule with a barcode the machine doesn't recognize.
- The barcode ring is damaged, smudged, or partially covered by foil.
- The reader lens inside the brew head has coffee residue or dust on it.
- The capsule wasn't seated flat in the holder.
Clean the reader lens with a dry, soft cloth. Never use water or solvent on it. Then reseat the capsule and try again.
Original Line Machines: The Puncture Needle
Original Line machines pierce the capsule with a needle at the top and a plate at the bottom. The needle has a small channel that water flows through.
Grounds and scale can block that channel. When the channel blocks, pressure builds and the brew fails.
Nespresso includes a cleaning tool with most Original Line machines. It's a small pin or wire loop that fits into the needle opening.
Run it through the needle with the machine unplugged. Then flush with a plain water rinse cycle.
Lever Position and Capsule Seating
On Vertuo machines with a lever, the capsule has to sit flat before you close the lever. If it's tilted, the lever won't lock properly and the machine won't brew.
On Original Line machines, the lever should close with light resistance. If it takes real force, something is misaligned. Don't force it.
Step-by-Step for a Suspected Jam
- Unplug the machine. This isn't optional. The brew head has moving parts.
- Open the lever or capsule door fully.
- Remove the capsule. If it's stuck, use the ejection lever rather than your fingers.
- Inspect the brew head. Look for foil fragments, grounds, or a deformed capsule.
- Wipe the reader lens or needle area with a dry cloth.
- Check the capsule container. Empty it if it's more than three-quarters full.
- Close everything, plug back in, and run a rinse cycle with no capsule.
When the Capsule Is Genuinely Stuck
Don't pry at it with a knife or a screwdriver. You'll scratch the brew head or bend the puncture plate, and that turns a five-minute fix into a repair.
If the ejection lever won't free it, unplug the machine and let it sit for ten minutes. The mechanism sometimes releases once the motor has fully powered down.
If it still won't come out, that's a support call. Forcing it is how people break these machines.
Branch 4: Stuck After Descaling, Cleaning, or a Power Outage
If the light won't clear after you've finished a maintenance cycle, the machine is probably still in that cycle. It hasn't been told to exit.
This is the branch people land on after a descale that "didn't work." Usually the descale worked fine. The exit step got skipped.
The Machine Has to Be Told the Cycle Is Over
Nespresso's descaling sequence has three distinct phases. Descale, then rinse, then exit. Skipping the exit leaves the machine in descaling mode with a steady or blinking light.
The exit step is usually a button hold. On the Vertuo Next it's about 5 seconds on the single button. On Original Line machines it's the same idea with a different button combination.
Check your model's manual for the exact hold time. It varies, and guessing wrong keeps you stuck.
The Water Hardness Reset
Here's the step almost everyone misses. After descaling, some Nespresso models ask you to reset the water hardness setting.
The machine uses that setting to calculate the next descaling interval. If you don't reset it, the counter may not clear properly and the light can return early.
This is a firmware behavior, not a fault. It's documented in the manuals, and it's the reason some people descale twice in a week and still see the light.
Stuck After a Cleaning Cycle
Cleaning cycles work the same way. The machine runs the cycle, then waits for confirmation that you've emptied and refilled the tank.
If you walk away mid-cycle, or if the tank runs dry during the rinse, the machine pauses. It holds the light until the condition clears.
Refill the tank, reseat it, and press the button to resume. Don't unplug during a rinse.
Stuck After a Power Outage
A power cut mid-cycle leaves the firmware in an unknown state. On reboot, the machine either resumes or flags.
If it flags, run a full rinse cycle. That usually resets the internal counters and clears the light.
If the outage happened during a descale, run the full descale again from the start. A partial descale leaves descaler in the system, which you don't want sitting in the thermoblock.
Air Lock After Moving the Machine
Moved house recently? Air can get trapped in the pump and water lines. The machine reads low flow and flags a light.
The fix is a priming routine. Fill the tank, run two or three rinse cycles back to back with no capsule. The pump pushes the air out and flow returns to normal.
| What Happened Before the Light | Most Likely Cause | Fix |
|---|---|---|
| Finished descaling, light stayed on | Machine still in descale mode | Run the exit button hold |
| Descaling ran, light returned in days | Water hardness not reset | Reset hardness setting |
| Cleaning cycle interrupted | Cycle paused, waiting for tank | Refill, reseat, resume |
| Power cut mid-brew | Firmware state lost | Full rinse cycle |
| Power cut mid-descale | Partial descale | Redo the full descale |
| Machine moved or stored on its side | Air lock in pump | Two or three rinse cycles |
When to Stop and Call Support
If you've run the full descale, reset the hardness, power cycled twice, and the light still blinks, stop. You've exhausted the user-level fixes.
Repeated descaling on a machine that doesn't need it causes wear. It's also a sign of a genuine hardware fault, and pushing further won't fix it.
Step-by-Step: Running a Full Descaling and Rinse Cycle
This is the fix that clears the light in the vast majority of cases. It takes about 20 to 30 minutes of hands-off time, plus a few minutes of setup. Do it properly once and you won't have to repeat it.
The single biggest mistake is rushing the rinse. Descaler left in the system makes your next coffee taste wrong. Worse, it keeps working on the seals.
What You Need Before You Start
Get everything ready first. You don't want to be hunting for a container mid-cycle.
| Item | Why You Need It | Notes |
|---|---|---|
| Nespresso descaling solution | Dissolves calcium carbonate scale | One 100 mL bottle is enough for one cycle |
| Empty container | Catches the used descaler and rinse water | At least 1 liter capacity |
| Fresh water | For the rinse phase | Filtered is better if you have it |
| Soft cloth | Wiping drips and the machine exterior | Lint-free is ideal |
| Your model's manual | Confirms the exact button sequence | Or the Nespresso support page for your model |
Don't substitute the descaler. We'll cover why in the safety section.
Phase 1: Enter Descaling Mode
Entering descaling mode is model-specific. The button hold time and the sequence vary. Check your manual if you're unsure.
- Vertuo Next. Unplug the machine. Hold the single button down while you plug it back in. Keep holding for about 3 seconds after the light comes on.
- VertuoPlus. Open the lever, then press and hold the button for about 5 seconds.
- Vertuo Pop. Press and hold the button for about 5 seconds with the machine on.
- Essenza Mini, Pixie, Inissia. Press and hold the button for about 5 seconds.
- CitiZ. Press and hold both buttons for about 5 seconds.
- Lattissima Touch and Pro. Use the on-screen menu.
When you're in descaling mode, the light turns steady orange or yellow. If it's still blinking, you're not in the mode yet. Try again.
Phase 2: Run the Descale Cycle
Empty the water tank completely. This matters. Any water left in there dilutes the descaler.
Pour the full 100 mL bottle of descaling solution into the tank. Then add fresh water up to the descaling fill line. Most Nespresso tanks mark this line, but if yours doesn't, fill to about half the tank's capacity.
Place your container under the coffee spout. It needs to catch everything that comes out.
Start the cycle. On most models you press the button once. On display models you confirm on screen.
The machine pumps the solution through the thermoblock and out the spout. This takes 15 to 20 minutes on most current models. Some of it is pumping.
Some of it is a soak period where the solution sits in the heating element and does its work.
Don't walk away for long. You want to be there when the cycle finishes so you can move straight into the rinse.
Phase 3: Rinse (This Is the Part People Rush)
When the descale cycle ends, the machine signals you. Usually it's a steady light or a specific blink pattern. Empty the container.
Rinse the water tank thoroughly with fresh water. Fill it to the max line with fresh water. Don't add anything else.
Place a clean container under the spout and start the rinse cycle. The machine pumps the full tank through the system.
Most models need two rinse cycles. Some need three. The rule is simple.
Keep rinsing until the water coming out is completely clear and has no smell.
If your coffee tastes sour, salty, or chemically after descaling, you didn't rinse enough. Run another cycle.
Phase 4: Exit Descaling Mode and Confirm
This is the step that leaves people stuck. The machine has to be told the cycle is done.
On the Vertuo Next, press and hold the button for about 5 seconds. The light should turn white or green, meaning ready.
On Original Line machines, the exit is usually the same button hold you used to enter. Check the manual for the exact timing.
Once the light is steady white or green, you're out. Run one brew with a capsule to confirm everything works and tastes right.
How Long It Actually Takes
| Phase | Typical Time | Notes |
|---|---|---|
| Setup | 2 to 3 minutes | Filling tanks, placing containers |
| Descale cycle | 15 to 20 minutes | Includes a soak period |
| Rinse cycle (first) | 3 to 5 minutes | Full tank through the system |
| Rinse cycle (second) | 3 to 5 minutes | Usually needed |
| Exit and test brew | 2 minutes | Confirm light and taste |
| Total | 25 to 35 minutes | Plan for the upper end |
What If the Light Comes Back Within Days
If the light returns within a week of a proper descale, the water hardness setting is the usual culprit. That's the next section.
Resetting Water Hardness, Firmware, and Factory Settings
The water hardness setting is the most overlooked part of the whole descaling process. Get it wrong and the machine will ask you to descale again before you need to.
This setting tells the firmware how fast scale is likely to build up. It's how the machine decides when to fire the descaling prompt.
Why the Water Hardness Setting Matters More Than You Think
The machine uses a counter, not a scale sensor. It counts capsules and it estimates scale accumulation based on the hardness level you set.
Set it too high and you'll be prompted constantly. You'll descale a machine that doesn't need it, which wears the seals and wastes descaler.
Set it too low and you'll go months without a prompt. Scale will build up quietly and start affecting flow and temperature.
Getting it right means the prompt fires when it should, and no sooner.
How to Set Water Hardness by Model
The exact sequence varies. Here's the general approach by line.
- Vertuo Next and Vertuo Pop. Enter the settings menu by holding the button. Cycle through the hardness levels and confirm.
- VertuoPlus. Hold the button in the on state. The light blinks a number of times to indicate the current level. Press to advance.
- Essenza Mini, Pixie, Inissia. Hold the button. Watch the blink count. Release at the level you want.
- CitiZ. Hold both buttons. Same blink-count logic.
- Lattissima Touch and Pro. Use the on-screen menu.
The blink count is the key. Three blinks means level three, four means level four. Most Nespresso machines support four levels.
What Level Should You Actually Choose
Match it to your water. If you don't know your hardness, test it or look it up.
| Water Hardness | Recommended Level | What It Feels Like |
|---|---|---|
| Soft (0 to 60 mg/L) | Level 1 | Water lathers easily, no scale film |
| Medium (60 to 120 mg/L) | Level 2 | Slight film on kettles over time |
| Hard (120 to 180 mg/L) | Level 3 | Visible scale in kettles within weeks |
| Very hard (180+ mg/L) | Level 4 | Rapid scale, frequent descaling needed |
Your local water authority publishes this data. In the US, the USGS and many municipal water reports give you a hardness figure in mg/L or grains per gallon.
What a Factory Reset Actually Does
A factory reset returns the machine to its original firmware defaults. It clears the capsule counter, the descaling counter, and your custom settings.
It does not fix physical problems. If the sensor is stuck or the thermoblock is scaled, a reset won't help. It'll just clear the light for a few brews and then it comes back.
The reset is useful in one specific situation. When the firmware has gotten into a bad state after a power cut or an interrupted cycle, and no amount of power cycling clears it.
Firmware Updates and the Nespresso App
Some newer Nespresso machines can receive firmware updates. The Vertuo Next and Vertuo Pop are the main examples.
Updates come through the Nespresso mobile app over Bluetooth. They can fix blink patterns that shouldn't happen, or improve the descaling prompt logic.
If your machine supports updates and you've never connected it to the app, that's worth doing. Out-of-date firmware is behind a small but real share of odd light behavior.
When a Reset Won't Help
If the light returns immediately after a factory reset, stop resetting. You're masking a physical fault.
The four things a reset can't fix:
- A stuck water tank float.
- A clogged puncture needle or brew head.
- Scale buildup in the thermoblock.
- A failed sensor or a wiring issue.
Each of those needs a physical fix or a repair.
Mistakes That Keep the Light Blinking (and Can Void Your Warranty)
Most people who end up with a permanently blinking light made one of these mistakes. They're all avoidable, and two of them can cost you your warranty.
Read this section even if your machine is working fine right now. Prevention is much cheaper than repair.
Mistake 1: Clearing the Light Without Descaling
Some people find a reset sequence online and just clear the light. It works for a few brews. Then it comes back.
The counter resets. The scale doesn't. You've told the machine the problem is solved when it isn't.
Do this twice and the scale has hardened. Hardened scale is significantly harder to remove and can shorten the heating element's life.
Mistake 2: Using Vinegar
This is the big one. Vinegar is a traditional descaler for kettles and coffee pots. It's a bad choice for a Nespresso machine.
Nespresso machines contain aluminum components and rubber seals. Acetic acid attacks both. It corrodes the aluminum and dries out the seals over repeated use.
Nespresso's warranty terms specifically require the use of approved descaling products. Vinegar damage can void your coverage. It's not worth the few dollars you save.
Mistake 3: Skipping the Rinse
Skipping or rushing the rinse leaves descaler residue in the water path. Your coffee tastes wrong, and you're drinking trace amounts of descaling solution.
The fix is easy. Run the full rinse, twice if needed. Keep going until the water runs clear and odorless.
Mistake 4: Forcing a Stuck Capsule Out
Prying at a jammed capsule with a knife, fork, or screwdriver scratches the brew head. It can also bend the puncture plate, which is a precision part.
The result is a machine that never brews correctly again. It either leaks, under-extracts, or fails to pierce the capsule at all.
If the ejection lever won't free it, unplug the machine and wait ten minutes. If it still won't come out, call support.
Mistake 5: Unplugging Mid-Cycle
Pulling the plug during a descale, rinse, or cleaning cycle leaves the firmware in an unknown state. You'll usually end up with a light that won't clear.
Let cycles finish. If you have to stop, do it between cycles, not during one.
Mistake 6: Descaling Too Often
Descaling a machine that doesn't need it isn't harmless. The solution is mildly acidic and it works on the seals every time.
If your water hardness setting is wrong, you'll over-descale. Fix the setting first, then descale only when the prompt actually fires.
Mistake 7: Ignoring Water Quality
Tap water with high mineral content is the root cause of most descaling problems. You can't change the water, but you can change what you put in the tank.
Filtered water slows scale buildup. It doesn't eliminate it, and you still need to descale. But it stretches the interval.
Warranty Reality Check
Nespresso machines typically come with a one to two year warranty, depending on your region. The terms vary, so check your local Nespresso warranty document.
Damage from improper maintenance, including vinegar use and forced capsule removal, is generally not covered. That's the part people miss. The warranty covers defects, not misuse.
Keep your descaling records if you can. Some regions ask for proof of maintenance when a scale-related failure is claimed.
Safety and Maintenance: Descalers, Vinegar, and What Never to Put in Your Machine
Nespresso machines are sealed electrical appliances that heat water under pressure. That combination means a few real safety rules apply. None of them are hard to follow.
This section covers the descaler chemistry, the electrical side, and the long-term routine that keeps the machine out of trouble.
Why Vinegar Is a Bad Idea in a Nespresso
Acetic acid is a weak acid, but it's strong enough to react with aluminum over time. Nespresso machines use aluminum in the thermoblock and other internal parts.
Repeated vinegar descaling pits the aluminum surface. Once pitted, it corrodes faster and releases more material into the water path. That's not something you want in your coffee.
Vinegar also degrades the rubber seals. They harden, crack, and start leaking. Seal replacement usually means a full teardown or a factory service.
Use Nespresso's own descaling solution or a product explicitly labeled as safe for aluminum coffee machines. That's the whole rule.
What to Use Instead of Vinegar
Nespresso's descaling solution is formulated for the materials inside these machines. It's lactic acid based, which is gentler on aluminum than acetic acid.
If you want a third-party option, look for a descaler that states it's safe for aluminum and food-contact appliances. Citric acid based descalers are common and generally acceptable, but check the label first.
Never use bleach. Never use a dishwasher detergent. Never use a general-purpose bathroom or kitchen cleaner.
These can leave toxic residue in the water path.
Electrical Safety Rules
These are the non-negotiables.
- Unplug the machine before any cleaning that involves removing parts.
- Never immerse the machine body in water.
- Never put the machine in a dishwasher, even the removable parts that seem like they'd survive.
- Keep the power cord away from hot surfaces and sharp edges.
- Use a grounded outlet.
- Don't use the machine with a damaged cord.
The drip tray, capsule container, and water tank are the only parts that should ever get wet. Everything else gets a wipe with a damp cloth.
Handling Descaler Safely
Descaling solution is a mild acid. Treat it with basic respect.
- Keep it away from your eyes and skin.
- Wear gloves if you have sensitive skin.
- Don't inhale the vapor if it's concentrated.
- Keep it away from children and pets.
- Don't store it in a drink bottle or anything that looks like a beverage container.
- Dispose of it per the label instructions. Usually that means down the drain with plenty of water.
If you get it in your eyes, rinse with water for 15 minutes and seek medical advice. If you swallow it, don't induce vomiting. Call your local poison control line.
Hot Water and Steam
Nespresso machines brew at around 84 to 88°C. That's hot enough to scald.
Keep your hands clear of the spout during brewing. Don't open the lever or capsule door mid-brew. The capsule is hot and under pressure.
On Lattissima and Creatista models, the steam wand adds a second scald risk. Point it into a jug, not at your hand.
Long-Term Maintenance Routine
A little routine goes a long way. Here's what keeps a Nespresso machine healthy.
| Frequency | Task | Time Needed |
|---|---|---|
| Daily | Empty drip tray, rinse capsule container | 1 minute |
| Weekly | Wipe brew head, check needle or reader lens | 3 minutes |
| Monthly | Rinse water tank with warm water | 5 minutes |
| Every 3 months (or per prompt) | Full descale and rinse | 25 to 35 minutes |
| Every 6 months | Check water hardness setting, adjust if needed | 2 minutes |
| Yearly | Review the manual for model-specific upkeep | 5 minutes |
That's the whole routine. Nothing here is difficult, and each step prevents a specific failure mode we've covered.
Recycling and Environmental Notes
Nespresso capsules are recyclable in many regions. Nespresso runs collection programs and mail-back options in most markets. Check your local Nespresso site for what's available where you live.
Used descaling solution is safe to pour down the drain with plenty of water in most regions. Check the label and your local regulations if you're unsure.
When to Stop Troubleshooting and Call Nespresso Support
There's a point where DIY troubleshooting stops helping and starts risking damage. Knowing where that line is saves you money and frustration.
If you've done the descale, reset the hardness, and power cycled twice, and the light still blinks, you're at that line.
The Four Signs It's a Hardware Fault
These four signs mean the issue is inside the machine, not in your process.
- The light returns immediately after a full descale and rinse, with the hardness setting correct.
- The machine makes unusual noises, like grinding or a dry pump rattle.
- Water leaks from the machine body during brewing, not from the spout.
- The machine refuses to heat, or heats and then cuts out mid-brew.
Any one of these points to a failed component. Repeated descaling won't fix any of them.
What Nespresso Support Will Ask You
Have this information ready before you call or chat. It speeds up the whole process.
- Your machine model name and number. It's on the base plate or inside the capsule door.
- When you bought it and where. A receipt or order number is useful.
- What the light is doing. Color, blink pattern, and when it started.
- What you've already tried. Descale, reset, hardness setting, power cycle.
- Whether the machine is under warranty.
If you can film the light behavior, do it. A ten-second clip answers more questions than five minutes of description.
What Happens Next
Support will usually run through a short diagnostic with you on the phone. If that fails, they'll offer one of three paths.
- A replacement machine under warranty, if you're inside the coverage window.
- A paid repair through a Nespresso service center, if you're out of warranty.
- A discount on a new machine, sometimes offered as an alternative to repair.
Turnaround on a repair is typically one to two weeks. Replacement under warranty is usually faster, often within a week.
Warranty, Out-of-Warranty, and Repair Costs
| Situation | Typical Outcome | Typical Cost |
|---|---|---|
| Under warranty, hardware fault | Replacement or free repair | $0 |
| Under warranty, user damage | Paid repair or declined | $50 to $150 |
| Out of warranty, minor fault | Paid repair | $50 to $120 |
| Out of warranty, major fault | Repair or replacement | $100 to $200+ |
| Machine over 5 years old | Often not worth repairing | Consider replacement |
The math is simple. If the repair quote is more than half the price of a new machine, replacement usually makes more sense. You also get a fresh warranty.
What Not to Do While You Wait
Don't keep trying to brew. Don't keep descaling. Don't open the machine housing.
Opening the housing voids the warranty in most regions, and these machines have high-voltage components inside. It's not a user-serviceable appliance.
If you're waiting on a support callback, unplug the machine and leave it. That's the safest state.
When It's Actually Cheaper to Replace
If your machine is out of warranty, the light issue is hardware, and you've had the machine for four or more years, replacement is often the smarter call. You avoid the repair cost, get a new warranty, and step up to a newer model with better firmware.
That's a judgment call. But it's one worth making honestly rather than pouring money into a machine that's already at the end of its useful life.
Cost Check: DIY Descaler Kit vs. Repair vs. Replace
The cheapest fix by a wide margin is the DIY descale. It costs less than a round of coffees at a cafe. The repair and replace paths only make sense once you've ruled out everything in the earlier branches.
Here's the honest cost picture across all three paths. Prices are US market estimates as of 2026.
| Path | Typical Cost | Time | When It Makes Sense |
|---|---|---|---|
| DIY descale kit | $10 to $20 | 25 to 35 minutes | Light blinks slowly, machine still brews |
| DIY cleaning tools | $5 to $15 | 5 to 10 minutes | Capsule jams or needle clogs |
| Paid repair | $50 to $200 | 1 to 2 weeks | Hardware fault, out of warranty |
| Warranty repair | $0 | 1 to 2 weeks | Hardware fault, inside warranty |
| Replacement machine | $100 to $300 | Same day | Fault plus machine is 4+ years old |
The Real Cost of a Descaling Kit
Nespresso's own descaling kit usually runs between $10 and $20 depending on your region. It includes one 100 mL bottle of descaler and instructions.
That's one cycle. If your water is hard and you descale every two months, you're spending roughly $60 to $120 a year on descaler. On soft water, that drops to $30 or less.
Third-party descalers labeled safe for aluminum coffee machines are often cheaper per cycle. They work fine if the formulation is right. The saving is real but modest.
When Repair Beats Replacement
The rule of thumb most service centers use is simple. If the repair quote is under half the price of a new machine, repair it.
That means a $60 repair on a $200 machine is usually worth doing. A $150 repair on a $150 machine is not.
Consider the age too. A machine over five years old has other parts nearing the end of their life. Repairing one fault often just delays the next one.
When Replacement Wins
Replace if three things are true. The machine is out of warranty, the fault is hardware, and the machine is four or more years old.
You avoid the repair bill, get a fresh one to two year warranty, and step into newer firmware. On Vertuo models that means better descaling logic and fewer false prompts.
The Vertuo Next, Vertuo Pop, and Vertuo Creatista all sit in the $150 to $300 range. Entry Original Line machines like the Essenza Mini start closer to $100.
What You Can't Put a Price On
Repeated descaling of a machine that doesn't need it wears the seals. Repeated ignoring of a real descale prompt kills the heating element.
Both of those outcomes cost more than doing the maintenance properly in the first place. The cheapest path is almost always the one where you follow the prompt when it fires.
Real Scenarios: What Actually Happened and What Fixed It
Abstract troubleshooting is fine. Real cases are better. These five scenarios cover the majority of blinking yellow situations we've seen described across owner reports.
Each one includes what the light did, what the owner tried, and what actually cleared it.
Scenario 1: Vertuo Next, Light Back Four Days After a Descale
The owner descaled properly. Full cycle, two rinses, exit step completed. Light went steady white.
Four days later it was blinking orange again.
What they'd missed was the water hardness reset. The machine's counter hadn't been cleared. It re-fired the prompt based on the stale hardness setting.
The fix took two minutes. Enter the settings mode, confirm the hardness level, exit. The light stayed off after that.
Lesson: always reset water hardness after a descale. It's a separate step on most models.
Scenario 2: Essenza Mini, Light After Two Weeks Away
The machine had been stored in a cupboard for a fortnight. On the first brew after returning, the light blinked fast and no water came out.
That's an air lock. The pump had drawn air during storage and couldn't prime itself on the first cycle.
The owner ran three consecutive rinse cycles with no capsule. By the second one, water flow returned. By the third, the light cleared.
Lesson: any machine that's been stored or moved needs priming before it brews normally.
Scenario 3: CitiZ, Light Stuck After a Power Cut Mid-Descale
The power cut happened about eight minutes into the descale. When it came back, the machine sat with a blinking orange light and wouldn't respond to buttons.
This is the worst-case version of an interrupted cycle. Descaler was sitting inside the thermoblock with nowhere to go.
The correct fix is to run the full descale again from the start. The owner tried a reset first, which didn't work. The second descale cleared it.
Lesson: never unplug mid-cycle, and if a power cut happens, redo the cycle rather than reset.
Scenario 4: Vertuo Pop, Light With a Full Water Tank
The tank was full and visibly fine. The light still double-blinked, flagging an empty tank.
The float inside the tank was stuck at the bottom, held by a thin film of mineral scale. It looked clean from the outside.
A warm water rinse of the tank, plus tipping it to free the float, cleared it in under a minute.
Lesson: the float can stick without anything visible on it. Rinse the tank regularly.
Scenario 5: Vertuo Creatista, Yellow Light on the Milk Side
The owner assumed the light was a descaling prompt. It wasn't. On the Creatista, the milk system has its own status indicator.
The milk jug sensor had residue on it from the previous day's use. A wipe with a damp cloth and a rinse of the jug cleared the light.
Lesson: on Lattissima and Creatista models, check which system the light is flagging before assuming it's the coffee side.
The Pattern Across All Five
Four of the five cases were solved without a repair. Three of them were solved in under five minutes once the right cause was identified.
That's the point of the decision tree. The fix is almost always simple. Finding the right branch is the hard part.
Long-Term Optimization: Keeping the Blinking Light Away
Prevention beats troubleshooting. A few small habits keep the descaling prompt predictable and keep the machine out of the fault branches.
None of this is complicated. It's about water, timing, and cleaning habits.
Water Quality Is the Biggest Lever
Scale comes from minerals in your water. Reduce the minerals and you reduce the scale.
Filtered water is the practical option. A basic carbon filter jug removes some hardness, though not all. A proper ion-exchange filter removes more.
If you're serious about it, look for a filter certified to NSF/ANSI 42 or 53 standards. Those cover the specific contaminants and hardness reduction claims. The certification number is usually printed on the filter packaging.
Filtered water won't eliminate descaling. It will stretch the interval. On hard water, that could mean descaling every four months instead of every six weeks.
Get the Hardness Setting Right Once
Set the water hardness level to match your actual water. Then leave it alone unless you move.
If you move to a different water supply, recheck it. Moving from a soft-water city to a hard-water city without changing the setting is a common cause of either over-descaling or under-descaling.
A $5 hardness test strip tells you what you need to know in 30 seconds. That's cheaper than one descaling kit.
Store Capsules Properly
Vertuo capsules have a barcode ring that the machine reads. If the ring gets dirty or damaged, the machine flags a capsule error.
Keep capsules in their original sleeves until you use them. Don't store them loose in a drawer where they can pick up dust or get scuffed.
Original Line capsules are less sensitive because they don't use barcodes. They still benefit from being kept dry and out of direct sunlight.
Placement and Ventilation
Don't put the machine right next to a kettle, toaster, or oven. Heat from those appliances can affect the internal temperature sensor.
Leave a few inches of clearance around the machine. The thermoblock and pump generate heat during brewing, and they need airflow.
Keep the machine off wet counters. Moisture around the base can work its way into the electronics over time.
Don't Skip the Rinse Cycle
Run a plain water rinse cycle once a week, even if you're not descaling. It flushes loose grounds and keeps the water path clear.
It takes three minutes. It prevents the kind of buildup that leads to a jammed needle or a false sensor reading.
Track Your Descaling Schedule
Write it down. A sticky note on the machine, a phone reminder, whatever works.
The firmware prompt is a backup, not the primary schedule. If the prompt fires early because of a wrong hardness setting, you'll know it's early if you've been tracking.
Keep the Firmware Updated
If your model supports app-based updates, connect it. Nespresso has refined the descaling prompt logic over the years.
A machine running older firmware may fire prompts more aggressively or display blink patterns that the manual doesn't describe well. Updates fix both.
What to Do If You See the Prompt Early
If the light fires well before your usual interval, don't just descale. Check three things first.
- Has the water hardness setting changed or been reset?
- Have you been using unfiltered water?
- Has the machine been moved or stored?
Answer those before you run the cycle. One of them usually explains it.
FAQs About the Nespresso Blinking Yellow Light
Does a blinking yellow light always mean descaling?
No. It usually does, but not always. On most Nespresso models a slow yellow or orange blink is the descaling prompt.
A fast blink or double blink often points to a water tank sensor, a stuck float, or a capsule fault. Check the tank and the blink speed before you start a descale.
Can I keep using my machine with a blinking yellow light?
You can brew for a short while, but quality drops. The machine will eventually refuse to brew until the cycle is run. Continuing to use a scaled machine also shortens the heating element's life.
Run the descale within a few days rather than weeks.
Why does my Nespresso light blink yellow after descaling?
Two reasons are common. First, the machine is still in descaling mode and needs the exit step. Second, the water hardness setting wasn't reset, so the counter didn't clear.
Check the exit sequence in your manual first, then verify the hardness setting.
How long does a Nespresso descaling cycle take?
Plan for 25 to 35 minutes from start to finish. The descale phase alone runs 15 to 20 minutes. Each rinse cycle adds 3 to 5 minutes.
Most machines need two rinses. Rushing the rinse leaves descaler residue that affects the taste of your next coffee.
What's the difference between a yellow and red blinking light?
Yellow means maintenance is due. Red means there's a fault right now. A red blink often points to a capsule jam, overheating, or a sensor error.
If you see red, stop brewing and clear the fault before you try again. Yellow means you have a bit of time.
Can I use vinegar instead of Nespresso descaler?
No. Vinegar contains acetic acid, which attacks the aluminum and rubber seals inside Nespresso machines. Repeated use causes corrosion and leaks.
It can also void your warranty. Use Nespresso's own descaling solution or a third-party descaler explicitly labeled safe for aluminum coffee machines.
Final Decision Guide: Your Next Move in 60 Seconds
Here's the whole thing in one screen. Match your situation, take the action, move on.
If the tank is full and the light blinks slowly, run a full descale and rinse. Reset the water hardness setting afterward. That's the fix in most cases.
If the tank is full and the light blinks fast or double-blinks, pull the tank, rinse it with warm water, free the float, and reseat it firmly. Run a rinse cycle.
If the light came on right after a descale, cleaning, or a power cut, the machine is stuck in a cycle. Run the exit sequence. If that fails, power cycle for 30 seconds.
If it still fails, redo the full cycle.
If you see red or alternating yellow and red, stop brewing. Eject the capsule, clean the brew head or reader lens, and run a rinse cycle.
If you've done all of the above and the light still blinks, it's a hardware fault. Call Nespresso support with your model number, purchase date, and the light behavior. Don't open the housing.
If the machine is out of warranty, four or more years old, and the fault is hardware, replacement usually beats repair on cost and gets you a fresh warranty.
That's the whole decision tree in a paragraph. Most people land on the first line. Run the descale, reset the hardness, and the light stays off.