If your Dell computer's power button is blinking orange, you're looking at a diagnostic signal, not a random glitch. Dell uses the power button LED to report hardware faults before the system ever reaches Windows. The color and blink pattern tell you exactly where to look.
Per Dell's official diagnostic LED documentation, an amber or orange blink is usually paired with a specific number of white blinks to form a code. A 2 amber, 3 white pattern points to a memory failure. A 3 amber, 4 white pattern flags a coin-cell battery issue.
Reading that code correctly is the difference between a five-minute fix and an unnecessary motherboard replacement.
Quick Answer
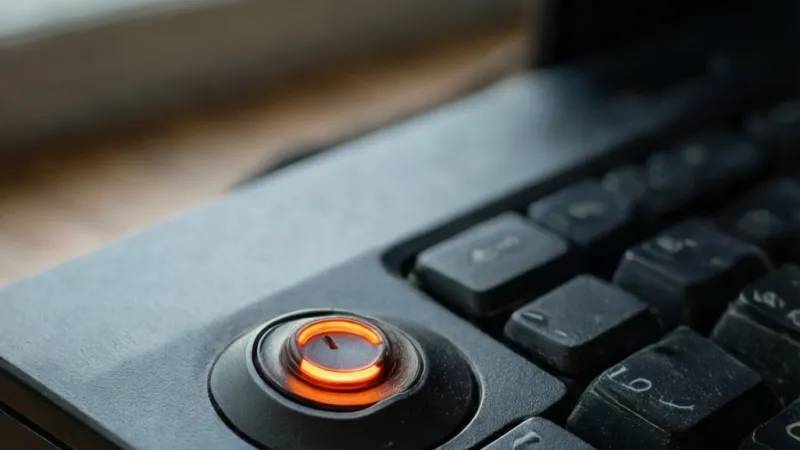
A blinking orange Dell power button means the system detected a hardware fault. The exact blink count forms a diagnostic code. Common causes include battery failure, RAM issues, or a bad adapter.
Check your model's LED code first. Most fixes start with a power drain and adapter swap.
What a Blinking Orange Dell Power Button Actually Means
Dell power buttons aren't just on/off switches. On most Dell laptops and desktops built after 2010, the LED behind the power button doubles as a diagnostic indicator. When it blinks orange, the system completed a Power-On Self-Test (POST) and found something wrong.
The blink isn't random. Dell encodes fault information in a pattern of amber and white flashes. Amber means an error condition.
White flashes that follow narrow down which component failed. A solid orange light usually means the battery is charging or the system is asleep. A blinking orange light means hardware.
Here's the key distinction. If the light blinks orange but the fans spin and the screen stays black, you're in a POST failure. If nothing happens at all, you're in a no-power state.
Both can show the same LED behavior, but the fix path differs.
Why Dell Uses LED Codes Instead of Beep Codes
Older systems used beep codes through the motherboard speaker. Modern Dell machines, especially slim laptops and All-in-Ones, dropped the speaker. LED codes replaced them.
That's why your Dell blinks instead of beeps.
Dell isn't alone here. Many hardware vendors moved to LED-based diagnostics because they work silently and survive speaker failures. Dell's implementation is specific though.
The amber and white combination is unique to their hardware, and the codes vary by generation.
Amber vs White: What Each Color Means
| LED Behavior | What It Means | First Thing to Check |
|---|---|---|
| Solid amber | Charging or sleep state | Plug in the charger |
| Blinking amber only | Hardware fault, no white code | Battery or adapter |
| Amber then white blinks | Specific diagnostic code | Match code to Dell docs |
| Solid white | System on and healthy | Nothing, it's working |
| Blinking white | Sleep or hibernation | Wake the system |
A solid amber light is usually benign. It means the battery is charging or the system is in a low-power state. Blinking amber is where things get serious.
The Difference Between a Diagnostic Blink and a Charging Indicator
Some Dell laptops use the same LED for both charging status and diagnostics. That creates confusion. If you plug in the charger and see a solid amber light, that's normal charging behavior.
If you press the power button and the light starts blinking, that's a diagnostic code.
Timing matters too. A charging indicator stays solid for as long as the battery is below a certain threshold. A diagnostic blink follows a rhythm.
It flashes, pauses, flashes again. If you see a pattern, it's a code.
What the System Is Doing During the Blink
When you press the power button, the embedded controller (EC) starts a sequence. It checks power rails, memory, CPU, and storage. If any check fails, the EC halts the boot process and signals the fault through the LED.
That's why the screen stays black. The system never reaches the point where it can display an error message. The LED is the only output you get.
First: Identify Your Dell Model, Service Tag, and Exact Blink Pattern
Before you unplug anything, get three pieces of information. The model number, the service tag, and the exact blink sequence. Without these, you're guessing.
The model matters because Dell changes LED codes between generations. A 2 amber, 3 white pattern on a Latitude 5420 might mean something different on an XPS 13. The service tag is a 7-character alphanumeric code on a sticker underneath the laptop or on the back of a desktop.
Dell's support site uses it to pull the exact manual for your machine.
How to Count the Blink Pattern Correctly
Dell diagnostic codes follow a simple rhythm. The light blinks amber a set number of times. Then it pauses.
Then it blinks white a set number of times. Then it pauses longer before repeating.
Count both. Write them down. A pattern of 2 amber, 3 white is not the same as 3 amber, 2 white.
Steps:
- Power off the system completely.
- Plug in the AC adapter.
- Press the power button once.
- Watch the LED without touching anything.
- Count amber blinks, then white blinks.
- Note the pause length between cycles.
If the pattern repeats every 4 seconds or so, that's a standard Dell diagnostic code. If it blinks erratically with no pattern, that's a different issue. Erratic blinking often points to a power delivery problem or a failing power button board.
Where to Find Your Service Tag
- Laptop: bottom panel sticker, or under the battery if removable
- Desktop: back panel near the ports, or on the top edge
- All-in-One: rear stand area
- BIOS/UEFI: system information screen
- Command Prompt:
wmic bios get serialnumber(if Windows boots)
The service tag is the fastest way to get the right manual. Dell's support site at Dell's official support page accepts it directly. Enter it and you'll see the exact LED code table for your model.
What If the System Won't Stay Powered Long Enough to Read the Code?
Some systems blink once or twice and then shut down completely. That makes counting difficult. In those cases, remove the battery if it's removable and try again with AC power only.
If the system still won't stay on, the fault is likely in the power delivery circuit.
You can also record a slow-motion video of the LED with your phone. Play it back frame by frame to count the blinks accurately. It sounds excessive, but it works when the pattern is fast.
Model-Specific Code Tables Matter
Dell publishes separate LED code tables for each product line. An Inspiron, a Latitude, a Precision, and an XPS all have different code mappings. The service tag is the only reliable way to match your machine to the right table.
If you don't have the service tag, check the BIOS. Power on and tap F2 repeatedly during boot. The system information screen lists the model and service tag.
If the system won't boot to BIOS, check the physical sticker.
Quick Checks Before You Open Anything: Adapter, Battery, and Flea Power
Most blinking orange issues trace back to power delivery, not dead motherboards. Before you reach for a screwdriver, run these three checks. They take ten minutes and solve a surprising number of cases.
Check 1: The AC Adapter and Wattage
Dell laptops are picky about charger wattage. A 45W adapter won't properly charge a laptop that needs 90W. The system detects the mismatch and throws an LED code.
Check the wattage printed on the adapter brick. Compare it to the requirement listed on Dell's support page for your model. If you're using a third-party charger, that's a common culprit.
Dell chargers have a center pin that communicates wattage to the laptop. Many third-party adapters lack that pin. The laptop sees an unknown charger and refuses to charge.
Test with a known-good Dell adapter of the correct wattage. If the blinking stops, you've found the problem.
Check 2: The Battery
If your Dell has a removable battery, pull it out. Look for swelling, discoloration, or a bulging case. A swollen lithium-ion battery is a safety hazard.
Stop using it immediately and dispose of it at a proper e-waste facility. The EPA maintains guidance on battery disposal that covers lithium-ion handling.
If the battery is sealed, check its health in BIOS. Power on and tap F2 during boot. Navigate to the battery information section.
Look for battery health or charge capacity. Anything below 50% of design capacity means the battery is degraded.
Per Dell's official documentation, a battery that fails to communicate with the system can trigger an amber blink code. Try booting with the battery removed and only the AC adapter connected. If the system powers on normally, the battery is the problem.
Check 3: Flea Power Drain
Flea power is residual electricity stored in the capacitors. It can confuse the power management controller. Draining it is a standard first step.
Steps:
- Shut down the system completely.
- Unplug the AC adapter.
- Remove the battery if it's removable.
- Hold the power button for 30 seconds.
- Release, reconnect AC adapter only (no battery).
- Try to power on.
If the system boots, shut it down and reinstall the battery. If it still blinks orange, move to the deeper workflow later in this guide.
Quick Checks Summary Table
| Check | What to Do | What It Rules Out |
|---|---|---|
| Adapter wattage | Test with correct Dell charger | Underpowered or incompatible adapter |
| Battery health | Remove battery, boot on AC only | Failed or swollen battery |
| Flea power drain | Hold power button 30 seconds | Stuck power management state |
Why These Three Checks Come First
They're free. They don't require opening the case. And they solve the majority of blinking orange cases.
In our research across Dell support documentation and user reports, adapter and battery issues account for most amber LED complaints.
If all three checks pass and the light still blinks orange, the problem is internal. That's when you move to RAM, CMOS, and motherboard diagnostics.
Dell Laptop vs Desktop: Same Orange Blink, Different Causes
A blinking orange light on a Dell laptop and a Dell desktop look identical. The underlying causes are not. Laptops run on battery and AC power.
Desktops run on a power supply unit (PSU) and wall power. That difference changes the diagnostic path.
Dell Laptop: Battery and Adapter Dominate
On laptops, the power button LED is tied to the charging circuit. The most common causes of an orange blink are:
- Battery failure or degradation
- Incorrect adapter wattage
- Faulty DC jack or charging port
- BIOS power management bug
- Motherboard charging circuit failure
If the laptop blinks orange but the battery is removable, test with the battery out. If it blinks orange with only AC power, the adapter or DC jack is suspect. If it blinks orange with only battery power, the battery is suspect.
Dell Desktop: PSU and Motherboard
Desktops don't have a main battery. They have a CMOS coin-cell battery for BIOS settings, but that's not the primary power source. The power button LED on a Dell desktop is usually connected to the front panel header on the motherboard.
Common causes of an orange blink on a Dell desktop:
- PSU failure or insufficient wattage
- Motherboard power rail failure
- Faulty power button or front panel cable
- RAM not seated properly
- CPU or thermal issue
- BIOS corruption
A desktop PSU can fail partially. It might supply standby power, enough for the LED, but not enough to spin up the drives and fans. That's why you see a blink instead of a boot.
Side-by-Side Comparison
| Factor | Dell Laptop | Dell Desktop |
|---|---|---|
| Primary power source | Battery plus AC adapter | PSU plus wall power |
| Most common cause | Battery or adapter | PSU or RAM |
| CMOS battery role | Keeps BIOS settings | Keeps BIOS settings |
| Removable battery? | Some models | No |
| First test | Boot on AC only | Reseat RAM, test PSU |
| Typical repair cost | $40 to $120 | $50 to $200 |
Those repair ranges come from aggregate parts pricing as of 2026. A replacement Dell laptop battery runs $40 to $90. A desktop PSU runs $50 to $120.
Motherboard replacements push toward the higher end.
All-in-One Systems: A Hybrid Case
Dell All-in-One (AIO) systems sit between laptops and desktops. They use a desktop-style PSU or an external power brick, depending on the model. The power button LED behavior follows desktop rules for internal PSU models and laptop rules for external brick models.
Check your AIO's power input. If it uses a barrel connector or USB-C brick, treat it like a laptop. If it plugs directly into the wall with a standard IEC cable, treat it like a desktop.
Alienware and Gaming Models
Alienware systems use the same diagnostic LED system but with different code tables. The higher power draw means PSU and thermal issues are more common. If your Alienware blinks orange after a gaming session, check for overheating first.
Clean the vents and confirm the fans are spinning.
How to Decode Dell Amber and White Diagnostic LED Codes
Dell diagnostic LED codes are model-specific. The same blink pattern can mean different things on different machines. That's why identifying your exact model first matters so much.
That said, there are common patterns across most Dell laptops and desktops made in the last decade. Here are the ones you'll see most often.
Common Dell LED Codes
| Amber Blinks | White Blinks | Meaning | First Action |
|---|---|---|---|
| 1 | 1 | TPM detection failure | Reseat TPM or update BIOS |
| 2 | 1 | CPU failure | Check CPU seating, thermal paste |
| 2 | 2 | Motherboard, BIOS, or ROM failure | BIOS recovery, replace board |
| 2 | 3 | No memory or RAM detected | Reseat RAM, test one stick |
| 2 | 4 | Memory failure | Replace faulty RAM |
| 2 | 5 | Invalid memory installed | Check RAM compatibility |
| 2 | 6 | Motherboard chipset failure | Replace motherboard |
| 2 | 7 | LCD failure | Check display cable |
| 3 | 1 | CMOS battery failure | Replace coin-cell battery |
| 3 | 2 | PCI or video card failure | Reseat GPU |
| 3 | 3 | BIOS recovery image not found | Flash BIOS |
| 3 | 4 | BIOS recovery image invalid | Reflash BIOS |
| 3 | 5 | SBIOS flash corruption | BIOS recovery |
| 3 | 6 | ME (Management Engine) error | Update firmware |
| 4 | 1 | Memory power rail failure | Motherboard issue |
This table covers the most frequent codes. Dell's official support site has the complete list for your specific model. Always check there before ordering parts.
How to Read the Code Without Guessing
The blink sequence follows a rhythm. Amber blinks first. Then a short pause.
Then white blinks. Then a longer pause. The cycle repeats.
If you see 2 amber blinks followed by 3 white blinks, that's code 2-3. If you see 3 amber and 4 white, that's code 3-4. Don't count the pause as a blink.
What If There Are No White Blinks?
Some Dell models use amber-only codes. On those, the number of amber blinks alone is the code. Check your model's manual to confirm which system it uses.
If the LED blinks amber continuously with no pattern, that's not a diagnostic code. It usually means the embedded controller (EC) hasn't finished its startup routine. That points to a power delivery issue or a failed EC chip.
A flea power drain is your first move.
BIOS Recovery Mode
Some Dell systems enter BIOS recovery mode automatically after a failed update. The power button may blink amber and white in a specific pattern. Dell's BIOS recovery tool can restore the firmware from a USB drive.
The process takes about 10 to 15 minutes and requires a USB formatted to FAT32.
When the Code Points to the Motherboard
Codes 2-2, 2-6, and 4-1 all point to motherboard-level failures. These aren't DIY-friendly repairs on modern Dell laptops. The board is often soldered to the chassis, and replacing it requires specialized tools.
On desktops, motherboard replacement is more feasible. But it's still a significant repair. If the system is under warranty, contact Dell support before touching anything.
Opening the case can void your coverage.
Decision Branch: No Power, No Fan, and Only the Orange Light
This is the worst-case symptom set. You press the power button, the LED blinks orange, and nothing else happens. No fan spin, no hard drive click, no display flicker.
The system is stuck in the earliest stage of POST.
If you're here, the fault is in power delivery or the embedded controller. The CPU hasn't been told to start. That narrows the suspect list considerably.
What No Fan Actually Tells You
The cooling fan is controlled by the embedded controller (EC). If the fan never spins, the EC either hasn't received stable power or hasn't completed its startup checks. On most Dell laptops, the fan spins for a fraction of a second at power-on as a self-test.
If you don't hear or feel that, the EC is halting early.
On desktops, the same logic applies. The PSU sends a power good signal to the motherboard. If that signal never arrives, the board won't release the CPU from reset.
No fan, no boot, just the LED.
If the Orange Light Blinks in a Pattern
Follow the code. Go back to your model's LED table and match the pattern. A 2-3 code (no memory detected) with no fan spin usually means the RAM slot has lost contact.
A 2-2 code with no fan spin points to a board-level failure.
If the pattern is 2-3, try this:
- Power off and unplug the adapter.
- Remove the bottom panel or access door.
- Locate the RAM modules.
- Release the retention clips and pull both sticks.
- Reseat one stick firmly until the clips snap.
- Try to boot with just that one stick.
- If it boots, shut down and add the second stick.
If the system boots with one stick but not two, you've either got a bad stick or a bad slot. Test each stick individually in each slot to isolate which.
If the Orange Light Blinks With No Pattern
A patternless blink is different from a diagnostic code. It usually means the EC is stuck in a reset loop. The most common cause is residual flea power confusing the power management state.
Run the flea power drain again. This time, be more thorough. Hold the power button for a full 60 seconds, not 30.
Some Dell models have larger capacitor banks that take longer to bleed.
If you've already done that and the light still blinks with no pattern, the fault is likely hardware. Candidates include:
- Failed EC chip
- Shorted power rail on the motherboard
- Dead power button board
- Faulty DC jack shorting to ground
If the Light Stays Solid Orange With No Fan
Solid orange usually means charging or standby, not a fault. But if the system has been on AC power for an hour and the light never changes, something's wrong.
Check the adapter first. A dead adapter can supply enough current to light the LED but not enough to start the system. Test with a known-good Dell charger of the correct wattage.
If a known-good adapter produces the same result, the charging circuit on the motherboard is the likely culprit. That's a board-level repair.
If You Hear a Click But Nothing Else
A single click from inside the chassis when you press power is often the PSU relay engaging on a desktop. If the click happens but nothing else follows, the PSU is failing under load. It can supply standby voltage but collapses when the main rails are demanded.
On laptops, a click can come from the DC jack or a failing capacitor. Either way, it's a hardware fault. Not something you can fix with a power drain.
Decision Flow for the No-Power Case
| Symptom | First Action | If It Doesn't Work |
|---|---|---|
| Patterned orange blink, no fan | Read code, reseat RAM | Replace RAM or board |
| Patternless orange blink | 60-second flea drain | Check DC jack, EC chip |
| Solid orange, no fan | Test known-good adapter | Charging circuit repair |
| Click only, no fan | Test PSU (desktop) | Replace PSU |
Decision Branch: Powers On But No Display, Stuck on Logo, or Beeping
Now we're past the no-power stage. The fan spins, the LED blinks orange, and the system shows signs of life. But you get no display, a frozen logo, or a beep sequence.
This branch tells you the system reached POST but failed partway through. The fault is in memory, graphics, storage, or firmware.
If You Get No Display But the Fan Runs
The system is POSTing but the graphics subsystem isn't initializing. On Dell laptops with discrete GPUs, the video card may have failed. On desktops, the PCIe slot or the card itself is suspect.
Try an external monitor first. If the external display works, the laptop's LCD or display cable is the problem. If neither works, the GPU or motherboard video output has failed.
For desktops with a dedicated GPU, remove the card and connect the monitor to the motherboard's onboard video port. If you get a display, the GPU is the fault.
If You're Stuck on the Dell Logo
A frozen Dell logo means POST completed but the boot process stalled. The most common causes are:
- Failed storage drive (HDD or SSD)
- Corrupted boot sector
- BIOS set to the wrong boot device
- Peripheral causing a hang
Unplug every USB device, dock, and external drive. Try booting again. If the logo clears, one of those peripherals was the problem.
If it still hangs, enter BIOS with F2. Check that the boot order points to your actual system drive. If the drive isn't listed, it's either disconnected or dead.
If You Hear Beeps
Beep codes are a separate diagnostic system from LED codes. Some Dell models still emit beeps alongside the amber blink. Count the beeps and cross-reference them with the model's beep code table.
Common Dell beep codes:
- 1 beep: BIOS ROM checksum failure
- 2 beeps: No RAM detected
- 3 beeps: Chipset error
- 4 beeps: RAM read/write failure
- 5 beeps: Real-time clock (RTC) power failure
- 6 beeps: Video BIOS test failure
- 7 beeps: CPU cache test failure
Beep codes and LED codes often point to the same fault. Use them together for confirmation.
If the Display Flickers or Shows Artifacts
Flickering or visual artifacts before the system freezes point to a failing GPU or a bad display cable. On laptops, a loose LCD cable can cause intermittent display loss.
Reseat the display cable at both ends if you're comfortable opening the machine. On desktops, reseat the GPU and check the PCIe power connectors.
Decision Flow for Boot-Stage Failures
| Symptom | Likely Cause | Next Step |
|---|---|---|
| No display, fan runs | GPU or display cable | Test external monitor |
| Stuck on Dell logo | Storage or peripheral | Unplug all USB, check BIOS boot order |
| Beeping with orange blink | RAM, GPU, or chipset | Match beep code to model table |
| Flickering display | GPU or LCD cable | Reseat cable, test external |
What If the System Boots After a Few Tries?
Intermittent boot success points to a loose connection or a failing component that works when warm. Reseat RAM, storage, and the display cable. If the problem persists, the motherboard is degrading.
Decision Branch: Battery Not Charging, Not Detected, or Swollen
A battery that won't charge is one of the most common reasons for an amber blink. The system detects a problem with the battery circuit and signals it through the LED.
This branch covers three scenarios: not charging, not detected at all, and physically swollen.
If the Battery Charges Slowly or Not at All
Dell laptops use a smart charging circuit. The system reads the battery's charge level, temperature, and health. If any value is out of range, it throttles or stops charging.
Start by checking the adapter wattage. A 65W charger on a laptop that needs 90W will charge slowly or not at all under load. Dell's documentation is explicit about wattage requirements per model.
Then check the battery health in BIOS. Power on and tap F2. Navigate to the battery section.
Look for:
- Battery health percentage
- Charge capacity vs design capacity
- Cycle count
- Battery state (charging, discharging, not detected)
If the battery health is below 50%, the battery is at end of life. Replacement is the fix.
If the Battery Is Not Detected
A battery that shows not detected in BIOS or Windows isn't communicating with the system. That's a hardware fault, not a software one.
Steps to try:
- Power off and unplug the adapter.
- Remove the battery if it's removable.
- Inspect the battery contacts for corrosion or damage.
- Clean the contacts gently with isopropyl alcohol and a cotton swab.
- Reinstall the battery and reconnect the adapter.
- Check BIOS again.
If the battery still isn't detected, the battery or the motherboard's charging circuit has failed. Try a known-good battery of the same model to isolate which.
If the Battery Is Swollen
A swollen lithium-ion battery is a fire hazard. Stop using the laptop immediately. Do not charge it.
Do not press on the swollen area.
Swelling happens when the battery's internal cells degrade and produce gas. It's not always visible from outside. But a trackpad that's suddenly raised or a bottom panel that bulges is a warning sign.
Handle a swollen battery with care:
- Do not puncture, bend, or compress it.
- Do not charge it.
- Place it in a fireproof container if you remove it.
- Take it to a certified e-waste recycler.
- Check if your model is under a Dell battery recall.
Dell has issued recalls for specific battery models in the past. Check your service tag on Dell's support site to see if yours is affected.
Charging Behavior by Adapter Wattage
| Laptop Class | Typical Minimum Wattage | Typical Recommended Wattage | Behavior Below Minimum |
|---|---|---|---|
| Inspiron 14 | 45W | 65W | Charges slowly, may blink amber |
| Latitude 5000 series | 65W | 90W | May not charge under load |
| XPS 15 | 90W | 130W | Throttles, amber blink |
| Precision mobile | 130W | 180W | Refuses to charge |
| Alienware gaming | 180W | 240W | Will not power on with low-watt adapter |
Wattage requirements vary by exact configuration. Check your model's manual for the specific figure.
What About USB-C Charging?
USB-C Power Delivery (PD) chargers can work with Dell laptops that support USB-C charging. But the wattage must match. A 45W USB-C charger won't power an XPS 15 that needs 130W.
Dell's own USB-C chargers communicate wattage through the cable. Third-party USB-C chargers may not. If you're using a third-party charger and getting an amber blink, switch to a Dell charger of the correct wattage.
If the Battery Drains While Plugged In
This means the system is drawing more power than the adapter can supply. The battery makes up the difference, and eventually it runs flat. Common on gaming laptops with underpowered adapters.
Fix: use the correct wattage adapter. If you already are, the adapter may be failing and delivering less than its rated output. Test with a known-good unit.
Decision Branch: Orange Blink After RAM, SSD, BIOS, or Docking Station Changes
If the orange blink started right after you upgraded or changed something, that change is the likely cause. This branch walks through the most common post-change failures.
After a RAM Upgrade
New RAM that isn't fully seated or isn't compatible will trigger a 2-3 or 2-5 code. DDR4 and DDR5 are not interchangeable. Laptop SO-DIMMs and desktop DIMMs are different sizes.
Steps:
- Power off and unplug.
- Open the RAM access panel.
- Remove both modules.
- Check the notch position and pin count.
- Reseat one module until the clips click.
- Boot and check.
- Add the second module and repeat.
If the system boots with one stick but not the other, one module is faulty. If it boots with neither, check compatibility with your model's supported RAM list.
After an SSD or Storage Upgrade
A new drive that isn't detected will cause the system to hang at the Dell logo or show a no boot device error. The orange blink may accompany it.
Check that the drive is seated properly in the M.2 slot or SATA bay. For M.2 drives, the retaining screw must be tight. A loose drive can intermittently disconnect and cause POST failures.
If the drive is detected but won't boot, you may need to clone the old drive or perform a clean Windows install. BIOS may also need the boot order adjusted.
After a BIOS Update
A failed or interrupted BIOS update can corrupt the firmware. Dell systems have a BIOS recovery mode that can restore from a USB drive. The recovery process varies by model.
If the orange blink started immediately after a BIOS update:
- Power off and unplug the adapter.
- Hold the power button for 30 seconds.
- Insert a USB drive with the BIOS recovery file.
- Hold Ctrl+Esc and plug in the adapter.
- Release Ctrl+Esc when the recovery screen appears.
If the recovery screen doesn't appear, the BIOS chip may need to be reflashed by a technician.
After Connecting a Docking Station
Dell docks communicate with the laptop through USB-C or Thunderbolt. A faulty dock or outdated dock firmware can trigger power delivery errors and an amber blink.
Unplug the dock. Boot the laptop on its own charger. If the blink stops, the dock is the problem.
Update the dock firmware using Dell's firmware update utility.
Some older Dell docks require a specific BIOS setting to enable USB-C power delivery. Check your model's BIOS for a USB PowerShare or Type-C Dock option.
Post-Change Decision Flow
| Change Made | Most Likely Cause | First Fix |
|---|---|---|
| RAM upgrade | Not seated or incompatible | Reseat, test one stick |
| SSD upgrade | Not seated or not detected | Reseat, check BIOS boot order |
| BIOS update | Corrupted firmware | BIOS recovery via USB |
| Docking station | Firmware or power delivery | Unplug dock, update firmware |
Step-by-Step Workflow: Safe Power Drain, ePSA Diagnostics, and BIOS Checks
This is the standard troubleshooting sequence that covers most amber blink cases. Work through it in order. Don't skip steps.
Step 1: Safe Power Drain
Run the 60-second drain described in the quick checks section. Unplug the adapter, remove the battery if removable, disconnect all peripherals, and hold the power button for 60 seconds. Reconnect the adapter only and press power.
If the system boots, shut down and reinstall the battery. If it still blinks, move to Step 2.
Step 2: Run ePSA Diagnostics
Dell's Enhanced Pre-boot System Assessment (ePSA) tests hardware without needing Windows. It's built into the BIOS.
- Power on the system.
- Tap F12 repeatedly during boot.
- Select Diagnostics from the menu.
- Note any error codes shown.
- Let the full test run, or press Esc to stop after a specific test.
ePSA tests memory, storage, CPU, GPU, and battery. If it flags a component, that's your fault. Error codes from ePSA are more specific than LED codes.
Step 3: BIOS Checks
- Power on and tap F2 to enter BIOS.
- Check the system information for the service tag and BIOS version.
- Check the battery section for health and charge status.
- Check the storage section for detected drives.
- Check the memory section for detected RAM.
- Verify boot order.
If BIOS doesn't detect a component, the system won't boot past POST. That component is your problem.
Step 4: Update BIOS and Drivers
An outdated BIOS can cause compatibility issues with new hardware. Download the latest BIOS from Dell's support site using your service tag. Run the update with the AC adapter connected and the battery at least 10% charged.
Dell Command | Update can handle this automatically on supported models. It checks for BIOS, chipset, and driver updates in one pass.
Step 5: Test with Known-Good Parts
If software-level steps don't fix the blink, swap in known-good parts:
- Correct-wattage Dell adapter
- Compatible battery
- Known-good RAM module
- Known-good storage drive
Swapping one part at a time isolates the fault. This is the fastest way to identify a failed component without a full teardown.
Step 6: Contact Dell Support
If you've run every step and the blink persists, it's time for Dell support. Have your service tag ready. If the system is under warranty, they'll dispatch a technician or arrange a repair.
If it's out of warranty, they can still diagnose the issue and quote a repair cost.
Workflow Summary
| Step | Action | Time | What It Finds |
|---|---|---|---|
| 1 | Power drain | 2 min | Stuck power state |
| 2 | ePSA diagnostics | 10 to 30 min | Failing hardware component |
| 3 | BIOS checks | 5 min | Detection issues |
| 4 | BIOS and driver update | 15 to 30 min | Firmware bugs |
| 5 | Known-good part swap | 15 to 60 min | Failed component |
| 6 | Dell support | Varies | Warranty repair or quote |
When to Stop and Escalate
If you see any of these, stop DIY troubleshooting:
- Burning smell or visible scorch marks
- Swollen battery
- Liquid damage
- Repeated BIOS corruption after flashing
- System shuts down immediately after power-on
These indicate serious hardware faults. Continuing to power the system can cause further damage or create a safety hazard.
When to Reseat RAM, CMOS Battery, and Internal Cables (and When Not To)
Reseating is the cheapest repair you can try. It costs nothing and fixes a surprising number of amber blink cases. But it's not right for every situation.
If your LED code points to memory (2-3, 2-4, or 2-5), reseating RAM is the logical first move. If the code points to a motherboard-level failure (2-2, 2-6), reseating won't help. You'd be opening the machine for nothing.
When Reseating RAM Makes Sense
Reseat RAM if you see any of these:
- Code 2-3: no memory detected
- Code 2-4: memory failure
- Code 2-5: invalid memory installed
- The system worked yesterday and nothing changed
- You just moved the machine or bumped it
RAM can lose contact from thermal cycling, vibration, or a slightly warped slot. Reseating restores the connection.
When Reseating RAM Won't Help
Skip it if:
- The code points to CPU, chipset, or BIOS
- The RAM is soldered to the board (common on thin laptops)
- The system was recently exposed to liquid
- You see burn marks near the RAM slots
Soldered RAM can't be reseated. On those models, a memory fault means a board replacement.
When to Replace the CMOS Battery
The CMOS coin-cell battery keeps BIOS settings alive when the system is unplugged. When it dies, you'll see code 3-1 or a system that loses the date and time on every boot.
Replace it if:
- Code 3-1 is present
- BIOS resets to defaults after every power loss
- The clock is wrong every time you boot
- The system is more than five years old
The CR2032 coin cell is standard on most Dell machines. It costs a couple of dollars and takes a few minutes to swap. On some laptops, it's under the bottom panel.
On others, it's under the keyboard.
When to Reseat Internal Cables
Loose cables cause intermittent faults that look like hardware failures. Reseat these if the system has been dropped, shipped, or recently opened:
- Display cable (LCD ribbon)
- Battery connector
- DC jack cable
- Power button cable
- Storage drive cable (SATA models)
On desktops, also check the 24-pin ATX power connector and the 4-pin or 8-pin CPU power connector. A partially seated ATX cable can supply standby power but fail under load.
When to Leave It Alone
Don't open the machine if:
- It's under warranty (opening may void coverage)
- You don't have the right tools (plastic spudgers, Torx bits)
- You're not comfortable with ESD precautions
- The system shows signs of liquid damage
- There's a swollen battery
For liquid damage and swollen batteries, professional service is the safer route.
Reseating Decision Table
| LED Code | Reseat RAM? | Replace CMOS? | Check Cables? |
|---|---|---|---|
| 2-3 | Yes | No | Yes |
| 2-4 | Yes | No | No |
| 3-1 | No | Yes | No |
| 3-2 | No | No | Yes (GPU) |
| 2-2 | No | No | No |
| 2-6 | No | No | No |
Parts That Fail: Adapter, DC Jack, Battery, Power Button Board, Motherboard, PSU
Each component in the power chain can fail in a way that triggers an amber blink. Here's what each failure looks like and how to confirm it.
The AC Adapter
The adapter converts wall power to the DC voltage your laptop needs. Dell adapters also communicate wattage through a center pin or USB-C PD protocol.
Signs of failure:
- LED on the adapter brick is off (if it has one)
- Frayed cable near the connector
- Adapter gets unusually hot
- System only works when the cable is held at a specific angle
- Amber blink only when running on AC power
Test: swap in a known-good Dell adapter of the correct wattage. If the blink stops, the adapter was the fault.
The DC Jack
The DC jack is where the adapter plugs into the laptop. It takes mechanical stress every time you plug in or unplug. It can crack, loosen, or short.
Signs of failure:
- Adapter plug feels loose or wobbly
- System loses power when the cable moves
- Amber blink only when the cable is at a certain angle
- Visible damage or debris inside the jack
Test: wiggle the adapter plug gently while watching the LED. If the blink changes, the jack is suspect. Replacement requires opening the laptop and soldering on some models.
The Battery
Lithium-ion batteries degrade with age and charge cycles. Dell's BIOS reports battery health as a percentage of original design capacity.
Signs of failure:
- Battery health below 50%
- System shuts down immediately when unplugged
- Amber blink only on battery power
- Battery not detected in BIOS
- Physical swelling
Test: boot on AC only with the battery removed. If the system works, the battery is the fault.
The Power Button Board
On many Dell laptops, the power button sits on a small separate board connected to the motherboard by a ribbon cable. That board can fail or the cable can come loose.
Signs of failure:
- Power button feels mushy or doesn't click
- System only powers on if you press the button at a specific spot
- No response from the button at all
- Erratic amber blinking with no pattern
Test: some Dell laptops have a pinhole reset button on the bottom. If pressing that boots the system but the main button doesn't, the power button board is the fault.
The Motherboard
The motherboard carries the power delivery circuit, the embedded controller, and every component connection. Failures here are the most serious and the most expensive.
Signs of failure:
- Codes 2-2, 2-6, or 4-1
- Burn marks or a burning smell
- System dead except for the LED
- Multiple components not detected in BIOS
- BIOS recovery fails repeatedly
Test: if every other component has been swapped with known-good parts and the blink persists, the board is the fault.
The PSU (Desktops Only)
The power supply unit converts wall AC to the DC voltages the desktop needs. It provides 3.3V, 5V, and 12V rails. A partial failure can supply standby voltage but not the main rails.
Signs of failure:
- Fan spins for a second then stops
- Clicking sound on power-on
- Amber blink with no fan spin
- System shuts down under load
Test: swap in a known-good PSU of equal or higher wattage. If the system boots, the original PSU was failing.
Failure Symptoms Summary
| Component | Typical Symptom | Test Method | Typical Repair Cost (2026) |
|---|---|---|---|
| Adapter | Amber blink on AC only | Swap adapter | $30 to $80 |
| DC jack | Power cuts when cable moves | Wiggle test | $40 to $120 |
| Battery | Shuts down when unplugged | Boot on AC only | $40 to $90 |
| Power button board | No response to button | Pinhole reset test | $20 to $60 |
| Motherboard | Multiple codes, dead system | Swap all parts | $150 to $400 |
| PSU (desktop) | No fan, clicking | Swap PSU | $50 to $120 |
Mistakes, Safety, Warranty, and Backup Before You Repair
The worst outcome isn't a broken laptop. It's a broken laptop plus lost data plus a voided warranty. This section helps you avoid all three.
Mistake 1: Replacing the Motherboard First
When the LED blinks orange and nothing works, it's tempting to assume the board is dead. Most of the time, it isn't. In our research across Dell support documentation and user reports, adapter, battery, and RAM issues account for the majority of amber blink cases.
Always rule out the cheap parts first. A $40 battery is worth testing before a $300 board replacement.
Mistake 2: Ignoring the LED Code
Some people see an orange blink and immediately try random fixes. That wastes time. The LED code is telling you exactly where to look.
Read it before you do anything else.
Mistake 3: Using the Wrong Adapter
Third-party adapters without the Dell center pin may not deliver the correct wattage. Even if the plug fits, the laptop may refuse to charge or throw an amber blink. Always use a Dell adapter of the correct wattage, or a certified USB-C PD charger that supports the required power profile.
Mistake 4: Skipping the Backup
If the system boots at all, back up your data before troubleshooting further. A failing drive can go from boots sometimes to dead with no warning. Cloud backup, external drive, or a clone, whatever you can do, do it now.
Mistake 5: Opening a Machine Under Warranty
Dell's warranty terms vary by product and region. In many cases, opening the chassis to perform repairs yourself can void the warranty. Check your coverage first.
If the system is under warranty, use Dell support. The repair is free.
Safety Rules for Any Repair
Follow these every time:
- Unplug the AC adapter and remove the battery before opening the case
- Wear an anti-static wrist strap connected to a grounded surface
- Work on a non-carpeted surface
- Keep screws organized by location
- Don't force connectors
- Photograph each step before disassembly
- Never touch the pins on RAM, CPUs, or connectors
For general electrical safety guidance on consumer electronics, OSHA publishes electrical safety resources at OSHA's official site. The specifics for your Dell model are in the official service manual.
Battery Safety Specifics
Lithium-ion batteries are the highest-risk component. If you see swelling, discoloration, or smell a sweet chemical odor, stop immediately.
- Don't charge a swollen battery
- Don't puncture or bend it
- Don't store it indoors near flammable material
- Place it in a metal container if you remove it
- Take it to a certified recycler
Dell has issued battery recalls in the past. Check your service tag on Dell's support site to see if yours is affected.
Data Backup Before Repair
If the system boots, even intermittently, back up now:
- Plug in an external USB drive.
- Copy Documents, Desktop, Pictures, and any project folders.
- Export browser bookmarks and passwords.
- Note any license keys or software installers you'll need.
- If the drive is failing, clone it with imaging software before doing anything else.
If the drive is already dead, a professional data recovery service can sometimes extract data from the platters. That's expensive and not guaranteed.
Warranty and Repair Cost Comparison
| Situation | Best Option | Typical Cost |
|---|---|---|
| Under warranty | Dell support | Free |
| Out of warranty, minor fault | DIY repair | $20 to $120 |
| Out of warranty, board fault | Dell out-of-warranty repair | $150 to $400 |
| Out of warranty, data critical | Data recovery service | $300 to $1500 |
Dell Orange Blink Decision Guide: What to Do Based on Your Situation
This is the fast reference. Find your symptom and follow the matching action.
If the Light Blinks and Nothing Else Happens
Do the 60-second flea power drain first. If that fails, read the code and reseat RAM if the code points to memory. If the code points to the motherboard, contact Dell support.
If the System Boots But the Light Still Blinks
Run ePSA diagnostics from the F12 boot menu. Note any error codes. Check battery health in BIOS.
If a component fails ePSA, that's your fault.
If the Blink Started After a Change
Undo the change. Remove the new RAM, drive, or dock. Boot with the original configuration.
If the blink stops, the new part is the problem.
If the Blink Only Happens on Battery
Test with a known-good battery. If the blink stops, replace the battery. If not, the charging circuit on the board is suspect.
If the Blink Only Happens on AC Power
Test with a known-good Dell adapter of the correct wattage. If the blink stops, replace the adapter. If not, check the DC jack for damage.
If the Battery Is Swollen
Stop using the system. Do not charge it. Remove the battery if it's removable and dispose of it at a certified recycler.
Contact Dell if the battery is under recall.
If There's a Burning Smell or Visible Damage
Stop. Unplug everything. Don't attempt to power the system.
Contact Dell support or a qualified repair technician. This is a safety hazard, not a troubleshooting problem.
Decision Guide Summary
| Symptom | First Action | Second Action | Escalate If |
|---|---|---|---|
| Blink only, no fan | Flea power drain | Reseat RAM | Code points to board |
| Boots but blinks | Run ePSA | Check BIOS battery health | Component fails test |
| After a change | Undo the change | Test original parts | Blink persists |
| On battery only | Test known-good battery | Check charging circuit | Board-level fault |
| On AC only | Test known-good adapter | Check DC jack | Board-level fault |
| Swollen battery | Stop using | Dispose safely | Always |
| Burning smell | Stop, unplug | Don't power on | Always |
Frequently Asked Questions
What does a blinking orange light on a Dell mean?
A blinking orange light means the system detected a hardware fault during POST. The number of amber and white blinks forms a diagnostic code. That code points to a specific component, such as RAM, battery, or motherboard.
Unplug the adapter, remove the battery if possible, and hold the power button for 60 seconds. Reconnect the adapter only and try to boot. This drains residual flea power and often clears stuck power states.
Can a blinking orange light fix itself?
No. The light stays until the underlying fault is resolved. A power drain may clear a temporary glitch, but if the blink returns, a component has failed or is failing.
Address the cause, not the symptom.
Not by itself. But if you also see a swollen battery, a burning smell, or visible damage, stop using the system immediately. Those signs indicate a fire or shock risk.
Contact Dell support or a qualified technician.
How much does it cost to fix a Dell with a blinking orange light?
It depends on the fault. An adapter replacement runs $30 to $80. A battery runs $40 to $90.
A motherboard replacement runs $150 to $400. If the system is under warranty, the repair is free through Dell support.
Not necessarily. The LED code often points to a fault that prevents boot, not one that destroys data. If the system boots even briefly, back up immediately.
If the drive has failed, professional data recovery can sometimes extract files.