The NES system blinking red light is the most common complaint in retro gaming, and it rarely means the console is dead. What you're watching is the lockout chip resetting itself over and over. That reset loop is what makes the power LED flash instead of glow steady.
In most cases, the console is healthy and the cartridge connection is the problem.
Nintendo's service documentation names the 10NES lockout chip as the gatekeeper for that handshake. It also names the 72-pin ZIF connector as the part that carries it. The NES-001 front-loader feeds games through a Zero Insertion Force tray, so the pins barely touch the cartridge's edge connector.
Here's how to work out which branch you're on, and how to fix it properly.
Quick Answer
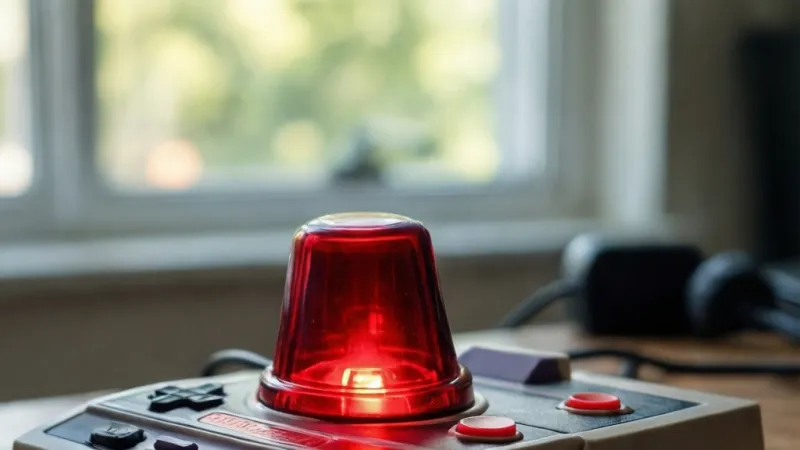
An NES system blinking red light almost always means a bad cartridge connection. The 10NES lockout chip resets the console about once per second. That reset is what makes the LED flash.
Clean the cartridge pins first. Then clean or replace the 72-pin connector.
Why Your NES Power Light Blinks Red (And What It's Telling You)
Here's the thing most people get wrong from the start. That red LED isn't a fault light. It's a power indicator, nothing more.
It lights up whenever the console's power board is receiving voltage.
So a blinking light is actually good news. It means your NES-002 adapter is working, the board is alive, and the CPU is sitting there waiting for permission to boot. The blink comes from the reset line being pulsed, not from a power fault.
A console with a truly dead power supply shows no light at all. That's a completely different problem, and it's usually cheaper to diagnose. If you're seeing a blink, you can cross the adapter off your suspect list for now.
The Four Light States and What Each One Means
If the light blinks, the lockout chip is holding the CPU in reset. If the light is solid but you get no picture, the console is running and your video path is the issue. If the light is dark, you have a power problem.
| Power LED behavior | What it usually means | Your first move |
|---|---|---|
| Blinks on and off, roughly once per second | 10NES lockout chip is resetting the console | Clean the cartridge, then the 72-pin connector |
| Blinks a few times, then goes solid | Contact was made, then lost | Reseat the game, check connector tension |
| Solid red, no picture | Console boots, video path or game is faulty | Check the RF switch, cable, and TV channel |
| Completely dark | No power reaching the board | Test the NES-002 adapter, then the console fuse |
Notice the pattern. Each state points at a different subsystem. Each one sends you down a different branch.
That's why guessing wastes so much time.
What the Blink Cannot Tell You
This is the part that trips up first-time repairers. The blink is a single symptom with at least four possible causes. It can't tell you whether the fault is the cartridge, the connector, the lockout chip, or the power board.
So you test in order. Cheapest and safest first. Invasive and permanent last.
Cleaning a cartridge costs pennies. Cutting a chip leg or replacing a connector doesn't.
One more thing worth knowing. A front-loader NES will blink with no game inserted at all. That's normal behavior, not a fault.
The console has nothing to complete the handshake with, so the reset loop just runs. Always test with a cartridge before you panic.
How the 72-Pin Connector and 10NES Lockout Chip Create the Blink
Two components create this symptom, and they work together. Understand them and the whole repair process stops feeling like guesswork.
What the 10NES Lockout Chip Actually Does
The 10NES is Nintendo's lockout chip, also called the CIC, short for Checking Integrated Circuit. Every licensed NES cartridge has a matching chip inside it. The console's chip and the cartridge's chip talk to each other before the game is allowed to boot.
The console chip sends a stream of data. The cartridge chip has to answer correctly. If the answer checks out, the console releases the CPU and your game starts.
If it doesn't, the console chip holds the CPU in reset and tries again.
That retry happens about once per second. The patent covering this scheme was filed with the US Patent and Trademark Office, and it explains why the blink has such a steady, rhythmic feel. One pulse, one reset, one flash of the LED.
Here's the practical takeaway. The lockout chip is almost never the broken part. It's doing exactly what it was designed to do.
It's refusing to boot a cartridge it can't read.
Why the 72-Pin ZIF Connector Wears Out
The 72-pin connector is the slot your cartridge slides into. ZIF stands for Zero Insertion Force, and the name describes the mechanism. You slide the cartridge in with almost no resistance, then push the tray down.
That downward motion cams the pins onto the cartridge's edge connector.
The design was clever for kids in 1985. It was also a long-term liability. Contact pressure is low by design, so the pins rely on being clean and springy.
Add decades of use and both of those things fade.
As of 2026, working NES-001 consoles are pushing forty years old. Most have never had that connector replaced. The original pins are tarnished, flattened, or both.
| Component | What it does | How it typically fails |
|---|---|---|
| 10NES lockout chip (CIC) | Verifies the cartridge is licensed | Rarely fails, usually still fine |
| Cartridge CIC chip | Answers the console's handshake | Rarely fails |
| 72-pin ZIF connector | Carries data and power to the cartridge | Dirty pins, lost spring tension |
| Cartridge edge connector | 72 gold contacts on the game board | Tarnish, scratches, plating wear |
| NES-002 AC adapter | Supplies 9V AC at 1.3A | Dead capacitors, wrong replacement |
| Power LED | Shows the board has power | Almost never the problem |
The Contact Problem in Plain Numbers
The cartridge's edge connector has 72 gold-plated contacts. Gold doesn't oxidize, which is why it was chosen. But the plating is thin, and underneath it sits nickel and copper that absolutely do corrode.
Once the gold wears through at a high-wear point, moisture and oxygen get to work. You end up with a brown or black film on the contact. That film is an insulator.
It blocks the data line the lockout chip needs.
The connector side has the same problem plus one more. Its pins are made of spring metal. Push a cartridge down ten thousand times and those springs stop springing.
Low contact pressure plus surface tarnish equals a signal that flickers instead of flows.
Why Blowing Into the Cartridge Makes It Worse
Every kid in the eighties did it. It sometimes worked for a minute. It also accelerated the damage.
Your breath carries moisture and traces of saliva. Both are mildly acidic and both promote corrosion on the very contacts you're trying to fix. The temporary improvement came from friction, not from the air.
If you've been blowing into your games for years, expect the pins to need more cleaning than usual. It's still fixable in most cases.
Decision Tree: Match Your Symptom to the Right Fix
The right repair depends on what your console is doing, not on what model you own. Work through the branches below in order and stop at the first one that matches.
Blinking With a Game Inserted
If the light blinks steadily with a cartridge in the slot, you have a contact problem until proven otherwise. This is the most common scenario by a wide margin. Start with cartridge cleaning, then move to the connector.
Try one more thing first. Press the reset button once while the light is blinking. Some consoles catch the handshake on the second or third attempt when the pins are marginal.
If the game loads and stays loaded, your contacts are on the edge and cleaning will help.
Blinking With No Game Inserted
If the light blinks with an empty slot, nothing is wrong. That's expected behavior. The console has no cartridge chip to answer it, so the reset loop runs forever.
Insert a game and check again. If it still blinks with a cartridge seated, you're in the previous branch. If it goes solid, your console is fine.
Blinks Once, Then Goes Solid
If the light pulses once or twice and then holds steady, contact was made and then broken. Usually the tray didn't seat fully, or the cartridge is sitting slightly high.
Pull the cartridge, check that the tray is fully down, and try again. If you get a solid light but a garbled screen, the data lines are still marginal. Clean the cartridge pins and retest.
A solid light with a clean picture means you're done.
Worked Yesterday, Blinking Today
If the console was fine yesterday and blinking today, suspect the environment before you suspect hardware. Humidity swings, dust, and temperature changes all affect marginal contacts.
Did you swap games? A cartridge with dirtier pins can leave residue on the connector. Clean the new game, then clean the connector, then retest.
If the fault follows one specific cartridge, the cartridge is your problem.
60-Second Checks Before You Open the Console
Run these before you reach for a screwdriver. They cost nothing and they resolve a surprising share of cases.
- Unplug the console, remove the game, and reseat it firmly. Push the tray all the way down.
- Try a second cartridge, ideally a first-party Nintendo game with visibly clean pins.
- Check the TV is on the correct input, or on channel 3 or 4 if you're using RF.
- Confirm the AC adapter is an NES-002 and the barrel plug is fully seated.
- Press reset once while the light is blinking.
- Check the RF switch box connections if you're on a coaxial setup.
The Branch Table
| If this is true | Go to this branch |
|---|---|
| Blinks with every game you own | 72-pin connector cleaning or replacement |
| Blinks with one game only | Cartridge cleaning |
| Blinks with no game inserted | Normal behavior, insert a game |
| No light at all | Power adapter and console fuse |
| Solid light, no picture | Video cable and TV setup |
| Blinks, then solid, garbled screen | Cartridge cleaning, then connector |
Branch 1: Clean the Cartridge the Right Way With 91% Isopropyl Alcohol
This is your first move for one simple reason. It's cheap, it's reversible, and it fixes a large share of blinking consoles on its own. Do it before you touch the console.
What You'll Need
You don't need a repair bench for this. A few household items will do, plus one thing you should buy if you don't have it.
- Isopropyl alcohol at 91% concentration or higher
- Cotton swabs, the plain kind without added oils
- A lint-free cloth or microfiber square
- Optional: a commercial cartridge cleaning kit with a shaped head
- Optional: a 3.8mm security bit if you want to open the shell for a deep clean
Skip the 70% drugstore alcohol if you can. The extra water slows drying and leaves more residue behind. Isopropyl alcohol is flammable, so keep it away from open flames and let the cartridge dry fully.
That's standard practice under OSHA flammable liquid guidance.
Step-by-Step Cartridge Cleaning
- Unplug the console. Remove the cartridge and set it on a clean surface.
- Inspect the edge connector. You're looking for brown, black, or greenish film on the gold contacts.
- Dip a cotton swab in isopropyl alcohol and shake off the excess. Damp, not dripping.
- Rub the contacts side to side along the row. Don't scrub up and down, which can lift the plating.
- Swap the swab as soon as it turns dark. Keep going until a fresh swab comes away clean.
- Let the cartridge sit for 60 seconds. Isopropyl evaporates fast at room temperature.
- Reinsert the game, push the tray down, and power on.
Most cartridges take two or three passes before the swab stays white. If you see visible green corrosion, that's copper oxidation and it may need a few more rounds. Don't scrub harder, just clean longer.
What Never to Use on NES Cartridge Pins
| Use this | Never this | Why it matters |
|---|---|---|
| 91%+ isopropyl alcohol | Water or saliva | Moisture corrodes the contacts |
| Cotton swabs | Sandpaper or metal files | Abrasives strip the gold plating |
| Lint-free cloth | Paper towels | Paper fibers snag between pins |
| Electronics-grade contact cleaner | WD-40 or general lubricants | Leaves an insulating film behind |
| White vinyl eraser, used gently | Pencil eraser | Pencil erasers are abrasive and leave grit |
A white vinyl eraser does work on stubborn tarnish, and plenty of technicians use one. Just use it lightly and clean up the residue with alcohol afterward. Never follow it with sandpaper.
If Cleaning the Cartridge Doesn't Fix It
If you've cleaned three different games and the light still blinks with all of them, the cartridge isn't your problem. Your connector is.
That's a different branch with different tools, and it's where the fix gets more involved. Before you go there, do one honest check. Look at the pins inside the console slot with a flashlight.
If they look dull, brown, or flattened, you already have your answer.
Branch 2: Clean or Replace the 72-Pin Connector
If you've cleaned three cartridges and the light still blinks, your connector is the culprit. Now you have a decision to make. Clean it in place, or pull it and replace it.
Both paths work. Which one you take depends on how bad the pins look and how much time you want to spend.
Cleaning the Connector in Place
You can clean the connector without removing it. It's less effective than pulling it, but it's a good first attempt because it's fast and free.
- Unplug the console and remove any cartridge.
- Get a thin lint-free cloth or a cleaning card sized for a 72-pin slot.
- Dampen it with 91% isopropyl alcohol. Damp, not wet.
- Slide it into the slot and work it in and out a dozen times.
- Repeat with a fresh cloth until it comes out clean.
- Let it dry for five minutes before you insert anything.
If the pins are just lightly tarnished, this buys you real improvement. If they're flattened or brown, you're polishing a part that's already past saving.
The Boiling Method and What It Actually Does
You'll see the boiling trick recommended everywhere. Boiling a 72-pin connector in water for a few minutes does work, and the physics is simple.
Heat causes the metal pins to expand. When they cool, they contract and the spring tension comes back a little. The water also lifts surface grime out of the gaps between pins.
It's a temporary fix. The tension you regain is a fraction of what a new connector gives you. Expect a few months to a couple of years, not another four decades.
If you try it, use distilled water, keep the connector fully submerged for three to five minutes, and let it dry completely for at least 24 hours. Any moisture left behind will cause corrosion and you'll be worse off.
Cleaning vs Replacing: Which One Fits Your Connector
Look at the pins with a flashlight and a magnifying glass before you decide. What you see tells you which branch you're on.
| What the pins look like | Best option | Expected result |
|---|---|---|
| Bright, evenly spaced, springy | Clean in place | Solid light, game loads |
| Slightly dull, still springy | Clean in place, then boil if needed | Good for months to a year |
| Brown or black film on most pins | Replace the connector | Full restoration |
| Visibly flattened or bent pins | Replace the connector | Full restoration |
| One or two pins pushed down | Careful pin bending, then replace if it fails | Mixed, often temporary |
The honest rule is this. If you've opened the console anyway, replace the connector. A new one costs less than a takeaway meal and it removes the part from your suspect list permanently.
Replacing the 72-Pin Connector
Replacing the connector requires opening the console. You'll need a 3.8mm security bit for the shell screws, a Phillips screwdriver for the internal brackets, and patience.
- Unplug everything and let the console sit for ten minutes.
- Remove the six security screws from the underside of the shell.
- Lift the top shell off and set it aside. Watch for the power button and reset button springs.
- Locate the 72-pin connector at the front of the board.
- Unscrew the two brackets holding it to the chassis.
- Slide the old connector off the main board pins. It's a friction fit, not soldered.
- Align the new connector and press it straight down onto the board pins.
- Refit the brackets and screws.
- Reassemble the shell and test with a clean cartridge.
The connector is not soldered on the NES-001. That surprises people. It just presses onto a row of pins, which makes this one of the most beginner-friendly repairs in retro gaming.
Aftermarket Connector Options and What to Avoid
Not all replacement connectors are equal, and this is where people get burned.
- Standard replacement connectors are the cheapest option and usually work fine. They're gold-plated and fit the original brackets.
- The Blinking Light Win is a different design that grips the cartridge much harder. It eliminates the tray's ZIF action, so you push the game in with real force. Some collectors love it, some hate it.
- Cheap unbranded connectors from marketplace sellers often have weak plating and thin pins. Aggregate buyer feedback on these is mixed at best.
Avoid anything that requires soldering to the main board. The NES-001 doesn't need that, and if a listing tells you it does, you're looking at the wrong part.
One more thing. Some replacement connectors are slightly thicker than the original. If your cartridge tray feels stiff after the swap, that's why.
It usually loosens up after a dozen inserts.
Branch 3: Disable the 10NES Lockout Chip
Disabling the lockout chip is the branch people reach for when cleaning and replacing don't solve it. It's effective, it's permanent, and it's genuinely simple. It's also the point of no return.
What Disabling the Lockout Chip Actually Does
The 10NES chip holds your console in reset when it can't verify a cartridge. Cut its reset line and it can't hold anything. The console boots and runs whatever game is in the slot.
You're not removing the chip. You're removing its authority over the CPU. The chip stays on the board and keeps doing its internal thing.
It just loses the wire it uses to keep the console switched off.
The result is a console that boots first time with almost any cartridge, dirty or clean. It also plays unlicensed games and PAL cartridges that the original chip would reject.
The Pin 4 Cut Method, Step by Step
Pin 4 is the reset output. That's the one you want. On the NES-001 main board, the 10NES chip sits near the front right of the board with the cartridge slot facing you.
- Unplug the console and let it sit for ten minutes.
- Open the shell and remove the top cover.
- Find the small chip with the Nintendo logo, close to the connector.
- Count to the fourth pin on the row nearest the board edge. Pin 1 is marked with a dot or a notch on the chip body.
- Take a small pair of flush cutters and snip pin 4 cleanly at the chip body.
- Check that the cut leg isn't touching anything nearby.
- Reassemble and test.
You can also lift pin 4 instead of cutting it. Bend it gently upward so it no longer touches the board pad. That's reversible if you ever change your mind.
The Ground Wire Alternative
Some technicians prefer to ground pin 4 instead of cutting it. You solder a short wire from pin 4 to a ground point on the board.
This achieves the same outcome. The chip's reset line is pulled low permanently, so it can never pulse the CPU into reset.
It's tidier than cutting and it's fully reversible. It does require soldering skill. If you're not confident with an iron, cutting is the safer option.
What Changes After the Lockout Chip Is Disabled
The behavior change is immediate and obvious. Your console stops blinking and starts booting.
| Before | After |
|---|---|
| Blinks with dirty cartridges | Boots them anyway |
| Refuses unlicensed cartridges | Plays them |
| Refuses PAL cartridges | Plays them, with speed and color issues |
| Lockout chip active | Lockout chip bypassed |
| Fully reversible | Reversible only if you lifted the pin, not cut it |
What You Lose by Disabling It
You lose the lockout function. That's it. The console has no other use for that chip, and the 10NES scheme is dead technology from a licensing war that ended decades ago.
The one honest downside is irreversibility if you cut. Lifted pins can be bent back. Cut legs cannot be reattached without microsoldering.
Collectors who care about originality sometimes avoid this mod. If your console is a rare variant or has sentimental value as an untouched unit, think twice. For a standard working NES-001, the mod is harmless and it fixes the problem permanently.
Branch 4: Power Adapter, Capacitors, and Board-Level Faults
You've cleaned the cartridges. You've replaced the connector. You've disabled the lockout chip.
And the light still blinks.
That's rare, but it happens. When it does, the fault is on the power side. This is the branch where a multimeter earns its place.
Testing the NES-002 Power Adapter
The NES-002 adapter outputs 9 volts AC at 1.3 amps. That's AC, not DC, and this catches people out constantly.
An AC output adapter cannot be swapped for a DC one. If you've been using a random 9V DC adapter from a drawer, that alone could be your problem. The console expects an alternating waveform to feed its internal rectifier.
Test it like this.
- Set your multimeter to AC voltage, not DC.
- Probe the barrel plug's inner and outer contacts.
- You should see roughly 9 to 10 volts AC with no load.
- Anything under 7 volts AC means the adapter is failing.
An adapter can also read correct voltage with no load and still collapse under load. If you have a spare known-good NES-002, swapping it in takes thirty seconds and rules the whole thing out.
The Console Fuse and Voltage Regulator
Inside the console there's a fuse and a voltage regulator on the power board. If the fuse is blown, you get no light at all, not a blink. So a blink means the fuse is intact.
The voltage regulator is a different story. If it's outputting low or unstable voltage, the console can behave strangely. Check the regulator's output pin against ground.
It should sit near 5 volts DC.
A failing regulator usually causes random resets, garbled graphics, or a console that boots sometimes and not others. It rarely causes a clean, rhythmic blink.
Capacitor Aging on the Power Board
Electrolytic capacitors have a service life, and the NES is well past it. As of 2026, every original console is running on capacitors that are around forty years old.
Symptoms of tired capacitors include:
- A console that needs to warm up before it works
- Occasional resets during play
- A light that flickers rather than blinks steadily
- Audio hum or buzzing through the TV
Replacing capacitors requires desoldering and soldering, plus the ability to read polarity markings. If you're not there yet, this is the point to hand the console to a technician.
When to Stop and Hand It Over
Stop when you've worked through cleaning, connector replacement, and lockout chip disabling, and the light still blinks. Stop sooner if you smell burning, see scorch marks, or notice bulging capacitors.
Board-level repair has a real failure cost. Lifted pads, bridged traces, and cracked joints are all easy to create and hard to fix. A professional retro repair shop charges for the work, but they'll return a working console instead of a paperweight.
Mistakes That Make It Worse: Blowing, Sanding, Bending Pins
Some of the most common fixes are the ones that do the most damage. Here's what to avoid, and why it matters.
Blowing Into Cartridges
We covered this earlier, but it deserves a second mention because it's so widespread. Your breath deposits moisture and mild acid onto the contacts. Both accelerate corrosion.
The temporary fix people remember came from the friction of inserting and removing the cartridge. The air did nothing useful. If you've been doing this for years, your games need extra cleaning, not extra blowing.
Sanding or Filing Cartridge Pins
Never sand a cartridge's edge connector. Sandpaper, emery boards, and metal files all remove the gold plating. Once the gold is gone, the exposed nickel and copper corrode fast.
A white vinyl eraser used lightly is fine. Anything abrasive is not. If the gold is already worn through in patches, no amount of sanding brings it back.
Bending Connector Pins Too Far
The classic advice is to bend the connector pins upward with a small hook to restore tension. It works, briefly, if you do it gently.
Overdo it and you'll snap pins or push them into a position where the cartridge can't seat at all. Bent pins also misalign with the cartridge contacts, which creates new faults on lines that were fine before.
If you're going to bend anything, do it a fraction of a millimeter at a time and test after each pass. Or skip it entirely and buy a replacement connector.
Boiling Connectors and Leaving Moisture Behind
The boiling trick works only if the connector dries completely. Water trapped between pins causes corrosion, and that corrosion is worse than what you started with.
Give it a full 24 hours in a warm, dry spot. A hair dryer on low heat helps, but keep it moving so you don't warp the plastic housing.
Using the Wrong Power Adapter
The NES-002 puts out 9V AC. Most replacement adapters people grab are 9V DC. Some are 12V.
Some have reversed polarity on the barrel plug.
Any of these can damage the console's power board. If you need a replacement, look for an adapter specifically listed for the NES-001 with 9V AC output.
Skipping Static Protection
Electronic components are sensitive to static discharge. You might not feel a zap, but the chip underneath can take damage anyway.
Touch a grounded metal object before you reach inside the console. Better still, wear an anti-static wrist strap. They cost almost nothing and they protect parts you can't easily replace.
That's the cheap insurance that separates a successful repair from a dead board.
Costs, Tools, and Timelines: DIY vs Shop Repair
Every branch on this tree has a price tag and a time cost. Knowing both before you start helps you decide whether to pick up a screwdriver or mail the console to someone who does this daily.
Tools You'll Need and What They Cost
Most of this list is a one-time buy. If you already own a screwdriver set, you're halfway there.
| Tool | Typical cost | Needed for |
|---|---|---|
| 3.8mm security bit | $5 to $10 | Opening the NES-001 shell |
| Small Phillips screwdriver | $3 to $8 | Internal brackets and board mounts |
| 91% isopropyl alcohol | $4 to $8 | Cartridge and connector cleaning |
| Cotton swabs, 500 pack | $3 to $5 | Cartridge pin cleaning |
| Multimeter | $15 to $40 | Testing the NES-002 adapter and regulator |
| Flush cutters | $8 to $15 | Lockout chip pin 4 cut |
| Soldering iron, adjustable | $25 to $60 | Ground wire mod, capacitor work |
| Anti-static wrist strap | $5 to $10 | Board-level protection |
| Replacement 72-pin connector | $8 to $15 | Connector replacement branch |
| Blinking Light Win connector | $25 to $35 | Premium connector replacement |
Add it up and a full DIY kit runs about $80 to $150, with the soldering iron and multimeter doing most of the heavy lifting. If you already own those two, you're looking at under $50 to fix a blinking NES.
Parts Costs by Branch
The part itself is almost never the expensive bit. It's the labor and the shipping that add up.
- Cartridge cleaning: effectively free once you own alcohol and swabs.
- 72-pin connector replacement: $8 to $15 for a standard part, $25 to $35 for a premium one.
- Lockout chip disable: free if you cut, roughly $1 in wire if you ground it.
- Power adapter replacement: $15 to $25 for a known-good NES-002 or a quality third-party equivalent.
- Capacitor kit: $10 to $20 for a full recap set.
- Voltage regulator: $2 to $5 for the part.
A console that only needs cleaning costs you nothing beyond supplies you'll use again. A console that needs a recap is where the money starts to matter.
Professional Repair Costs
Retro repair shops vary wildly on price. Here's what aggregate listings and shop rate cards suggest as of 2026.
| Service | Typical shop price | Turnaround |
|---|---|---|
| Full diagnostic | $25 to $40 | 2 to 5 days |
| 72-pin connector replacement | $40 to $70 | 3 to 7 days |
| Lockout chip disable | $30 to $50 | 2 to 5 days |
| Full capacitor recap | $60 to $120 | 1 to 2 weeks |
| Complete restoration, all of the above | $120 to $200 | 2 to 4 weeks |
Some shops charge a flat bench fee and roll it into the repair. Others bill hourly at $40 to $80 per hour. Ask for a quote before you ship anything.
DIY vs Shop: Which Fits Your Situation
The right call depends on your confidence and the fault you're facing.
- Cleaning and connector replacement are genuinely beginner-friendly. The connector isn't soldered on the NES-001. If you can turn a screwdriver, you can do this.
- Lockout chip disabling sits at intermediate level. Cutting a pin is easy. Getting the shell back together without losing a spring is the fiddly part.
- Capacitor replacement and board-level diagnostics need real soldering skill. Lifted pads are common on forty-year-old boards.
- If your console has sentimental value or you're unsure, pay the shop. A botched recap costs more to fix than the original repair would have.
Realistic Timelines
If you're doing it yourself and you have the parts on hand, expect these numbers.
- Cartridge cleaning: 5 to 10 minutes per game.
- Connector cleaning in place: 15 to 20 minutes.
- Connector replacement: 45 to 90 minutes including reassembly.
- Lockout chip disable: 30 to 60 minutes.
- Boiling method: 3 to 5 minutes of boiling, 24 hours of drying.
- Full recap: 2 to 4 hours for an experienced solderer.
Most people fix a blinking NES in a single evening. The parts are cheap, the console comes apart with six screws, and none of the common fixes require exotic tools.
Front-Loader NES vs Top-Loader: Is the Blink Even Possible?
This is a question worth answering directly, because the two NES models behave differently. If you own a top-loader and you're seeing a blinking light, you're looking at a different fault entirely.
Does the NES-101 Top-Loader Blink?
No. The NES-101 top-loader doesn't have the 10NES lockout chip, and it doesn't have a ZIF connector. It has a straight-edge slot you push the cartridge into, much like the original Famicom.
That design change removes both causes of the blink. The top-loader doesn't care whether a cartridge is licensed. It just reads whatever is in the slot.
If a top-loader shows no picture, the fault is elsewhere. Check the video cable, the power adapter, or the cartridge itself. A blinking light on an NES-101 isn't a thing that happens.
Why the Top-Loader Was More Reliable
Nintendo learned from the front-loader's failures. The ZIF connector was a marketing feature, not a durability feature. It let kids insert games easily, and it wore out doing so.
The top-loader dropped the tray entirely. Cartridges press straight onto a set of pins with normal spring tension. Fewer moving parts, better contact, fewer failures.
It also dropped the lockout chip. That removed the reset loop, which removed the blinking light, which removed the single most common NES complaint of the last thirty years.
Why the Front-Loader Still Wins for Collectors
Reliability isn't everything. The front-loader is the model most people picture when they hear "Nintendo Entertainment System." It's the one from the commercials, the one from childhood, the one with the angular grey box and the sliding tray.
Front-loaders also output cleaner composite video when modded, and the RF output is easier to tune. Collectors pay more for them despite the connector issues.
| Feature | NES-001 front-loader | NES-101 top-loader |
|---|---|---|
| Lockout chip | Yes, 10NES present | No |
| Cartridge connector | 72-pin ZIF tray | Straight-edge slot |
| Blinking red light possible | Yes, common | No |
| Reliability over time | Lower, connector wears | Higher |
| Collector appeal | Higher | Moderate |
| Video output | RF, easy to composite mod | RF, composite mod possible |
| Release year | 1985 | 1993 |
What This Means for Your Repair Decision
If you own a front-loader and it's blinking, you're on the standard repair path. Every branch above applies.
If you own a top-loader and it's misbehaving, skip the lockout chip and connector branches entirely. Your problem is power, video, or the cartridge. Test those in that order.
And if you're shopping for a working NES as of 2026, this is worth knowing before you buy. A top-loader will blink less. A front-loader will look better and feel more nostalgic.
Pick the tradeoff that matters more to you.
Maintenance: Keeping the Light Solid Long-Term
A repaired NES stays repaired if you treat the contacts well. These habits cost nothing and they extend the life of every part you just cleaned or replaced.
Cartridge Storage That Protects the Pins
Store games in sleeves or cases, not loose in a drawer. Dust settles on the edge connector and works its way into the pin gaps.
If you use a storage rack, keep it out of direct sunlight. UV doesn't damage the contacts, but it does degrade the plastic shells and labels over years.
Never stack loose cartridges on top of each other with pins exposed. A cartridge resting on another's edge connector will scratch the plating.
Periodic Cleaning Routine
A quick clean once a year keeps everything working. You don't need to deep-clean every game.
- Wipe cartridge pins with a dry lint-free cloth before storage.
- Do a full isopropyl clean on any game that starts showing load issues.
- Clean the console connector every six to twelve months if you swap games often.
- Replace the swab as soon as it darkens. Don't spread dirt around.
If you play one or two games regularly, your connector stays cleaner than if you rotate through fifty titles. Every insertion is a tiny bit of wear.
Reducing Insertion Wear
Every time you slide a cartridge into a front-loader, the ZIF mechanism moves. That's the wear point. Fewer insertions means a longer connector life.
- Leave a game in the slot if you're coming back to it. No need to remove and reinsert.
- Don't slam the tray down. Push it smoothly until it clicks.
- Avoid inserting cartridges at an angle. Straight in, straight down.
- If a game feels tight, stop and check for debris. Don't force it.
Some collectors use a single sacrificial cartridge as a slot protector when the console is stored. That keeps dust out of the connector without stressing the pins.
Environmental Factors
Humidity is the enemy of marginal contacts. In damp climates, contacts tarnish faster and cleaning helps less.
- Keep the console in a climate-controlled room when possible.
- Use silica gel packets in storage bins for cartridges.
- Avoid storing the NES in basements, garages, or attics with big temperature swings.
- If you live in a humid region, clean your games more often.
A small dehumidifier in the game room makes a measurable difference over a few years. So does keeping the console covered when not in use.
When to Stop Cleaning and Start Replacing
If you're cleaning the connector every month and it keeps blinking, cleaning has stopped being a fix. The pins have lost their spring and no amount of alcohol brings that back.
That's when you replace the connector. It's the cheapest part in the whole system and it resets your maintenance clock to zero.
Safety Notes: Soldering, Capacitors, and Isopropyl Alcohol
None of these repairs are dangerous if you follow basic precautions. All of them can hurt you or the console if you skip them.
Capacitor Discharge
Capacitors on the NES power board hold a charge after you unplug the console. It's small, but it's enough to give you a jolt and enough to damage components if you short something.
Unplug the console and wait at least ten minutes before opening it. If you're recapping, discharge each capacitor with a resistor before you desolder it. Never bridge a capacitor's legs with a screwdriver.
Soldering Safety
A soldering iron tip runs between 600°F and 800°F. That's hot enough to leave a serious burn in a fraction of a second.
- Always set the iron in its stand when you're not holding it.
- Work in a ventilated space. Solder flux fumes are a respiratory irritant.
- Wear safety glasses. Molten solder spits.
- Keep a damp sponge or brass wool nearby for tip cleaning.
- Never leave a powered iron unattended.
Lead-free solder is safer for home use, though it's harder to work with. If you use leaded solder, wash your hands thoroughly afterward. Lead exposure is cumulative and it doesn't leave your body.
Isopropyl Alcohol Handling
Isopropyl alcohol at 91% or higher is flammable and it evaporates quickly. The vapor is heavier than air and can pool in low spots.
- Keep it away from open flames, pilot lights, and sparks.
- Use it in a ventilated area.
- Don't soak components in it. Dampen a swab or cloth instead.
- Let everything dry completely before applying power.
Store it in its original container with the lid tight. It absorbs moisture from the air over time, which lowers the concentration and reduces its cleaning power.
Electrostatic Discharge Protection
ESD damage is invisible and permanent. A static zap you can't feel is still enough to kill a chip.
- Touch a grounded metal object before you reach inside the console.
- Wear an anti-static wrist strap connected to a grounded point.
- Work on a hard surface, not carpet.
- Don't shuffle your feet or wear wool while handling boards.
If you're only cleaning cartridges or swapping the connector, ESD risk is low. If you're touching the main board or the lockout chip, it's real and worth the five-dollar strap.
Electrical Safety
Never work on a console that's plugged in. Never test voltage on a live board unless you know exactly what you're doing.
If you smell burning, see smoke, or hear a pop, unplug immediately and don't plug it back in until you've found the fault. A failed capacitor can take other components with it if you keep applying power.
When to Walk Away
Stop and hand the console to a professional if any of these apply.
- You're not comfortable with a soldering iron.
- You've already lifted a pad or bridged a trace.
- The console shows scorch marks or bulging capacitors.
- You've replaced the connector and disabled the lockout chip and it still blinks.
- The console has significant sentimental or collector value.
There's no shame in it. Retro repair shops exist for exactly this reason, and a working console is worth more than a repaired one you damaged yourself.
Frequently Asked Questions
Does a blinking red light mean my NES is broken?
No, it usually means the console can't read the cartridge. The 10NES lockout chip holds the CPU in reset when it can't complete its handshake. That reset pulses the power LED about once per second.
Cleaning the cartridge and the connector resolves most reported cases.
Why does my NES blink even with no game inserted?
That's normal behavior, not a fault. With an empty slot, there's no cartridge CIC chip to answer the lockout handshake. The console's 10NES chip keeps retrying forever.
Insert a game and test again. If the light goes solid, your console is fine.
Is blowing into the cartridge actually bad for it?
Yes, and it's the most common self-inflicted damage in retro gaming. Your breath deposits moisture and mild acid onto the gold contacts. Both promote corrosion over time.
The temporary fix people remember came from the friction of reinserting the game, not from the air itself.
Will cutting pin 4 on the lockout chip damage my NES?
It won't damage the console, but it is permanent. Cutting pin 4 removes the chip's ability to hold the CPU in reset. The chip stays on the board and keeps working internally.
It just loses its authority over the console. Lifting the pin instead of cutting keeps the mod reversible.
Can I use any 9V adapter with my NES?
No. The NES-002 outputs 9 volts AC at 1.3 amps, not DC. A standard 9V DC adapter won't work and can damage the power board.
Look for an adapter specifically rated for the NES-001 with AC output. If the voltage reads under 7V AC on a multimeter, the adapter is failing.
How long does a repaired NES usually last?
A properly cleaned console holds up for months to years depending on use and climate. A connector replacement resets the clock to roughly a decade of normal play. Disabling the lockout chip eliminates the blink as a failure mode entirely.
Maintenance matters more than the repair itself.
Decision Guide: Your Result, Your Next Move
You've worked through the branches. Here's where to land based on what your console did at each stage. Find your row, follow the action, and stop there.
| Your result after each step | What it means | Your next move |
|---|---|---|
| Light went solid after cartridge cleaning | Dirty cartridge pins | Clean your other games periodically |
| Light went solid after connector cleaning | Tarnished connector pins | Clean the connector every 6 to 12 months |
| Light still blinks after both cleanings | Worn or flattened connector pins | Replace the 72-pin connector |
| Light still blinks after a new connector | Lockout handshake failing on some cartridges | Disable the 10NES chip |
| Light blinks only with one game | That cartridge is the problem | Deep-clean or replace that game |
| Light blinks with no game in the slot | Normal behavior | Insert a game and retest |
| Light is dark, no blink at all | Power fault | Test the NES-002 adapter, then the console fuse |
| Light is solid but no picture | Video path fault | Check the RF switch, cable, and TV input |
| Light flickers instead of blinking evenly | Power instability | Test the adapter, then suspect capacitors |
| Console needs to warm up before working | Aging electrolytic capacitors | Full recap, ideally by a technician |
| Nothing worked after all branches | Board-level fault | Take it to a retro repair shop |
If You Only Have Ten Minutes
Do the cheapest thing first. Pull the game, clean the pins with 91% isopropyl alcohol, let it dry, and reseat it. Press reset once if the light still blinks.
That sequence resolves a surprising share of cases before you ever touch a screwdriver.
If You Have an Evening
Open the console, replace the 72-pin connector, and disable the lockout chip while you're in there. Both fixes together cost under $50 in parts and about two hours of work. You'll likely never see that blink again.
If You're Not Sure About Soldering
Replace the connector only. It isn't soldered on the NES-001, so the whole job is screws and friction fits. Skip the lockout chip mod and the capacitor work.
Those need an iron, and a lifted pad on a forty-year-old board turns a cheap repair into an expensive one.
If the Console Is Sentimental or Valuable
Pay a professional. A full diagnostic and restoration runs $120 to $200 at most retro shops. That's money well spent on a console you can't replace.
Ask for photos of the board before and after, and confirm they use new-old-stock or high-quality replacement parts.
The One Thing That Fixes Most Blinking NES Consoles
Cleaning the cartridge and replacing the 72-pin connector together solves the vast majority of blinking red lights. Everything else on this tree is a fallback. Start there, test with a known-good first-party game, and work outward only if the light keeps flashing.