A motorcycle blinking brake light is either a deliberate safety upgrade or a warning that something's gone wrong. Modulators and flasher modules pulse the rear stop lamp to grab a driver's attention, and plenty of riders swear by them. But the same blinking can also signal a bad ground, a CAN bus fault, or a brake switch stuck in the on position.
In our research, the dividing line comes down to two things: what your local vehicle code permits, and whether the blinking is intentional or a symptom. Federal Motor Vehicle Safety Standard 108, usually written as FMVSS 108, sets the baseline for stop lamps in the United States. What that means for your specific bike depends heavily on where you ride and what you've installed.
Quick Answer
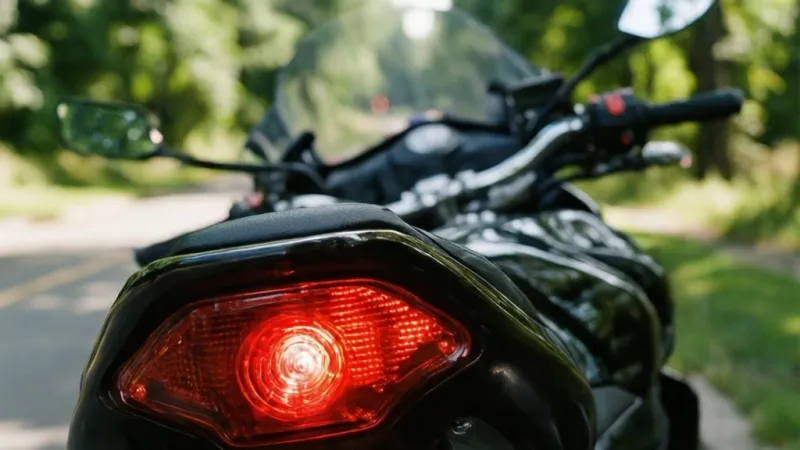
Most US states allow a motorcycle blinking brake light, but only briefly. The light must flash a few times, then hold steady. FMVSS 108 requires stop lamps to burn steadily.
Many modulators pulse three to five times. Then the lamp stays solid. Constant blinking usually signals a fault.
Why a Blinking Motorcycle Brake Light Is a Safety and Legal Issue
Rear-end crashes are the most common crash type on the road. Motorcyclists absorb them worse than anyone. A rider has no crumple zone, no seatbelt, and no airbag.
The gap between a driver noticing you and a driver hitting you is measured in fractions of a second.
That's the entire case for a flashing or pulsing brake light. It's a conspicuity device, nothing more. The idea is simple.
A lamp that changes state draws the human eye faster than a lamp that's just sitting there glowing.
In our review of crash data published by the National Highway Traffic Safety Administration, motorcyclists remain dramatically overrepresented in fatal crashes relative to passenger vehicle occupants. Rear-end collisions show up again and again as a contributing factor. Enhanced brake light conspicuity is one of the few countermeasures a rider can add without changing how they ride.
Rear-End Collision Risk and Rider Visibility
Does a pulsing brake light actually reduce crashes? The evidence leans positive, but it isn't ironclad. Studies on center high mount stop lamps in cars, the third brake light mandated in the US since 1986, found measurable reductions in rear-end collisions.
The mechanism is attention capture.
Research on motorcycle brake light modulation has shown shorter reaction times from following drivers in controlled test settings. Real-world crash reduction is much harder to prove. You can't easily isolate one lighting change from everything else happening on the road.
Still, the physics of attention favor a light that changes. A steady red lamp blends into the visual field. A pulsing one doesn't.
There's a catch. Attention capture cuts both ways. A pattern that's too fast, too bright, or too long stops reading as "this person is braking." It starts reading as "emergency vehicle" or "hazard lights." That's a different message entirely, and it's the wrong one.
Tickets, Insurance, and Liability Exposure
Here's where it gets uncomfortable. A brake light modulator that's perfectly legal in one state can get you pulled over in the next one. Several US states restrict flashing stop lamps outright.
Others allow a brief pulse but ban anything that flashes continuously.
If you're cited, the fine is usually modest. Expect somewhere in the $50 to $500 range, depending on the state and whether it's a first offense. The real exposure is civil.
Picture a rear-end crash where the other driver's attorney argues your non-compliant brake light was confusing. That argument doesn't need to win. It just needs to muddy the water in front of a jury.
Insurance is a quieter problem. Standard motorcycle policies don't usually ask about lighting modifications during underwriting. But a claims adjuster can point to an unapproved mod as a contributing factor when liability is disputed.
It's rare. It also happens.
Why "It Looks Cool" Isn't a Legal Defense
Vehicle codes don't care about intent. They care about what the lamp does. If your brake light flashes in a way the code prohibits, the reason you installed it is irrelevant to the officer writing the ticket.
Enforcement is inconsistent, and that's the trap. Plenty of riders run modulators for years without a second look. That's not the same as being legal.
It just means nobody noticed yet.
Inspection is where it usually catches up with you. A state safety inspection or a UK MOT test will fail a stop lamp that doesn't behave the way the inspector expects. By then you're scrambling to rewire before your registration lapses.
| Risk type | What it looks like in practice | Real-world cost |
|---|---|---|
| Traffic citation | Officer sees continuous flashing | $50 to $500 plus court costs |
| Failed inspection | Stop lamp won't hold steady | Reinstall, retest fee, lost riding time |
| Civil liability | Attorney cites confusing brake signal | Higher settlement exposure |
| Insurance dispute | Adjuster flags unapproved lighting mod | Delayed or reduced payout |
How Motorcycle Brake Light Modulators and Flashers Work
A brake light modulator is a small electronic module wired inline with your brake light circuit. It interrupts the signal for a fraction of a second at a time, then hands control back to the normal circuit. That's the whole trick.
Most units are sealed, potted, and roughly the size of a matchbox. They tap into the brake light wire somewhere between the brake switch and the tail light assembly. Some plug directly into the factory connector.
Others require you to cut and splice.
Brake Light Modulator vs. Flasher Relay
These two get confused constantly, and mixing them up is a real installation mistake. A flasher relay cycles a circuit continuously, which is what turn signals and hazard lights need. A brake light modulator only acts on the brake light circuit, and it stops acting after a set number of pulses.
Install a flasher relay in your brake light circuit, and your brake light will blink forever while you're braking. That's both illegal in most places and genuinely dangerous. A constantly flashing lamp reads as an emergency signal.
| Feature | Brake light modulator | Flasher relay |
|---|---|---|
| Circuit it controls | Brake light only | Turn signals or hazards |
| Cycle behavior | Pulses, then holds solid | Flashes continuously |
| Typical trigger | Brake switch activation | Turn signal switch or hazard switch |
| Legal status | Permitted in many regions if brief | Not permitted in brake circuit |
| Common install | Inline with brake wire | Replaces factory flasher unit |
Flash Patterns: Pulse, Strobe, and Flash-Then-Solid
Flash pattern is where legality lives. The pattern determines whether a device is tolerated, ignored, or ticketed.
- Flash-then-solid: Pulses three to five times over roughly one second, then holds steady red. This is the most widely accepted pattern and the default on most commercial modulators.
- Pulse-only: A slower, gentler brightness modulation that never fully extinguishes. Some riders prefer it because it's subtler. Legality varies.
- Strobe or rapid flash: Very fast, high-contrast flashes. Eye-catching, but frequently reads as an emergency vehicle signal. Banned in many jurisdictions.
- Progressive or sequential: Lights illuminate in sequence across a bar or array. Popular in custom builds, rarely compliant as a stop lamp function.
- Continuous flash: Never terminates. Almost universally non-compliant and the pattern most likely to trigger a fault code on CAN bus bikes.
How the Brake Light Switch Triggers the Module
Your bike has two brake light switches, and both feed the same lamp circuit. The front switch sits at the hand lever, usually hydraulic on modern bikes or mechanical on older ones. The rear switch sits at the foot pedal, typically spring-actuated.
Squeeze the lever or press the pedal, and the switch closes the circuit. Power flows to the brake light filament or LED array. A modulator sits in that path and chops the signal on the way through.
On CAN bus equipped motorcycles, the picture changes. The brake switch may report to the ECU rather than directly to the lamp. The ECU then decides what the brake light does.
That's why some modulators throw bulb-out warnings or trigger diagnostic trouble codes on newer machines.
Blinking Brake Light vs. Hazard Lights vs. Turn Signals
Three different systems, three different jobs, and drivers mix them up constantly. That confusion is exactly why lighting laws exist in the first place.
A blinking brake light is meant to say "I'm slowing down, pay attention." Hazard lights say "something is wrong, go around." Turn signals say "I'm changing direction." When a brake light flashes continuously, it starts borrowing meaning from the other two.
Why Drivers Confuse Them
Human peripheral vision is good at detecting change and bad at identifying detail. A flashing red lamp in your peripheral vision could be a brake light, a hazard flasher, or an emergency vehicle. Your brain guesses based on pattern and context.
Amber flashers are legally reserved for hazard and turn functions in most regions. Red flashing lamps are reserved for emergency vehicles and school buses in many places. That's the source of the confusion when a red brake light strobes.
Legal and Safety Differences
| System | Lamp color | Typical behavior | Legal restriction |
|---|---|---|---|
| Brake light | Red | Steady when braking | Must be steady in most codes |
| Brake light modulator | Red | Brief pulse, then steady | Tolerated in many US states, restricted elsewhere |
| Hazard lights | Amber (usually) | Continuous simultaneous flash | Legal only when stopped or in emergency |
| Turn signals | Amber | Rhythmic on/off, one side | Legal for signaling direction only |
| Emergency vehicle lights | Red, blue, or both | High-intensity strobe | Restricted to authorized vehicles |
What Each System Is Actually For
Brake lights communicate deceleration. That's it. They're a status indicator, not a request.
Hazard lights communicate a stationary or severely impaired vehicle. Using them while moving in traffic is technically illegal in most jurisdictions, even though plenty of riders do it in heavy rain.
Turn signals communicate an intended direction change. They're the only one of the three that asks another driver to do something.
Understanding that distinction matters when you're deciding whether to add a modulator. You're enhancing a status indicator. You're not creating a new signal.
Legal Rules by Region: FMVSS 108, ECE R7, State Codes, and Inspections
Lighting law is layered. There's a federal or national standard, then state or provincial rules on top, then inspection criteria on top of that. Any one of them can trip you up.
United States: FMVSS 108 and State Vehicle Codes
FMVSS 108 is the federal standard governing vehicle lighting in the US. It requires stop lamps to be steady-burning. That's the baseline.
NHTSA has issued interpretations over the years allowing brief modulation that terminates in a steady lamp. That's the narrow window most commercial modulators operate in. It is not a blanket approval.
State codes add their own layer. Some states explicitly permit brake light modulators. Some are silent.
A few prohibit flashing stop lamps outright. California, for example, has language restricting the flash rate of stop lamps. Other states simply defer to the federal standard.
Because state codes change, we can't give you a universal answer. Check your own state's vehicle code, or call your DMV, before you install anything.
Europe and UK: ECE R7 and MOT Checks
In Europe, UNECE Regulation No. 7 governs stop lamps. Like FMVSS 108, it calls for a steady-burning lamp. Type approval is the enforcement mechanism, and an unapproved lighting modification can fail a roadworthiness test.
The UK MOT test manual is specific about stop lamp behavior. An inspector checking your brake light expects a steady glow when the lever or pedal is applied. A lamp that pulses first may or may not be flagged, depending on the tester.
The safest approach in Europe is to buy a modulator with an ECE-compliant mode, or to skip the mod entirely.
Australia and Canada: ADR and CMVSS
Australia's Australian Design Rules cover vehicle lighting under the ADR 13 series. Canadian requirements sit under the Canadian Motor Vehicle Safety Standards, specifically CMVSS 108.
Both frameworks generally require steady stop lamps. Aftermarket modulators sold into these markets often ship with a compliance note or a selectable mode that terminates the flash.
Provincial and state inspections in both countries can fail a non-compliant brake light.
Inspection and Enforcement Realities
As of 2026, no major regulator has moved to permit continuous flashing brake lights. Brief, terminating pulses remain the only broadly tolerated pattern across the US, Europe, Australia, and Canada.
| Region | Governing standard | Steady-burn requirement | Practical enforcement |
|---|---|---|---|
| United States | FMVSS 108 plus state codes | Yes, with limited NHTSA interpretation | Varies widely by state |
| Europe | UNECE Regulation No. 7 | Yes | Type approval and roadworthiness tests |
| United Kingdom | ECE R7 plus MOT manual | Yes | MOT inspection |
| Australia | ADR 13 series | Yes | State roadworthy inspections |
| Canada | CMVSS 108 | Yes | Provincial safety inspections |
One more thing worth knowing. Enforcement is often complaint-driven. A modulator alone rarely gets you stopped.
A modulator plus an aggressive riding style, or a loud exhaust, tends to attract attention that ends with a lighting citation tacked on.
When Blinking Is a Warning: ABS, CAN Bus, Bulb-Out, and Wiring Faults
Not every blinking brake light is intentional. Some are the bike telling you something is broken. That distinction matters, because a fault that kills your brake light is far more dangerous than a modulator you installed on purpose.
If your brake light pulses only when you squeeze the lever, and it settles into a steady glow, you're probably looking at a modulator. If it blinks when you're not braking, or it flickers randomly, stop riding and diagnose it.
ABS and Brake System Warning Lights
A blinking ABS light is not a brake light modulator. It means the anti-lock braking system has detected a fault and disabled itself. You still have normal brakes, but you've lost the anti-lock function.
Most bikes handle this by lighting the ABS warning lamp solid at startup, then extinguishing it once you roll above roughly 3 to 6 mph. If it stays lit or starts blinking, a wheel speed sensor is the usual suspect. Debris on the sensor ring, a damaged tone ring, or a chafed sensor cable all cause it.
Don't ignore a blinking ABS lamp because the brakes still feel fine. On a wet road, that's exactly when you'll want the system working.
CAN Bus Errors and Bulb-Out Warnings
CAN bus motorcycles route lighting through the ECU rather than a simple wire. That changes everything about how a modulator behaves.
On these bikes, the ECU monitors current draw at the lamp. Swap an incandescent bulb for an LED, and the ECU sees less current than expected. It concludes the bulb has failed and throws a bulb-out warning, often a fast blink on the dash or a message on the instrument cluster.
Modulators can trigger the same response. The ECU sees an interrupted circuit and logs a diagnostic trouble code, usually shortened to DTC. On some machines this disables the brake light entirely until you clear the code.
If you own a CAN bus bike, look for a modulator marketed as CAN bus compatible. These include internal logic that mimics the correct load, so the ECU stays happy.
Hyperflash, Bad Grounds, and Faulty Switches
Hyperflash is a rapid blink, much faster than normal. It shows up most often on turn signals after an LED swap, but on combined tail light assemblies it can bleed into the brake circuit. The fix is usually a load resistor or a flasher relay designed for LED loads.
A bad ground is the sneakiest cause of all. When the ground path corrodes or loosens, current finds a return path through another circuit. The result is bizarre behavior.
Your brake light might dimly glow when you signal. It might flicker over bumps.
Brake light switches fail in two directions. A switch stuck closed leaves the brake light on permanently, which drains the battery and annoys everyone behind you. An intermittent switch causes flickering that looks like a failing modulator.
Use this table to narrow it down before you start replacing parts.
| Symptom | Most likely cause | First thing to check |
|---|---|---|
| Blinks only while braking, then holds steady | Modulator working as designed | Confirm pattern length and local legality |
| Blinks constantly, even parked | Brake switch stuck closed | Front and rear brake switch adjustment |
| Flickers over bumps | Loose ground or connector | Frame ground point and harness clips |
| Rapid flash after LED swap | Insufficient load, hyperflash | Load resistor or LED-compatible relay |
| Dash warning plus no brake light | CAN bus bulb-out detection | Scan for DTCs, check modulator compatibility |
| Dim glow with signals on | Bad ground, cross-feeding circuit | Ground strap and tail light ground wire |
A Simple If/Then Diagnostic Path
- If the light only blinks when you brake, then holds steady: the modulator is doing its job. Move on to verifying it's legal where you ride.
- If the light blinks while parked: the brake switch is stuck closed or shorted. Disconnect the switch and retest.
- If the light flickers with vibration: check grounds first, then connectors, then the switch.
- If a dash warning appears alongside the blinking: scan for codes before touching anything. You may have a CAN bus compatibility problem, not a hardware failure.
- If the light never comes on at all: check the fuse, then the bulb or LED array, then the switch.
That order matters. Fuses and grounds cost nothing to check. Modules and switches cost money.
Core Components: Modulators, Load Resistors, Relays, Switches, and LED Tail Lights
Five parts do most of the work in a brake light circuit. Knowing what each one does makes troubleshooting dramatically faster, and it stops you from buying the wrong fix.
Modulators and flasher relays get confused constantly, which we covered earlier. The other three components cause just as much grief, and they're cheaper to diagnose.
Brake Light Modulator Modules
A modulator is a sealed electronic module wired inline with the brake light feed. Internally it's a small microcontroller, a switching element, and usually a potting compound that seals everything against moisture and vibration.
Manufacturer specs on common units list an operating range of 6V to 16V DC, which covers normal charging system behavior on a 12V motorcycle. Most draw well under 1 amp. Physical size runs about the dimensions of a matchbox.
Flash pattern is set either by a fixed program or by a selector switch. Programmable units let you choose pulse count, flash duration, and whether the pattern terminates in a steady lamp.
Buy one with an IP67 or IP68 rating if you ride in rain. Vibration resistance matters too, because tail sections on twins and singles shake hard.
Load Resistors and Flasher Relays
A load resistor is a ceramic power resistor, typically 6 ohms at 10 to 25 watts, wired in parallel with an LED lamp. It draws extra current so the bike's monitoring circuit sees a normal load.
The tradeoff is heat. A 25W resistor running a brake light cycle gets genuinely hot, hot enough to melt nearby plastic if you mount it carelessly. Bolt it to metal, keep it away from wiring, and never bury it inside the tail section.
An LED-compatible flasher relay is the cleaner solution where the bike uses a traditional relay. It's a direct replacement for the factory unit and eliminates the need for resistors entirely.
Front and Rear Brake Light Switches
The front brake light switch lives at the hand lever. On hydraulic systems it's a pressure switch in the master cylinder banjo bolt. On cable systems it's a mechanical microswitch at the perch.
The rear brake light switch sits near the pedal, usually with a spring and an adjustable threaded body. That adjustment nut is where most problems start. Too tight, and the light stays on.
Too loose, and it never triggers.
Test both switches independently. Apply the front only, then the rear only, and watch the lamp each time. If one side doesn't trigger the light, you've found your fault.
LED vs. Incandescent Tail Light Assemblies
LED arrays are brighter, draw less current, and last far longer. They also break CAN bus monitoring, which is why the compatibility question keeps coming up.
Incandescent bulbs are simple and cheap. A standard 21W single-filament bayonet bulb handles the brake function on many older bikes. They're also easy to diagnose, because you can see a broken filament with your eyes.
| Component | What it does | Typical spec | Common failure |
|---|---|---|---|
| Brake light modulator | Pulses the brake feed, then holds steady | 6V to 16V DC, under 1A, IP67 | Water ingress, vibration fatigue |
| Load resistor | Adds current draw for LED swaps | 6 ohm, 10W to 25W | Overheating, poor mounting |
| LED flasher relay | Drives LED lamps at correct rate | Direct factory replacement | Wrong pinout, no LED support |
| Front brake switch | Triggers lamp from hand lever | Hydraulic pressure or microswitch | Leak, corroded contacts |
| Rear brake switch | Triggers lamp from foot pedal | Spring and threaded adjuster | Misadjustment, broken spring |
| LED tail light assembly | Emits brake and tail light | 1W to 3W per function | CAN bus mismatch, seal failure |
Standards work in this space matters more than most riders realize. SAE International publishes the performance documents that govern stop lamp intensity, beam pattern, and durability. Those documents feed directly into the federal standards we covered earlier.
Benefits and Drawbacks of a Pulsing Brake Light
Let's be honest about what a pulsing brake light does and doesn't do. It's not a force field. It's a nudge to the driver behind you, and nudges work better on some people than others.
The benefit case is real. The drawback case is also real. Which one wins depends on where you ride and how the device is configured.
Visibility Gains in Traffic, Rain, and Fog
Attention capture is the whole mechanism here. Human vision is tuned to detect change, not steady state. A lamp that pulses triggers that detection faster than a lamp that just glows.
The gain is largest in low-contrast conditions. In rain, fog, or flat overcast light, a steady red lamp competes with spray and glare. A pulsing one stands out.
The gain is smallest at night, when your brake light is already highly visible against a dark background. Some riders actually find modulation more annoying than helpful after dark, because the contrast change is harsh.
Stop-and-go traffic is where modulators earn their money. That's the scenario with the highest rear-end risk for motorcyclists, and the one where a driver's attention is most likely to be elsewhere.
Distraction and Confusion Risks
Here's the flip side. A brake light that flashes too long, too fast, or too brightly stops reading as a brake light.
Drivers learn a vocabulary early. Red steady means slowing. Amber flashing means turning or hazard.
Blue and red flashing means emergency. Red flashing is reserved in many places for school buses and emergency vehicles.
Break that vocabulary and you create a moment of hesitation. Hesitation behind you at 60 mph is not what you want.
There's a documented concern about photosensitive epilepsy as well. Rapid flashing light at certain frequencies can trigger seizures in susceptible people. Most compliant modulators flash slowly enough to stay outside the risk band, but high-rate strobe patterns are a different story.
Reliability, Water Ingress, and Vibration
Motorcycle tail sections are a hostile environment. They see road spray, pressure washing, temperature swings, and constant vibration.
A modulator that isn't potted and sealed will eventually fail. Water gets in, corrosion starts, and the module either stops working or starts behaving erratically. An erratic brake light is worse than no modulator at all.
Vibration kills cheap electronics. Solder joints crack. Connectors work loose.
Wire strands fatigue and break inside the insulation, which is the hardest fault to find.
Mount the module with some isolation. Zip ties to a rigid frame member transmit every vibration straight into the circuit board. Foam tape or a rubber-lined clip does a much better job.
| Factor | Benefit side | Drawback side |
|---|---|---|
| Conspicuity | Faster driver reaction in traffic | Can read as emergency signal |
| Low visibility conditions | Strong gain in rain and fog | Marginal gain at night |
| Cost | $20 to $150 for most units | Adds a failure point to a safety circuit |
| Reliability | Sealed units last years | Cheap units fail from water and vibration |
| Legality | Compliant modes widely tolerated | Non-compliant patterns risk tickets |
| Distraction | Grabs attention when needed | Long or fast patterns cause hesitation |
Who It's For: Commuters, Tourers, Group Riders, and Custom Builds
A modulator isn't right for everyone. It solves a specific problem, and if you don't have that problem, it's just extra complexity on a safety circuit.
Here's who actually benefits, and who should probably leave the wiring alone.
High-Traffic Commuters
If your ride involves dense urban traffic and frequent stops, you're the prime candidate. Rear-end collisions cluster in exactly that environment, and driver attention is at its worst.
Commuting also means repetition. You brake in the same places at the same times, and drivers behind you get used to your bike. A pulsing brake light resets that familiarity every single stop.
Check your local rules first. Urban jurisdictions tend to enforce lighting violations more aggressively than rural ones, simply because there are more officers around.
Touring and Group Riders
Group riding creates a specific hazard. Riders in a staggered formation watch the bike ahead, and brake light timing becomes a communication channel. A brief pulse actually helps here, because it signals braking earlier in the rider's peripheral vision.
Touring riders also spend more time on highways at speed. Closing speeds are high, and the cost of a missed brake light is severe.
Long-distance riders should prioritize reliability. Buy a sealed, potted unit with a real warranty. A failure 400 miles from home is a bad day.
Custom Builders and OEM Upgrades
Custom builders have the most freedom and the most legal exposure. Integrated tail lights, sequential arrays, and aftermarket LED units all change how the brake function behaves.
If you're building a bike from scratch, check your jurisdiction's requirements before you commit to a lighting design. Some regions require a minimum lamp area, a specific mounting height, and a defined separation between brake and turn functions.
OEM upgrades are simpler. Several manufacturers offer accessory brake light modules through their own parts catalogs. Those units are typically designed to work with the bike's existing electrical architecture, including CAN bus monitoring.
Who Should Skip It
- Riders in jurisdictions that prohibit flashing stop lamps outright.
- Owners of older bikes with marginal charging systems and brittle wiring.
- Anyone who isn't comfortable making a permanent splice into a safety circuit.
- Riders who mostly ride in daylight on open roads with light traffic.
For those riders, a brighter LED tail light or an auxiliary brake light bar delivers most of the visibility benefit with far less legal and electrical risk.
Installation Workflow for Plug-and-Play and Hardwired Modulators
Two paths exist here, and they're genuinely different jobs. Plug-and-play takes 15 minutes. Hardwired takes an hour or more and requires actual wiring skill.
Pick your path before you buy anything. The wrong module for your bike means cutting connectors you didn't need to cut.
Tools, Connectors, and Safety Prep
Gather everything first. Stopping mid-job to hunt for a connector is how mistakes happen.
| Tool or material | Why you need it |
|---|---|
| Multimeter | Verify voltage, ground, and continuity |
| Posi-tap connectors | Splice without cutting the factory wire |
| Soldering iron and heat shrink | Permanent, vibration-proof connections |
| Dielectric grease | Seal connectors against moisture |
| Zip ties and foam tape | Secure and isolate the module |
| Service manual or wiring diagram | Identify the correct brake light wire |
| Load resistor (if LED) | Prevent bulb-out warnings and hyperflash |
Disconnect the battery negative terminal before you touch any wiring. A shorted brake circuit can blow a fuse at best and melt a harness at worst.
Photograph the connector layout before you disconnect anything. Reassembly is much easier with a reference.
Step-by-Step Wiring and Mounting
- Locate the brake light feed wire. Consult your wiring diagram. It's usually a specific color running from the brake switch to the tail light.
- Confirm with a multimeter. Probe the suspect wire while pressing the brake pedal. Voltage should appear only when braking.
- Disconnect the battery negative terminal.
- Install the modulator inline. Use a Posi-tap for a reversible install, or cut, solder, and heat shrink for a permanent one.
- Add a load resistor if you've swapped to LED. Wire it in parallel across the brake light feed and ground.
- Mount the module. Choose a spot away from direct spray and exhaust heat. Isolate it from vibration.
- Secure all wiring. Route it away from moving parts and sharp edges. Leave a small service loop.
- Reconnect the battery.
- Test every function before reassembling bodywork.
That last step is where most people get lazy. Test first, then close everything up.
Testing Front Brake, Rear Brake, Turn Signals, and Hazards
Test each function in isolation. Don't press the brake and signal at the same time until you've verified both work alone.
- Squeeze the front lever. Confirm the pulse pattern runs, then holds steady.
- Press the rear pedal. Confirm the same behavior.
- Activate the left turn signal. Confirm normal rate, no hyperflash.
- Activate the right turn signal. Same check.
- Switch on hazard lights. Confirm both sides flash and the brake light still works.
- Watch the instrument cluster for any warning lamps or DTCs.
If your bike has CAN bus monitoring, this is the moment it will complain. A bulb-out warning or a brake system fault means you need a compatibility fix.
Road Test and Final Inspection
Ride somewhere quiet and do a series of stops. Have someone watch from behind if you can. They'll catch things you can't see from the saddle.
Check for flickering over rough pavement. That's the vibration test, and it exposes bad splices and loose grounds.
Then re-check your work after the first ride. Heat cycles loosen connectors and shift wiring. A five-minute inspection after 20 miles catches most early failures.
A good rule of thumb: if the pattern runs longer than about one second before holding steady, shorten it. If it runs faster than roughly 5 Hz, slow it down. Both extremes draw the wrong kind of attention.
Mistakes to Avoid: Hyperflash, Illegal Patterns, Bad Splices, and Water Ingress
Most modulator problems trace back to a handful of install errors. The device itself is usually fine. The wiring around it, or the configuration choice, is where things go wrong.
Here are the ones we see come up over and over, and how to sidestep each.
Choosing a Non-Compliant Flash Pattern
This is the single biggest mistake. A pattern that flashes longer than roughly one second, or faster than about 5 Hz, stops reading as a brake light.
Many programmable modulators ship with a wide menu of patterns. Some of those patterns are designed for off-road or show use. Running them on the street is asking for a citation.
Set the pattern to flash-then-solid with three to five pulses. That's the configuration most jurisdictions tolerate.
Skipping Load Resistors or CAN Bus Adapters
Swap an incandescent bulb for an LED array, and the current draw drops sharply. The bike's monitoring circuit reads that drop as a failed bulb.
The result is hyperflash, a bulb-out warning, or a disabled brake light. None of those are good.
If your bike uses CAN bus monitoring, buy a modulator advertised as compatible. If it uses a traditional flasher relay, add a load resistor or fit an LED-compatible relay.
Poor Splicing and Ground Connections
A splice that looks fine can fail under vibration. Crimp connectors loosen. Twisted-and-taped joints corrode.
Use Posi-tap connectors for a reversible install, or solder and heat shrink for a permanent one. Never rely on electrical tape alone.
Ground connections deserve the same care. A loose frame ground causes all kinds of strange behavior, including dim glow and cross-feeding between circuits.
Ignoring Local Laws and Insurance Terms
Don't assume that because a modulator is sold in your country, it's legal in your state or province. Retailers sell to a wide market.
Check your own vehicle code. Call your DMV if the language is unclear. And read your insurance policy's modification clauses.
A lighting mod that's disclosed and compliant is a non-issue. One that's non-compliant and shows up in a crash investigation is a different story.
Burying the Module and Resistor
Heat and water kill electronics. A module stuffed inside a sealed tail section with no airflow will run hot. A load resistor bolted to plastic will melt it.
Mount the module where it gets airflow but not direct spray. Bolt the resistor to metal, away from wiring and bodywork.
Quick Reference: Mistake and Fix
| Mistake | What it causes | The fix |
|---|---|---|
| Long or fast flash pattern | Confusion, citations | Set flash-then-solid, 3 to 5 pulses |
| No load resistor after LED swap | Hyperflash, bulb-out warning | Add 6 ohm, 10W to 25W resistor |
| Crimp-only splice | Intermittent failure over time | Solder and heat shrink, or Posi-tap |
| Loose frame ground | Dim glow, erratic behavior | Clean, tighten, add dielectric grease |
| Module buried in tail section | Overheating, water ingress | Relocate to ventilated, sheltered spot |
| No legal check before install | Ticket or failed inspection | Verify state or provincial code first |
Costs, Specs, and Performance Data
Prices vary widely, and the spread isn't always about quality. A $25 module and a $120 module may do the same job. The difference usually comes down to sealing, programmability, and compatibility features.
Here's what our research shows you'll pay, and what you actually get at each price band.
Price Ranges for Modulators and Kits
| Price band | What you typically get | Best for |
|---|---|---|
| $20 to $40 | Basic fixed-pattern module, minimal sealing | Budget builds, dry climates |
| $40 to $80 | Sealed module, selectable patterns, decent warranty | Most riders, daily use |
| $80 to $150 | CAN bus compatible, IP68, programmable, multi-year warranty | Modern bikes, touring, wet climates |
| $150 and up | Integrated tail light with built-in modulation | Custom builds, full upgrades |
Load resistors run $5 to $15 each. An LED-compatible flasher relay runs $15 to $35. A replacement brake light switch is usually $10 to $30 depending on the bike.
Voltage, Current Draw, Flash Rate, and IP Ratings
Manufacturer specs on common modulators list an operating range of 6V to 16V DC. That covers normal charging system behavior on a 12V motorcycle, including the brief voltage spike when the regulator kicks in.
Current draw is typically well under 1 amp for the module itself. The lamp draws whatever it draws, whether that's 21W for a standard incandescent bulb or 1W to 3W for an LED array.
Flash rate on compliant units usually sits between 3 and 5 Hz. Flash duration before holding steady is typically 0.5 to 1 second.
IP rating tells you how well the enclosure keeps out dust and water. IP65 handles spray. IP67 handles brief immersion.
IP68 handles sustained immersion.
Warranty, Lifespan, and Installation Time
Warranty coverage ranges from 1 year on budget units to 5 years on premium ones. A long warranty usually signals a sealed, potted design.
Real-world lifespan depends heavily on mounting. A well-mounted, sealed module can last the life of the bike. A poorly mounted one can fail in a single season.
Installation time runs 15 to 30 minutes for plug-and-play units. Hardwired installs with resistor and switch work take 45 to 90 minutes.
What the Numbers Don't Tell You
Specs won't tell you how a module behaves on your specific bike. CAN bus compatibility in particular is bike-specific, not just brand-specific.
Some modules work perfectly on one model year and throw codes on the next. That's why verified buyer feedback matters more than the spec sheet here.
Read reviews for your exact bike before you buy. If you can't find any, buy from a seller with a no-questions return policy.
Maintenance, Troubleshooting, and When to See a Pro
A modulator adds one more component to a circuit that already has several failure points. Regular inspection keeps small problems from becoming roadside breakdowns.
The good news is that brake light circuits are simple. Diagnosis rarely takes more than a multimeter and 20 minutes.
Diagnosing a Brake Light That Blinks, Stays On, or Won't Light
Start with the simplest explanation. Then work toward the complex one.
- If the light won't come on at all: check the fuse first. Then the bulb or LED array. Then the switch.
- If the light stays on constantly: the brake switch is stuck closed. Disconnect each switch in turn to isolate which one.
- If the light flickers over bumps: check grounds and connectors before anything else.
- If the light blinks only when braking: the modulator is working. Verify the pattern terminates in a steady lamp.
- If a dash warning appears: scan for DTCs. On CAN bus bikes, this usually points to a load or compatibility issue.
- If one brake switch triggers the light and the other doesn't: the non-working switch is the fault.
Work in that order every time. It saves money and it saves frustration.
Cleaning, Dielectric Grease, and Waterproofing
Every spring, pull the tail light connector apart and look inside. Green corrosion means moisture has been getting in.
Clean contacts with electrical contact cleaner, let them dry, then pack them with dielectric grease. The grease keeps water out without blocking the connection.
Inspect the module's mounting point too. If the zip ties have cut into the wiring insulation, replace that section of wire.
Check the ground point on the frame. It should be clean bare metal with a tight fastener. Paint, rust, or a loose bolt all cause problems.
When to Visit a Mechanic or Inspector
Some problems are worth handing off. If your bike has ABS or traction control and you're seeing brake-related warning lamps, get a proper diagnostic scan.
If your brake light circuit shares wiring with the ECU and you're not confident reading a wiring diagram, a shop will save you hours.
And if you're unsure whether your setup is legal, ask an inspection station before you get cited. Many will do a quick pre-check for a small fee.
| Symptom | DIY or pro? | Why |
|---|---|---|
| Fuse blown | DIY | Simple replacement |
| Bulb or LED array failed | DIY | Direct swap |
| Brake switch misadjusted | DIY | Threaded adjuster, no special tools |
| Ground or connector corrosion | DIY | Clean and grease |
| CAN bus fault code | Pro | Requires diagnostic scanner |
| ABS or traction control warning | Pro | Safety-critical system |
| Legal compliance question | Pro | Inspection station knows local code |
Frequently Asked Questions
Is a blinking brake light illegal?
It depends on where you ride and how it blinks. Most US states tolerate a brief pulse that ends in a steady lamp. FMVSS 108 requires steady-burning stop lamps, and NHTSA interpretations allow short modulation.
Continuous flashing is illegal nearly everywhere. Check your state or provincial vehicle code before installing.
Can a blinking brake light cause a failed inspection?
Yes, if the inspector considers it non-compliant. UK MOT testers and US state inspection stations both check that the brake light holds steady when the lever or pedal is applied. A pattern that never terminates, or one that flashes too fast, is the most likely to fail.
Why does my brake light blink when I'm not braking?
A brake light that blinks while parked usually has a stuck or misadjusted brake switch. The rear switch is the common culprit, since it uses a spring and threaded adjuster that can drift. Disconnect each switch in turn to isolate the fault.
Do brake light modulators work with LED tail lights?
Yes, but they often need extra parts. LED arrays draw less current than incandescent bulbs, which triggers hyperflash and bulb-out warnings on monitored circuits. A load resistor or an LED-compatible flasher relay solves the problem.
CAN bus bikes may need a modulator specifically rated for that system.
Will a flashing brake light void my insurance?
Not automatically, but it can complicate a claim. Standard motorcycle policies don't usually ask about lighting mods during underwriting. If a crash investigation finds a non-compliant brake light, an adjuster may argue it contributed to the collision.
Disclosing the mod to your insurer removes that risk.
Can a blinking brake light prevent rear-end collisions?
Research suggests it improves driver reaction time, which is the mechanism behind rear-end prevention. Studies on center high mount stop lamps in cars showed measurable crash reductions. Motorcycle-specific real-world data is thinner.
The benefit is real but modest, and it doesn't replace riding defensively.
Final Verdict: Should You Run a Blinking Brake Light?
Here's our honest position. A brake light modulator is a legitimate safety tool when it's set up correctly and used within the law. It is not a substitute for riding as if you're invisible.
The visibility gain is real, especially in traffic and in poor weather. The legal risk is also real, and it varies enormously by where you live. Both things are true at once.
Safe and Legal Use Cases
Run a modulator if you commute in dense traffic, ride in rain or fog regularly, or tour on highways with high closing speeds. Choose a unit with a flash-then-solid pattern of three to five pulses.
Verify your local code first. If your jurisdiction permits it, a compliant modulator is a sensible addition to a safety-critical circuit.
Buy a sealed unit with an IP67 or IP68 rating and a real warranty. Mount it properly. Test every function after installation.
Alternatives If Modulators Are Restricted
If your area prohibits flashing stop lamps, you still have options that improve visibility without touching the brake circuit's behavior.
- A brighter LED tail light assembly with higher candela output.
- An auxiliary brake light bar mounted higher on the tail section.
- A center high mount stop lamp, if your bike doesn't have one.
- High-visibility riding gear with retroreflective panels.
- A headlight modulator, which is regulated separately and permitted in many regions.
None of those carry the same legal risk, and several deliver comparable conspicuity gains.
Bottom-Line Recommendation
If you can run a compliant modulator legally, do it. Set it to flash briefly and hold steady. Wire it properly.
Test it after every service.
If you can't run one legally, or you're not comfortable modifying a safety circuit, skip it. A brighter LED tail light and better riding habits will do more for you than a device that might get you cited.
Either way, check your brake light works before every ride. A modulator that fails, or a bulb that burns out, leaves you with no rear signal at all. That's the scenario worth losing sleep over.