A Fujitsu mini split blinking green light can mean two very different things. On most Halcyon and Airstage indoor units, that green operation lamp is a status display. It blinks during normal defrost and standby.
It also blinks when the system logs a fault. Knowing which one you're seeing changes everything.
Fujitsu's service documentation treats the LED as a real diagnostic channel, not just a power indicator. Count the blinks, and the pattern usually maps to a code in your model's service manual. Ductless systems like these often rate above 20 SEER2, according to the [U.S.
Department of Energy](https://www.energy.gov), so a genuine fault is worth chasing down properly. Here's how to read the signal, step by step.
Quick Answer
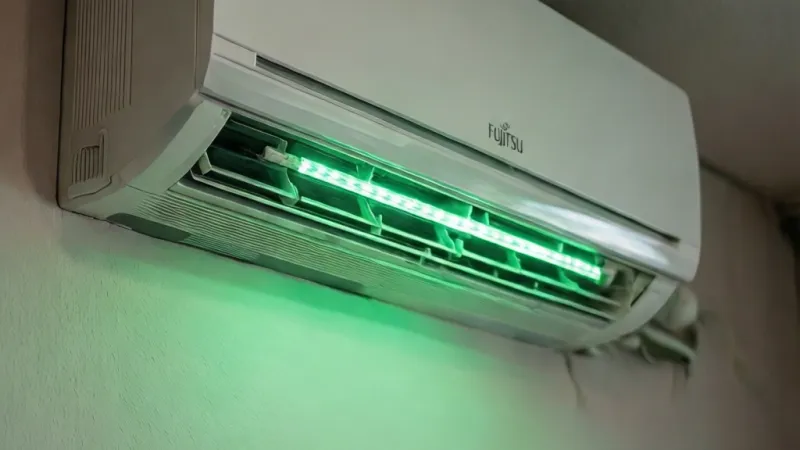
A Fujitsu mini split blinking green light is usually a status or fault code. Normal blinks happen during defrost, standby, and startup. A repeating blink pattern usually means a logged error.
Count the blinks and check your model's service manual. A breaker reset clears some faults, but not all.
What the Blinking Green Light on Your Fujitsu Mini Split Really Means
The green lamp on the indoor unit is called the operation lamp. It has one job: tell you what the system is doing right now. Solid green means normal operation.
Blinking green means the system wants your attention.
A blink isn't automatically a breakdown. Fujitsu uses the same lamp for happy states, neutral states, and fault states. The pattern is what separates them.
Why the operation LED doubles as an error display
Fujitsu General builds a self-diagnostic routine into every indoor unit. The green lamp is the simplest way to surface that diagnostic on a unit with no display screen.
On models with a wireless remote, the lamp blinks a set number of times, pauses, then repeats. That repeating pattern is the code. On models paired with a wired remote, the same fault often shows up as text like "E:EE" or "E:00" on the remote screen.
Same underlying error, two different ways of showing it.
The lamp isn't decorative. It's a fault channel that's been part of Fujitsu's design language for years.
When a green blink is completely normal, and when it isn't
Not every blink is a problem. Here's the split.
Normal blinks:
- Defrost cycle during heating mode. The outdoor coil frosts up, the indoor fan pauses, and the lamp may blink briefly.
- Standby after the room hits your setpoint.
- Startup self-check for the first 1 to 3 minutes after you press On.
- Filter reminder, which usually shows on a separate lamp but can coincide with a green blink.
Blink patterns that point to a real fault:
- Continuous blinking that never stops.
- Blinking plus no cooling or no heating.
- Blinking that starts right after a power surge, storm, or outage.
- Blinking that comes back within minutes of a breaker reset.
If the lamp blinks and the unit runs fine, wait three minutes and watch again. If the lamp blinks and the unit stops, you've got a code to pull.
The three lamps on a Fujitsu indoor unit
Most Halcyon and Airstage indoor units carry three indicator lamps. Knowing which one is blinking matters as much as the blink count.
| Lamp | Color | What it typically signals |
|---|---|---|
| Operation | Green | Power state, running mode, and the main blink error code |
| Timer | Orange | Timer on/off status, plus some fault patterns |
| Economy | Green | Energy-saving mode, plus some fault patterns |
If only the green lamp is blinking, you're usually looking at an operation fault. If the green and timer lamps blink together, the pattern is different and the code changes. Fujitsu's own service manuals spell out each combination by model.
How Fujitsu's Self-Diagnostic LED System Works
Fujitsu doesn't use a single universal code list. The system is model-specific, generation-specific, and split between two product families. A blink count that means "drain fault" on one Halcyon can mean something else on a newer Airstage unit.
The logic is consistent, though. The indoor control board watches a set of inputs. When one falls outside its expected range, the board flags a fault and pushes that fault to the LED.
Your job is to read the flag and match it to the right code.
The operation lamp, timer lamp, and economy lamp
Think of the three lamps as a three-digit binary readout. Each lamp can be off, solid, or blinking. That gives you a surprising number of combinations.
The operation lamp carries the primary code. The timer and economy lamps add context.
On a wired remote, the remote displays the full code as text. That's the easiest path if you have one. On a wireless remote, you're counting blinks and cross-referencing.
How blink counting actually works
Blink counting is simple in theory and easy to botch in practice. The pattern is: blink, blink, blink, pause, repeat. The number of blinks before the pause is the code number.
The pause usually runs around 3 seconds.
If you see 3 blinks, then a pause, then 3 blinks again, your code is 3. Not "3 blinks total." Not "the lamp is broken." Count the blinks in one cycle.
Wireless remote vs wired remote error reporting
The reporting method changes how you read the fault.
| Setup | How the fault appears | Easiest way to read it |
|---|---|---|
| Wireless remote | Green lamp blink pattern | Count blinks, check service manual |
| Wired remote (UTY-RNNYM and similar) | Text code on the remote display | Read the code directly |
| Third-party thermostat | Usually no code display | Pull the code from the LED |
If you have a wired remote, you're in luck. The code appears as text, and you can skip the counting entirely.
Where the model and serial number change the meaning
Fujitsu's service literature is organized by model number. A code that means one thing on a Halcyon RLS3 series indoor unit can map to a different fault on a newer RLS4 or Airstage unit. Same blink count, different meaning.
Find the model and serial number before you go any further. They're on a sticker on the side of the indoor unit, usually under the front panel or near the service access. Write them down.
You'll need them for the manual and for any warranty call.
Condition Variables That Change the Answer
A blinking green light isn't one problem. It's a category. The right next step depends on six variables.
Skip this step and you'll guess at the fix.
Variable 1: Blink count and pause length
The blink count is your primary clue. One or two blinks in a repeating pattern often points to something minor. Five or more usually points to a real component fault.
The pause length matters too. A 3-second pause is standard. A longer pause can mean the unit is in a different diagnostic mode.
Variable 2: Halcyon vs Airstage vs older Fujitsu generations
Halcyon is Fujitsu's residential ductless line in North America. Airstage is the commercial VRF line. Older units from the 2000s use simpler blink schemes.
Newer units with inverter compressors and advanced PCBs use more codes.
If your unit is more than 10 years old, expect fewer codes and simpler diagnostics. If it's from the last five years, expect a longer code list.
Variable 3: Operating mode
The same blink can mean different things depending on mode.
- In heating mode, a brief blink during defrost is normal.
- In cooling mode, a blink usually means a real fault.
- In fan-only mode, a blink is almost always a fault.
- In auto mode, the unit switches between heating and cooling, so brief blinks during transitions can be normal.
Check what mode you're in before you panic.
Variable 4: What happened right before
Context is a diagnostic tool. Ask yourself what changed in the last 24 hours.
- Power outage or brownout? Suspect communication or PCB.
- Lightning storm? Suspect surge damage.
- Filter cleaned or front panel removed? Suspect a filter sign or a loose connector.
- New installation? Suspect wiring, refrigerant charge, or configuration.
- Nothing changed? Suspect a component that's finally worn out.
Variable 5: Single-zone vs multi-zone outdoor unit
Multi-zone systems share one outdoor unit across several indoor heads. A fault on one head can trigger a blink on all of them. That's normal behavior, not a system-wide failure.
If you have a multi-zone setup, check every indoor unit. The one with a different blink pattern is usually the source.
Variable 6: Season and climate
Defrost cycles are more frequent in cold, humid climates. That means more normal blinks in winter. In hot, dry climates, you'll see fewer defrost blinks and more cooling-mode faults.
Knowing your climate helps you rule out the normal stuff first.
Step 1: Read the Blink Count and Pull the Error Code
This is where the actual diagnosis starts. Everything before this was prep. Now you count, you record, and you cross-reference.
How to count blinks accurately
Do it in this order.
- Stand about 6 feet from the indoor unit so you can see the lamp clearly.
- Watch for a full cycle: blink, blink, pause, blink, blink, pause.
- Count the blinks between pauses, not the total blinks in 30 seconds.
- Repeat the count three times to confirm.
- Write the number down before you touch anything.
If the lamp blinks once every few seconds with no pause pattern, that's a continuous blink, not a counted code. Treat it as its own category.
How to enter self-diagnostic mode
Many Fujitsu indoor units have a test run button or a diagnostic button behind the front panel. Pressing it puts the unit into a self-check routine. The lamp then blinks the stored fault code.
On units with a wired remote, the remote usually has a diagnostic or service mode you can enter from the menu. The remote shows the code as text.
Before you press anything, write down the current blink pattern. Some diagnostic modes clear the stored code when you exit.
A quick reference for common blink categories
This table is a starting point, not a substitute for your model's manual. Fujitsu's codes vary by generation.
| Blink pattern | Likely category | First move |
|---|---|---|
| 1 to 2 blinks, then pause | Minor or normal | Wait 3 minutes and recheck |
| 3 to 5 blinks, repeating | Sensor or communication | Pull the code, check wiring |
| Continuous fast blink | Communication fault | Check breaker and terminal connections |
| Blink plus no airflow | Fan, filter, or drain | Check filter, drain pan, float switch |
| Blink plus no cooling | Refrigerant or compressor | Stop running the unit, call a tech |
Commonly reported Fujitsu error codes
These codes show up again and again in Fujitsu service literature and in owner reports. Your model's manual is the final word.
- E:EE usually points to a communication error between the indoor and outdoor unit.
- E:00 typically indicates an outdoor unit fault or a communication problem.
- Codes in the E:0x to E:1x range often relate to thermistor or sensor faults.
- Codes in the E:4x to E:5x range commonly relate to indoor or outdoor fan issues.
- Codes in the E:6x to E:7x range often point to refrigerant or compressor problems.
Don't guess from the range alone. Open the service manual for your exact model.
Why recording the code matters
Write down the code, the blink count, the time of day, and what the unit was doing. This does three things.
- It gives you a clean starting point if the code clears and comes back.
- It lets a technician arrive prepared instead of spending an hour on discovery.
- It gives you documentation if the fault turns out to be a warranty issue.
A single line on your phone notes app is enough. "3 blinks, heating mode, 8:40 PM, after power flicker." That's all you need.
When to reset, and when not to
Reset only after you've recorded the code. Reset first and you erase the evidence. If the unit runs fine after the reset and the code doesn't come back within 24 hours, it was likely a one-time glitch.
If it comes back, you have a real fault and you now have the code to prove it.
One hard reset procedure that works on most Fujitsu mini splits:
- Turn the unit off with the remote.
- Flip the dedicated breaker off at the panel.
- Wait 3 to 5 minutes. This lets the capacitors drain.
- Flip the breaker back on.
- Wait 2 minutes for the board to boot.
- Turn the unit on and watch the lamp.
If the lamp stays solid green, you're good. If it blinks again, stop resetting and move to Step 2.
One honest caveat
As of 2026, Fujitsu's published error code lists still vary across Halcyon and Airstage model generations. Any generic code chart you find online, including this one, is a starting point. The only authoritative source for your unit is the service manual that matches your exact model number.
If you don't have it, Fujitsu General's official site and their authorized dealer network can provide it. And if refrigerant handling is involved, the work falls under EPA Section 608 rules, which means a certified technician, not a DIY fix.
Step 2: Filter, Drain, and Float Switch Branches
This is the most common branch, and it's the one you can usually fix yourself. Filter and drain issues cause a huge share of blinking green light complaints. They're also the easiest to rule out.
If the blink appeared after weeks of running, suspect the filter first
A dirty filter is the number one cause of a blinking green light that isn't a real fault. Fujitsu indoor units monitor airflow. When the filter clogs, the unit can't move enough air across the coil.
The filter sign usually shows on a separate lamp. On some models, the green operation lamp blinks too. If the unit is still cooling or heating, even weakly, check the filter before anything else.
Pull the front panel. Slide out both filter screens. Hold them up to a light source.
If you can't see light through them, they're clogged.
Wash them in lukewarm water. Use a mild dish soap if they're greasy. Let them dry completely before reinstalling.
A wet filter can trigger a moisture sensor on some units.
If the blink came with water on the floor, it's the drain
Water leaking from the indoor unit plus a blinking green light almost always points to the drain system. The drain pan collects condensate. The drain line carries it outside.
The float switch is a safety device that trips when the pan overflows.
When the float switch trips, the unit shuts down and blinks. That's by design. It's protecting your ceiling and walls.
How to clear a clogged condensate line
The most common cause is a clogged drain line. Dust, biofilm, and insect nests build up over time. Here's the if/then flow.
- If you see standing water in the drain pan, stop running the unit.
- If the pan is full, the float switch has tripped. The unit won't run until it clears.
- Locate the drain line exit outside. It's usually a 5/8-inch or 3/4-inch PVC or vinyl tube.
- If water drips freely when you run the unit, the line is clear.
- If nothing comes out, the line is blocked.
To clear a block, use a wet/dry vacuum on the outdoor end of the drain line. Seal the vacuum hose around the pipe with your hand. Run it for 30 seconds.
That pulls the clog back toward you.
If that doesn't work, use a drain gun or a hand pump to push water through from the indoor side. Never use high-pressure air. It can blow the line apart at the joints.
What the float switch actually does
The float switch is a small lever or magnet inside the drain pan. When water rises, the float lifts. That opens or closes a circuit.
The control board sees the change and stops the unit.
Float switches fail two ways. They can stick in the up position and keep the unit off. They can stick in the down position and let water overflow.
If your pan is dry and the unit still blinks a drain code, the switch is likely stuck or faulty.
Drain pump vs gravity drain
Some Fujitsu indoor units use a gravity drain. Water flows downhill to the outside. Others use a small condensate pump.
The pump pushes water up and out when the drain line runs uphill.
If your unit has a pump, listen for a hum when the unit runs. No hum plus a blinking green light usually means the pump failed or lost power. Pumps are replaceable, but the indoor unit usually needs to come off the wall.
| Symptom | Likely cause | DIY or tech |
|---|---|---|
| Blink plus weak airflow | Dirty filter | DIY |
| Blink plus water on floor | Clogged drain line | DIY with vacuum |
| Blink plus full drain pan, line clear | Float switch or pump | Tech |
| Blink plus no water, pan dry | Float switch stuck | Tech |
| Blink after heavy humidity | Drain overload | Clean and retest |
When to stop and call someone
If you've cleaned the filter, cleared the drain, and the blink comes back, stop. You've ruled out the easy stuff. The next step is a technician with a multimeter and the service manual.
Step 3: Communication and Wiring Fault Branches
Communication faults are the second most common cause of a blinking green light on Fujitsu mini splits. The indoor and outdoor units talk over a low-voltage communication wire. When that conversation breaks down, the green lamp blinks.
If the blink started after a storm or outage, suspect communication
Power events are hard on control boards and communication circuits. A surge can damage the communication chip on either board. It can also corrupt the settings stored in memory.
If the blink started right after a storm, brownout, or outage, this is your likely branch. Start with a full power reset. If the blink returns immediately, the fault is real.
The most common communication fault: E:EE
E:EE is the code most Fujitsu owners report when they see a blinking green light with no cooling. It means the indoor unit lost communication with the outdoor unit. That can be a wiring issue, a board issue, or a power issue.
Check the wiring first
The communication wire runs from the indoor terminal strip to the outdoor terminal strip. It's usually a 3-core or 4-core cable. Look for these problems.
- Loose terminal screws. Vibration works them loose over years.
- Corroded or green terminals. Moisture gets in and eats the copper.
- Rodent damage. Mice love the warm space behind the indoor unit.
- Pinched wire. Installation can crush the cable against a stud or pipe.
- Wrong wire gauge. Undersized wire causes voltage drop over long runs.
Turn the breaker off before you touch any terminal. Then check each screw with a screwdriver. If any are loose, tighten them.
If any are corroded, clean them with contact cleaner and a small brush.
If the wiring looks fine, check the breaker and voltage
A weak breaker can cause communication faults. The unit starts, the voltage sags, and the boards reset. That shows up as a blinking green light.
Test the breaker with a multimeter. You should see the rated voltage at the outdoor unit disconnect. If it's low, the problem is upstream in your panel or service.
If the code comes back after tightening, suspect a board
Communication faults that survive a wiring check usually point to the control board. The indoor PCB or the outdoor PCB has a failed communication circuit.
Board replacement is a technician job. The boards are model-specific. You'll need the exact part number from the service manual.
Fujitsu's authorized parts network is the safest source.
| Check | What you're looking for | If it fails |
|---|---|---|
| Terminal screws | Tight, clean, no corrosion | Tighten or clean |
| Wire condition | No nicks, pinches, rodent damage | Replace the wire run |
| Voltage at disconnect | Within 10% of rated | Call an electrician |
| Breaker | No trips, no heat, no buzz | Replace the breaker |
| Board LEDs | Fault LED lit on PCB | Replace the board |
What about a hard reset for communication faults?
A hard reset clears the stored fault and forces the boards to re-handshake. Here's the sequence.
- Turn the unit off with the remote.
- Flip the breaker off.
- Wait 5 minutes. Longer is fine.
- Flip the breaker on.
- Wait 2 minutes for both boards to boot.
- Turn the unit on and watch the lamp.
If the lamp stays solid, the fault was transient. If it blinks again within minutes, the fault is physical. Move to the board check.
One warning about resetting repeatedly
Don't reset more than twice. Each reset stresses the compressor and the boards. If the fault returns twice, stop.
Repeated resets can turn a small fault into a dead compressor.
Step 4: Thermistor, PCB, and Sensor Branches
Thermistors are tiny temperature sensors. Fujitsu mini splits use several of them. Each one reports a temperature to the control board.
When one fails or drifts out of range, the board flags a fault and the green lamp blinks.
The main thermistors on a Fujitsu mini split
Here's what the system is watching.
- Indoor return air thermistor. Reads the temperature of the air entering the indoor unit.
- Indoor coil thermistor. Reads the temperature of the indoor coil.
- Outdoor air thermistor. Reads the outside temperature.
- Outdoor coil thermistor. Reads the outdoor coil temperature.
- Discharge pipe thermistor. Reads the compressor discharge temperature.
Each one has an expected resistance at a given temperature. The service manual lists these values. A thermistor that reads open or short triggers a code.
If the blink code points to a thermistor, test before replacing
Thermistors are cheap, but they're not always the problem. A bad connection at the board can look like a bad thermistor. So can a dirty connector.
Here's the if/then flow.
- If you have a multimeter, unplug the thermistor from the board.
- Measure resistance across the two pins.
- Compare to the resistance table in the service manual for that temperature.
- If it's close, the thermistor is fine. Check the connector and the board.
- If it reads open or way off, replace the thermistor.
Never replace a thermistor without testing. It's a waste of money and time.
PCB failure signs
The control board is the brain of the indoor unit. When it fails, you get a blinking green light and often a dead unit. Look for these signs.
- Burn marks or discoloration on the board.
- Bulging capacitors.
- A burnt smell near the indoor unit.
- Relays that click constantly but nothing happens.
- The unit won't respond to the remote at all.
If you see any of these, the board is done. Replace it.
Remote and configuration faults
Not every blink is a hardware fault. Sometimes it's a setting.
- Child lock is on. The unit won't respond to the remote, and the lamp may blink.
- Timer conflict. Two timers set at once can confuse the board.
- Wrong remote. A remote from a different Fujitsu model may send codes the unit doesn't understand.
- Wired remote address conflict. On multi-zone systems, two indoor units set to the same address will fault.
Check the remote first. It's free to rule out. Press the reset button on the remote, or pull the batteries for 30 seconds.
If the blink happens only in one mode
If the blink happens only in heating, the outdoor coil thermistor or the defrost logic is suspect. If it happens only in cooling, the indoor coil thermistor or the refrigerant charge is suspect.
Mode-specific blinks narrow the branch fast. Write down which mode triggers it.
Step 5: Refrigerant, Compressor, and Outdoor Unit Branches
This is the branch you don't DIY. Refrigerant work is regulated. Compressor work is high-voltage and high-pressure.
If your blink points here, your job is to diagnose and document, not to repair.
If the blink comes with no cooling and no airflow, suspect refrigerant
Low refrigerant is a common cause of a blinking green light on a unit that's been running fine for years. The system loses charge slowly through a small leak. Eventually the pressure drops too low for the compressor to run safely.
The board detects the low pressure or the abnormal temperature and shuts the unit down. The green lamp blinks.
Signs of low refrigerant:
- The indoor coil ices up in cooling mode.
- The outdoor unit runs but the air isn't cold.
- Hissing or bubbling sounds at the service valves.
- The compressor short-cycles.
If you see ice on the indoor coil, turn the unit off. Running it with low charge can kill the compressor.
Compressor overload and inverter faults
The compressor is the heart of the system. Inverter compressors vary their speed. When the inverter board or the compressor itself fails, the unit faults out.
Symptoms of a compressor or inverter fault:
- The outdoor unit tries to start, hums, then stops.
- The breaker trips repeatedly.
- A burning smell from the outdoor unit.
- The outdoor fan runs but the compressor never starts.
These are all technician-level faults. The inverter board holds dangerous voltages even after power is off.
Outdoor fan and coil issues
Sometimes the fault is simpler. The outdoor unit needs airflow. If the coil is blocked or the fan is dead, the system overheats and faults.
Check these yourself before calling a tech.
- Clear leaves, grass, and debris from around the outdoor unit.
- Keep at least 12 inches of clearance on all sides. 24 inches is better.
- Hose off the outdoor coil from the inside out. Never use a pressure washer.
- Spin the outdoor fan blade by hand with the power off. It should spin freely.
- Listen for the fan running when the unit is on.
If the fan doesn't spin or the coil is packed with dirt, that alone can cause the blink.
Frozen indoor coil and short cycling
A frozen indoor coil points to low airflow or low refrigerant. Low airflow means a dirty filter or a dead blower. Low refrigerant means a leak.
Short cycling means the unit runs for a few minutes, stops, then starts again. That's hard on the compressor. Common causes are an oversized unit, a bad thermostat, or a refrigerant issue.
| Symptom | Likely branch | Action |
|---|---|---|
| Ice on indoor coil, cooling mode | Low refrigerant or airflow | Turn off, check filter, call tech |
| Outdoor fan not spinning | Fan motor or capacitor | Tech |
| Breaker trips on startup | Compressor or inverter | Tech |
| Hissing at service valves | Refrigerant leak | Tech, EPA-certified |
| Unit runs but no cooling | Refrigerant charge | Tech |
The EPA rule you can't ignore
Refrigerant handling is regulated under Section 608 of the Clean Air Act. You cannot legally buy, handle, or vent refrigerant without EPA certification. That includes R-410A and R-32, the two refrigerants used in modern Fujitsu systems.
If your diagnosis points to refrigerant, the repair belongs to a certified technician. Period.
What to tell the technician
Give them the code, the symptoms, and what you've already checked. A good tech can arrive with the right parts and tools. That saves you an hour of diagnostic time, which is usually billed at $75 to $150 per hour.
Mistakes to Avoid When Troubleshooting a Blinking Green Light
Most people make the same mistakes. Here's what to skip.
Mistake 1: Resetting the breaker before reading the code
The stored code is evidence. Reset first and you erase it. Always read and record the blink count before you touch the breaker.
Mistake 2: Confusing the green and timer lamps
The green operation lamp and the orange timer lamp carry different codes. If you count blinks on the wrong lamp, you'll chase the wrong fault. Watch which lamp is blinking.
Mistake 3: Assuming every blink means a breakdown
Defrost, standby, and startup blinks are normal. If the unit is heating or cooling well and the lamp blinks briefly, leave it alone. Check again in five minutes.
Mistake 4: Swapping parts without testing
Thermistors, float switches, and boards are all replaceable. But guessing wastes money. Test first, replace second.
A $20 multimeter saves $200 in unnecessary parts.
Mistake 5: Ignoring a code that clears and comes back
An intermittent fault is still a fault. It will get worse. Document it and fix it before it strands you in a heat wave or a cold snap.
Mistake 6: Using a pressure washer on the outdoor coil
High pressure bends the coil fins flat. That kills airflow permanently. Use a garden hose, a soft brush, or a coil cleaner made for the job.
Mistake 7: Running the unit with ice on the indoor coil
Ice means the system is starving for airflow or refrigerant. Running it makes the compressor work harder. Turn it off and diagnose.
Mistake 8: Assuming a new unit can't fault
New installations fault all the time. Loose terminal screws, undercharged lines, and wrong DIP switch settings are common on day one. If your unit is new and blinking, call the installer.
That's a warranty issue, not a DIY one.
Mistake 9: Trusting a generic online code chart
Fujitsu codes vary by model and generation. A chart for a 2015 Halcyon may not match your 2024 unit. Always verify against your model's service manual.
Mistake 10: Ignoring the model and serial number
You can't order the right part or get the right manual without them. Write them down at the first sign of trouble. It takes 30 seconds and saves hours.
Safety, High Voltage, and Warranty Rules
Before you open any panel or touch any wire, know what you're dealing with. A Fujitsu mini split has two power sources inside. The indoor unit runs on line voltage.
The outdoor unit runs on line voltage plus a high-voltage inverter circuit.
The capacitor warning that matters most
The outdoor unit holds large capacitors. They store a charge after the power is off. That charge can knock you across the room or worse.
Always wait at least 5 minutes after killing power before you open the outdoor unit. Longer is safer.
Even then, never touch the capacitor terminals with your bare hands. Use insulated tools. Discharge them properly if you know how.
If you don't, stay out of the outdoor cabinet.
Lockout and tagout is not optional
If you're working on the system, flip the breaker and lock the panel. Tag it so nobody turns it back on while you're mid-repair. This is standard practice under OSHA electrical safety rules, and it applies to your home panel just as much as a jobsite.
Tell everyone in the house. A roommate flipping the breaker to charge a phone can ruin your day.
Refrigerant rules you can't skip
Refrigerant is regulated. Under EPA Section 608, you need certification to buy, handle, or vent refrigerant. R-410A and R-32 are the two refrigerants in modern Fujitsu systems.
Both are covered.
Venting refrigerant to the atmosphere is illegal. It's also dangerous. Refrigerant displaces oxygen in a closed space.
Inhaling it can cause frostbite, dizziness, and heart arrhythmia.
If your diagnosis points to a refrigerant leak or charge issue, stop. That's a certified technician's job. No exceptions.
Warranty terms to know before you touch anything
Fujitsu's standard residential warranty covers parts for 5 to 10 years, depending on the model and registration. Labor is usually covered for 1 to 2 years. The compressor often has its own longer coverage.
DIY repairs can void the warranty. So can unauthorized parts. So can skipping annual maintenance if the manual requires it.
If your unit is under 5 years old and blinking, call the installer first. That call is usually free. A DIY repair could cost you thousands in lost coverage.
What voids a Fujitsu warranty
- Installing non-OEM parts.
- DIY refrigerant work.
- Failure to register the unit within the required window.
- No proof of professional installation.
- Damage from power surges without a surge protector.
- Operating the unit with a known fault.
Keep your receipts, your install paperwork, and your maintenance records. A warranty claim is only as good as your documentation.
Electrical code and installation rules
Mini splits are covered by the National Electrical Code (NFPA 70) and local amendments. Key requirements include a dedicated circuit, correct breaker sizing, and proper disconnects. Outdoor units need working clearance for service.
Local permits may be required for new installs. Some jurisdictions require a licensed electrician for the circuit. Check with your local building department before you assume anything.
Landlord and tenant responsibilities
If you rent, your lease probably says the landlord handles HVAC repairs. Don't touch the unit. Report the blinking light in writing.
Include the code, the time, and photos if you can.
If you own a rental property, you carry the responsibility. A blinking green light that goes unfixed can turn into water damage, mold, or a tenant complaint. Respond fast, even if it's just a filter clean.
Personal protective equipment for the safe DIY jobs
For the jobs you can do (filter cleaning, drain flushing, outdoor coil rinsing), here's the minimum.
- Safety glasses. Coil cleaner and dust both find eyes.
- Nitrile gloves. Drain lines and coils are gross.
- Non-slip shoes. Ladders and wet floors don't mix.
- A flashlight or headlamp. Dark panels hide problems.
For anything past that, add insulated gloves and a voltage tester. If you don't own a voltage tester, don't open the panel.
Ladder safety for indoor unit access
Indoor units sit high on the wall. Falls from a 6-foot ladder send thousands of people to the ER every year. Set the ladder on level ground.
Keep three points of contact. Don't reach sideways. Move the ladder instead.
DIY vs Technician: Costs and Timelines
Not every blinking light needs a $150 service call. Here's the honest split.
The 15-minute jobs you can handle
- Clean or replace the air filter.
- Reset the unit with the remote.
- Do a breaker reset after recording the code.
- Clear obvious debris from around the outdoor unit.
- Flush the drain line with a wet/dry vacuum.
- Check the remote for child lock or timer conflicts.
These cover the majority of blinking green light cases. If the blink stops after one of these, you're done.
The jobs that need a technician
- Any refrigerant diagnosis or repair.
- Board replacement, indoor or outdoor.
- Compressor or inverter work.
- Float switch or drain pump replacement.
- Thermistor testing with a multimeter.
- Communication wiring diagnosis beyond the terminals.
These require tools, certifications, and sometimes a helper. The risk of making things worse is real.
Typical cost ranges
Prices vary by region, but here's a realistic ballpark for the US as of 2026.
| Job | Typical cost range |
|---|---|
| Diagnostic visit | $75 to $150 |
| Filter (OEM pair) | $20 to $60 |
| Float switch replacement | $150 to $300 |
| Drain pump replacement | $200 to $400 |
| Thermistor replacement | $150 to $300 |
| Indoor PCB replacement | $400 to $800 |
| Outdoor PCB replacement | $500 to $1,000 |
| Refrigerant leak search and repair | $300 to $1,200 |
| Compressor replacement | $1,200 to $2,500 |
Labor rates run $75 to $150 per hour in most US markets. Some metro areas run higher.
What's worth repairing and what isn't
If your system is under 10 years old and the repair is under $800, repair it. The unit has years of life left.
If the repair is over $1,500 and the unit is over 12 years old, weigh replacement. A new high-efficiency mini split runs $2,000 to $5,000 installed. That includes a fresh warranty and better efficiency.
If the compressor is dead on a 15-year-old unit, replace the system. Throwing a $2,000 compressor into an old outdoor unit rarely makes sense.
How to brief a technician so they arrive prepared
Give them five things when you book the call.
- Model and serial number of both indoor and outdoor units.
- The blink code, exactly as you counted it.
- What mode the unit was in when it faulted.
- What you've already checked and cleaned.
- Whether the unit is under warranty.
A prepared tech brings the right parts. That often means one visit instead of two. On a $150 diagnostic fee, that saves real money.
If the unit is under warranty
Call Fujitsu's authorized service network, not a random HVAC company. Warranty work usually has to be done by an authorized contractor. If you call someone outside the network, you may pay out of pocket and lose the reimbursement.
Have your install date, model number, and proof of purchase ready. The faster you can produce those, the faster the claim moves.
Maintenance That Keeps the Green Light Solid
Most blinking green light faults are preventable. A little routine care keeps the unit running clean and quiet for years.
Filter cleaning schedule by season and climate
Filters are the first line of defense. A clean filter means good airflow. Good airflow means fewer faults.
| Climate or condition | Filter check interval |
|---|---|
| Dusty or dry climate | Every 2 weeks |
| Normal home, no pets | Every 4 weeks |
| Pets in the home | Every 2 to 3 weeks |
| Smoky or high-pollution area | Every 2 weeks |
| Heavy use season (summer/winter) | Every 2 weeks |
| Light use season | Every 4 to 6 weeks |
Wash with lukewarm water. Never use hot water. Never put them in the dishwasher.
Let them dry fully before reinstalling.
Drain line flush
Run a cup of distilled water or a diluted vinegar solution through the drain pan every 3 months. This keeps biofilm from building up. Biofilm is the slime that clogs drain lines and trips float switches.
If your unit has a condensate pump, listen for it during a cooling cycle. A pump that's silent is a pump about to fail.
Outdoor coil cleaning
Rinse the outdoor coil with a garden hose twice a year. Spring and fall are good times. Spray from the inside out if you can access the back of the coil.
Never use a pressure washer. It flattens the fins and kills efficiency.
While you're out there, check the clearance. Twelve inches minimum on all sides. Twenty-four is better.
Trim back shrubs and clear away leaves.
Seasonal startup and shutdown
Do a quick check at the start of each season.
- Run the unit in cool mode for 10 minutes. Listen for odd noises.
- Run it in heat mode for 10 minutes. Check that warm air comes out.
- Check for water under the indoor unit.
- Verify the outdoor fan spins freely with the power off.
- Look at the breaker. Any heat or discoloration means call an electrician.
Catching a problem in April is cheaper than fixing it in July.
When to schedule professional service
Book a pro once a year if the unit gets heavy use. Every two years is fine for light use. The tech will check refrigerant pressures, clean the coils deeper than you can, test electrical connections, and verify the charge.
A typical annual service runs $150 to $300. That's cheap insurance against a mid-summer breakdown.
The one maintenance habit most people skip
Write down what you do and when. Filter changes, drain flushes, pro visits, fault codes. A simple note on your phone is enough.
When something goes wrong, you have a history. When you sell the house, you have proof of care. When you file a warranty claim, you have documentation.
Final Decision Guide
You've read the code, checked the easy stuff, and you know what you're dealing with. Here's the short version.
If the light blinks and the unit runs normally
Leave it alone. Watch for 10 minutes. If the blink stops and cooling or heating is fine, it was defrost or standby.
Clean the filter anyway. Check the drain line. Move on with your day.
If the light blinks and the unit stops
Record the blink count and the mode. Do one hard reset after writing everything down. If the unit restarts and runs clean for 24 hours, you're done.
If the blink returns, you have a real fault. Match the code to your model's service manual.
If the code points to filter or drain
Handle it yourself. Clean the filter. Flush the drain line.
Check the float switch. These are the DIY jobs. Most blinking green light cases end here.
If the code points to communication or wiring
Check the terminal screws with the power off. Look for corrosion, rodent damage, or pinched wires. If everything looks clean and the fault returns, call a technician.
Board replacement is not a homeowner job.
If the code points to refrigerant or compressor
Stop. Turn the unit off. Call a certified technician.
Refrigerant work is regulated under EPA Section 608. Compressor work is high-voltage and high-pressure. This is not a DIY branch.
If the unit is under warranty
Call Fujitsu's authorized service network first. Don't let an unauthorized tech touch it. Document everything.
Keep your install paperwork handy.
If the repair cost is high on an old unit
Do the math. Under $800 on a unit under 10 years old, repair. Over $1,500 on a unit over 12 years old, get a replacement quote.
A new high-efficiency system pays you back in lower power bills and a fresh warranty.
The one-line rule for every case
Record the code before you reset. Test before you replace. Stop before you touch refrigerant.
Follow those three and you'll solve most blinking green light problems without wasting a service call.
Frequently Asked Questions
Why is my Fujitsu mini split blinking green but still cooling?
A unit that still cools with a blinking green light is often in a normal state like defrost or standby. If the blink repeats in a set pattern, a minor fault has been logged. Check the filter, then watch for 10 minutes.
If cooling fades or the pattern changes, pull the code.
What do 1, 2, or 3 green blinks mean?
Blink counts vary by model and generation. One or two blinks usually point to a minor or transient condition. Three to five blinks often point to sensor or communication faults.
Never rely on a generic chart. Your model's service manual is the only accurate source for your unit.
Can a blinking green light be caused by a power surge?
Yes, power surges are a common cause. A surge can damage the communication circuit or scramble board memory. Do a full breaker reset and wait 5 minutes.
If the blink returns within minutes, the fault is physical. If it stays clear, the surge was transient. Consider a whole-home surge protector.
How long should I wait after resetting the breaker?
Wait at least 5 minutes with the breaker off. This lets the capacitors drain and the boards fully reset. Then wait 2 more minutes after power is restored before turning the unit on.
Rushing the sequence can cause a false fault and a second blink.
Does the blinking green light always mean an error code?
No. Normal blinks happen during defrost, standby, and startup. These blinks are brief and the unit runs normally.
Fault blinks repeat in a set pattern and often come with a loss of cooling or heating. If the unit performs well, the blink is likely normal.
Is it safe to keep running the unit while it blinks?
It depends on what else is happening. If the unit cools or heats well and the blink is brief, running it is fine. If the unit has stopped, is leaking water, or is making odd noises, turn it off.
Running a unit with a real fault can damage the compressor or flood your ceiling.