Your smoke detector blinking green and red is a status message, not one fixed warning. On most units, green means power or standby. Red means alarm, trouble, or carbon monoxide.
The exact meaning flips depending on the brand, the model, and whether the light is steady or flashing. That's why the same pattern can be totally normal on one alarm and a genuine fault on another.
Per NFPA 72, smoke alarms need a visible status indicator so you can spot trouble without guessing. Underwriters Laboratories lists most residential units to UL 217, which sets performance and signaling requirements. The lights aren't decoration.
They're a diagnostic code you can read if you know the rules. Here's how to decode yours.
Quick Answer
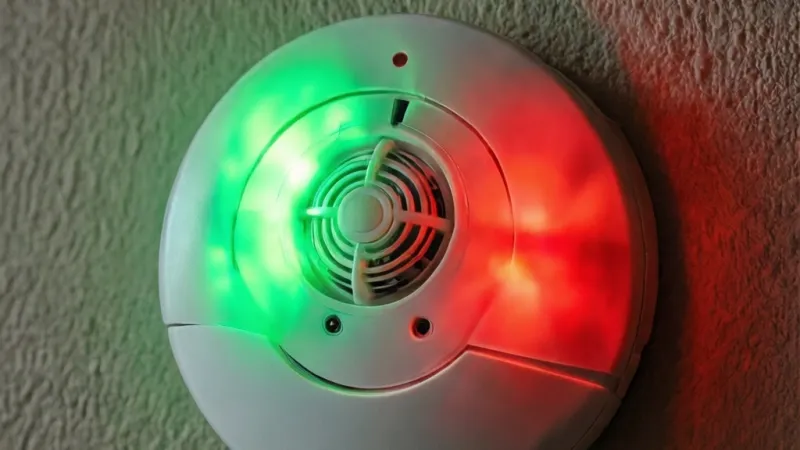
A green and red blink usually means the alarm has power. It's also reporting a status condition. Green signals power or standby.
Red signals alarm, trouble, low battery, or end of life. Some brands flash both during warm-up or self-test. Check your model manual before you act.
Why Green and Red Lights Mean Different Things on Different Smoke Alarms
There is no single universal LED code for residential smoke alarms. NFPA 72 requires a visible indication of alarm and trouble conditions. It does not mandate specific colors.
That gap leaves every manufacturer free to invent its own scheme.
So green and red aren't a global standard. They're a brand language. On one alarm, a red blink means "replace me." On another, the exact same blink means "there's smoke." Same light, opposite instruction.
The confusion gets worse because many units use two LEDs, not one. A green power light and a red alarm light can flash on their own separate timers. When those timers overlap, you see what looks like one pattern.
It's actually two signals running side by side.
Here's the mental model that fixes this. Read the light as a code, not a color. Color tells you the category.
Blink speed and rhythm tell you the urgency. That two-part reading works across almost every brand on the market.
Why UL and NFPA don't settle the color question
People assume a safety standard would lock down LED colors. It doesn't. UL 217 covers how a smoke alarm detects smoke and sounds its horn.
UL 2034 covers carbon monoxide alarms. Neither standard dictates that green must mean power and red must mean alarm.
What the standards do enforce is that a fault or trouble condition must be visibly indicated. How that looks is up to the maker. Some brands use amber or yellow for faults.
Some flash red. Some use a red and green combo. All of them can still pass listing.
That's the root of the whole problem. The standard guarantees you'll get a signal. It doesn't guarantee the signal means the same thing twice.
As of 2026, that gap still exists. No US code has closed it, and manufacturers show no sign of adopting a shared color language.
The two-LED overlap problem
Most modern detectors have a green LED for power and a red LED for alarm or trouble. Each one blinks on its own clock. Green might pulse every 40 seconds.
Red might pulse every 60. Every few minutes, the two pulses land close together.
To your eye, that reads as "green and red blinking." To the alarm, it's just two independent status lights doing their jobs. This is the single most common reason people panic over a perfectly healthy unit.
If your detector is silent and the pattern only shows up now and then, that overlap is the likely explanation. Check your manual's blink frequency for each color. If the rates match what you're seeing, nothing is wrong.
Warm-up and self-test sequences
Newer units run a startup cycle when they get power. That means a fresh install, a battery swap, or power coming back after an outage. During this window, many alarms flash green and red in sequence.
Manufacturer documentation typically puts warm-up at 30 to 60 seconds. After that, the unit settles into its normal standby pattern. If the green and red show stops on its own, it was just the boot sequence.
If it keeps going past a minute or two, you're looking at a real status code.
What the Green and Red LEDs Actually Do: Power, Alarm, Fault, and CO
Think of each LED as a channel. Green is the "I'm alive and powered" channel. Red is the "something needs your attention" channel.
On combination smoke and CO alarms, red often carries double duty for both hazards.
Blink frequency is the part most people miss. A red light that flashes once a minute is a low-level notice. A red light that flashes once a second is a full alarm.
Same color, wildly different meaning.
Here's the general framework that holds across most brands.
| LED behavior | Typical meaning |
|---|---|
| Green steady | AC power present, normal standby |
| Green blink every 30 to 60 seconds | Battery-powered unit, normal heartbeat |
| Red blink every 30 to 60 seconds | Trouble, low battery, or end of life |
| Red blink every 1 second | Alarm condition (smoke or CO) |
| Amber or yellow blink | Fault, sensor error, or low battery on many brands |
| Green and red together | Warm-up, self-test, or brand-specific fault code |
That table is a starting point, not a verdict. Your manual overrides every row in it.
Green = power or standby, red = alarm or trouble (usually)
The green light answers one question. Does this unit have power? On a hardwired alarm, steady green means the 120V circuit is live.
On a battery unit, a periodic green blink means the battery is fine and the unit is in standby.
The red light answers a different question. Is there something to act on? Red covers a wide range.
It can mean smoke, carbon monoxide, a low battery, a dirty sensor, an interconnect fault, or end of life.
This is why red alone tells you almost nothing. You need the blink rate and the sound. Red plus silence is usually a maintenance issue.
Red plus a chirp is usually a battery or lifespan issue. Red plus a full horn is an emergency.
Why the same pattern means something else on another brand
Brand variance is real and it's significant. Kidde and First Alert, the two biggest names in US residential alarms, use different code schemes for some conditions. Nest Protect uses a completely different color language built around green, yellow, and red.
A pattern that means "replace the battery" on one unit can mean "replace the whole alarm" on another. A red and green alternation that signals a fault on one brand can be a normal interconnect handshake on another.
The practical takeaway is simple. Never trust a generic chart over your own manual. Find the model number.
Pull the PDF. Read the LED table for your exact unit. That ten-minute step prevents almost every wrong decision.
First Fork: Is Your Detector Silent, Chirping, or Sounding the Alarm?
Before you decode any light pattern, listen. Sound narrows the possibilities faster than color ever will. The three branches are silent, chirping, and full alarm.
Each one leads somewhere different.
Use this as your first split.
| What you hear | What it usually means | First move |
|---|---|---|
| Silence | Standby, warm-up, or a low-priority status code | Check the manual's LED table |
| Single chirp every 30 to 60 seconds | Low battery, end of life, or fault | Identify chirp type, then act |
| Continuous horn | Smoke or CO alarm | Evacuate, then call for help |
If it's silent
Silence plus a green and red blink is the most common and least scary case. It's usually the two-LED overlap we covered earlier, or a warm-up cycle that hasn't finished.
If the pattern is steady and the unit is silent, your job is to confirm, not panic. Grab the manual. Match your pattern to the LED table.
If it lines up with "normal standby," you're done.
There's one exception worth knowing. A silent unit can still be reporting a fault it can't sound for. If the red blink is fast and constant, treat it as a real problem even without noise.
A dead horn is itself a fault.
If it's chirping
A chirp every 30 to 60 seconds is the classic maintenance signal. The light pattern usually matches. Green and red together with a chirp almost always points to one of three things: low battery, expired sensor, or a dirty or faulty chamber.
The chirp type matters. A single chirp is different from a triple chirp on many brands. Some units chirp differently for low battery versus end of life.
That distinction decides whether you swap a battery or replace the whole alarm.
If you can't tell the chirp types apart, check the manual's sound table. It usually lists each chirp pattern next to its meaning. Then match it to your LED behavior.
If it's sounding the alarm
A continuous horn plus red flashing is an alarm condition. Stop troubleshooting and act. Get everyone out, then call 911 from outside if you suspect a real fire.
If the alarm is a combination smoke and CO unit, the sound pattern often tells you which hazard triggered it. Many brands use a different horn cadence for CO versus smoke. CO alarms typically use four quick beeps followed by a pause.
Never assume a sounding alarm is false just because you see green. Green only confirms power. It says nothing about whether the hazard is real.
Treat every full alarm as genuine until proven otherwise from a safe location.
Decoding the Pattern: Steady, Blinking, Alternating, or Both at Once
Now we get to the pattern itself. Four shapes cover almost everything you'll see. Each one points to a different set of causes.
Match your unit to the closest shape, then narrow with sound and the manual.
Steady green, blinking red
This is the most common combination and usually the most benign. Steady green confirms the unit has solid power. The blinking red is the unit's way of flagging something in the attention channel.
If the red blink is slow, roughly once a minute, expect a low battery, a dirty sensor, or an end-of-life timer. If the red blink is fast, roughly once a second, treat it as an active alarm even if the horn is quiet.
That fast-blink-without-sound case is rare but serious. It can mean the horn has failed. A detector that can't sound is not protecting you.
Replace it.
Blinking green, blinking red
Two blinking lights usually means two things happening at once. The green is doing its standby heartbeat. The red is doing its attention signal.
When they line up, you see an alternating or paired flash.
On battery units, a blinking green is normal. It's the unit conserving power while confirming it's alive. Pair that with a slow red blink and you're likely looking at a low battery or a maintenance reminder.
On hardwired units, a blinking green is less common and more meaningful. It can indicate the unit has switched to battery backup because AC power is out. Check your breaker and your backup battery.
Alternating green and red
Alternating flashes, where green and red take turns rather than overlap, are almost always a brand-specific code. This is the pattern that varies most from maker to maker.
On some units, alternating green and red means the alarm is in a specific fault state. On others, it's part of an interconnect signal or a self-test sequence. A few brands use it during the first minutes after power is restored.
Because this pattern is so brand-dependent, there's no reliable generic answer. This is the one case where you genuinely need the manual in hand before you do anything.
Green and red lit at the same time
Both LEDs on at once is different from both blinking. Steady green plus steady red usually means the unit is in an active alarm state with power confirmed. On combination alarms, it can also mean a CO event alongside a smoke standby.
If the horn is sounding, evacuate. If the unit is silent and both lights are steady, that's unusual and worth treating as a fault. Power the unit down, wait 30 seconds, and restore power to see if it clears.
If the pattern returns after a power cycle, don't keep resetting it. Replace the unit or call the manufacturer's support line. Repeated fault states after reset point to a hardware problem, not a user error.
Brand and Model LED Codes: Kidde, First Alert, Nest, X-Sense, Ring, BRK, Honeywell
Every brand writes its own rulebook. The table below summarizes the general patterns reported in manufacturer documentation. Treat it as orientation, not gospel.
Your specific model may differ.
| Brand | Green LED | Red LED | Notes |
|---|---|---|---|
| Kidde | Steady or blink = AC or battery power | Blink = alarm or trouble | Amber often signals fault or low battery |
| First Alert | Steady = AC power | Blink = alarm, chirp = low battery | Green blink common on battery units |
| BRK | Same family as First Alert | Blink = alarm or trouble | Codes closely mirror First Alert |
| Nest Protect | Green = all clear | Red = emergency, yellow = warning | Uses color plus voice, not just blink |
| X-Sense | Green = normal power | Red = alarm or fault | Yellow used for some fault states |
| Ring Alarm | Green = powered and connected | Red = alarm or fault | App often shows the same code |
| Honeywell | Green = power present | Red = alarm or trouble | Commercial units may use more colors |
Where to find your model number and manufacture date
You need two numbers to decode your unit correctly. The model number tells you which manual to read. The manufacture date tells you whether the alarm is near or past its lifespan.
Both are usually on the back of the alarm. Check the battery compartment, the mounting bracket, or the side of the housing. Some units print a date code instead of a full date.
Date codes are often a letter plus digits, like "A2345" or similar. Each brand uses its own format. If you can't read it, the manufacturer's website usually has a decoder, or support can translate it for you.
Grab both numbers before you call anyone. It saves a full round of back-and-forth and gets you to the right answer faster.
Manufacturer tables and what they don't tell you
A manufacturer LED table is your best source. It's also incomplete in ways that matter. Most tables assume the unit is working as designed.
They don't always cover combined states.
For example, a table might list "red blink = alarm" and "green blink = low battery" separately. It may not tell you what "green and red together" means, because that combination wasn't part of the design intent. It's just two independent signals overlapping.
There's also the recall layer. A pattern that looks like a normal fault code can sometimes be a known defect on a specific batch. The US Consumer Product Safety Commission publishes recall notices for smoke and CO alarms.
It's worth a quick check against your model and date code.
Finally, firmware matters on smart units. Nest, Ring, and similar detectors can change LED behavior through software updates. If your unit started a new pattern after an app update, the manual may be out of date.
Check the brand's support page for the current code list.
Combo Smoke and CO Alarms: When Red Means Carbon Monoxide, Not Fire
A combination alarm watches for two threats with one device. That dual duty is why its red light can be so confusing. On a smoke-only unit, red almost always means smoke.
On a combo unit, red can mean smoke, carbon monoxide, or a fault.
The sound is your best clue for which hazard triggered it. Smoke alarms typically use a repeating three-beep pattern. CO alarms use four quick beeps followed by a pause, then repeat.
Some brands add voice alerts that say the hazard out loud.
If you hear four beeps and see red flashing, treat it as carbon monoxide. Get everyone outside immediately. CO is invisible and odorless, so the alarm is your only warning.
What the green light does during a CO event
Green usually stays steady or keeps its normal heartbeat during a CO alarm. That's the unit telling you it still has power. Green is not a safety clearance.
It only confirms the electronics are running.
Some combo units change the green blink rate during a CO event to distinguish it from a smoke event. That's brand-specific. Check your manual if you need to tell the two apart from the light alone.
CO levels and why the alarm timing matters
CO alarms don't trigger at a single fixed level. They respond to a combination of concentration and time. UL 2034 sets the response windows that listed alarms must meet.
| CO concentration | Typical alarm response window |
|---|---|
| 70 ppm | 60 to 240 minutes |
| 150 ppm | 10 to 50 minutes |
| 400 ppm | 4 to 15 minutes |
A slow red blink without a horn could mean the unit is sensing low-level CO below the alarm threshold. Some newer units log these events in an app. If yours does, check the history before you dismiss it.
Never ignore a CO alarm because you feel fine. Symptoms like headache, dizziness, and nausea can take hours to build at low levels. Children, elderly adults, and people with heart conditions are at higher risk.
After a Power Outage, Battery Swap, or Test Press: Warm-Up vs Real Fault
Three events commonly trigger a green and red pattern that isn't a fault at all. They are power restoration, battery replacement, and a test button press. Knowing the normal behavior for each one saves you a lot of unnecessary worry.
The 30 to 60 second warm-up window
Most detectors run a startup cycle when they get power. Manufacturer documentation typically puts that window at 30 to 60 seconds. During warm-up, the unit may flash green and red in sequence or alternate them.
The key detail is duration. If the pattern stops within about a minute, it was the boot sequence. If it keeps going past two minutes, something else is going on.
Hardwired units with a backup battery may run a longer self-check after AC power returns. Some models test the battery, the sensor, and the interconnect before settling into standby. That can stretch the warm-up to two or three minutes on certain brands.
What a brownout or tripped breaker does to the status light
A brownout is a partial voltage drop, not a full outage. It can confuse a hardwired alarm without fully resetting it. You might see a red blink or an alternating pattern that clears on its own once voltage stabilizes.
A tripped breaker is more straightforward. The alarm loses AC power and switches to battery backup. Many units flash green or amber to show they're running on battery.
Check your breaker panel and reset the tripped circuit.
If the breaker trips again right away, don't keep resetting it. That points to a wiring fault or an overloaded circuit. Call a licensed electrician.
Repeated breaker trips near a hardwired alarm are a fire risk, not a nuisance.
After a battery swap
A fresh battery almost always triggers a startup cycle. The unit powers up, runs a self-check, and then settles. Green and red flashes during that window are normal.
If the pattern persists after the warm-up, check three things. First, confirm the battery is seated correctly and the polarity is right. Second, confirm you used the correct battery type.
Third, check the expiry date on the battery itself.
Rechargeable batteries are a common mistake. Most smoke alarms are not designed for them. Their lower nominal voltage can trigger a low battery signal even when fully charged.
Stick to the battery type listed in your manual.
The test button runs a full self-check. Most units flash the LEDs, sound the horn briefly, and then reset. A green and red flash during the test is expected on many models.
If the unit doesn't return to normal standby within a minute after the test, that's a signal. It can mean the test revealed a fault. Try a power cycle.
If the fault returns, replace the unit.
The Decision Tree: Match Your Light Pattern to the Right Action
This is the section you'll come back to. Work through it top to bottom. Stop at the first branch that matches what you're seeing and hearing.
If the unit is silent and the pattern is slow
Slow means a red blink roughly every 30 to 60 seconds. This is the most common presentation of a green and red pattern. It almost always points to a maintenance issue, not an emergency.
- If the unit is battery-powered, replace the battery first.
- If the battery is fresh, check the manufacture date. Units past 10 years are at end of life.
- If the unit is under 10 years old and the battery is new, clean the sensor chamber with a vacuum.
- If the pattern persists after all three, replace the unit.
If the unit is chirping and the pattern is slow
Chirping narrows it down fast. The chirp pattern tells you which maintenance branch you're on. Most brands use a single chirp for low battery and a different pattern for end of life.
- Single chirp every 30 to 60 seconds: low battery. Replace the battery.
- Triple chirp or a distinct end-of-life sound: the sensor has expired. Replace the whole unit.
- Chirp with a red blink but no green: check the AC power or the battery connection.
If the unit is sounding the alarm
A continuous horn means evacuate. Don't troubleshoot first. Get out, then call 911 from outside if you suspect a real fire.
- If the horn is a three-beep pattern, treat it as smoke.
- If the horn is a four-beep pattern, treat it as carbon monoxide.
- If you can't tell the pattern apart, treat it as the more dangerous of the two.
A dead test button means the unit isn't functioning. That's a serious problem. A detector that can't be tested can't be trusted.
- Confirm the unit has power. Check the breaker and the battery.
- Try a hard reset by removing power for 30 seconds and restoring it.
- If the test still fails, replace the unit immediately. Don't wait.
If the pattern is fast and the unit is silent
A fast red blink, roughly once per second, with no horn is rare but serious. It usually means the horn has failed. The unit is trying to alarm but can't make sound.
Replace the unit the same day. A silent alarm is worse than no alarm, because it gives you false confidence.
If you see the pattern only at certain times of day
Timed patterns point to environmental triggers. Steam from a morning shower, cooking fumes at dinner, or dust kicked up by HVAC cycling can all trip a sensor briefly. Green and red may flash during the event and then clear.
If this happens often, check placement. Detectors too close to a kitchen, bathroom, or air vent will false-alarm repeatedly. NFPA 72 has placement guidance that covers minimum distances from those sources.
Low Battery, End-of-Life, Dust, and Sensor Faults: The Maintenance Branches
Four maintenance conditions produce a green and red pattern most often. Each one has a different fix. Getting the diagnosis right saves you from replacing a unit that just needed a new battery, or from trusting a unit that's actually expired.
Low battery
Low battery is the most common cause of a chirp-plus-blink pattern. The green light may dim or blink irregularly. The red light blinks slowly.
The horn chirps once every 30 to 60 seconds.
Replace the battery with the exact type listed in your manual. Don't mix old and new batteries. Don't use rechargeable batteries unless the manual specifically allows them.
After the swap, the unit should settle into normal standby within a minute. If it doesn't, you're not dealing with a battery issue.
End of life
Smoke alarms have a lifespan. Most are rated for 10 years from the manufacture date. CO sensors inside combo units often expire sooner, typically 5 to 7 years.
The end-of-life signal is designed to be annoying. It chirps and blinks in a pattern that's hard to ignore. That's intentional.
The manufacturer wants you to replace the unit, not silence it.
There's no reset for end of life. You can't clear it with a button press or a battery swap. The sensor has degraded and the unit can no longer be trusted.
Replace it.
Dust and debris in the sensor
Dust, insects, and spider webs are common causes of false alarms and fault signals. The sensor chamber is sensitive. A small amount of debris can trigger a reading.
Clean the unit with a vacuum brush attachment or a soft brush. Don't use water or cleaning sprays. Don't disassemble the sensor chamber.
Just remove surface dust around the openings.
If the pattern clears after cleaning, you've solved it. If it returns within a few days, the sensor itself may be failing. Replace the unit.
Sensor faults
A sensor fault is an internal failure. The unit knows it can't reliably detect smoke or CO anymore. It signals this with a specific blink pattern, often amber or a fast red.
Sensor faults can't be fixed by the user. Cleaning won't help. A battery swap won't help.
The unit needs to be replaced.
Check the manufacturer's support page for your model. Some brands have known fault codes tied to specific batches. The US Consumer Product Safety Commission publishes recall notices that cover smoke and CO alarms.
It's worth a quick search against your model and date code before you buy a replacement.
A maintenance schedule that actually works
Here's a simple schedule that covers all four branches.
| Task | Frequency |
|---|---|
| Press the test button | Monthly |
| Vacuum the sensor openings | Every 6 months |
| Replace the battery | Annually, or per manual |
| Replace the smoke alarm | Every 10 years |
| Replace the CO alarm | Every 5 to 7 years |
| Check for recalls | At every battery change |
Daylight saving time is a convenient twice-a-year reminder for battery checks. Fire Prevention Week in October is another good anchor. Pick one and stick to it.
Evacuate Now: When Red and Green Means Get Out and Call 911
Some patterns are not troubleshooting puzzles. They're evacuation orders. Knowing the difference is the most important skill in this entire guide.
The signals that mean leave immediately
If the horn is sounding and red is flashing, evacuate. Don't investigate first. Don't grab belongings.
Get everyone out and call 911 from outside.
If the alarm is a combo unit and you hear the four-beep CO pattern, evacuate the same way. CO spreads fast in enclosed spaces. Opening windows helps, but it doesn't make the space safe to stay in.
If anyone in the home has symptoms like headache, dizziness, confusion, or nausea, tell the 911 operator. Those are signs of CO poisoning. They need medical attention even if the alarm stops.
What to do once you're outside
Call 911 or your local fire department. Tell them what you observed: the light pattern, the sound pattern, and whether anyone has symptoms.
Don't go back inside until the fire department says it's safe. CO can linger. A fire can reignite.
The few minutes you wait outside are worth far more than anything you left behind.
If the alarm was a false trigger, the fire department can still help you confirm. They'd rather respond to a false alarm than arrive too late to a real one.
What not to do during an active alarm
Never take the battery out to silence an alarm that's sounding. Never cover the unit with tape, a plastic bag, or a towel. Never assume it's a false alarm without confirming.
These moves disable your only warning. They're the leading cause of preventable fire and CO deaths in homes. If an alarm is bothering you, fix the underlying issue.
Don't kill the messenger.
When the alarm stops on its own
If the horn stops but the red light keeps blinking, the hazard may still be present at a lower level. Don't assume it's over. Ventilate the space, check for sources, and call the fire department if you're unsure.
If the alarm stops and the light returns to normal green standby, the event has cleared. Still investigate what triggered it. A brief smoke event from cooking is one thing.
An unexplained alarm at 3 a.m. is another.
Mistakes That Turn a Confusing Light into a Real Danger
Most of the harm around smoke alarms doesn't come from the alarm itself. It comes from what people do when they can't decode the light. A few wrong moves turn a working detector into a useless plastic disc on the ceiling.
Pulling the battery or covering the unit to silence it
This is the number one mistake, and it's the deadliest. People get annoyed by a chirp at 2 a.m. They pull the battery, set it on the counter, and go back to sleep.
That alarm is now blind.
Covering the unit with tape, a plastic bag, or a towel is just as bad. The sensor can't see smoke. The horn can't reach the room.
You've created a false sense of safety that's worse than having no alarm at all.
If the chirp is bothering you, fix the underlying cause. Swap the battery. Clean the sensor.
Replace the unit if it's expired. Never disable the messenger.
Painting, taping, or relocating a detector without checking the manual
Painting over a smoke alarm blocks the sensor openings and voids the listing. Taping over vents does the same thing. Relocating a hardwired unit without checking code can put it in a dead-air space where smoke never reaches it.
NFPA 72 sets placement rules for a reason. Detectors need to be a minimum distance from kitchens, bathrooms, and air supply vents. They need to be on the ceiling or high on a wall, not tucked into a corner.
If you're remodeling, remove the detector before you paint. Cover the opening with painter's tape, not the unit itself. Reinstall it exactly where it was, or follow the manual's placement guidance if you're moving it.
Ignoring an intermittent red blink for weeks
A red blink that shows up now and then is easy to dismiss. It's also easy to miss a real fault that way. A sensor that's failing intermittently can still trigger during a real event, but it can also fail to trigger when it matters.
Treat any recurring red blink as a signal to investigate. Check the manual. Clean the unit.
Test it. If the pattern keeps coming back, replace the unit. Detectors are cheap.
A missed fire is not.
Assuming green means everything is fine
Green means the unit has power. That's it. It does not mean the sensor works, the horn works, or the unit is within its lifespan.
A 12-year-old alarm can show a steady green light right up until the day it fails.
The only way to know a detector works is to test it. Press the test button monthly. If the horn doesn't sound, the unit is not protecting you, no matter what color the light is.
Using the wrong battery type
Rechargeable batteries are the most common wrong choice. Their nominal voltage is lower than a standard alkaline or lithium cell. That can trigger a low battery signal even when the battery is fully charged.
The second most common mistake is mixing old and new batteries. If your unit takes two AA cells, replace both at the same time. Mixing them can cause uneven discharge and early low-battery chirps.
Stick to the exact battery type listed in your manual. If it calls for a specific brand or chemistry, use it. The few cents you save by substituting aren't worth the risk.
Not replacing the unit on schedule
Smoke alarms have a finite lifespan. The sensor degrades over time, even if the electronics still work. A 10-year-old alarm may pass a test and still fail to detect a real fire.
CO sensors inside combo units degrade faster, often within 5 to 7 years. The end-of-life signal is designed to force a replacement. If you've silenced that signal more than once, you've already waited too long.
Write the install date on the back of the unit with a marker. That one step makes it easy to know when it's due. Some units also have a built-in timer that triggers the end-of-life chirp automatically.
Not testing after maintenance
After you swap a battery, clean the sensor, or move the unit, test it. Press the test button and confirm the horn sounds. Then watch the light return to normal standby.
Skipping that step means you don't know if your maintenance fixed the problem or created a new one. A loose battery connection or a misaligned sensor can leave the unit non-functional without any obvious sign.
Reset, Hush, Power Cycle, and Hard Reset: What Each One Actually Does
Four different reset methods get thrown around in troubleshooting forums. They are not interchangeable. Using the wrong one can make things worse, or leave you thinking you've fixed a problem you haven't.
Here's what each one does, when to use it, and when to avoid it.
| Method | What it does | When to use it |
|---|---|---|
| Hush | Silences the horn for 5 to 15 minutes | False alarm from cooking or steam |
| Reset button | Clears a latched alarm or fault state | After a test or a false trigger |
| Power cycle | Removes and restores power | After a fault code, or a stubborn chirp |
| Hard reset | Factory reset on smart units | Pairing issues, app sync failures |
Hush mode
Hush silences the horn without disabling the sensor. The unit is still watching for smoke. If the smoke gets thicker, the alarm will override the hush and sound again.
Hush is the right tool for a kitchen false alarm. Press the button, ventilate the room, and let the unit reset itself. It's not a fix for a low battery chirp or an end-of-life signal.
Most brands limit how often you can use hush. If you're pressing it repeatedly, the unit is trying to tell you something. Investigate instead of silencing.
The reset button clears a latched alarm state. After a test or a brief smoke event, the unit may stay in a triggered state until you press reset. That's normal behavior.
Reset does not fix a low battery, an expired sensor, or a hardware fault. If the pattern returns within a few minutes of the reset, the underlying condition is still there.
On some units, the test button and the reset button are the same physical button. A short press tests. A longer press resets.
Check your manual for the timing.
Power cycle
A power cycle means removing power completely, waiting 30 seconds, and restoring it. On a battery unit, that means pulling the battery. On a hardwired unit, that means turning off the breaker or unplugging the harness.
Power cycles clear transient faults. If the unit had a one-time glitch, a power cycle usually brings it back to normal standby. If the fault returns after the cycle, it's not transient.
Don't power cycle as a habit. Repeatedly cycling a unit that keeps faulting is just delaying a replacement. Two power cycles that don't fix the issue means the unit is done.
Hard reset
Hard reset is a smart-detector term. It returns the unit to factory settings and wipes any paired devices, app connections, or custom settings. It's the nuclear option.
Use it when the app won't sync, the unit won't reconnect after a Wi-Fi change, or a firmware update fails. Don't use it for a chirp or a low battery. Those have simpler fixes.
After a hard reset, you'll need to re-pair the unit to your app and reconfigure any interconnect settings. That's a 10 to 20 minute process on most brands. Have the manual and your Wi-Fi password ready before you start.
What none of these methods do
None of these methods extend the life of an expired sensor. None of them fix a failed horn. None of them replace a missing battery.
If your unit has a real hardware problem, resetting it just delays the inevitable.
If you've tried a power cycle and the fault returns within 24 hours, stop resetting. Replace the unit. That's the honest answer.
When to Replace the Unit (and How to Check for Recalls)
Replacement timing is where most homeowners get it wrong. They replace batteries faithfully but keep the same detector for 15 years. That's backwards.
The battery is the cheap part. The sensor is the part that ages out.
The lifespan rules you need to know
There are three numbers to remember.
- Smoke alarms: replace every 10 years from the manufacture date.
- CO alarms: replace every 5 to 7 years, depending on the brand.
- Combination smoke and CO alarms: follow the shorter of the two lifespans, usually 5 to 7 years.
These aren't marketing suggestions. They're based on how the sensing elements degrade over time. A photoelectric sensor can accumulate dust and lose sensitivity.
An electrochemical CO cell can dry out and stop responding.
The manufacture date is printed on the back of the unit. It's often a date code rather than a full date. Most manufacturers have a decoder on their support site.
If you can't find it, call support with the model and code.
How to check for recalls
The US Consumer Product Safety Commission maintains a public recall database that covers smoke and CO alarms. You can search by brand, model, or date range at cpsc.gov. It takes about two minutes.
Check for recalls when you install a new unit and again at every battery change. Recalls are usually tied to a specific manufacturing batch. Two units from the same brand can have very different statuses depending on when they were made.
If your unit is under recall, the manufacturer typically provides a free replacement. You don't need to buy a new one. Follow the instructions on the recall notice or the CPSC listing.
What a recall covers and what it doesn't
A recall usually addresses a defect that causes the unit to fail to alarm, alarm falsely, or fail to reset. It does not cover normal wear, expired sensors, or user-caused damage.
If your unit is under recall and also past its lifespan, replace it regardless. The recall replacement may still be a new unit, but if it's an older model, it may already be near the end of its service life.
How to dispose of an old detector
Smoke alarms contain small amounts of radioactive material in ionization models. That's not dangerous in normal use, but it does affect disposal. Many municipalities require you to take them to a hazardous waste facility rather than tossing them in the trash.
Photoelectric and combo units are usually safe for regular disposal, but check your local rules. The manufacturer's website often has a disposal guide. Some brands run a take-back program.
When to replace early
Don't wait for the end-of-life chirp if any of these are true.
- The unit has visible damage, cracks, or water exposure.
- It has false-alarmed repeatedly without a clear cause.
- It failed a test.
- It has been painted or covered.
- It has been in a fire or flood.
- The manufacture date is unreadable and you can't confirm its age.
Replace it. A new detector costs between $15 and $50 for a standard model. That's a small price for a working safety device.
Frequently Asked Questions
Why is my smoke detector blinking green and red with no sound?
A silent green and red pattern usually means two independent status lights are overlapping. Green is the power heartbeat. Red is a low-priority notice like low battery or a maintenance reminder.
Check your manual's LED table for your model. If the pattern is fast and constant with no sound, treat it as a horn failure and replace the unit.
Why did the pattern start after a power outage or battery change?
Most detectors run a 30 to 60 second warm-up after power is restored. During that window, green and red flashes are normal. If the pattern continues past two minutes, the unit may be reporting a battery or sensor fault.
Check the battery connection and the manufacture date. If both are fine, power cycle the unit once.
Does a blinking red light always mean there's smoke?
No. Red means the unit has something to report. That could be smoke, carbon monoxide, low battery, a dirty sensor, an interconnect fault, or end of life.
The sound pattern is your best clue. Three beeps usually means smoke. Four beeps usually means CO.
Silence plus a slow red blink usually means maintenance.
Can I just take the battery out until morning?
No. Removing the battery disables the detector completely. You lose all protection for the hours it's offline.
If the chirp is keeping you up, replace the battery with the correct type. If the unit is at end of life, replace the whole unit. Never leave a detector without power.
How do I know if my detector has expired?
Check the manufacture date on the back of the unit. Smoke alarms last 10 years. CO and combo units last 5 to 7 years.
If you can't find the date, or the unit is chirping in a pattern that won't clear after a battery swap, assume it's expired. Replace it. Write the new install date on the back with a marker.
Can a smoke detector blink green and red if it's working fine?
Yes, on some brands. A warm-up cycle, a self-test, or a scheduled status check can produce a green and red pattern that clears on its own. If the unit returns to a steady green or a slow green blink within a minute, it's working normally.
If the pattern persists or repeats often, investigate.
Final Decision Guide: Your Pattern, Your Next Step
Here's the whole guide collapsed into one table. Find your pattern. Follow the action.
If you're unsure at any step, err on the side of caution.
| Your situation | Most likely cause | Your next step |
|---|---|---|
| Silent, slow green and red blink | Two-LED overlap or maintenance reminder | Check manual, replace battery if due |
| Silent, fast red blink | Horn failure or sensor fault | Replace the unit today |
| Chirping once every 30 to 60 seconds | Low battery | Swap battery, retest |
| Chirping with a triple pattern | End of life | Replace the whole unit |
| Continuous horn, three-beep pattern | Smoke alarm | Evacuate, call 911 |
| Continuous horn, four-beep pattern | CO alarm | Evacuate, call 911 |
| Pattern after power outage | Warm-up cycle | Wait 1 to 2 minutes |
| Pattern after battery swap | Startup self-test | Wait 1 to 2 minutes, check battery seating |
| Pattern only at certain times | Environmental trigger | Check placement, clean sensor |
| Test button does nothing | Power or hardware failure | Check power, then replace |
The rule that sits above all of this is simple. A detector you can't trust is a detector you shouldn't keep. If a pattern won't clear, if a test won't pass, if a unit is past its lifespan, replace it.
The cost is small. The alternative isn't.
And if you ever hear the horn sound and see red flashing, don't consult this table. Get out. Call 911.
Troubleshoot from the driveway.