That blinking red light on your Meta Quest 2 isn't random, and it isn't always a death sentence. If you're searching for a meta quest 2 blinking red light, you're probably staring at a headset that won't wake up, won't charge, or keeps flashing red no matter what you plug in. When the screen stays black, that little LED is the only way the headset can talk to you.
Here's what it's actually saying.
Per Meta's official specifications, the Quest 2 runs on a 3640 mAh lithium-ion battery and charges at a maximum of about 10W, or 5V/2A, over USB-C. That ceiling matters. The headset doesn't support fast charging, so a weak or mismatched charger can trigger the same red blink as a genuinely dead battery.
Let's sort out which cause you're actually dealing with.
Quick Answer
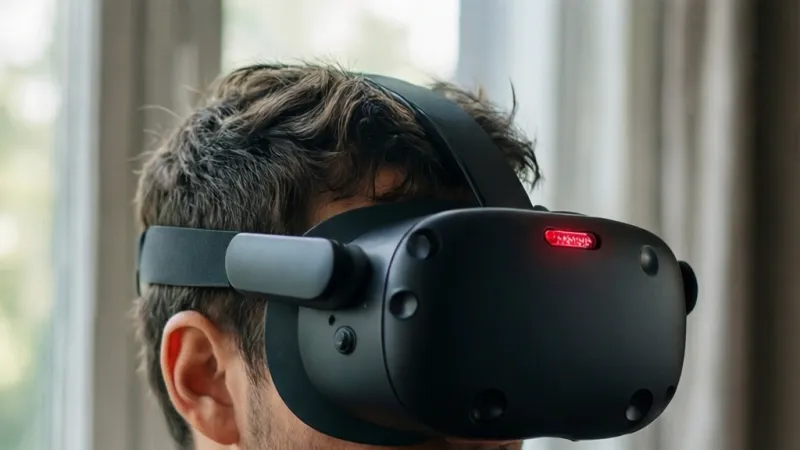
A blinking red light on the Meta Quest 2 usually means a critically low battery. It can also signal a charger that isn't powerful enough. Charge with the official 10W adapter for at least 30 minutes.
If it keeps blinking, swap the USB-C cable. Still blinking? The port or battery may be failing.
What a Blinking Red Light on the Quest 2 Actually Tells You
The Quest 2 has one tiny LED on the left side of the headset, sitting just above the power button. That light is your only status readout when the screen is dark. It changes color and blink pattern based on battery level and charging state.
Red is the low-battery color. A solid red light means the battery is critically low but the headset is still taking a charge. A blinking red light is different.
It usually means the battery is too low to boot, or something is interrupting the charge before it can build up.
Where the LED Lives and Why It Matters
You'll find the LED on the left strap arm, right next to the power button. It's small, and it's easy to miss in bright light. Cover the headset with your hand or step into a dim room to read it clearly.
The LED is the headset's fallback communication channel. When the display won't turn on, the LED is all you get. That's why reading it correctly saves you from guessing.
Solid Red vs Blinking Red: Not the Same Thing
These two states look similar, but they mean different things. Mixing them up sends you down the wrong troubleshooting path.
- Solid red: The battery is critically low, but the headset is charging normally. Leave it plugged in and wait.
- Blinking red: The battery is critically low and the headset can't charge properly. Something is blocking the charge, or the battery has drained too far to accept a normal charge.
Solid red is a waiting game. Blinking red is a diagnostic clue.
Why Meta's Documentation Leaves You Guessing
Meta's official support pages describe the LED in broad terms. They confirm red means low battery, but they don't publish a full blink-pattern chart. That gap is exactly why so many people end up guessing.
In our research across user reports, repair forums, and Meta's own help articles, the blinking red light almost always traces back to one of six causes. We'll walk through each one. You can also check Meta's official support site for firmware notes and warranty details.
How the Quest 2 Charges: Battery, LED Indicator, and USB-C Port Basics
Before you start swapping parts, it helps to understand how the charging system actually works. The Quest 2 is a closed system with tight power tolerances. It's not a phone, and it doesn't behave like one.
The headset charges over USB-C. The port handles both data and power. When you plug in, the headset negotiates with the charger to pull as much current as it's allowed.
If the charger can't deliver enough, the headset refuses to charge and blinks red.
Quest 2 Charging Specs at a Glance
Here's what the hardware actually supports. These numbers come from Meta's published specs and consistent user measurements.
| Spec | Value |
|---|---|
| Battery capacity | 3640 mAh lithium-ion |
| Max charge rate | ~10W (5V/2A) |
| Full charge time | ~2.5 hours |
| Active runtime | 2 to 3 hours |
| Charging port | USB-C (USB 3.2 Gen 1) |
| Safe charging temp | 0°C to 35°C |
| Safe storage temp | -20°C to 45°C |
The 10W ceiling is the single most important number here. The Quest 2 does not support USB Power Delivery fast charging. Plugging it into a 65W laptop charger won't make it charge faster.
It'll just pull what it needs.
Why the USB-C Port Is Pickier Than You'd Expect
USB-C looks universal, but it isn't. The USB Implementers Forum, the body that governs the standard, defines many cable and power profiles. Not every USB-C cable carries the same wires.
Cheap cables often skip the power pins the Quest 2 needs. Some only handle data. Others can't carry 2A safely.
If your cable is thin, generic, or came free with a phone, it may be the reason the light blinks.
What Happens Inside When You Plug In
The headset checks the incoming voltage and current before it accepts a charge. If the numbers fall outside its expected range, it locks out charging and flashes red. This is a safety feature, not a fault.
Lithium-ion cells are sensitive to overcharging and overheating. The Quest 2's battery management system protects the cell by refusing bad power. So a blinking red light is often the headset doing its job.
Why the Quest 2 Is Different From Quest 3
As of 2026, the Quest 2 is discontinued, but millions are still in daily use. The Quest 3 and Quest 3S use a different charging architecture and a slightly different LED behavior. Don't assume a fix that works on Quest 3 will work on Quest 2.
The Quest 2's battery is also older now. Cells that have been through hundreds of charge cycles hold less capacity. A headset from 2021 may blink red sooner than one from 2023.
Decision Tree: Which Branch Are You On?
Here's the fastest way to diagnose your blinking red light. Find the branch that matches your situation. Follow the if/then logic and stop when the light changes.
Branch 1: You Just Plugged In a Different Charger or Wall Outlet
If the blinking started right after you switched chargers, the charger is your prime suspect.
The Quest 2 needs at least 10W. A 5W phone brick, a low-power laptop port, or a cheap gas-station adapter won't cut it. Plug into the official adapter or another 10W-or-higher source.
Then watch the LED for 10 minutes.
If the light turns solid red or orange, you've found the problem. If it keeps blinking, move to Branch 2.
Branch 2: You've Swapped Cables and Nothing Changed
If a new cable didn't fix it, the cable might be the problem, not the fix.
Try the cable that came in the box first. If that's long gone, use a cable rated for at least 3A and USB 3.0 data. Thin charging-only cables are a common culprit.
If the box cable works, toss the old one. If both cables fail, move to Branch 3.
Branch 3: The Headset Hasn't Been Used in Months
If it's been sitting in a drawer for weeks or months, you're likely dealing with deep discharge.
Lithium-ion cells self-drain over time. When they drop below a certain threshold, the headset can't boot and flashes red. This is the most recoverable scenario on this list.
Plug into the official charger and leave it for 24 hours. Don't touch it. Don't try to turn it on.
A slow trickle charge often revives the cell. If 24 hours does nothing, move to Branch 6.
Branch 4: It Was Working Fine, Then Froze or Updated
If the blink started after a firmware update, a freeze, or a crash, software is the likely cause.
Hold the power button for 30 seconds to force a restart. If the headset boots, you're done. If it stays dark and keeps blinking, you may need recovery mode or a factory reset from the Meta Quest mobile app.
Branch 5: It Feels Hot, or It's Been Somewhere Cold
If the headset is warm to the touch, let it cool to room temperature before charging. If it's been in a cold car or garage, let it warm up first.
The Quest 2 charges safely between 0°C and 35°C. Outside that range, the battery management system locks out charging and blinks red. This is normal protection, not a fault.
Give it 30 to 60 minutes at room temperature. Then try again.
Branch 6: You've Tried Everything and Nothing Changes
If you've swapped chargers, swapped cables, cleaned the port, and done a 24-hour charge with no change, the hardware is the problem.
That means a faulty charging port, a dead battery, or a board-level issue. This is where you weigh repair against replacement. We'll cover those costs later.
Quest 2 LED Codes and Blink Patterns, Decoded
Meta doesn't publish a full LED chart, but the patterns are consistent enough to decode. Here's what each one usually means, based on aggregated user reports and Meta support guidance.
| LED Pattern | What It Usually Means | First Thing to Try |
|---|---|---|
| Solid white | Powered on, normal operation | Nothing, it's fine |
| Blinking white | Booting, updating, or waking from sleep | Wait 1 to 2 minutes |
| Solid red | Battery critically low, charging normally | Leave it plugged in |
| Blinking red | Low battery plus charging fault or deep discharge | Check charger, cable, port |
| Orange or amber | Charging in progress | Wait, then unplug |
| Solid green | Fully charged | Unplug and use it |
| Blue | Bluetooth pairing mode | Normal during setup |
| No light at all | Off, or no power getting through | Check cable and outlet |
The Blink Rate Matters More Than You Think
A slow blink and a fast blink can mean different things. A slow, steady pulse usually points to low battery. A rapid, erratic blink often points to a charging fault.
In our research, users who reported a fast blink were more likely to have a cable or port problem. Users with a slow blink were more likely to have a deep discharge. Watch the rhythm for 30 seconds before you act.
What the Colors Tell You That the Blink Doesn't
Color narrows the diagnosis. Blink rate confirms it.
- Red: Battery or charging issue. The headset wants power it isn't getting.
- White: Normal operation or boot sequence. Nothing is wrong.
- Orange or amber: Active charging. The headset is working as intended.
- Green: Charge complete. The cell is topped up.
- Blue: Pairing mode. Only relevant during setup.
- No light: No power is reaching the headset, or it's fully off.
When a Color Change Is a Good Sign
If you plug in a better charger and the light shifts from blinking red to solid red or amber, that's progress. The headset has accepted the power source and started charging.
Leave it alone. A deep discharge can take several hours to recover. Check back in 30-minute intervals.
The light should slowly move toward green.
When a Color Change Is a Warning
If the light goes from red to off with no charge, the headset may be shutting down for protection. That usually means a thermal issue or a battery fault.
Unplug it. Let it sit at room temperature for an hour. Then try again with the official charger.
If it still won't charge, stop and consider hardware repair.
Step-by-Step: The Fix-It Workflow, In the Order That Actually Works
Most people start troubleshooting in the wrong place. They jump straight to a factory reset before they've checked the basics. That's like replacing an engine before checking the fuel gauge.
Work through these steps in order. Stop as soon as the light changes. Each step takes a few minutes, and you'll know within 30 minutes whether you've found the cause.
Step 1: Confirm the Light Is Actually Blinking Red
Watch the LED for a full 60 seconds. Blink rate, color, and rhythm all carry meaning. A slow pulse is different from a fast flicker.
If you can't tell, dim the room. Cup your hand around the left strap arm. The LED sits right above the power button, and it's easy to miss in daylight.
Step 2: Plug Into the Official Charger
Use the 10W adapter that came with the headset if you still have it. If you don't, use any charger rated at 5V/2A or higher from a reputable brand.
Plug the adapter directly into a wall outlet. Skip power strips, USB hubs, and laptop ports for now. Those often cap output below what the Quest 2 needs.
Wait 10 minutes. Check the LED.
Step 3: Swap the USB-C Cable
If the light hasn't changed, try a different cable. Use one rated for at least 3A and USB 3.0 data. The cable that came in the box is your best starting point.
Thin cables and free-with-your-phone cables are common culprits. They often lack the power pins the Quest 2 needs to negotiate a charge.
Wait another 10 minutes. Check again.
Step 4: Clean the Charging Port
Power off the headset. Unplug everything. Shine a flashlight into the USB-C port on the left side of the headset.
Look for lint, dust, or debris. Pocket lint is the silent killer here. Use a wooden toothpick or a dry, soft brush to gently clear it out.
Never use metal tools, compressed air at high pressure, or liquid. Metal can short the pins. High-pressure air can push debris deeper.
Liquid can corrode the contacts.
Step 5: Force a Restart
Hold the power button down for 30 full seconds. Don't let go early. The headset may not respond visually, but the internal reset still triggers.
Release and wait 30 seconds. Then plug in and check the LED.
Step 6: Try a 24-Hour Trickle Charge
If the headset has been unused for weeks or months, this is your best shot. Plug into the official charger and leave it alone for a full 24 hours.
Don't check it every hour. Don't try to turn it on. Deep discharge recovery needs uninterrupted trickle current.
Step 7: Check Temperature
If the headset feels warm, unplug it and let it cool to room temperature. If it's been somewhere cold, let it warm up first. Both extremes block charging.
Step 8: Attempt a Factory Reset
If the LED is still blinking after all of the above, try a factory reset through the Meta Quest mobile app. This wipes your data, so back up what you can first.
Step 9: Contact Meta Support
If nothing works, you're looking at a hardware fault. Open a support ticket with Meta. Have your serial number and proof of purchase ready.
Here's the full workflow at a glance:
| Step | Action | Time to Wait | What Success Looks Like |
|---|---|---|---|
| 1 | Confirm blink pattern | 1 minute | You know what you're dealing with |
| 2 | Official charger, wall outlet | 10 minutes | Light turns solid red or amber |
| 3 | Swap USB-C cable | 10 minutes | Light changes color |
| 4 | Clean charging port | 2 minutes | Debris removed, pins visible |
| 5 | Force restart | 1 minute | Headset boots or LED resets |
| 6 | 24-hour trickle charge | 24 hours | Light moves toward green |
| 7 | Temperature check | 30 to 60 minutes | Headset at room temp |
| 8 | Factory reset | 10 minutes | Headset boots clean |
| 9 | Meta support | Varies | Repair or replacement options |
Deep Discharge Recovery: The 24-Hour Trickle Charge
Deep discharge is the most common cause of a blinking red light on a Quest 2 that's been sitting unused. It's also the most fixable. You just have to be patient.
Lithium-ion cells self-drain slowly over time. When the voltage drops below a certain threshold, the headset's protection circuit kicks in. It refuses to boot and flashes red to signal that the battery is too low to safely power on.
Why the Quest 2 Won't Just Charge Normally
A deeply discharged cell can't accept a fast charge. Pushing high current into a depleted lithium-ion cell can cause internal damage or, in rare cases, swelling.
The Quest 2's battery management system drops into trickle mode. It feeds the cell a small, steady current until the voltage climbs back into a safe range. This takes hours, not minutes.
How to Run a Proper 24-Hour Charge
Here's the exact routine. Follow it step by step.
- Use the official 10W adapter or a certified equivalent rated at 5V/2A.
- Plug directly into a wall outlet, not a power strip or hub.
- Use a known-good USB-C cable rated for at least 3A.
- Leave the headset powered off the entire time.
- Don't touch it. Don't check it every 20 minutes. Let it sit.
- Check the LED at the 12-hour mark, then again at 24 hours.
If the light has moved from blinking red to solid red or amber by hour 12, you're on the right track. Keep it plugged in. If it's still blinking at hour 24, move on to hardware diagnosis.
Signs the Recovery Is Working
The light changes first. That's your signal. Then the headset will eventually boot when you hold the power button.
Don't rush this. A headset that's been dead for six months may need the full 24 hours. Some users report needing up to 48 hours for very old, very drained units.
Signs the Recovery Has Failed
If nothing changes after 24 hours, the battery has likely lost the ability to hold a charge. That's a hardware problem, not a charging problem. You're now looking at a battery replacement or a repair.
The Calibration Myth
You'll find advice online telling you to fully drain and fully recharge the battery to "calibrate" it. That advice is outdated and harmful for lithium-ion cells.
Deep discharging a lithium-ion battery accelerates wear. The Quest 2's battery management system handles calibration automatically. You don't need to help it.
When the Problem Is the Charging Port or the Battery
If deep discharge recovery fails, the blinking red light points to hardware. There are two main suspects: the USB-C charging port and the battery itself. Both can fail, and both produce similar symptoms.
How to Tell If the Charging Port Is Failing
The charging port is the most common hardware failure on any USB-C device. It's mechanical, and it takes abuse every time you plug in a cable.
Look for these signs:
- The cable feels loose or wobbly when plugged in.
- The headset charges only at certain angles.
- You see bent, dark, or corroded pins inside the port.
- The port feels hot after charging for a few minutes.
- The cable falls out on its own.
If you see any of these, the port is likely the problem. A port replacement is a board-level repair. It's not something most people can do at home without soldering experience.
How to Tell If the Battery Is Failing
A failing battery produces different symptoms. The headset may charge but drain within minutes. It may blink red even when the charger is good.
Or it may refuse to hold any charge at all.
Look for these signs:
- The headset charges to 100% but dies in under 30 minutes.
- The back of the headset feels unusually warm during charging.
- The battery percentage jumps erratically, like 40% to 5% in seconds.
- The headset only works when plugged in.
- You notice physical swelling, bulging, or a gap in the casing.
If you see swelling, stop using the headset immediately. A swollen lithium-ion battery is a fire risk. We'll cover that in the safety section.
What a Port or Battery Repair Actually Involves
A charging port replacement requires opening the headset, desoldering the old port, and fitting a new one. A battery replacement is similar but involves disconnecting and swapping the cell.
Both repairs void any remaining warranty. Both require precision tools and steady hands. If you're not experienced with electronics repair, this is a job for a professional.
DIY vs Repair Shop vs Meta Support
Here's how the three options compare for a hardware fault:
| Option | Typical Cost | Turnaround | Best For |
|---|---|---|---|
| DIY repair | $30 to $80 in parts | A few hours | Experienced electronics repairers |
| Local repair shop | $100 to $200 | 3 to 7 days | Most users with a hardware fault |
| Meta support (out of warranty) | $150 to $250 | 1 to 2 weeks | Users who want official parts and warranty |
If your headset is still under warranty, go through Meta first. Opening the headset yourself voids the warranty immediately. In the EU, the warranty runs two years.
In the US, it's one year.
Firmware, Boot Loops, and Software Causes
Not every blinking red light is a hardware problem. Sometimes the issue lives in the software. The headset gets stuck during a boot sequence, a firmware update fails, or the operating system hits a bug.
When a Firmware Update Goes Wrong
Firmware updates are supposed to be invisible. But if the headset loses power mid-update, the firmware can corrupt. That leaves the device stuck between states, unable to boot, blinking red.
If the blink started right after an update, this is your likely cause. You'll need to force a restart first. Hold the power button for 30 seconds and release.
Then try to boot normally.
How to Force a Restart Correctly
A force restart is not the same as holding the power button for a few seconds. The Quest 2 requires a longer press to trigger a hard reset of the power state.
Hold the power button for a full 30 seconds. Don't release early, even if nothing seems to happen. Then wait 30 seconds before trying to power on.
Recovery Mode and Factory Reset
If a force restart fails, the next step is recovery mode. This is a low-level boot state that lets you reset the device to factory settings.
You can trigger a factory reset through the Meta Quest mobile app if the headset still connects. If it doesn't, you'll need to use the physical button combination, which varies by firmware version.
A factory reset wipes all data. Game saves tied to your Meta account are stored in the cloud and will return. Local data, screenshots, and sideloaded content will not.
Backing Up Before You Reset
Before any reset, sync your headset to the Meta Quest app. Check that your account is linked. Verify that cloud saves are enabled for the games you care about.
Most major titles use cloud saves now. A few older or sideloaded apps do not. If you're unsure, assume the data will be lost and act accordingly.
The Boot Loop Problem
A boot loop is different from a blink. The headset powers on, shows the Meta logo, then shuts off and repeats. If you see this, the issue is almost always firmware or storage corruption.
A boot loop sometimes resolves after a factory reset. If it doesn't, you're looking at a board-level repair. Meta support can sometimes reflash the firmware remotely, but that's rare.
The Link Between Firmware Bugs and LED Behavior
Firmware bugs can cause false LED states. A headset with a healthy battery might blink red because of a reporting error. This is uncommon, but it happens after certain updates.
If you've confirmed the battery charges fine in another device or the headset boots when warm, a firmware bug is possible. A reset usually clears it.
Mistakes That Make a Blinking Red Light Worse
The wrong troubleshooting move can turn a 30-minute fix into a dead headset. Here are the most common mistakes, and what to do instead.
Using a Random Phone Charger and Hoping for the Best
Phone chargers vary wildly in output. Many deliver less than the 10W the Quest 2 needs. Some deliver odd voltage profiles that confuse the charging circuit.
Use a charger rated at 5V/2A or higher from a known brand. Check the label. If it doesn't list 5V/2A, don't trust it.
Reaching for the Toothpick and Going Too Deep
Cleaning the port is good. Jamming a toothpick into the port is bad. You can bend the pins or push debris further in.
Use a wooden toothpick at a shallow angle. Use light pressure. If you can't see the pins clearly, stop and try a soft brush instead.
Skipping the Cable Swap
People assume the cable is fine because it charges their phone. That's not a valid test. Phones draw different current profiles than the Quest 2.
Always try a second cable before you conclude the headset is broken. It's the cheapest, fastest test you can run.
Charging in a Hot Car or Cold Garage
Temperature extremes stress the battery and block charging. A hot car in summer can push the headset well past its 35°C charging limit. A cold garage in winter can drop it below 0°C.
Let the headset reach room temperature before you plug in. This alone fixes a surprising number of cases.
Ignoring the Swollen Battery Warning
A swollen battery is not a normal failure. It's a safety hazard. Stop charging immediately if you see bulging, a gap in the casing, or a hot spot on the back of the headset.
Don't try to force a charge. Don't press on the casing. Move the headset to a cool, ventilated spot away from anything flammable.
Then dispose of it properly at a battery recycling facility.
Using Cheap Third-Party Chargers With No Certification
Uncertified chargers can deliver unstable voltage. They can also fail in ways that damage the headset's charging circuit. Look for UL, CE, or FCC marks on the charger body.
These certifications confirm the charger meets basic safety standards. A $5 no-name charger saves you nothing if it kills a $300 headset.
Running a Factory Reset Before Checking the Basics
A factory reset wipes your data. It should be step eight, not step one. Chargers, cables, ports, and temperatures come first.
If you reset first and the problem was a bad cable, you've lost your data for nothing. Always diagnose before you erase.
What It Costs to Fix: DIY vs Repair Shop vs Meta Support vs Replacement
Once you've confirmed a hardware fault, cost becomes the deciding factor. The Quest 2 is discontinued as of 2026, which changes the math. A $200 repair on a headset worth $100 used rarely makes sense.
Here's the full cost breakdown across all four paths. Prices reflect what repair shops and parts sellers currently charge for Quest 2 work.
| Path | Parts Cost | Labor Cost | Total | Turnaround |
|---|---|---|---|---|
| DIY battery swap | $30 to $50 | $0 | $30 to $50 | 1 to 2 hours |
| DIY port replacement | $20 to $40 | $0 | $20 to $40 | 2 to 4 hours |
| Local repair shop | $40 to $80 | $60 to $120 | $100 to $200 | 3 to 7 days |
| Meta out-of-warranty service | Included | Included | $150 to $250 | 1 to 2 weeks |
| Replacement (used Quest 2) | N/A | N/A | $80 to $150 | Same day |
| Replacement (Quest 3S) | N/A | N/A | $299 and up | Same day |
When DIY Makes Sense
DIY is worth it if you've soldered before and the fault is isolated. A battery swap on the Quest 2 is a moderate repair. It requires opening the casing, disconnecting the old cell, and seating a new one without pinching wires.
A port replacement is harder. The USB-C connector is surface-mounted on a daughterboard. You need a hot air station and flux to do it cleanly.
Without those tools, you'll lift pads and ruin the board.
When a Repair Shop Makes Sense
A local shop is the sweet spot for most people with a hardware fault. You get professional tools and experience without the two-week wait of a warranty claim.
Call ahead and ask if they've worked on Quest 2 units. VR headsets are not phones. A shop that only fixes iPhones may not have the right jigs or thermal pads.
When Meta Support Makes Sense
Meta support is your best option if the headset is still under warranty. US warranties run one year from purchase. EU warranties run two years under consumer protection rules.
Out of warranty, Meta charges a flat service fee. That fee often exceeds the cost of a used replacement. Do the math before you commit.
When Replacement Makes More Sense Than Repair
If the repair cost is more than half the price of a working used unit, replace it. A used Quest 2 in good condition sells for $80 to $150 as of 2026.
If you can stretch to a Quest 3S at $299, you get a newer battery, better tracking, and a fresh warranty. That's a bigger jump, but it's worth weighing.
The Hidden Costs of Each Path
Every path has costs beyond the sticker price. Shipping, data loss, and downtime all count.
- DIY: Risk of damaging the board, voided warranty, no guarantee it works.
- Repair shop: Time without the headset, no coverage if the fix fails.
- Meta support: Long turnaround, potential data wipe, shipping fees.
- Replacement: Losing your existing accessories, re-setup time.
Safety and Warranty: Battery Swelling, Heat, and Disposal Rules
A blinking red light is annoying. A swollen battery is dangerous. Knowing the difference matters, because the wrong response can turn a nuisance into a hazard.
How to Spot a Swollen Battery
Swelling is the most serious battery failure mode. It happens when internal gas builds up inside the cell. The casing bulges to relieve pressure.
Look for these warning signs:
- The back plate feels raised or uneven.
- You see a gap between the front and back casing.
- The headset wobbles when laid flat on a table.
- The rear surface feels hot even when idle.
- The headset makes a faint popping or creaking sound when pressed.
If you see any of these, stop using the headset immediately. Unplug it. Do not press on the casing.
What to Do With a Swollen Battery
Move the headset to a cool, dry, well-ventilated area. Keep it away from anything flammable. Don't put it in a closet, a drawer, or a car.
Do not try to charge it. Do not try to discharge it. Do not open the casing yourself.
A punctured lithium-ion cell can vent hot gas or ignite.
Take it to a battery recycling facility or a hazardous waste center. Many electronics retailers accept swollen batteries for free disposal. Call ahead to confirm.
Lithium-Ion Safety Standards You Should Know
The U.S. Consumer Product Safety Commission publishes guidance on lithium-ion battery safety for consumer electronics. The core rules apply here too.
Don't charge unattended overnight if you suspect a battery fault. Don't charge near soft furnishings. Don't use a charger that runs hot.
IEEE 1725 is the industry standard for lithium-ion battery design in mobile devices. It covers cell quality, pack assembly, and system integration. A headset that meets this standard is safer by design, but no standard eliminates wear.
Heat: The Silent Battery Killer
Heat accelerates battery degradation faster than anything else. A Quest 2 charged in a hot room loses capacity faster than one charged in a cool one.
Keep the headset below 35°C (95°F) while charging. That's the top of Meta's stated safe range. If the back feels hot to the touch, unplug it and let it cool.
Cold: Not Dangerous, But Blocking
Cold doesn't damage the battery the way heat does. But it does block charging. Below 0°C (32°F), the battery management system refuses to accept current.
If the headset has been in a cold car or garage, let it warm to room temperature first. That takes 30 to 60 minutes. Then charge normally.
Warranty Terms by Region
Warranty length varies by where you bought the headset. Here's the breakdown.
| Region | Warranty Length | Coverage |
|---|---|---|
| United States | 1 year | Manufacturing defects |
| European Union | 2 years | Consumer protection law |
| United Kingdom | 2 years | Consumer Rights Act |
| Canada | 1 year | Manufacturing defects |
| Australia | 2 years | Australian Consumer Law |
Opening the headset voids the warranty in every region. So does water damage or physical impact. If you're still covered, always go through Meta first.
Data Privacy When Sending for Repair
Before you ship a headset for repair, wipe it. A factory reset removes your account, saved data, and any personal media. It's the same step you'd take before selling a phone.
If you can't wipe it because it won't boot, ask the repair service how they handle data. Reputable shops wipe devices as standard. Ask anyway.
Charging Habits That Keep Your Quest 2 Alive Longer
Most blinking red lights don't happen overnight. They build up over months and years of poor charging habits. The good news is that better habits are easy to adopt.
Use the Right Charger Every Time
The Quest 2 wants 5V/2A, which is 10W. Any charger that meets or exceeds that output will work. Anything below it will struggle.
Keep the official adapter with the headset. If you travel, bring a certified 10W or higher USB-C charger. Skip the hotel USB port and the airplane seat outlet.
Avoid Full Discharge
Lithium-ion cells hate being run to zero. Every full discharge adds wear. Try to plug in when the headset hits 20% to 30%, not when it dies.
The Quest 2 warns you at low battery. Listen to it. That warning exists to protect the cell.
Don't Leave It Plugged In for Days
Charging to 100% and leaving it there is fine for a few hours. Leaving it plugged in for a week is not. Once the light turns green, unplug.
If you use the headset daily, this isn't a problem. If you use it once a month, don't leave it on the charger between sessions.
Store It at 50% for Long Periods
If you're putting the headset away for weeks or months, charge it to about 50% first. That's the sweet spot for long-term lithium-ion storage.
A cell stored at 100% degrades faster than one stored at 50%. A cell stored at 0% risks deep discharge, which is exactly what causes the blinking red light in the first place.
Keep It Cool and Dry
Store the headset somewhere with stable temperature. A closet shelf is fine. A windowsill in summer is not.
Avoid bathrooms. Humidity can corrode the charging port over time. Avoid garages and attics, which swing between hot and cold.
Clean the Charging Port Monthly
Lint is the number one cause of intermittent charging on any USB-C device. A 30-second clean once a month prevents most port problems.
Power off the headset. Use a wooden toothpick or a soft dry brush. Gently clear any visible debris.
Don't blow into the port with your mouth, since moisture can cause corrosion.
Use a Surge Protector
Power surges can damage the charging circuit. If your home has unstable power, plug the charger into a surge protector. It's cheap insurance for a $300 device.
Rotate Cables
Cables wear out. The connector end takes the most abuse. If you use the same cable daily, it will fail eventually.
Keep two cables in rotation. Swap them every few months. This spreads the wear and gives you a spare if one dies.
Frequently Asked Questions
Does a blinking red light always mean the battery is dead?
No. It usually points to a critically low battery, but a weak charger, bad cable, dirty port, or temperature issue can trigger the same blink. Rule out each cause in order before assuming the battery has failed.
How long should I charge a Quest 2 that shows a blinking red light?
Give it a full 24 hours on the official charger with the headset powered off. Deep discharge recovery is slow by design. Checking every 20 minutes won't speed it up and may interrupt the trickle cycle.
Can a blinking red light fix itself?
Sometimes, yes. If the cause is temperature or a drained cell, letting the headset reach room temperature and charging it properly can clear the blink on its own. If it persists after 24 hours, it's a hardware fault.
Is it safe to keep using a Quest 2 that blinks red?
Only if the headset charges normally once the cause is fixed. If the light keeps blinking after proper charging, or if you notice swelling or unusual heat, stop using it. A failing battery is a fire risk.
Does the Quest 2 support fast charging?
No. The Quest 2 caps charging at around 10W, or 5V/2A, over USB-C. Plugging it into a 45W or 65W fast charger won't speed things up.
The headset pulls only what it needs.
Will a factory reset fix a blinking red light?
Only if the cause is software. A factory reset won't help a dead battery, a bad port, or a failing cable. Try charger, cable, port cleaning, and a 24-hour charge first.
Reset only after those fail.