You plug in your AirPods case, glance down, and see an amber light blinking back at you. AirPods blinking orange while charging can mean two very different things, and only one of them is a problem. On most models a steady amber light simply means the case is topping up.
A flashing amber light usually points to a reset in progress or a genuine charging fault.
Apple's published charging window sits between 0°C and 35°C (32°F and 95°F), and that matters more than most people realize. Step outside that range and the case may refuse to charge or blink amber to tell you something's off. Our research into user reports and Apple's published specs shows the right fix depends on your model, your cable, and where the earbuds sit.
Here's how to read the light properly and pick your next move.
Quick Answer: Solid Amber vs. Flashing Amber at a Glance
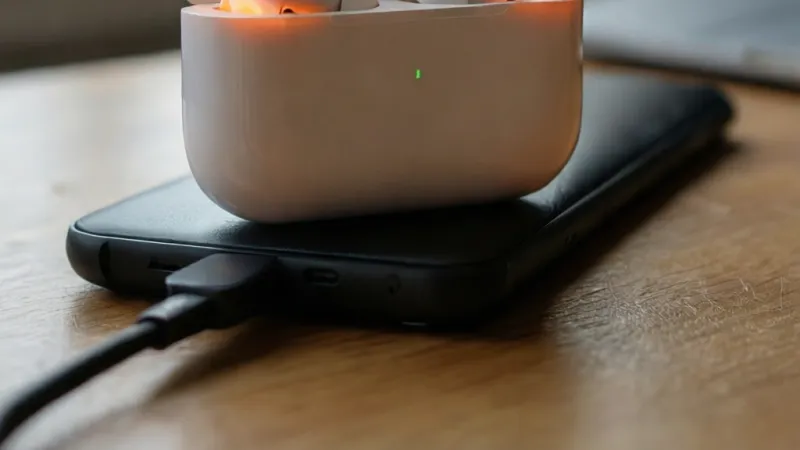
An orange or amber light on AirPods means two things. A steady amber light means the case is charging. A flashing amber light means a reset is running.
It can also signal a charging fault. Let it charge first, then clean the contacts if it keeps flashing.
What an Orange Light on Your AirPods Case Actually Means
Apple's status light is a charge indicator, not an error code. That's the first thing to get straight. It tells you how much power is left, or whether the case is currently pulling current from a charger.
It only becomes an error signal in one specific pattern, and that pattern is the flashing one.
One quick language note. Apple uses "amber" in its documentation. Most people searching online type "orange." They're the same color and the same light.
If you've been hunting for an orange light fix, you're in the right place.
The full status light dictionary
Here's what each state actually means across the current AirPods family.
| Light state | What it means | What to do |
|---|---|---|
| Solid green, brief | Case and earbuds are fully charged | Unplug, or leave it connected |
| Solid amber | Case is charging, or below full charge | Leave it plugged in for 30 minutes |
| Flashing amber | Reset in progress, or a charging fault | Finish the reset, then clean contacts |
| Flashing white | Ready to pair | Connect through Bluetooth settings |
| No light at all | No power is reaching the case | Check cable, adapter, outlet, alignment |
The green light has one quirk worth knowing. It only shows briefly when you open the lid with the earbuds inside. Apple designed it to fade after a few seconds to save power, so a light that switches off isn't a fault.
It's the case going back to sleep.
Amber does not always mean trouble
A solid amber light is the single most misread signal on AirPods. People see it, assume the worst, and start resetting things they don't need to reset. In reality, solid amber is exactly what you should see when a case is plugged in and charging.
It's also what you'll see when the case is charged but the earbuds inside aren't. The light reports the lowest charge state in the chain. If your left AirPod is at 40% and the case is at 100%, you'll still get amber.
That's not a fault. That's the case telling you it still has work to do.
Here's the rule that cuts through most confusion:
- Solid amber means power is flowing, or charge is incomplete.
- Flashing amber means the case is doing something specific, either running a reset sequence or flagging a problem it can't fix on its own.
If your light is steady, you almost certainly don't have a hardware failure. If it's pulsing or blinking repeatedly, keep reading.
Which AirPods model you're holding changes everything
The light's location, its behavior, and the reset method all shift between generations. That's why generic advice online so often sends people down the wrong path. As of 2026, Apple's lineup spans several case designs with genuinely different charging hardware.
| Model | Status light location | Wireless charging support |
|---|---|---|
| AirPods (1st and 2nd gen), Wired Charging Case | Inside, between the earbuds | No |
| AirPods (2nd gen), Wireless Charging Case | Front of case | Qi |
| AirPods (3rd gen) | Front of case | MagSafe and Qi |
| AirPods (4th gen) | Front of case | USB-C only |
| AirPods (4th gen) with Active Noise Cancellation | Front of case | MagSafe and Qi |
| AirPods Pro (1st gen) | Front of case | Qi, later MagSafe case sold separately |
| AirPods Pro (2nd gen), Lightning | Front of case | MagSafe, Qi, Apple Watch charger |
| AirPods Pro (2nd gen), USB-C | Front of case | MagSafe, Qi, Apple Watch charger, USB-C |
| AirPods Max | Right ear cup | Wired only |
Two things jump out from that table. First, older wired-charging cases hide the LED inside the lid. If you're staring at a case with no visible front light, check between the earbud slots.
Second, AirPods Max don't have a charging case at all, so any "case light" advice simply doesn't apply to them.
The AirPods Pro (2nd generation) and AirPods 4 with Active Noise Cancellation cases also carry a small speaker. It plays a chime when you start charging or when the battery runs low. That chime is a second diagnostic tool.
If you hear it and see amber, the case is talking to you. If you see amber and hear nothing on a model that should chime, that's a useful clue too.
Where the light sits and why it matters
On front-LED cases, the light is visible with the lid shut. That makes it easy to check charging status on a desk or nightstand without opening anything. On older inside-LED cases, you have to lift the lid, and the light only reports when the lid is open.
That difference explains a lot of contradictory advice you'll find online. Someone with a 1st-gen case will tell you the light only works with the lid open. Someone with an AirPods Pro case will tell you the opposite.
Both are right about their own hardware.
The Variables That Decide Your Next Step
Four things change what a blinking amber light means. Work through them in order before you touch anything.
Which AirPods model you have
Model determines the reset method, the compatible chargers, and whether your case has a speaker or a front LED. AirPods Pro (2nd generation) and AirPods 4 with ANC have a setup button on the back, same as earlier models, but the reset timing and the feedback differ slightly.
AirPods Max are the outlier. There's no case, no lid, and no front light. The status light sits on the bottom edge of the right ear cup, and you check it by pressing the noise control button briefly.
If you're seeing amber there, you're looking at the earbuds' own battery state, not a case issue.
Lid open or closed, earbuds in or out
This is the variable people skip, and it's the one that causes the most false alarms.
- Lid open, earbuds in: the light reports the charge status of the AirPods themselves.
- Lid open, earbuds out: the light reports the charge status of the case.
- Lid closed: the light reports the case status, and only on front-LED models.
So a green flash followed by amber can mean something very specific. It often means the earbuds are fully charged but the case isn't. Nothing is broken.
The case is simply lower on power than the earbuds it's holding.
What you're charging from
The power source changes the failure modes completely. Wired charging depends on the cable, the adapter, and the port. Wireless charging depends on coil alignment and the Qi standard, which the Wireless Power Consortium maintains and certifies.
| Charging method | Common failure point | Typical amber behavior |
|---|---|---|
| Lightning or USB-C cable | Lint in the port, frayed cable, weak adapter | Flashing amber, or no light |
| MagSafe charger | Misalignment, thick case cover | Flashing amber, intermittent charging |
| Qi wireless pad | Off-center placement, non-certified pad | Flashing amber, slow or no charge |
| Apple Watch charger | Case model not compatible | Flashing amber or no response |
Apple Watch chargers are the trickiest one. They work with the AirPods Pro (2nd generation) case and the AirPods 4 with ANC case. They don't work with most older cases, and a failure there isn't a fault.
It's an incompatibility.
Temperature and how long it's been blinking
Lithium-ion cells won't accept charge outside a safe window. Apple specifies 0°C to 35°C (32°F to 95°F) for both operating and charging. Storage can go colder, down to -20°C (-4°F), but that's storage, not charging.
If your case sat in a hot car or a freezing bag, let it reach room temperature before you plug it in. A case that's too cold or too hot may blink amber and refuse to take a charge. Give it 30 to 60 minutes at normal room temperature and try again.
Duration matters too. A light that flashes amber for two or three seconds during a reset is normal. A light that keeps flashing for minutes on end, with no reset in progress, is a fault signal.
That's the point where you move from "leave it alone" to "start troubleshooting."
Decision Tree: Match Your Situation to the Right Fix
Find your pattern in the table below. Then follow the matching branch.
| What you see | Most likely cause | Your first move |
|---|---|---|
| Solid amber, plugged in | Normal charging | Leave it for 30 minutes |
| Flashing amber, never reset it | Cable, adapter, or port fault | Swap the cable first |
| Flashing amber after holding setup button | Reset sequence running | Keep holding until it flashes white |
| Flashing amber on a wireless pad | Misalignment or case cover | Reposition, remove the cover |
| Flashing amber on an Apple Watch charger | Case not compatible | Switch to a cable or Qi pad |
| Amber with only one earbud | Dirty contact on that earbud | Clean the contact |
| Amber then white, repeating | Reset loop | Let it finish, then re-pair |
| No light, plugged in | No power reaching the case | Test outlet, adapter, cable |
If the light is solid amber
Do nothing for 30 minutes. Check again. If it's green, you're done.
If it's still amber after an hour on a known-good charger, move to Branch 1.
If the light is flashing amber and you never started a reset
Jump to Branch 1 if you're using a cable. Jump to Branch 2 if you're on a wireless pad. Both are covered in detail below.
This is the one case where flashing amber is completely expected. Hold the button for about 15 seconds total. The light flashes amber first, then flashes white.
Release when you see white. That means the reset worked.
If the light is flashing amber on one earbud only
Pull both earbuds out and look at the charging contacts at the base of each stem. A single dirty or corroded contact will stop that earbud charging. Clean it, reseat it, and watch the light again.
If there's no light at all
Work backward through the power chain. Test the outlet with something else. Try a different adapter.
Try a different cable. On wireless pads, lift the case and reposition it dead center. No light almost always means no power, not a dead case.
Branch 1: Blinking Orange While Plugged Into a Cable
A cabled connection gives you the most control, because you can swap each link in the chain one at a time. That's exactly what we recommend doing.
Swap the cable, adapter, and outlet in that order
Order matters here. Cables fail far more often than adapters, and adapters fail more often than wall outlets. Work through them cheapest and fastest first.
- Unplug the case and look inside the port. Use a flashlight. Lint, dust, and pocket fluff compact at the bottom of Lightning and USB-C ports. It's the single most common cause of intermittent charging we see in user reports.
- Clean the port gently. Use a dry wooden toothpick or a soft anti-static brush. Never use metal, and never spray anything into the port. Work the debris out, don't push it deeper.
- Swap the cable. Use a known-good Apple cable or an MFi-certified third-party cable. Cheap uncertified cables often can't deliver enough current, which can trigger a fault blink.
- Swap the power adapter. Try a different one, ideally rated 5W or higher. Apple's own support documentation recommends testing with a different adapter and cable when charging fails.
- Swap the outlet. Plug something else in to confirm the socket works. Also try a different USB port if you're charging from a computer, since some ports under-deliver power.
- Check the contacts in the case. With the earbuds out, look at the two metal pins inside each slot. They should sit clean and springy. A pin that's stuck down or blackened won't make contact.
- Reseat the earbuds and watch the light. Firm press, lid closed, cable in. Give it 30 seconds. A solid amber light means you've fixed it.
If you get a solid amber light after all seven steps, you're charging normally. If it's still flashing, the fault is inside the case or the earbuds, and you're into service territory.
What a green flash then amber tells you
This pattern confuses a lot of people, and it has a clean explanation. When you open the lid with the earbuds inside, the light first reports the earbuds' charge state. A brief green means they're topped up.
Then the light switches to reporting the case, which flashes amber because the case itself is low.
Nothing is broken. The case simply gave its power to the earbuds and now needs a top-up. Leave it plugged in until the light settles on green, then unplug.
The same logic explains a green-then-amber pattern on a wireless pad. It's a status handoff, not an error.
What a repeating amber and white cycle means
Amber then white, over and over, usually means the case is stuck in a reset loop. That can happen after a failed pairing attempt or a firmware update that didn't complete.
Here's how to break out of it:
- Leave the lid open and the earbuds inside.
- Hold the setup button on the back for a full 15 seconds.
- Wait for the light to flash amber, then flash white.
- Release the button and set the case down next to your iPhone.
- Leave it for 10 minutes with the lid open.
If the cycle keeps repeating after two attempts, stop resetting it. Repeated resets won't fix a hardware fault, and they drain the battery further. That's your signal to book a service appointment.
When the cable fix isn't enough
Some faults sit behind the port. Liquid exposure, a bent connector, or a swollen battery will all produce a fault blink that no cable swap will solve. Apple's one-year limited warranty covers manufacturing defects, and AppleCare+ extends that.
If your case is within coverage, a Genius Bar visit is free.
If it's out of warranty, a case replacement or battery service is usually cheaper than a new pair of AirPods. We cover those numbers later in this guide.
Branch 2: Blinking Orange on a Wireless, MagSafe, or Apple Watch Charger
Wireless charging removes the cable, but it adds a new set of variables. The magnetic coil has to line up, the pad has to be certified, and nothing can sit between the two surfaces. Miss any of those and you'll get a blinking amber light with no fault in the AirPods at all.
Coil alignment and case covers
Alignment is the number one cause of wireless charging failures we see in user reports. Qi pads and MagSafe chargers both need the receiving coil in the case to sit directly over the transmitting coil in the pad.
Shift it 10 millimeters off center and charging becomes unreliable. Shift it further and it stops entirely.
MagSafe makes this easier because magnets snap the case into position. Qi pads don't, so you have to place the case by eye. Here's what to check:
- Remove the case cover. Silicone, leather, and card-holder skins all add distance between the coils. Anything thicker than about 3 millimeters will kill wireless charging outright.
- Check for metal inside the cover. MagSafe wallets and magnet plates interfere with the field. Apple warns against placing credit cards or metal objects between the case and the charger.
- Set the case dead center. On a Qi pad, the charging zone is often smaller than the pad itself. Look for a marked center ring or a small indicator LED on the pad.
- Listen for the chime. On AirPods Pro (2nd generation) and AirPods 4 with ANC, a chime confirms the connection. No chime means no charge.
- Watch the light for 30 seconds. Solid amber means it's working. Flashing amber means the connection keeps dropping.
- Try a different pad. If a second Qi pad charges fine, your original pad is the problem, not the case.
Why Apple Watch chargers are hit or miss
Apple Watch chargers use a different coil design and a different power profile. They work with the AirPods Pro (2nd generation) case and the AirPods 4 with ANC case. They don't work with most other AirPods cases, including the AirPods Pro (1st generation) and the AirPods 3 case.
That incompatibility produces a blinking amber light that looks identical to a fault. It isn't one. The case is simply not receiving usable power.
| Case model | Apple Watch charger support | Result if unsupported |
|---|---|---|
| AirPods Pro (2nd gen), Lightning | Yes | Charges normally |
| AirPods Pro (2nd gen), USB-C | Yes | Charges normally |
| AirPods 4 with ANC | Yes | Charges normally |
| AirPods 4 (standard) | No | Flashing amber or nothing |
| AirPods Pro (1st gen) | No | Flashing amber or nothing |
| AirPods 3 | No | Flashing amber or nothing |
| AirPods 1 and 2, Wireless Charging Case | No | Flashing amber or nothing |
If you're not sure which case you have, check the model number printed inside the lid. Apple's support pages list the exact case model numbers, and it takes about 20 seconds to confirm.
One more thing about wireless pads. Cheap uncertified chargers often claim Qi compliance without holding it. A pad that hasn't been through certification testing may deliver unstable current.
That instability shows up as a case that charges for a minute, then blinks amber, then charges again. Swap to a certified pad before you assume the case is faulty.
Branch 3: Blinking Orange After a Reset or Re-Pair
A reset produces a deliberate amber flash. If you've just held the setup button, that blink is the system working exactly as designed.
The confusion starts when people release the button too early and then panic at the light. Let's break the sequence down properly.
Reading the amber-then-white flash sequence
The full reset sequence runs in two stages. Getting the timing right is the whole game.
- Place both earbuds in the case and leave the lid open.
- Press and hold the setup button on the back of the case.
- Keep holding. After roughly 15 seconds the status light flashes amber.
- Keep holding. The light then flashes white.
- Release the button the moment you see white.
Amber means the case is clearing its paired-device memory. White means it's ready to pair again. If you let go during the amber stage, you've canceled the reset halfway through.
The case will sit there blinking amber with nothing happening.
That half-finished state is one of the most common reasons people search for help. The fix is simple. Start again and hold until white.
When the reset never completes
A reset that won't finish points to a deeper problem. Try these in order before assuming the worst.
- Charge the case first. A reset needs enough battery to run. Below roughly 10% charge, the sequence can stall. Plug in and wait 30 minutes.
- Check both earbuds are seated. The reset touches both earbuds. If one isn't making contact, the sequence can hang at amber.
- Clean the contacts. Dirty pins are the most common cause of a stalled reset. A dry brush on both the earbud stems and the case pins usually sorts it.
- Forget the device on your iPhone first. Go to Settings, then Bluetooth, tap the info icon beside your AirPods, and choose Forget This Device. Then run the reset again.
- Try a different device. Sometimes the pairing handshake is the problem, not the AirPods. Test with an iPad or Mac.
If you've done all five and the light still won't reach white, the fault is likely firmware or hardware. Firmware can often be nudged along. Hardware needs service.
We cover the firmware route in the next section.
Branch 4: Blinking Orange With One AirPod or a Case That Won't Hold Charge
One-sided charging problems are the easiest to misdiagnose. The case light reports the lowest charge state in the chain, so a single bad earbud drags the whole reading down.
Testing each earbud separately
You can isolate the problem in about five minutes. All you need is the case and one earbud at a time.
| Test | Setup | What a solid amber light tells you |
|---|---|---|
| Left only | Left earbud in, right out, lid closed | Left earbud is charging normally |
| Right only | Right earbud in, left out, lid closed | Right earbud is charging normally |
| Both in | Both seated, lid closed | Both are charging, case still topping up |
| Neither in | Empty case, lid closed | Case is charging on its own |
Run each test for 30 seconds. If one earbud gives you a blinking amber light while the other charges fine, you've found your culprit. That earbud isn't making reliable contact.
Nine times out of ten it's debris on the stem contact or a bent pin in the case slot. Look closely at both with a flashlight.
Separating a bad earbud from a bad case
Once you know which side is failing, the next question is whether the earbud or the slot is at fault. Swap the earbuds into opposite slots and repeat the test.
- Fault follows the earbud. The earbud's contact or internal battery is the problem.
- Fault stays with the slot. The case pin or that slot's charging circuit is the problem.
- Fault disappears entirely. You had a seating issue. It's fixed.
A fault that follows the earbud usually means battery wear. Lithium-ion cells lose capacity over hundreds of charge cycles. One earbud often ages faster than the other because people use one side more for calls.
Apple's battery service covers single-earbud replacement in most regions.
A fault that stays with the slot points to the case. That's a case replacement, not an earbud swap.
Cleaning the Contacts and Charging Port: The Step Most People Skip
Cleaning is the highest-yield fix on this entire list. It costs nothing, takes five minutes, and resolves a huge share of charging complaints. Yet it's the step most people jump past on their way to a reset.
What you actually need
You don't need a kit. Four household items will do, and three of them you already own.
| Tool | Purpose | Avoid |
|---|---|---|
| Dry wooden toothpick | Lift compacted lint from the port | Metal pins, needles, paperclips |
| Soft anti-static brush | Sweep dust from case slots | Stiff wire brushes |
| Dry cotton swab | Wipe the earbud stems | Wet swabs, alcohol-soaked pads |
| Flashlight or phone light | See into the port and slots | Nothing, this one's essential |
Skip compressed air. It can push debris deeper into the port or force moisture into places it shouldn't go. Skip liquids entirely.
Apple's guidance is clear that moisture and cleaning fluids shouldn't enter the connector.
The cleaning sequence
Work from the outside in, and do it with the case unplugged.
- Unplug everything. Cable out, pad off, case unpowered.
- Remove both earbuds. Set them aside on a clean, dry surface.
- Light up the charging port. Look for a gray or black plug of compacted lint at the very bottom.
- Work the toothpick gently. Angle it along the wall of the port, not straight down the middle. Hook the debris and lift it out.
- Brush the case slots. Sweep the two pins in each slot and the surrounding plastic. Don't press hard on the pins.
- Wipe the earbud stems. Run the dry swab around the metal band at the base of each stem. You'll often see a dark residue come off.
- Check the pins are springy. Press each case pin lightly. It should move down and spring back. A pin stuck flat won't make contact.
- Reseat everything and charge. Give it 30 seconds and read the light.
If the light goes solid amber, you've fixed it. If it's still flashing, the fault is elsewhere.
How often you should be doing this
Pocket lint builds up faster than most people realize. If you carry your case in a bag or a jacket pocket, clean the port every two to three months. If you work outdoors, in construction, or anywhere dusty, do it monthly.
You'll notice the difference in reliability long before you notice the debris. Intermittent charging is usually the first warning sign, and it's easy to ignore until the case stops charging altogether.
Reset, Re-Pair, and Firmware: The Software Fixes in Order
Software faults are real, and they can absolutely produce a blinking amber light. The key is doing these in the right order. Resetting before re-pairing, and re-pairing before checking firmware, saves you time and avoids unnecessary steps.
Step 1: Forget the device on every connected device
AirPods remember the last device they paired with. If you've paired them with an iPhone, an iPad, and a Mac, all three hold a stale entry.
Forget the AirPods on each one. Settings, Bluetooth, tap the info icon, then Forget This Device. On a Mac it's System Settings, Bluetooth, then the same option.
This clears the pairing handshake completely. Skipping it is why some resets appear to do nothing.
Step 2: Run the reset properly
Lid open, both earbuds in, hold the setup button for 15 seconds. Wait for amber, then white, then release. Set the case next to your iPhone with the lid open.
The pairing card should appear on screen within about 10 seconds. If it does, connect and check the light again.
Step 3: Re-pair and let it settle
Once connected, leave the AirPods alone for a few minutes. Don't immediately start resetting again if the light is still amber. The case may just be low on charge and doing its job.
Check the battery widget on your iPhone. It shows the charge level of each earbud and the case separately. That reading tells you more than the light alone.
Step 4: Check and force a firmware update
Firmware updates fix real bugs, and charging behavior is one of the things they address. Updates install automatically, but only under specific conditions.
| Requirement | Why it matters |
|---|---|
| AirPods connected to a paired iPhone, iPad, or Mac | The update has to come from somewhere |
| Case plugged into power | Prevents the update stalling mid-install |
| Both earbuds in the case, lid closed | Both earbuds need the new firmware |
| Device nearby and connected to Wi-Fi | The firmware file downloads first |
| 30 minutes or more | Updates are not instant |
To check your current version, go to Settings, Bluetooth, tap the info icon beside your AirPods, and scroll to Firmware Version. Compare it against the latest Apple has published for your model.
If it's behind, follow the conditions above and leave everything alone for half an hour. Don't open the lid, don't unpair, don't reset. Interrupting a firmware install can leave the case in a bad state, and that's when you start seeing reset loops.
When software stops being the answer
You've now cleared the pairing memory, reset the case, and confirmed the firmware is current. If the amber light is still blinking, you're looking at a hardware fault.
That means one of four things. A worn battery. A damaged charging port.
Liquid exposure inside the case. Or a failed charging circuit on the case board. None of those respond to another reset, and repeated attempts just drain what charge is left.
That's the point to stop troubleshooting and start pricing your options. We cover those numbers next.
When It's Actually Hardware: Heat, Liquid Damage, and Battery Wear
Once you've cleaned the contacts, reset the case, and confirmed current firmware, the remaining causes are physical. There are four, and each one leaves its own fingerprint.
Heat and cold outside Apple's charging window
Lithium-ion cells won't accept charge outside a safe temperature band. Apple specifies 0°C to 35°C (32°F to 95°F) for both operating and charging your AirPods.
A case left on a car dashboard in summer can hit 60°C inside. Plug it in and the case will either refuse to charge or blink amber as a warning. Same story in reverse if the case spent the night in a freezing car.
Let it sit at room temperature for 30 to 60 minutes. Then try again on a known-good charger. If it charges normally, heat was your whole problem.
Liquid exposure and what the ratings actually cover
Most AirPods charging cases carry no water resistance rating at all. The USB-C AirPods Pro 2 case and the AirPods 4 case are the exceptions, rated IP54 for dust and splashing water.
IP54 is splash protection, not submersion. It won't survive a swim, a washing machine, or a spilled coffee that pools inside the lid.
Corrosion is the giveaway. Look at the case pins and the metal band at the base of each stem. Green or black residue means liquid got in and started eating the contacts.
If you suspect liquid exposure, stop charging immediately. Power plus moisture plus a lithium cell is a combination you don't want to test.
Battery wear and how to spot a swollen cell
Every charge cycle shaves a little capacity off a lithium-ion cell. After two or three years of daily use, most AirPods cases show noticeable runtime loss.
Normal wear looks like a case that holds less charge than it used to. It doesn't cause blinking amber lights.
A swollen battery does. Watch for these signs:
- The lid no longer sits flush when closed.
- The case rocks on a flat surface.
- The case feels warm when it isn't charging.
- The outer shell has a visible bulge near the hinge or the base.
A swollen cell is a safety issue, not a repair job. Stop using the case, keep it away from heat and sharp objects, and dispose of it through a proper battery recycling point. The U.S.
Consumer Product Safety Commission publishes guidance on lithium battery safety and disposal that's worth a read if you're unsure how to handle it.
Counterfeit cases and fake status lights
Counterfeit AirPods are common, and their status lights don't follow Apple's logic at all. A fake case might blink amber for no reason, or show a green light while sitting at 20% charge.
Check the serial number. Go to Apple's coverage checker and enter the serial printed inside the lid. If it doesn't come back as a genuine product, the light you're chasing means nothing.
Fake cases also tend to fail early. Their charging circuits are cheaper, and they often can't regulate current properly. That's a fault that no amount of cleaning will fix.
Mistakes and Unsafe Shortcuts to Avoid
Most of the advice floating around about amber lights is harmless. Some of it isn't. Here's what to skip, and why.
The resets that make things worse
Resetting repeatedly is the most common mistake we see. People reset five or six times in a row, hoping one will stick.
Each reset drains the battery a little further. On a case that's already low, that's the opposite of helpful. Cap it at two attempts, then move on.
Cleaning shortcuts that damage hardware
| Shortcut | What people think it does | What it actually does |
|---|---|---|
| Metal pin or paperclip in the port | Scrapes out lint | Scratches contacts, can short pins |
| Compressed air | Blows debris out | Pushes it deeper, forces moisture inward |
| Wet cotton swab or alcohol wipe | Cleans thoroughly | Pushes liquid toward the connector |
| Toothbrush with toothpaste | Deep clean | Leaves abrasive residue on the pins |
| Blowing into the port | Clears dust | Adds moisture from your breath |
A dry wooden toothpick and a soft brush handle every job on this list. Nothing else is needed.
The rice myth and other liquid fixes
Rice does not draw moisture out of an AirPods case. It does add starch dust to the inside of the port, which is the last thing you want near the pins.
The hairdryer trick is worse. Heat warps the plastic shell and stresses the battery. A hot-air gun can deform the case in seconds.
If liquid got in, leave the case open in a dry room at room temperature for 48 hours. Then test it. If the light still misbehaves, it's a service issue.
Chargers and cables that quietly cause faults
Uncertified cables and cheap Qi pads are a real cause of intermittent charging. They often can't hold a stable current, so the case connects, drops, and reconnects.
That pattern shows up as a light that flickers between amber and nothing. Stick to Apple cables, MFi-certified Lightning cables, USB-IF certified USB-C cables, and Qi-certified pads.
The USB Implementers Forum maintains the certification program for USB-C cables if you want to verify a specific product.
Charging habits that shorten battery life
Heat is the biggest killer of lithium-ion cells, and charging generates heat. A case charging under a pillow or on a sunny windowsill runs hotter than it should.
Overnight charging is fine on its own. Apple's charging hardware stops pulling current once the case hits full. The problem is overnight charging in a hot, enclosed spot.
What Battery Service and Case Replacement Cost
Pricing varies by country, model, and whether you're in or out of warranty. These are the typical US figures as of 2026, and they shift over time.
| Option | Typical cost | Best for |
|---|---|---|
| DIY cleaning | Free | Debris and contact issues |
| New MFi-certified cable | $10 to $20 | Intermittent cabled charging |
| Qi-certified wireless pad | $20 to $40 | Failed wireless charging on a bad pad |
| Out-of-warranty battery service | Around $49 per component | Worn battery, case or earbud |
| Charging case replacement | $79 to $99 depending on model | Failed case circuit or port |
| New AirPods | $129 and up | Multiple failures, older models |
What the warranty covers
Every new set of AirPods comes with a one-year limited warranty against manufacturing defects. A case that fails on its own within that window is covered, and the repair is free.
AppleCare+ for AirPods extends coverage and adds accidental damage protection. It costs around $29 in the US and covers a set number of incidents per year with a service fee on each claim. Check Apple's current terms before you buy, because the details change.
In the UK, the Consumer Rights Act 2015 can extend your claim well past the manufacturer's 12 months. EU buyers get a two-year legal guarantee on top of any manufacturer warranty. Keep your receipt.
Repair or replace?
Work through this before you spend anything.
- Under warranty or AppleCare+: Book a service. It's free or close to it.
- Out of warranty, case fault only: A replacement case is usually cheaper than new AirPods.
- Out of warranty, both earbuds failing: Compare the repair quote against a new set. On older models, new often wins.
- Swollen battery: Replace. Don't repair, and don't keep using it.
- Counterfeit unit: Replace with genuine hardware. Repairs aren't available for fakes.
One last note on third-party replacement cases. They exist, they're cheap, and they often break within months. They also won't support firmware updates, Find My, or the chime on models that have it.
Genuine is the only route that keeps the full feature set working.
Frequently Asked Questions
Does a solid orange light on AirPods mean something is wrong?
No. A solid amber light means the case is charging or isn't fully charged yet. It's the normal state while plugged in.
Leave it connected for about 30 minutes and check again. Only a flashing amber light points to a reset in progress or a genuine fault.
Why are my AirPods blinking orange while charging and not turning green?
The case is either still charging, or it can't hold a charge. Give it a full hour on a known-good cable. If it stays amber, clean the charging port and the case pins.
Persistent amber after cleaning usually means battery wear or a failed charging circuit.
Hold it for about 15 seconds. The light flashes amber first, then flashes white. Release the moment you see white.
Letting go during the amber stage cancels the reset halfway through, which is why so many resets appear to fail.
Can I charge AirPods on an Apple Watch charger?
Only on the AirPods Pro 2 case and the AirPods 4 case with Active Noise Cancellation. Earlier cases aren't compatible and will blink amber or show no response. If yours isn't supported, use a Lightning cable, a USB-C cable, or a Qi-certified pad instead.
Does a blinking orange light mean my AirPods are broken?
Not necessarily. Flashing amber during a reset is expected behavior. Flashing amber outside a reset points to a charging fault, and most of those are caused by lint in the port, dirty contacts, a bad cable, or a misaligned wireless pad.
Hardware failure is the least likely cause.
Should I keep using my AirPods if the case gets hot while charging?
No. Unplug it and let it cool at room temperature. Mild warmth during charging is normal.
A case that's hot to the touch, bulging, or rocking on a flat surface has a battery problem. Stop using it and dispose of it safely.
Final Decision Guide: Reading Your Result and Choosing the Next Move
You've worked through the branches. Now match what you're seeing to the move that makes sense.
| What you observe now | What it means | Your next move |
|---|---|---|
| Solid amber, then green | Normal charging cycle | Nothing, you're done |
| Solid amber after an hour on a good cable | Case can't hold charge | Clean the port, then retest |
| Flashing amber, never reset it | Charging fault | Clean contacts, swap cable, retest |
| Flashing amber on a Qi pad | Alignment or case cover | Remove the cover, recenter the case |
| Flashing amber on an Apple Watch charger | Incompatible case | Switch to a cable or Qi pad |
| Flashing amber, one earbud only | Contact or battery fault on that side | Swap slots to isolate, then decide |
| Amber then white, repeating | Stuck reset loop | Two reset attempts, then book service |
| Case warm, lid not flush, shell bulging | Swollen battery | Stop using it, dispose safely |
| Serial number fails Apple's check | Counterfeit hardware | Replace with genuine AirPods |
When to stop and get help
Stop troubleshooting and contact Apple Support if you've hit any of these.
- Two proper resets didn't change the light.
- The case gets hot during charging.
- You can see physical damage, corrosion, or a bulge.
- The unit is under warranty or AppleCare+.
- The serial number doesn't verify.
Everything else on that list is a fix you can do at home in under ten minutes. Cleaning the port and contacts resolves more amber-light complaints than any other single step. Do that first, and you'll save yourself a service appointment more often than not.